8 Painting tips: Paint with less mess and less stress
Nothing can transform your home more quickly than paint. Or more inexpensively. When you are working to create a beautiful home on a teeny tiny budget, paint becomes your best friend. Throw a gallon of paint on the walls and the whole room comes to life.
Painting is most definitely not difficult. It isn’t something that takes any special talent or skill or even much experience, but the more painting projects you take on, the more tricks you learn. And with all the time I’ve spent holding a paintbrush, I’ve learned a lot along the way. These are my favorite tips for painting a room like a pro with less mess and less fuss.
Seal the edges of painter’s tape
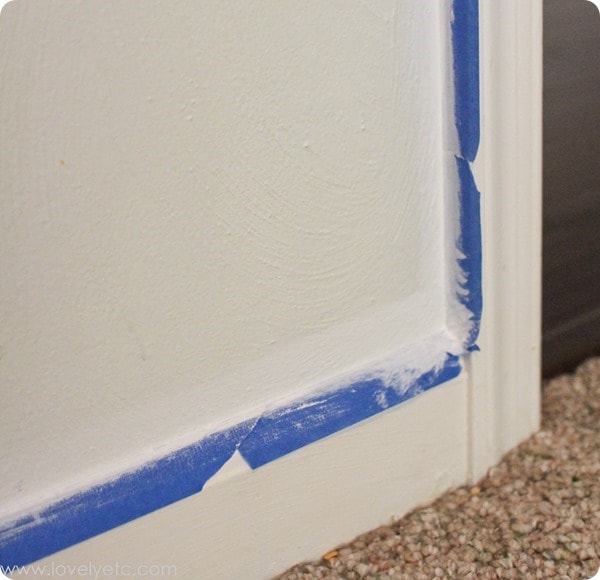
Painter’s tape can make painting around trim, ceilings, and floors much easier, especially if you don’t trust yourself to have a very steady hand. But what most people don’t know is that just sticking painter’s tape up isn’t enough. If all you do is roll out some tape, paint can and will seep under the edges – no matter how good the tape is.
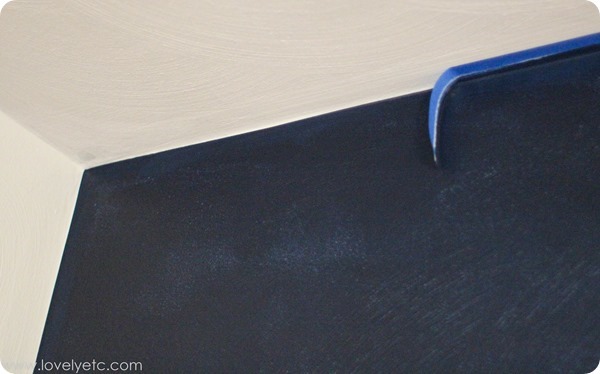
If you really want a clean line, you need to seal the tape so that no paint can creep underneath. First, run your finger along the tape to make sure it is pressed down firmly. Then paint the edge of the painter’s tape using the same color paint that is under the tape. So if you are taping along white trim, seal the tape with white paint. This will give you a perfect paint line when you remove the tape.
Remove the tape while the paint is still wet
It seems like you should let all of your paint get nice and dry before you start messing with the tape, but nope. You need to peel off the painter’s tape before the last coat of paint dries. If you let it dry fully, the dry layer of paint will peel and crack as you remove the tape, leaving you with a mess and a million spots to touch up. Just be careful removing the tape, since there will be wet paint on it.
Let the paint dry completely
Ok, yeah I know. Duh. But seriously, let it dry completely. It is so, so tempting to start touching up spots that look uneven when the first coat of paint is only halfway dry. But when you do this, half the time the paint roller ends up pulling as much paint off the wall as it paints on. Which only makes things more uneven. (You can probably guess how I know this.)
Plus, there is no way to really know if a second or third coat is needed or not until the paint is completely dried. Some paint colors change dramatically when they fully dry – that’s why sometimes you start painting and it feels like store must have given you the wrong paint. Once it dries, the color typically becomes much darker.
Use nail polish remover to check what kind of paint you have
When painting trim, cabinets, or doors, there is a good chance they may have been previously painted with an oil-based paint. This is extremely important to know but you can’t tell just by looking at the paint finish. It’s important to know because you can’t just paint latex paint over oil-based paint. If you do, the paint won’t stick. It may look okay at first, but it will soon begin scratching and peeling off whenever it is touched. Not good.
So how can you tell what kind of paint you have? The easiest way is to use a little nail polish remover. Just make sure it contains acetone because that is what makes this little test work. Put a little nail polish remover on a cotton ball and rub it on your painted surface. If paint rubs onto the cotton ball, it is latex paint. If it doesn’t, it is oil-based.
Oil and water based paints don’t mix – most of the time
Okay, when to use which paint can be confusing. If something has previously been painted with oil-based paint, you cannot paint over it with latex primer and paint. It won’t work. So what are you supposed to do if you want to use latex paint on it? Well, the funny thing is that even though latex paint cannot be painted over oil-based paint, it can be painted over oil-based primer. So if you have something that is painted with oil, and you want to paint with latex, you can. Just be sure to use the right primer in between!
Cover your paint tray with foil
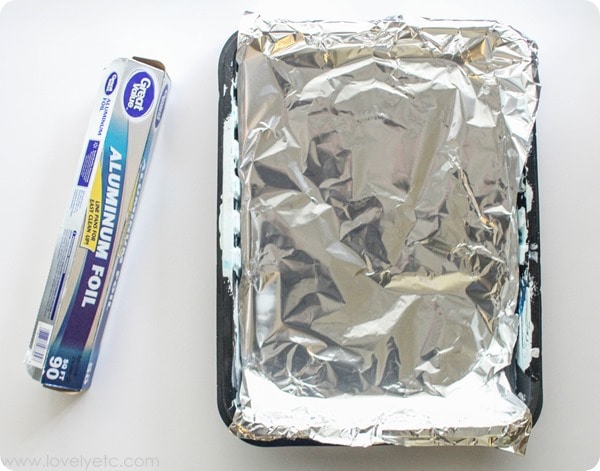
This isn’t something you have to do for a perfect paint job, but is a definite money-saver. I used to buy the thin plastic liners to put in my paint trays whenever I started a new paint job, but then I learned that aluminum foil does the job just as well. And when you are done painting, you can just wad up the foil and throw it away. It saves a little money, plus, it has saved me a trip to the home improvement store many times.
Store your paintbrushes and paint rollers in the refrigerator
Yep, right there with your milk and eggs.
Painting can often be a long, drawn out task. Sometimes you have to wait for the first coat of paint to dry so that you can start the next coat. Lots of times I’m trying to squeeze painting projects into little pockets of time between taking care of the kids, cooking, and running errands which can turn a simple paint job into a multi-day affair. There is no way I want to be washing my paintbrushes and rollers every single time I need to take a break to do something else.
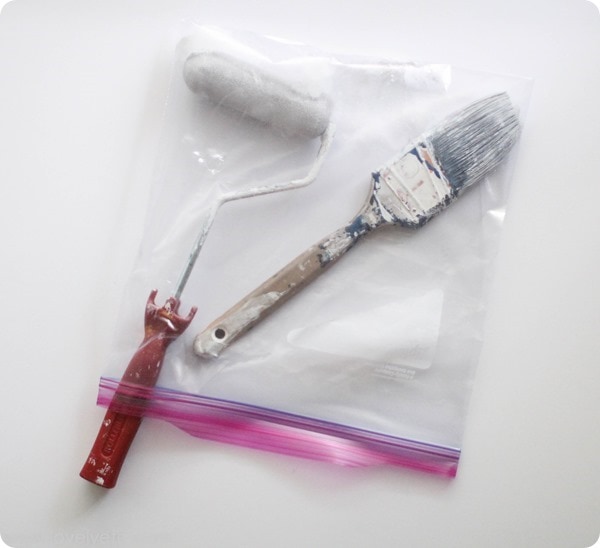
Instead you can just stick them in a ziplock bag and toss them in the fridge. This helps keep the paint damp so that your brush doesn’t get all dried out. When you are ready to paint some more, just pull it out and get back to work. If you don’t have any ziplock bags, you can also just wrap them up with foil or plastic wrap.
Note, this will not work for paintbrushes that you are using with oil-based paint.
Use really good paintbrushes
I used to buy cheap paint brushes, but I’ve learned that a quality paintbrush really does make a huge difference in the finish you get. (And that is coming from a major cheapskate.) There is absolutely nothing worse than having to pick paintbrush bristles out of your fresh paint job. I always get great results using a Purdy paintbrush and the Purdy 2 inch angle brush (affiliate link) is my absolute favorite.
I know there are tons more painting tips, these are just the ones I use most often. Did I miss one of your favorites? I’d love for you to share your favorite tips in the comments.

Linda saliga says
I came across your plank accent wall & followed all your instructions on materials. My problem is everyone does dry brushing milk paint so different. I would love if you could go over it again so I can get started
Carrie says
Linda, I will walk you through how I did my dry brushing and if you still have questions let me know. First, I painted the board with the base color. I just did one coat of paint – the entire board was covered but the color wasn’t necessarily even. I used a basic chip brush to do my dry brushing. These are super cheap at any store that has painting supplies. To dry brush, I dipped the chip brush into the second color, getting just the tips of the brush wet. Then I wiped any extra paint off on the edge of the paint can. I then wiped even more paint off onto a paper towel. When there was barely any paint left of the brush, I lightly brushed it onto the board. Then I repeated until I had the look I wanted. The boards that I also used stain, I stained first and then followed with the dry brushing.
Dawn Kuc says
Not being a good painter myself, I will definitely use your painting tips!! Thank you!!
Carrie says
You’re welcome and thank you for reading!!
Barbara says
I also paint anything that will stand still for me. When you are painting a wall that has outlets, when you take off the covers screw the screw back in to the outlet. That way when you are putting it all back together you aren’t looking for the screws.
Carrie says
Great tip – I have definitely lost those tiny screws more than once!
Natalie @ NeliDesign says
These are awesome tips Carrie! Thanks
Carrie says
Thank you so much Natalie!