The Best Cedar Sealer: How to Protect Cedar Furniture Outdoors
Learn the best cedar sealer options so you can keep your cedar furniture looking beautiful for years to come.
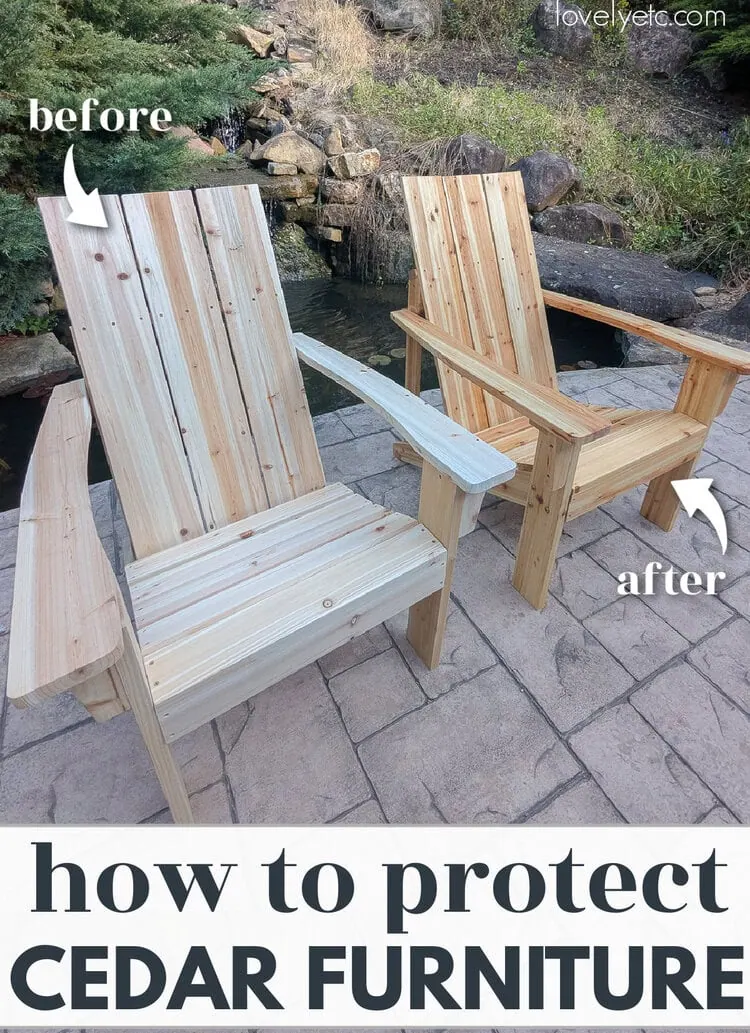
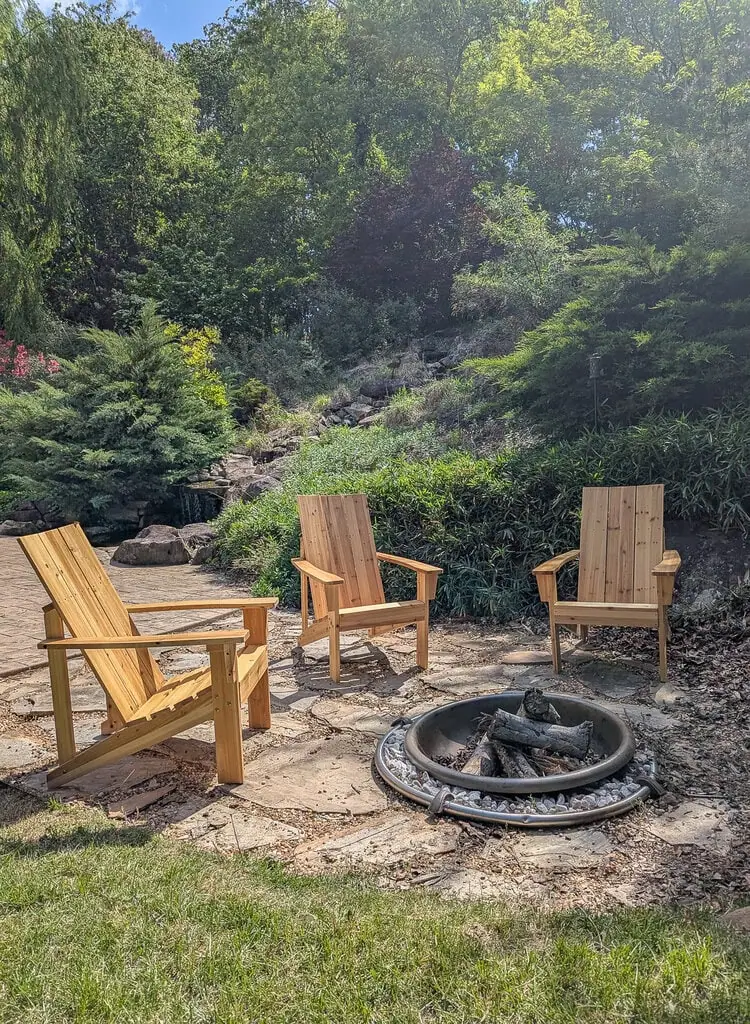
I recently bought a set of cedar Adirondack chairs to put around our firepit. I love the beautiful wood tone of the chairs and I definitely want them to last as long as possible, so I started researching the best way to protect them.
It turns out finding the best sealer for cedar isn’t nearly as straight forward as I imagined. There are lots of different opinions about the best way to seal cedar. So I got to work and waded into all those different opinions to figure out a sealer that
- Can protect cedar furniture from the elements
- Enhances the natural color of the cedar rather than covering it up
- Keeps cedar from graying
- Is easy to apply and maintain year after year
In this post, I’m sharing the most popular options for sealing cedar, the pros and cons of each, the sealer I chose that met all my criteria, and some simple tips for applying it.
This post contains affiliate links which means if you make a purchase after clicking a link I will earn a small commission but it won’t cost you a penny more. Click here to see my full disclosure policy.
Do you even need to seal cedar?
Cedar is a really popular wood to use for outdoor projects including outdoor furniture. Cedar can last a long time outdoors because it resists rot and moisture, resists termites and other pests, and handles temperature fluctuations well.
What’s more, unlike most other woods, you don’t have to seal cedar to use it outdoors. When cedar is left unsealed, the color fades to a silvery gray and the wood itself becomes drier. Cedar furniture, fences, and shingles can continue to last for many, many years after fading to gray.
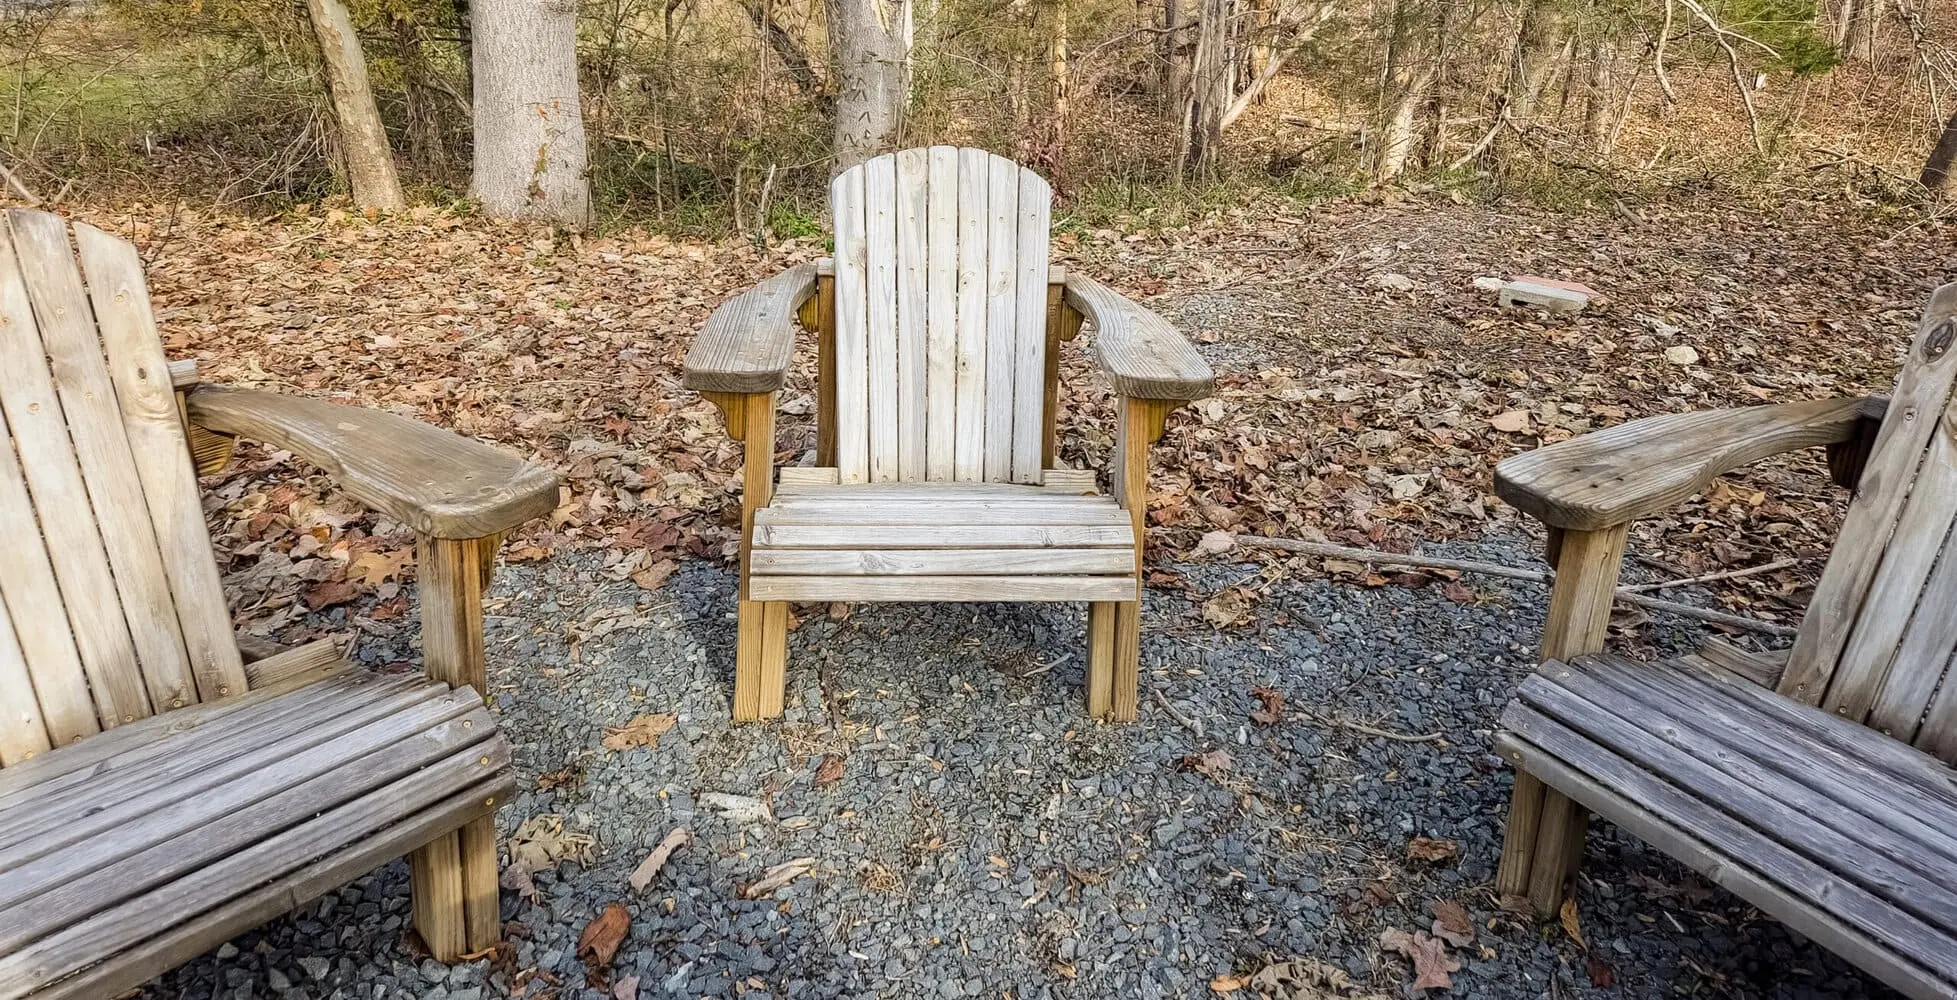
You’ve probably seen outdoor benches and chairs that look like these. This is how cedar looks after a year or so. As more time passes, they continue to look even more weathered and gray.
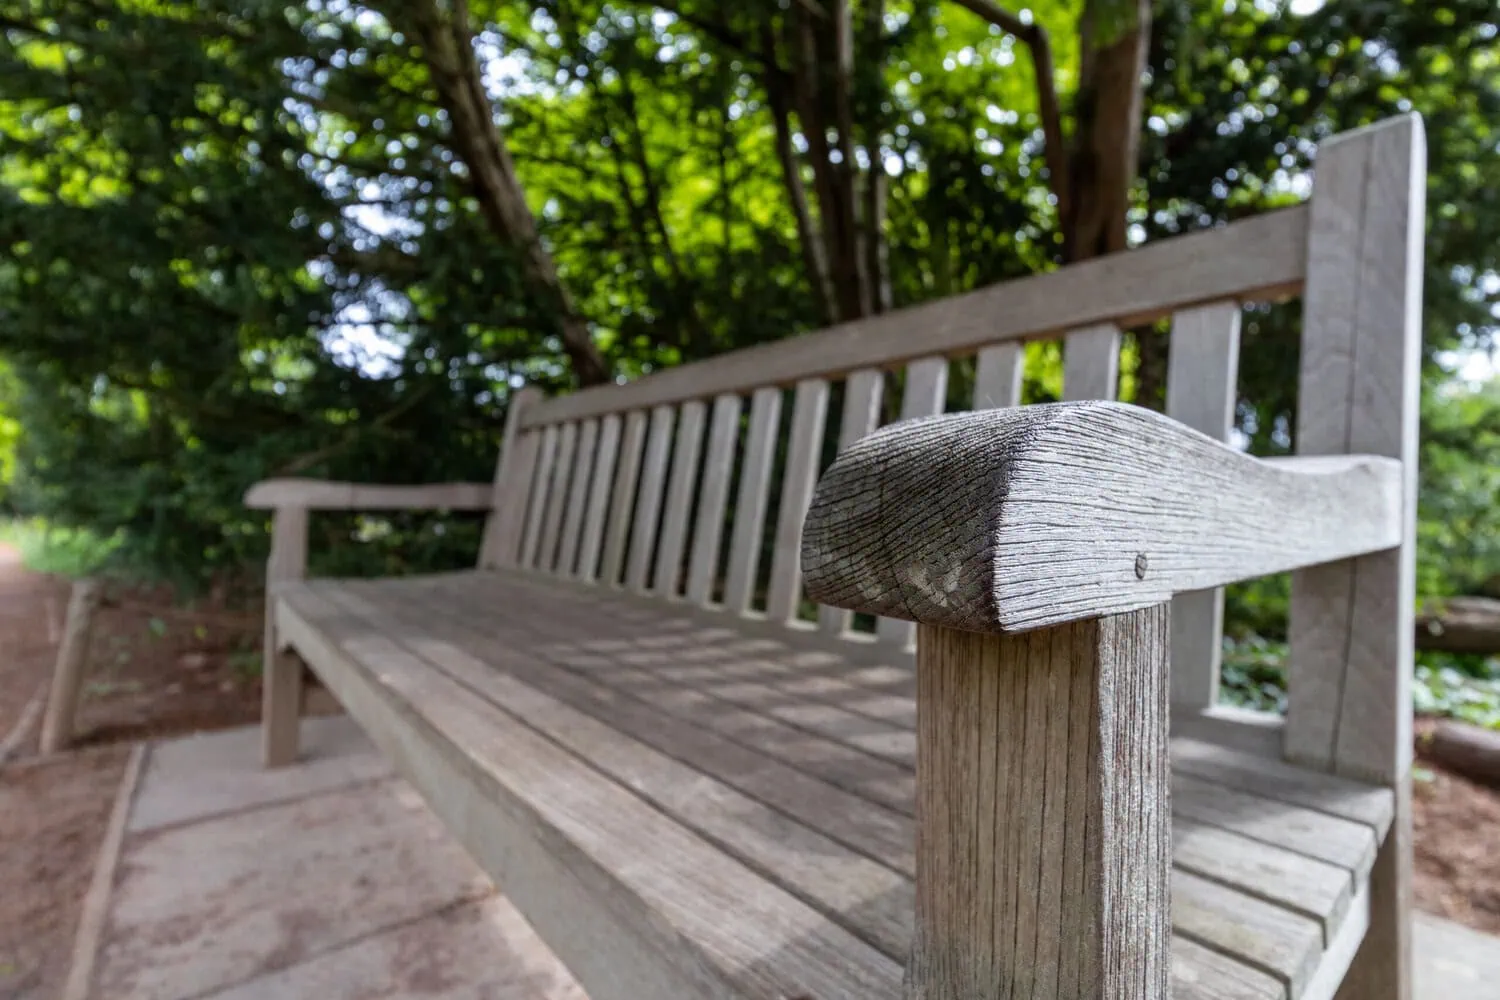
The color itself isn’t necessarily a bad thing, however, there is a downside to letting cedar gray. When the wood is unsealed, it doesn’t have protection from the sun’s UV rays. The sun exposure dries the natural protective oils in the wood which allows water to more easily penetrate the wood, making it more susceptible to rot, decay, and fungus.
You can see up close that the wood looks very dry and brittle.
So while you absolutely do not have to seal cedar in any way, it will definitely last longer if you do.
Plus, I personally just really love the color and warmth of fresh cedar.
Note – if you are using cedar for an indoor project, there’s no need to seal it since it won’t be exposed to outdoor conditions. I built these cedar storage cubes five years ago and they still look exactly the same today.
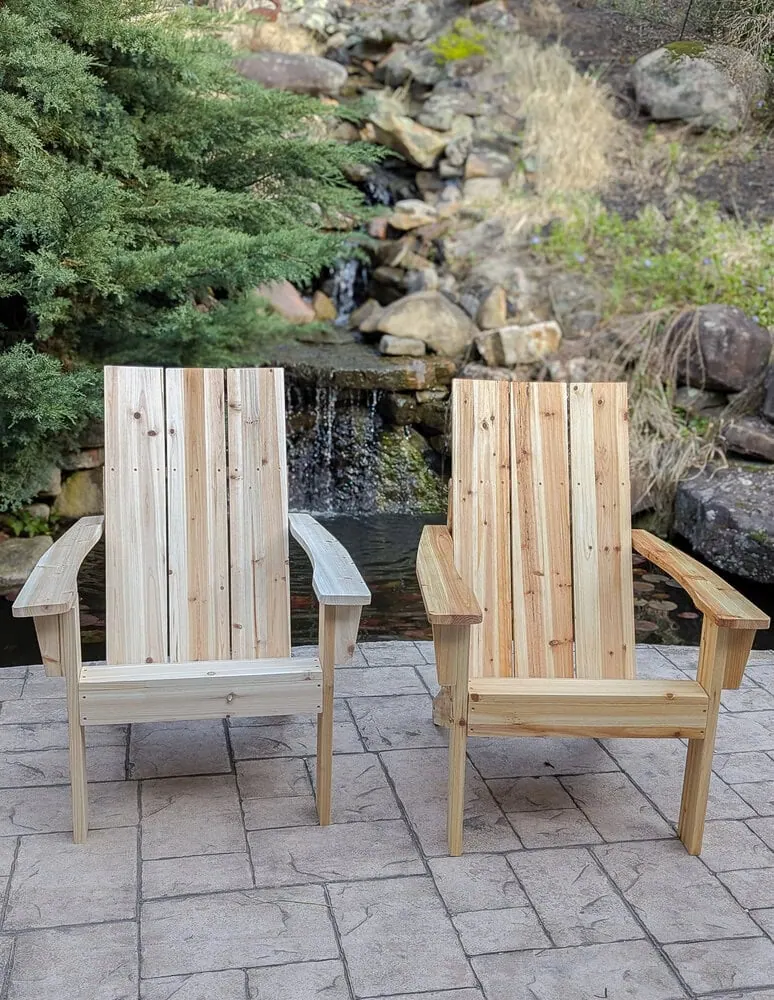
I recently bought a set of unfinished cedar Adirondack chairs. I chose a more modern style of Adirondack chairs and I love the slightly updated shape.
The chairs were a great price and to be honest, I was a little skeptical at first if they were actually made from cedar. All those doubts went away when I pulled the pieces out of the box though – the smell of cedar is unmistakable!
I love the look and color variation of fresh cedar and I knew I wanted to preserve the clean lines and bright color rather than letting these chairs fade to gray over time.
Sealers for Cedar Wood
After doing lots of research into the best sealers for cedar wood, I found that there are a LOT of different opinions about the best way to seal cedar. For every professional woodworker that loves a certain finish, there are three more that declare it’s the absolute worst.
Since there isn’t a definitive answer, I’m going to share a quick rundown of the most popular options including the pros and cons. Then I’ll share which I chose for my own chairs.
There are four popular options for sealing cedar:
- Clear Stain
- Semi-Transparent Stain
- Spar Urethane
- Outdoor Furniture Oil
Opaque stains and exterior paints are also options for protecting cedar, but obviously they also completely cover the original color. Since they completely change the look of the cedar, I didn’t include them here.
1. Clear Exterior Stain
Clear stains are often suggested to those who want to protect their cedar but don’t want to change the color with a more traditional stain.
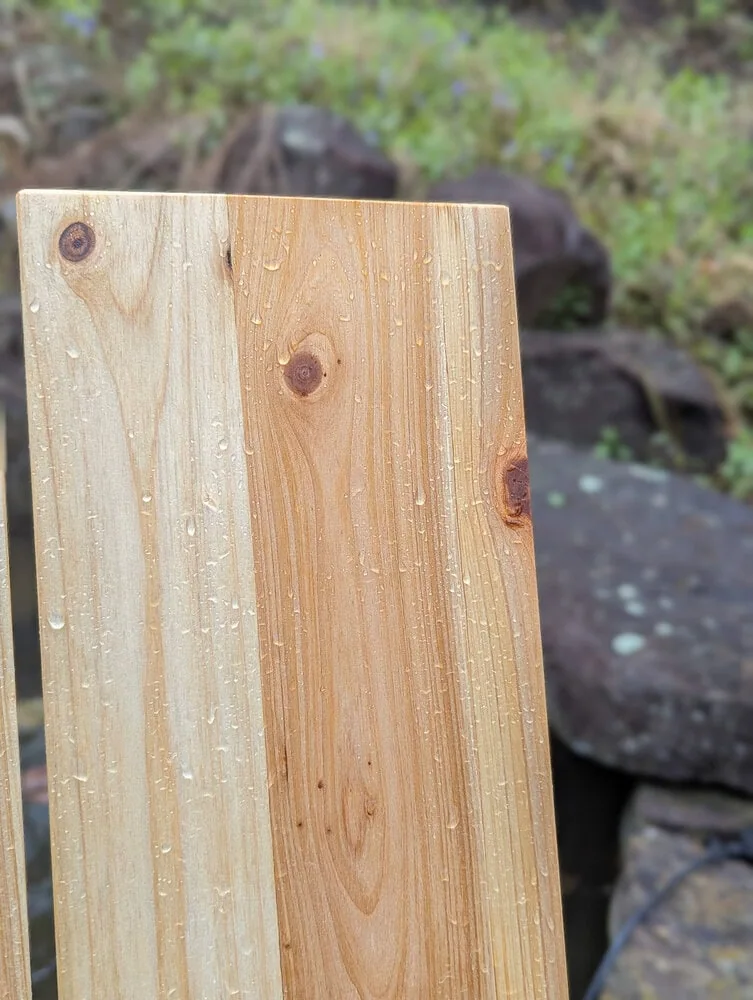
It’s important to not that all of these finishes including clear finishes will slightly change the color of the natural wood. For cedar, that usually means enhancing the red or yellow tones. If you aren’t sure how your cedar will look when sealed with a clear product, wet it with a little water. That’s the color it will be.
Pros:
- Protects against moisture and mildew.
- Using a clear stain preserves the natural color.
- Stains absorb into the wood rather than forming a film on top and are less likely to crack and peel.
Cons:
- Clear stains provide very little protection from UV rays so the natural color will fade more quickly.
If you do choose to use a clear stain, Penofin clear penetrating oil stain comes highly recommended.
2. Semi-transparent Exterior Stain
Semi-transparent stains add a bit of color to the wood while still allowing the wood grain to show through.
Pros:
- Semi-transparent stains provide more protection from the sun than clear stains.
- They also protect against moisture and mildew.
- Stains absorb into the wood rather than forming a film on top and are less likely to crack and peel.
- There are quite a few color options so you can choose your favorite.
Cons:
- Though semi-transparent stains offer some protection against UV rays, the color will still fade with time.
Ready Seal Exterior Stain and Sealer is a highly recommended semi-transparent stain and sealer in one that comes in several great colors including natural cedar.
3. Spar Urethane
Spar Urethane is a clear outdoor sealer that forms a barrier to protect wood from the elements. It comes in oil or water-based formulas, but oil is generally recommended for cedar. This is probably the most divisive of the finishes, with some loving it and others declaring it the worst possible choice.
Pros:
- Protects wood from UV rays, rain, moisture, and temperature fluctuations.
- It can be used alone for a clear finish or over a stain, giving lots of color options.
- Available in a variety of sheens including satin, semi-gloss, and gloss.
Cons:
- Rather than a penetrating oil, this is a film finish that sits on top of wood.
- Can be a bit more finicky to apply.
- This finish is more likely to eventually peel and will need to be scaped or sanded before it can be reapplied.
I have used Minwax Helmsman Spar Urethane to seal many pieces of outdoor furniture. I recommend the satin finish to avoid your furniture looking unnaturally shiny.
4. Outdoor Furniture Oil
Wood oils like boiled linseed oil and tung oil penetrate deep into wood to protect it from the elements.
Pros:
- Protects from UV rays, temperature fluctuations, moisture, and mildew.
- Very easy to apply.
- When the finish starts to show wear, you can simply apply another coat. No sanding or scraping needed.
Cons:
- May need to be reapplied a bit more frequently than some other finishes.
There are several options for finishing oils for cedar. These are some of the most popular:
Keep in mind that whichever sealer you choose, it will eventually fail and will need to be reapplied. Nothing lasts forever.
The sealer I chose to use
After doing lots of research on all the options, I decided to go with a wood oil to treat my cedar. I like the fact that it penetrates and conditions the wood rather than just forming a protective film on top.
But most importantly, I wanted to make maintenance as easy as possible. Wood oils still need to be reapplied every year or so, but reapplying them is a much easier process. Instead of sanding and scraping off the old finish first, you can simply apply more oil directly to the wood.
And if life gets too crazy and you miss your yearly maintenance, you won’t end up with a mess of peeling finish. Your wood will simply begin to dry and gray naturally.
Choosing which oil to use was tougher. There are quite a few options and each have their devoted fans.
In the end I chose to use General Finishes Outdoor Wood Oil. I have used many General Finishes products at this point and haven’t been let down by one yet.
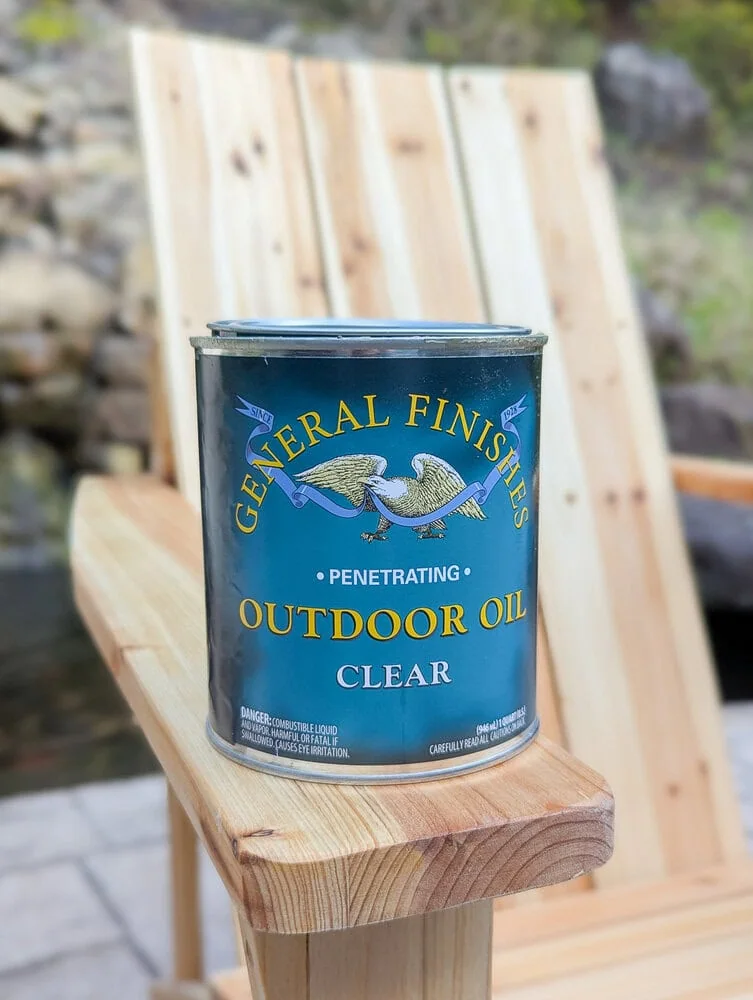
I will note that the General Finishes wood oil is not the cheapest option. If you are looking for a cheaper option, boiled linseed oil or tung oil are both great options that are sold by a variety of brands at a lower price point.
How to seal cedar furniture
Sealing your furniture (or fence or deck) is pretty simple, but it is a bit time-consuming.
You’ll want to make sure you work outdoors or in a well-ventilated area.
Before applying, stir your oil thoroughly. Make sure your wood is dry and clean before beginning.
If your wood is already smooth and clean, you don’t necessarily need to sand before applying oil. I did sand my chairs lightly with 150 grit sandpaper first as there were some rough spots.
You can apply the oil with a natural bristle paintbrush, staining pad, roller, paint sprayer, or a cloth. I chose to use a cloth because I love the control a cloth gives – it’s easy to tell if you are applying too much or too little oil.
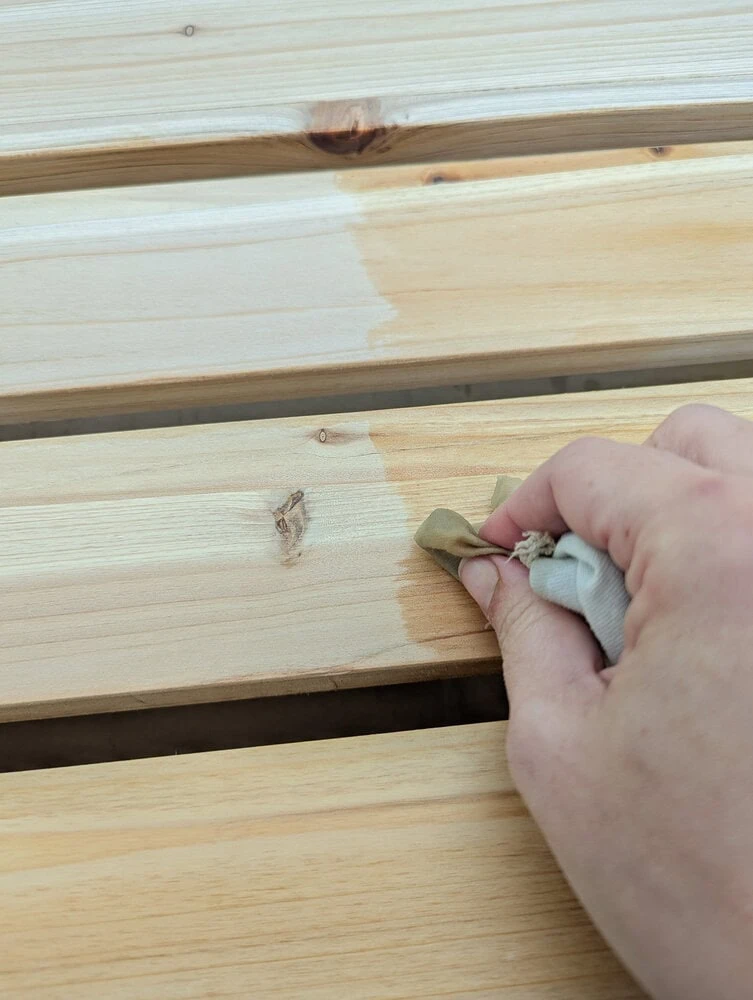
My chairs came mostly unassembled, so I applied the oil before assembling. Building furniture has taught me that it is always easier to do your finishing before assembly whenever possible.
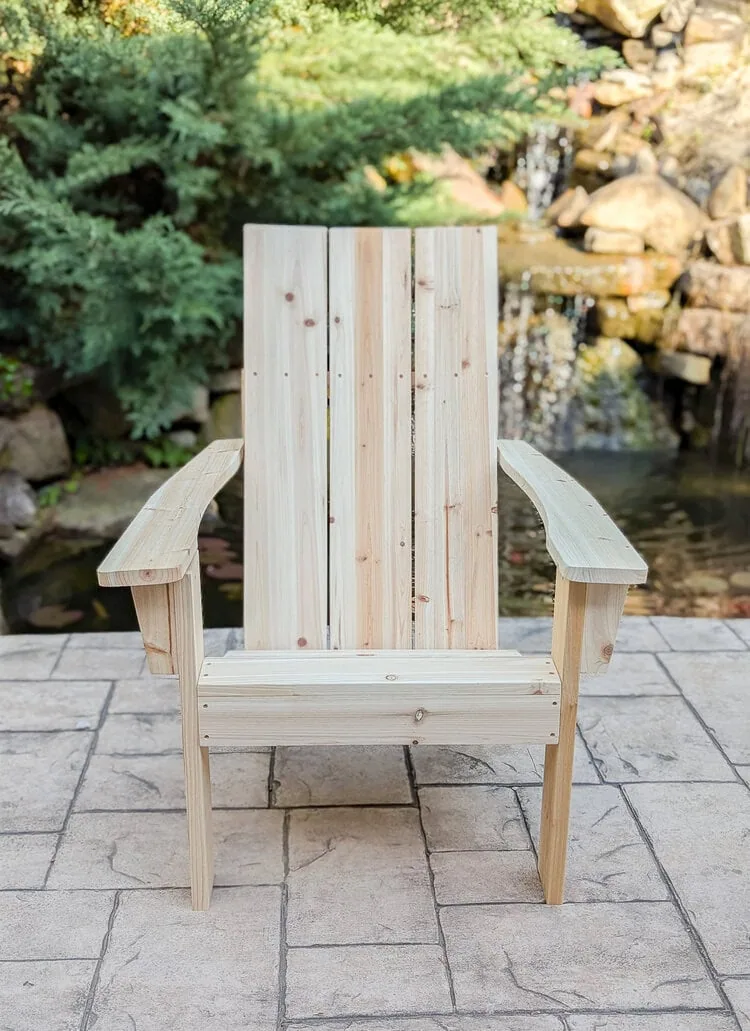
This oil (and all oil-based finishes) will amber your wood. When we talk about painted furniture, yellowing is typically a bad thing; but when it comes to natural wood finishes, it can actually be really beautiful.
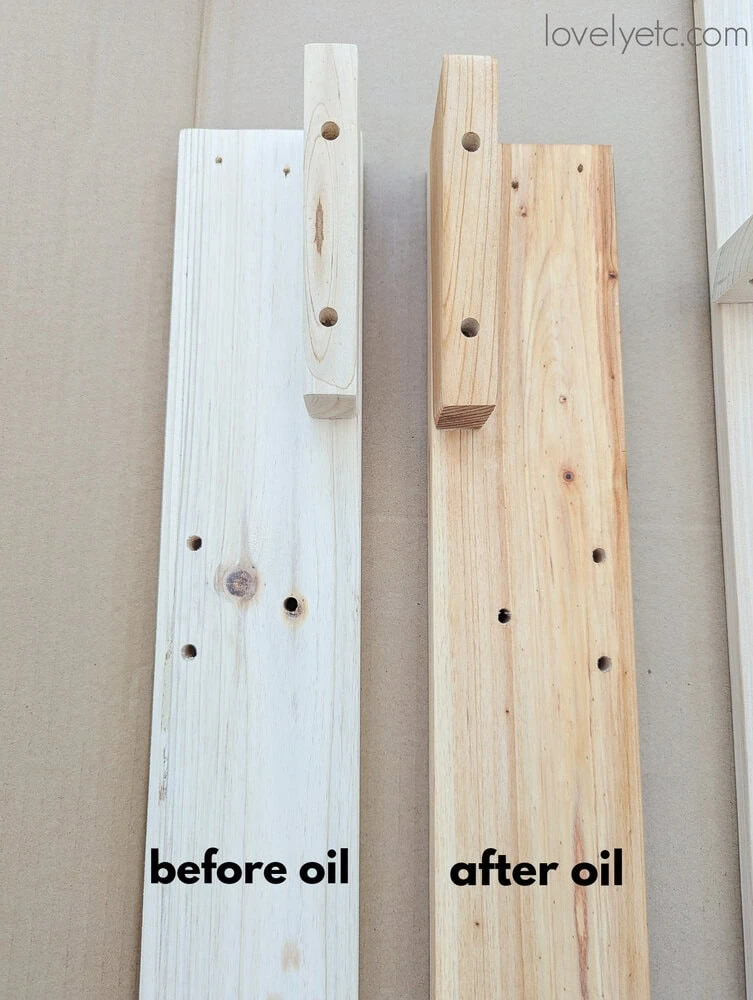
In this case, applying the oil really helped bring out the beautiful colors in the cedar. So not only will it help prevent future graying, it also helps accentuate the color now even though it isn’t a stain.
I applied two coats of oil, allowing 24 hours of dry time between coats.
Always be sure to safely deal with oily rags before disposing of them! They can spontaneously cause fires. The easiest way to do this is simply let them dry flat outdoors. Once they are completely dry, you can throw them away.
I put one chair together before finishing to show the difference in color the oil made. I’m a big fan!
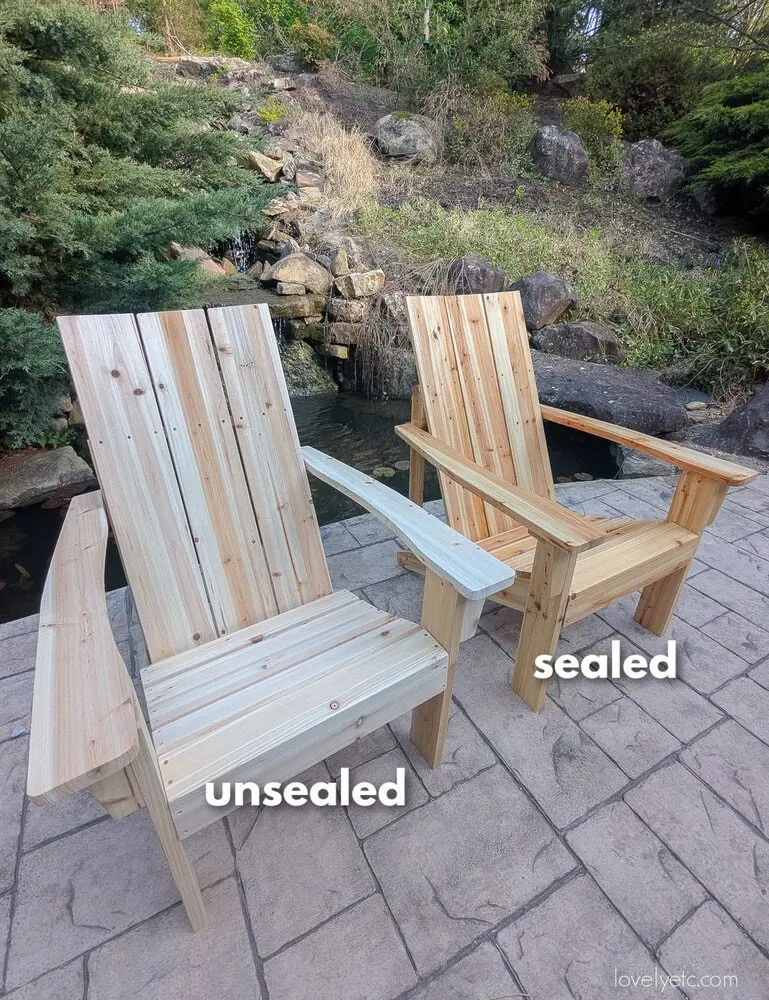
Of course, I can’t say for sure how long these will last before I need to add another coat of outdoor oil, but I expect to get at least a year out of them before needing a touch up.
And I’ve already seen that the chairs are well protected against moisture. We had a spring storm the day after I put these together and the water beaded right up beautifully.
These chairs are all set around the firepit now and ready for lots of smores nights this summer!
Looking for more info on protecting your outdoor furniture? Check out these posts next:
I’d love for you to share this post on Pinterest!