Since sharing my budget kitchen makeover a few weeks ago, the number one question I have been asked is how my painted laminate countertops are holding up. It has been almost three years since I originally painted my countertops and they have definitely been put to the test during that time!
Today I am sharing all of the details about how our countertops look today, the pros and cons of the countertop painting method I used, and what I would do differently if I were starting all over today.
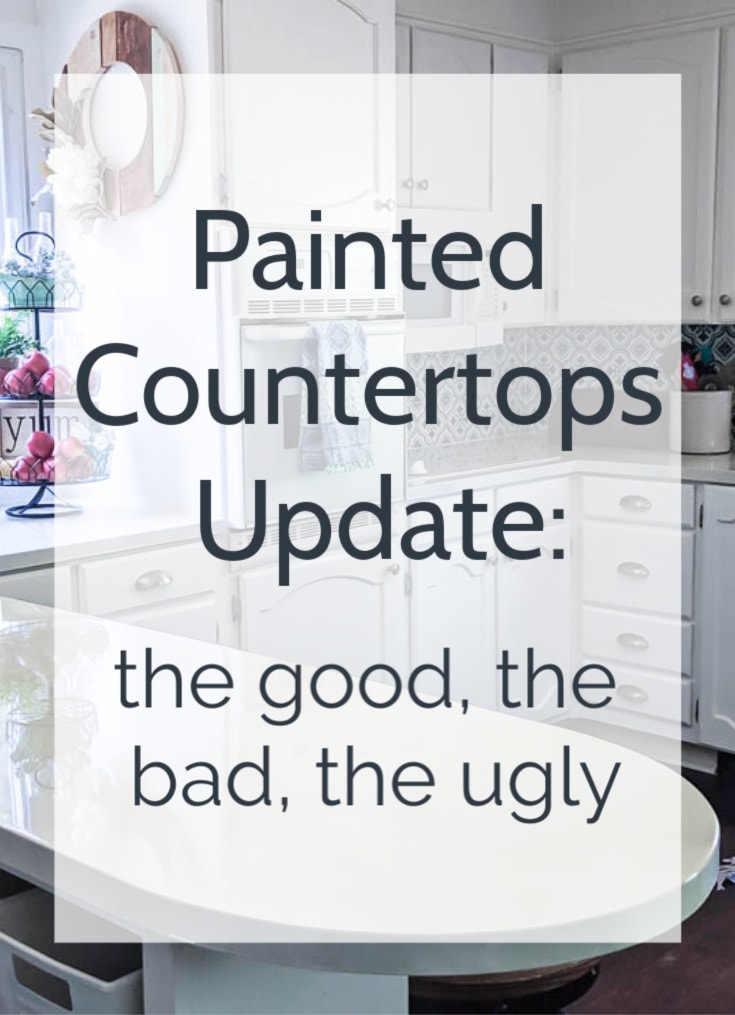
If you haven’t yet, be sure to read my tutorial on the actual process of painting laminate countertops including the cost and time involved.
This post contains affiliate links which means if you make a purchase after clicking a link I will earn a small commission but it won’t cost you a penny more. Click here to see my full disclosure policy.
Painting Laminate Countertops: The Good
I chose to paint our laminate countertops because they were incredibly ugly and more than ready for an update.
To be honest, I was unsure about painting our laminate countertops. Kitchen countertops get daily use and abuse from water, heat, spills, and constant cleaning.
And in our house, they take an extra hard beating. My three boys are two, four, and six years old and they have definitely put every surface in our home to the test.
The bar stools at our kitchen counter are their favorite spot to eat breakfast and lunch, do homework, play with toys, do art projects, build with Legos.
Basically anything the older two don’t want the toddler messing with, gets done at the counter.
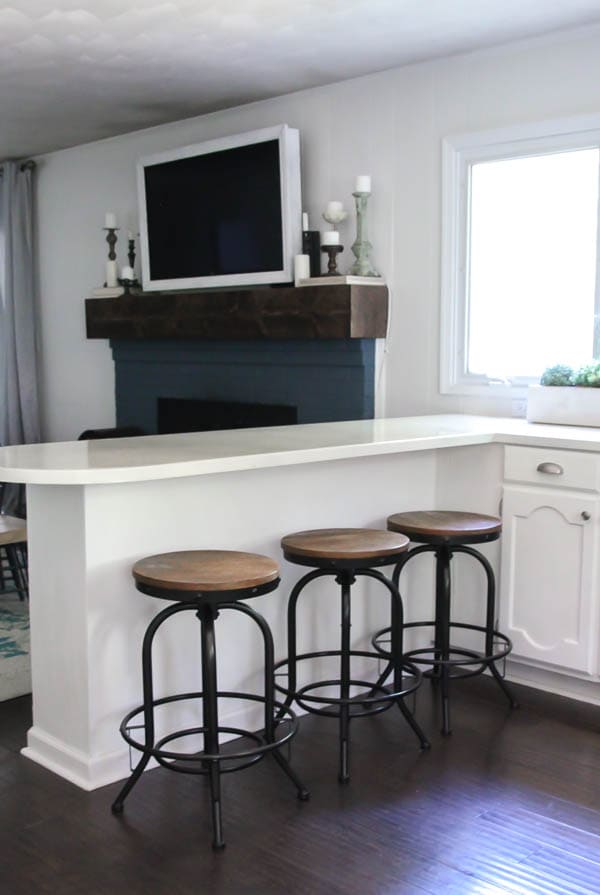
barstools, fireplace painting tutorial, DIY mantel tutorial
I worried that with all of that heavy use, paint was not a very practical solution.
Thankfully, I was wrong and the counters have actually held up very well!
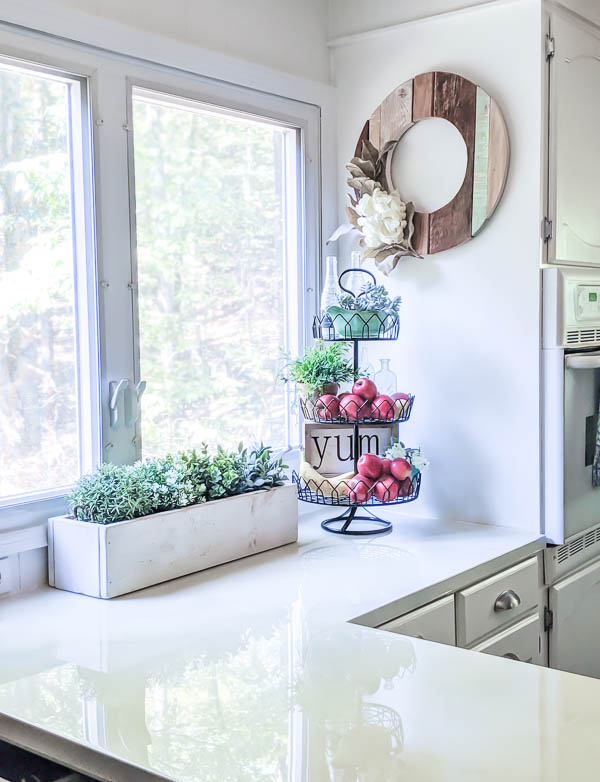
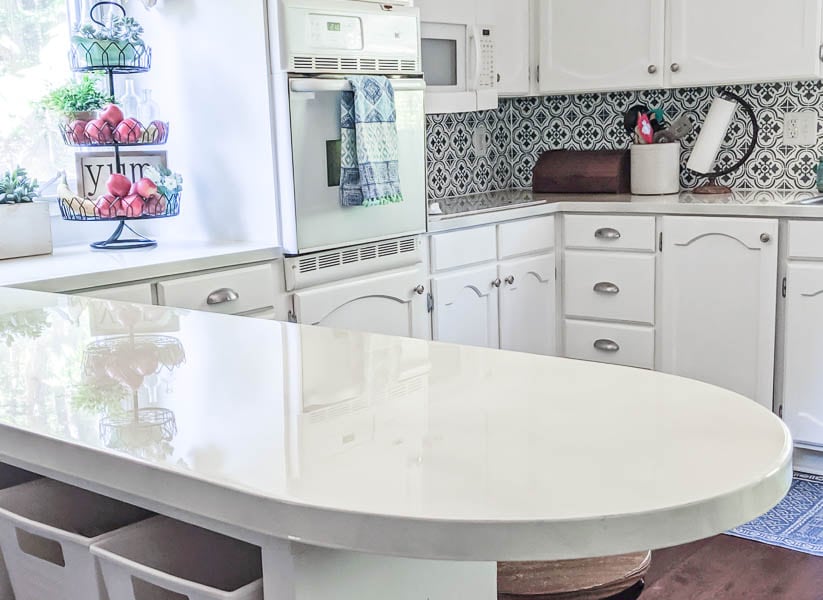
When I finished painting and sealing our countertops, I loved them right away. They were shiny and clean and so much more beautiful than the horrible laminate we had before.
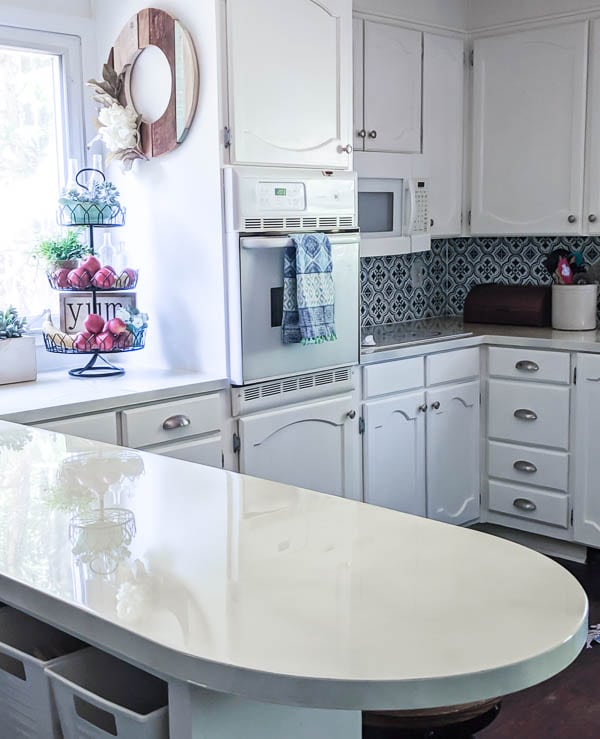
And they still look as shiny and new as they did when I finished painting them.
The paint has not faded, chipped, worn away, or scratched off at all. Hallelujah!
Painting Laminate Countertops: The Bad
Even though our countertops overall look amazing and I absolutely continue to love them, they aren’t perfect.
I’m going to get a bit nit-picky here, but I’m a perfectionist, it’s what I do.
Plus I want to share all of the relevant details so you can make the best decision about whether or not this is a project for you.
The biggest issue I have had is some slight yellowing of my countertops, most noticeably in the corner beside our range.
I am not sure what the cause is, but it is something that happened during the initial painting/sealing process.
I noticed the yellowing within a few weeks of finishing the countertops and it hasn’t gotten worse at all in the months and years since.
The yellowing itself is very slight. There are no yellow, discolored spots; there is simply a more yellow undertone than I would like.
It is very subtle. My husband doesn’t see it at all. But I do, especially against the white range, white cabinets, and white backsplash areas. It isn’t something that bothers me a lot, but is something to be aware of.
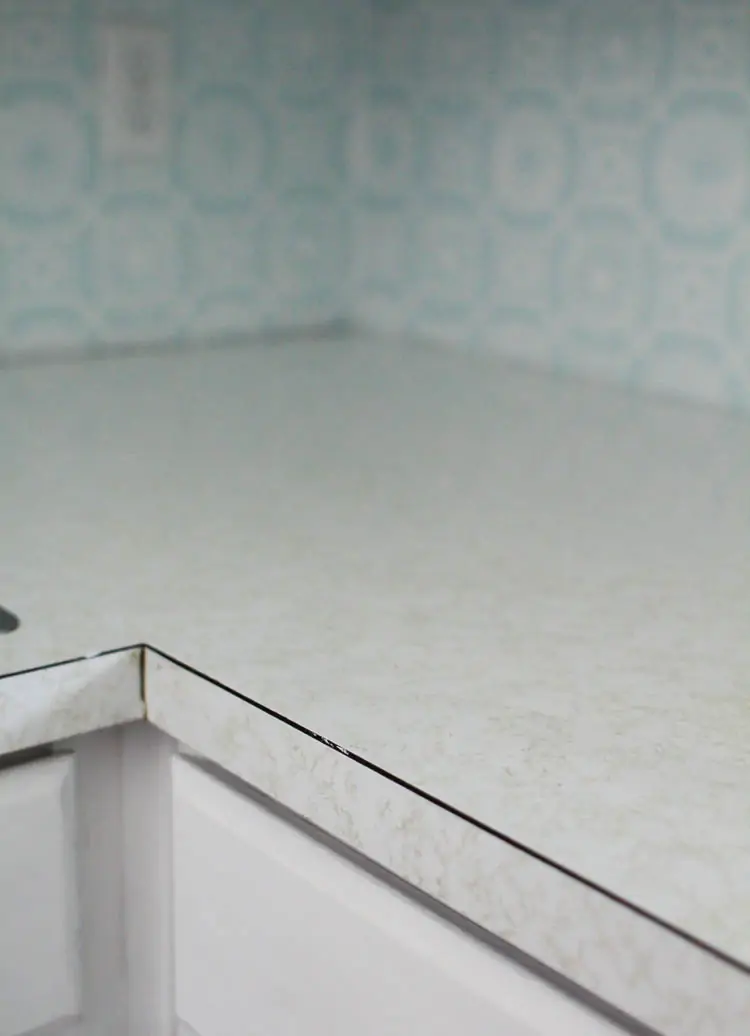
The other issue I have noticed is that there are a few areas where you can see light scratches on the countertop finish when the light hits it.
This is primarily an issue in the area where the kids like to do craft projects and is only noticeable when the light hits at a certain angle.
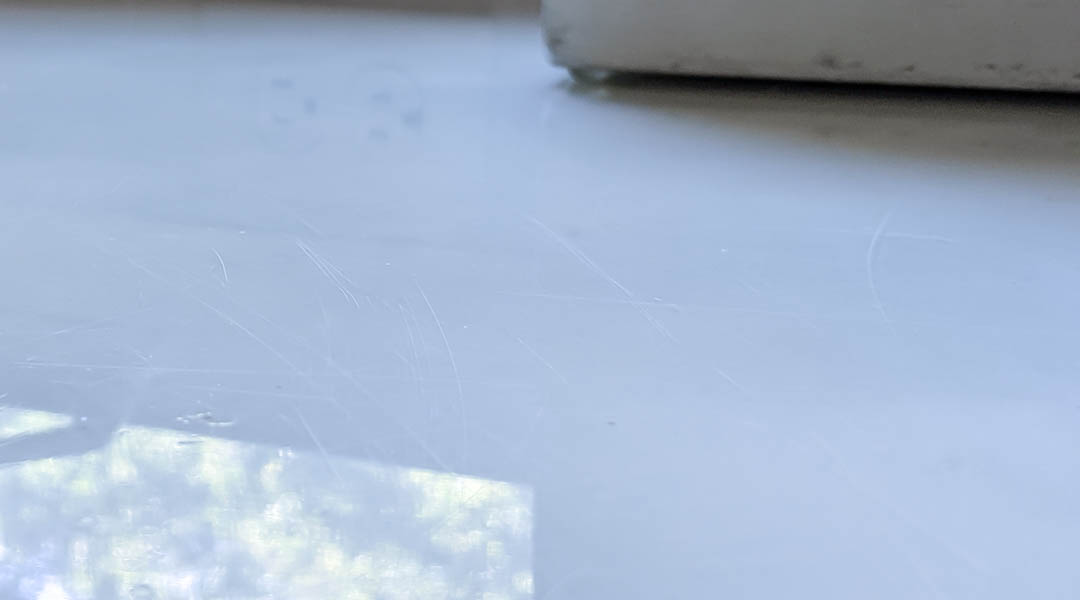
This is an extreme close-up of some of the scratches. They are really hard to capture in a photo but hopefully, you can get the idea.
There may be some way to buff these scratches out, but they are so minor, I really haven’t looked into it.
The Best Paint for Countertops
Ok, so here’s the thing. It really doesn’t matter what kind of paint you use. I know that sounds like a lame answer, but it is true.
Using a certain kind of paint is not the key to painting countertops so they last. I used a combination of leftover wall paint and acrylic craft paint and both were great.
You absolutely do not need to buy a special countertop painting kit unless you really want to.
If you use a good primer and a high-quality sealer, it doesn’t matter what paint you use on your countertops.
The paint is simply the color – the sealer is the actual finish that takes all of the abuse. (This is the primer I use for almost everything because it sticks to anything.)
The key to the longevity of our painted countertops is 100% the resin topcoat I used over the paint. Resin is a thick clear finish that you pour on rather than brushing on.
It gives the finished project a glossy, three dimensional look that more closely mimics the look of a true solid countertop.
When the light from the window hits the countertop, it shines through the layers of the finish rather than simply bouncing off.
painted cabinets tutorial, stenciled backsplash tutorial
Working with this type of pour-on finish is more difficult than simply painting on a top coat and has a bit of a learning curve, but the finished look is so worth it.
(Several people share their after photos in the product reviews on Amazon if you are looking for more examples and they are all amazing.)
Would I do anything differently?
First of all, if I had it to do all over again, I would most definitely still paint my countertops.
Changing the dated laminate without the expense of actually replacing the countertops was completely worth it.
And I would also use the same resin sealer. Even though it hasn’t been perfect, it has held up incredibly well and just looks so darn good.
I do, however, wish that I had added a lot more gray graining to my ‘marble’ countertops.
Once the sealer was added, the shine and dimension really softened the color variation in the paint finish.
The marbling of the final countertops is a lot more subtle than I would have liked.
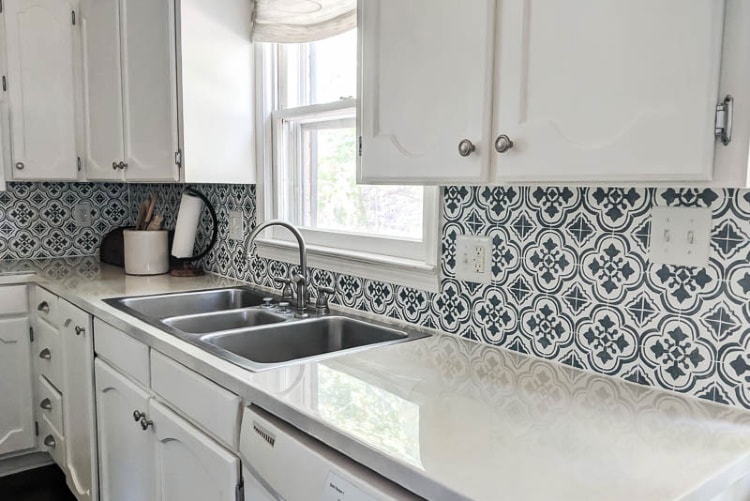
In fact they more closely resemble white quartz countertops than marble – but since it’s really just paint, I’m pretty happy with that result!
In fact to make things even easier, I would love to try using marble contact paper instead of paint. I know, I know, nothing says classy like a contact paper countertop, but I think it could be a beautiful, inexpensive solution.
There is some really gorgeous contact paper available these days that looks very similar to Carrara marble.
I don’t think contact paper alone would necessarily make a long-lasting countertop, but you could easily use the same resin finish over the contact paper.
That way the paper does the hard work of mimicking a true marble finish and the resin takes care of making everything durable and shiny.
And that’s it. The good, the bad, and the ugly of our painted laminate countertops nearly three years later. If you have other questions I did not address, be sure to let me know in the comments.
And if you haven’t checked out the rest of our budget kitchen makeover, you are in for a treat!
You can see the entire kitchen reveal here including info on all of the DIY projects involved.

Hannah says
Hi Carrie. I would like to use this method in my kitchen but my counters have a lip that goes up the wall about 2 inches… how will the self leveling resin work on this?
Carrie says
Hmm, I think it would be possible to use the resin on a vertical lip, but probably very difficult. It is much harder to get the resin to stay in place on vertical surfaces and it will definitely drip down some onto your counter which may or may not level out well. If I were you, I would probably skip the resin on the lip. You might even be able to paint everything the same way and then just use the resin for the flat part of the countertop and use a glossy poly to seal the lip.
Doris says
I have a four-inch backsplash on my countertops. I painted mine with a good bonding primer and then “marbled” them myself. I used Giani epoxy resin. (You can also buy a marble kit, but I already had primer and paint.) The videos for the Giani marble kit are great to teach you how to marble. I learned I had to sponge on a white paint under my “veins” to get the movement of paint I wanted. I had tried Parks Super Glaze Epoxy before. Parks was pretty finicky. Giani was much more user friendly. You roll it on and it covered my round edges and my backsplash perfectly. I didn’t have to apply heat to get bubbles out. I love that stuff. I’ll try to attach a photo.
Carrie says
Thanks for sharing your experience!
Rebekah says
Did the Giant resin drip down the sides of your countertops like the resin from the post? Did it react the same way the author described her experience but did not require a blow torch? I also have a Formica lip at the back of my countertops so I’m trying to find the best resin to cover all of it.
Thanks, rebekah
gw says
The yellowing is probably from light. If its near the range more and you have an overhead light it will yellow the top coating over time. Same with the rest of the countertop
Carrie says
Thanks, I think you are right.
Sara says
Your countertops look amazing, I would like to try this how do you do the sides with your resin? And if it’s a poor how do you keep it from running down on the sides? What kind of resin do you use
Carrie says
Hi Sara, The sides are definitely the trickiest part. The resin does run down the sides so you have to be sure to cover everything all around the area including the cabinets and floor. As it dries and drips down, just brush the sides lightly to keep it smooth and even. I used this resin (affiliate link). You can find more details of the how to part here: https://www.lovelyetc.com/painted-countertops/
Rachel says
Ok, I flipping LOVE the contact paper/resin idea! May have to try that in our powder room ;) Question – Did you remove your sink, or did you just tape it off and paint around it? I am wondering about how the self-leveling resin works around the sink if you don’t remove it … I mean, the resin is a fairly thick coat, correct? Does it do funny things around the lip of the sink? Thanks so much for your tutorials and updates, they are giving me tons of ideas for our stuck-in-the-90’s kitchen and bathrooms! :)
Carrie says
I didn’t remove the sink. I just used painter’s tape to protect the edges. The resin is thicker than poly would be, but it is still only maybe a couple of millimeters thick so it isn’t as high as the lip of our sink. I just went and checked to be sure I wasn’t mis-remembering, but it definitely looks find around the edge of the sink. :) I’m glad my tutorials are helpful and good luck with your kitchen and baths!
Mrs uncle Jeff says
I would test this idea somewhere first as the resi may “eat” the contact paper!
Carrie says
Definitely a good suggestion!
Julie says
Hi! Thanks for the update! I learned about 30 years ago to put shelf paper on the countertops, and even our floors when I lived in base housing overseas. It certainly made our kitchens better, just like our wall paper was material dipped in liquid starch.. but I digress .. now a days contact paper is expensive, I cover my camping trailer and even buying inexpensive paper, it was still a big dent in the wallet, painting was much cheaper.
I recently painted my kitchen counter using a Giani granite paint Kit, I then finished it with 2 coats of epoxy. My counters look amazing, and thanks to posts like yours I wasn’t afraid to do it. I also painted about 3” of backsplash and put epoxy on it, it was tricky but it worked.
Carrie says
Thanks for sharing your experience Julie! You’re right – the cost of contact paper can really add up, but it’s also easy so I guess it comes down to which is more important for each person.
Shanna Ramos says
How did you marble? I cannot wait to try this! Thank you for all the info
Carrie says
All the info on the marbling is here: https://www.lovelyetc.com/painted-countertops/. Good luck! This was such a rewarding project!
Shannon says
This is amazing looking!!!! Inspiring me to do the same. I was curious about the resin over contact paper idea, i was checking out the reviews on Amazon and some people seem to think that the heat from the setting process of the resin would bleed the contact paper. Have you seen anyone try it or what are your thoughts on that? Also, if you were going to do a backsplash as well would you do the backsplash before or after your counter project? I was leaning towards backsplash last but I’m newer at home makeover projects.
Carrie says
Thanks Shannon! That is a good point about the heat. I have not tried this, but my thought is that I only needed to use a very small butane torch to get the bubbles out of the epoxy. I don’t think it would be enough to heat up the contact paper below since the torch only passes over each section for a few seconds. I wouldn’t use the resin for a backsplash because it is hard to deal with on vertical surfaces. But if I were going to do a different backsplash, I would do the counter first and then the backsplash.
Danelld says
I’m curious how many gallons you needed to purchase of the resin and what your square footage of countertops are?
Carrie says
I used three gallons of the resin- two would have been plenty but I ran out halfway through sealing them and had to do a second coat to get everything nice and even. And my countertops are around 40 square feet give or take. You can see more info on the process and cost here if you are interested: https://www.lovelyetc.com/painted-countertops/
Michelle says
We have UGLY granite countertops, do you think you could paint and epoxy granite?
Thanks!
Carrie says
Yes, I don’t think it would be a problem!
Heidi says
HI, Thank you for your post. Did you sand the counter tops prior to painting?
Carrie says
I did sand it lightly – you can see the whole process I used here: https://www.lovelyetc.com/painted-countertops/
Katie says
Hi Carrie!
I didn’t really read most of the comments, but I wanted to ask about your sink. I have the same type of sink and I absolutely hate it. I get water splashed on me so much because the faucet is so much closer than normal. Do you enjoy yours? Have you found special ways to go about using your sink so it isn’t irritating? Or do you love it, and i’m a crazy person? ;)
And your kitchen looks just lovely. I think you did a very nice job updating them on a very low budget. It is very inspiring! Also why did it become a think to get rid of wall ovens?! It would totally save my back and my worry about little hands being curious at the oven. You have a very nice set-up and you’ve done a lovely job with it!
Thanks!
Katie
Carrie says
Thanks Katie! I so agree about wall ovens. It may not be cool but it is so much more practical – especially with little kids! I actually like my sink. It is not pretty at all, but it works well for us. Ours has three sections which I love. If I’m being real, I mostly love it because there’s always a clear section even when there are lots of dishes piled in the sink. I don’t know if yours is the same or not? We haven’t had a lot of problems with splashing, maybe because the faucet flows pretty much straight into the middle drain.
Lisa DIEFENDERFER says
Thank you so much for your tutorial! I am going to paint my countertop that has ceramic tile currently. Do you have an suggestions as for how to make the grout lines even with the tile so that it doesn’t look like tile when it is painted and sealed?
Carrie says
Hi Lisa, My parents actually just paid someone to do this to their tile countertops. I believe he used a Giani Granite countertop kit right over the tile and it self-leveled. I believe that the resin I used might also work since it is self-leveling as well but it would be hard to know for sure without doing a test.
Vicky says
What an informative and honest review thank you! Can you tell me how much resin you used and how many square ft of counter you have? I see your link is for a gallon, wondering if that was enough/ not enough for you? Thank you!
Carrie says
Yes! My countertops are approximately 50 square feet and I used 3 gallons of the resin. I used extra because I originally ran out and had to do a second coat to even everything out. Without that mistake, 2 gallons would have been plenty for 50 square feet.
Karen says
Thanks, Carrie, for this post and the tutorial itself. Great stuff! In your tutorial you mentioned that the countertops yellowed due to a Slow Cooker, but in this post it sounds like you later concluded that the yellowing was more due to something that happened early on while it was curing, maybe? My question: Have you used a Slow Cooker in the last three years on these counters? I’m a huge crockpot cooker, lol, but hoping to try this project on our new house…any tips on how you handle appliances on the counters, heat sensitivity, etc., would be super appreciated!
Carrie says
Hi Karen, So originally, we used a slow cooker on our countertops and it left a dark yellow circle underneath that was definitely directly related the slowcooker. Later, one section of the resin seemed a bit yellower all along but this was more of a very faint yellow tint, so the two incidents were very different. After the original incident, I have tried to always set our slowcooker on top of our ceramic cooktop instead of on our countertops. I have also set it on top of a wooden cutting board at times. Mainly, I didn’t want to risk the same problem occurring. However, we have used our InstantPot directly on the countertops plenty of times and I’m not sure there is a huge difference other than a shorter cooking time. In general, other than the Crock-pot, we haven’t really been any more careful with our countertops than we were with our old laminate countertops. Good luck!
Brenda says
Hello, I painted my counter tops last year woth a counter top kit but they look terrible, initially looked nice faux marble over my ugly laminate but it observed any stains like coffee or sauce that would not wipe off and turned yellowing and scratched easily. I’m thinking the pour over apoxy may be the key since the kit had a brush on and probably not thick enough for the beating it took. I am going to attempt to paint over it and try to apoxy. Any tips you have? I wonder if I should sand before I repaint?
Carrie says
I am so sorry that happened! If I were you, I would lightly sand the countertop to remove and loose paint and then be sure to use a good oil based primer before painting. I like Zinsser Oil Based Primer – it will stick to pretty much anything. Fingers crossed everything works better this time!
Patti says
I recently bought a 1930 farmhouse with a large kitchen (30 ft of counters). My counters are laminate with a built in short backsplash and warped in places; so, I’d like to replace them with plywood and do this directly on the plywood. Also, given the age of the house and the cabinets and floors, which I love, nothing is level so I’m a little concerned about pooling. Any suggestions?
Carrie says
I think it could work. You should be able to adjust the plywood with wood shims to make it more level when you install it. Another idea would be to stain the plywood if you like the look of wood countertops. You would need to seal them with a waterproof sealer but plywood can actually look really beautiful. Here’s a post from another blog with gorgeous plywood counters if you’re interested – https://www.thriftydecorchick.com/2021/01/wood-counters-for-less-DIY.html
Carolynne says
I am wondering if you have any comments on how the countertops have held up to heat? Like can you set a hot pan down on them? Thanks
Carrie says
I try to avoid putting hot pans directly on the countertop for more than a couple of seconds. I do set warm things on the countertops with no problems, but not super hot ones. And we don’t cut directly on the countertops – I think it would definitely leave small scratch marks if you cut on it with anything sharper than a butter knife.
Cathy Cosgrove says
Hi there. I am very interested in trying this technique. The only thing nobody ever discusses is how to care for the counter tops to keep them clean and glossy with daily use.
Carrie says
Good point! We clean our countertops pretty much the same we did when they were laminate – we use an all purpose counter spray (I like the ones from Method) and a clean cloth and it has worked well.
Kimberly- KKAbsherWrites says
Your countertops are lovely! Like you, I use Zinsser Cover Stain as my go to primer. Even used it on floors and they have t chipped or cracked. I’m thinking the yellowing is the resin reacting to the heat of the oven or stove. The scratches? Well, unfortunately resin scratches, but most people won’t even notice. You did an amazing job.
Carrie says
Thank you so much!
Missy says
Your counters are lovely and the shine is great, but what if someone wants a more satin finish, ala soapstone?
Carrie says
Thank you! I love the look of a good soapstone countertop. You can get a satin finish using the same pour-on resin I used, but I have never tried it. There are instructions included with the product and it involves sanding the surface with 600 grit sandpaper and then sealing it with a paste wax. I probably wouldn’t use that method for a countertop. If I were doing a satin countertop, I would probably paint and then seal it with many thin layers of a good water-based satin sealer. General Finishes High Performance Top Coat is a favorite of mine for cabinets and furniture and probably what I would also try for countertops. It comes in matte, satin, semigloss, and gloss and the matte finish actually has just a touch of sheen to it and would work well for a soapstone finish.
Amanda says
I was reading the comments, To anyone doing the countertop paint kits Giani or whatever it is. Those actually hate to say look terrible after few years and ruin your counters in long run may have to get whole new countertops after few years sorry to say!
Carrie says
Oh no! Thanks for sharing!
NANCY says
Hi great job! I did the same thing but came to say i used benjamin moore advance high gloss distant gray which is white. It’s been over four years. No worn spots.
Carrie says
That’s great to know – I’m always keeping an eye out for paints that really last. Thanks for sharing!
Amanda says
Hi! I have a question.. my laminate has peeling on the edge- so I obviously can’t paint over top of the unfinished part.. what would you recommend?? Is there new pieces of laminate I can glue down??
Carrie says
You can buy new sheets of laminate but I don’t have any experience with the cost or how to install them. If you are going to paint the laminate anyway, you could also use a strong adhesive to secure any loose pieces and then use bondo or wood filler to fill in the parts that are peeled. Then sand it smooth so that it is even with the rest of the laminate. Once it is painted, you shouldn’t be able to tell.
Gilli says
I painted mine in 2013. I used a 2 pac type kit from the hardware, in a satin black with silver flecks. I loved it, and it lasted up until 2021. My 2 sons are men now, so with 3 men in the house it has had a bashing.
Carrie says
Thanks for sharing your experience! I’d say a painted counter that lasts 8 years is doing really well!
Stacy lohan says
Hiya Carrie, brilliant kitchen you’ve made I just wanted to (brag) tell you about my experience with contact paper, known a Sticky back plastic in the UK. It was pretty tricky to lie it on the counters because it’s large pieces, small bits are easier. And around the sink was hard. But the way it looks is amazing, it’s a kind of textured white concrete effect. It’s very hard wearing you can scrub it clean. But the main reason imo is that it’s so inexpensive that you can change the look of your kitchen whenever you fancy a change. I’ve actually done most of my kitchen with different types of contact paper for the cabinets and tile splashback. Its easy when you get the knack but still have the odd time of a big piece sticking to yourself and itself. Thanks for your tips!
Carrie says
That sounds amazing – I wish I could see it! Thanks so much for sharing your experience.
Sara says
My kitchen gets HEAVY use as a baker, in home daycare provider and mom of 3.
What did you use for cleaning? Does it hold up well to all cleaners?
Carrie says
I usually just use a general purpose spray like Method all purpose cleaner. It has held up really well to cleaning, but now after close to six years, I am starting to see a few small spots with a bit of wear at some of the corners of the countertop.
Jodie says
Hi- can you tell me how you dealt with the sharp pieces of resin after pouring and drying?
Thank you
Carrie says
Hi Jodie, I didn’t have ay sharp pieces of resin after pouring. I did, however, have a few drips hanging down from my countertops and I was able to scrape those off with a paint scraper. If there are sharp pieces in other areas, I would try lightly sanding it with 400 grit sandpaper. There’s a chance this will give the resin a cloudy finish rather than a clear one, but if it is a small area, especially on a vertical surface, it shouldn’t be noticeable. Good luck!