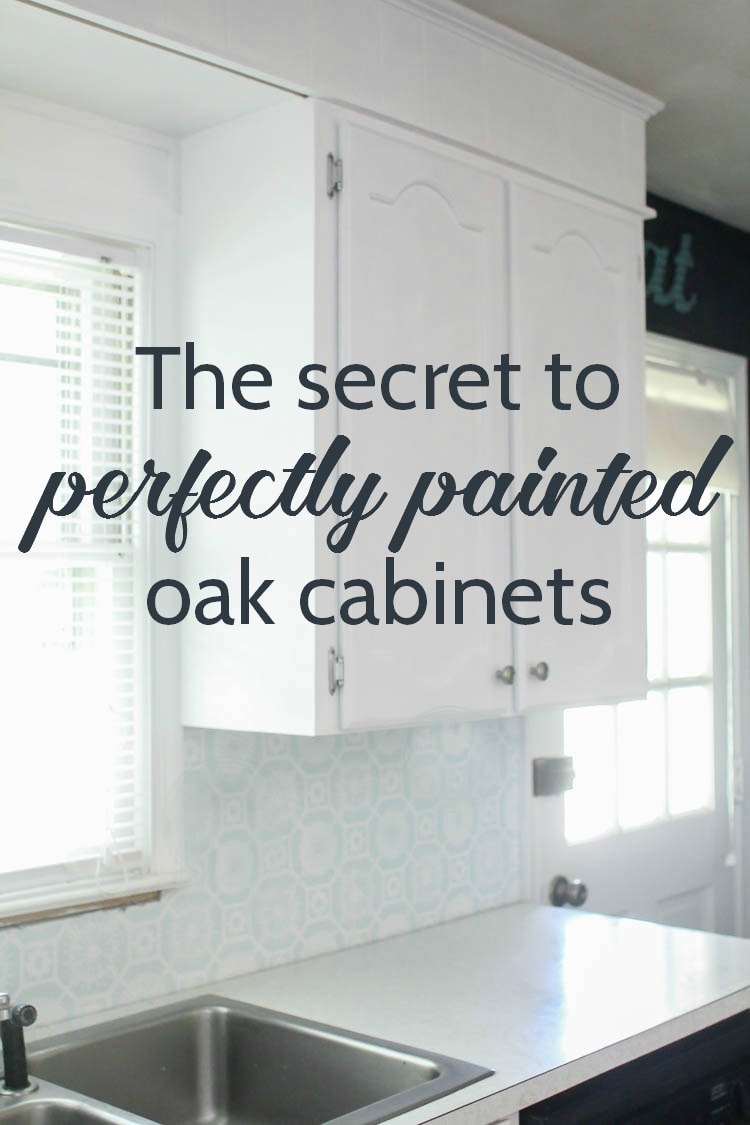
Painting oak cabinets white: An amazing transformation
Painting our oak cabinets white is one of the most worthwhile DIY projects I have ever tackled. Seriously, one of the very best.
It certainly isn’t the flashiest project I have done and it wasn’t the fastest by a long shot. But the difference this one simple step has made in our home is unbelievable.
When I was deciding what process to use to paint my kitchen cabinets, I was focused on two things:
- I wanted really beautiful, professional looking results.
- And I wanted it to be as quick and painless as possible. In that order.
I’ve seen lots of tutorials for painting your cabinets the absolute fastest, easiest way possible and while I am all for that, I am a total perfectionist at heart. I knew I wouldn’t be happy with anything less than a perfect paint job and I wasn’t willing to save time if it meant less than perfect results.
And yes, that meant doing extra work to eliminate that oak wood grain. But even with my high expectations, I was able to eliminate a few steps by using the right paint and materials.
*Update: I’ve gotten tons of questions about how my painted cabinets have held up now that it has been over two and a half years since I painted them. I put together a full post sharing all of the details of how my painted oak cabinets look now along with plenty of pics right here. I would definitely recommend checking it out before tackling your own painted cabinets.*
This post contains affiliate links which means if you make a purchase after clicking a link I will earn a small commission but it won’t cost you a penny more. Click here to see my full disclosure policy.

Okay, before I get into all the how-to stuff, let me take a moment to talk about oak cabinets and the wood grain debate.
Oak cabinets have the special distinction of having a very prominent wood grain. Most pine, maple, cherry etc. wood cabinets don’t have this extra issue.
I am not just talking about the fact the cabinets look like wood, this grain is etched deep into the face of the cabinets. When you paint oak cabinets white, the grain texture remains very apparent.
This doesn’t bother some people one bit. But as I said, I’m a total perfectionist and it bothers me. Instead of fresh classic white cabinets, to me, they look like dated oak cabinets that are trying to hide behind white paint.
So there was no question I had to take care of the wood grain before I could really start painting. This was by far the most time-intensive part of the whole project, but the final finish on my cabinets is flawless so it was totally worth it.
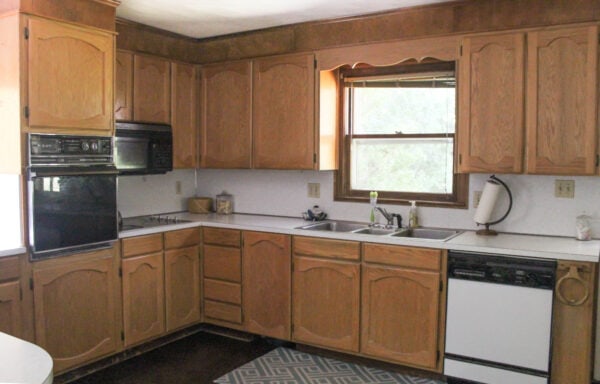
Here’s a look at how my cabinets looked before painting. They were definitely in need of some help!
Materials for Painting Kitchen Cabinets White
- cleaner – I love KrudKutter PrePaint Cleaner for this. My other favorite cleaner is Dawn dish soap diluted with water in a spray bottle.
- painter’s tape – if needed to protect adjoining surfaces
- Zinsser Oil-Based Primer – this is my favorite primer for sealing the wood so that wood tannins don’t bleed through your paint and cause yellowing
- Spackling
- Small putty knife
- 320 grit sandpaper
- high quality paintbrush – These are my favorite paintbrushes for getting a smooth finish on cabinets and furniture.
- small foam paint roller
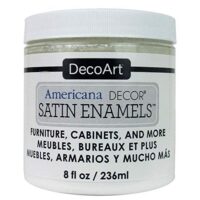
- A high quality paint – I used DecoArt Satin Enamels paint in Pure White to paint my cabinets and it worked really well. Another great paint that I recommend for painting cabinets is General Finishes Milk Paint.
Painting Oak Cabinets White
Step one: Remove the doors
Before you can really get started at all, you have to remove all of the cabinet doors and drawers.
Be sure to label each door as you remove it so you will know exactly where it goes. If you are reusing your hinges, be sure to label them as well.
I simply labeled a small baggie and stuck all of my hinges and screws in the baggie. This is important because even though cabinet doors may look the same, if they are put back in the wrong spot, they will not fit correctly.
(Trust me. I have a friend that did this and their cabinets that they worked so hard to paint looked awful because the doors were all misaligned.)
Step two: Clean the cabinets
As with most painting projects, preparing the surface for paint takes the majority of the time. But if you want your paint to last, it is vital.
Before doing anything else, your cabinets need to be very, very clean. Even though they look clean, cooking grease builds up over the years and paint most definitely does not like to stick to grease.
A lot of people use TSP to degrease their cabinets, but I read a tip that Dawn dish soap works just as well. And since I swear by Dawn for cleaning just about anything, that is what I went with.
I wiped my cabinets down with soapy water and then wiped them with a clean rag to remove any soapy residue.
I followed this up with DecoArt stain blocker. This helps with making sure any lingering grease and grime is sealed away, but more importantly, it keeps wood tannins from ruining your paint job.
Have you ever painted a piece of wood furniture white only to find the wood color seeping through your fresh white paint? These are wood tannins seeping through.
The first time I was painting a piece of furniture and this happened, I tried to cover it up with more and more layers of paint. This was a big mistake and did not work.
What I didn’t know is that certain dark woods and red-toned woods have to be sealed before painting or the tannins will continue to leak through your paint no matter how many coats you add.
You can also accomplish the same this with a good oil-based primer – I’m a big fan of Zinsser oil-based primer.
If you choose to use primer rather than the stain sealer, I would wait to do it after the next step – spackling the wood grain.
(And if you want more info on using oil-based primers with water-based paints, I have a blog post that breaks down everything you need to know about primer.)
Step three: Deal with the wood grain
I did a lot of research and a bit of experimentation on the best way to deal with the oak wood grain.
The clear consensus was that spackle is the best way to eliminate wood grain. Yep, I’m talking about the same spackle you use to patch nail holes in drywall.
Use a flexible putty knife to apply a very, very thin layer of spackling over the surface of your cabinets. Give it a few minutes to dry and then sand all of the excess off using a very high grit sandpaper. (I got the best results from 320 grit.)
Once it is sanded, the spackle will only be left in the little crevices of the wood grain, leaving them smooth with the surface of the wood. When everything is sanded smooth, use a microfiber cloth to remove the sanding dust. Do not use a wet cloth, as the water will pull the spackle out of the wood!

Personally, while I did paint the inside of my cabinet doors, I did not spackle them. I only did this step on the most prominent areas – the drawer fronts, cabinet doors, and cabinet boxes.
Because of this, it is really easy to see the difference between filling the wood grain and skipping it. Here are a few pictures that show how the wood grain looks painted to help you decide if it is something you want to worry about or not.


Step four: Paint
And finally, the last step is to actually paint.
I used a foam roller meant for painting smooth surfaces to paint the flat areas and I used a high quality paintbrush for getting into smaller areas.
After hundreds of painting projects, I’ve learned that the paintbrush you use matters. A lot.
I’ve turned into a bit of a paintbrush snob, so when I saw these DecoArt paintbrushes I wasn’t even planning to use them at first. But I decided to give them a try, and I am so glad I did. The bristles are extra soft and are perfect for getting a very smooth finish. I will definitely be using these again in the future.
Okay, so here is the secret to getting an incredibly smooth finish on your cabinets without using a paint sprayer.
Foam rollers are great at giving a pretty smooth surface, but in my experience they tend to leave a bit of a speckled surface. The color is uniform, but the texture is similar to the surface of a football with tiny raised bubbles from the roller.
This isn’t always a big deal, but I was going for perfection. I wanted cabinets that looked professional.
I painted the cabinets using the roller as usual. Then before the last coat of paint, I gently sanded everything using my 320 grit sandpaper again. This made the cabinet surface silky smooth.
Then I brushed on the last coat of paint using my super soft paintbrushes.
Yes, this added more time to the process yet again. But the cabinets look and felt amazingly smooth and beautiful.
And the best part? No top coat is needed. DecoArt satin enamels is an enamel paint which means it dries to a very hard finish. Which means you don’t need to put anything over it for protection like other softer paints.
I was able to reattach my cabinet doors the same day I finished painting them, though I did try to be extra gentle with them for a few weeks just in case.

As you can see, we also finally removed that little flourish above the sink. Good riddance!

It is absolutely unbelievable what a difference painting our kitchen cabinets white made. Yes, it is time consuming. Yes, it is a pain to have your kitchen in chaos. But it is so very, very worth it in the end.
Even if we didn’t change anything else – not the gold speckled laminate countertops, not the appliances from the 80s, nothing – painting the cabinets alone makes it feel like an entirely new kitchen. I know that sounds crazy, but I am completely serious.
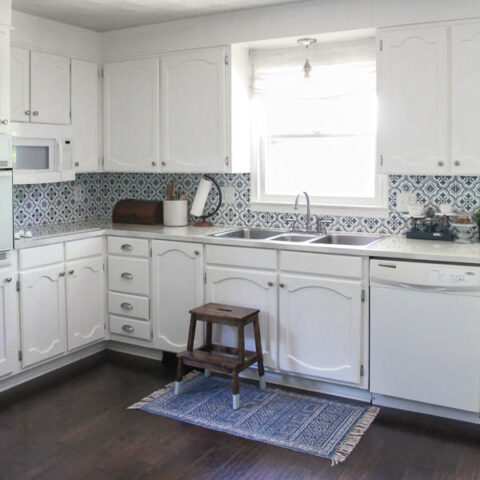
And now with a few other budget DIY projects, our entire kitchen is transformed!
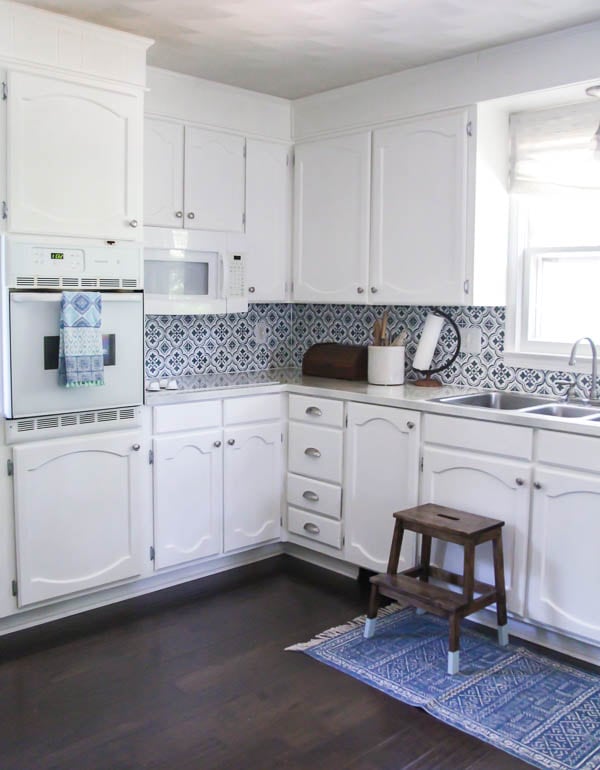
Take a look at this before and after – now that is a serious update!

I also recently painted my oak bathroom cabinets using mostly the same method but a different type of paint that I like even more. I recommend heading over there next if you are considering tackling this project.
Painting Oak Cabinets
This tutorial explains step by step how to paint oak cabinets white and achieve a perfectly smooth finish.
Materials
Instructions
- Remove the cabinet doors and drawers. Label each door, drawer, and hinge as you remove them so you can easily put them back where they go. You can place the hinges and hardware for each door in a labeled plastic bag.
- Clean your cabinet boxes, doors, and drawers well to remove any dust and grease.
- Paint a coat of DecoArt Stain Blocker onto all of the bare wood surfaces. This will prevent the tannins in the wood from bleeding through your fresh paint and causing yellowing. (Or if you prefer, you can use an oil-based primer instead, but if you choose to use a primer, you will apply it after the next step.)
- To smooth the heavy oak wood grain, use a putty knife to apply a very thin layer of spackle onto your cabinets. Once the spackling has dried, sand it smooth with 320 grit sandpaper.
- If you are using primer instead of the Stain Blocker, apply it using a smooth foam paint roller.
- Use a foam roller to paint your cabinet doors, drawer fronts, and cabinet boxes. You can use a paintbrush to paint smaller areas the roller can't reach. You will need at least two coats of paint, possibly more if you are painting with pure white paint.
- To get a very smooth paint finish on your cabinets, sand each flat surface with 320 grit sandpaper before painting your final coat of paint. Then brush on the final coat of paint rather than using the roller.
- Once your cabinets are completely dry, carefully reattach the cabinet doors, drawers, and hardware. Be extra gentle with your painted cabinets for the first few weeks until the paint is fully hardened.
Recommended Products
As an Amazon Associate and member of other affiliate programs, I earn from qualifying purchases.
More Budget Kitchen Makeover Inspiration
Be sure to head over and see the update on how our painted cabinets are holding up two years later as well as our final kitchen makeover reveal. We transformed our entire kitchen on a tiny budget with painted cabinets, painted countertops, a stenciled backsplash, and lots of other budget DIYs.
I’d love for you to pin this post on Pinterest!

In the 40s people painted and carpeted wood chairs cabinets and floors. What a shame, hiding the beauty of the wood.
Oak is strong, durable and beautiful.
I would like to update my kitchen, but never paint wood.
I know you can stain, wipe even stress wood.
Do have any suggestions other than paint?
I’ve spent a lot of time sanding and removing paint from old beautiful wood items.
I agree that far too much beautiful wood furniture has been covered with paint. For me, my builder grade cabinets weren’t beautiful wood though so I had no problem painting them. If you want to keep your wood cabinets, you could always try a gel stain. That way you wouldn’t have to completely strip the old finish. Or if you aren’t opposed to some color, you could try white-washing them so the color is lightened but the wood still shows through. And sometimes just updating the hardware can make a world of difference.
I want to to do a makeover of my cabinets. I really like what you did in your kitchen. It is just beautiful!
I have oak cabinets in my kitchen. They have PU Coating on the wood. If I want to paint the way you did, do I have to strip the PU coat? Do I have to sand all doors before I apply the spackle? Or does DecoArt stain blocker is sufficient before I apply the Spackle?
I have about 52 doors in the kitchen and other area to paint. I am a retired person and can work for 6 to 8 hours a day.
Please let me know how much time it would take and how much of each material I need to buy.
Any help in this regard is highly appreciated.
We live in Michigan.
Thanks
No, you don’t have to strip off the poly before painting. (Thankfully. That would be a huge pain.) If the coating is pretty shiny and slick, I would sand the doors lightly first just to make sure the spackle has something to grip. The DecoArt stain blocker isn’t really a primer and won’t help paint or spackle stick to the cabinets. It just helps seal away stains and wood tannins so they don’t bleed through and mess up your paint. Although, I do think it might be a better idea in your case to skip the stain blocker and just use a good primer instead. The order would be – clean, lightly sand if needed to roughen cabinet surface, spackle, sand spackle, primer, paint. It’s hard to say how long it would take or how much material to buy – it’s just so hard to estimate and everyone’s kitchen is different. It sounds like your kitchen is bigger than mine though so I would start with a gallon of primer and 6 of the 8 oz pots of DecoArt paint if that is the paint you are using. Good luck!
Is DecoArt Décor Americana Decor Satin Enamels a chalk paint. Can I use a chalk paint to paint my kitchen cabinets or not?
DecoArt Satin Enamels is not a chalk paint – it is an enamel paint. If you were to paint your kitchen cabinets with chalk paint, I would strongly recommend that you start with a good primer like Zinsser oil-based primer and end with a durable top coat like General Finishes High Performance Top Coat. Those two steps will make your paint job much more durable. I definitely would NOT recommend using chalk paint followed by wax on cabinets – wax just isn’t durable enough for the heavy use cabinets endure.
I just had my cabinets painted and no one mentioned removing the grain to me. I was going for the look you have!
Is there any solution to the grain after painting? I am so mad the painter didn’t mention it so now I am at least trying to fix where it is super obvious.
It really stinks that they didn’t even bring it up! Professional painters should know that this is something to consider! I don’t know of any easy way to fix it after the fact but with some work, you should be able to fix it. If I were in your shoes and wanted to fix the obvious areas, I would double check what paint the painter used. Then I would clean them well, fill the grain with spackle and sand. Then repaint those areas. You should only need one or two coats of paint to get good coverage. But I would really think about how much it bothers you first because it isn’t going to be a quick process. Good luck!
Newcomer here… I was just wondering why you chose to hand paint the cabinets instead of use a sprayer? And I was also wondering if you have any tips for getting the spackle cleaned up in the beveled part of the cabinets. I am using a wood filler and I feel like there has got to be an easier way than what I am doing. I’m tempted to just spackle the inside of the face and not the frame so as to not get any of the filler in the beveled edges … thoughts?
I chose not to use a sprayer for a couple of reasons. Most importantly, I didn’t have one at the time! Also, this was a project that I was only able to work on for a few hours a day spread out over several weeks. Spraying the cabinet boxes would have involved lots of dropcloth/tape/covering things and would have been a pain for that long while also cooking in our kitchen. But I do have a paint sprayer now and if I were doing this now, I would probably hand paint the cabinet boxes and spray the doors and drawers. Regardless, the finish turned out beautifully.
I didn’t really have any trouble with the spackle in the beveled edges. You mentioned both spackle and wood filler so I’m not sure which you are using. But before settling on using the spackle, I did a test run with wood filler and hated it. It caked up the edges of the door and was very difficult to sand as smooth as I wanted. With spackle I didn’t have any of those problems because it sands to dust with very little effort.
Why do your “with spackle” pics have beveled edges but your “without spackle” pics have square edges?
That is because I only used spackle on the fronts of the cabinet doors – those are the pics with the beveled edge. I painted the backs of the doors but did not use spackle there – those are the square edges. I took pictures of both so you could see the difference the spackle made.
Thank you so much for the information. It was so helpful! My husband finally agreed to let me paint our oak vanity (he loves wood) and it turned out beautiful!
Yay, I’m so glad to hear that!
I had never considered making sure the wood grain doesn’t show through! To be clear – you did NOT sand before applying the spackle, right?
No, I did not! No sanding before, but I did sand after spackling to get everything smooth.
How many containers of the deco paint did you go through? I’m thinking of painting mine with it as well :)
I believe I used about 8 containers in the end – but you need more or less depending on how many cabinets you have! Good luck with your cabinets!
Did you use any poly or sealer after painting?
I did not use a sealer on these cabinets, but if I were to do it again I would. I have since painted my bathroom cabinets with General Finishes Milk Paint and sealed with General Finishes High Performance Top Coat and they are holding up extremely well.
Love your kitchen transition! Thank you for the info.
We are in the process of using your guide to do our kitchen as I type this sitting I a pile of sanded dust.
We have done everything to a T and the grooves just seem to show even after spackling and sanding down and painting just as you said (we tried a smaller area to see). What might we be doing wrong? Maybe it’s just the lighting?
Hmm, I have a few ideas that could help. First, does the cabinet feel smooth to the touch after sanding the spackling but before painting? If not, the problem is with the spackling step. Be sure to use a high grit sandpaper – 220 grit or higher to sand the spackling. It might also help to use a sanding block or sanding sponge to make sure you aren’t accidentally pressing the sandpaper into the grooves. Also, be sure you aren’t wiping the dust off with a damp cloth – the water can pull the spackling out of the cracks. If it feels smooth, but you can see the grain still, you may just need to add another coat or two of paint to get really even coverage. I hope that helps!
I’m so glad I found this! I think I saw a similar question answered above but wanted to clarify a bit for my situation… we just moved into our house and they painted the kitchen cabinets white clearly without following any steps like this because the grain is obvious, it’s thick and already peeling off in high contact areas. What’s the best approach? Sand everything down, sparkle, sand and repaint? Do I need to be doing anything specific to try and remove the paint they put on first?
Thank you!!!
Oh no, I’m sorry! Dealing with peeling paint is a real pain. You can use a chemical stripper to remove all the old paint first, but you don’t have to. It’s a very messy, time-consuming process, so I would probably sand them down instead. When sanding, make sure you remove any paint that is loose or peeling at all and also sand down any thick looking areas. Then clean it well. If you want to remove the wood grain, I would then do the spackle and sand it down and then use a good primer. If you think there is any chance the cabinets were painted with an oil-based paint, you will need to use an oil-based primer followed by whatever paint you want. (I prefer to always use oil-based primer on cabinets and furniture because it will adhere to anything) In any case, it’s a good idea to use a separate primer before painting since you don’t know exactly what paint they used and the primer will help the new paint adhere better than the old paint did. Good luck!
Hi Carrie,
Thank you so much for such a well written article with appropriate photos.
About the stats you mentioned – are these for the entire project ?
Based on the widest photo – seems like around 16 cabinet doors ( so insides of 8 cabinets ) and 6 functional drawers & insides and 2 faux drawer-fronts ( in front of the sink). Am I correct ? I am trying to calculate the time it might need for my project so just want to confirm the stats with you.
( Prep Time: 1 hour 30 minutes
Active Time: 15 hours
Total Time: 16 hours 30 minutes
Difficulty: intermediate
Estimated Cost: $20-$60 )
Yes, this is my best guess at how long it took. I did this project spread over a few weeks so it is hard to say the exact number of hours it took, but this is my best estimate. Good luck!
Throughout the years I have used an oil and wax to bring my honey oak cabinets back to life. Is this going to effect the process at all? Great article, I am trying to decide wether to do them myself or hire out. Even if I hire out I learned a lot to make sure the job is done right!
Great question! While oil and wax are great for treating wood, they do make it more complicated to paint because paint can have trouble sticking to either. In this situation, I would recommend first wiping everything down well with mineral spirits. Mineral spirits work really well for taking off any wax buildup. Then I would clean the cabinets well and primer with an oil-based primer before painting. You definitely can still paint your cabinets but the prep will be more involved and will be incredibly important. It also wouldn’t be a bad idea to test out this process on one cabinet door to make sure you are happy with the results before doing the entire kitchen. Good luck!
Hi Carrie,
From the steps you listed, you used the DecoArt Stain Blocker then the spackle and sanded. I didn’t see a picture of the stain blocker, is it just a thin layer? Could you use another brand of stain blocker, then spackle?
The stain blocker is a very thin layer that dries clear. Zinsser oil-based primer would also accomplish the same purpose and can be bought at any home improvement store. If using the primer, I would do the spackle/sanding and then prime and then paint. (I’m going to update the post to reflect this too – thanks!)
Hello!! We are currently in the process of painting our cabinets. I honestly believe they look exactly like yours! We have followed every step so far and same results. We primed with the Zinsser oil based primer. We feel it went on and looks very thick. We are now thinking we will have to sand it before painting? Does this sound right?? It looks very thick in spots and heavy. I would say its just my painting but since there are 2 of us, Im just not sure? Any suggestions or help?
I’m sorry to take so long to respond to this comment! You have likely moved on already but I still want to respond in case it helps you or someone else. The oil-based primer does go on thickly sometimes. It’s important to stir it well before applying it and also to use a good paintbrush. This primer is bad about leaving a lot of brushstrokes when applied with a rougher brush. And even if you do stir it, you may need to sand any rough spots lightly with 220 grit sandpaper to smooth it down.
Wow. This is what I want. It takes long time to find correct one. Thank you. Carrie.
I have a question.
It’s varnish on cabinet.
Do I have to strip varnish first and then follow your amazing your steps, right?
If you know how to strip varnish, please let me know.
Have a great day and thank you in advance.
Hi, I have stripped the finish from furniture several times, but I have never stripped varnish, but I know it is recommended to strip varnish before painting. I’ve seen some painters say you don’t have to strip it completely if you use an oil based primer over the varnish before painting. If I were you, I would probably do a test with oil-based primer and paint on the back of one of the cabinet doors to make sure it adheres well. If it works, you should be safe giving the varnish a quick sanding coat to help the primer stick but not completely stripping it. And if the test doesn’t work, you’ll know you definitely need to strip it. Good luck!
Hi Carrie. Tx for your great article. Can I use the same enamel paint and high foam roller on laminate kitchen cabinets pls ?
Yes, you should be able to use the same roller and paint on laminate cabinets. But be sure to lightly scuff them with sandpaper first to help the paint grip the shiny surface. And then use a good oil-based primer before painting. Good luck!
Hi!
Where were you able to buy the paint? I only see it in little 8oz jars.
This paint does come primarily in 8 oz. jars so I used several – it has been awhile, but I believe I used 6 to paint all of my cabinets. It feels weird to use all these small jars of paint for large projects like cabinets and furniture but it’s actually kind of nice because you can buy exactly the amount you need. It used to be sold at Michaels in stores, but may only be available online now. Or you can also find it on amazon.
I really want to complete a similar project in my kitchen. I know the wood grain detail would bother me if I just painted the cabinets. Did you sand by hand or use a sanding machine? I have a bit of arthritis.
I’m sorry about your arthritis – my husband has dealt with arthritis since his twenties and it can be a pain. I sanded by hand but using an orbital sander or other handheld sander would also work well for the flat surfaces. Then if your doors have any detail areas, you could just do those by hand.