How to Paint a Bathroom Vanity: Secrets for a Perfect Finish
Painting a bathroom vanity is such an easy, inexpensive way to completely change the look of your bathroom. I’m going to show you step-by-step how to paint a bathroom vanity with a perfectly smooth paint finish that will last for years.
Of all the changes I made in my recent $100 bathroom makeover, painting our old oak bathroom cabinet was one of the projects that made the biggest difference to the space.
Even if I hadn’t changed anything else in the room, just painting the vanity alone would have made a huge difference!
Painting a bathroom vanity really isn’t particularly difficult even if you don’t have a lot of painting experience.
But there are lots of small things you can do during the process to make sure your paint finish is as beautiful as possible and lasts as long as possible.
Along with a step-by-step tutorial, I’m sharing the best paint to use for painting cabinets, how to make sure your paint job lasts, and my trick for getting a perfectly smooth paint finish, even on oak cabinets with a heavy wood grain.
I’ve also put together a video tutorial at the end of this post for those who prefer video.

This post contains affiliate links which means if you make a purchase after clicking a link I will earn a small commission but it won’t cost you a penny more. Click here to see my full disclosure policy.
Materials
- Bathroom cabinets in need of an update
- Cleaner – I love to clean furniture with simple Dawn dish soap diluted with water in a spray bottle.
- Painter’s tape – if needed to protect adjoining surfaces.
- Paint – I used General Finishes Milk Paint in the color Persian Blue. This is one of my favorite paints for painting both furniture and cabinets.
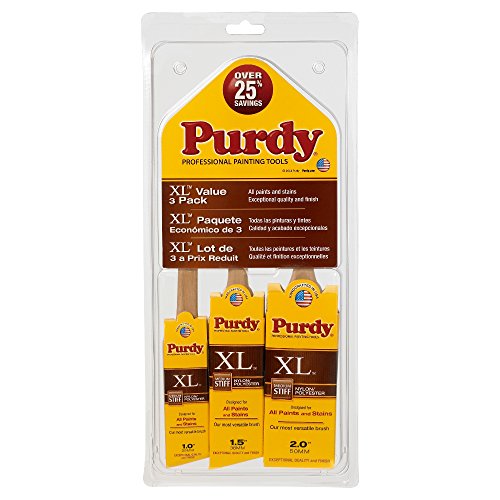
- High quality paintbrush – These are my favorite paintbrushes for getting a smooth finish on cabinets and furniture.
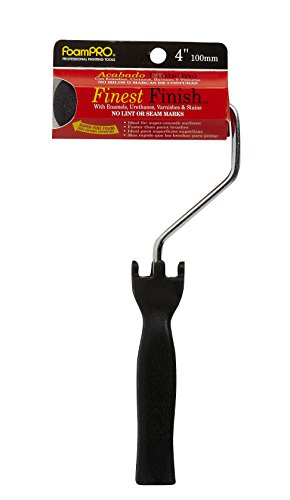
- Small foam paint roller – a foam paint roller is excellent for getting a smooth paint finish when painting flat surfaces.
- Topcoat – General Finishes High Performance Topcoat is my absolute favorite sealer. It is easy to work with and gives a very durable finish.
- Blue sponge applicator (optional) – This sponge is awesome for applying topcoat with a perfectly smooth finish, but you can also use a good paintbrush instead.
If you are painting oak cabinets
- Spackling – this is the secret to getting a truly smooth finish when painting oak cabinets.
- Putty knife – for applying the spackling.
- 220 grit sandpaper – to sand the spackling smooth.
If you are replacing your old hardware
- New hardware – If you are looking for new hardware, you should check out this list of my favorite sources for affordable hardware.
- Wood filler – If your new hardware isn’t the same size as the old hardware, you will need to fill the old holes with wood filler.
- Drill and drill bits – if you need to drill new holes for your new hardware.
How to Paint a Bathroom Vanity
As much fun as it would be to jump in and just start rolling on the paint, that is never a good idea.
Before you paint anything, you have to start with prep. That’s what keeps your paint job looking good and not chipping off within weeks.
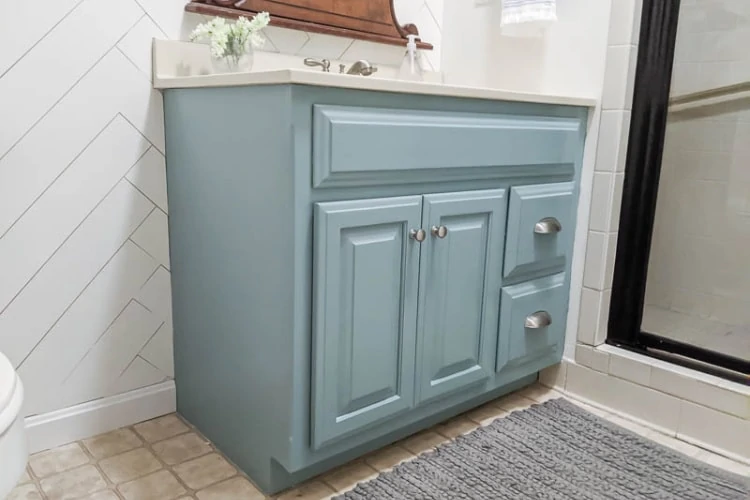
This is the cabinet I am painting.
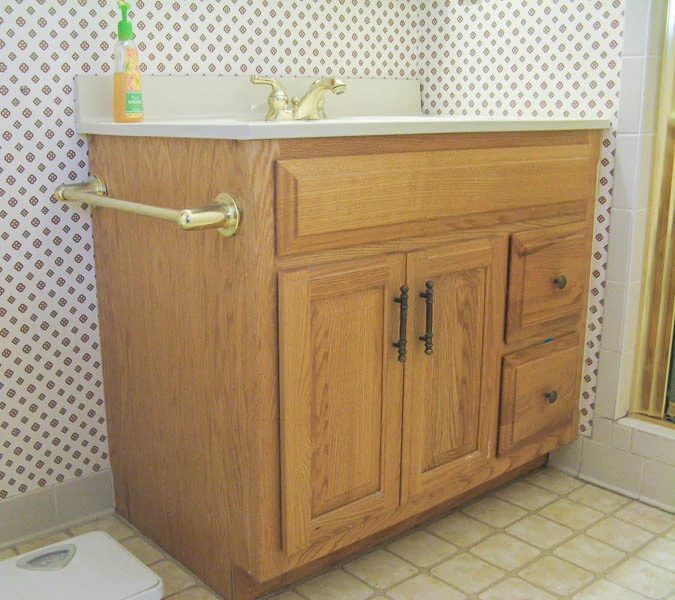
It’s a builder basic oak vanity from the 90s and I know a simple coat of paint and some new hardware is going to make all the difference.
Removing the doors and drawers
The first thing you need to do is remove your cabinet doors and all the hardware.
You could try to paint your cabinets with the doors still attached, but it’s going to be a lot harder to get a perfect finish and will end up taking even more time than simply removing them from the start.
You can also remove any drawers at this point and set them on top of your vanity or somewhere else you can easily reach them for painting.
Cleaning
Cleaning is always the first step to painting anything, whether it’s furniture, cabinets, or floors.
You need to remove any dust, grease, or soap scum so that the paint has somewhere to stick.
I like to use Dawn dish soap mixed with warm water in a spray bottle for cleaning furniture and cabinets before painting.
Just spray it on, wipe it off well with a paper towel or a clean rag, and rinse it with clean water. It really gets everything off the surface, including dirt you can’t even see.
Deciding on Hardware
This is a good time to decide whether you will be replacing the hardware with something different.
If you are changing out the hardware, figure out if the current holes will work or if you will need to drill new holes for the new cabinet knobs and drawer pulls.
If so, fill in the old holes with wood filler, allow it to dry completely, and then sand it smooth.
You can drill the holes for your new hardware now or wait until after painting.
Smoothing Oak Wood Grain
If you are painting bathroom cabinets that do not have a highly textured wood grain, you can skip over this section.
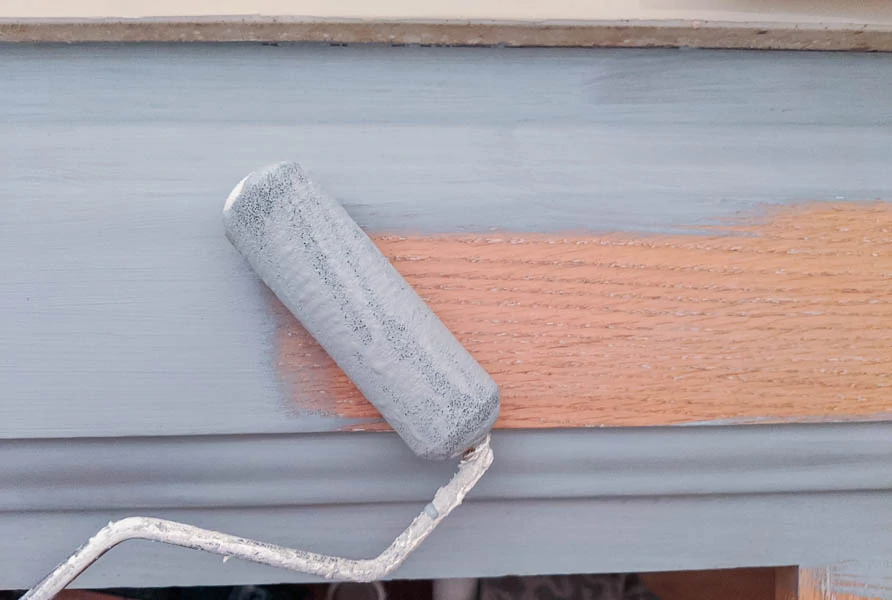
My bathroom vanity is oak. If you’ve ever looked closely at oak cabinets, then you know that they have a really pronounced wood grain.
It’s so pronounced that even after you paint it, you can still see a lot of tiny little grooves and cracks where the wood grain is showing through.
So when I painted my kitchen cabinets a few years ago, I learned a great trick for smoothing out the wood grain so that your painted cabinets have a gorgeous, smooth finish.
The simple trick to getting rid of the wood grain is spackling. Not wood filler, which is what I originally thought would make sense.
I’m talking about the same spackling you use to fill in little nail holes on your walls.
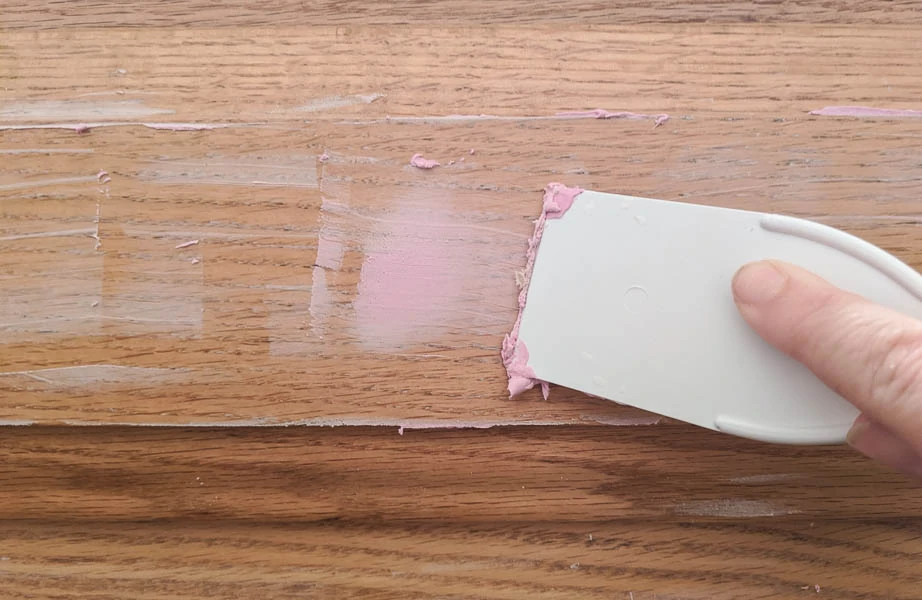
Use a small putty knife to smooth a very thin layer of spackling all over the surface of your cabinets, pushing in just a bit so that the spackling fills in all those little tiny cracks in the wood grain.
Allow it to dry for a few minutes, and then sand all of the excess off using 220 grit sandpaper.
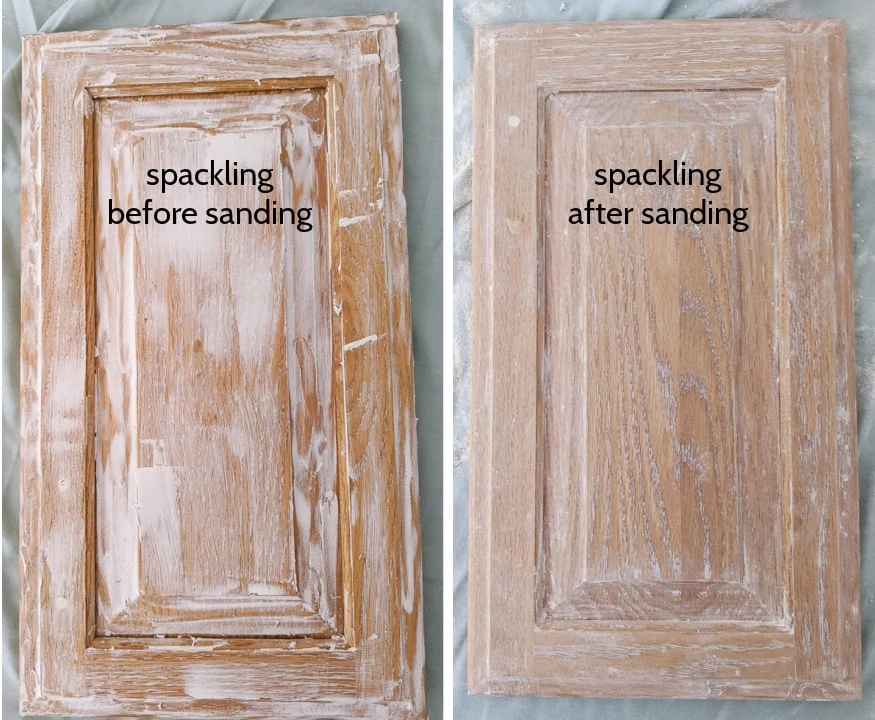
Once it is sanded, the spackling will be left only in the tiny crevices of the wood grain, leaving them smooth with the surface of the wood.
You can then wipe away the dust using a microfiber cloth or other rag. (Don’t use a wet rag for this or the water can pull the spackling out of the wood.)
Do you need to sand your cabinets before painting?
This is the point where a lot of people get confused. Everybody wants to do the right thing, but a lot of times it’s hard to know what that is.
How do you know if you need to sand or not? How do you know when you need to use primer and when you can skip it?
Nobody wants to be doing extra unnecessary work, but at the same time, we want to make sure we do everything right so that our paint job lasts.
The kind of prep you need to do for your cabinets depends on two main things.
- What kind of cabinets you’re painting and the condition they’re in.
- What kind of paint you are using to paint them.
Are your cabinets super shiny and slick? Then you probably do need to give them a light sanding before you can paint.
Are your cabinets really rough to the touch and they’ve seen better days? Again, a light sanding is a good idea to smooth them out.
Those are the main reasons to sand cabinets before painting – to scuff up a very smooth surface so that paint can stick or to smooth a rough surface.
Most people with standard bathroom cabinets do not need to sand them before painting.
Do you need to use primer?
Whether or not you need to use a primer before painting depends on both the type of cabinets you are painting and the type of paint you are using.
Again, if your cabinets are super slick, primer is important to help the paint stick to them.
If your cabinets are dark wood and you’re painting them white or another light color, primer is a great idea to make sure wood tannins aren’t going to bleed through and yellow your white paint.
Also, if your cabinets have been painted before with oil-based paint, you need to use an oil-based primer before painting.
(This is most likely not an issue unless your cabinets were painted many years ago. If you aren’t sure, you can pour a little bit of nail polish remover with acetone or rubbing alcohol onto a rag and rub it onto the painted surface that you want to test. If some of the paint rubs off, it is latex paint. If no paint rubs off, it is oil-based paint. If that is the case, I have a whole post about painting over oil-based paint that may be helpful.)
You may also need to start with primer based on the type of paint you are using.
Many paints, including regular latex paint, require a primer to be used first to help them stick to hard surfaces like cabinets.
If you aren’t sure if your paint requires a primer or not, you should be able to easily find out from the instructions on the paint can.
After priming, if your cabinet feels a bit rough to the touch, it’s a good idea to lightly sand your cabinets with 220 grit sandpaper to get the surface as smooth as possible before painting.
In my case, I am painting an oak vanity without a shiny surface or any other issues that require a primer and I am using a paint that doesn’t require primer.
So I do not need to sand or primer; after doing my special technique to smooth the wood grain, I can skip right to the paint.
Cabinet Prep Checklist
I know it can be really confusing to figure all of that out for your specific situation.
So I put together a free checklist that walks you through the process of figuring out exactly what you need to do to prep your specific bathroom or kitchen cabinets for paint.
When you answer the questions, it will help make it really clear what you need to do and what you can get by with skipping.
If you are already an email subscriber, you can get a copy in the freebie library that is exclusively for email subscribers.
If you aren’t a subscriber yet, you can sign up below to get your free copy.
Choosing Cabinet Paint
For my cabinets, I am using General Finishes Milk Paint.
This is one of my favorite furniture paints and it is also great for cabinets.
General Finishes Milk Paint goes on really smoothly, doesn’t require a primer, and gives a nice durable finish.
This paint doesn’t require a separate sealer, but it is recommended that you use one for high-use projects like cabinets.
Benjamin Moore Advance paint is another paint that comes very highly recommended by professional painters.
It is a self-leveling non-yellowing paint that dries to a hard finish. It does require a primer but doesn’t require a separate sealer.
Choosing paintbrushes and rollers
I get a lot of questions asking if you can get a really smooth paint finish on cabinets without using a paint sprayer.
Yes, you definitely can!
I do have a paint sprayer and it’s fantastic for painting things quickly with a very even finish.
Even so, it does take more time to set up for painting with a sprayer and I use high-quality paintbrushes and good rollers for most of my painting projects, including painting my kitchen cabinets.
If you want an absolutely perfect paint finish without the slightest hint of a paintbrush stroke, a paint sprayer is probably your best bet.
But if you just want a nice, really smooth surface that feels and looks great to the average person, you’ll be just fine with paintbrushes and rollers.
It is, however, important that you use really good paintbrushes. Cheaper brushes will leave behind loose bristles in your finish and make it nearly impossible to get a smooth finish.
I really like Purdy paintbrushes. They aren’t terribly expensive compared to other brushes, they last a long time, and they are great for getting a really smooth finish.
When it comes to paint rollers, I like to use small foam paint rollers for painting furniture and cabinets.
These are usually labeled as rollers for cabinets and doors. And after trying a few different brands of foam paint rollers, I have found them all to be pretty equal.
Painting your bathroom vanity
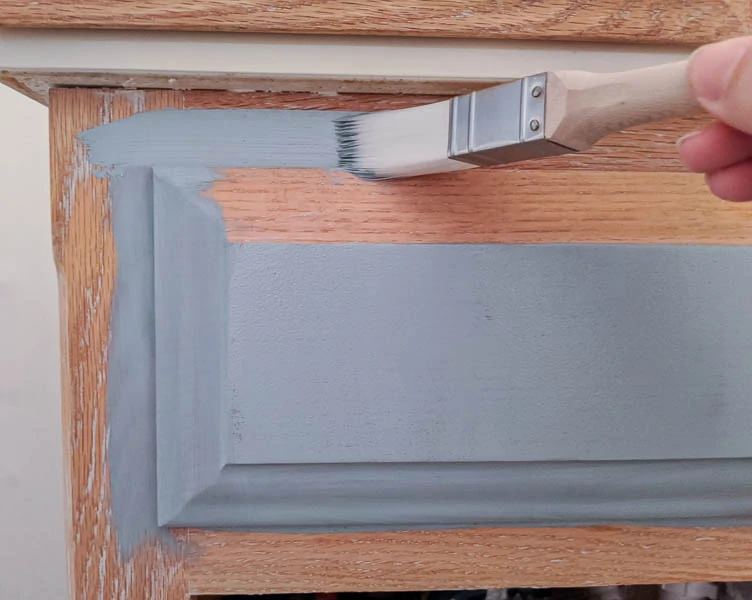
The painting itself goes pretty quickly. Use your paintbrush to cut in around the edges of your cabinets, and then fill in the large flat surfaces with the paint roller.
There are a couple of things to remember when painting to make sure you get as smooth a finish as possible:
- When using your paintbrush, paint with long smooth strokes rather than lots of short, choppy ones.
- When using the roller, make sure there is enough paint on your roller that you don’t have to put much pressure on the roller to paint. (But also don’t load up with so much paint, you get a drippy mess. You want to find the sweet spot in between.)
- After you finish the first coat of paint, resist the temptation to touch up any areas that look a little light! Touching the paint when it is halfway dry will very quickly mess up your paint job and lead to uneven, textured paint.
- In general, you want to apply the paint and then leave it alone. Most paints will smooth out quite a bit as they dry.
Once your first coat of paint is completely dry to the touch, you can add a second coat.
Two coats of paint are often enough to get an even finish, but you may need three or four coats, especially if you are painting your cabinets white.
Protecting your paint with a topcoat
You do not always have to protect painted cabinets with a sealer or topcoat, but I am a big fan of using a good topcoat to protect your paint finish.
Some paints, like Benjamin Moore Advance, do not require a topcoat at all.
Other paints, like the General Finishes Milk Paint I used, do not require a topcoat but do recommend you use one for pieces that are going to get a lot of daily use.
I considered saving myself some time and skipping the topcoat on my bathroom vanity. But I know that we’re going to be opening and closing these doors and cabinets every single day.
So to be safe, I decided sealing is the right thing to do. It’s going to take a little bit more time, a little bit more money, but I’d much rather put a little bit more work now and get results that last for years than start having chips in a few months and really wish that I had just done that one last step.
I used General Finishes High-Performance Topcoat. This is my favorite sealer; I use it on furniture all the time.
A lot of other sealers can be difficult to work with, but I always have good luck with General Finishes without having to be super finicky about how I apply it. It’s really durable and it goes on smoothly.

You can put this topcoat on with a high-quality paintbrush, a foam brush, or a clean rag.
I have used each of those methods with success. For this project, I chose to apply my topcoat with my blue sponge applicator.
The blue sponge is sold by the Dixie Belle paint company and it is my new favorite tool for applying topcoats to furniture, just because it is really easy to use and gives a perfectly smooth finish.
To apply the topcoat, get a little bit on your sponge and wipe it onto your cabinet, using long strokes, all going in one direction.
Allow it to dry completely and then apply a second coat.
Finished Vanity
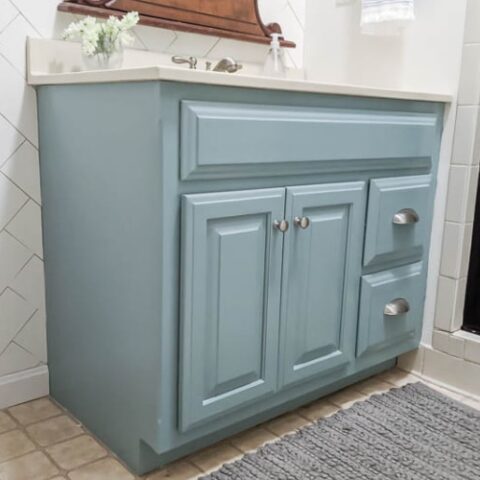
I am so happy with how my bathroom vanity turned out! With a simple coat of paint and some new hardware, it looks completely fresh and updated.
And I am loving this blue color – I’ve been wanting blue cabinets for years and I am so happy to finally have some, even if it’s just a small set in our tiny master bathroom!
And with the rest of the inexpensive updates I made in this space, it’s like a whole new bathroom!

Video Tutorial
If you haven’t seen it, make sure you check out the full reveal of my $100 bathroom makeover. It is absolutely crazy how big a difference you can make with just a hundred dollars.
I’d love for you to pin this project on Pinterest!

How to Paint a Bathroom Vanity: Secrets for a Perfect Finish
Completely transform your bathroom vanity with this step-by-step tutorial. Learn how to get a perfectly smooth paint finish that will last for years even on oak cabinets.
Materials
- Bathroom cabinets in need of an update
- Cleaner
- Painter’s tape
- Paint
- Paintbrush
- Topcoat
- Blue sponge applicator
Tools
- Spackling
- Putty Knife
- 220 Grit Sandpaper
- Wood Filler
- New Hardware
- Drill and Drill Bits
Instructions
- Remove your cabinet doors and all the hardware.
- Clean well to remove any dust, grease, or soap scum so that the paint has somewhere to stick.
- If you are changing the hardware, fill in the old hardware holes with wood filler.
- Allow the wood filler to dry completely, and then sand it smooth.
- If you are painting an oak vanity, use a small putty knife to smooth a very thin layer of spackling all over the surface of your cabinets.
- Allow it to dry and then sand smooth with 220 grit sandpaper.
- Wipe away the dust using a microfiber cloth.
- If you are using a paint that requires primer, use a paintbrush and small foam roller to apply primer.
- Once the primer is dry, start painting the vanity by cutting in around the edges of your cabinets with a paintbrush. Then fill in the large flat surfaces with a foam paint roller.
- Once your first coat of paint is completely dry to the touch, add a second coat.
- When your final coat of paint is dry, apply two thin coats of sealer or topcoat to protect your paint finish.
- Reattach the hardware and cabinet doors.
- Handle your painted vanity gently for the first few weeks while the paint hardens.
Recommended Products
As an Amazon Associate and member of other affiliate programs, I earn from qualifying purchases.
-
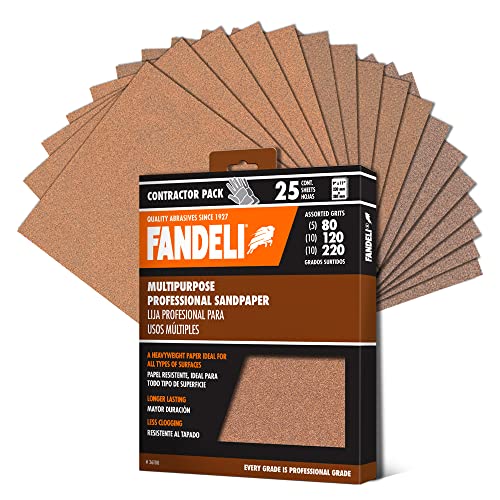
 Fandeli Assorted Grits (80,120,220), sandpaper sheets, multipurpose for furniture, wood, metal, "9x11", 25 sheet pack
 -
DAP INC 18746 Alex Plus Quart Spackling, 32 oz, White
-
FOAM PRO 184 Foam Paint Roller, Pack of 1
-
Purdy 140853100 XL Brush 3 Pack
-
General Finishes High Performance Water Based Topcoat, 1 Quart, Satin
-
General Finishes Water Based Milk Paint, 1 Quart, Persian Blue
-
ScotchBlue Original Painter's Tape 2090-18NC, 0.70 in x 60 yd (18mm x 54,8m), 1 Roll


I love the blue color. Great job.
Thank you!
lots of great advise!Thank you!
I’m glad it is helpful!
You entire bathroom turned out amazing Carrie. Love all of your painting tips for getting great results!
Thank you so much Michelle!
Love the video and What color did you use for vanity?
Thank you! I used General Finishes Persian Blue.
Love it all! Question – why not paint the wood on the mirror too?
I definitely could have, but for mow I like the dark wood of the antique mirror with the painted vanity.
Beautiful job Carrie! What a difference! Thanks for going into the details for getting a great finish. I appreciate all the tips as I plan to do my bathroom vanity in the fall.
Thank you! You will love the results!
I’ve watched the video multiple times and finally did my oak cabinet this past weekend. Oh my. It was a huge job for me. After many hours of work, I still see the woodgrain. I don’t think I over sanded. I purchased everything you recommended. The paint looks ok, but the top coat is a hot mess. The doors are very streaked. I put two coats on and used the sponge you recommended and a small brush. I watched numerous videos on how to add it. I obviously am not a DIYer. I don’t think I will ever try it again. I appreciate your instructions, even though I’m disappointed in my results. Yours looks wonderful
I am so sorry you didn’t get great results! I know that is incredibly disappointing, especially after you put a lot of time into it. Top coats are probably the trickiest part of painting – a lot of times they go on beautifully, but every now and then they don’t and it can be really hard to figure out why. I totally understand if you want to just be done with it, but if you want to keep trying, you may be able to salvage the finish. Do the streaks look cloudy and white to the point they are messing up the look of the paint? If so you can lightly sand off the streaks using a high grit sandpaper (at least 220 grit, 300-400 grit is even better.) Then you can reapply it. If it isn’t actually affecting the look of the paint but just looks streaky when light hits it, you can probably fix it by adding a few more light coats. Sometimes the streaking is because everything just isn’t evenly coated yet. Be sure to stir the top coat really well before using it. Apply it with long even strokes and aim to do several very light coats. You want each coat to be very thin with no pooling at all. Again, I’m sorry it didn’t work out well the first time! If you need more help, feel free to email me at carrie at lovelyetc.com
Six months later, I just came back and saw your reply. Thank you so much for taking the time to try to help. I lightly sanded the top coat a couple of times and reapplied it to try to get a better finish. One door looks better than the other. It’s mostly when the light shines on it. I decided it’s good enough, since it’s hard to see the light reflection on the doors when you walk into the room. Believe it or not, I got brave after my frustrations wore off and painted another small vanity (using a different kind of paint), and it turned out better. The learning curve got me on the first one. I still see yours pop up on Pinterest or YouTube, and admire how wonderful it looks!
I’m glad you had better results the second time. It does sometimes take a little practice to get the feel for it. And I definitely think that we are more critical of our work than others ever will be. I sometimes see flaws in things I paint and my husband can never see them even when I point them out.
Did you paint the inside of the vanity too?
I did not. I typically leave the insides or drawers and cabinets unpainted unless the wood is in bad condition.
Thank you for making this look so doable! My vanity has a hard, shiny laminate like finish. How would you prep this service?
Thank you!
Betsy
Hi Betsy, I would lightly sand the finish first with 220 grit sandpaper – this will rough it up a bit so paint will stick better. Then I would use the Zinsser oil-based primer because it adheres really well. You can follow that with the paint of your choice. Good luck!
Did you spackle the whole vanity? Or just the doors/drawers?
I did most of the vanity – the doors, drawers, and the one exposed side since those are the most visible parts.