How to Make Cheap and Easy DIY Shelf Brackets
These simple DIY shelf brackets are incredibly easy and inexpensive to make. With just a few pieces of scrap wood, you can create beautiful open shelving for any room in your house.
I love open shelving for adding extra style and storage to empty walls and the simplicity of these DIY wood shelf brackets makes them a good fit for any decor style.
I made these shelf brackets for the open shelving in my $100 bathroom makeover and I love how they turned out!
These DIY shelves are a great way to use some of your small bits of scrap wood.
But even if you have to buy all of your wood new, it only costs a few dollars for all the wood you need to make a whole pile of shelf brackets.

This post contains affiliate links which means if you make a purchase after clicking a link I will earn a small commission but it won’t cost you a penny more. Click here to see my full disclosure policy.
Materials
- Reclaimed wood or a 2″ x 10″ common board – for your shelf boards
- 2″ x 2″ furring strip – you can find these for super cheap at your local home improvement store
- 1″ x 2″ pine common board
- 100-grit sandpaper
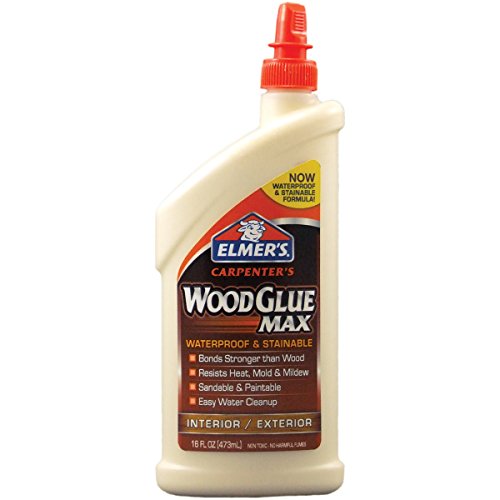
- Wood glue
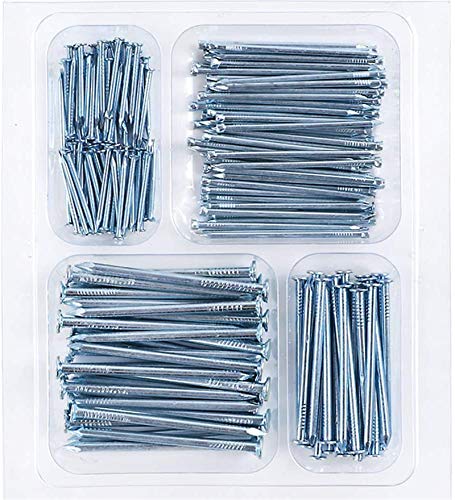
- Finishing nails
- Paint or stain of your choice – I used white paint and dark walnut stain for the weathered white finish on my shelf brackets.
- 2½” screws – for hanging. These screws are ideal because they have a built-in anchor and are made specifically for hanging things like shelves.
Tools
- Tape measure
- Pencil
- Miter saw
- Hammer
- Drill and drill bits
- Level
How to Make DIY Shelf Brackets
Dimensions
The shelf brackets I made are 7.5″ tall and 7.5″ deep. This size works well for most shelf sizes, but you can easily adapt these instructions for larger shelves.
My shelves are 8″ deep and these brackets are perfect.
If you want to hang deeper shelves, you can adjust your support measurements to be a bit bigger.
Just make sure your brackets are at least 1/2″ shorter than your shelves – otherwise they will stick out.
I have used these same shelf brackets for both 36″ wide shelves and 26″ shelves and they worked great for both.
If you want to use these for longer shelves, it’s a good idea to add an additional bracket every 3 or 4 feet to prevent bowing.
Cutting the Pieces
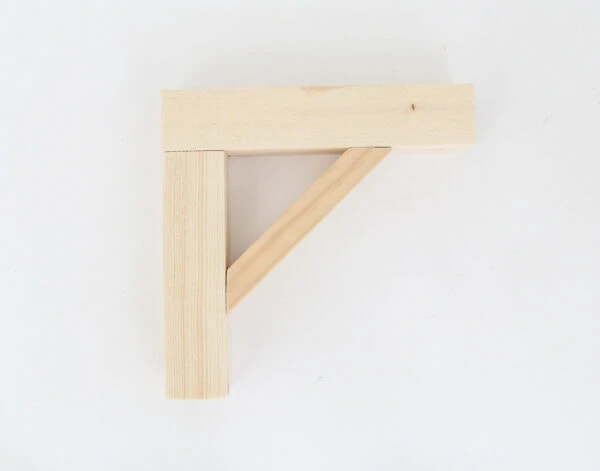
To make the shelf brackets, cut a 2″ x 2″ board to 7.5″ (or whatever length you have chosen for your supports). Cut a second piece to 6″ (or 1.5″ shorter than the first piece).
To make the final side of the shelf brackets, use a miter saw to cut the 1″x2″ board to 5.5″ long, with a 45-degree angle cut along each side to form a trapezoid as shown in the photo below.

Sand any rough edges.
Building the brackets

Use wood glue and finishing nails to connect the three pieces to form the shelf bracket.
Weathered Paint Finish
Depending on the look you want, you can either paint or stain your shelf brackets.
You might want to stain your brackets to match the finish of your shelves themselves.
I decided to paint my shelf brackets instead so the gorgeous reclaimed wood of my actual shelves would stand out more.
I used one of my favorite weathered paint techniques on my brackets to complement my reclaimed wood shelves.
For a similar finish, start by painting the shelf brackets white.
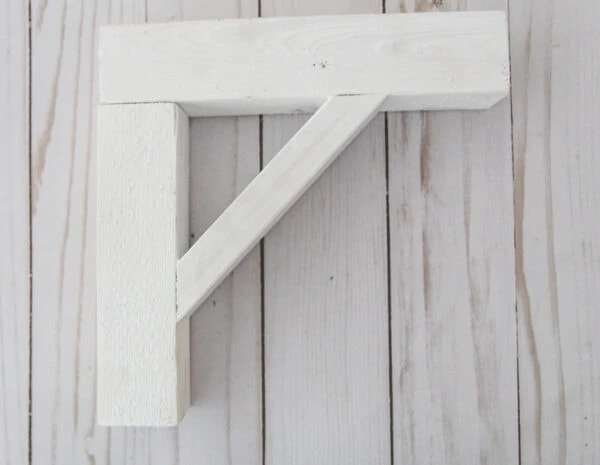
Then sand them to reveal some of the raw wood beneath, really focusing on the edges and corners.
Using a clean rag, wipe a dark stain all over the bracket, making sure to cover all of the exposed edges.
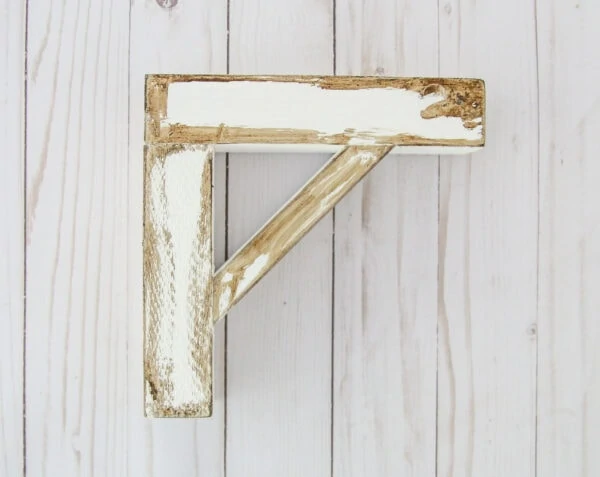
Immediately afterward, use a second clean rag dipped in mineral spirits to wipe away all of the excess stain.
The stain will stick to the raw wood that you exposed when sanding but wipe away from the paint.
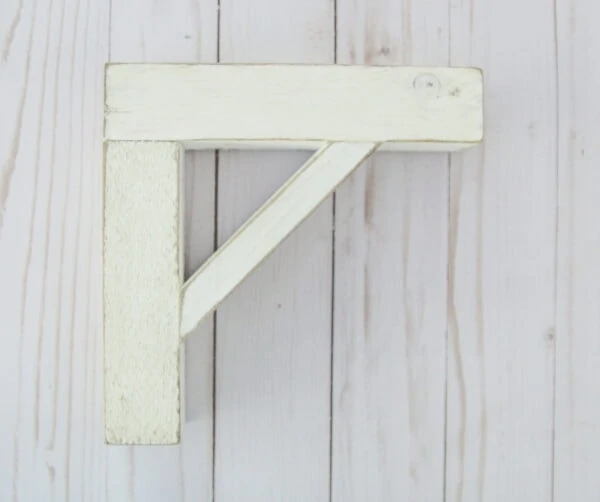
This gives a quick and easy natural-looking weathered finish.
Choosing wood for your shelves
You can use pretty much any sturdy wood for your actual shelves. I had some great reclaimed wood that I cut to size for my open shelving.
You can also use common board or even buy wood that is specifically marketed as ‘shelf board’ and have it cut to size in the store.
Whatever wood you use, just make sure to choose straight boards that are thick enough to be sturdy.
Two-inch thick boards work really well, especially for longer shelves, but one inch boards can also work.
Hanging your shelves
When you are ready to hang your shelves, if at all possible, it’s a good idea to screw the brackets directly into studs.
But sometimes that just isn’t possible. If I had hung the shelves in my bathroom using studs, they would have looked completely random instead of being centered over the toilet.
So instead I used plan B to hang these shelves – sturdy anchors.
Start by predrilling holes through your shelf brackets where the screws will go.
Whenever you predrill holes for screws, they should be just slightly smaller than the screws you will be using.
Then use a large drill bit to notch out a larger area just at the very beginning of each hole.
This creates a pocket for the screw-head to fit in so that it is flush with the wood.

You are going to be drilling one hole straight through the bottom of the shelf bracket and one diagonally through the top and back of the bracket as shown above.
These cabinet-mounting screws are perfect for hanging these shelf brackets.
They have a built-in anchor and are made specifically for hanging things like shelves.
You’ll want to use a level when hanging your shelves to make sure they are perfectly straight.
You may also want to screw your shelf boards to your shelf brackets, especially if your shelves are in a high traffic area. (Or you live where there are earthquakes.)
Just screw up through the top of your shelf brackets into the bottom of each shelf.
I chose to skip this step since my shelves are tucked out of the way.

Here are my diy shelf brackets in action in my recently finished $100 master bathroom makeover.

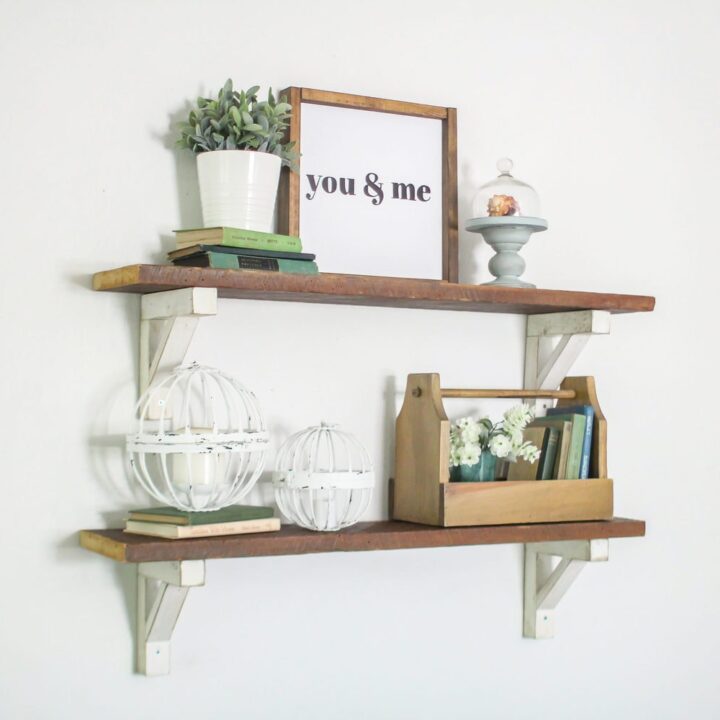
And here is a slightly longer version I made a couple of years ago.
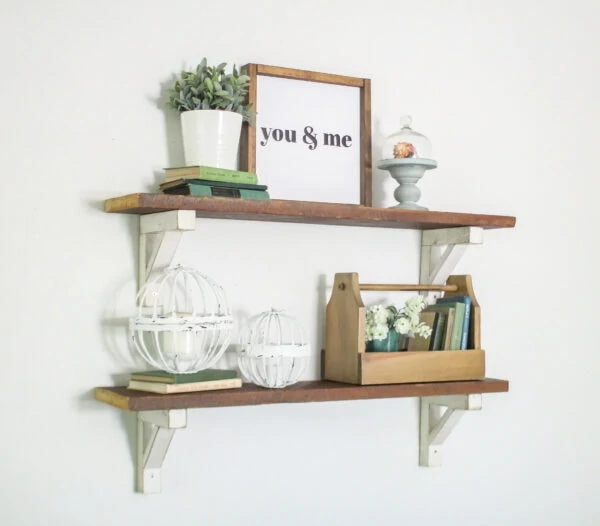
I love the way these shelves look. They really are awesome for adding both style and storage to any blank wall.
If you haven’t seen them yet, you should definitely check out my full $100 bathroom makeover and the how-to for that gorgeous herringbone wood wall!
I’d love for you to share this post on Pinterest!


How to Make Cheap and Easy DIY Shelf Brackets
It's easy to make your own shelf brackets for open shelving using inexpensive lumber or even scrap wood.
Materials
- Reclaimed wood or a 2″ x 10″ common board
- 2″ x 2″ furring strip
- 1″ x 2″ pine common board
- 100-grit sandpaper
- Wood glue
- Finishing nails
- Paint or stain of your choice
- 2½” screws – for hanging
Tools
- Tape measure
- Pencil
- Miter saw
- Hammer
- Drill and drill bits
- Level
Instructions
- Cut a 2″ x 2″ board to 7.5″.
- Cut a second piece to 6″.
- Use a miter saw to cut the 1″x2″ board to 5.5″ long, with a 45-degree angle at each side to form a trapezoid.
- Sand any rough edges.
- Use wood glue and finishing nails to connect the three pieces to form the shelf bracket.
- Paint or stain your shelf brackets.
- Sand them to reveal some of the raw wood focusing on the edges and corners.
- With a clean rag, wipe a dark stain all over the bracket.
- Use a second clean rag dipped in mineral spirits to wipe away the excess stain.
- Hang your shelves by predrilling holes through your shelf brackets where the screws will go.
- Use a large drill bit to notch out a larger area at the beginning of each hole.
- Drill one hole straight through the bottom of the shelf bracket and one diagonally through the top and back of the bracket.
- Use a level when hanging your shelves.
- Add the boards to the shelves.
Recommended Products
As an Amazon Associate and member of other affiliate programs, I earn from qualifying purchases.
-
 CRAFTSMAN Level, 24-Inch, Box Beam (CMHT82346)
 -
BLACK+DECKER 20V MAX Cordless Drill / Driver with 30-Piece Accessories (LD120VA)
-
Metabo HPT C10FCGS Compound Miter Saw, 10-Inch, Single Bevel, 15-Amp Motor, 0-52° Miter Angle Range, 0-45° Bevel Range, Large Table, 10" 24T TCT Miter Saw Blade
-
The Hillman Group 376250 WallDog Cabinet Mounting Screw, 2-1/2-Inch, White
-
Coceca Hardware Nail Assortment Kit 200pcs, Galvanized Nails, 4 Size Assortment
-
Elmer's E7310 Carpenter's Wood Glue Max, Interior/Exterior, 16 Ounces
-
Fandeli 36025 100 Grit Multipurpose Sandpaper Sheets, 9" x 11", 25-Sheet


Google Web Story: How to Make Easy Shelf Brackets
Lovely and clear, but I need to make brackets to hang the shelves from ABOVE–the brackets would be above the shelves (because I want to put shelves above the pegboard I made to hang tools from, with the shelf immediately above the pegboard and hence no room for a bracket below, only above). Could I use bolts and nuts to securely support the board?
You may be able to, but I would probably use a different bracket design if hanging the brackets above the shelves. These brackets are secured with screws but also gravity really helps with keeping the shelf in place on the bracket and keeping the horizontal part of the bracket supported by the vertical part. When turning the design upside down, I would worry about losing a bit of the stability, especially if putting anything heavy on the shelves.