How to Make a Beautiful DIY Wood Headboard
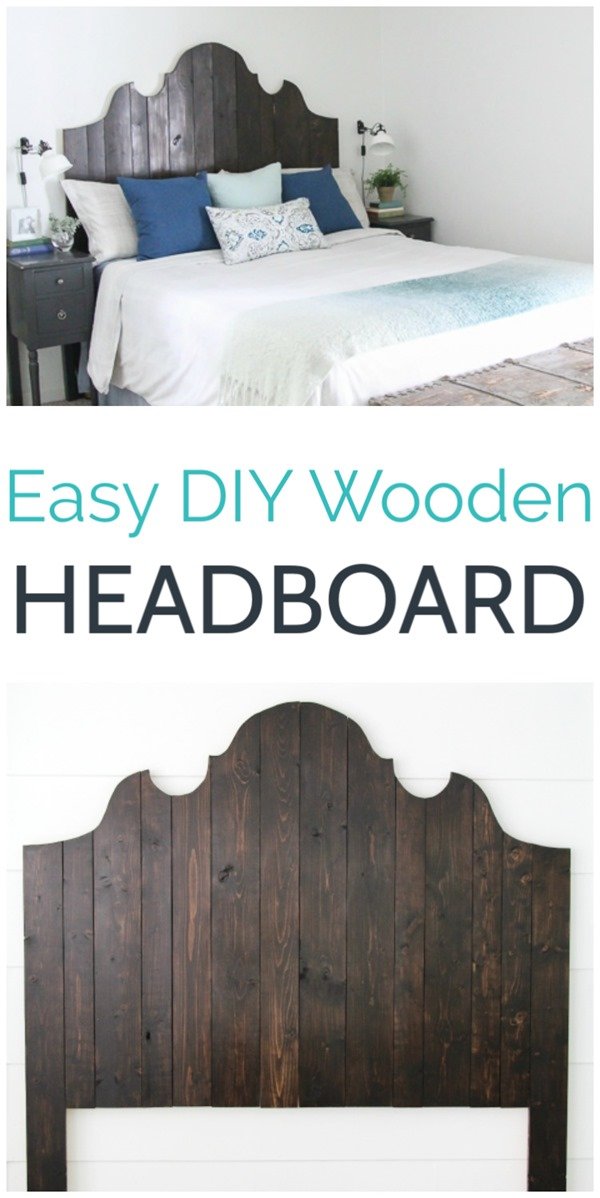
Learn how to make a gorgeous DIY wood headboard using inexpensive lumber and a few basic tools. This tutorial walks you step by step through making a queen size DIY headboard, but the directions can easily be adjusted to work for any size bed.
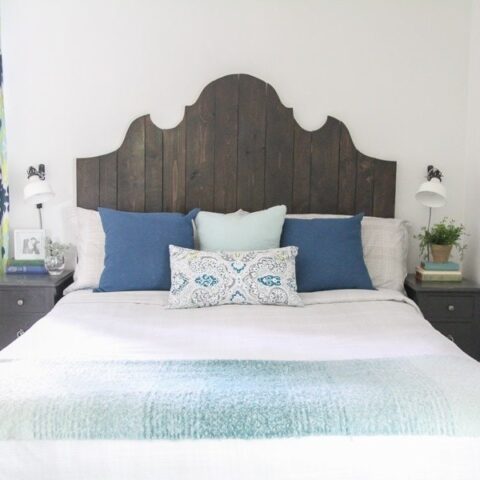
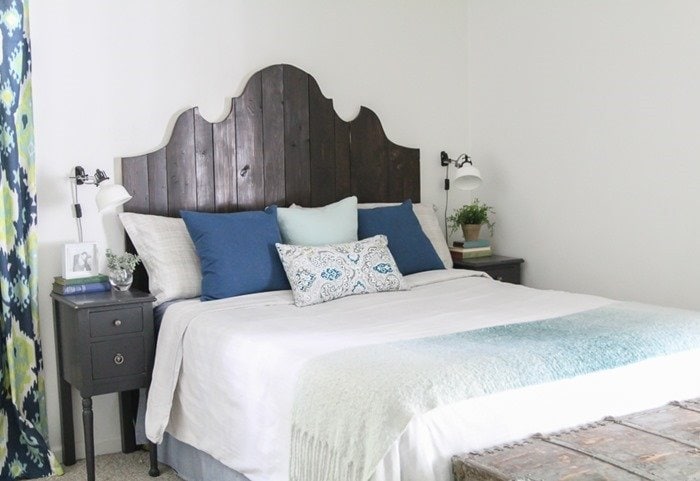
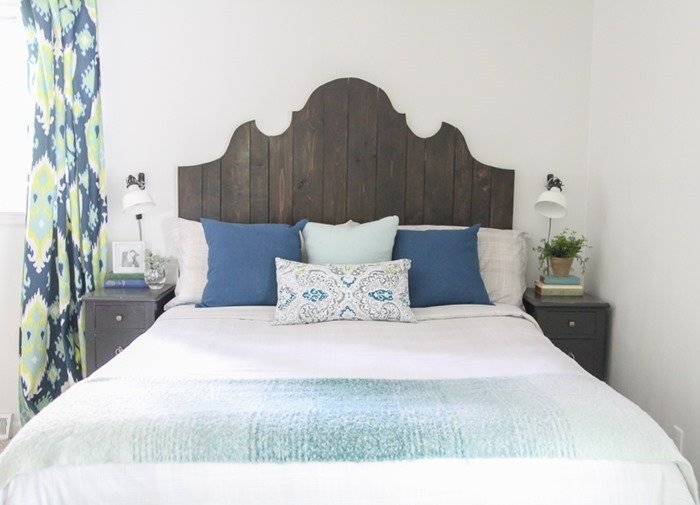
My very favorite part of our recent bedroom makeover is our new DIY wood headboard. This headboard is the perfect combination of rustic and modern, feminine and masculine. It makes a fantastic focal point for any bedroom and it is incredibly easy to make.
This curvy wood plank headboard is one of the tutorials included in my new book Wood Plank Projects: 30 Simple and Creative DIY Decor Ideas for Your Home and Garden. With the official release of my book quickly approaching, I thought it would be a great time to share the full tutorial with all of you here. Hopefully this will give you a better idea of the the setup of the tutorials in the book as well as the types of projects included. (Also, don’t forget to enter the book giveaway right here if you haven’t yet!)
This post contains affiliate links which means if you make a purchase after clicking a link I will earn a small commission but it won’t cost you a penny more. Click here to see my full disclosure policy.
Materials for DIY Wood Headboard
Three 1” x 4” x 8’ common board
1” x 5” x 8’ common board
Three 1” x 6” x 8’ common board
Two 1” x 5” x 6’ common boards (for the two ends of the headboard)
Wrapping paper, butcher paper, or other large paper (to make a pattern)
General Finishes High Performance Sealer in Flat
Rag or brush
Two 1” x 4” x 8’ furring strips
French cleat hardware for attaching the headboard to the wall (optional)
Necessary Tools
Pencil
Dimensions
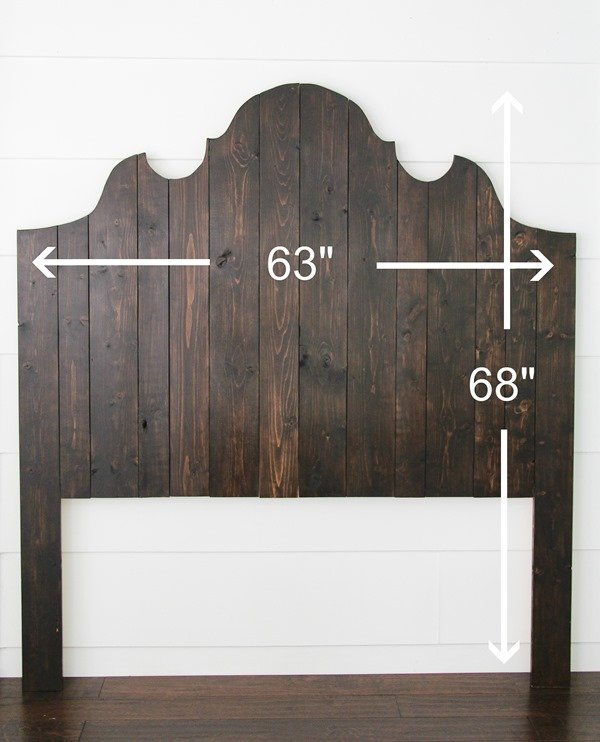
This queen size headboard is 63” wide and 68” high at the tallest point. To make a headboard for a different size bed, simply adjust the width.
How to Make a DIY Wood Headboard
Start by cutting the 1”x4”, 1”x5”, and 1”x6” boards in half to make four foot long boards. Arrange the boards in a random pattern with the two 1”x 5”x6’ boards on each end.
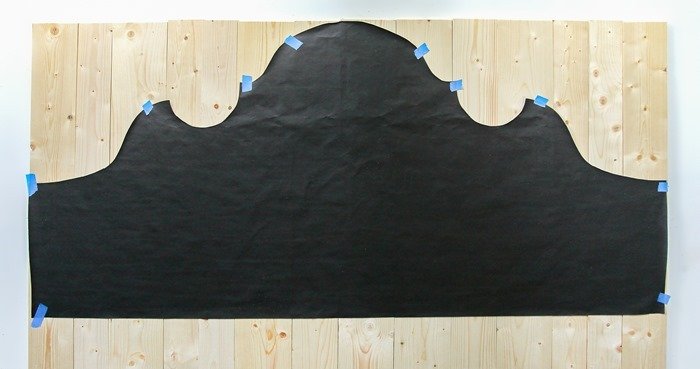
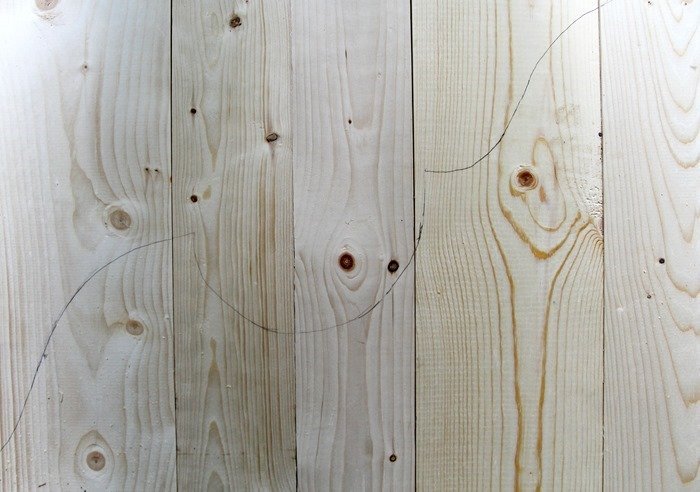
Cut a large piece of wrapping paper or other large paper into 63” or the width of the headboard. This will form the pattern for your headboard design. It is easier to draw and adjust a pattern on paper until it is just right than it is to draw a pattern directly onto the wood.
Fold the paper in half and draw the shape you would like for your headboard. Cut it out.
Unfold the pattern and trace it onto your wood planks.
Use a pencil to label the back of each plank with a number, numbering them from left to right. This will make it easier to assemble the headboard at the end.
Use a jigsaw to cut out the shape you drew, one plank at a time.
Sand the rough edges using 100 grit sandpaper. Also lightly sand each of the edges along the front face of each board so they are slightly more rounded. This will give the wood a bit more of a rustic look and accentuate the fact that they are separate planks. You may choose to use a palm sander so this goes a bit faster, but sanding by hand is also fine.
Lightly sand the front of each plank using 220 grit sandpaper to prepare for stain.
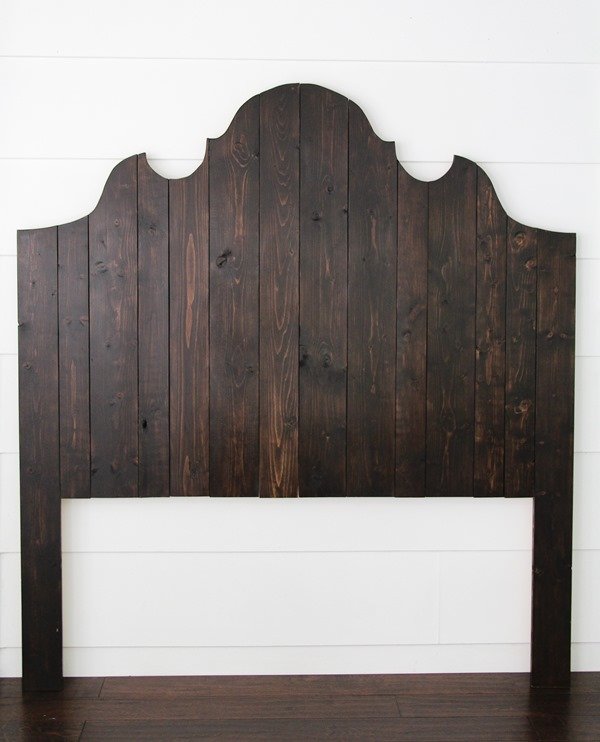
Now stain or paint your planks. It is easier to get the stain into the tiny grooves between each plank before they are attached together. The finish shown is Rustoleum Kona Stain followed by General Finishes High Performance Top Coat in Flat. This is a great stain for getting a dark, even finish on inexpensive pine boards. The General Finishes top coat is great for rustic projects because it has only the slightest hint of sheen.
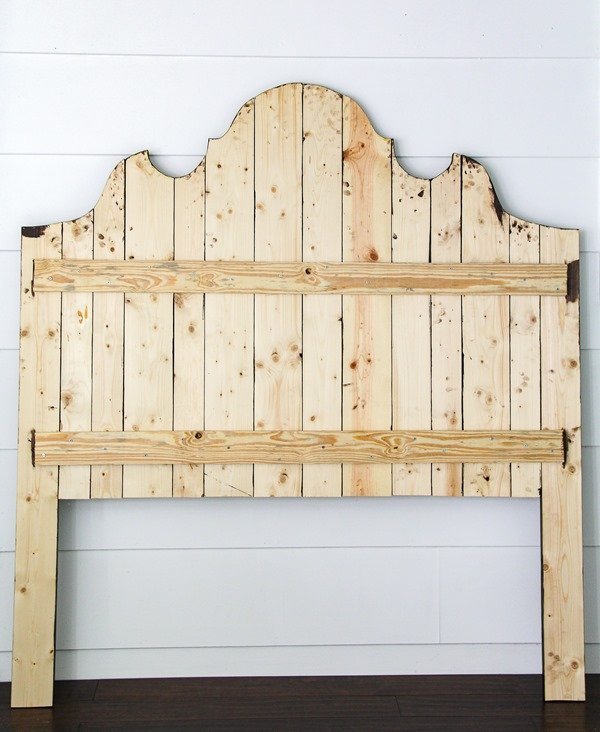
Once the stain has dried, arrange the planks back in order, facedown. Cut two 1”x4”x8’ strips of pine furring to 60 inches long, or a few inches less than the width of the headboard.
Lay the two strips across the planks on the back of the headboard, and use wood glue to attach it. Predrill holes attaching each plank of the headboard to each of the two boards. Attach the planks to the two strips using 1¼” wood screws.
Be sure to secure your headboard to the wall before using it. One common method is to use a sturdy French cleat. Use the included screws to attach one side to the headboard and the other side to the wall. The two pieces interlock securely when you slide your headboard into place.
I had such a hard time choosing a finish for this curvy beauty. I love this dark stain but I also think it would look great in a lighter, weathered gray stain or painted with milk paint for that perfect chippy finish.
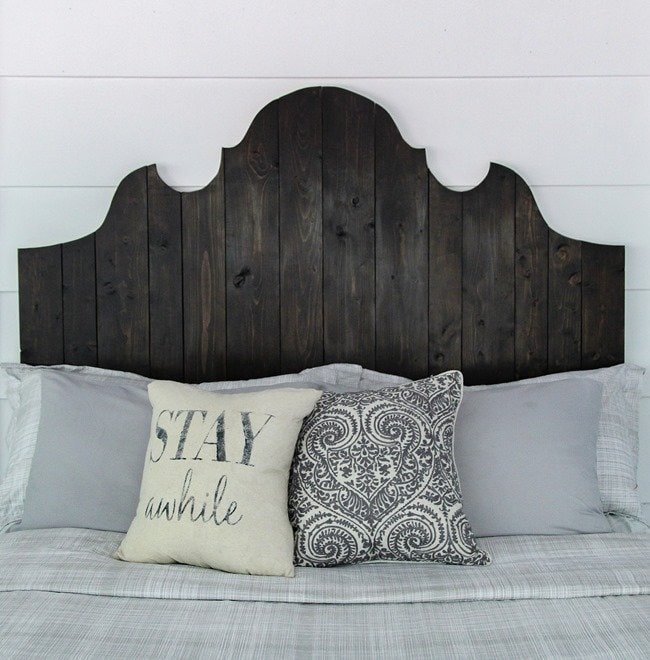
The photo above shows how I photographed the headboard in all neutrals for the book. But of course when I moved it into my own space, I just had to add some color! (If you missed the rest of my inexpensive bedroom makeover, you can see the whole thing here.)
This is actually the third headboard I have made for this space in the past 10 years. (Yes, I may have a problem!) This is my favorite of the three, but the previous two were also pretty charming. They were both inexpensive upholstered headboards with a unique twist and you can check them both out at the links below.
Upcycled Upholstered Headboard
Unique DIY Upholstered Headboard
I’d love for you to pin this for later!
How to Make a DIY Wood Plank Headboard
Make this DIY wood plank headboard with just a few basic tools and inexpensive lumber. This tutorial is for a queen size DIY headboard, but you can adjust the measurements to make any size you like!
Materials
- Three 1” x 4” x 8’ common boards
- 1” x 5” x 8’ common board
- Three 1” x 6” x 8’ common boards
- Two 1” x 5” x 6’ common boards
- Wrapping paper or butcher paper
- Sandpaper, 100 and 220 grit
- Rustoleum Kona Stain
- General Finishes High Performance Sealer in Flat
- Rag or brush
- Two 1” x 4” x 8’ furring strips
- Wood glue
- 1¼” wood screws
- French cleat hardware
Tools
- Safety Glasses
- Hearing Protection
- Tape Measure
- Pencil
- Saw
- Jigsaw
- Palm Sander
- Drill and drill bits
Instructions
<ol><li>Cut the 1”x4”, 1”x5”x8', and 1”x6” boards in half to make four foot long boards. </li><li>Arrange the boards in a random pattern with two 1”x 5”x6’ boards on each end. </li><li>Cut a large piece of wrapping paper to 63”. </li><li>Fold the paper in half and draw the shape you want for your headboard. You will draw half of your headboard and when you unfold the paper, the two sides will match exactly.</li><li>Cut out the pattern. Unfold the pattern and trace it onto your wood planks. </li><li>Use a pencil to label the back of each plank, numbering them from left to right. </li><li>Use a jigsaw to cut out the shape you drew on each plank. </li><li>Sand any rough edges using 100 grit sandpaper. </li><li>Stain or paint your planks. </li><li>Once dry, arrange the planks in order, facedown. </li><li>Cut two 1”x4”x8’ furring strips to 60 inches long. These two boards will secure all of the planks together.</li><li>Lay the two strips across the planks on the back of the headboard. </li><li>Secure with wood glue. </li><li>Predrill holes attaching the two boards to each plank of the headboard and attach the strips to the planks using 1¼” wood screws. </li><li>Secure your headboard to the wall.</li></ol>
Recommended Products
As an Amazon Associate and member of other affiliate programs, I earn from qualifying purchases.
-
BLACK+DECKER Jig Saw, Smart Select, 5.0-Amp (BDEJS600C)
-
Measuring Tape, Tape Measure 25-Foot(8m) Tape Ruler Metric and Inches with Magnetic Hook, Nylon Coating, Wrist Strap for Construction, Home, Carpentry Measurement
-
French Cleat Hanger 10 Inch - 2 Pack - Picture, Mirror, Whiteboard, Pallet or Panel Wall Mount Bracket - Z Bar Hanger Supports 50 lbs
-
Titebond 5004 II Premium Wood Glue, 16-Ounces,Honey Cream
-
General Finishes High Performance Water Based Topcoat, 1 Quart, Flat
-
Rust-Oleum 260154 Ultimate Wood Stain, Quart, Kona



Hey,
I am totally impressed with the colors. headboard design is awesome
Thank you!
I made a head board based off this photograph. Then I burned a design of vines of flowers, leaves and butterflies. I then water painted each of them. I finished it with middle colored stain.
It turned out amazing!
I made two. One 4ft high, the other 6 ft high. Turns my husband said the 4ft
Was high enough. (I think he didn’t want to move The 6ft up the stairs)
While making it,I did suffer a permanent accident on first finger on my left hand. So I’ll never play my violin again. There nerve damage soMy finger feels very little—which work great with great with my Diabeties
Your headboards sound beautiful! And I’m so sorry about your finger, but way to look on the bright side!