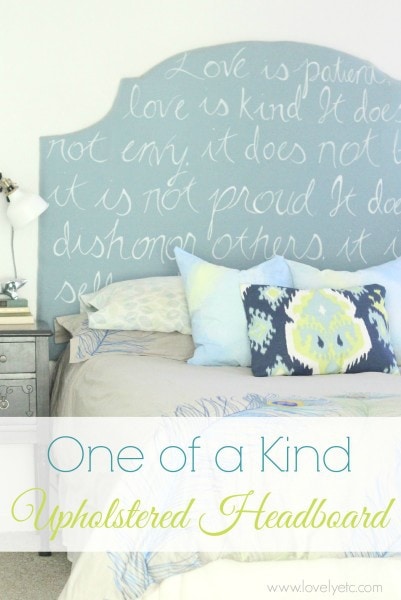
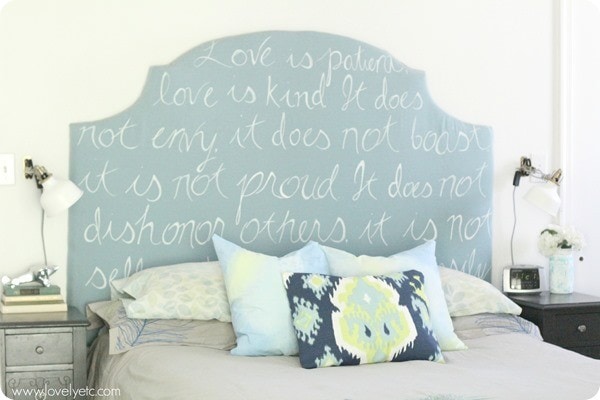
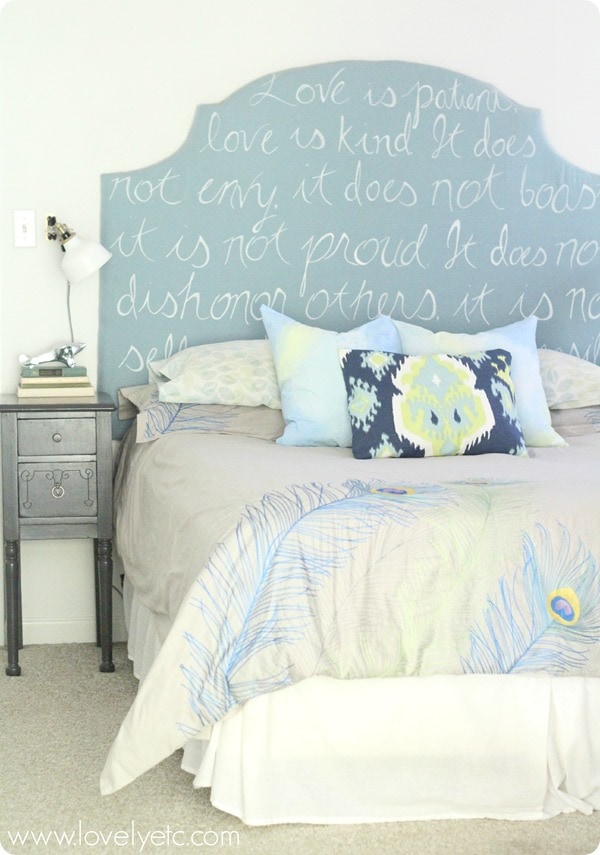
And we have a new headboard! A new super inexpensive, completely DIYed, unique, personalized headboard!
My absolute favorite thing about this headboard is the meaning behind it. I knew I wanted to incorporate I Corinthians 13 somewhere in our master bedroom makeover. Sometimes this passage gets a bad rap – it has been used in a million wedding ceremonies and Hallmark cards which makes it seem a bit cheesy. However, if you really read the words, you’ll see why everyone wants them read at their weddings – they are beautiful.
The verses on the headboard read: Love is patient, love is kind. It does not envy, it does not boast, it is not proud. It does not dishonor others, it is not self-seeking, it is not easily angered, it keeps no record of wrongs.
Pretty powerful stuff. These verses really helped me during some hard times in my own marriage and they aren’t something I want to forget.
Materials to make an upholstered headboard
- plywood or pegboard – (64 x 45 inches for queen size bed)
- king size mattress topper
- roll of batting
- fabric – (2 yards for queen size bed)
- paint pens
- staple gun and staples
Personalized Upholstered Headboard
You will need a piece of plywood or pegboard to start out. I happened to have a large scrap of pegboard on hand so that is what I used for my headboard; plywood will also work quite nicely. If you have a queen sized bed, you want to start out with a 64″ x 45″ piece of wood or pegboard. (If you have a king size bed, your headboard will need to be 80 inches wide rather than 64).
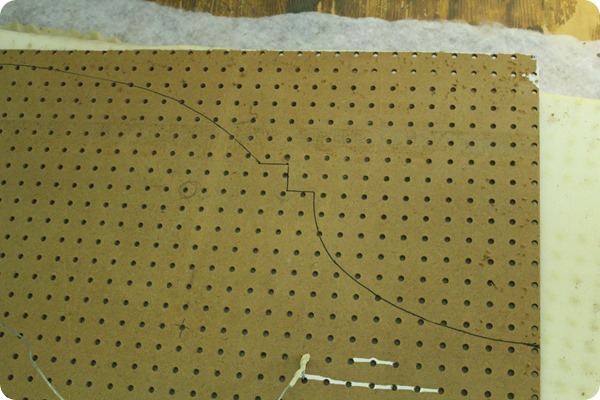
Now it’s time to add some shape. A simple way to get a nice symmetrical shape is to cut a piece of brown craft paper (or even wrapping paper) to the size of your wood. Then fold it in half and draw the shape you want on one half of the paper. Cut it out and when you unfold the paper, you will have a perfectly sized symmetrical pattern that you can trace right onto your wood.
Then you simply cut out your shape with a jigsaw. Seriously, this is not hard at all. If you have never used a jigsaw, don’t be intimidated. You can do this – it is no harder than cutting with a knife. Just practice on some scrap wood first.
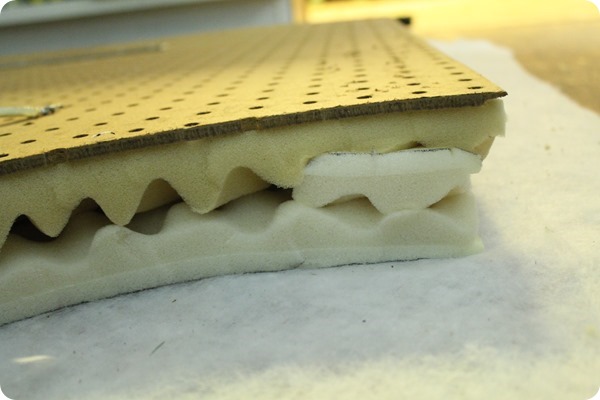
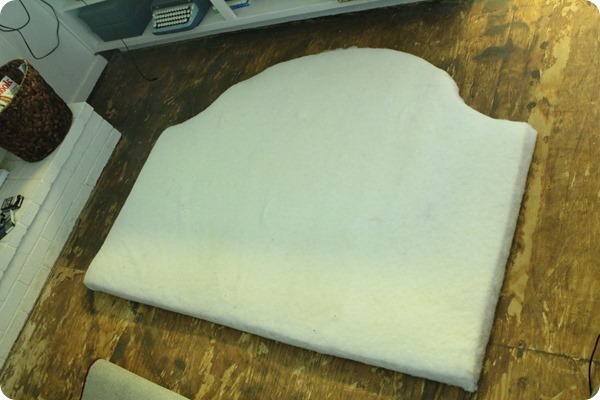
Next comes the foam layer. It turns out that thick foam from a sewing supply store is incredibly expensive, so I went a different route. I bought a king size foam mattress topper. Not a super fancy one – just a cheap one from Walmart. Using my paper template, I also cut it into the same shape, making two layers.
And now you put it all together!
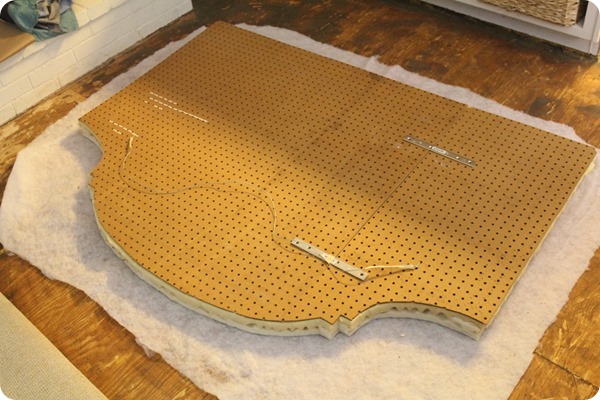
Unroll the batting onto the floor. Stack the two layers of foam on top of the batting (bumpy side in), followed by the wood. You can see in the photo there is a little extra foam in each corner. When you pull everything tight in a minute the corners tend to get smushed and sloppy looking – the extra foam helps prevent that.
Pull the foam tight and staple it to the wood. Be sure to start out with one staple in the middle of each side and then work your way around the edges.
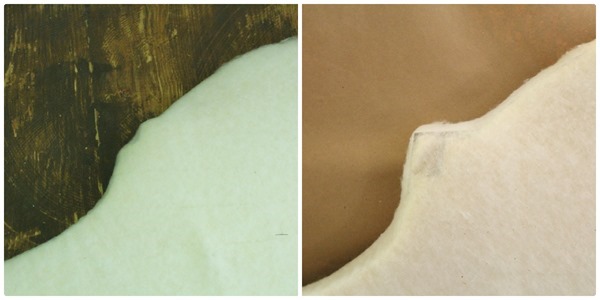
(If you are very observant you may notice that the pieces shown above have a slightly different design from my finished headboard. I found that the small corners were completely obscured when I added my batting so I had to alter my design partway through. I would recommend not trying to be too detailed with your shape. I ended up using some cardboard and 2 wooden ABC blocks to fix my shape. Yes, that’s right, I used my son’s blocks to fix my headboard – now that is the mark of a true professional).
Now for the fun part – the fabric.
For this project I used some blue fabric I had picked up at a yard sale last year for $1.50 and four white fabric paint pens ($10 using coupons from Michaels – Yes, I am that person that feels the need to use a 40% off coupon for a $4 paint pen.) If you aren’t lucky enough to already have fabric on hand, you can find lots of creative ideas of really cheap fabric sources here.
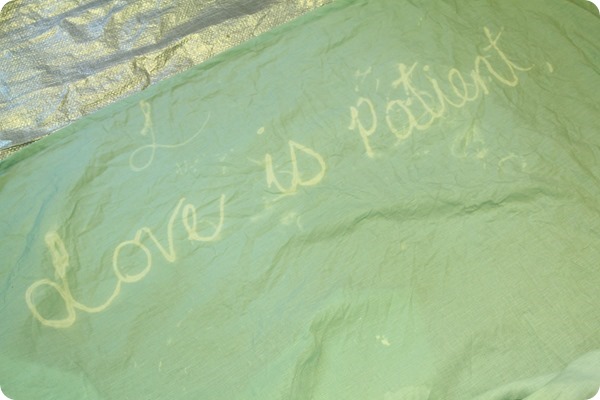
I once again used my paper template and traced it onto the fabric with chalk to use as a guideline when writing. I also made lines across the fabric using painter’s tape to help keep my writing straight.
I originally planned to use a bleach pen to write the words, but I quickly found that was just a big ole mess.
Luckily the paint pen worked just fine.
The final step is to add the fabric to the headboard. Lay your fabric on the floor facedown and then place your headboard on top of it, batting side down. Pull the fabric tight and staple it, starting with one staple on each side as before. Because I needed the writing to line up exactly, I taped each side to the pegboard with painter’s tape and checked to make sure it was lined up correctly before stapling.
I hung my headboard on the wall just like I would hang a heavy mirror or piece of art. I attached a heavy duty wire across the back of the headboard and then hung it on the wall using two screws with anchors.
And our master bedroom makeover is well under way!
If you were going to make a headboard with a message, what would yours say? Any other ideas of nontraditional surfaces to decorate with words? I think a floor or accent wall would be pretty cool.

Cassie @ Primitive & Proper says
awesome!!! love the shape and the sentiment!
Cassie @ Primitive & Proper says
awesome!!! love the shape and the sentiment!
Our Pinteresting Family says
That is beautiful! I love the shape and the beautiful wording too. :)
Diana W. says
Love this project! Great job using the blocks to fix you angles. I believe the mark of a true professional is getting the job done….as you did and succeeded very well too! Now here’s a thought on the foam, check Amazon. I have bought foam from Amazon for about 1/2 the price as it is at Joann’s. Even using the 40% off coupon, if they even allow you to use it (mine wouldn’t, hence the Amazon knowledge) Of course this only works if you have the time to wait for it to ship. Kinda of a drag if you’re in the middle of a creative storm… Thanks for sharing your hard work.
Cecilia Bramhall says
That’s one of my favorite verses too. I love how you incorporated it into your master bedroom . I’m a new follower. Found you on Home Talk.
:-)
Cecilia
Loribeth Clark says
Beautiful! I’ve been thinking about doing this for our bedroom. We have the dark furniture my husband had before we met, and I really want to lighten it up with something softer. But we’re in the middle of a kitchen renovation right now, so it will be a while. You did a great job explaining it, though, so I won’t feel so intimidated by it when I finally do get around to doing it.
ana@carpe_diem says
Honestly, I don’t know what to write here right now, I am sooo amazed! Great idea!
I saw this project on hometalk and I am so glad that I did :)
Miranda Winslett says
This is too cute! I’d love it if you’d link this up to my blog hop party, DIY Weekend:
http://mrandmrswinslett.blogspot.com/2013/09/diy-weekend-919.html
Thank you!
Miranda @ Mr. and Mrs. Winslett
Chatt-a-while Gardener says
Very lovely. Wish you lived close by so you could make one for me.:)
Claudia Aguilar says
Such a lovely headboard! I’ve been wanting to do something similar for my the girls’ bedroom, but am intimidated a bit :/
Abby says
This is so pretty! I’m so glad I read this, because I have a bench I’ve not been able to recover due to the cost of foam for it! I’m so excited about your brilliant idea to use mattress foam! You are so smart! Thanks for sharing this!
Ansel Nobel says
This comment has been removed by a blog administrator.
Rachel says
That turned out so cool, and perfectly personalized, too! It’s definitely a fun and useful home project since you’ll be seeing it every night!
The Random Writings of Rachel
Krista @ the happy housie says
Carrie this is sooo fabulous! I love how it turned out- the paint pen worked amazingly! So special and unique – pinning!
Carrie says
Thanks Krista! The paint pen really did work great – I am pretty sure there isn’t much of anything you can’t paint in one way or another.
Lauren @ The Thinking Closet says
Wow! Very powerful text to have on a headboard…the finished look is so classy! Thanks for the FB comment…so delighted to “meet” you and explore your blog a bit. Cheers!
Carrie says
Thanks for stopping by Lauren! The text is very powerful – it’s a great reminder without being in your face.
Amber says
This is super cool! Love it!!!
Amber @ Averie Lane
Carrie says
Thanks Amber!
Reema @ Uratex Hotel Mattress says
I love what you have said that you always use what you have, that’s my attitude to in making DIY projects. Thank you for sharing this one it inspires me more.
Carrie says
Thanks Reema! I definitely love to use what I have – it is what keeps DIY affordable for sure! Plus, it seems so wasteful to always be buying new stuff.
Jan Elizabeth says
This is lovely. I’ve been wanting to do something similar for awhile, so I will pin it as well. Great idea to use the blocks! :)
Mari says
This looks so lovely! I am actually making almost the same thing now with pegboard on the back but I cannot get any of my staples to go through or attach to the pegboard… Can I ask what type of staples you used and what size?? It would help a bunch!!
Carrie says
Mari, I do not remember exactly what staples I used but I do remember having a little trouble getting them to go into the pegboard smoothly. What helped me was to make sure to keep the pegboard very stable and also to make sure that the staples I used had chiseled tips, not flat tips.