Learn how to make super cheap DIY curtain rods in any size with this simple step-by-step tutorial.
It’s absolutely crazy how expensive nice curtain rods can be, especially if you need an extra long curtain rod for a double window.
We have several double windows along with a big bay window in our living room and when I started shopping around for curtain rods, I definitely had sticker shock.
So I decided to make my own inexpensive DIY curtain rods instead. And when I realized that I could make my own curtain rods for just a few dollars using inexpensive supplies from my local home improvement store, I couldn’t wait to get started.
In this post I’m sharing the full step-by-step tutorial for making your own super cheap DIY curtain rods including exactly what to buy at the hardware store and how to put it all together. Plus, I’m also sharing my top tips for hanging inexpensive IKEA curtains so they look much more luxe.
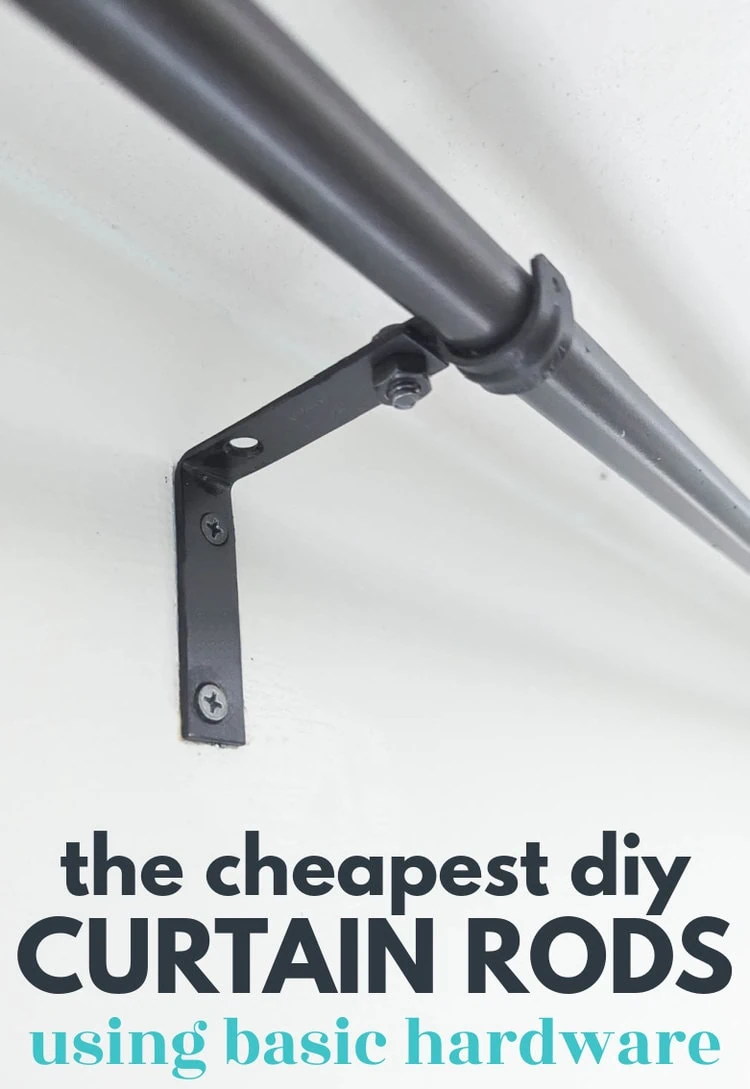
I first made these DIY curtain rods and shared this tutorial way back in 2012. Now, eleven years later in 2023, these curtain rods are still going strong!
This post contains affiliate links which means if you make a purchase after clicking a link I will earn a small commission but it won’t cost you a penny more. Click here to see my full disclosure policy.
Materials for DIY Curtain Rods
The prices listed below are based on the prices at my local Lowes stores as of 2023. The conduit and straps were found with the electrical supplies, the corner braces were near the cabinet hardware.
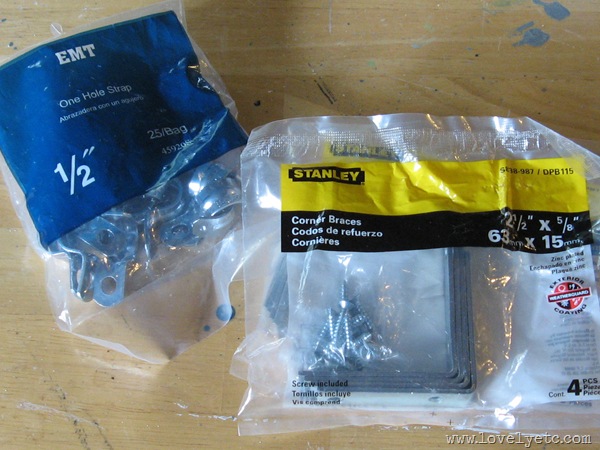
- 1/2 inch Electrical Conduit – $7 for a 10 foot length, be sure to get metal conduit, not pvc
- Corner braces – $4.50 for a pack of 4
- 1/2 inch One hole straps – $5 for a pack of 25
- Nuts and bolts to attach the straps to the braces – $1.50 for a pack of 5
- Spray primer (optional)
- Spray paint in desired color (optional)
Based on these prices, the cost for one curtain rod (up to 10 feet long!) comes to $18. That is much cheaper than most extra long curtain rods. But the real savings comes in when you make multiple curtain rods – you could make four regular five foot long curtain rods for only $31 or less than $8 each.
(This is extra nice because most inexpensive curtain rods that you can buy only extend to 4 feet wide. The additional width means you can actually hang these curtain rods wide like all the designers advise.)
How to Make DIY Curtain Rods
Cut your conduit to size
Tip: They will sometimes cut the electrical conduit to length for you at the store if you ask very nicely. When I bought mine, the man told me they do not cut it there…but he cut it as he was speaking.
If you didn’t get your conduit cut to size at the store, you can go ahead and do that now. Be sure to allow extra length for your curtain rod to extend 6″-12″ past each end of your window. This helps make your windows look larger and lets a lot more natural light into your space.
If you are cutting your conduit at home, there are several different tools you can use. The easiest tool to use is a small handheld tubing cutter. They aren’t very expensive and make cutting all types of pipe super easy.
If you don’t have a tubing cutter, you can use a simple hacksaw, an oscillating tool with a metal blade, or any other saw that’s appropriate for cutting metal.
Paint your components
You can leave your metal conduit and hardware in the standard finish for a more industrial look. But if you would prefer a different color, it’s easy to spray paint everything in any color you want. You can go for black, white, even brass.
If you choose to spray paint your parts, be sure to start with a coat of spray primer. This will help your paint stick to the metal finish better.
Once the primer has completely dried, you can spray paint everything with your chosen color. When I originally made these DIY curtain rods, I painted everything oil-rubbed bronze (was there really any other color choice in 2012?) Since then, I’ve repainted them black and they still look fabulous.
Be sure to paint all of the parts right down to the nuts and bolts for the best look.
I’ve got an awesome trick for painting screws super fast with no mess here.
Assemble your curtain rod brackets
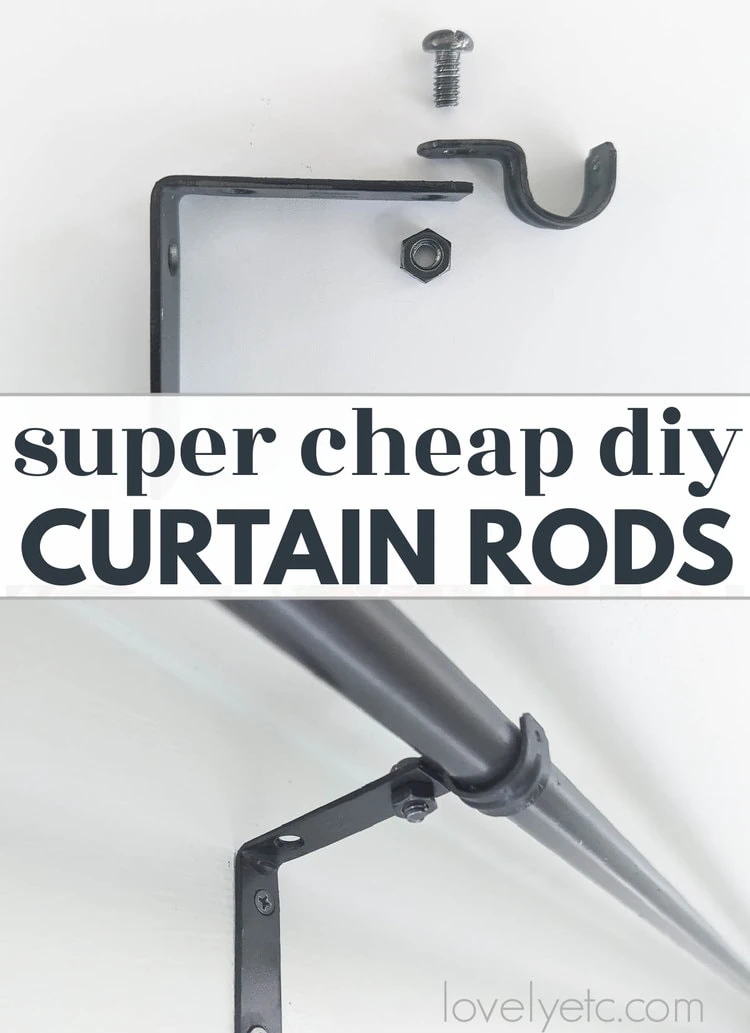
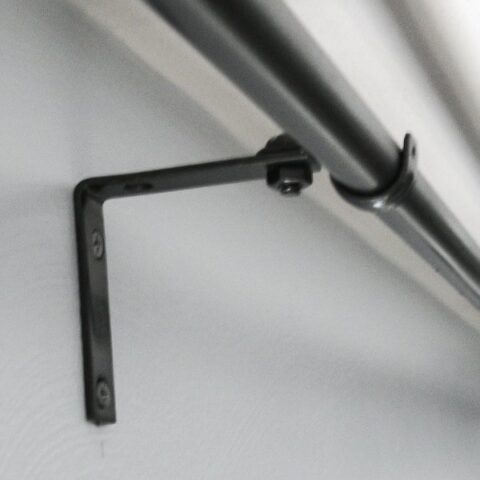
Putting together the brackets in pretty simple. For each brace you will need a corner brace, a pipe strap, a bolt, and a nut.
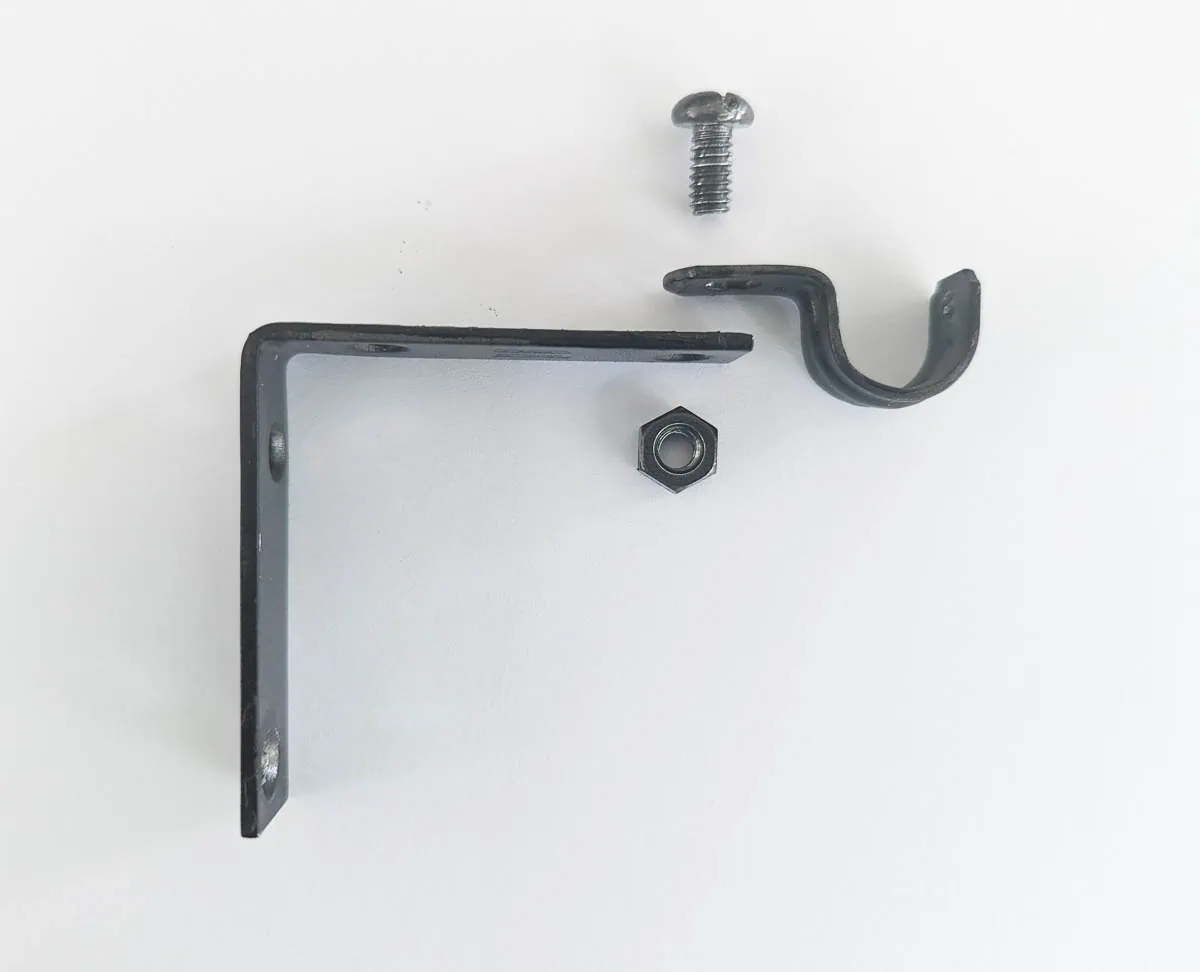
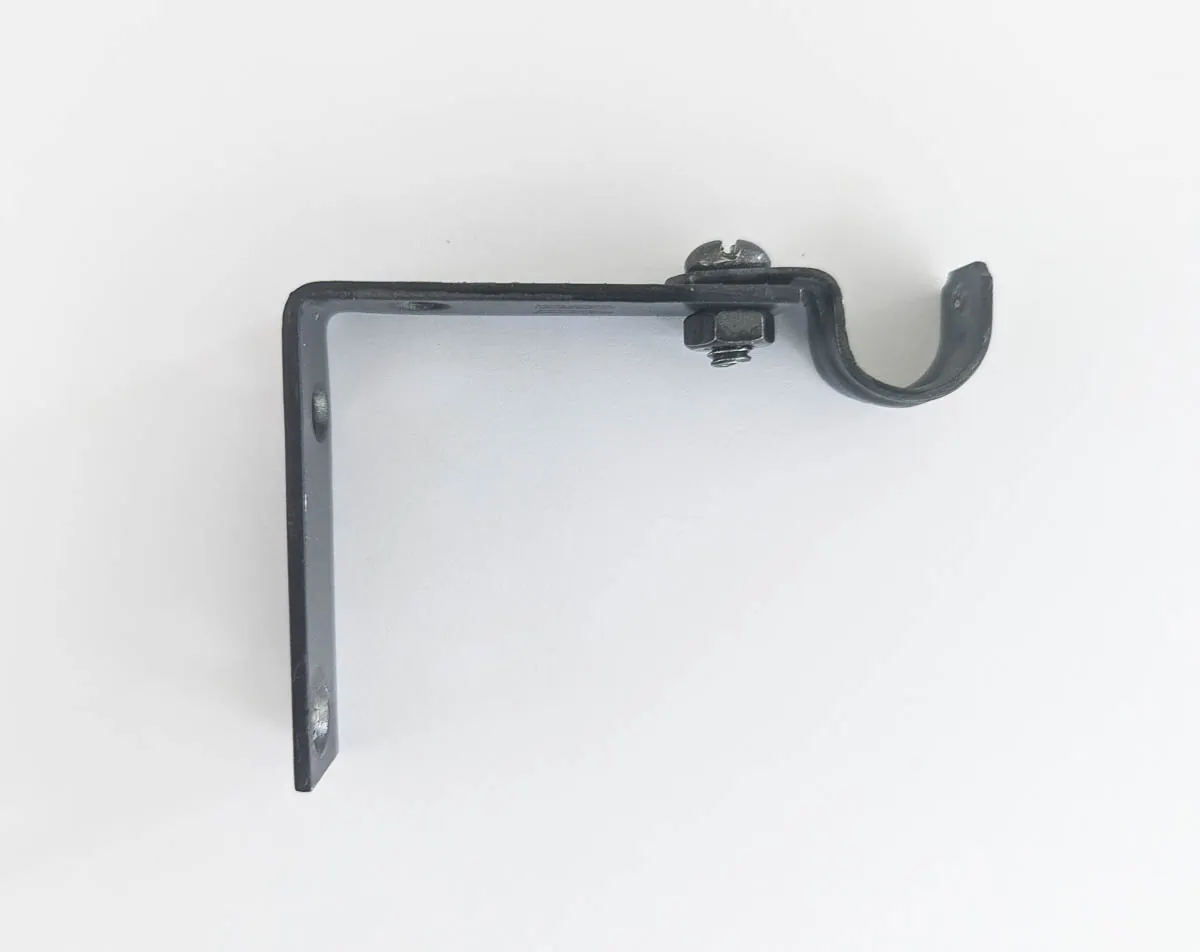
Attach a strap to each corner brace using a bolt. Tighten the nut underneath to hold everything in place.
Mount the brackets on the wall
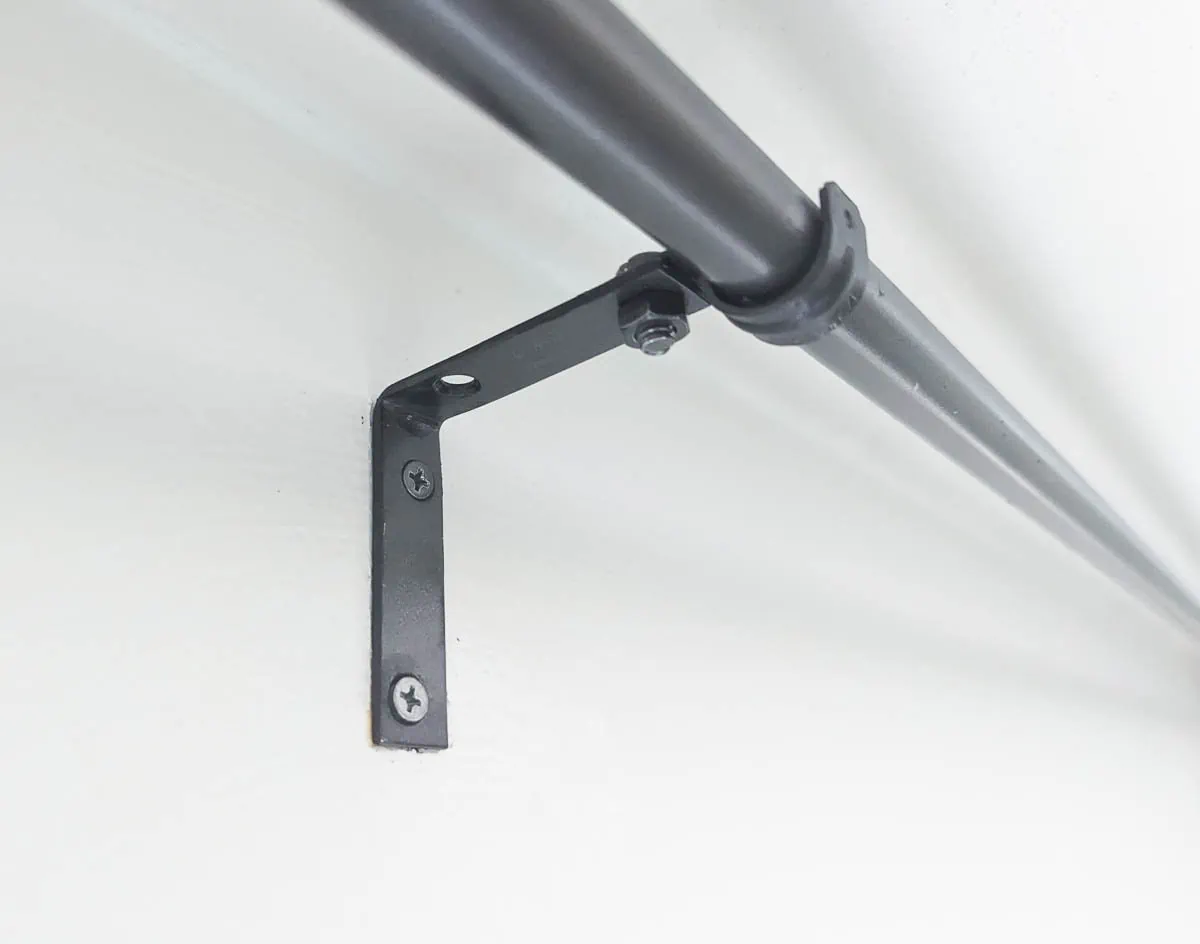
Mark where you want your brackets to be and then hang them in place.
You may need to use drywall anchors to hang your brackets depending on what type of walls you have and how heavy your curtains are.
If you are hanging an extra long curtain rod, it is probably a good idea to make a third bracket to help support the middle to prevent sagging. I used a third brackets on my ten foot curtain rod and it still looks and works great eleven years later!
An alternative option for semi-DIY curtain rods
There is also another option if you want inexpensive curtain rods but you don’t want to deal with gathering the hardware bits yourself.
You can buy simple curtain rod brackets like these sold on Amazon. They look very similar to the DIY version above but they’re already put together.
If you pair these with the electrical conduit, you will still save a good amount of money over store-packaged curtain rods. In fact, if you are only making one curtain rod, using these brackets actually comes out a few dollars cheaper than the DIY version. If you are making two or more curtain rods, the DIY version is more cost-effective.
If you want to add a bit more pizazz to your curtain rods, I recently shared all the details of the inexpensive DIY finials I added to my super cheap curtain rods.
Hang your curtains
Once your brackets are in place, you can attach your curtains to your curtain rod and set it onto the brackets.
Tip for to making tab-top curtains look better
The curtains I chose to use are bleached Lenda panels from Ikea – again beautiful but frugal at only $20 for two 96-inch panels.
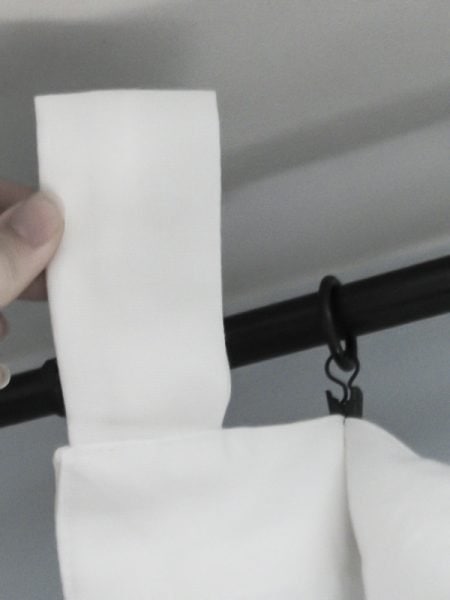
These curtains are a tab-top style, something I have never been a fan of.
To help them look nicer and less like a bargain find, I simply folded the tabs behind the curtains and used curtain rings to attach them to the rods instead.
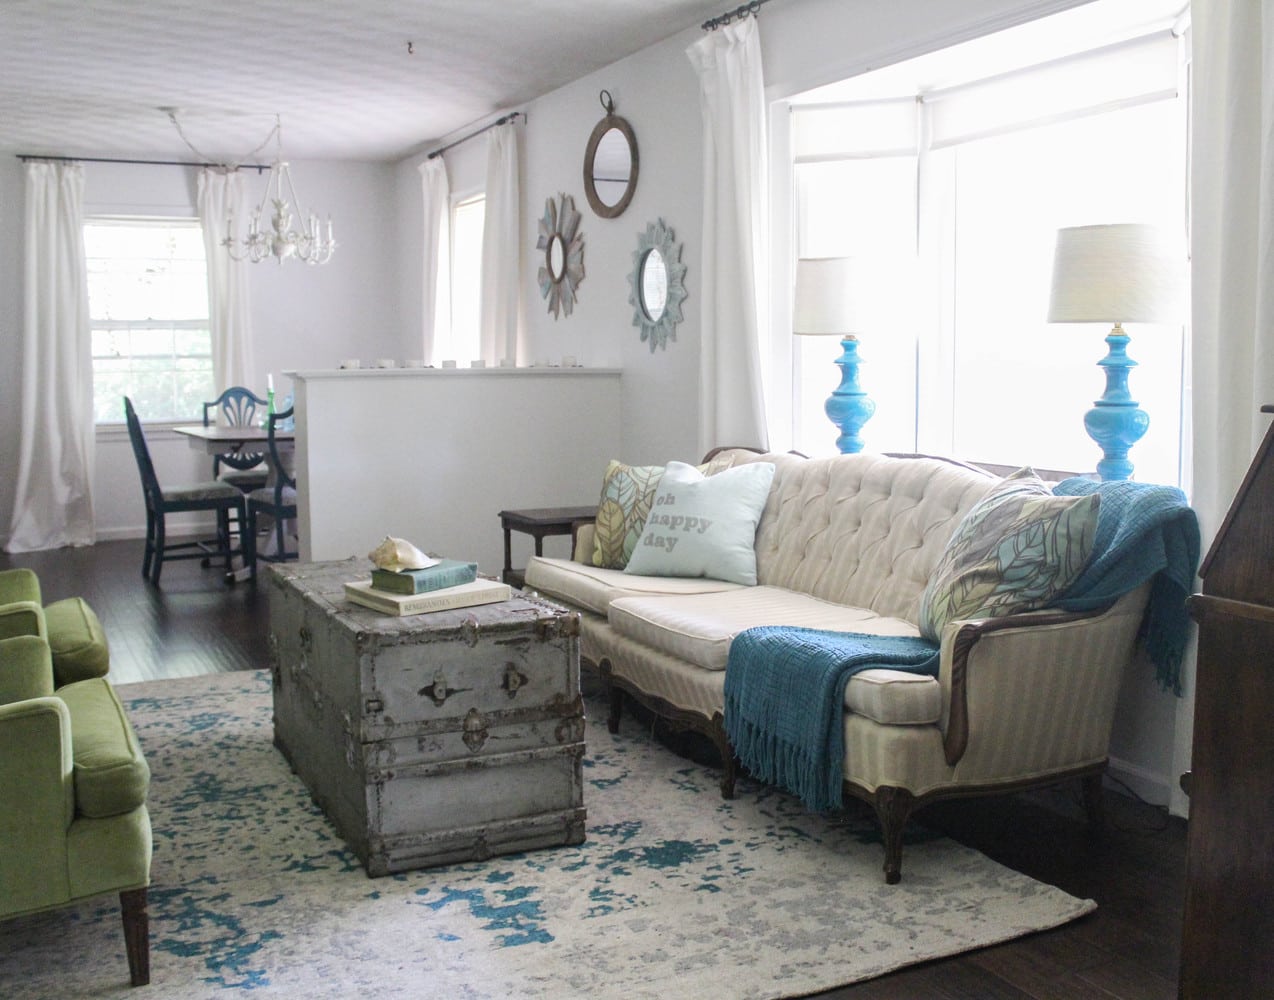
Even though they are simple white curtains, they make a world of difference as far as softening the room.
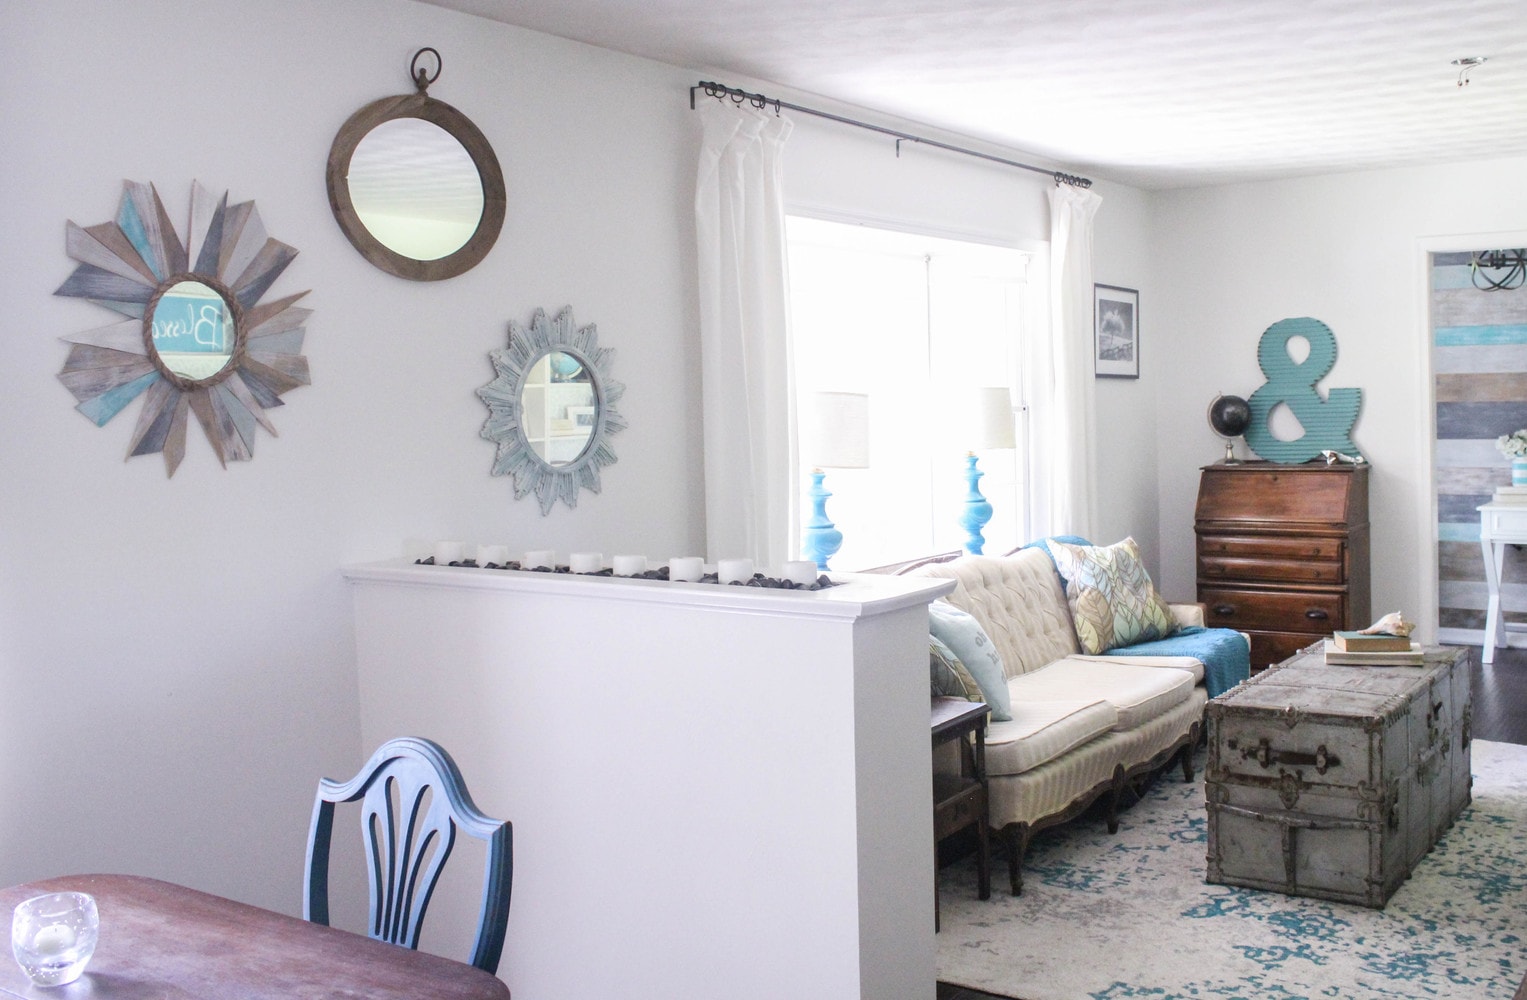
Looking for more inexpensive DIY curtain rod and curtain ideas? I’ve got you covered:
I would love for you to pin this post to Pinterest so you can find it later!

DIY Curtain Rods
These DIY curtain rods are cheap and easy to make, even if you need to fit extra long windows. You can easily make any size curtain rods you need in any finish.
Materials
- 1/2" electrical conduit
- Corner braces
- 1/2" one hole straps
- Nuts and Bolts to attach the straps to the braces
- Drywall anchors and screws
- Spray primer (optional)
- Spray paint (optional)
Tools
Instructions
- Cut the electrical conduit to length. Be sure to make it long enough to extend past your window at least six inches on each side.
- If you choose to paint your curtain rods, it is easiest to paint each of the pieces before assembling the DIY curtain rod brackets. Make sure your hardware is clean first. Then spray each piece with a thin coat of spray primer.
- Once the primer is fully dry, paint each component with a few thin coats of your chosen spray paint.
- Align the hold of each one-hole strap with the last hole of each corner bracket. Use a nut and bolt to attach the two.
- Attach each corner brace to the wall using screws and drywall anchors.
- Hang your curtains on your electrical conduit curtain rod and set it on the brackets.
Notes
If you are making an extra long curtain rod, be sure to add an additional curtain rod bracket to support the middle of your curtain rod.
Recommended Products
As an Amazon Associate and member of other affiliate programs, I earn from qualifying purchases.
Faith, Trust and Pixie Dust says
You had me at “cheap”! Your rods look fantastic. I’d love to give this a try.
Warmly, Michelle
Faith, Trust and Pixie Dust says
You had me at “cheap”! Your rods look fantastic. I’d love to give this a try.
Warmly, Michelle
Mel@Mellywood's Mansion says
Pinning this! You’re a genius!
Aramelle {One Wheeler's World} says
Oh, I love this tip! I was just starting to look for rods and curtains for our dining room and kitchen the other day and couldn’t stop complaining about how expensive they are! Thanks for sharing this. :)
(Visiting from the Link Party at Simple Home Life)
CraftyMomof5 says
Wonderful idea for curtain rods. What did you use at the ends for finials?
Anonymous says
Fabulous idea, I’m a huge fan of cheap!!!
Debbie B says
I am planning to replicate the curtain rods. I can email photos when it is complete, but I want to note that I needed 3/4″ one hole straps to accommodate the outer circumference of my 1/2″ conduit. Also, from another blog, someone suggested creating end finials from knobs (available in my garage stash). I plan to screw them into a 5″ legnth of 1/2″ wood dowel and then wedge that into the end of the curtain rod/conduit. I plan to paint the entire thing.
DebbieB says
I am trying to replicate the inexpensive rods. So far, I noticed that I need to buy the 3/4″ straps to accommodate the 1/2″ conduit. I also plan to use some cabinet knobs in a wooden dowel on each end as finials.
Crystal Joseph says
Try using a leather belt and cut to the size for the straps.
Becky says
I love this idea! I need a 150″ curtain rod, so I’m definitely on the look out for cheap. I’m just wondering, did you do anything to the ends? I don’t see a clear picture of them on here.
Carrie says
I didn’t do anything to the ends – just left them plain. I have thought about adding some type of finials using drawer pulls but haven’t actually done it yet. I kind of like the simplicity of the plain rods.
Malinda says
Are the electrical conduits sturdy? How much weight could I put on it before it started to bend? Thanks for the tutorial! It’s so thrifty!
Carrie says
The conduit really is pretty sturdy. I wouldn’t do pullups on it or anything but it should be able to handle pretty substantial curtains. And if you have an extra long window and are worried you can just add an extra support in the middle like real extra long curtain rods have. Good luck!
homepath says
Hello! Someone in my Facebook group shared this site with us so I came to look it over.
I’m definitely loving the information. I’m bookmarking and will be tweeting this to my followers!
Outstanding blog and outstanding design.
Carrie says
Thanks!
M. Gentry says
Where did you find the nuts and bolts for this? Were they in a bag as the 5 pack?
Carrie says
Yes, they were in a bag of nuts and bolts together in the hardware aisle. Hope that helps!
Gael says
Like the cheap curtain rods! Pinning this! We just moved and need curtain rods.You could fix the wonky curtains by sewing an accent fabric to the bottom of each panel (after cutting them to the same length).
Carrie says
Thanks – curtain rods can be so pricey!
Sharon says
Unfortunately, with all the scrapping, I think they hocked the prices of the conduits to a rediculous amount. My Home Depot had them for $14. So I went to Walmart and got a rod set that extends to 120″ for $15. Which didn’t come with a 2nd rod. So I got another one the day later bc the rods are soooo pricy and with the two purchases…I got a set and they match. Sigh.
Carrie says
Wow, that stinks! I will have to check out the prices of our conduit next time I am at the home improvement store and see if they have gone up that much here!
Anna says
I have to have a 6 inch clearance on 96 inch wide x 96 inch long curtains — and need them to wrap around the ends – does that make sense?
Any ideas?
Carrie says
Hmmm, do you mean you want the curtain rods to wrap to meet the wall? I have another DIY curtain rod post that wraps but is very industrial looking – https://www.lovelyetc.com/2012/10/diy-industrial-curtain-rods/ If you need a six inch clearance from the wall, you could just use a longer pipe nipple.
Anna says
OH! I have had the amazing fortune of having a Habitat for Humanity resale store near us! Builders donate things that they pull out of homes they remodel, home improvement store donate their overstocks… I have remodeled 2 bathrooms with the most expensive thing being a shelf I bought from a neighborhood facebook yard sale site the week before I found the store!
Carrie says
Wow! I would love to remodel my bathrooms but get so intimidated by the huge project it would be. Way to go with your thrifty remodels! The Restore really is amazing.
Colbee Snyder says
Hi! I used your hardware bracket idea to make my own double brackets! I just added another 1 hole strap to the second hole in the bracket and it worked great! Thanks for the inspiration!
Carrie says
Awesome idea Colbee! Talk about a money saver – those double curtain rods get so pricey!
Chuck Norton says
I think these not just the cheapest but the best option. I looked at the major big box stores and never found anything close to the cost of making my own from conduit. Plus when you go with the adjustable size there is a point where the grommet on the curtains catches. Totally annoying. These curtain rods are low cost, easy to make and the only hard part is painting. I found the best approach is do many light coats with a 15 minute break between and use something like Rustoleum Appliance Epoxy. I very happy for final result and plan on using design on other windows that need curtain rods.
Carrie says
You are so right – I hate how curtains catch on the point where the curtain rod adjusts! Appliance Epoxy sounds like a great paint to use for this – thanks for the tip!
BeckyAnn says
So glad I found you on Pinterest, keep up good work! Saved me hundreds of $ following your tutorial, so far I have installed 28ft of rods through my newly renovated home. I love natural metal look so did not paint them. I used knock out seals from electrical isle to cap ends then wrapped my gromet curtains to wall on bracket. I also used a locking nut on my screw connecting L bracket and bracket, maybe overkill but made me feel more secure about my connections. Along with my clearance curtains these look expensive, are very trendy, and best yet super functional, grommets slide so smooth! Thank you for detailed tutorial, I literally used your site as my shopping list at the big box store!
Carrie says
That is awesome! I am so glad you were able to outfit your home’s windows with my tutorial. Once you see how cheap making your own curtain rods is, it’s hard to imagine buying them again!
Bridget says
FANTASTIC!!!!! Was so sick of fighting my grommet style curtains to get over the division on my old adjustable rods! These are great! It was exciting sawing them to length. Such sparks! LOVE this! Thank you so much!
Carrie says
Thanks Bridget! I have had the same problem with adjustable curtain rods – such a pain!
Linda at Mixed Kreations says
Very clever, and I love cheap. I bet these are so much sturdier then other rods as well. Next time I need some curtain rods I’m gonna try this.
Amanda Clark says
This project saved me hundreds! I did my 300 sq ft sunroom for around $100 (I did purchase some tools as well)! The room has 5 sliding glass doors + I wanted to cover the entire wall with sheers as it is being converted into my photography studio!
I am SO glad I got ticked off because curtain rods were ridiculously expensive + lacking in strength and quality! Thank heavens I decided to do it myself + found your website!
It’s kind of empowering to do things that I usually just let my husband help me with! Thank you!! I Can’t wait to get the studio up and running!
Carrie says
Amanda, yay I am so glad you got ticked off too! This is exactly the kind of room this project was made for! It’s great to save money on any window but it’s those rooms full of long windows where you can literally save hundreds of dollars! And yes to being empowered – it feels so good!
Barbara says
Dear Carrie
this is a wonderful website. I live in Australia in a house with huge windows which have vertical blinds fitted. Yuk!!! Am going to replace one window at a time with chain store curtains and painted conduit rods with imaginative home made finials. Or maybe seek out some porcelain door knobs……
Many thanks
Barbara
Carrie says
Your huge windows sound wonderful – but definitely a pain when it comes to window coverings. And vertical blinds- yikes! It sounds like you have a great plan to change things up.
michele says
I love this idea. I need a 13 foot curtain rod. Would a 1/2-1″ conduit be supportive enough for curtains? The curtains I have aren’t a heavy material, but I’m concerned about the conduit bowing, or drooping in middle. I plan on using a middle bracket. What was the length of your longest window you used with conduit? Thank you.
Carrie says
Hi Michele, The conduit is actually very sturdy. I have one of these curtain rods over a bay window that I believe is 10 feet long. Unless your curtains are crazy heavy, I wouldn’t be concerned about it bowing. However, I do think that conduit is usually sold in 10 foot lengths. To do a longer length, you may need to use two pieces of conduit, butting up against one another at the middle support.
Dina Choudry says
This is great! Conduit is fairly strong, but I do think the larger Ikea curtain rods are inexpensive and decent enough. I don’t like their brackets though so I used plant hangers instead and it looks great! I was worried that the curtains would stick out too far from the window but I held the rods in place with screws, and now the ends of the plant hangers are holding Christmas decorations.
For drapery wands, I used Miracle Wands, I’ll leave the link below. I had a craft night with my girls and we made a fun little Disney-colored theme for them, with pink paint and then you drop glitter on while it’s drying. My husband spray painted his dark blue for his study, and I left one pair plain in the livingroom and one I painted a sort of ocean teal with acrylic paints.
Carrie says
Thanks Dina! IKEA curtains rods are probably a great choice – sadly, the closest IKEA to me is a four hour drive. Definitely too far for curtain rods (and lots of other stuff I would love to buy!) Luckily the conduit is very strong and easy to find. And your craft night sounds so fun!
Eileen says
These are fantastic ideas, but they’re not quite the cheapEST….When I moved into an apartment years ago I found beautiful kitchen curtains dirt cheap. There were already brackets on the walls so all I needed was a rod. I couldn’t believe how much they cost. While taking a walk, I spied an almost perfectly straight stick that looked to be the right length, so I took it home. My curtains hung from that stick as long as I lived in that apartment (15 years). So with a little luck, being in the right place at the right time, you can get curtain rods absolutely free.
Carrie says
Lol, yes that is definitely cheaper! And how lucky that you already had brackets!
Lollie says
Hi! This is so helpful! I have been scouring the internet for a good looking, sturdy DIY rod. Can you tell me where you got your curtain rings/what size they are? Thank you!
Carrie says
I’m so glad it is helpful! My curtain rings are 1.5 inches although 2 inches would also work well. I have gotten them at both Walmart and Lowes but they are also some that look nice on amazon: https://amzn.to/3diF2Gx
Colleen says
Do you have any idea what size nut/bolt you used? I went into the hardware store and felt like an idiot – there are a million of them and I couldn’t figure it out.
Carrie says
Oh man, I have definitely been that person standing in the hardware aisle with no clue what to buy before! I don’t recall the exact size, but you need bolts that are 1-1.5″ inches long. As far as the size, just make sure they can fit into the holes in your other bracket pieces. It really doesn’t have to be a perfect fit; just not too wide to fit. If you can find a little pack of nuts and bolts together, that is easiest but if not, you can buy them separately, just make sure to buy the same size. Good luck!
Jaime says
I LOVE this idea! Thanks for the aging idea! And as an urban renter who doesn’t have any place to spray paint hardware and can’t drill into the walls for the brackets, I’m using Kwik-Hang brackets instead? Have you heard of them?? Takes 2 seconds to install, no work needed, and renter friendly – so no unnecessary holes! Turned this already fast and easy DIY into a true budget renter’s dream
Carrie says
I haven’t heard of those but sounds perfect for renters!
Erin says
Clever!! Did you use metal or PVC conduit?
Carrie says
I used metal conduit. It has been several years since I did this project and it looks like the price has gone up a bit since then. I just checked and at my local store, it is now $7 for a ten foot length. I think this is still a great price but definitely a bit more than it used to be.
Riley says
Hi Carrie! Thank you so much for creating this tutorial. I’m so excited to use this solution in my home! I did have a couple questions that I’m hoping you might be able to answer. First, it looks like the conduit isn’t secured in the bracket in any way – it’s simply set on top of the bracket. I was planning to use the existing tabs on the backs of my ikea curtains to hang them on the conduit (not fabric tabs at the top… they could maybe be compared to rod pockets). The tabs aren’t a tight fit but they’re not as easy to slide as grommets or curtains rings either. I’m worried that the the conduit will move side to side in the bracket when opening and closing curtains because it’s not secured. If it does, can you make any suggestions as to how I could secure the conduit to the bracket? My second question is related to the number of brackets you used for each conduit. I read a previous comment between you and another reader where you said your longest rod was 10 ft and you had no issues with bowing. My question is whether you only used two brackets with the 10ft conduit. You mention in the blog to use extra brackets when making an extra long rod but it wasn’t clear to me what you consider extra long. I have a window that’s about 7 ft wide and I’m wondering how many brackets I’ll need. Thanks so much!!
Carrie says
Ok, so I just went and looked at my curtain rods in the other room because I hadn’t really tested how secure they are in the brackets before. The conduit is quite snug in the brackets and didn’t slide back and forth even when I tugged on it. So I wouldn’t worry about them moving when you slide the curtains. And yes, I did use a third center bracket for my 10 ft long curtain rod. If you are making a rod for a 7 ft window and are planning to have it extend a bit beyond either side, adding a third bracket is probably a good idea though you could get away without it. Good luck!
Viv says
I would not dare hang curtains on electric conduit pipes. They are not even close to sturdy , on the contrary: they are bendable and flexible on purpose, to facilitate electricity works. Electricians carry them rolled !
Carrie says
These are metal conduit pipes – not the more flexible type. I have had these curtain rods up for almost ten years now with no problems!