Quick Tip: The Easiest Way to Paint Screws
Learn how to paint screws super fast and with no mess. This quick tip will make your next DIY project so much easier.
Painting screws to match a DIY project is one of those little details that usually ends up taking way too much time and effort.
You just want to paint the screw heads to match your curtain rods or hinges or drawer pulls. But when you try to paint them, they roll all over the place and the threaded part of the screw gets all gummed up with paint and it turns into a major headache.
I’ve tried quite a few methods to make this job easier over the years and this method is by far the best for a few reasons.
- You don’t need anything fancy – just a cardboard box.
- Only the screw heads get painted; no stray paint is going to gum up your actual screw.
- The screws are held in place exactly where you want them.
- There’s no clean up.
Seriously, it’s the best.

How to Paint Screws
Find a medium sized cardboard box. I don’t know about you, but I’ve always got a mountain of Amazon boxes waiting to be recycled in my basement, so finding a spare box is never a problem.
The box will hold your screws in place as well as acting as a drop cloth to protect everything nearby from paint overspray.
The first step is to clean any dust, grime, or grease off your screws. Even new screws should be cleaned before painting as they are often coated with a rust preventative.
You can just let them soak in a bowl of water and dish soap for a few minutes and then use an old toothbrush to quickly remove any grime.
Stick your screws through the bottom flaps of the box. I found it quickest to poke a bunch of holes with a Phillips head screw driver and then stick the screws in.
Be sure to push your screws all the way in so only the tops are exposed.

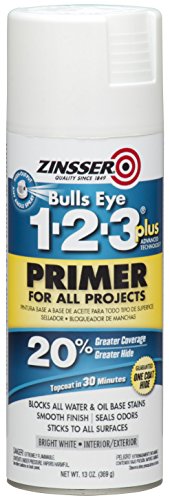
Spray your screws with a light coat of spray primer.
Follow this with two light coats of your chosen spray paint, waiting a couple of minutes between coats.

Allow your paint to fully dry and then remove the screws from the box.
And that’s it! Because the box catches any overspray, there’s nothing to clean up. And if you do a lot of painting projects, you can just keep this same box and use it over and over.
Do you have to use spray paint?
Spray paint is always my top pick for painting anything metal. It adheres well and is quick and easy to apply.

But you can use a brush-on paint like chalk paint if you prefer. I find the box method helpful even when using a paintbrush to apply the paint.
Just stick your screws in and brush paint over all the tops. This saves you from trying to hold each tiny screw as you paint it.
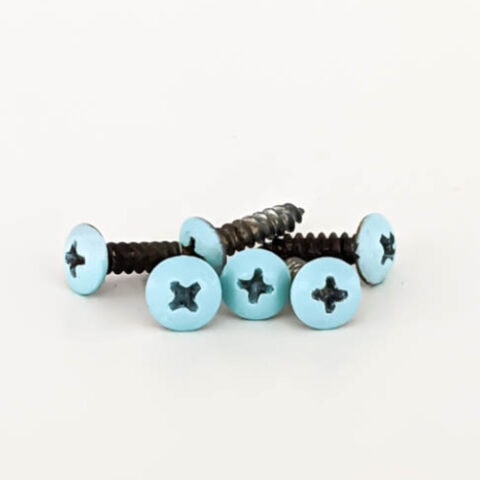
These beautiful blue screws are now right at home on this little table and chairs I painted for our porch.

How to Paint Screws (The Easy Way)
Learn how to paint screws the quick and easy way. This simple trick makes painting screws for hardware, curtain rods, and furniture so much faster and easier.
Materials
- screws
- dish soap or all-purpose cleaner
- medium cardboard box
- spray primer
- spray paint
Tools
- Phillips head screwdriver (optional)
- old toothbrush or scrub brush (for cleaning)
Instructions
- Clean your screws well before painting. You can clean them with dish soap or an all purpose cleaner. If needed, use an old toothbrush to scrub away any grime.
- Stick your screws through the bottom flap of the cardboard box. It is easiest to poke holes with a Phillips head screwdriver first and then stick the screws in the holes so that only the tops are exposed.
- Spray the screws with a light coat of spray primer.
- Once the primer has dried, spray the screws with two light coats of spray paint, waiting a few minutes between coats.
- When the paint has fully dried, remove the screws from the box.
Recommended Products
As an Amazon Associate and member of other affiliate programs, I earn from qualifying purchases.
And that’s it! Happy painting!
More painting tips I think you’ll like:
- How to Get Perfect Paint Lines with Painter’s Tape
- The Best Paintbrushes for a Perfectly Smooth Paint Finish
- 8 Painting Tips: Paint with Less Mess and Less Stress

Great Tip!
Thank you! It’s a quick and easy one!
Great article. I would greatly recommend to anyone trying this to not skip the cleaning stage as suggested for new screws. New screws, especially steel screws are packaged in an oil to avoid rusting. Most common are black oxide and oil, but steel screws with have a coating that will prevent paint from sticking well.
Thanks for the tip – I’ll update the post with this info.
How did you install the screws without damaging the paint job?
As carefully as possible. :) If you let the paint dry for a few days, you should be able to install them without any problems. If you can’t wait that long, wait at least a few hours for the paint to dry and then screw them in as much as possible just using your fingers. Then tighten them the rest of the way very carefully with a screwdriver.
How do you make sure the paint does not fill the space for the screwdriver ( Slotted and/ or phillips)?
A light coat of paint will get in that space, but as long as you are doing a light coats of paint, it shouldn’t gum it up or fill it in.