How to reupholster a couch on the cheap
Reupholstering a sofa or couch is an amazing way to give new life to old furniture without spending a lot of money. I’m sharing lots of tips and tricks to save money on materials and make your next upholstery project go much more smoothly.
For a long time I have had a major itch to reupholster a vintage couch. I have a bit of an obsession with stalking Craigslist and Facebook Marketplace for furniture that just needs a little love and I am constantly seeing insanely cheap vintage sofas with beautiful lines and proportions covered in hideous, worn out upholstery.
Every single time I think to myself, I bet I could save that old couch and make it gorgeous! And finally I did. Yay me!
One day I was perusing Facebook when I saw someone had listed a couch and two matching chairs for sale.
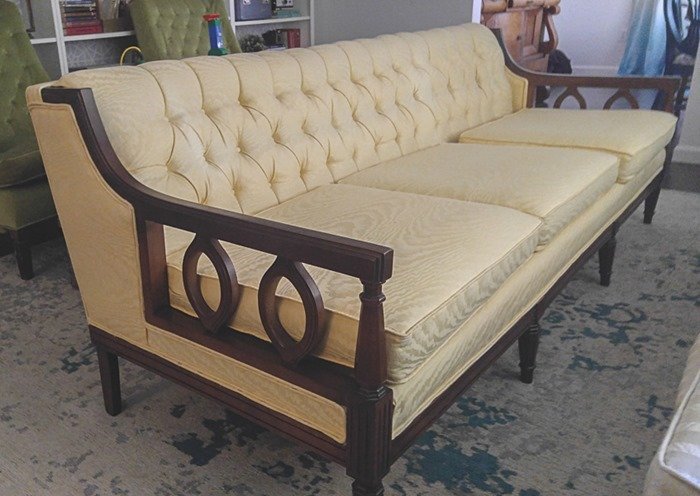
The fabric was bright yellow and shiny and incredibly dated but the furniture was in pristine condition and had gorgeous mid-century lines. And that tufting – I’m a major sucker for tufted furniture.
But the real clincher was it was $50 total for the sofa and both chairs. I simply couldn’t resist snapping them up.
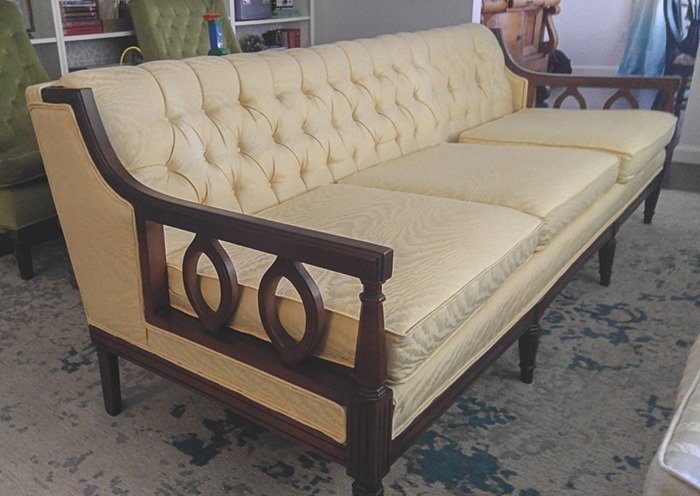
But once I had them home, I really struggled trying to decide what to do with them.
I didn’t love the finish on the wood. From across the room, the dark wood looked nice, but up close it had an odd speckled finish. And those cut out details on the side were very cool, but also not at all my style.
In the end I decided to keep things simple and classic as much as possible and I love the clean lines of this sofa now even more. If you are a lover of mid century modern style, you may not love what I ended up doing, but I’m pretty happy with it and to be quite honest, that’s really all that matters in the end.
(Since finishing this sofa, I’ve also reupholstered the matching chairs with a bit of a different look. You may want to check them out next.)
In this post I am going to talk you through the basics of how to reupholster a couch, share plenty of photos of the process, and hopefully answer your most pressing questions.
My particular sofa is a vintage, tufted sofa with wooden arms but a lot of the same upholstery principles apply to any type of couch.
Above all, I hope that reading this post gives you the confidence to tackle your own sofa upholstery project. Because if I’m going to save all of the gorgeous old sofas on Facebook, I’m definitely going to need some help!
If you have zero desire to actually reupholster a sofa and you’re just here for the cool before and after pics, go ahead and scroll to the bottom for plenty of pics! And while you are there be sure to also check out the latest furniture transformations from the rest of The Furniture Flippers. I’m never disappointed by what they share.
Time and Cost of Reupholstering a Sofa
Reupholstering a sofa sadly is not a quick and easy project. If you have ever looked into paying someone else to reupholster your furniture, you know it costs a LOT of money and there is good reason for that. Upholstery is time-consuming, especially when you are dealing with something as large as a couch.
I didn’t track how long it took me to completely redo this sofa, but it could easily have been 20 hours total between removing the old upholstery, refinishing the wood, adding the new upholstery, and sewing the cushions.
This also isn’t necessarily an easy project. It doesn’t require any highly technical skills, but there are a lot of steps and it can quickly become overwhelming. I would not recommend taking on a sofa as your first upholstery project – at least do a few simple dining room chairs first to get a feel for the process.
(If you’re looking for more upholstery inspiration, head over to check out my other upholstery projects including this reupholstered armchair, this reupholstered leather settee, or these simple dining chairs upholstered with a shower curtain.)
Personally I was most nervous about sewing the new cushion covers. I have complete confidence in my ability to wield a staple gun after doing several upholstery projects in the past, but my sewing skills are not the best. I strongly considered doing the body myself and hiring a professional just to sew the cushion covers.
But in the end, my frugality won out and I just couldn’t bring myself to pay someone to finish my project. Luckily the sewing portion of this project went much more smoothly than I had anticipated.
The cost of reupholstering a sofa depends on several factors including the cost of the sofa you are reupholstering (unless you are working on a sofa you already owned), the cost of the fabric you choose, and whether or not you already own all of the necessary tools.
My own sofa total came to around $90 including the cost of the sofa, all of the fabric, a covered button kit, and an upholstery staple remover (the only tool I didn’t already have.) This wasn’t a free project by any means but $90 for a nice sofa is still a total steal.
This post contains affiliate links which means if you make a purchase after clicking a link I will earn a small commission but it won’t cost you a penny more. Click here to see my full disclosure policy
Recommended Tools and Supplies
Your exact supply list may vary slightly depending on the details of the couch you are working on, but these are the basic tools and supplies you will need to reupholster furniture.
- Upholstery staple remover – this thing makes removing the old upholstery 1000 times easier
- Flathead Screwdriver
- Needle nose pliers – if you don’t have an upholstery staple remover, you can use a screwdriver and needle nose pliers to remove the old stapes
- Hammer – to help with removing tack strips and other upholstery parts
- Sharpie – for labeling the old upholstery pieces as you remove them
- Staple gun – this is a must-have
- Upholstery twist pins – these are awesome for holding upholstery in place in hidden areas
- Trim of your choice – for finishing off your reupholstery job
- Liquid Stitch fabric glue – this makes adding trim to finish off your upholstery job a breeze
- Fabric button kit – you’ll need this if you are reupholstering a tufted sofa
- Upholstery needle – for tufting the back of the sofa
- Piping cord – for making piping to add to your couch cushions
- Zippers – for the cushion covers or you may be able to reuse the zippers from your old cushion covers.
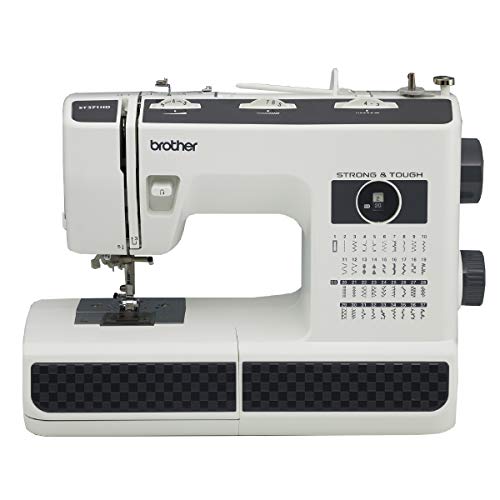
- Sewing machine – this is the one I have and love. It’s super easy to use even if you aren’t the most experienced at sewing.
Choosing Fabric
Aside from having a burning desire to take on reupholstering a vintage sofa, we also really needed a sofa for our living room and didn’t have a lot of money to spend on one.
Even though I got the sofa for a steal, upholstery weight fabric can be expensive and it takes a LOT of fabric to reupholster a sofa. I consulted a few upholstery yardage charts and it looked like I would need 9 –12 yards of fabric for my sofa. Most upholstery weight fabric is $20+ per yard which would mean more than $200 just for the fabric!
Instead I went with an alternative fabric that’s an old favorite among thrifty DIYers – drop cloth. Drop cloth is a heavy duty fabric that is very inexpensive and looks a lot like linen. You can bleach or dye drop cloth, but it also looks really nice in it’s natural color.
I bought a one 9’ x 12’ and one 6’ x 9’ drop cloth from Lowes for a total of $45 and still have plenty left over for other small projects. More recently I used this 9×12 drop cloth from Amazon for a different upholstery project and highly recommend it. (If you are looking for more ideas for alternative places to find great fabric for DIY projects, I’ve got a ton of ideas right here.)
To prepare the drop cloths, I simply washed and dried them and then got to work. It is a good idea to also iron your fabric at this point, but I was impatient and skipped this step.
Removing the Old Upholstery
The first step of any reupholstery project is removing the old upholstery.
This isn’t a crazy ‘demo day’, rip it all off kind of project. You want to remove everything very carefully and pay lots of attention as you work. Removing the old upholstery will teach you pretty much everything you need to know when it comes time to add the new upholstery.
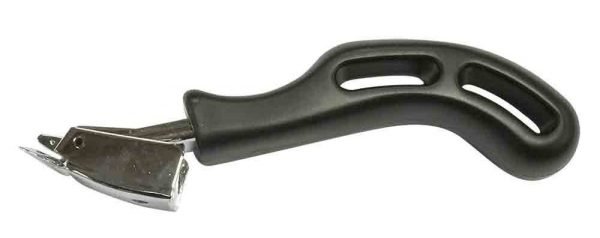
The majority of the fabric will be attached to the frame with staples. Lots and lots of staples.
To remove all of those staples you have two choices. The first method is to use a flat head screwdriver to pry the staples loose and then use needle nose pliers to pull the staples out. This method works great, but it takes a lot of time and your hands will get very tired.
The other option is to use a special tool for removing upholstery staples. You can buy one of these for around ten bucks and it is well worth it for a large upholstery project like this. I started out using a screwdriver and pliers before buying a staple remover and the old screwdriver method was so much harder and took twice as much time.
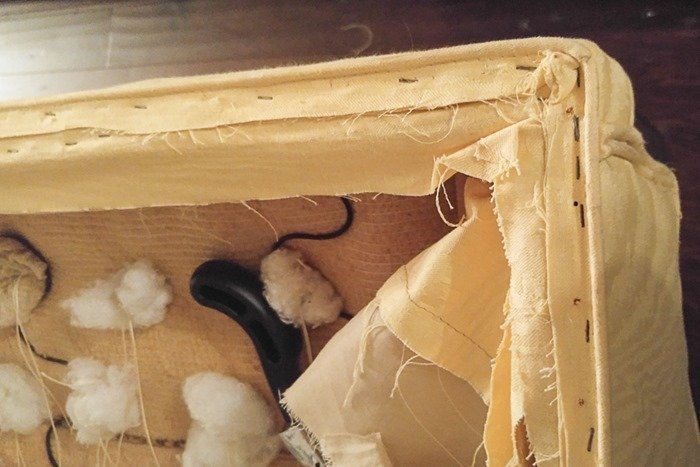
You’ll start by removing the piece of lightweight fabric underneath the sofa. It is easiest to turn the sofa upside down before getting to work.
Carefully remove the staples and pull the bottom piece of fabric off. This piece of fabric is often black or another dark color and serves to finish off the piece. Be sure to set it aside to be reused when you put the sofa back together.
Next, remove the fabric on the back of the sofa, starting at the bottom edge. Carefully pull the fabric off.
You may find tack strips, strips of cardboard or plastic pieces as you are removing the fabric. It is important to keep all of these along with the fabric. As you remove the fabric, label it with a marker, noting where the fabric was on the sofa as well as which end of the fabric is the top, bottom, left, and right.
Also label all tack strips, cardboard and plastic pieces and where they went on the fabric– these can usually be reused when putting the sofa back together.
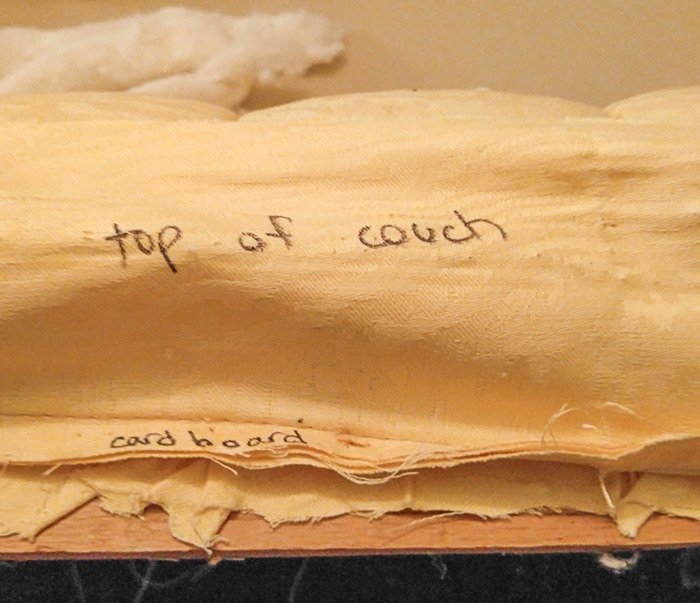
It’s also a smart idea to take photos of your sofa before you start removing the fabric and at each step along the way. When it is time to put the sofa back together, these photos will come in handy.
Once the back is removed, look carefully at your sofa. Every sofa is put together differently and you will need to look closely at your particular piece to see which layer to remove next.
Keep in mind that not every piece of fabric has to be removed; in some sections you can simply staple the new fabric right on top of the old fabric. Any pieces that are attached smoothly and don’t have piping, tufting, or texture in the way can be left in place.
On my own sofa, I was able to leave the fabric on the front panel and both side panels in place, simply removing the trim.
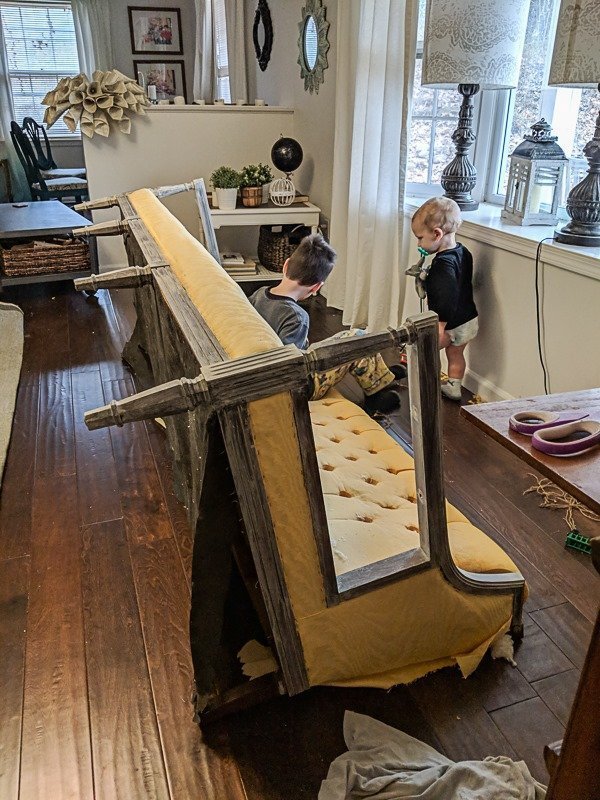
Somehow this is the best photo I have of the sofa once the old upholstery was removed. If you’ve ever wondered what it looks like doing DIY projects with three little kids running around, here’s a little glimpse into the not so glamorous behind the scenes.
Refinishing the Wood Frame
I know not everyone will agree with this decision but I had to get rid of those oval pieces on the sofa arms. They were not my style and they were messing up the nice clean lines of the arms. I went for the easiest route and sawed them right off with a handsaw.
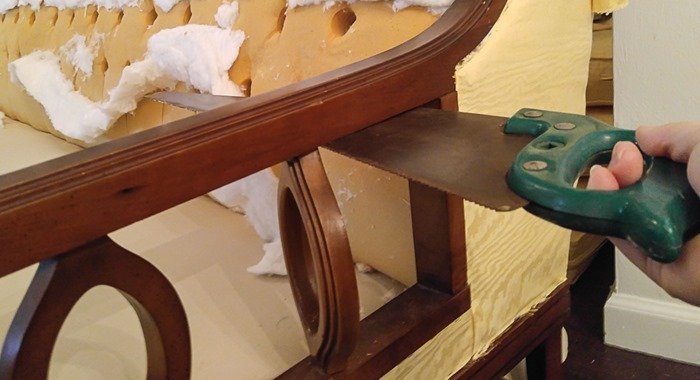
After removing them, I sanded down the rough spots where they connected to the arms, filled them in with wood filler, and then sanded them again. So much better.
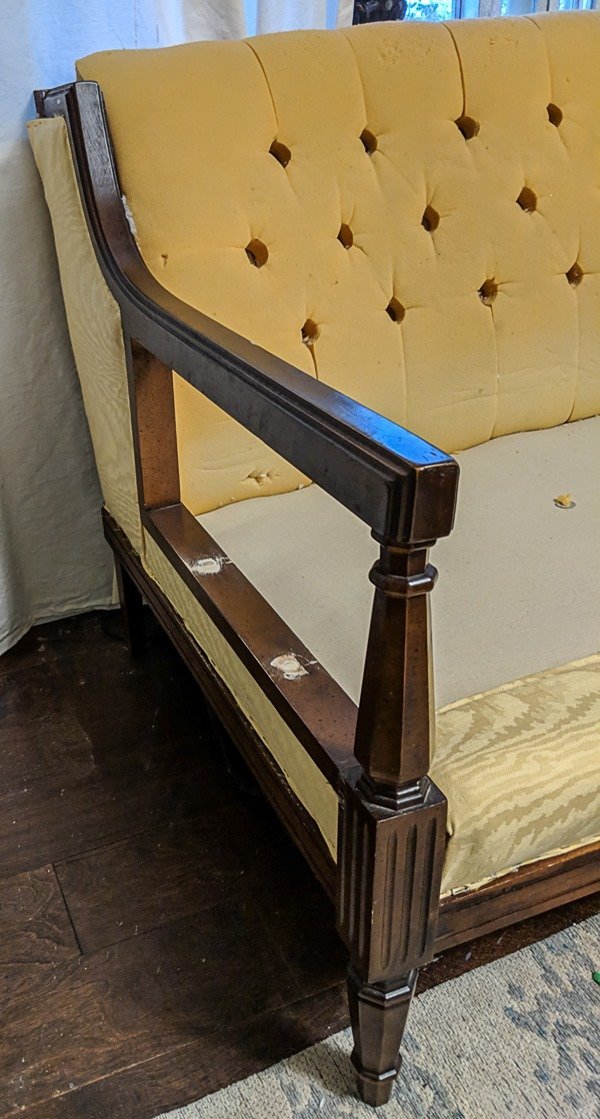
As I mentioned, the dark wood frame of my sofa looked nice from a distance, but it actually had a very dated speckled faux finish up close.
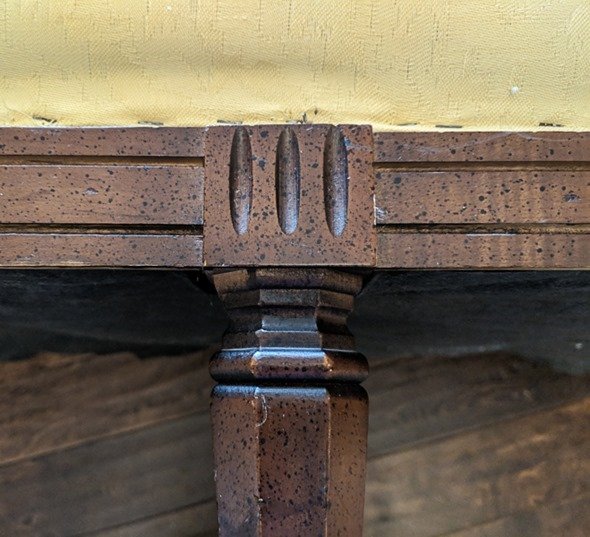
I really wanted to lighten up the dark color but I wasn’t about to strip the old finish off of all those curves and details. Instead, I used paint to create a lighter faux wood finish. To keep this post from becoming insanely long, I’ve written a separate post with a full tutorial of my faux wood finish method and will simply share the overview here.
I used a dark brown and a light tan acrylic craft paint and a chip brush. I mixed the two brown colors together in varying strengths to make a few different browns and dry brushed them onto the wood in layers.
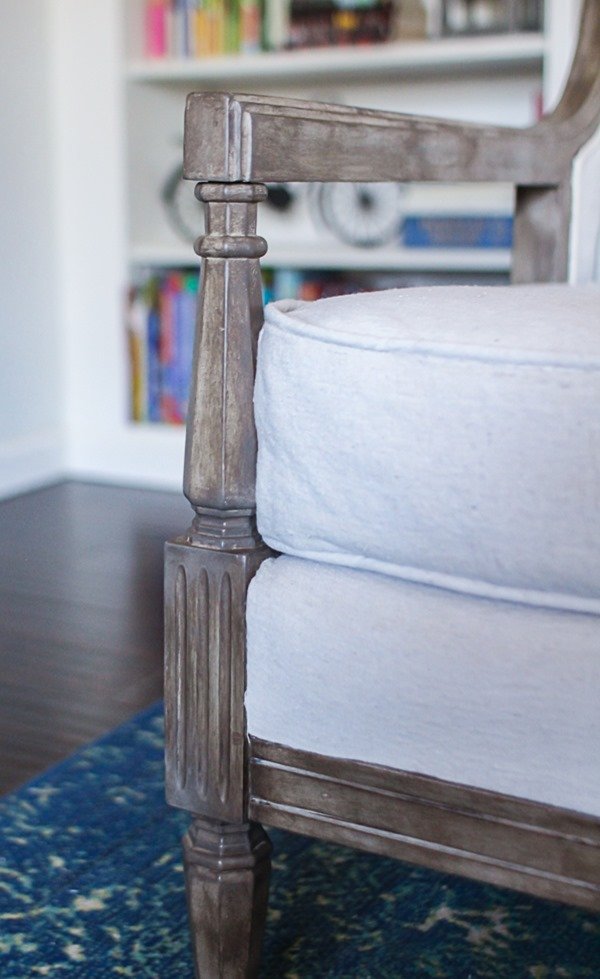
Once the paint was dry, I used General Finishes Flat out Flat Topcoat to seal the finish. (This is my favorite topcoat anytime I want a matte finish for a painted piece of furniture.)
Reupholstering a Sofa
Ok, finally it is time to actually get to the upholstery. Use the fabric you removed from your sofa previously as a pattern when cutting your new fabric. Be sure to also allot enough fabric for upholstering any areas where you didn’t remove the original fabric as well as recovering the cushions.
When you are reupholstering your sofa, your goal is to put the sofa back together the same way you took it apart.
Wherever the old fabric was stapled to the frame, you will be stapling the new fabric. Wherever tack strips held the fabric in place, use tack strips. If the old fabric was folded over a piece of cardboard to make a straight edge, fold the new fabric over the cardboard as well.
If any of your tack strips of bit of cardboard were damaged during removal, you can purchase new ones on Amazon.
As you attach the new fabric to your sofa, it is very important that you pull the fabric nice and tight. The biggest reason some DIY upholstery jobs end up looking less than professional is that the fabric is too loose and becomes wrinkly and not polished looking.
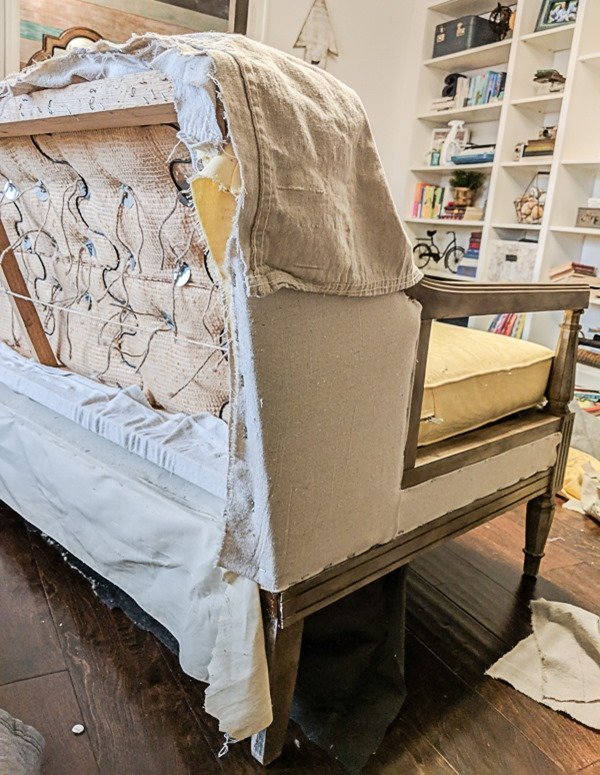
You are going to work in reverse order of how you removed the old fabric. Start with the places you didn’t remove the fabric at all, then move on to the last places you removed the fabric.
For most sofas, you will start with the panel on front of the sofa which is typically attached to the bottom of the couch with staples and sewn under where the couch cushions will be. Once you have stapled the bottom side, you can either hand sew the final side or you can go a much easier route and use upholstery pins instead.
Upholstery pins are pins with a curved end that twists down into the sofa to hold the fabric firmly in place. They won’t be seen once the cushions are in place and they hold the fabric nice and snug with no sewing needed.
Continue putting the new fabric on in the same way you removed it. You may also need to attach trim to cover some of the staples.
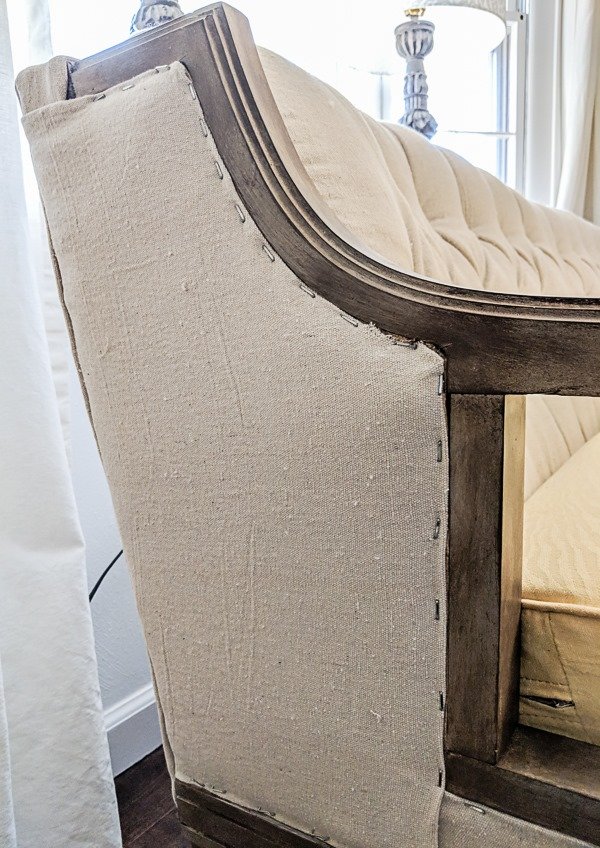
My sofa originally had double welting trim that was stapled over these edges. I love the way double welt cord finishes off reupholstered furniture and I have a simple tutorial for making your own double welt cord.
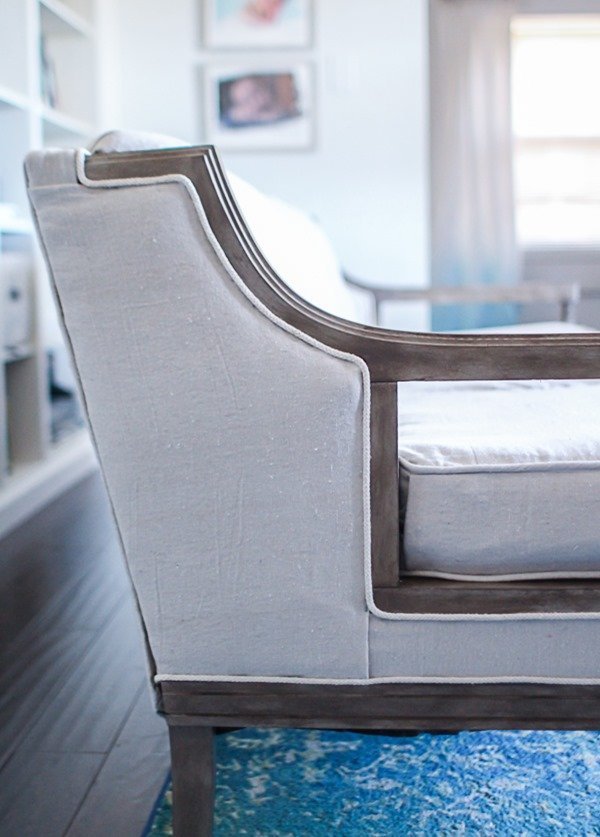
But for this sofa, I chose to save a little time and buy trim instead of making my own double welting.
I found a simple braided cord at JoAnn’s Fabrics that matched my drop cloth upholstery quite nicely and used Liquid Stitch fabric glue to attach it. It covered all of the staples nicely for a beautiful finished look without a ton of work.
Reupholstering a Diamond Tufted Sofa
If your sofa has tufting like mine, there are a few extra steps you’ll have to take.
First, you will need to make fabric covered buttons using your new fabric. This is one of those things that seems intimidating at first but is actually quite easy.
Simply measure the diameter of the buttons that were previously on your tufted sofa and buy a button making kit with buttons that same size. I used 5/8″ buttons for my sofa. The button making kit will come with everything you need to create professional looking fabric covered buttons; it only takes a few minutes to do and you don’t need any special tools.
I do want to point out that if you are using heavy duty drop cloth as your upholstery fabric like me, the fabric may be too thick to make covered buttons. I had a scrap of linen fabric that matched my drop cloth pretty closely and simply used that to make buttons.
If you don’t already have a matching fabric, you can inexpensively buy a 1/4 yard at a fabric store.
The actual diamond tufting can be very intimidating, but it isn’t nearly as impossible as it may seem.
First you need to cut your fabric for the tufted portion of your sofa. Use the old upholstery you removed as a pattern when cutting your new fabric. You can also use the old button holes to mark where the button holes will go on your new fabric at the same time; this will make the entire process so much easier.
I used straight pins to mark these holes, but you could also use a writing pen since these spots will be covered by the buttons anyway.
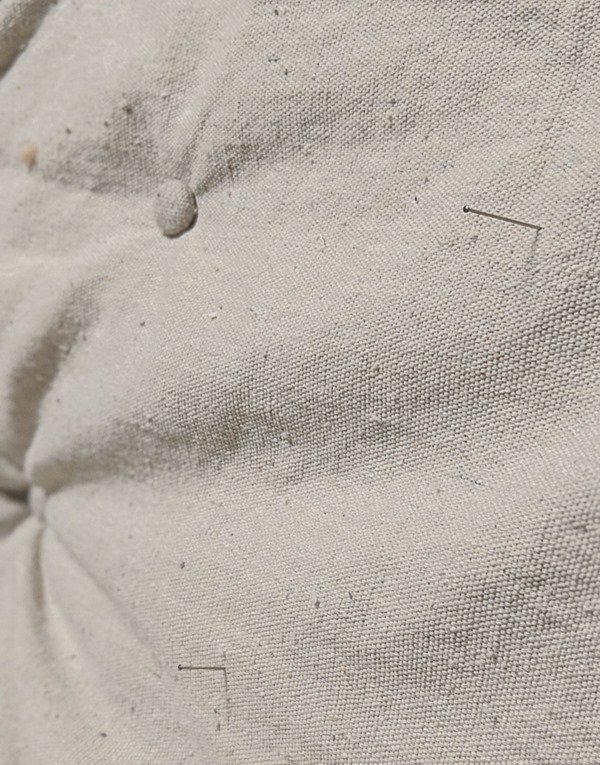
Lay your fabric over the back of the couch, lining up the middle button hole on the fabric with the middle button hole on the back of your couch. Use a long needle and a sturdy twine or other thick string to attach the first fabric button in the center of the sofa.
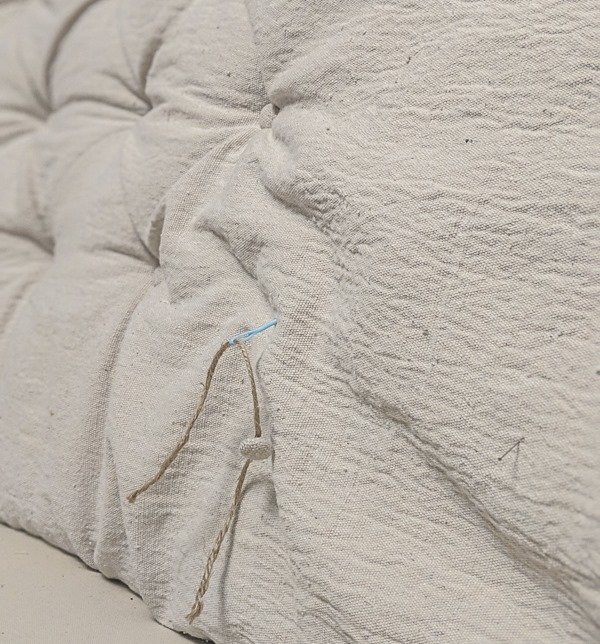
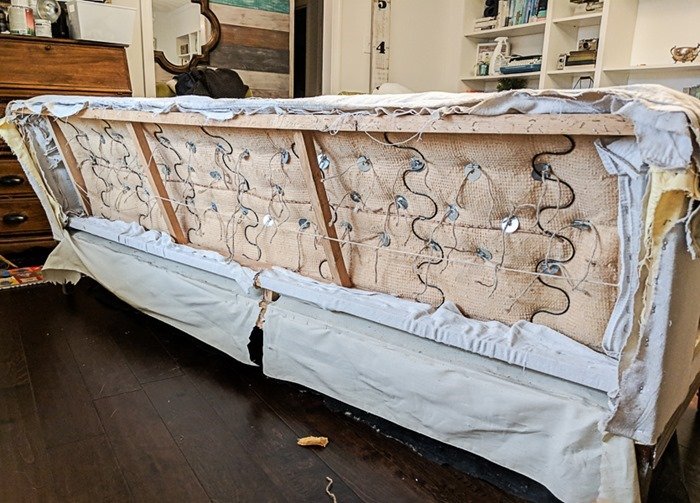
Both ends of the string should be poking through the back of the sofa. After reading about various methods, I chose to use both a large washer and a screw to secure my button strings in the back of the couch.
The washer was helpful because it was large enough that it wouldn’t slip back into the hole. Once I had tied the twine to the washer, I slipped a screw under the knot to keep it from slipping loose; the threads of the screw worked perfectly for gripping the twine.
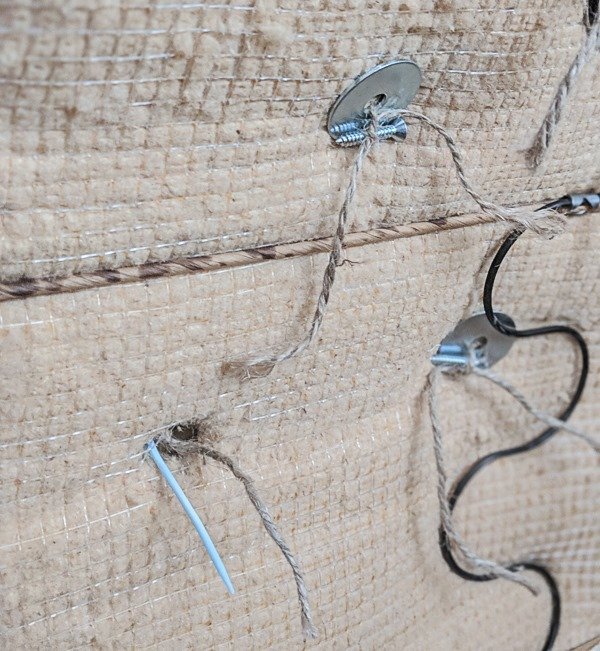
I also found it helpful to have my husband push on the buttons as I tied the string to keep everything tightly in place.
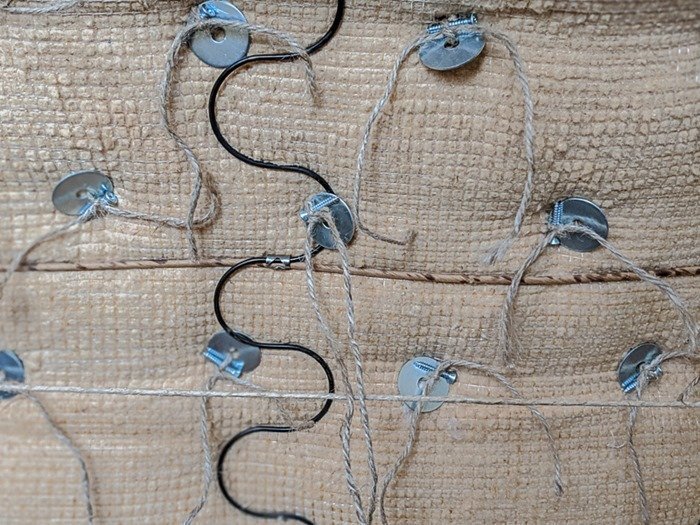
Once the first button was in place, I repeated the process with the adjoining button holes, helping to neaten the folds of the diamonds as I went.
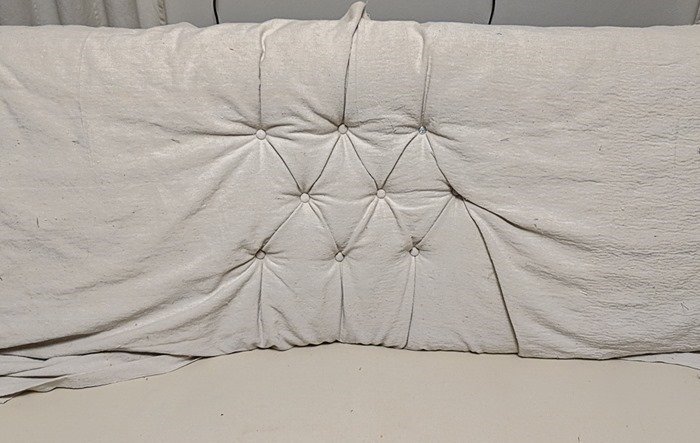
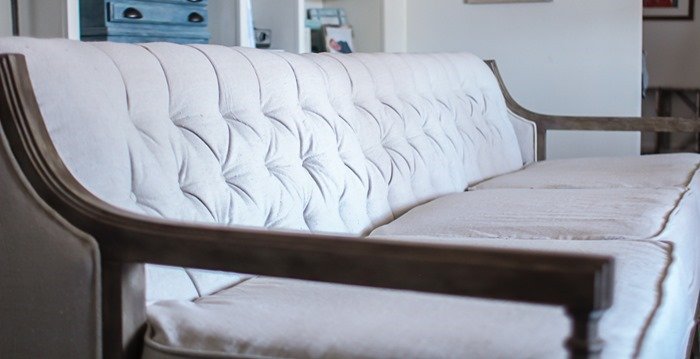
When all of the buttons were in place, I pulled the edges of the fabric tight and stapled them to the sofa frame, tucking the fabric into the grooves in the foam along the top and bottom edges.
Recovering the cushions
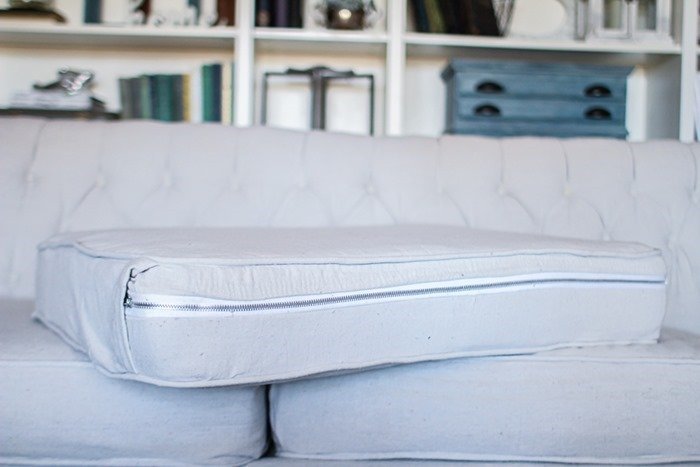
As I mentioned earlier, I am not a master seamstress, but I was determined to make a go at recovering the cushions myself. And while they didn’t turn out perfectly, they actually don’t look bad at all.
However, I do not feel qualified to even attempt to write a tutorial for anyone else to follow since I basically just muddled through myself. So instead I will point you to this easy to follow tutorial or this video for a full how to.
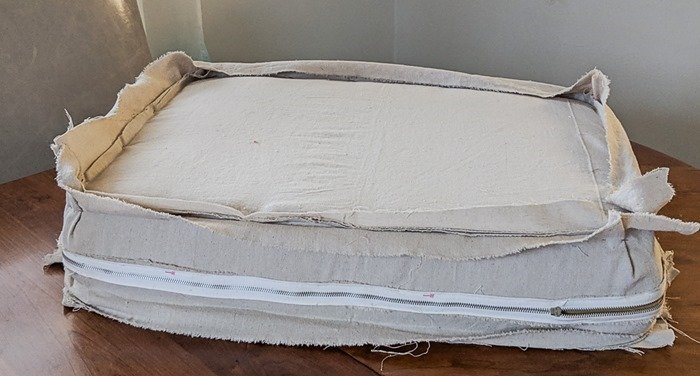
I do, however, have a couple of quick tips to share.
If you are recovering the original cushions that came with the sofa rather than replacing them, be sure to remove the old covers and give them some time to air out. I was somewhat amazed at how much my couch cushions fluffed back up once the old covers were removed.
Also, you can save a bit of money by reusing the zippers from the original couch cushions. If your cushions have piping around the edges like mine, you may also be able to reuse the cording. Not only does this save you a little bit of extra cash, but all of the pieces will already be cut to the perfect size which comes in handy.
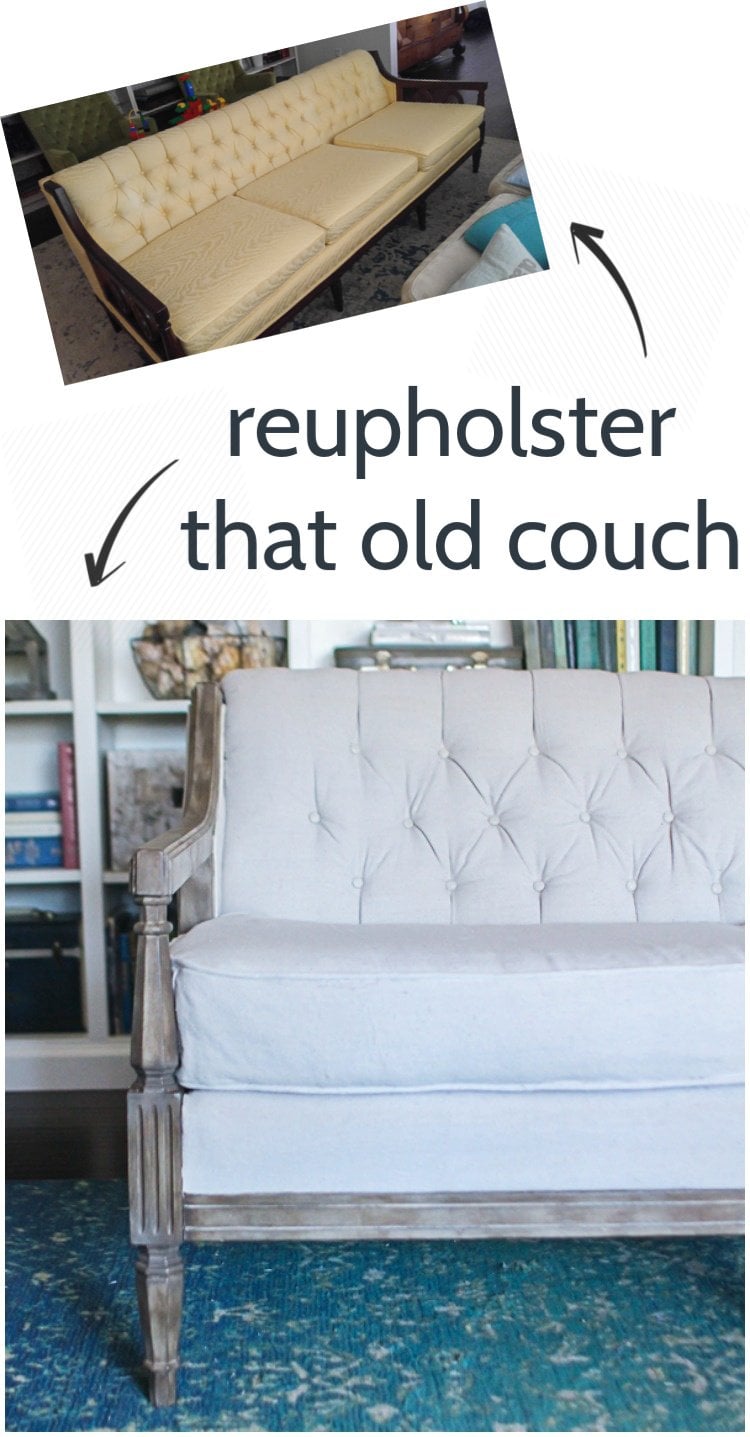
Are you ready to see how my ugly duckling sofa turned out? Here’s a little reminder of how she looked before in all of her swirly yellow glory.
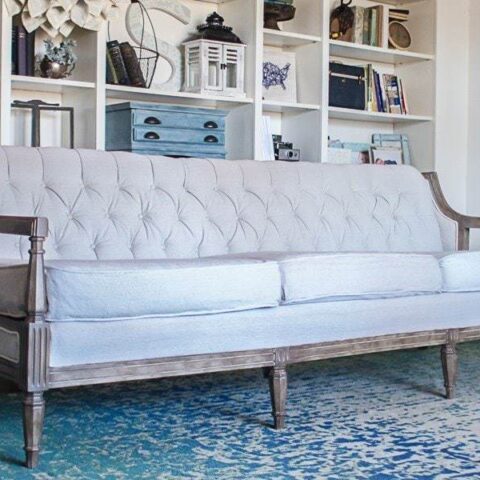
And here is how she looks now:
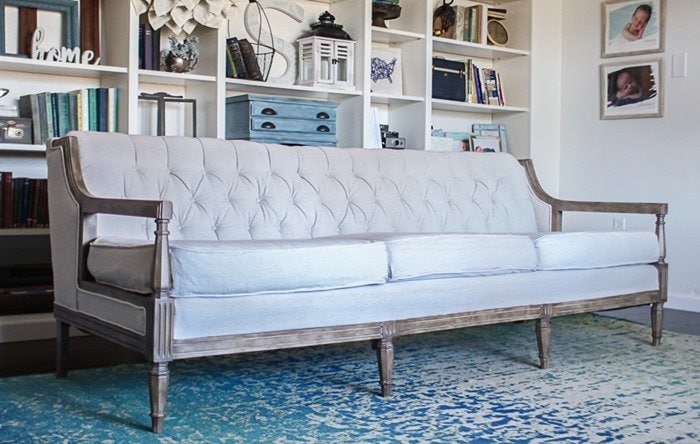
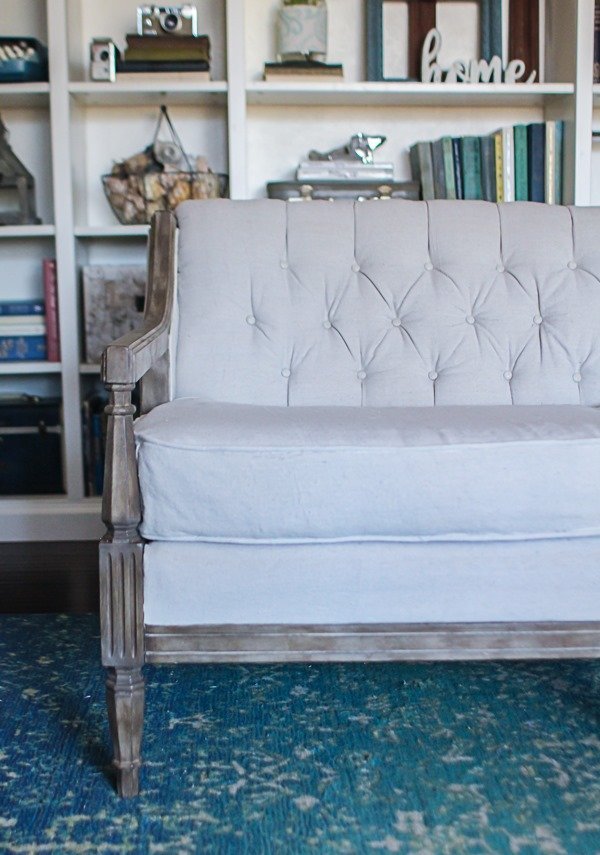
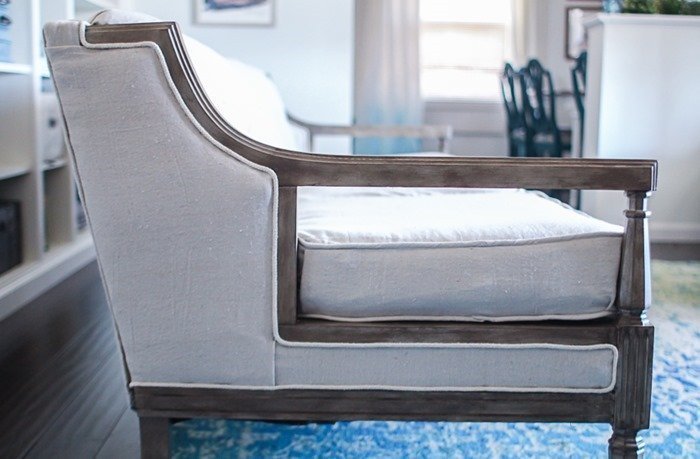
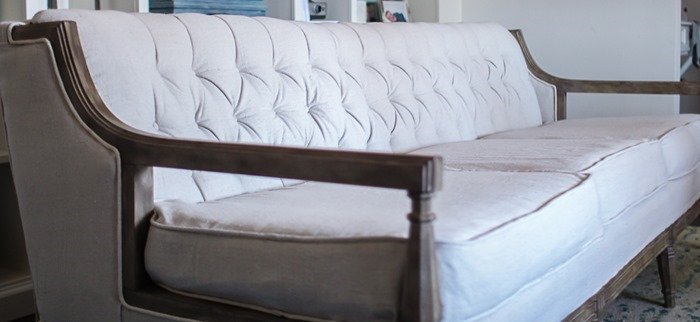
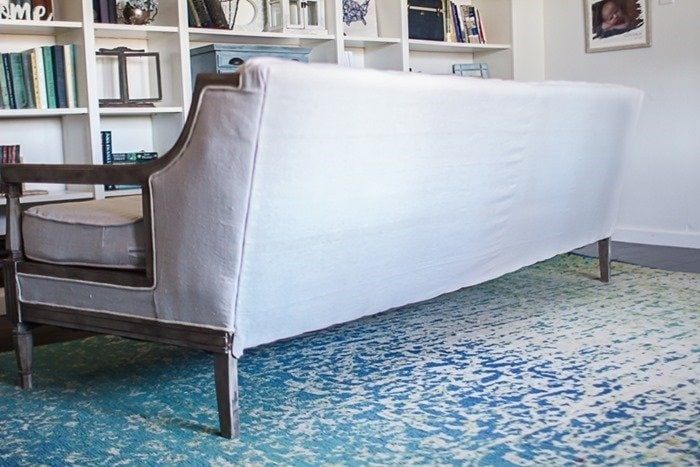
It isn’t perfect, especially the cushions, but I love it. It’s the perfect blend of casual and elegant. Who knew drop cloth would be so perfect as upholstery fabric!

I’d love for you to pin this post on Pinterest!
You can head to my post on reupholstering the matching chairs to see how using a different fabric gave them a totally different look. Not sure you’re ready to tackle upholstery? I’ve also got a bunch more DIY ideas for updating an old sofa right here.
Now be sure to head over and see what the rest of The Furniture Flippers have been up to!

- How to Reupholster a Vintage Sofa by Lovely Etc. (you are here)
- Dresser Makeover by A Fresh Squeezed Life
- Painted Vintage Dresser with DIY Chalk Paint by Refresh Living
- Easy Filing Cabinet Makeover by Repurpose and Upcycle
How To Reupholster A Couch On The Cheap
Learn how to reupholster a couch without spending a lot of money. It's a great way to give new life to old furniture.
Materials
- Sharpie
- Upholstery Twist Pins
- Trim
- Liquid Stitch Fabric Glue
- Fabric Button Kit
- Upholstery Needle
- Piping Cord
- Zippers
Tools
- Sewing Machine
- Staple Gun
- Upholstery Staple Remover
- Flathead Screwdriver
- Needle Nose Pliers
Instructions
- Remove the old upholstery staples with either a flat head screwdriver and needle nose pliers, or an upholstery staple remover.
- Remove the piece of lightweight fabric underneath the sofa and set it aside.
- Remove the fabric on the back of the sofa, starting at the bottom.
- Set aside, and label with a marker, any tack strips, strips of cardboard or plastic pieces to use for the new fabric.
- Remove and label the fabric you removed from your sofa and use as a pattern when cutting your new fabric.
- Begin to recover your sofa with your new fabric. When you are reupholstering your sofa, your goal is to put the sofa back together the same way you took it apart. Wherever the old fabric was stapled to the frame, you will be stapling the new fabric. Wherever tack strips held the fabric in place, use tack strips.
- You are going to work in reverse order of how you removed the old fabric. Start with the places you didn’t remove the fabric at all, then move on to the last places you removed the fabric.
- Be sure to pull the fabric nice and tight as you go.
- Add trim to cover any visible staples. You can make custom piping or buy a trim that matches your fabric.
Recommended Products
As an Amazon Associate and member of other affiliate programs, I earn from qualifying purchases.
-
Brother ST371HD Sewing Machine, Strong & Tough, 37 Built-in Stitches, Free Arm Option, 6 Included Feet
-
Bed N' Basics Upholstery Twisty Pins with Clear Heads - 50 Pack - Holds Bedskirts, Slip Covers, Drapes and Other Fabric and Materials Securely in Place - for Sewing and Home Decor
-
Arrow T50 Heavy Duty Staple Gun
-
Air Locker A01 Upholstery & Construction Heavy-Duty Staple Remover

Google Web Story: How to Reupholster a Couch on the Cheap



Wow, Carrie! I am super impressed! I do a lot of sewing and a project like this would scare me!
The finished product is beautiful!
Thank you Randi! It definitely scared me too but I am so glad I got past it!
Wow this looks like a 5 thousand dollar sofa now! Way to go, this is amazing.
Thank you so much Lindsey!
Terrific transformation! You really did a fabulous job!
Thank you so much Laura!
You are a wonder woman! This is a beautiful transformation. If I’d seen the sofa in the “after” form without the context of your blog I would have guessed it was from Restoration Hardware. Beautiful.
Thx for this great tutorial.
Jane
Thank you Jane! Restoration Hardware is such a compliment but I think you are right – it does have that look!
Carrie, it’s beautiful! I LOVE drop cloth, and I really love seeing you use it on this fairly formal, definitely traditional, tufted back sofa!!! I have been a “crafty seamstress” through the years, and I would normally be frightened to undertake this, but you have made it look so “doable” I’m tempted!!! Thanks for your straightforward comments, and your honesty with respect to simplifying and saving during your process. I always take the “easiest way” in most everything I do ~ It just makes sense to me!
I recently purchased a grey linen-look slip cover for a sofa, and extra for an ottoman, etc., but I am seriously thinking “drop cloth instead” now!?! Physical restraints are my only remaining concern … but you give me encouragement sharing this great project! Thanks again!!!
Oh! I think the splatters on the wood might have been an attempt to mimic pecan. they Just added a bit too many “dots” … we have a few pieces, because it was my parents’ favorite wood!
Thank you Kathleen! I am glad my post is encouraging – this was a daunting project but is definitely doable! And I’m so happy I chose to use the dropcloth. It looks beautiful and you would never guess that is what it is! And thank you for the comment about pecan wood – I’ve had other furniture with a finish sort of like this and never knew what look they were trying to imitate. I’m going to look up pecan wood now to see what the real thing looks like!
It was a very popular finish on relatively high end furniture in the late 60’s and early 70’s.
Thanks for sharing!
Beautiful! Def needing the painted wood tutorial:)
Thanks Lynne! I need to get on that!
You did a great Job! This is something I have tackled before and I find the cushions are the most difficult part. Yours look great!
Thank you Michelle! I definitely had to redo one of the cushions because it was terrible but they turned out pretty well in the end. And kudos to you for taking on a project like this as well!
Oh my so impressive!! My husband and I covered a 50s slipper chair and it was pretty involved, so to cover this sofa took a great deal of skill and talent, especially with the baby helping lol!! Lovely!!
Thank you Lin! The baby definitely thought he was helping, lol.
Oh my – I am in love with this couch!! First, I can’t believe what a deal you got on it, but even more impressive is how you brought it back to life. So many great upholstery tips!!
Thank you so much Jenny!
That looks awesome! I bought a gorgeous, swanky1930’s era vintage tufted sofa last year that I wanted to have reupholstered but now I’m going to try it myself using drop cloth to make sure I can actually do it. Drop cloth is such a great idea and relatively inexpensive to practice with. Great step by step tutorial and tips. Thank you so much for doing this project…love it!!!
Yay! Your sofa sounds awesome and drop cloth really turned out to be such a great fabric for this. Good luck with your sofa!
Wow you did an awesome job on this. It’s beautiful! I would be scare to tackle something like this.
Thank you Linda! I was scared too but I am still so glad I didn’t give up!
Fabulous!!
Thank you Lisa!
You did an amazing job!
Thank you!
Hi beautiful job! I’ve just received two french armchairs from Freecycle today in need of reupholstering, this has given me the confidence to attempt it myself. I’ve just ordered some drop cloths on eBay what size piping did you use please x
Yay! I’m so glad you are going for it! I actually reused the piping that was originally on my sofa – I just removed the old fabric and recovered it. So I am not exactly sure what size it is but it looks like 1/4 inch is typical.
Outstanding! I’m very Disappointed with drop cloths. Every time I buy them they come with a seam in the middle:( So have to return them back. This have discouraged me from reupholstered my vintage sofa.. Any recommendation? We greatly appreciated. Thanks for sharing
Yes, that seam can be really annoying! It can be really unpredictable at times which will have a seam and which won’t as well. I bought 9’x12′ drop cloths for this sofa at Lowes and they did have a seam but they were so large, the seam didn’t cause a problem. I just cut the dropcloth into two sections and went from there. I also recently bought this 9×12 drop cloth from amazon – https://amzn.to/3jAOB6Z to cover a daybed on our porch. It was nice quality, not super thick or thin, and did not have a seam down the middle.
Beautiful makeover. Pat yourself on the back for job well done. I’m curious, what decade is that style of sofa from? Its absolutely gorgeous.
Thank you so much! I don’t really know what decade it is from. I did a little research but had a hard time finding something similar. Whenever it is from, I really like it as well!
Your end product looks wonderful. I really love it. I’m trying to imagine what a bunch of little kids will do to a light-colored couch but that’s your problem, not mine. :)
I did want to mention that this is recovering a couch, not reupholstering a couch. Reupholstering means removing all the stuff down to the frame and starting completely afresh with new padding, springs, webbing, et cetera. That’s why it can cost multiple thousands of dollars to get a couch done professionally. If the springs are good and it doesn’t smell awful and you can recover instead of reupholster that’s the way to go for sure.
Thanks for the info! And I definitely understand why it costs so much – even just recovering is a lot of work! Thankfully so far, so good as far as the light sofa goes. I sprayed it with a ton of Scotch Guard and won’t let food or drink near it. :)
Wow – what an amazing result! Makes me think of French Country now, rather than Mid Century Modern. Good call, removing those circles from the arms!
Thank you so much!
Fantastic job and fantastic post. Thank you. So helpful. I’m going to try this.
Good luck!
I love what you have done, but I would have liked to have the seat in one long cushion i.e. not 3 little ones. But you have done a fantastic job and I hope you are very proud of yourself. I’ve come across your blog as I’m looking to reupholster an arm chair and the job you did was magnificent. I’ve just got to find myself some fabric.
Thank you! I love the idea of one long cushion too!
How has the scotch guarded dropcloth held up? I’m working on my couch now, but decided against dropcloth. I used it on some chairs and it gets super dinjy super fast. Ive resorted to using dropcloth only on things i can throw in the wash… but haven’t tried scotchgaurding dropcloth. You did a great job! Thanks for inspiration to keep going!!!!
It has held up really well! I need to do a full update on how the drop cloth upholstery has held up, but the scotchguard has definitely helped. I’m actually pretty surprised it still looks as clean as it does with my kids. It has developed a lot of little lint balls over time that made it look dingy, but I recently used a fabric shaver to remove them and it made a huge difference. Now it looks as good as new!
Wow, Carrie! I am super impressed! I do a lot of sewing and a project like this would scare me!
The finished product is beautiful!
Thank you! To be honest, I was scared too but I am so glad I went for it!
What do you think a couch like that would go for? You did a beautiful job. Love It
Thank you! I don’t know how much it would go for but definitely a lot!