The Best Way to Fill Billy Bookcase Holes
Filling the shelf pin holes is a super easy way to update your IKEA Billy Bookcases or other flat-pack bookcases. This easy, five minute update makes a huge impact with very little time or effort.
I love IKEA bookcases; they’re budget-friendly, have loads of storage, and are super easy to put together.
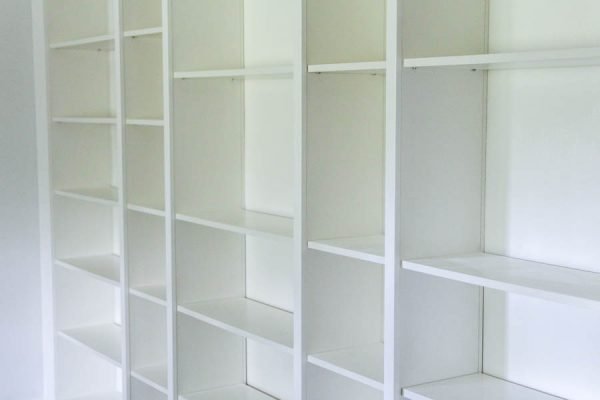
But there’s one thing I absolutely hate about them – those rows and rows of holes lining the insides.
Sure, it’s super handy that you can adjust the shelves to any height you want. But once your shelves are all placed, those holes just scream cheap.
A couple of months ago, I shared the big beautiful wall of built-in bookshelves I made from IKEA Billy bookcases.

To make the Billy bookcases look like actual built-in wood bookcases, I framed them with MDF, added trim, painted everything.
And at the end of all that work, when I stepped back and looked at them, they were gorgeous.
Or they would have been, except all I could see were those darn holes.
They were everywhere and they were making the entire thing look cheap and thrown-together.

So I did a bit of research and a bit of experimenting and found a very easy way to make those bookshelf holes disappear.
This easy method will work whether you’re doing a huge IKEA hack like I did or you simply want to give your basic IKEA bookcases a quick update.
This post contains affiliate links which means if you make a purchase after clicking a link I will earn a small commission but it won’t cost you a penny more. Click here to see my full disclosure policy
How to Fill Holes in IKEA Billy Bookcases
IKEA actually sells little plastic plugs that you can stick in to plug the holes.
Unfortunately, these plugs are designed for plugging holes in their kitchen cabinets and not necessarily for bookcases.
I haven’t personally tried these because the nearest IKEA is three hours away.
However, I did find reviewers who shared that they fit the holes in older IKEA Billy bookcases, but not ones sold in the past five years.
They also don’t sit exactly flush with the sides of the bookcase, but have a slight dome to them. So even though those would be a very quick option, they weren’t for me.
Thankfully I found the perfect solution – basic spackling.
Spackling is very inexpensive, it is easy to apply, and it dries to a white that very closely matches most white bookcases.
Plus, it is not difficult to remove. If you decided you want to rearrange your shelves in the future, it is very simple to poke the spackling out with a screwdriver and stick a shelf pin in the hole.
Before beginning the spackling process, decide exactly how you want to arrange your shelves.
Remove the shelf boards to give yourself room to work, but leave the shelf pins in the holes you plan to use for your shelves.
You definitely don’t want to accidentally fill the holes you need!

I had seven bookcases and hundreds of holes to fill so I refined my process as I worked through them.
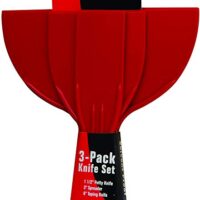
I started out applying the spackling with a plastic putty knife, but eventually I found that it was much faster to simply rub some into each hole using my finger.

Once you have applied spackling to each hole in one section, wipe off any excess with a slightly damp paper towel or with your finger.

Allow the spackling to dry fully.
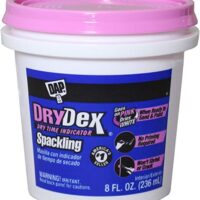
As you can see, I always prefer to use DAP Drydex Dry Time Indicator spackling.
It is pink when you apply it and turns white when it is fully dry.
I tend to get impatient to move on to the next step when doing projects and this keeps me from jumping ahead too quickly.

This picture was taken when I first started. You can see that I hadn’t yet figured out that it is much easier to wipe off the excess spackling before allowing it to dry. From left to right: freshly applied spackling, mostly dried spackling, and smoothed spackling.
Once it is dry, you don’t even have to sand it. Since you already removed most of the excess spackling, just gently rub a damp paper towel over the spackling to wipe away any rogue spots.
Since IKEA Billy bookcases are laminate and non-porous, the spackling doesn’t stick well to it and any excess easily wipes away.
The spackled holes blend in beautifully with the white bookcases.
Filling holes for bookcases that are not white
This solution worked beautifully for me because my bookcases are white and so is the spackling, but what if your bookcases aren’t white?
If you are planning to paint your bookcases anyway, simply apply the spackling before painting.
If your bookcases are already painted a color other than white, find the paint swatch that most closely matches your bookcases and use a sample of that paint to paint over just the white spackling circles to make it blend.
And if your bookcases are wood color, you can either find a paint that is a similar color to the wood to paint over just the tiny spackled holes, or you can find wood look hole plugs online – just be sure to measure first so you get the right size for the your bookshelf holes.
Such a quick and easy update and it truly makes such a difference!
Once all the holes had disappeared, I could finally look at my new wall of bookcases with a real sense of pride and satisfaction.
If you’re feeling inspired to maybe go even further, be sure to check out my IKEA built-ins tutorial. I really worked to make sure each step was simple and clear. And they turned out beautifully!

The Best Way to Fill Billy Bookcase Holes
This is a simple way to give IKEA Billy bookcases, and other flat-pack bookcases and cabinets, a major update by filling in all of those shelf pin holes.
Materials
- Damp paper towel
- Spackle
Tools
- Plastic Putty Knife
Instructions
- Rub some spackling into each hole using your finger. You can use a plastic putty knife but I found it was faster to use my finger.
- Once you have applied spackling to each hole, wipe off any excess with a slightly damp paper towel.
- Allow the spackling to dry fully.
- When it's dry, you don’t even have to sand it. Just gently rub a damp paper towel over the spackling to wipe away any rough spots.
Recommended Products
As an Amazon Associate and member of other affiliate programs, I earn from qualifying purchases.


Nice job. Definitely worth posting. I have a book case in my living room that has those nasty holes. I will spackle them like you did ! Thank you for posting this great idea
Yay, I am glad it helped!
I have the opposite problem. I bought the glass fronted Lintorp IKEA bookcases only to discover the few holes it has doesn’t let me adjust my shelves efficiently to be able to stand up my bookcases. I called five days in a row to IKEA customer service and they refuse to call me back to offer suggestions on how to adjust or even drill more holes. Worst customer service EVER!
Anyhoos, do you know how I can drill new holes? Is there a certain bit I should use? Is it even possible?
Thanks and love your blog,
Anne
Oh no, that sounds super frustrating! I have not drilled holes in IKEA bookcases before, but I think it should be able to be done. If you don’t have enough shelf pins, you can buy more in the hardware section of any home improvement store, though they may not be the exact size of the IKEA shelf pins since IKEA generally uses metric measurements. I don’t know the correct bit size to use with the standard IKEA shelf pins, but I would just see what bit you have matches the best, or if needed take one into the store to find a match. I would advise putting a bit of painters tape on the bookshelf where you will be drilling. This should help keep the fake wood from cracking or busting as much. Good luck!
Actually I believe if you go to IKEA help desk they can give you more free caps.
Drilling is a bit tricky though you’ll definetly need a drill.
When you drill holes in your IKEA bookcase be sure to mark your drill bit with a piece of tape so you don’t drill to deep or drill through.
Great tip!
Was making me ill…the holes would not off gas, I tried vinegar, baking soda. I thought using something to stuff, the material would shrink over time.
And flake. Cloves. I stuffed the holes with cloves as I was looking for a solution. The smell was causing headaches. Alas…I found the answer.
Use blue painters tape for the ones in the back, unseen, a strip will close ten of the holes. For the ones in the front, I bought bronze truss screws from Lawless, big bag for a few dollars. No need to screw…just place them, they stay in, but block the obnoxious odor. Hooray.
Thanks for sharing your experience!