How to Build Easy Built-Ins from IKEA Billy Bookcases
These simple, step-by-step instructions make it easy to create gorgeous IKEA Billy built-in bookcases.
These Ikea built-ins have been a long time coming and now that they are finished, I am so happy with them!
Even though the majority of the structure comes from tall IKEA Billy bookcases, you would never guess these built-ins were inexpensive laminate furniture.
All of the little details that make flat-pack furniture look cheap have been removed or covered up including those cheap cardboard backs, the millions of holes for shelf pins, and the ugly toe kick at the bottom.

IKEA Billy Built-In Bookcases
This whole project started way back in 2012 when I decided I wanted a wall of built-in bookcases in our living room to add style and storage.
Huge built-in bookcases are incredibly expensive, so I decided to save money by using IKEA Billy bookcases and just adding molding to make them look built-in.
So I headed off to IKEA, bought a huge pile of IKEA Billys, brought them home, and assembled them.
The problem was I never quite managed to turn them into the built-ins of my dreams.
I read a bunch of blog posts about making IKEA bookcases look built in, but most of them sadly weren’t as helpful as I had hoped.
They were full of beautiful photos of the end result and then said something like “My husband/father-in-law/dad/neighbor installed them so I can’t give a step-by-step tutorial but it isn’t that hard.”
Not helpful for those of us without a handy relative to make our built-in dreams come true!
So back in 2012, I added some trim to connect all of my Billy bookcases together into one unit and hide the ugly toe kick and called it a day.
At the same time, I painted the backs this royal blue color.

A couple of years later, I was over the blue so I updated the bookcase backs with a stencil.
It was a huge pain to do but I think it looked really pretty.

When I installed hardwood floors in this room, I had to move the bookcases out of the way so I could install the new flooring under them.
To move them, I had to take all of the trim off and never got around to putting it back on so they were back to being basic Billy bookcases with a pretty stenciled back.
And they were fine. They were. But they just weren’t what I had really wanted.
One day I was sitting on the couch looking at those bookcases and I decided it was high time I turned them into the built-ins I had been dreaming about from the beginning.
I may not be a professional cabinetmaker, but I’ve definitely improved my DIY skills over the years and even more importantly, I’m way more confident.
Even though I didn’t know exactly how to make it happen, I felt confident I could figure it out.
So I got up off the couch and started ripping off those cardboard backs that very night.
And then of course the next morning I wondered if I had just made a big mistake, tearing up part of our house without really having any idea what I was doing.

Thankfully, it worked out beautifully in the end and I finally got my real grown-up wall of built-in bookcases.
And the best part – you would never guess they were really just IKEA bookcases at heart!
I want this tutorial to be actually helpful to others interested in creating their own Billy built-ins, so I’m going to share as much detail as possible.
I am not a professional carpenter by any means, but this method worked beautifully for me.
If all you care about are some pretty pictures, feel free to scroll to the end.
Also, my fellow Furniture Flippers are also sharing their latest furniture redos, so be sure to check those out below the tutorial as well.
They always leave me feeling inspired!
This post contains affiliate links which means if you make a purchase after clicking a link I will earn a small commission but it won’t cost you a penny more. Click here to see my full disclosure policy.
Materials for creating IKEA Built-In Bookcases
- Basic bookcases of your choice – I used IKEA Billys but any basic flat pack bookcases should work
- 1/2″ square dowels – you can get these at your local home improvement store
- caulk and caulk gun
- paint that matches your bookcases – I used Valspar Dove White which is a good match for IKEA white
- paintbrush – these are my favorite paintbrushes for painting furniture
- wood filler
- sandpaper
- plywood or MDF – the size will depend on how much open space will be around your bookcases
- 1″x 2″x 8′ boards – one less than the number of bookcases you are using
- 1″x4″ boards – enough to span the length of your bookcases
- base molding
- crown molding
Suggested tools
- table saw (for cutting plywood/MDF or you can have your wood cut in the store)
- miter saw (for cutting trim and molding)
- nail gun or hammer and finishing nails if you don’t have one (I highly recommend a nail gun for this project if possible. It will save you so much time.)
- hammer and needle nose pliers (if removing old bookcase backs)
How to turn IKEA bookcases into Built-Ins
For my space, I used four 31″ wide white Billy bookcases and three 15 3/4″ wide white Billy bookcases.
My bookcases are the standard 79” height and 11” depth but there are lots of options including bookcases that reach almost to the ceiling or are extra deep.
This same method will work with any configuration of multiple bookcases, including other basic bookcases from other stores.
Remove the bookcase backing and prepare the bookcases
I chose to remove the backs from my bookcases and let the wall serve as the back instead.
The back panel is basically glorified cardboard and it’s obvious.
The stenciling I had done before went a long way in hiding the ugly fold marks on the backing, but I still thought they would look more like true custom built-ins without it.
There are also a couple of outlets along the wall where these shelves are and removing the backing allows them to still be accessible.
Since I was taking apart previously assembled bookshelves, I used a hammer to pry off the backing and pulled out any stray tacks with needle-nose pliers.

If you are working with brand new IKEA bookcases, you can simply skip the step where you add the backing.
The downside of not using backing is it makes the bookcases much less stable, but we are adding plenty of trim and wood facing so these are still solid as a rock.
I wouldn’t recommend using an IKEA Billy bookcase without the back unless you are planning to reinforce the bookcase somehow.
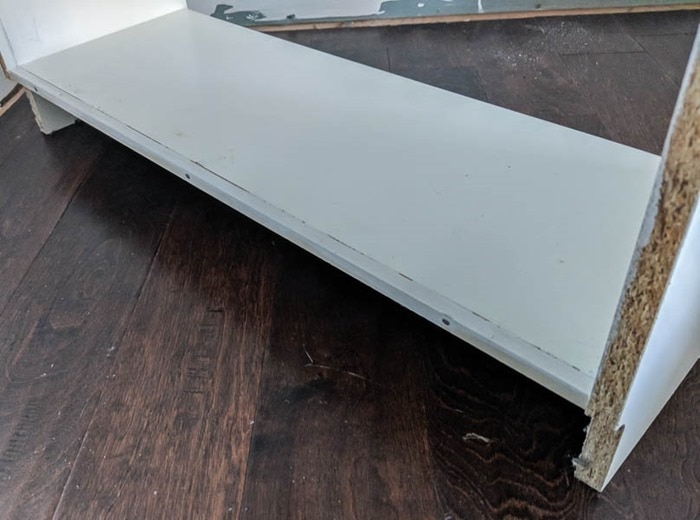
When the backing is removed, there is a groove along both sides that would have held the back in place.
I filled this groove in with caulk.
There is also a small gap at the back of the shelves where they meet the wall. I nailed a small 1/2-inch dowel to the back of the bottom shelves of each bookcase so that nothing could fall below and be lost forever.
There is still a small gap between the wall and the higher shelves but it isn’t very noticeable.
Prepare the wall
Before moving the bookshelves into place, go ahead and paint the wall behind to match.
I love the look of crisp white built-ins, so I chose to leave my IKEA bookcases in their original white color.
I bought Valspar Dove white paint which is a pretty close match to ‘IKEA white’ and used it to paint the wall. (I believe IKEA may have changed their specific shade of white since I purchased my Billys back in 2012, so you may find a different white to be a better match for newer IKEA furniture.)
I also chose to remove the baseboards from the wall behind the bookcases.
This wasn’t necessary but it made it a bit easier to fit the bookcases in place and I also wanted to reuse the original baseboards on the front of the bookcases.
Determine the placement of your bookcases
Once the wall was painted, I moved the bookcases into position exactly where I wanted them to be.
I chose to push all of my bookcases flush together with a bit of space on either end because this left all of my outlets accessible.
Another option is to space them out evenly throughout the space, leaving a small gap between each bookcase.
Once you are happy with the placement, go ahead and secure them to the wall using the hardware that is included with the bookcases.

Add trim to connect your bookcases
Next, I attached all of my bookcases together along the bottom by nailing a 1″x4″ board to the bottom shelf.
This gives a nice flat surface to attach baseboards to later which really helps give the look of custom built ins.
There will be a small gap between this board and the bottom of the shelves that can be filled with caulk.
I also used basic 1″x2” pine boards to attach each bookcase together vertically.
A 1″x2″ happens to be a perfect match for the width of two bookcase sides pushed together.
I cut each 1″x2″ to end right below the top edge of the bookcases.

In the photo above that trim has already been added along the bottom and between each bookshelf in the left half of the photo.
Just doing this makes the whole thing look so much nicer!

Add wood to encase your bookcases
Then it’s time to cover the open space between the ends of the bookcases and the walls to make this a true wall-to-wall built-in.
I measured the distance between the wall and the inner edge of the first bookcase in the row to find out the width of the board I would need.
To find the height, I measured from the floor to the lower edge of the top of the bookcases.
You can use a smooth high-quality plywood or MDF for these sides.
I chose to use MDF to save money and I also had them cut it for me in the store to save time.
To attach these sideboards, you need to add some wood supports to the wall.
Measure the distance from the back wall to the front of your bookcase. You will need to cut three or four scrapboards to that length.
Then nail them to the wall, nailing into a stud if possible.

When you nail on your sideboards, you will nail one side to the front of your bookcase and the other side to these wood supports.
(Here’s a little trick I figured out. When you nail up the sideboards, mark the location on the wall with some painter’s tape. Once you stick the boards up, the supports will be covered and you won’t be able to tell where they are.)

Now to fully enclose the bookcases, it’s time to close the open space between the bookcase and the ceiling.
Measure the distance between the ceiling and the tops of your vertical supports. (These should be at the lower edge of the top of the bookcases.)
Cut mdf or plywood to fit this area. If you have a very long wall of bookcases like me, you may need to use a couple of pieces of wood for this.
You will need to attach some wood boards to the ceiling for support, similar to how we did the sides.
It would probably be a bit better to simply attach a couple of longboards along the ceiling instead of short pieces like I did, but mine is still quite secure.
You want to be sure to attach these so they are even with the front of the bookcases and give a flat surface to attach the facing to.
Your MDF or plywood will rest on top of the vertical supports and be nailed to the tops of the bookcases as well as the top of these wood pieces attached to the ceiling.

Finish the built ins with molding, caulk, and paint
Now you can add base molding along the bottom of the whole thing and crown molding along the top.
At this point, you are so, so close to finishing!
Caulk all of the seams. Caulking can be a major pain, but it really gives such a beautiful finished feel.
Luckily, white caulk matches the white IKEA bookcases well enough, so it really doesn’t have to be painted over.
Use a bit of wood filler to fill in any nail holes, sand them smooth, and paint everything your ‘IKEA white’ paint.
(I’ve got a post all about when to use caulk and when to use wood filler if you’re a bit confused.)

Lastly, I decided on my shelf arrangement and filled all of the spare shelf holes with spackling.
This is such a small thing but it made an enormous difference in making this whole thing look like beautiful custom built ins and not furniture that came out of a box.
(I have more details and photos of the hole-filling process right here if you are interested.)

This does mean it won’t be as simple to move the shelves around in the future, but if I decide I really want to, it is easy enough to poke out the spackling with a screwdriver.
Seriously, look what a difference it made!

And now, finally, I have the built-in bookshelves that I’ve been dreaming of.
And I have to say I feel pretty darn proud of myself for doing this 100% on my own.


Here they are all loaded up with books and other things I love. I’ll have to share more soon about my process for filling these babies up because it can definitely be a daunting task!


Ready to see some more fabulous furniture flips? Follow the links below to see what the rest of The Furniture Flippers have been up to lately.
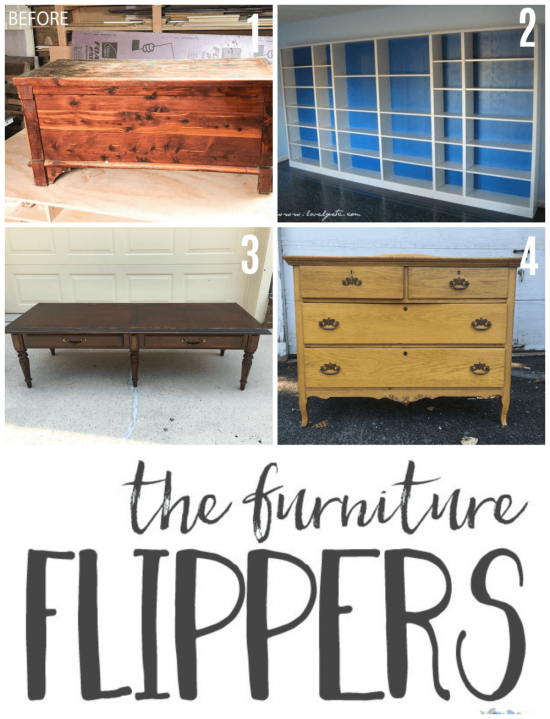
- Upcycled Chest to New Coffee Table by Houseful of Handmade
- How to Build Easy Built Ins from IKEA Bookcases by Lovely Etc.
- Lime Washed Coffee Table Makeover with Liming Wax by Repurpose and Upcycle
- How to Use Gel Stain to Change the Color of Stained and Finished Wood by Refresh Living
I’d love for you to pin this project on Pinterest!


How to Build Easy Built-Ins from IKEA Billy Bookcases
Everything you need to know to add beautiful built-ins to your home using IKEA Billy Bookcases.
Materials
- Basic bookcases of your choice
- 1/2″ square dowels
- Caulk and caulk gun
- Paint to match your bookcases
- Paintbrush
- Wood filler
- Sandpaper
- Plywood or MDF
- 1″x 2″x 8′ boards
- 1″x4″ boards
- Base molding
- Crown molding
Tools
- Table saw
- Miter saw
- Nail gun or hammer and finishing nails
- Hammer and needle nose pliers
Instructions
- Remove the backing from the bookcases. If using new bookcases, assemble them without the backing.
- Fill in the empty groove where the backing would go with caulk.
- Nail a small 1/2" dowel to the back of the bottom shelf of each bookcase.
- Paint the wall where the bookcases will be installed, the same color as the bookcases.
- Move the bookcases into position flush together.
- Secure them to the wall using the included hardware.
- Attach the bookcases together by nailing a 1″x4″ board to the bottom shelf.
- Fill any gaps with caulk.
- Attach each bookcase together vertically with 1″x2” pine boards.
- Add wood supports to the wall to attach the side boards. Secure into a stud in the wall. Also add wood supports to the ceiling for enclosing the space above the bookcases.
- Cover the open space between the ends of the bookcases and the walls with high-quality plywood or MDF, nailing it to the bookcases as well as the wood supports that were added earlier.
- Close the open space between the bookcase and the ceiling by adding MDF or plywood. Nail to the tops of the bookcases, as well as the top of the wood pieces that are attached to the ceiling.
- Add base molding along the bottom and crown molding along the top.
Recommended Products
As an Amazon Associate and member of other affiliate programs, I earn from qualifying purchases.
-
 Ryobi P320 Airstrike 18 Volt One+ Lithium Ion Cordless Brad Nailer (Battery Not Included, Power Tool Only)
 -
Ryobi 10 Amp 7 1/4 Sliding Mitre Saw!
-
Fandeli Assorted Grits (80,120,220), sandpaper sheets, multipurpose for furniture, wood, metal, "9x11", 25 sheet pack
-
Carpenter's Wood Filler, Interior Only, 16 Ounces, E849D8
-
Purdy 140853100 XL Brush 3 Pack
-
Newborn 930-GTD Drip-Free Smooth Hex Rod Cradle Caulking Gun with Gator Trigger Comfort Grip, 1/10 Gallon Cartridge, 10:1 Thrust Ratio
-
10.1 Oz Cartridge 18065 DAP Alex Painter's Acrylic Latex Caulk - White


Wow! These look really amazing. I have always wanted a wall of built ins and yours look so good. Also, the tutorial was way helpful!
Thank you Kati!
These built ins look amazing! I’ve been thinking about doing this in our home so I’m definitely saving this for later.
Thank you Lindsey! Good luck with your own!
These look really great! My bookcases are just sitting in front of the wall begging to be placed neatly and firmly in place. Yours look like they are truly built in. I would love this look with added cabinets and drawers. I have often pondered putting cabinets and bookcases together for a built in look. This gives me the inspiration to look into that further. Thanks so much for sharing your project and for the details and pictures of the process along the way. So many times I see these before/after projects, but no in-between and quickly lose interest.
Thank you Barbara! I love the idea of combining cabinets and bookcases for hidden storage. And I am glad my tutorial was helpful – this is the kind of thing where it really helps to see the process! Good luck with your bookcases.
We have done this but wondering what you did at the seems where the bookcases are bumped against each other? Did the sparkle in the holes show up visually once it dried? Would love to see an up close picture of them where the seems and holes are.
The spackle in the holes doesn’t show at all once dried. If you were to shine a light directly on the holes, you could probably see where the spackle is because it is more matte than the bookcase finish. But in day to day life, I can’t see it at all. There are some more close up photos in this post that might help: https://www.lovelyetc.com/the-best-way-to-fill-billy-bookcase-holes/
Carrie, your built in bookcases look incredible!!! You included so many helpful tips that really make these look like custom built ins. I look back at the projects I did in 2012 as well and can’t believe how much I’ve learned since then. Time to redo most of them!
Thank you Jenny!
This looks amazing, Carrie! I love how it turned out. I have been thinking of turning some of my bookcases into built ins, too, so if I do it, I’ll be sure to reference your tutorial! :)
Thanks Marly!
Carrie, these look amazing! (I’m glad I’m not the only one who tears things apart and then wonders if I’ve made a huge mistake!) I love seeing the progression these went through. Maybe I missed it, but did you paint over the spackling after you filled the holes? I need to do that to my bookshelves too. I can’t believe what a difference it makes!
Thanks Meredith! Good question – I did not paint over the spackling. Once it was dry, it was a close enough match to the white bookcases, it really isn’t noticeable. And I didn’t want to fool with painting the laminate bookcases unless I had to!
What a great, instructional post! Thank you for sharing your built in bookcases with us. I loved that you included the beginning and the middle and the end result, all three phases in one. How I wish I had the energy to do this one. Keep up the wonderful hints and instructions.
Thank you so much Kathie!
Great tutorial!
Unrelated, we love the rug in that room. Do you by chance know the manufacturer/where you purchased it?
Thanks
Thank you! You can find the rug here – https://www.rugstudio.com/artistic-weavers-egypt-lara-teal-blue—silver-area-rug.aspx. It is beautiful and has held up pretty well but has gotten a few pulls in it so it isn’t quite as durable as some other rugs I have had.
I love books… I always thought of making my own bookshelf at home !!… Hope I will incorporate this in my home
Good luck!
Beautiful! What suggestion you can give me if i have an air vent at the top
Good question! I am not an HVAC expert by any stretch but I would imagine you could put an attractive vent in the wood enclosing the top portion so the air could still circulate into the room. Or it might work even better to insert some cutout panels similar to what they used to used for radiator covers. They come in really pretty patterns and can be painted to blend in with the wall.
Hi! I am looking to do this in my office and have a question about painting the trim boards… Did you paint all of the baseboard trim in the rest of the room the “ikea white” or just the trim on the built-ins, leaving the rest of the baseboards/trim alone?
Love your tutorial – I’ve looked at MANY and yours is excellent! :) Thank you for sharing!!
Erica, great question. I actually debated about this. The rest of the trim was already painted a bright white so I ended up painting just the trim around the built-ins the ‘IKEA white’ and leaving the other trim bright white. If you look closely, you can tell a difference where the two meet but nobody would notice if they weren’t staring closely. And I’m really glad you found my tutorial helpful- I tried to be as detailed as possible because I was frustrated after reading a lot of less helpful ones!
I need this tutorial. I want to put a built-in in my middle bedroom/office. I am going to try this. Great detailed instructions.
Thank you! Good luck with your built-ins!
Hi! Thanks so much for such a helpful tutorial. Would you say the shelves are sturdy? Any sagging? That’s my main concern as I do want to fill them with books.
Yes, they are definitely sturdy. I haven’t had any problems with sagging at all. I have had these IKEA billy bookcases for several years now and while not all of the shelves are filled with books, several are. So far no problem and I don’t anticipate any!
Thank you for this clear step-by-step tutorial (with very clear pictures). This is my next project and, just like you, I’m finding all of the tutorials not at all helpful for a novice. Like, “My father-in-law is a carpenter with a full workshop so he did all the hard stuff after we assembled the bookcases” Ugh!! This was so helpful!
I am so glad it was helpful! If only we could all have a father in law to do everything for us, lol.
Love! We are currently doing our own billy hack. However, we are grappling with one issue. One of our walls has a baseboard that extends all the way to the wall we are doing the shelves against. The problem is I want both ends of the bookcase to sit flush against the ends of the walls. I am not sure how to deal with the end of that baseboard! Any suggestions? Not sure if we can shorten the baseboard, or if we just have to suck it up and not have the end of the bookcase be flush.
Hmm, I think I can visualize what you are describing. The easiest solution would probably be to cut off that baseboard right where it would hit the bookcase. A small oscillating saw works great for cutting down trim where needed. Good luck!
Hello,
Your tutorial is the BEST one I have seen. So user friendly. I have all of my booshelves put together and we want to have the same built in look as you. The only thing I still don’t know how to do is put the crown moulding on. My question is, where do I nail it? Into the board behind on the top and the bottom? Thanks
I am so glad my tutorial was helpful! When you attach the crown molding, hold it in place at an angle touching the board and the ceiling. When you do it, it will be obvious what I mean. Then nail it to the board behind. I did a couple of nails every few feet. Just make sure to nail into it at an angle (angled toward the ceiling). Good luck!
Thank you so much!!
One more question. When I added the board to the bottom, before the baseboard molding, there is a space between the board and the bookshelf. How do I fill that in?
I used caulk to fill in that gap. It is a bit wide so you will probably need to do two passes with the caulk. Good luck!
This is a really great idea. I’m looking at doing something similar, but not built-in… just combining a few as a single unit. What did you do about the space between the bottom shelf face and the base board… since the shelves don’t come out quite as far as the frame? Is that just caulking?
Yes, there is a sizable gap there but I just filled it with caulk.
Hi Carrie,
I see this is an older post, and you’re still answering questions. Love, love how you repurposed those Billy bookcases several times over! I am pretty good at DIY, but I don’t have the tools to cut wood and plywood myself. In the past I’ve had people at home depot do it for me, with very specific measurements. Did you cut the wood yourself? I’m wondering if I should invest in serious wood cutting tools, since I always seem to have a need for this.
Thanks Darlene! I’ve been a fan of these Billys since we bought them, but I really love them now! I have also had my wood cut at Lowes many times, especially when getting big sheets of plywood cut. In this case, I did cut the wood myself. It was a lot easier cutting it myself at home because my walls aren’t completely square so I had to cut a couple of pieces on a slight angle. I cut almost all of my own wood now using a miter saw for planks and angled cuts and a table saw or circular saw for cutting down plywood. It took a little bit of time to get comfortable, especially with the table saw, but it is so much easier being able to do it all myself. If you are able, I think investing in some tools is a great idea. And it really doesn’t even have to be expensive – I bought my table saw used and there are always tons of used tools available on Facebook marketplace. I also have a post with a list of my must-have power tools that might help: https://www.lovelyetc.com/do-you-need-power-tools-to-diy/
Hi! This project is beautiful! I’m curious if you remember where you got the wooden(?) bins with cutout handles on the skinnier Billy bookcases? I’m looking for something that can fit in (and make best use of) the slim depth of the Billy bookcase to hold a kid’s sweaters/sweatshirts. Those boxes look perfect…Thanks!
Yes, those are actually cardboard boxes that I covered in birch bark wrapping paper! They are made from diaper boxes and fit perfectly in the slim Billys and even in person, you would never guess they are just cardboard. I have a post showing the how-to and more pics for the boxes here: https://www.lovelyetc.com/turn-any-cardboard-box-into-beautiful-storage/
Hello! So helpful. How would you finish the top if you were doing shorter shelves only half way up the wall?
Good question. I think it depends on how high the shelves will go and what look you are going for. If they are anywhere near countertop height, I would probably top them with a wood plank either in stained wood or painted to match the bookcases. That would give a nice finished look and also make a good surface to place things on. If they are higher than counter height, but short enough that you can see the top. I might consider still adding a solid wood shelf across the top. Or alternatively, just adding square dowels to the back of the top shelf to close in the gap (like I did for my bottom shelves). If it is tall enough that you can’t easily see the top, I wouldn’t worry about doing anything special.
Where did you get/how did you make the big flower?
I made it from an old book. I don’t have a tutorial but here’s a tutorial for a really similar looking one: https://www.vintagepaintandmore.com/2013/11/book-page-wreath-tutorial.html
Hi – These look great. Did you caulk the gap between the back of each shelf and the backing?
Thanks!
No, I thought about doing that but I decided that they looked fine without it. You definitely could though!
Hi! Do you have any tips (or a separate post) for how to join the baseboard corner? Specifically the area where the front of the baseboard meets the wall where the old baseboard was never removed? Thank you so much for the detailed post! Yours was originally the one I found that made this project seem doable, and after looking at so many other diy’s it’s still the one I’m consistently referencing!
I’m so glad my post has been helpful – it really is crazy how little detail a lot of posts about this specific topic show! I don’t have a post about doing the baseboard, but I can explain how I do it. For the baseboard, I used a small scrap piece of the same type of baseboard. I traced the shape onto the new piece of baseboard and cut it out with my jigsaw. It ended up fitting really well and with a bit of caulk looks perfect. That is how I did it, but the ‘correct’ way to do it is called coping the baseboard joint. This article explains how to do it the real way – https://www.oneprojectcloser.com/cut-baseboard-molding-with-a-coping-saw/
Hello, I loved this tutorial, thank you!
I am just wondering, what made you use plywood and not sheet rock to fill in the gaps around the book shelves?
Honestly, I am more comfortable working with wood and I didn’t want the mess of sheet rock dust. I think sheet rock would also look wonderful.
You did a beautiful job. Did you caulk the back of the bookcases to the wall?
Thank you! I started to caulk the backs to the wall but then I stopped after the first bookcase because it was taking a lot of time and a lot of caulk and it really wasn’t making much of a visual difference.
Just want you to know how helpful this post is for me. I’m pretty hand but haven’t taken on many projects yet. I’ve been wanting to DIY bookcases. This is the first post that provides enough photos, details and material information! I feel like I’m ready!!! This project has to wait while we have some contractors finish up some work but I’ll post when I can get to it. Also, you never know when someone, years from your original post, will actually come upon it and feel inspired.
Thank you for your meticulous posts.
I’m so glad it was helpful. I always want my posts to be truly informational and helpful rather than just pretty before and after photos!
Thank you. I’m attempting to use Ikea bookcases for a built in and have been despairing over the fact that my bookcases were apparently the only ones leaving giant gaps everywhere. I still feel like the gap between the baseboard and the bottom shelf is huge but I’ll figure it out. Thank you for leaving a tutorial that actually teaches.
I’m so glad it was helpful!
I just sold my house in Boston where I had many built-ins in my library and I just moved to New York City into a much smaller place and I want some built-ins in my office/library and this is simply perfect. It does the trick. Probably one of the best do it yourself posts I see though so far. Thank you so much.
I’ve been looking so hard for a resource like this! I just bought all of my shelves today. However, I have an angled roof that I’m working with so mine will be a bit more extensive. One side of the wall is 11ft and the other is 9ft. I want shelves all the way up.
I’ll share photos after if you’d like!
Thank you for this blog!!
HI – I Love this and I am working on my library now. However, I am a little confused about the sideboards. Wouldn’t it be better to nail them to the walls where trim would join first, before attaching bookshelves to the wall? Also, how thick are the boards you used for that and did you use a nail gun to attach to the wall? I’m unsure what this step but I want it to be sturdy so I don’t want to skip it! Thanks so much!
I’m not completely sure I am following your question, but I think I understand it. You may be able to attach the sideboards to the wall before attaching the bookcases to the wall. I chose to attach my bookcases first, so they would be in their final spot and I could measure everything more precisely. But if you have a smaller space between the sides of your bookcases and the side walls, I can see that it might be difficult trying to maneuver to attach these pieces. In that case, I would do the side supports first, but just be extra careful with your measuring so they are in the right spot. I used 3/4 inch thick boards, but up to two inch thick boards would also work. I attached them directly into the studs using a nail gun but a hammer and nails would also work. I hope that answers your questions!
Hi Carrie, I know this is an older post but I just found it and it’s exactly the instructions I need! I just wanted to ask: did the shelves hold up over time? I’m assuming when you anchored them to the wall you did so through wall studs, so I’m sure it’s solid, I am just worried about the amount of load overall this will create on the wall itself – we would be loading them with books and they’d get fairly heavy – and trying to imagine if the shelves would sag or pull over time. Thanks for any updates or tips!
Yes, the shelves have held up really well! We actually just moved from that house a few months ago and when we moved it had been a little more than five years since I built these. They still looked perfect and had no sagging. They were anchored to the wall and the wood trim along the front helps keep them in place as well. I would have zero hesitations doing this project again.
This post has been super helpful! How did you attach the 1″ x 2″ boards between each bookshelf to make them look like one unit? I want to do this to my shelves, but I can’t think of a way to attach them without directly nailing it in from the front and having it show (clearly I have very minimal carpentry experience, lol!).
I did nail them from the front, but if you are painting them, the nails won’t show in the end. Be sure to use finishing nails (or brad nails if you are using a nail gun). When you nail them, make sure they go all the way into the wood so there is a tiny divot above the nail head. If you are hammering these with a hammer, you can use a cheap tool called a nail punch to get your nails in a little deeper. Then fill the holes with wood filler, sand smooth, and paint. I hope that helps.