Ikea hack: Moroccan stenciled bookcases
See how we stenciled bookcases for a fun and simple IKEA hack.

We added a huge wall of bookcases to our living room two years ago to hold our book collection (ok, my book collection.) I love all the storage they give, not to mention the huge statement they make in the room. But there was one thing I really didn’t love.
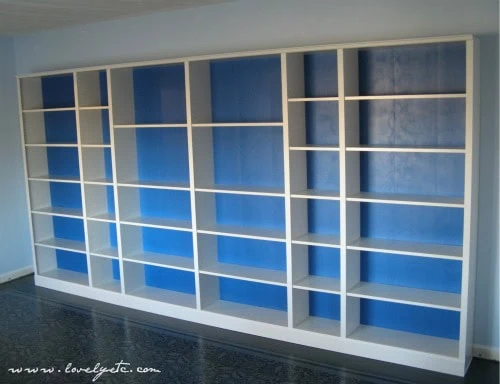
To make our huge wall o’ bookcases we used Billy bookcases from Ikea. Once we connected them together and added trim, they looked fabulous, nothing like furniture that comes in a cardboard box…except for one thing. That cardboard backing.
I painted the backs of the bookcases dark blue because I wanted to draw your eye to them. Unfortunately, it mainly seemed to draw your eye right to those cardboard seams.

This post contains affiliate links which means if you make a purchase after clicking a link I will earn a small commission but it won’t cost you a penny more. Click here to see my full disclosure policy.
How To Create Stenciled Bookcases
Replacing all of those bookshelf backings is certainly not in the budget right now, so I came up with a plan to disguise them instead. Royal Design Studio was nice enough to provide me a stencil to try out and I knew just the spot to use it.
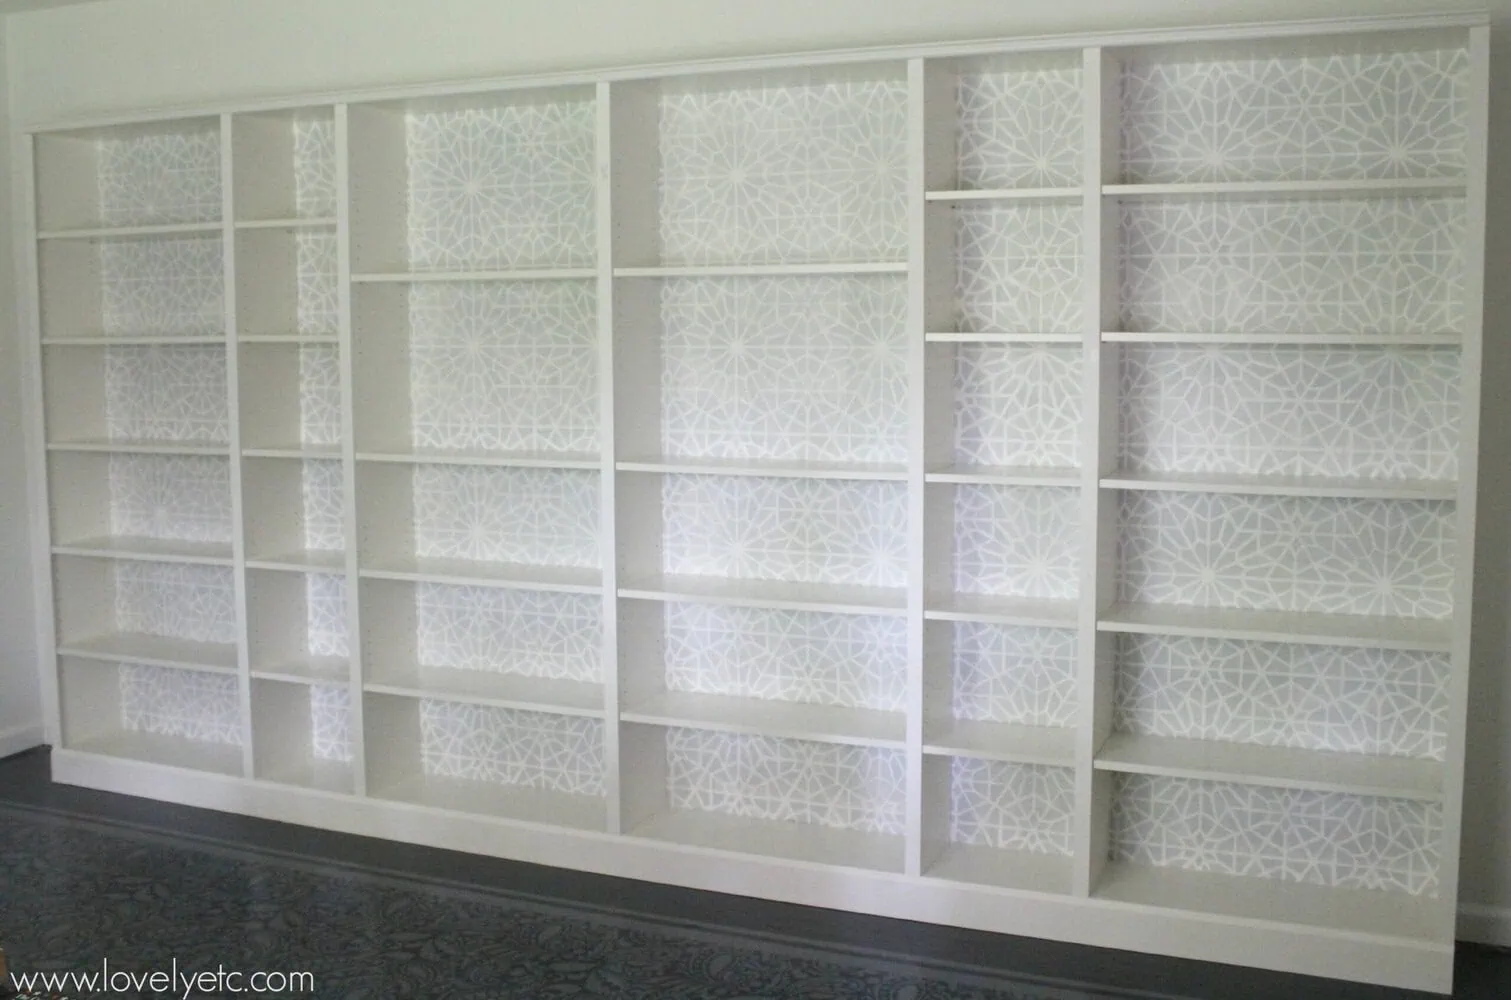
They have by far the best selection of stencil designs out there so I had a tough time, but in the end I went for the Starry Moroccan Night Stencil.
Before I could start painting, I had to take the hundreds of books and other stuff off the shelves. I knew I didn’t want to have to restyle all 28 shelves, so I made sure to take pictures beforehand so I could put things back where they were after painting.
I also removed all of the adjustable shelves before painting.

I painted the back of the bookshelves Valspar’s Dove White. This color is very similar to “Ikea white” and it is the color I had used previously to paint the trim. It took three coats to cover the blue fairly well.
Luckily, I knew it didn’t have to be perfect since the stencil would cover a lot of the white anyway.
The stencil I chose is a wall stencil which means it is nice and large so that you can cover more space at one time. Unfortunately, that large size which is awesome for walls makes it a little difficult to use inside a bookcase.
It is very flexible and bends easily but it is definitely easier to stencil using a completely flat stencil than a bent one. My stencil was around 36 inches long and my bookcase openings are 30 inches wide so I ended up cutting a few inches off each end of the stencil.
This made the stencil the perfect size to fit neatly inside each bookcase and made things move along super quickly.

I chose a light gray that I love by Valspar called Silver Leaf to use over the stencil. Whenever you stencil it is important to note which part of the pattern is actually being painted. With this stencil, the lines stay the first color you painted everything (white) and the ‘background’ is actually the top color (gray).
Because I had a pretty large area to stencil, I used a small foam roller. (These are sometimes labeled as door and trim rollers and they work great on smooth surfaces like furniture.) I just used a paper plate as my paint pan. (Because I was too lazy to pull out a real one).
Whenever you stencil, make sure not to put too much paint on your stencil or it can seep under your stencil. I like to lightly roll my roller onto a few paper towel each time I reload it with paint to get any excess off.
I have to admit, when I first started stenciling I was really unsure. The pattern was looking a little bit like a snowflake which I was definitely not going for. But I kept going and the more I added, the better it looked.
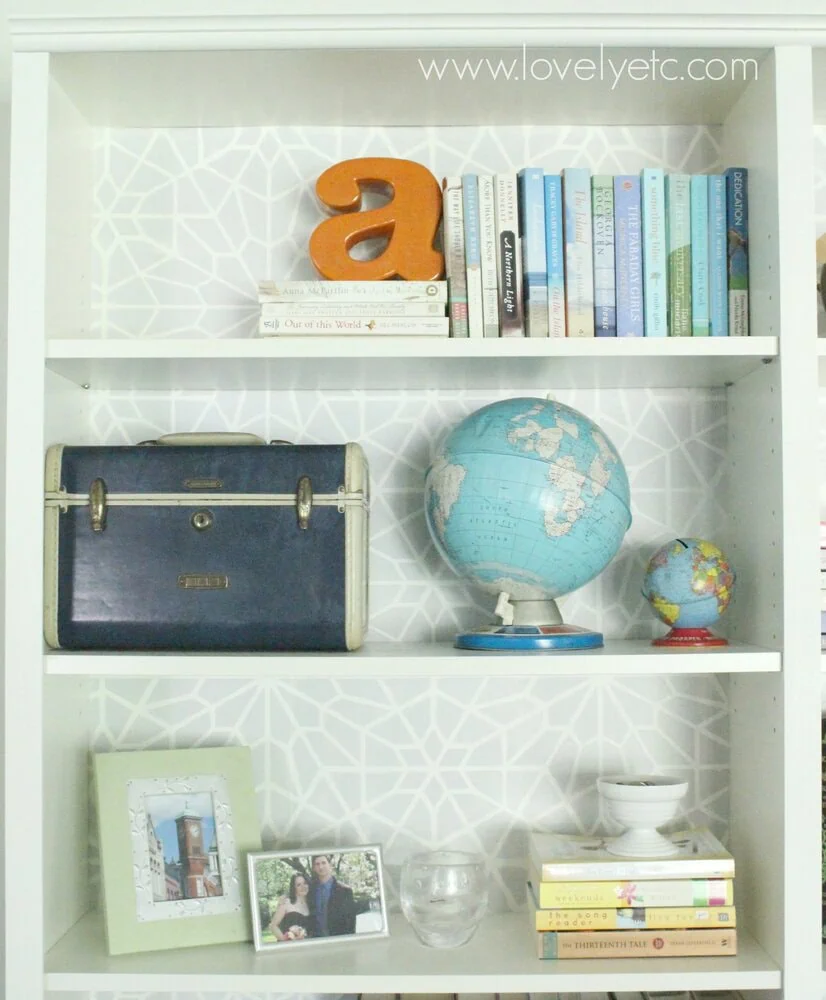
In the end, I am thrilled with how it turned out.

I love that it is so much lighter and brighter than the dark blue that was there before. And best of all, the cardboard seams completely disappear into the pattern. If you look closely, you can definitely still see them; but you would never notice them unless you were really trying to.

If any of you are ever painting your own bookcases, I have a great tip for you. Before you take anything off the shelves, take a few photos of them. I don’t know about you all, but I don’t have time to be re-styling my shelves all the time.
I pretty much liked how things were arranged so I wanted to make things easy on myself and just put everything back where it was.

Plus, extra bonus, my husband was actually able to help me load everything back on the shelves, because he could just refer to the pics. (Although, that didn’t work out quite as well as I wanted because five minutes in he got distracted looking at old photo albums instead of putting them back on the shelves).
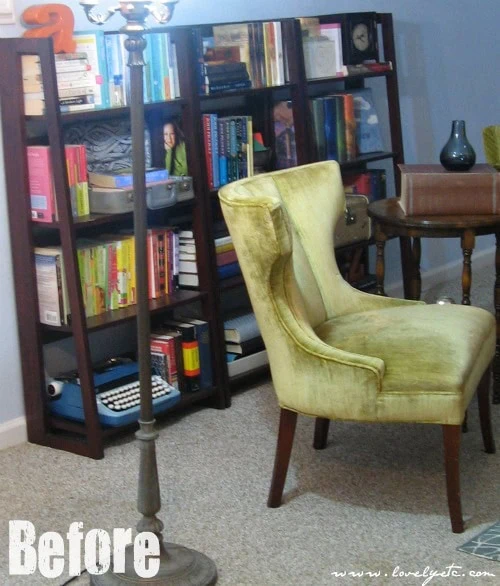
Check out this progress! From tiny folding bookcases to a light and bright wall of books.
Before: teeny, tiny bookcases
Progress: Wall o’ bookcases
After: light and bright with a bit of paint and stencil magic
Man, I love before and after pictures! They help me remember that I am actually getting somewhere. I may be moving at the pace of a turtle, but I am getting somewhere.

Since sharing this post, I have actually turned my wall of Billy bookcases into true built-ins and I love them more than ever. You can head to the post to see all the details of how to create built-ins from IKEA Billys.

How to stencil Bookcase Backs
Stenciling the back of a basic IKEA bookcase is an easy, inexpensive to disguise the cardboard backing and make it look more custom.
Materials
- Stencil of your choice
- Smal Foam Paint Roller
- Paint
- Painter's Tape
- Paper Towels
Instructions
- Remove all the items from the bookcases.
- Paint the back of the bookcase white.
- Attach the stencil to the back of the bookcase with painter's tape.
- Lightly roll paint onto your roller. Roll off any excess paint onto a few paper towels each time you reload it.
- Roll the paint roller lightly over the stencil.
- Gently pull off the stencil and move it to the next section.
- Repeat until the bookcase is completely stenciled.
Recommended Products
As an Amazon Associate and member of other affiliate programs, I earn from qualifying purchases.


love it! i love the softer colors and the pattern you chose is gorgeous!
Thanks Cassie! I’ve always admired bookcases with deep, bold colors on the backs but I finally realized they just weren’t right for this room. I’m so happy I went for something different.
Looks great! Thank you for the tips, what you used and where you got the stencils!
I do too, love before and after pictures!
Thanks!
Wow! They turned out amazing! The stencil is gorgeous and the colors are subtle enough not to steal the show from what you’ll showcase on the shelf. Way to go!
Thanks Kim! I was kind of worried about the pattern being too much with all of the stuff that goes on these, but I think you are right – the soft colors make it work out.
Wow! That’s an incredible after! So soft and the pattern is gorgeous!
Thanks! I was worried they would be too busy but I am in love with how they turned out!
Carrie – I love it!!! Pinning for sure. Now it I only had a wall of bookcases to stencil the backs of!
:) Linda
Thanks Linda! Maybe one day you too can have a wall o’ bookcases to stencil. ;)
So, so pretty Carrie! I love the subtle design!
Wow! This looks like a custom piece. When I saw the before I thought they looked cool with the blue, but the after blows it out of the water. So subtle and beautiful. Love it and love the stencils from Royal Design. Thanks for linking up at The Makers! We are so glad to have you back this week :)
Thanks Corey! I agree – it definitely doesn’t look like Ikea furniture anymore!
I love IKEA bookcase hacks, and yours was lovely. Since the last time that I looked at stencils they consisted of ducks and fruit, I need to get back out there! You did a great job and showed the beauty of elegant restraint.
Thanks Debbie! Stencils have definitely come a long way in the past few years!
That’s a beautiful stencil – I love the effect! :) I recently stenciled something for the first time too — it’s amazing what paint and pattern do for a surface.
Yvonne – you are right, stenciling can totally liven something up! Heading over to check out your stenciled floor now.
ooh, nice! love the way they turned out! We have a wall of Billy shelves, too….I keep thinking of doing something to the backs, but they’re so overflowing with books I don’t know if it would even show….
Thanks Gretchen – and bookcases covered with books are just how they should be!
These are gorgeous! Pinning!
Thanks Julie!
I love what you did to the bookcase, and I’m also loving that book page wreath/flower. Did you make that? If so, HOW?
Thanks Amy! I did make the book wreath a few years ago. Here is the post I wrote about it – https://www.lovelyetc.com/2011/10/saint-or-sinner/
How did you connect the shelves to make one unit? And they come in the different widths, I take it?
Yes, they come in two different widths. One is about half as wide as the other. To attach them all together, we lined them up and then used trim between each shelf and along the top and the bottom. You can find more details here – https://www.lovelyetc.com/2012/02/instant-library-ikea-billy-bookcases/
Hi!
I’m just about to buy a couple of IKEA bookcases and after hours trying to find how to embellish them I decided for your idea of using a stencil on the back.
I have a question nevertheless, did you sand the back of the bookcases before you primed them? I have heard it both ways but I would like to follow your instructions since this is the finish that I would like. Thanks in advance for your reply!
I did not sand them – just used primer and then paint and haven’t had any problems. Good luck with your bookcases!
Thanks for the prompt reply!