How to Paint Pretty Watercolor Pillows
Learn how to make easy beautiful painted pillows with this simple tutorial.
If you saw my master bedroom reveal from a few days ago, you may have noticed the gorgeous abstract pillows on the bed.
Making DIY abstract paintings is really popular right now so I decided I wanted to get in on it…but with a twist. Instead of painting a nice canvas to hang on the wall, I painted some pillow covers to pretty up our bed.

I’ve painted pillow covers a few times before (including these stenciled pillows and these ikat tie-dye pillows) plus I recently painted a huge world map on a duvet cover for my son’s room. So I knew painting pillows was entirely doable.
These painted watercolor pillow covers were much faster and easier to make than any of those other projects so they are perfect for beginners.
The great thing about these pillow covers is you can use any color combination you want. Plus it’s impossible to mess up this kind of abstract painting.
This post contains affiliate links which means if you make a purchase after clicking a link I will earn a small commission but it won’t cost you a penny more. Click here to see my full disclosure policy.
Materials
- white pillow cover – IKEA has great prices on plain pillow covers and this set from Amazon is also reasonably priced.
- acrylic craft paints – if you can’t make it to the store to choose your favorite colors, this set has a great selection of colors
- fabric medium
- paintbrush
- plastic cups – for mixing the paints
- cardboard or plastic drop cloth

How to Paint Pillow Covers
Prepare your pillow covers
Plain white throw pillow covers are perfect for this project. But if you happen to have a few spare white pillowcases for bed pillows, you can also make that work. Just cut the excess fabric off of the end of the pillowcase to form a square. You can sew the open end shut after you finish painting.
Put a piece of cardboard or plastic between the two layers of fabric to prevent the paint from bleeding through to the second side.
Also make sure to protect the surface where you will be painting with some sort of drop cloth.
Mix your fabric paint
You can make your own fabric paint by mixing regular acrylic craft paints with fabric medium and water. Check the instructions on your specific fabric medium for the correct ratios.
Adding the fabric medium will help make sure the fabric absorbs the paint evenly and stays soft rather than getting stiff and crunchy.
I chose four different paint colors and mixed them each with fabric medium and water in a plastic cup.
I found it helpful to experiment a bit on some scrap fabric before painting my pillow covers. I tried a few different concentrations of paint to see which gave me the best color. If you are going to do a practice run, just be sure to use a fabric that is similar to the fabric of your pillow covers since different types of fabric will take the paint differently.
My winning combination was three drops of paint, ten drops or fabric medium, and several tablespoons of water. Of course, you may find a different combination works better for you.
Painting your pillow covers
Use a paintbrush and paint patches of color onto your pillow cover.
Wherever two colors meet, overlap them a bit. This makes everything blend together and look really soft and layered.
You can continue to add layers of color until you are happy with how the painting looks. The great thing about this is there truly is no way to do this wrong. Just add colors here and there until you like it.
When the first side of the pillow cover is dry, flip it over and paint the other side.
DIY Watercolor Pillows
When your pillow cover is completely dry, add your pillow insert.
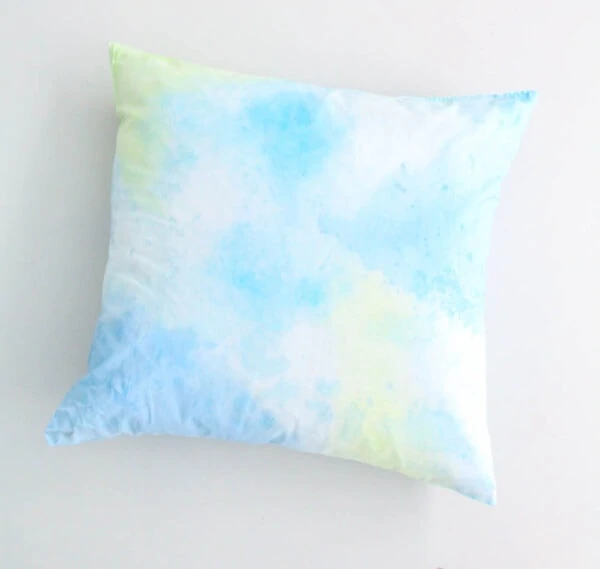
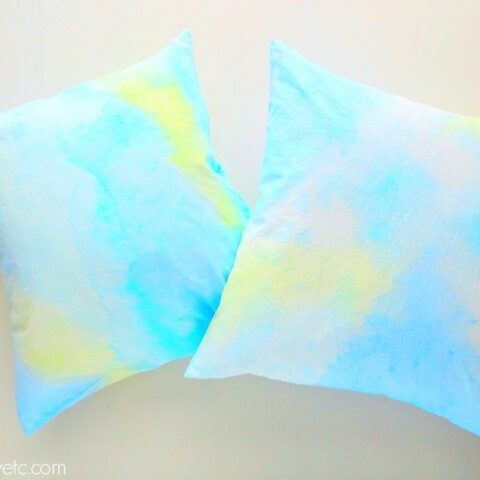
Now you have beautiful watercolor pillows!
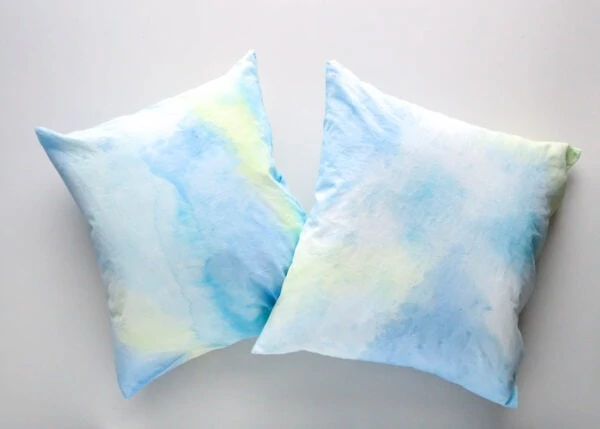
And here they are in our bedroom. I’m loving how the colors look in there although there is a really good chance these might just end up in one of the other rooms of our house. The best thing about cute throw pillows is how easy it is to move them from room to room!

DIY Abstract Watercolor Pillows
Make some gorgeous abstract watercolor pillows that will add a pop of color to your home.
Materials
- Craft paints
- Fabric paint medium
- Plastic Cups
- Cardboard
- White pillow covers
Tools
- Paint brush
Instructions
- Put some cardboard or plastic between the two layers of fabric while painting,
- Mix the craft paint with fabric medium and water according to the ratios specified on the fabric medium.
- Use a paintbrush and paint swaths of color onto your pillowcase until you are pleased with how it looks.
- Allow to dry. Flip and paint the other side.
- Fill the pillow with a pillow form.
Recommended Products
As an Amazon Associate and member of other affiliate programs, I earn from qualifying purchases.


More fabric DIYs I think you’ll like:
