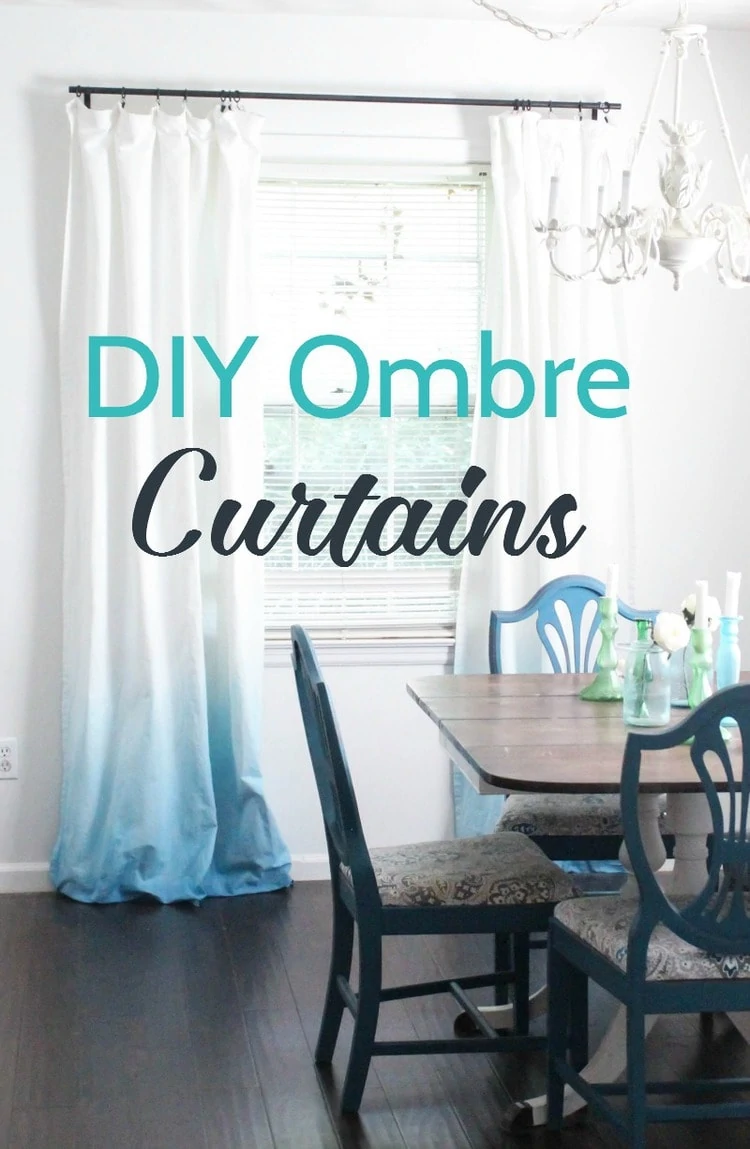
How to Make Beautiful DIY Ombre Curtains
Easy step by step tutorial for making DIY ombre curtains. This is an inexpensive way to add major style to a pair of plain white curtains.
Our dining room has been this close to being complete for awhile now. The only problem: the white wall and white curtain combo was seriously lacking in color.
It seemed like the perfect opportunity to try a project I’ve been wanting to do for months: DIY blue ombre curtains.
I could have just replaced the boring curtains, but I knew I could make them work. Call me old-fashioned, but I just have this need to work with what I’ve got instead of just buying something new. (Plus, I really wanted to try this project.)
Most people that dye their own ombre fabric use a dip-dye method. Basically that means you dip the bottom of the curtains in a bucket of dye and slowly lift it out over several hours so that the top is lighter than the bottom. But that method seemed messy and way too unpredictable for me, so I came up with an easier method.
This post contains affiliate links which means if you make a purchase after clicking a link I will earn a small commission but it won’t cost you a penny more. Click here to see my full disclosure policy.
Materials
- White cotton curtain panels – I used Lenda curtains from IKEA. Be forewarned though: they do shrink when you wash them so be sure to get the extra long ones. If you don’t have an IKEA nearby, there are also lots of options on Amazon. Just make sure whatever curtains you are using are cotton.
- Tulip One Step Tie Dye in your chosen color (I used blue, turquoise, and teal)
- Stiff paintbrush
- plastic drop cloth
- trash bags
How to make ombre curtains
Prepare your work area
Even though you aren’t dealing with buckets of dye, this is still very messy. Be sure to protect whatever surface you are working on very well using plastic drop cloth. A few layers of trash bags can also work.
Dye has one job and it is very good at it. Whatever it touches will change color! That includes your skin, so be sure to wear the gloves that are included with the dye kit.

Prepare your dye
These one-step tie-dye kits come in quite a few great colors, but they didn’t have exactly what I was looking for so I mixed my own color.
I used a combination of blue, turquoise, and teal dye to make my own color. I followed the directions to mix each dye with water and then mixed them together to create my custom color in an empty squirt bottle.
I made sure to keep track of the exact mixture so I would be able to mix more if needed. The recipe for the color I used is 30 teaspoons of blue, 20 teaspoons of aqua, and 15 teaspoons of teal. It made a great dark turquoise. Of course any one of these shades would also look great on their own.
Prepare your curtains
It’s a good idea to wash your curtains before beginning the dye process. This will make sure any shrinking gets out of the way and give you nice, clean fabric to work with.
With your work area well-protected, spread out the bottom of your curtain panel. Make sure that you have a cup of clean water and your paintbrush nearby. I wasn’t able to take many pictures of the actual process because you need to work quickly, but I will do my best to explain my process clearly.
Begin adding dye
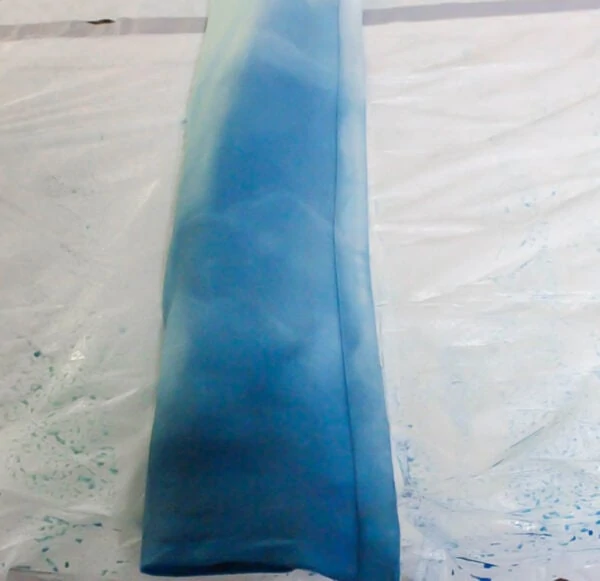
I started by brushing plain water onto the bottom few inches of the curtain panel because the fabric needs to be wet to accept the dye well.
Then I squirted a line of dye along the bottom. I quickly used the brush to spread the dye all along the bottom edge.
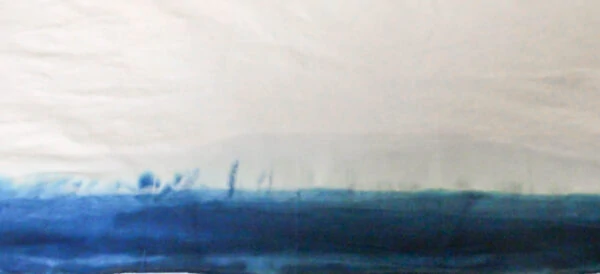
I added a few more lines of dye until the bottom six inches were covered. Then without adding more dye, I wet the paintbrush with water and dragged the dye up the curtain. Add more water to your paintbrush after every few brush strokes.
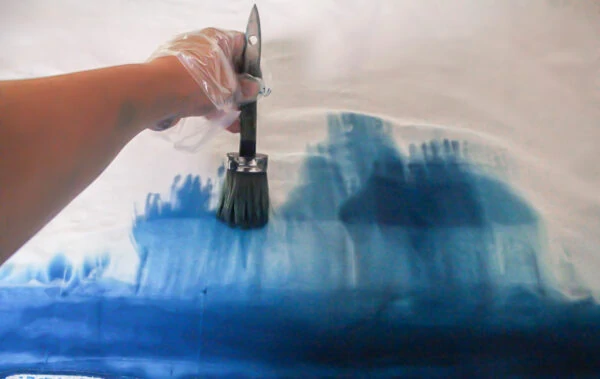
As you continue to brush upward and keep adding water to your brush, the color will get lighter and lighter. It is important to complete this process as quickly as possible and not let the dye dry before you finish or your finished product will look patchy.
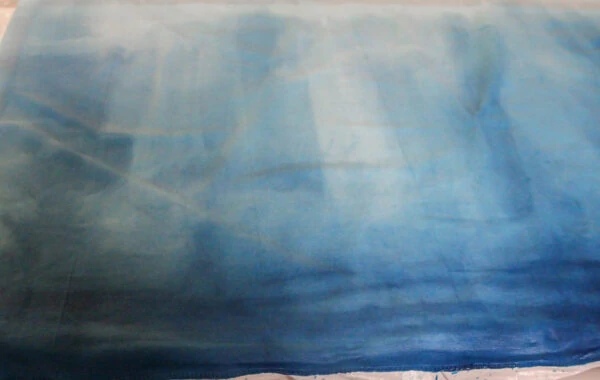
Keep in mind that the final color will look quite a bit lighter once the dye has been rinsed and the curtain dyed. So at this point, you want your dye to look darker than your desired result.
I experimented a bit with how much to wet the curtains as I went as well. I found that wetting the bottom few inches of the curtains at the beginning was all that was needed. Just wetting the paintbrush after that point gave the nicest looking results.
Cover the dye
Once everything is dyed and looking good, you are supposed to cover the dye with plastic for 6-8 hours. This is no big deal when you are dyeing a t-shirt, but when you are working on huge curtain panels, it is a little more difficult.
I rolled each curtain up like a burrito, making sure not to let the dyed area drip onto the white part of the curtain. Then I stuck the dyed end into a trash bag and left it overnight.
Rinse the curtains
In the morning, I carefully removed the trash bag and rinsed the excess dye off. Again, be careful that no dye splashes onto the white part of your curtains.
The final step is to let your curtains air dry and then they are ready to hang.
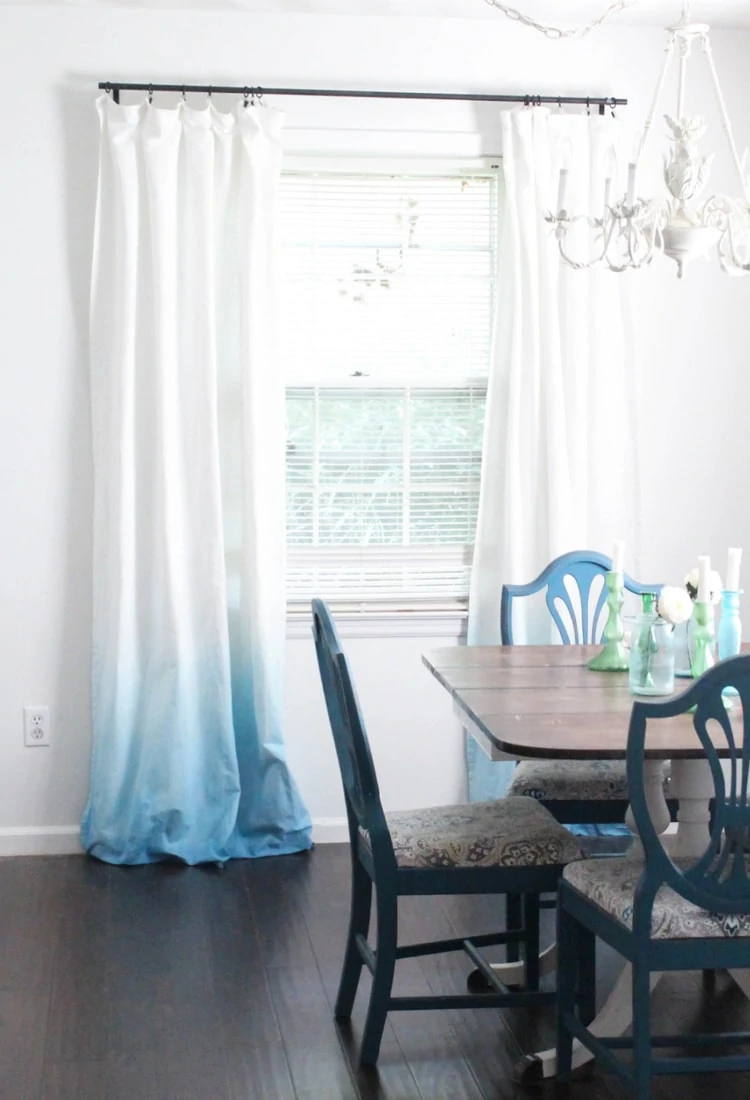
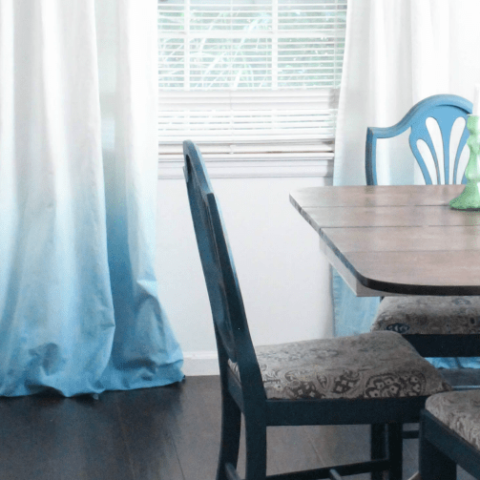
I’m loving how light and airy they are without being boring. I’m not sure whether they will stay in this room, but I’m definitely glad I finally tacked this project. (And let’s be real, this color will clearly work in any room in our house!)
Funny story – when I asked my husband what he thought about them, he said, “They’re nice. Are you going to finish dyeing the top part?” Haha, um no, that’s the whole point.
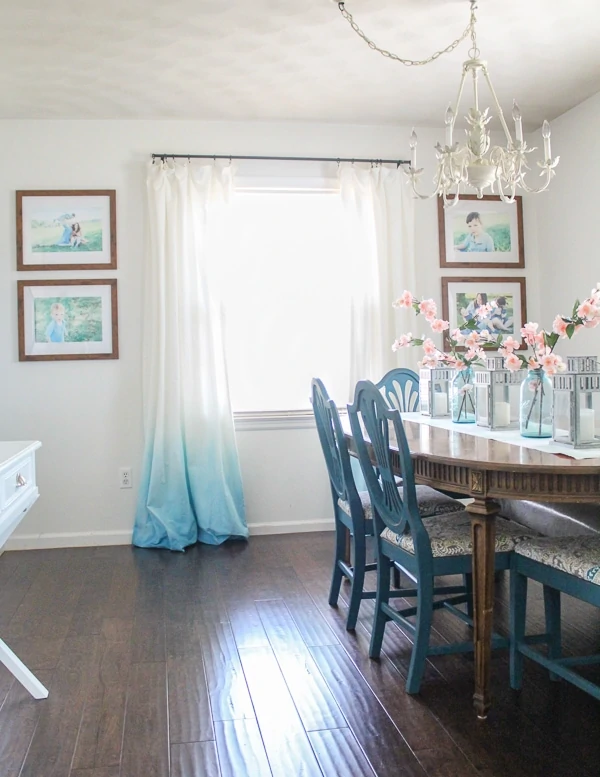
Update – it’s been a few years since I made these ombre curtains and they are still going strong! As you can see in this updated photo, some other things in the room have changed, but these curtains look just as good as they did on day one!
DIY Blue Ombre Curtains
Create beautiful DIY blue ombre curtains using a pair of simple white curtains and a tie dye kit.
Materials
- White cotton curtain panels
- Tie Dye Kit
- Trash Bags
- Paintbrush
Instructions
- Follow the directions to mix each dye with water in the included squirt bottle.
- Protect your work area and spread out the bottom of your curtain panel.
- Start by brushing water on the bottom few inches of the curtain panel.
- Squirt a line of dye along the bottom.
- Use the brush to spread the dye along the bottom edge.
- Add a few more lines of dye until the bottom six inches is covered.
- Wet a paintbrush with water and drag the dye up the curtain.
- Continue to brush upward and keep adding water to your brush.
- Roll the curtains up and place the end in the trash bags overnight.
- Remove the trash bag and rinse the excess dye off.
- Let your curtains air dry and then hang.
Recommended Products
As an Amazon Associate and member of other affiliate programs, I earn from qualifying purchases.

Want even more great DIY curtain ideas? I’ve put together a collection of my favorite 25 DIY curtain ideas and it’s filled with ideas for making your own gorgeous curtains from any fabric, updating old curtains you already own, and even making fabulous no-sew curtains.

These are amazing!! Love the ombre effect and it works fantastically with your dining room as well as the living room. It totally brings the blue from the living room into the dining room.
Thanks Stephanie! I am loving them!
I love how your blue curtains turned out, and I love how you created the ombre effect. Honestly, I’ve tried to use the “slowly pull it out of the bucket” method, and I don’t like the way it turned out as much as yours with the paintbrush. Thanks for the tip!
Thanks Jenny! I really love how they turned out!
Love these! And blue dyed curtains would work in just about any room in my house too ;)
I’m pretty sure that just means we have a ‘whole house color palette’ ;)
Hello Carrie, I absolutely love the Ombre look! Any idea how I’d go about making it go farther up the curtain?
Thank you for all your wonderful ideas!
Penny,
Thanks! To make it go further up, I would start by squirting the dye in several rows along the bottom before brushing it up. Then you can just brush it up as far as it will go. You can always add more dye as needed!
Thank you soo much! I found this post soo helpful. I find myself in the same predicament to upcycle my existing drapes rather than get new ones. And figured it will be a lot more fun to do it this way! I want to do a black ombre on the already off – white drapes. Was really just gonna dip and slowly pull out untill I saw ur post. Thanks for the tips. Wish me luck!
Good luck! I hope you love the results!