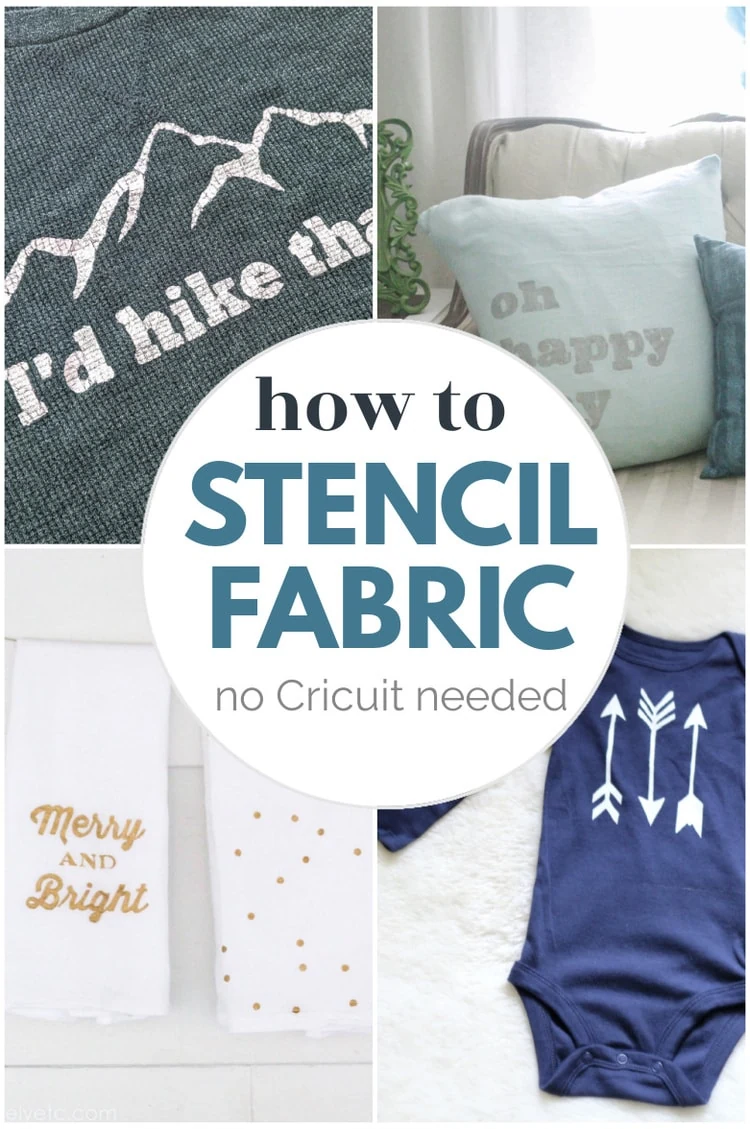
How to Stencil on Fabric: The Magic of Freezer Paper Stencils
I’m sharing how to stencil on fabric with perfect, crisp stencil lines plus how to make your own freezer paper stencils.
If you’ve never stenciled fabric with a freezer paper stencil before, prepare to be amazed. It is seriously like magic.
I don’t totally understand how or why it works, but what I do know is that it works amazingly well. This is by far the best way to stencil fabric and get perfectly crisp stencil lines.
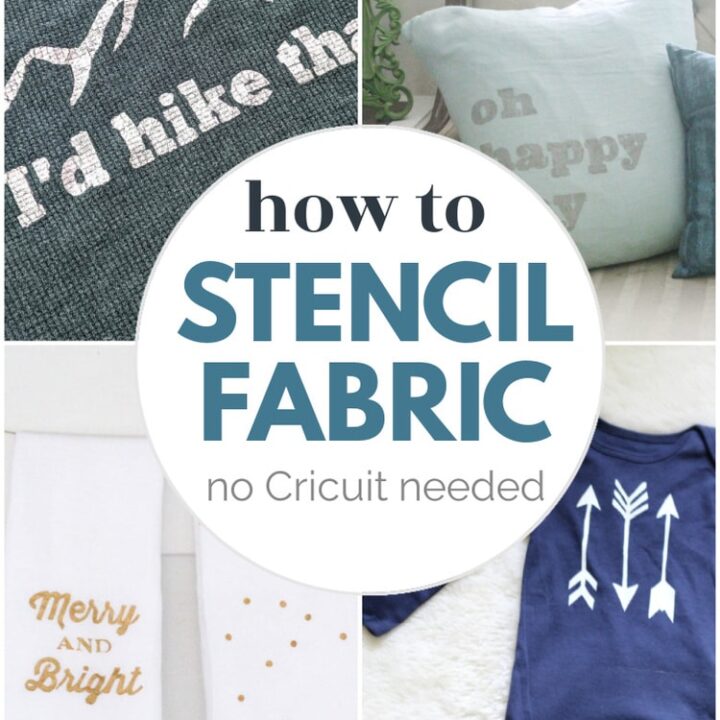
I’ve used freezer paper stencils to stencil all kinds of fantastic fabric crafts including pillow covers, shirts, and even sweet baby onesies.
This post contains affiliate links which means if you make a purchase after clicking a link I will earn a small commission but it won’t cost you a penny more. Click here to see my full disclosure policy.
What is a Freezer Paper Stencil?
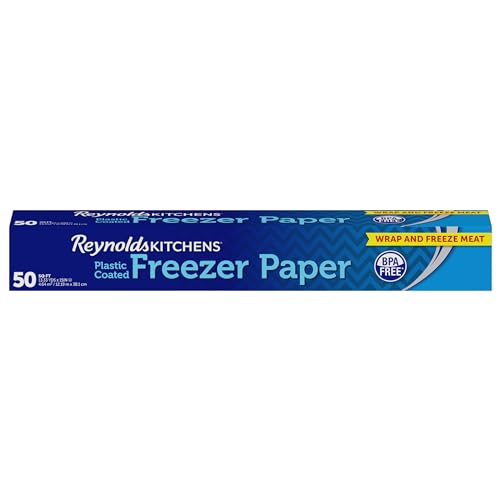
Not sure what a freezer paper stencil even is? It may sound fancy, but it’s actually about as simple as it can get. A freezer paper stencil is simply a stencil you cut out of freezer paper. That’s right – the same freezer paper that you can find next to the aluminum foil and plastic bags at the grocery store.
That’s part of the charm of these stencils. Not only do they work better than any other type of stencil on fabric, they are also incredibly inexpensive. You can buy enough freezer paper for dozens of stencils for just a few dollars.
Can freezer paper stencils be reused?
Of course there is a downside. Freezer paper stencils can really only be used one time, maybe two. So while they are great for one-off DIY projects, they aren’t the best if you are trying to reuse the same stencil over and over.
Do you need a Cricuit to make freezer paper stencils?
While you can use a Cricuit or other cutting machine to create freezer paper stencils, you absolutely do not need one. I have made many freezer paper stencils without using a Cricuit. All you really need are a few simple craft supplies.
In fact, if you don’t have a Cricuit, a freezer paper stencil is one of the best ways to create one of a kind shirts and decor.
Can you stencil fabric with other types of stencils?
Freezer paper stencils are great, but what if you already have a different stencil that you want to use to stencil fabric?
You can stencil fabric using a reusable plastic type stencil, but it is much more difficult. I have experimented with this a few times but found it very difficult to get clean stencil lines. Instead, I usually ended up with a blotchy mess.
What is great about freezer paper stencil is they seal to the fabric you are painting, creating a barrier that helps keep the paint from running where you don’t want it to be.
With a reusable stencil, there is no seal and the paint tends to run and spread into the surrounding fabric. This can happen on any surface you are stenciling, but is particularly a problem when stenciling fabric because of the way fabric absorbs liquids like paint.
The best way to solve this issue is to use repositionable spray adhesive to adhere your stencil to your fabric before painting. This creates a seal similar to a freezer paper stencil. (This is also my recommendation when stenciling on wood to help get really clean stencil lines.)
Just be sure to do a test on a scrap of your fabric (or a similar one) first to make sure your paint doesn’t run too much and your adhesive doesn’t leave behind residue on your fabric.
Or another option is to use your reusable stencil as a pattern, tracing it onto freezer paper to create a freezer paper stencil.
How to Make and Use Freezer Paper Stencils
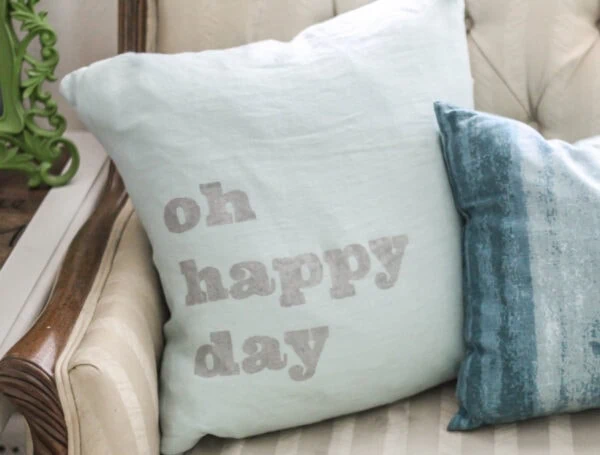
I’m sharing photos in this post from two different freezer paper stencil projects – a stenciled pillow and a stenciled shirt. This same process will work to stencil almost any fabric, but the smoother and tighter the fabric weave, the easier it will be to stencil.
Materials
- A pillow cover, shirt, hat, tote bag, or other fabric item to stencil
- Freezer paper – I’ve linked to where you can buy this at Amazon but you can also find it at your local grocery store
- Printer or pencil – you can either print your stencil design or simply draw it with a pencil
- Craft knife – for cutting out your stencil design
- Cutting mat – this is a must when using a craft knife to protect your work surface
- Clothing iron – for attaching the stencil to the fabric
- Fabric paint or craft paint plus fabric medium – for painting your design
- Paintbrush or makeup wedge – for applying the paint. It may sound strange but a makeup wedge sponge actually works really well for stenciling
How to Make a Freezer Paper Stencil
There are a couple of different ways to make a freezer paper stencil.
If you have a Cricuit cutting machine, you can use your Cricuit to cut your design for your stencil. I don’t personally have a Cricuit so I haven’t done it this way, but this tutorial walks you through the whole process.
But if you don’t have a Cricuit, don’t worry, this post will show you exactly how to make a great stencil using a craft knife.
Choose your stencil design
The first step is to choose the design you want for your stencil. This can really be anything you want it to be – text, a pattern, an image.
When you are choosing a design for your stencil, it’s best to choose something that isn’t overly detailed. Something with lots of clean lines will be easier to make into a stencil and also easier to use as a stencil. Very small details are often lost in the stenciling process.
Canva is a great place to start if you need a bit of help figuring out your design. Canva is free online design software that has lots of fonts as well as images you can use to create the perfect design.
Print or Trace your design onto the freezer paper
Once you’ve chosen a stencil design, you need to transfer it onto your freezer paper.
One of the easiest ways to do this is to simply print your design right onto the freezer paper.
First, cut a piece of freezer paper the same size as a standard piece of printer paper. The freezer paper is too slick and too floppy to go through the printer on it’s own. To make it work, tape your freezer paper to a piece of cardstock with the slick side facing the cardstock. Then you can load it into your printer one sheet at a time.
You can also draw or trace your design directly onto the freezer paper.
Or if none of those methods is working for you, you can use a simple pencil transfer to transfer your design to the freezer paper. (Just be sure to transfer it onto the less slick side.)
Cut out your design
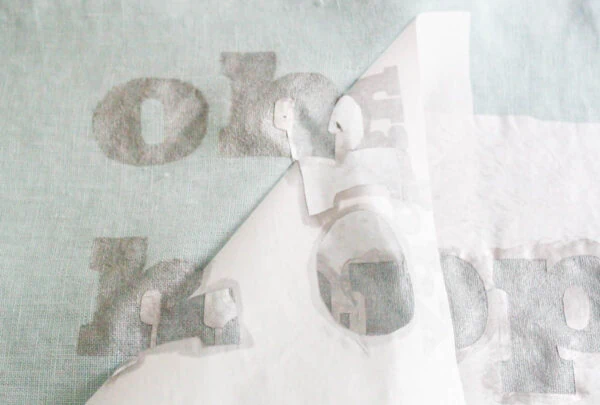
Place your freezer paper on top of your cutting mat. (Don’t forget the cutting mat or you may end up with your stencil carved right into your work surface!)
Trace around the lines of your design very carefully and slowly with your craft knife.
If you are cutting out letters, be sure to save the small circles that go in the centers of letters like o. When making a regular reusable stencil, you have to be sure to keep these small parts connected to the rest of the stencil. When making a freezer paper stencil, you don’t have to keep these connected, but do make sure not to lose them because you will need them.
How to Use a Freezer Paper Stencil
Now that your stencil is all ready, it’s time to actually use it.
Prepare your fabric
Before stenciling, it’s important to make sure your fabric is clean and dry. It also doesn’t hurt to iron whatever you will be stenciling if it is wrinkly, especially since you will already have the iron out.
Attach the stencil to the fabric
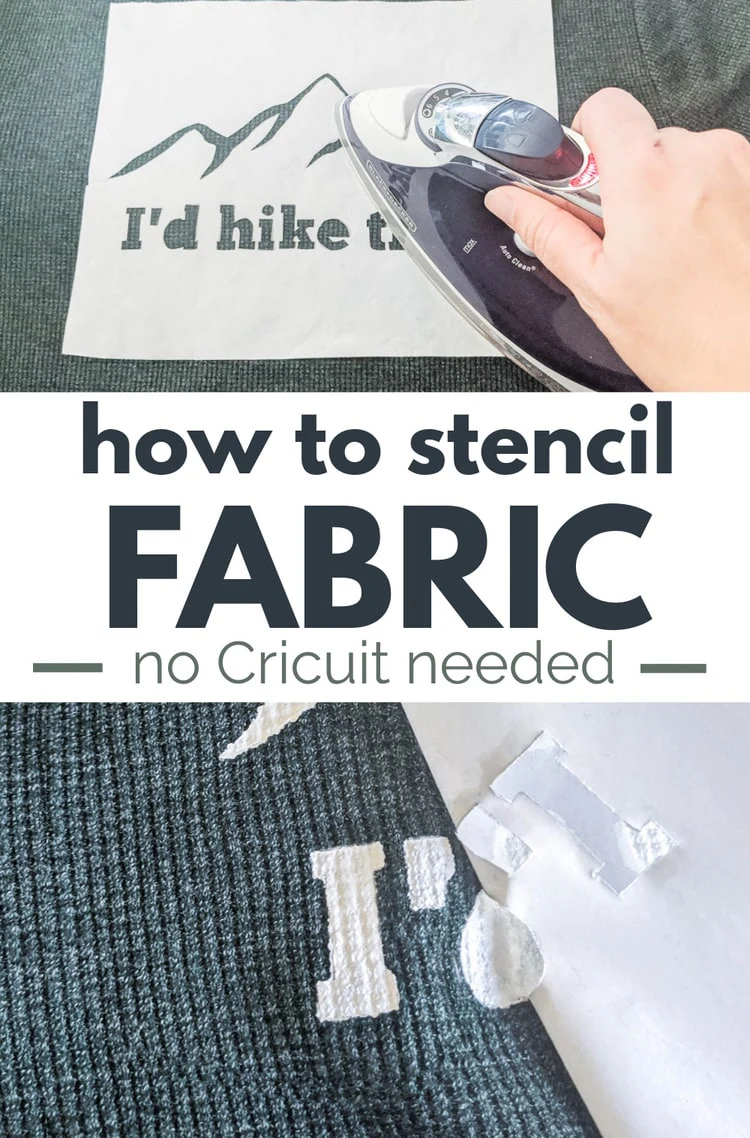
This is when the magic of freezer paper comes in.
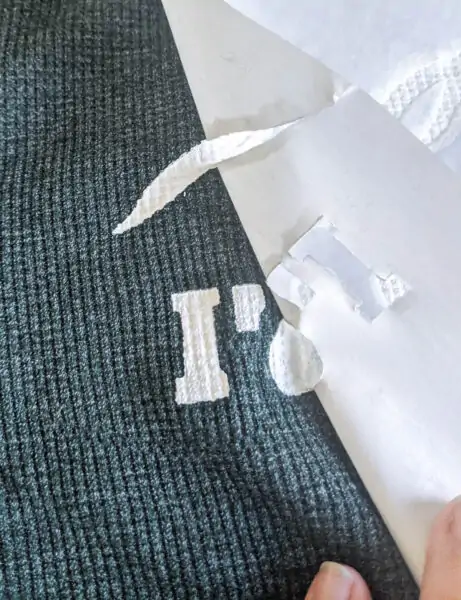
Lay your fabric onto your ironing board and place your stencil exactly where you want it with the slick, shiny side facing the fabric. Be sure that it is straight and centered.
Turn your iron on low and carefully iron the freezer paper stencil onto the fabric. The heat of the iron fuses the stencil to your fabric. (But don’t worry, once you are finished, it easily peels right off without leaving any residue.)
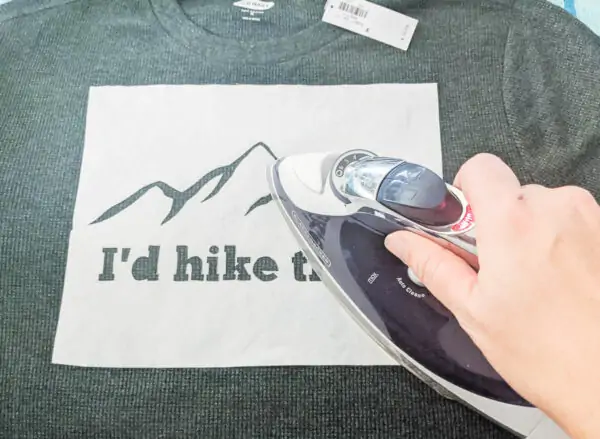
You only need to hold the iron on each section for a few seconds. If your stencil involves letters or shapes with inner parts, put those in place and iron them on as well.

You can gently tug on the edges of your stencil. If any sections aren’t firmly attached, just run the iron over them for a few more seconds.
Ironing the stencil seals it to the fabric so that no paint seeps under the edges when you paint it.
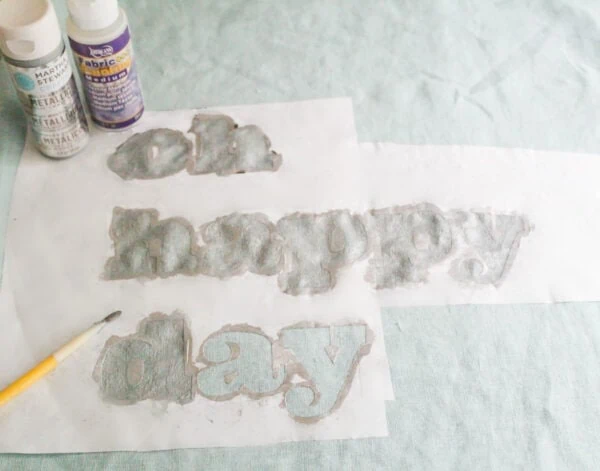
Paint your stencil
You can use either fabric paint or craft paint mixed with fabric medium to paint your stencil. Adding fabric medium to craft paint just helps keep it from drying too stiff and flaking off your fabric. The fabric medium will have specific instructions for the ratio of paint to fabric medium to use for best results.
I have a whole post with tons more info on painting fabric for all types of projects, if you want more details.
If you are painting a shirt or something else with multiple layers of fabric, be sure to slip a piece of cardboard or another piece of freezer paper beneath the area where you will be painting. This will help keep the paint from bleeding through to the other fabric layers.
Now you can start applying your paint. A regular paintbrush works fine for this, but my favorite thing to use for stenciling is a makeup wedge sponge. You can buy a whole bag for super cheap and they make the perfect applicator for stenciling smoothly.
Just dab some paint onto the sponge and then gently press it on to the fabric, using an up and down motion.
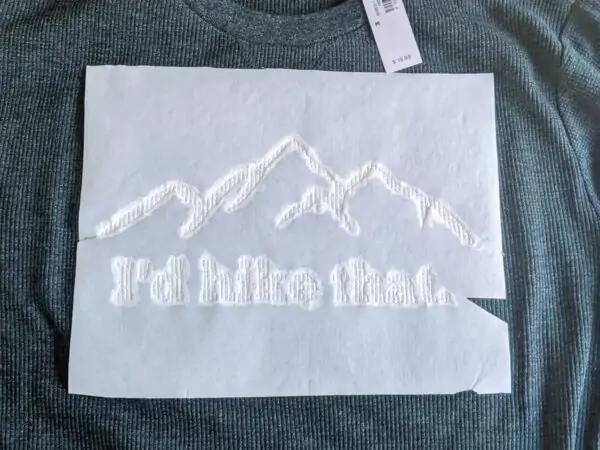
Remove the stencil
The final step is pulling off the stencil to reveal your finished design. The freezer paper pulls off cleanly with very little effort and leaves behind no residue. It really is crazy how well it works.
I was especially impressed that I was able to get such clean stencil lines on a very textured waffle knit shirt!
Here are a few other projects I have used freezer paper stencils on:
Adorable Stenciled Onesies Tutorial
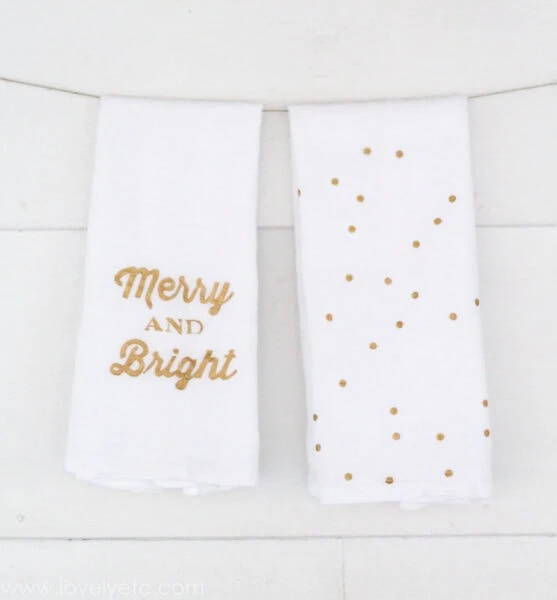
I don’t have a full tutorial for this project, but the Merry and Bright towel was made using exactly the same process I described above. The polka dot tea towel was also made using a stencil. I used a hole punch to punch holes in the freezer paper and then ironed it on and used gold paint to stencil the polka dots.
How does stenciled fabric hold up?
Wondering how a painted shirt really holds up over time? Well, it’s been more than two years since I originally stenciled this shirt and my husband wears it regularly, probably around once a week. Here’s a photo of how it looks now, more than two years later.

The design is still crisp, but there is some minor cracking in the painted areas. It’s not perfect, but it looks just as good as the graphic Ts we buy in stores after a few years of regular use. So I would definitely call it a win!
More DIY and craft projects I think you’ll like:
- How to Stencil Anything: 3 Secrets to Perfect Results Every Time
- 5 Gorgeous Paint Finishes to Transform your DIYs and Crafts
- How to Make Easy DIY Wood Signs
I’d love for you to pin this post on Pinterest!

How to Stencil on Fabric
Materials
- Pillow cover, shirt, hat, tote bag, or other fabric item to stencil
- Freezer paper
- Printer or pencil
- Craft knife
- Cutting mat
- Clothing iron
- Fabric paint or craft paint plus fabric medium
- Paintbrush or makeup wedge
Instructions
- Choose your stencil design.
- Print or trace your design on freezer paper.
- Cut out your design.
- Prepare your fabric.
- Attach your stencil to the fabric.
- Paint your stencil.
- Remove the stencil.
Recommended Products
As an Amazon Associate and member of other affiliate programs, I earn from qualifying purchases.
-
 Plaid Stencil Brush Set, (8-Piece), 0289956
 -
BLACK+DECKER Classic Steam Iron, F67E,White/Black,10.5" x 16.3" x 6.6"
-
1 Pieces Craft Knife Hobby Knife with 11 Pieces Stainless Steel Blades Kit for Cutting Carving Scrapbooking Art Creation (purple)
-
Reynolds Reynolds Kitchens Freezer Paper - 50 Square Foot Roll, White
-
Aleene's Repositionable Tacky Spray, 10-Ounce


Love it when things go haywire! Lovely idea and nice to see the hiccups.
Thanks Nicki! I definitely have lots of hiccups with my projects – this just happened to be a pretty major one. I just had to laugh when I stuffed my pillow insert in and the whole side busted open.
love this! that’s one of my favorite sayings!
Thanks Cassie! It’s got me wanting to sing all day!
Love this! It’s adorable.
I am just seeing this in 2024 for the first time. Thank you very much for this tutorial! You made it look easy and doable. I am going to try this!
I’m so glad it helped!
Do you let the paint dry completely before removing the freezer paper?
Great question. I do usually let the paint dry before removing the freezer paper. With most stencils, I remove the stencil before the final coat of paint dries to prevent the stencil getting sealed to the surface by the paint. But with fabric, I’ve found removing the stencil before the paint dries can get really messy and cause problems. So far I haven’t had any issues with the paint peeling since it adheres so well to fabric.