Everything you need to know to create your own modern diy wood accent wall on the cheap including the best wood to use, tips for choosing the right geometric design, and a full video tutorial.
When I decided to turn my son’s old nursery into my home office/craft room, I knew the old Dream Big mural I painted had to go. I absolutely loved that mural for the nursery, but it really wasn’t a great fit for my office.
I didn’t want to replace that great mural with a boring white box of a room, so I decided to create a more grown up wood accent wall in its place.
I already have a weathered wood plank wall in our entry and a herringbone wood wall in our master bathroom, but ever since I shared this roundup of amazing wood accent walls, I’ve been itching to add another one somewhere in our house.
It took some time to figure out exactly what kind of wood wall I wanted to do in here; there are just so many possibilities! But in the end I landed on a geometric wood accent wall that I absolutely love.
This wall is a bit of a mashup between classic shiplap and a more modern geometric wood wall. I think it strikes the perfect balance of adding interest and texture while still be neutral enough to go with any style or color scheme.
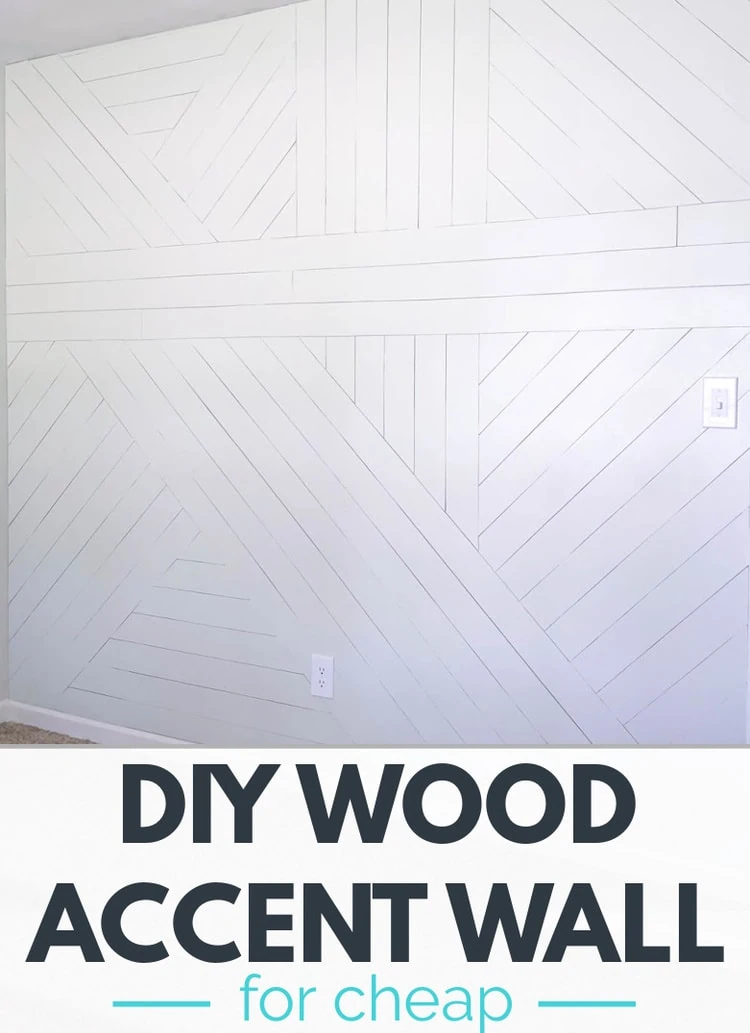
I have to be honest with you. While this project was very affordable at less than $100, it was not a quick and easy DIY.
I didn’t keep track of exactly how long this project took, but it was definitely time-consuming. If I had to guess a number, I would say this wall took more than ten hours of work.
But in the end, the results were totally worth it.
I’m sharing the complete step-by-step tutorial for this wood wall including the cheapest wood to use and how to cut perfect angles, and you’ll also find a video tutorial at the bottom of this post for those who are more visual learners.
This post contains affiliate links which means if you make a purchase after clicking a link I will earn a small commission but it won’t cost you a penny more. Click here to see my full disclosure policy.
Materials
- Wood for your wall – There is more information below about the different types of wood you can use for a wall like this. I use sheets of this inexpensive plywood and cut them into planks at home.
- 220 grit sandpaper – for sanding the rough edges and the spackling
- Spackling – for filling in all those tiny nail holes
- Paint in the color of your choice
- Small foam paint roller and paint tray – small foam rollers are perfect any time you are painting a large flat, smooth surface like wood planks
- Angle paintbrush – for cutting in around the edges of the wall
- Electrical Spacers – to help adjust your outlets and light switches to be flush with your new wood wall
- Revive outlet covers and light switch cover – You don’t have to have these to create an awesome wood wall, but I used them to cover my old dingy beige outlets and light switch and they’re awesome.
Tools
- Speed Square – this makes it so much easier to get everything lined up and cut to the correct angles
- Tape measure – for measuring all those wood cuts
- Table saw or circular saw – For ripping your sheet of plywood down into planks. If you are using a circular saw, make sure you use a rip guide to get nice straight cuts.
- Miter saw – For cutting your planks to the correct length and making angled cuts
- Jigsaw – For cutting your planks to fit around outlets and light switches
- Nail gun – this is the nail gun I have and love. It is easy to use and doesn’t require an air compressor.
How to Make a DIY Wood Accent Wall
Choose your design
What really makes this wood accent wall unique is the geometric design. When it comes to choosing a design, there are so many different ways to combine lines and angles to create a beautiful wall.
Knowing how you want your finished wall to look before you start is going to make this whole project so much easier.
I started by doing a quick search for some inspiration. You can find dozens and dozens of different geometric wood wall designs on Pinterest and Google. In fact I found so many awesome walls, I had a hard time narrowing down how I wanted my own wall to look.
Create a Mockup
Once I had decided the general look I wanted for my wall (which was heavily inspired by this awesome wood wall), I decided to go a step further to make sure my design would fit my specific wall well.
I created a scaled drawing of my wall design. This step is totally optional and it does involve a bit of math, but if you are a details person, this will give you a really clear idea of exactly how your wall will work. It’s a bit like creating a roadmap to use as you install your wall.
I measured the width and height of my wall (104″ x 93″) and then used canva to create a blank canvas with the same proportions. If you have Canva Pro, this is super easy. You can just open a blank canvas and then resize it to 104 x 93 or whatever your measurements are.
Then I added long rectangles to my design to represent the wood strips and just played around with it until I like how it looked.
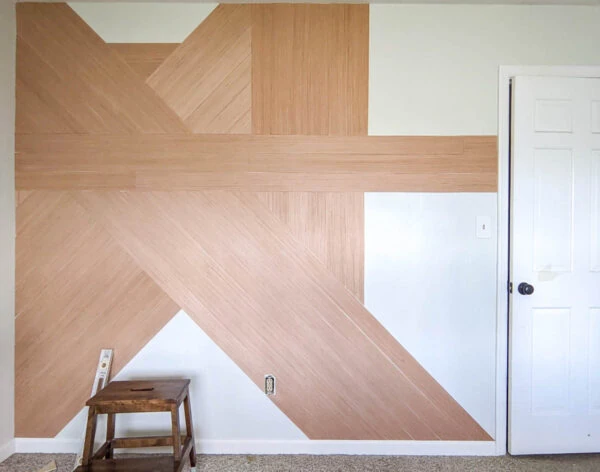
This is the final design I came up with:

If you’re more of a figure it out as you go person, that’s fine too. This type of random geometric wall can also be done on the fly, but it might be a bit trickier to figure out what should go where.
Choose your wood
The other big decision to be made is what type of wood you want to use.
There are several types of wood that can be used for wood plank walls – reclaimed wood, shiplap, MDF, plywood, or wood trim.
For this accent wall, I wanted something that was lightweight and inexpensive. I chose to use a super cheap 1/4″ plywood called Revolution Ply. This is a very inexpensive, lightweight wood that is often used as floor underlayment.
This plywood doesn’t have a pretty wood grain like more expensive plywoods, so it probably isn’t the best choice if you aren’t planning to paint your wood wall. In that case you may want to go with a nicer 1/4″ birch plywood.
Figuring out how much wood you need
Most plywood comes in 4’x8′ sheets so you will probably only need a few sheets to cover your entire wall.
To figure out exactly how many sheets of plywood you need to buy, first figure out the area of your wall by multiplying the height of the wall in inches by the width of the wall in inches.
One 4’x8′ sheet of plywood is 4608 square inches.
Divide the area of your wall by 4608 – this will tell you how many sheets of plywood to buy.
Just remember it’s always a good idea to buy a bit of extra wood for any project, especially when it has lots of crazy angles like this one.
So if your answer was something like 2.4, you will need three sheets of plywood and will have a bit of wiggle room. But if your answer was 2.9, you may end up needing four sheets of plywood to get all of the cuts you need for your wall.
Cut your wood into planks
If you are using a wood that is already cut into planks, you can skip this step.
But if you are using plywood, you will need to cut it into strips before you can really get started. I cut my wood into four inch planks and that size worked really well. Depending on the look you want, you could cut your planks a bit wider or a bit narrower.
You can use a table saw or circular saw to cut your plywood into planks.
If your design involves very long strips of wood, it is much easier to cut them with a circular saw. Maneuvering huge pieces of plywood on a table saw is really difficult.
For ripping long planks like this with a circular saw, I highly recommend using a rip guide to make sure your cuts are straight.
If your design is mainly shorter planks of wood, I find it easiest to use my circular saw to cut my plywood in half and then run each half through the table saw to cut the actual planks.
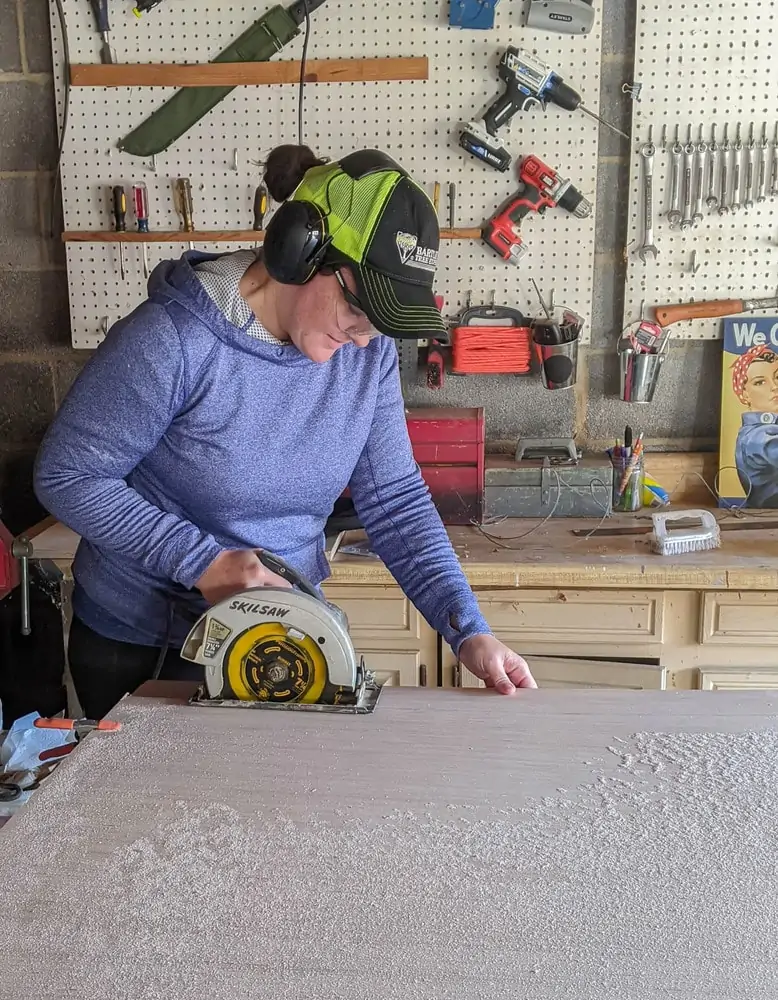
You can also sometimes get your plywood cut into planks in the store when you buy it, but many stores won’t make that many cuts. And the cuts done in stores are often done very quickly and not measured super accurately.
After cutting your wood planks, be sure to sand any rough edges. The inexpensive plywood I used is especially prone to splinters and rough spots.
Prepare the wall
You’ll need to remove any light switch plates and outlet covers along with anything else hanging on the wall.
If your wall is a drastically different color from your plank wall, it’s also a good idea to paint it before you start adding the wood. Even though it will be covered with wood, some of the wall is likely to show through between the wood planks.
Start attaching the wood
For my wall, I started by hanging the three horizontal boards that go all the way across the wall.
I wanted these boards to be about 2/3 of the way up the wall because dividing things into thirds is usually the most pleasing to the eye, so I used a tape measure to find the right height for the first board.
Use a level to make sure the first board is level and then attach it to the wall with your nail gun. It’s helpful to have a someone else to help hold these first few boards in place while you level and attach them.
How to attach a wood plank wall
I used my nail gun to nail up my wood planks. You could also use a hammer and finishing nails, but it would take a lot longer.
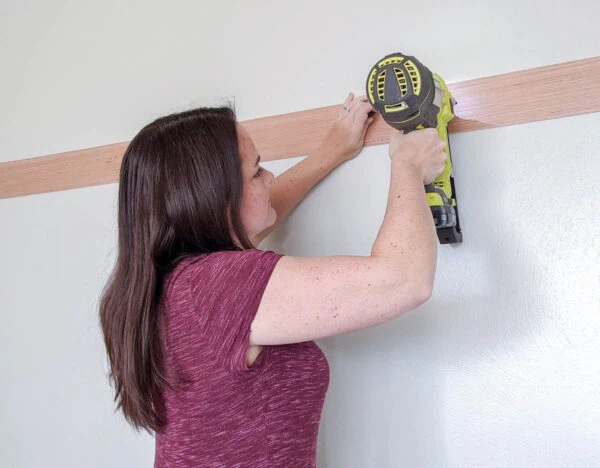
For a wall like this, you do not have to nail every nail into a wall stud if you use a lightweight plywood. If you are using thicker, heavier wood, attaching each piece to a stud may be a good idea.
Some people like to also use glue to attach their wood planks to the wall, but I personally prefer to skip the glue. I like having the option to remove my wood wall in the future without tearing up the drywall underneath.
I have hung several plank walls plus a board and batten wall without using glue and each of them has held up quite well for years now.
Measuring and cutting the planks
Once the horizontal planks are up, you can continue building the rest of the design from there, one section at a time.
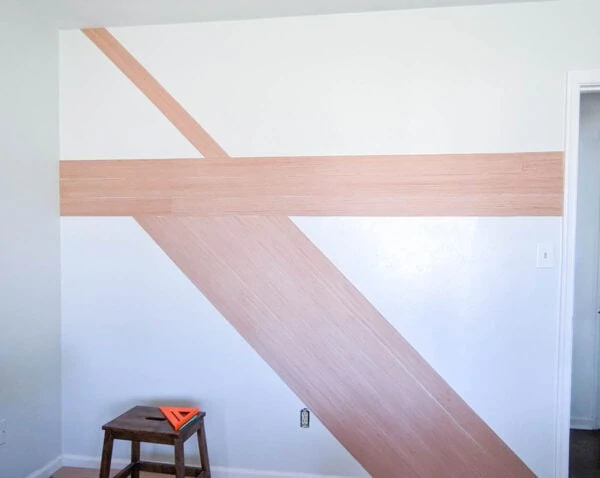
It works best to measure and cut each plank individually. The walls and ceilings in most houses aren’t perfectly square, so two boards that are right next to each other might need to be a slightly different length or angle.
Measuring and cutting the planks one at a time definitely takes longer, but it is worth it. Your boards will all fit perfectly in the end and look amazing. With a wall like this, if a board is just a tiny bit too short, it will stick out like a sore thumb.
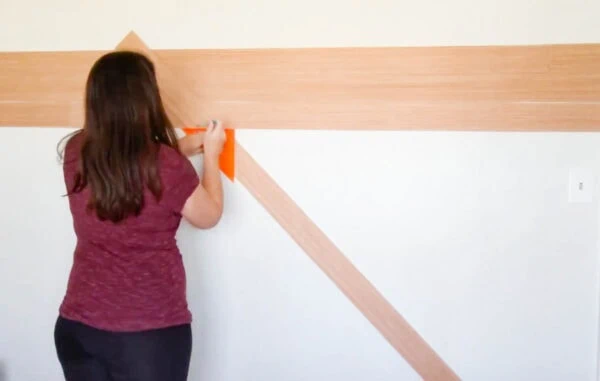
A miter saw works best for cutting your planks to length with the correct angles. All of the cuts for this type of wall should be at 90 degrees or 45 degrees, but for my wall, some ended up being closer to 43 or 46 degrees to make things fit perfectly.
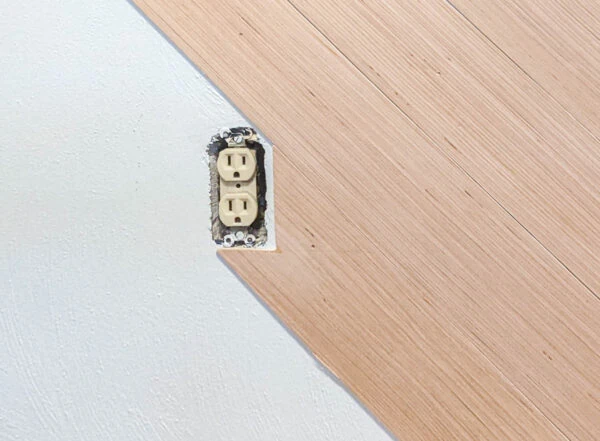
If your wall has light switches, outlets, or anything like that, you will need to cut your planks to work around these. It works well to mark exactly where your board needs to be cut and use a jigsaw to cut it.
Spackle the wall
If you are using a natural wood finish for your wood wall, you can stain and finish it at this point.
If you are painting your wall, you’ll want to spackle all of the tiny nail holes before painting. This is actually one part of this project that goes very quickly. Even though there are a ton of nail holes, spackling them is super quick.
Once the spackle dries, sand it lightly with 220 grit sandpaper for a smooth finish and then wipe all of the dust from the wall.
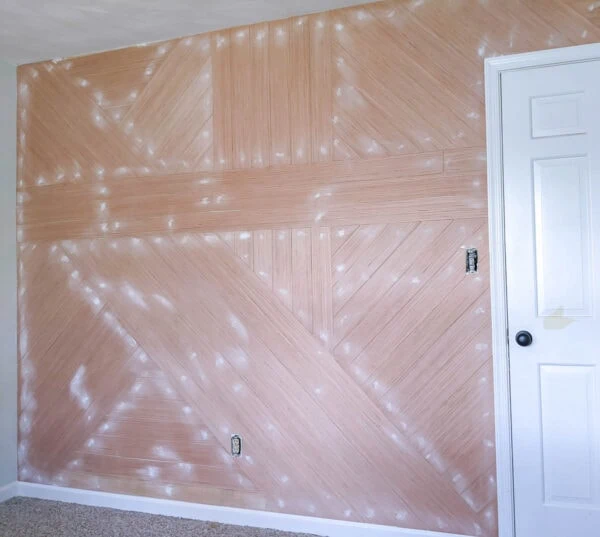
Spackling all of the tiny nail holes seems like it wouldn’t really make a big difference, but it actually really affects the look of your finished wall.
As I was painting the first coat of paint on my wall, I noticed a nail hole that I had missed. It was crazy how noticeable it was.
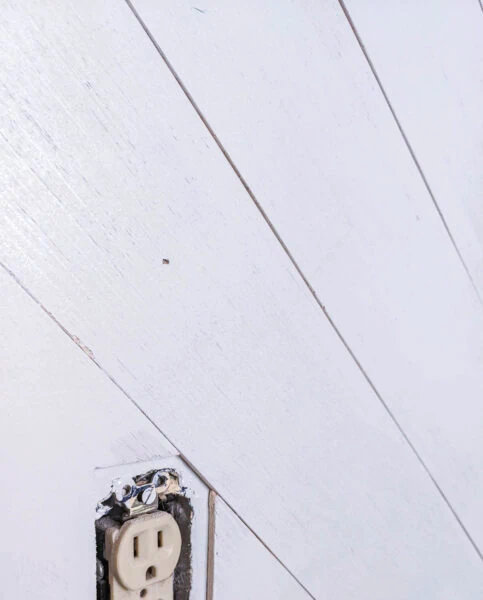
Paint the wall
I love small foam paint rollers for painting anything with a smooth surface, including furniture and wood walls. And an angle paintbrush works well for painting around corners and edges.
Roll the roller in your paint and then lightly roll it onto the wall, following the direction of the wood planks. As you are painting, make sure you don’t press down too hard with your roller because this will cause paint to squish into the spaces between your wood planks, messing up the graphic lines of your wall.
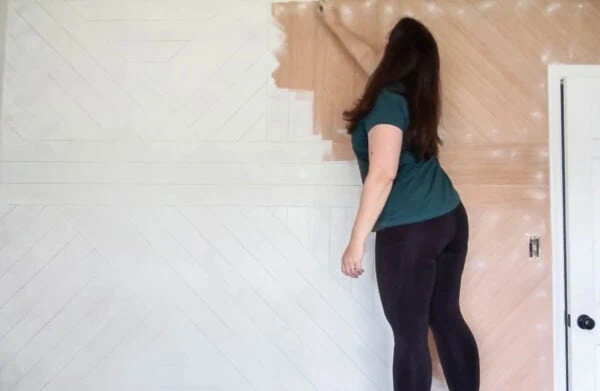
If you start to feel like you need to press down harder to paint, that really means it is time to load more paint onto the roller.
If some paint does end up dripping between the planks, it’s easiest to fix it before the paint dries. You can slide a scrap of cardstock (or sandpaper if it’s handy) between the planks to gently remove the excess paint.
If you don’t notice the pooled paint until it has already dried, you can carefully slide a utility knife between the planks to cut it away.
Adjust the outlets and light switches
If your plank wall has any outlets or light switches, they need to be adjusted to be flush with the new wall.
This is super easy to do. It doesn’t involve any wiring or electrical skills, but you do need to cut off the electricity to the outlets you are working on before you begin.
You can get simple plastic spacers to help move your outlets to the correct depth for your wall. Fold and click them together until they are the correct thickness.
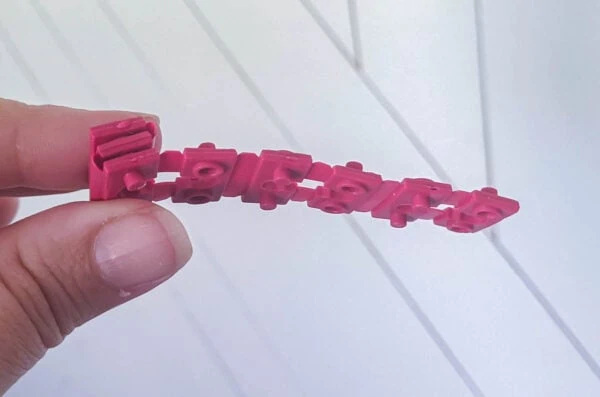
Loosen the screws holding your outlet in place and slip the spacers around the screws. Then tighten them back up.
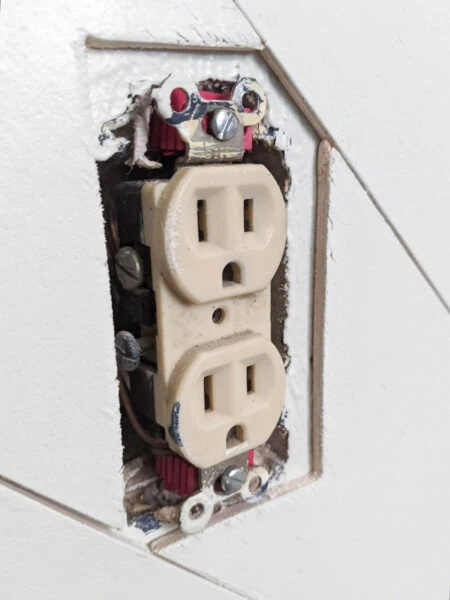
I also made another quick switch to my own outlets and light switch. They were all a dingy beige color and while I’ve hated them for years, it was even more noticeable against my bright, modern plank wall.
I’ve replaced outlets before and it was a pain that I really didn’t want to deal with right now. So instead I decided to try out these special outlet covers I found. You attach them right on top of your old outlets and they completely cover them.
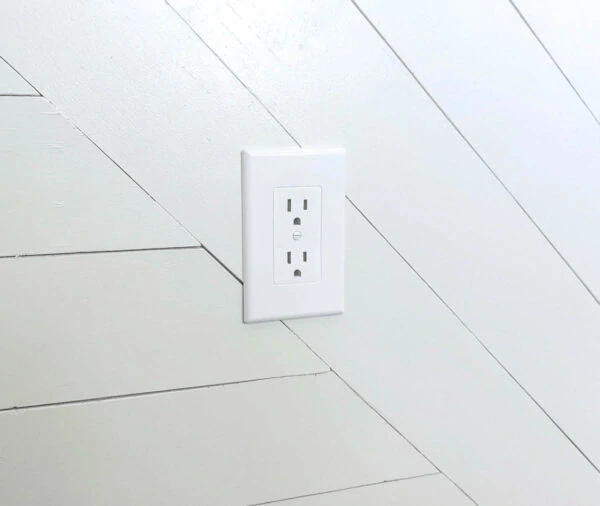
So far I am pretty thrilled with them. They only cost a couple of bucks, took less than a minute to install, and look great!
Finished Wood Accent Wall
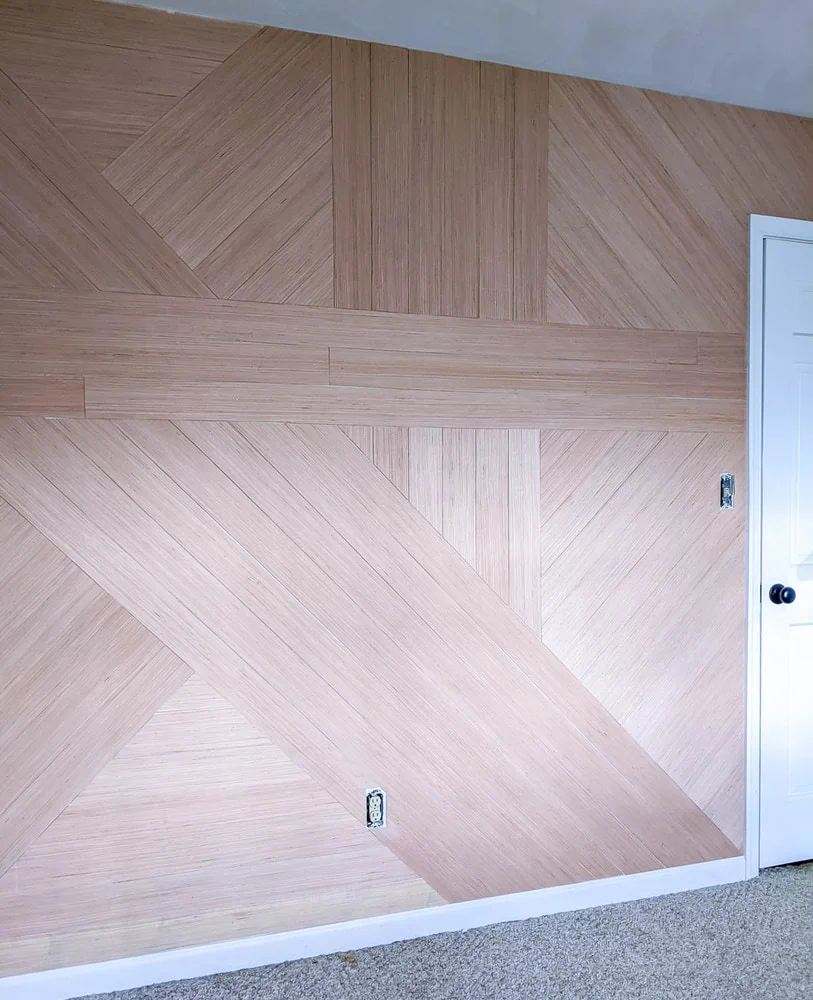
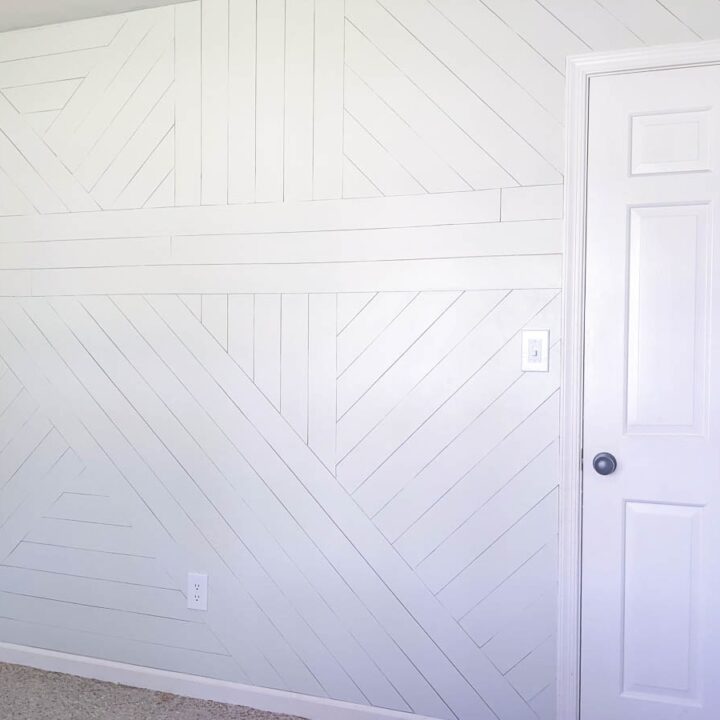
And here is my finished wall.
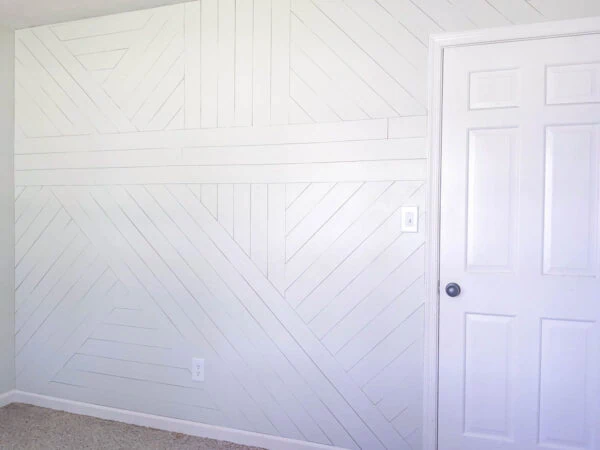
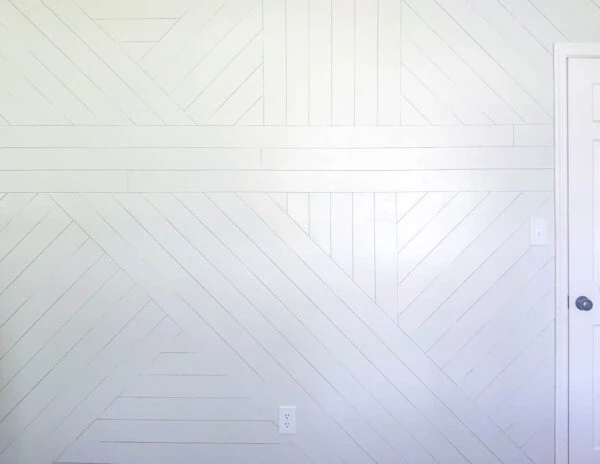
I’m pretty thrilled with how it turned out. It’s full of texture and style, but still subtle enough not to take over the room.
Here’s a peek at how the wall looks in my office now that the rest of the room is pulled together.
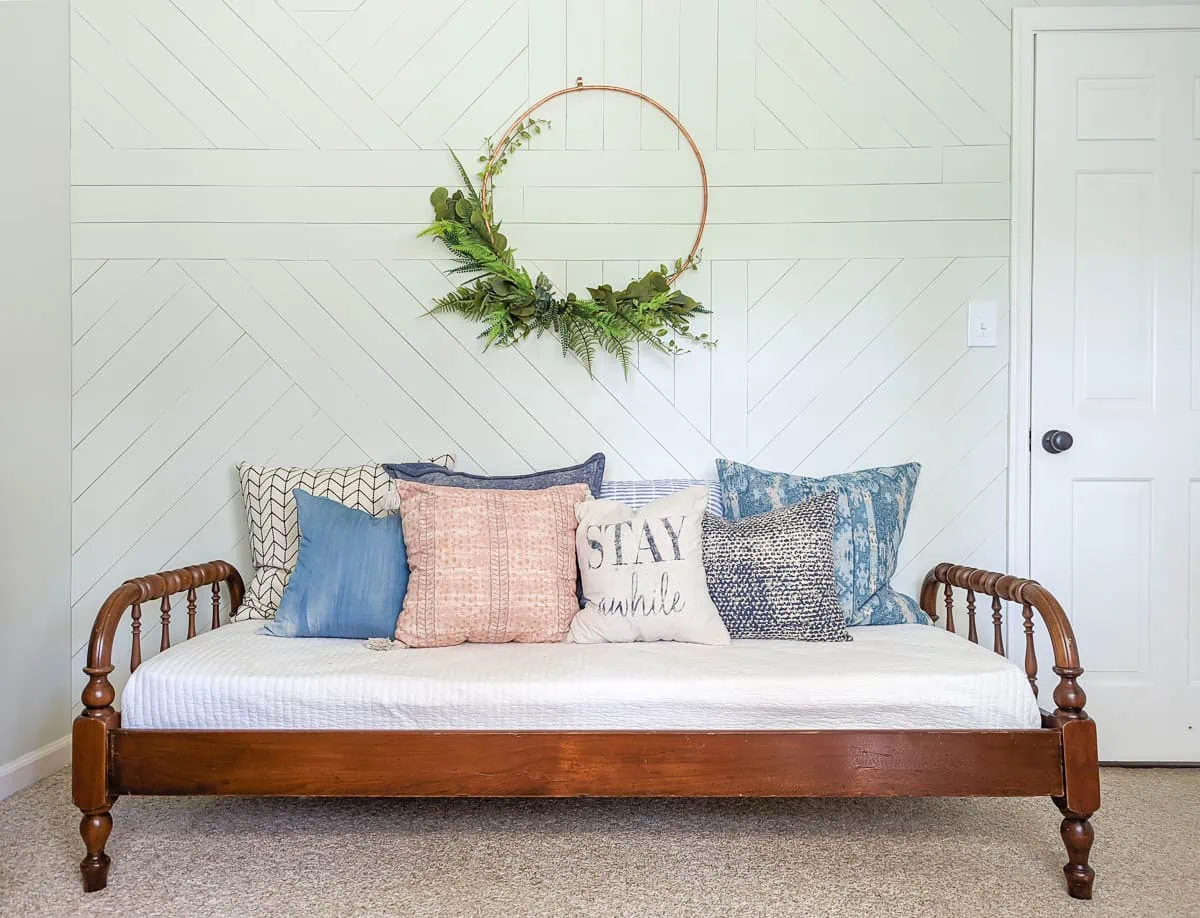
I’m loving how this space came together. You can see the rest of my budget-friendly home office makeover right here.
A cheaper and easier alternative
If you love the look of this wall but aren’t ready to put in the time it takes to create or just don’t really want to break out the power tools, there’s a much easier way to get a similar look.
I think this design would work fantastically as a ‘Sharpie shiplap‘ wall. I haven’t tried this technique myself but I’ve seen other DIY bloggers who I trust create fabulous faux shiplap simply by drawing lines on the wall using a Sharpie.
The results don’t have the texture of actual wood and I have to imagine you can tell it isn’t real if you look closely, but it still looks pretty cool. And with a more intricate, geometric design like this, I think it would look even better.
And it would be way faster and easier for sure.
Video Tutorial
I’d love for you to subscribe to my Youtube channel!
Want more wood accent wall ideas? I’ve got more for you to check out!
- DIY Herringbone Wood Wall on a Budget – this one is very similar, just with a different pattern
- How to make a Stunning DIY Plank Wall – this one’s all about that coastal, weathered wood look
- 23 Stunning DIY Wood Accent Walls for your Home – sooo many great ideas here
I’d love for you to pin this post on Pinterest!

Google Web Story: Gorgeous Wood Accent Wall DIY
How to Make a DIY Wood Accent Wall
The complete step-by-step tutorial for this wood wall including the cheapest wood to use and how to cut perfect angles.
Materials
- Wood for your wall - I used strips of inexpensive 1/4" plywood
- 220 grit sandpaper
- Spackling
- Paint in the color of your choice
- Electrical Spacers
- Revive outlet covers and light switch cover
Tools
- Small foam paint roller and paint tray
- Angle paintbrush
- Speed Square
- Tape measure
- Table saw or circular saw
- Miter saw
- Jigsaw
- Nail gun
Instructions
- Decide on the general look you want for your wall and create a mock-up on paper or in a program like Canva.
- Choose the type of wood you want to use. Several types of wood that can be used are reclaimed wood, shiplap, MDF, plywood, or wood trim.
- Use a table saw or circular saw to cut your wood into planks if needed. After cutting your wood planks, be sure to sand any rough edges.
- Remove any light switch plates and outlet covers along with anything else hanging on the wall.
- Hang your first board on your wall. If you are using a design similar to mine, start with one of the horizontal boards that goes all the way across the wall.
- Use a level to make sure the first board is level and then attach it to the wall with your nail gun.
- Continue building the rest of the design from there, one section at a time.
- A miter saw works best for cutting your planks to length with the correct angles.
- Once all of your boards are in place, spackle the tiny nail holes.
- Sand it lightly with 220 grit sandpaper.
- Paint the wall with a foam paint roller and angle paintbrush. Cut in around the edges with the paint brush and then fill in lightly using the paint roller.
- Adjust the outlets and wall covers using electrical spacers if needed. The spacers will ehlp bring your outlets out even with the new plank wall.
Recommended Products
As an Amazon Associate and member of other affiliate programs, I earn from qualifying purchases.
-
Ryobi 3 Piece 18V One+ Airstrike Brad Nailer Kit (Includes: 1 x P320 Brad Nailer, 1 x P190 18-Volt ONE+ 2.0 Ah lithium-ion battery, P118 dual chemistry charger (Renewed)
-
Komelon 4912IM The Professional 12-Foot Inch/Metric Scale Power Tape, Yellow
-
SWANSON Tool Co S0101 7 Inch Speed Square, Blue
-
Taymac 2600W Masque Revive Polycarbonate White 1-Gang Cover, Replaces Old and Discolored Wall Plate for Electrical Outlet, Decor and Home Improvement Essentials


Leave a Reply