How to Make a Stunning DIY Plank Wall
Well, friends, our ugly foyer is well on its way to being gorgeous! And it’s all thanks to our DIY plank wall.
I know white shiplap is all the rage these days thanks to Fixer Upper.
I love the look of a fresh white wall too, but what I really wanted was the look of a gorgeous reclaimed wood wall – without the stress of finding and dealing with actual reclaimed wood!
And this painted plank wall definitely fits the bill.
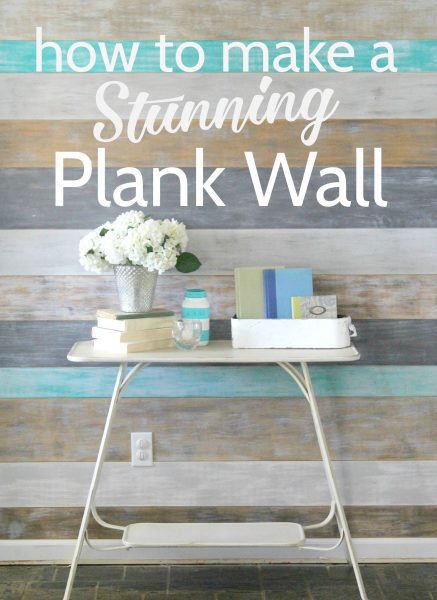
Even better I was able to complete this painted plank wall for less than $50!
To keep costs down, I used 1/4″ plywood to make my planks.
I read a lot of tips about saving money by using masonite, but I knew I wanted to incorporate some wood grain into my plank wall so masonite wasn’t a good choice for me.
This post contains affiliate links – you get to buy cool stuff you want and support Lovely Etc. at the same time. See my full disclosure here.
Materials
- 1/4 inch plywood
- finishing nails
- General Finishes paint in snow white
, seagull gray
, driftwood
, and patina green
- Minwax golden oak stain
- Paint brush (chip brushes work great for this project)
How to Make a Wood Plank Wall
For my entry wall, I needed two 4’x8’ sheets of 1/4 inch plywood. I had my plywood cut into strips at Lowes – 8 six-inch strips, 4 eight-inch strips, and 4 four-inch strips.
I am so glad I had my planks cut in the store – even with their huge cutting machine, it took a while to make all of those long cuts. (Plus, even better, they did the cuts for free.)
Once your planks are cut, the next step is to paint. For a unique look like this, it is so much easier to paint each plank before installing them.
My plank wall is a fairly small entry wall – it is only eight feet wide from the closet door to the corner.
Since the plywood is eight feet long, I simply did one plank per row.
If you are planking a longer wall, you will need more than one strip of wood in each row.
You can either paint all the wood in each row the same for a striped look like my wall or mix up the finishes for a more eclectic look.
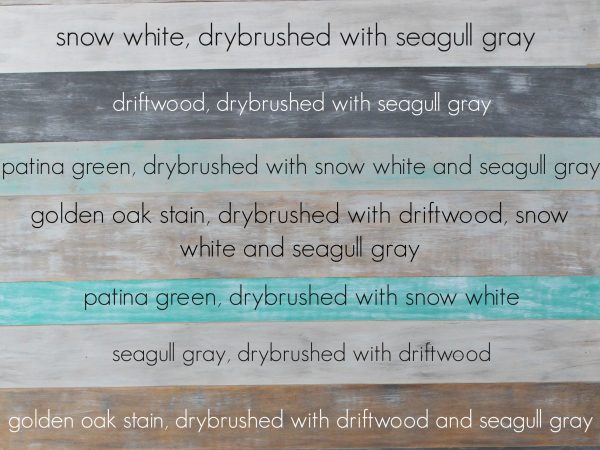
I knew I wanted a textured, weathered finish to give the feel of reclaimed wood and my go-to technique for this is dry-brushing.
Dry-brushing is incredibly simple. Chip brushes are ideal for this, but you can use any paintbrush.
Put a very small amount of paint on your brush and then wipe as much off on the lip of the paint can as possible.
To remove even more paint, you can wipe your brush on a paper towel several times.
Basically, you want your brush as dry as possible while still having some paint on it.
Then lightly brush your paint across your board.
I’ve gotten a ton of questions about how exactly to do this so I put together a quick video that makes it easy to understand.
Video Tutorial for Weathered Wood Paint Finish
General Finishes provided me some of their milk paint to try out for this project and I ended up using four of their colors: snow white, seagull gray
, driftwood
, and patina green.
I love General Finishes paint (and that patina green is amazing), but you can also get this look with almost any paint.
A paint with a matte finish will work best, so you could use chalk paint or even acrylic craft paints from a craft store.
In the video, I used Americana Decor Chalky Finish paint in everlasting (white), yesteryear (light gray), relic (dark gray), and treasure (turquoise).
I also used a bit of stain on some of my boards before painting to highlight the wood grain.
Check out all the different finishes I was able to get using only four colors of paint!
Once everything was painted, it was time to install the wall.
Let me say right now, that I do not have a nail gun. You can totally install a plank wall using an old-fashioned hammer and nails.
My husband and I worked together and we were able to get the whole thing installed in just a couple of hours.
I started out by cutting one of my four-inch strips in half to make 2 two-inch strips.
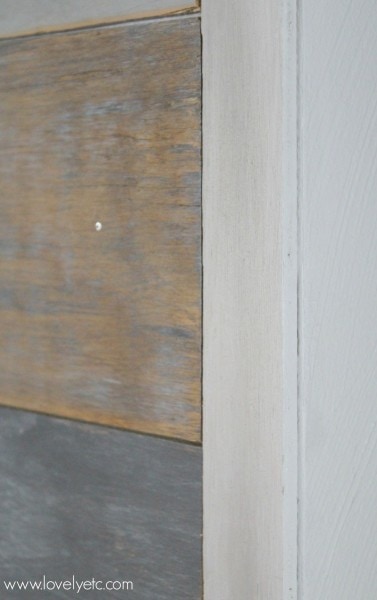
I used these as a sort of molding along the edges of the plank wall.
Then I used a stud finder to mark where the studs are in the wall.
I used a jigsaw to trim my boards to the right length while Mitch hung the boards.
You can use pretty much any kind of saw for these short straight cuts, or if you plan ahead well, you can have them cut to the correct length when you are at the store.
Because the plywood is so light, the planks were quite easy to hang.
We simply nailed them up with a finishing nail in each stud. (This worked out to three nails per board.)
This way, it is possible for us to remove the planks if we decide to change things up or put the house on the market in the future.
As we were hanging the planks, we used a few pennies between each board to keep the spacing between boards even.
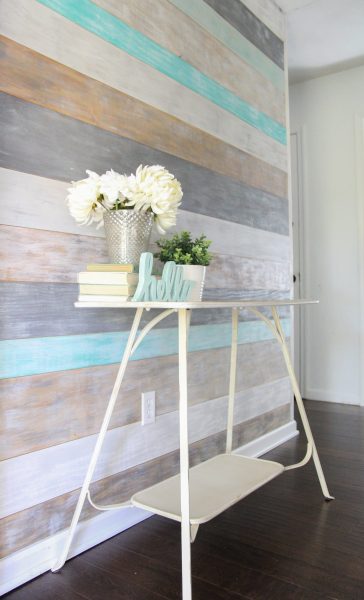
This wall seriously looks gorgeous no matter how you decorate it. Below is a picture of how it currently looks – swoon!
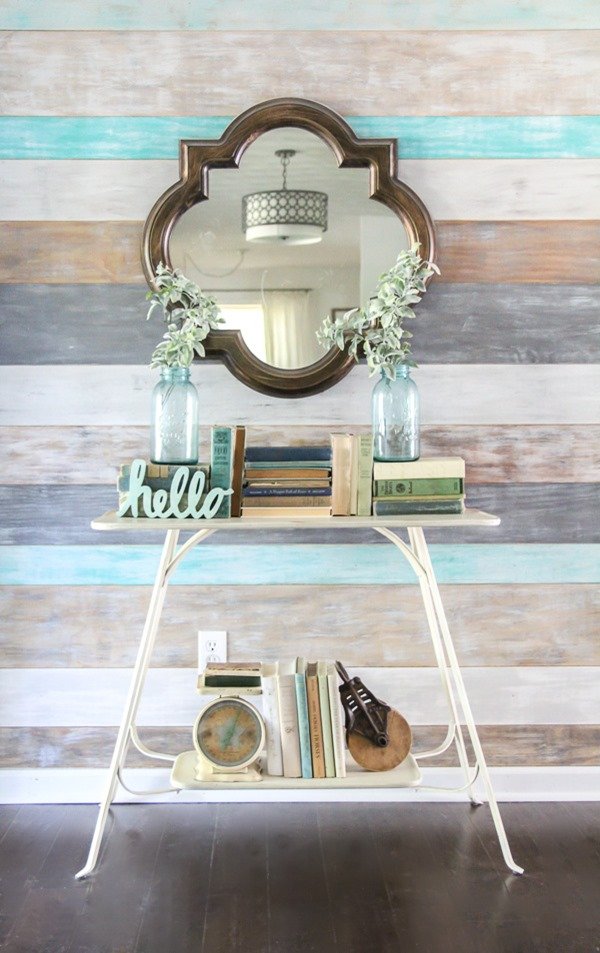
This is such a doable project for any DIYer, even if you are a beginner. It is inexpensive.
You don’t need fancy tools. You don’t need to find special reclaimed wood. And you don’t really need any special skills.
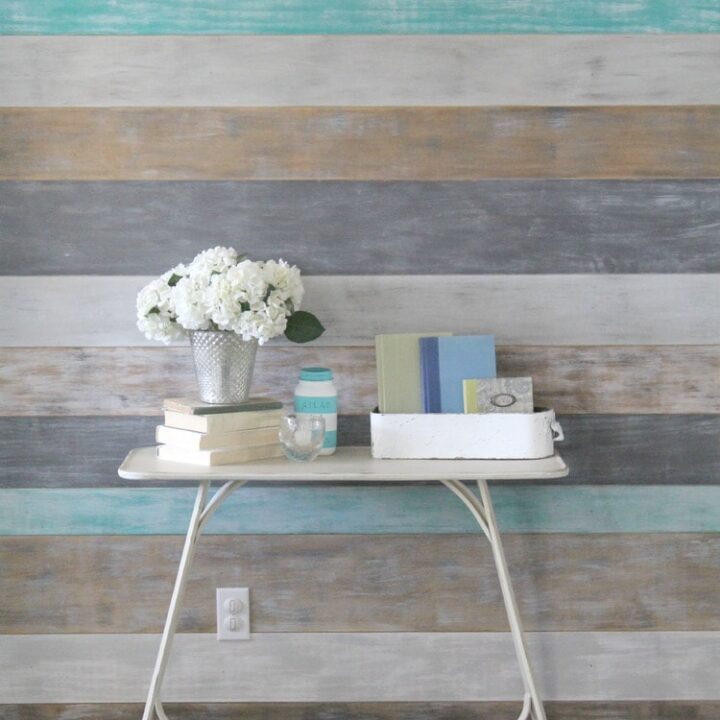
How to Make a Stunning DIY Plank Wall
Create the look of a gorgeous reclaimed wood wall – without the stress of finding and dealing with actual reclaimed wood!
Materials
- 2 1/4 inch plywood cut in 8 6" strips, 4 8" strips and 4 4" strips.
- General Finishes paint - snow white, seagull gray, driftwood, and patina green
- Minwax golden oak stain
Tools
- Chip brushes
- Hammer
- Finishing nails
- Jigsaw
- Stud Finder
Instructions
- Use a chip brush to paint each strip the color you want using a dry brush technique.
- I used 4 colors: Snow White, Seagull Gray, Driftwood, Patina Green
- Cut one of the four inch strips in half to make 2 two inch strips to use as molding.
- Use a stud finder to mark where the studs are.
- Hang each board using a hammer and finishing nails in each stud.
- Use a jigsaw to trim any boards as needed.
Want to see more inexpensive wood projects? Here are a few of my favorites:
- 23 Stunning DIY Wood Accent Walls for your Home
- How to DIY a Herringbone Wood Wall on a Budget
- Beachy Sunburst Mirror (This one is made from scraps of wood left over from my plank wall!)


I am very interested in doing this but my dilemma is I’m in a rental. Is there anyway I can create this without having to nail each plank to the wall. Like maybe construct the entire piece but how would I adhere it to the wall? Any suggestions?
Evie,
Good question. You might be able to attach each plank to one large sheet of thin plywood and then just attach that sheet of plywood to the wall. Are you allowed to hang pictures at all? If so, a few nail holes in the wall should be okay. You may be able to nail the whole thing up with a few well placed nails along the top and sides. Especially if it is resting on the floor/molding on the bottom to help with stability. (But if you have kids or large pets, I probably wouldn’t go this route.) Good luck!
My husband and I plan on doing a wall in our bedroom. His suggestion was to construct it on 2 2×4’s in the garage and then bring it in the house and secure the 2×4’s to the wall. I think we would leave off 3 or 4 planks and then nail or screw the 2×4’s to the wall and then nail on the 3 or 4 planks we left off. Then you will only have 4 holes in the wall.
That could definitely work! The planks will stick out from the wall 2 inches but you shouldn’t be able to tell once the boards are up. We nailed directly into the wall, but we used small finishing nails so the holes should be very easy to fill. Good luck with your wall!
Yes! I live in my own home but the thought of putting a million holds in my wall was unappealing. So, I built my walls in sections. They were built to stop at a stud. Each section is attached with 4 to 6 screws .
I even attached the boards to the plywood backing. I tried to add a picture but it wouldn’t let me.
Carrie’s post inspired me greatly.
Good Luck!
So I am trying to do this on the main wall in my nursery. You say what dimensions you cut the boards but how large is the wall you did. My wall is 8 ft tall and 9 ft wide. HELP?!?!
This will look so great in a nursery! My wall is right around 8′ x 10′ but a closet door at the end made the majority of the wall 8′ x 8′. Since the plywood is eight feet long, I was able to just use a single board for each row. Since your wall is a bit over eight feet, you will probably need to stagger your boards a bit to cover the entire length. Just make sure to stagger the seams between boards. One easy way to do this is to add a one foot long board to each row, alternating which end of the wall you add it on. Since each row will have more than one board, you could choose to paint both boards in each row the same colors or do different colors on every single board. I would probably go with a single color for each row, but either way could look beautiful. Also, you will want to make sure the two boards for each row are cut to the same height. Good luck and let me know if that doesn’t make sense or you have more questions!
When you used the spacing with the pennies did you need to prime the wall behind the boards with a particular color? I am guessing with the space you can see a bit of the wall between each board.
Okay, I just went and looked at my wall to double-check this! I did paint the wall white before adding the wood to make it uniform. Even though the wood on the wall isn’t white, you really can’t see the white between the boards. Even though there is a small space between each board, you can’t really see the wall color behind because of the thickness of the boards and the slight shadow they cast. I think if the wall behind was a bright color like red, it would probably show through, but with a light color, you can’t really see it. I hope that helps!
So how much material should I buy. I’m with you on one color per! It’s to bad I can’t get larger board. Or can I?
As far as I know, you can’t get plywood bigger than 4′ x 8′ at any typical home improvement store. I would buy 3 4′ by 8′ sheets of plywood. The first two sheets can be cut the same dimensions I mentioned in the post. The third sheet will need to be cut so that you end up with 8 six inch strips, 4 eight inch strips, and 4 four inch strips. Depending on the exact width of the wall, each of these strips needs to be around a foot long.
So a couple months ago I stumbled upon this blog post (via Pinterest) and LOVED it for an idea for my nursery!! We finally finished it this weekend and I wanted to share the results with you (although I don’t think I can post a picture here), so I have written a post on your Facebook wall. Thank you soo much for the awesome idea and great instructions!! I am so happy the way it turned out. I also tagged you in my FB post showing the photos (hope that’s ok – as you deserve credit for the idea)! And by the way, congratulations on your new baby boy!!
Kati, that is awesome! I can’t wait to see it – going to check it out now!
Hi there! I have a question regarding how you cut the boards. The dimensions you gave, are they cut across the board 4′ or along the 8′ edge? Thanks so much!!
Great question! They are cut along the 8′ edge so that the final boards are 8 feet long.
I came across this and will be featuring it in my round-up of beautiful wood planked walls! BEAUTIFUL job! :)
That is wonderful! Thanks for including me!
Did you sand the plywood before painting? I imagine a rough service may catch dust and be difficult to clean…how have you found this to be after time?
Laura, I did not sand the plywood before beginning but I did choose a thin plywood with a pretty smooth finish to use for this. I have to admit, I am not always the most motivated cleaner and I haven’t truly cleaned this wall but I also don’t see any dust or other things caught on the surface causing a problem.
I love this! I have builder cheesy yellow oak cabinets that I have been wanting to do something with for a long time but have not found the gray modern treatment I’ve wanted. I looove the dry brushing result on the golden oak!! I’m buying paint right now to test on wood before I tackle my cabinets :)
Kristal, sounds like an awesome idea for your cabinets! Let me know how it turns out!
This is so beautiful! I have a very crooked wall in my kitchen and am having trouble with tiles for a backsplash. This may be perfect! But I think I would need to seal it with something. Thank you for sharing!
Kathy, glad I could help give a new idea. I didn’t seal mine and the paint has held up well but you are right, sealing would really help as far as being able to wipe down the wall. I’ve also seen some wallpapers that look like a rustic plank wall that might work well for what you have in mind.
Gorgeous wall!! I love it. I was wondering what other brand of MILK paint you would recommend. I live in a state that doesn’t carry this General finishes brand. I just want to buy some sample sizes of this paint and I can only buy the quart sizes on AMAZON. Any suggestions or will any milk paint work???
Holly, great question. If you aren’t able to get the General Finishes paint, really any paint will work for a plank wall. It doesn’t have to be milk paint. I also really like Americana Decor chalky finish paint – you can buy it at Michaels and it is pretty inexpensive compared to other chalk and milk paints. But for this project, sample sizes of latex paint would also work well. If you are just interested in milk paint in general, I know some sellers stock samples of Miss Mustard Seed milk paint, but I don’t know a specific one off the top of my head.
I plan on doing this in my home office. My ceilings are really short (under 7.5 feet) so I was considering going vertical instead of horizontal to give the illusion of height…..but it might look too much like old school paneling. Any opinions??
Julie, I think it could look really great going vertical. One of my favorite plank walls I have ever seen was vertical – it is the second inspiration picture in this post. http://www.perfectlyimperfectblog.com/2011/07/installing-wood-paneling.html I think if it is done well, it won’t look like faux paneling at all.
I wanted to do a plank wall in my nursery but never really seemed like something I could do. THIS seems like something I can do! Looks amazing. Thanks for a great tutorial.
Jolene, I am so glad! I love a good feature wall in a nursery. I would love to see pictures if you end up doing this!
OH MY GOODNESS! I love this wall! Thank you so much for the tip on a dry brush; I tried a similar project once and the paint was too think. I am going to try this after Christmas!
Thanks Becky! I hope if you try this you love it! Let me know if you have any questions once you get started.
Love your wall! I have my boards cut already and I will start painting them this week. I see your photo of your color combinations. My question is did you cover the entire board completely with your base color and then use the dry brush technique once the solid base coat was completely dry? Any painting tips would be appreciated
Julie, how exciting! Yes, I painted one coat of the base color over the entire board and let it dry for about ten minutes. Then I went back over dry brushing. The first coat is super easy, but dry brushing can take a few tries to get just how you want it. When you are dry brushing, be sure to wipe almost all of the paint off your brush before painting with it. Then if it is lighter than you want, you can always add a little more. It wouldn’t be a bad idea to practice on a scrap piece of wood to get it just how you want it.
Loveeeee the wall! I’m going to try this in my entry way also since we are remodeling. But my question is I have a door way into another room and we are doing craftsman style trim around it so how does the plants and the trim match up? Do you put the trim over the planks which would seem to be very thick entry way and noticeable or butt it against each other? Which in that case may be some tricky cuts. Thanks
I have a doorway at the end of our plank wall as well. I didn’t put the trim over the planks because like you said, that would be very thick. I just butted the planks up against the edge of the trim. I hope that makes sense. If not, I can try to take a picture.
Beautiful! What type of wood did you use? Also, you mentioned using pennies to even out the spacing. Do you mean you put them between the strips horizontally? Where the strips not touching then?
We used a high quality plywood – I don’t remember which type exactly, but it was a smoother, stain grade plywood. And yes we just stuck a few pennies between the boardds horizontally so there is a small space between each board. It isn’t a very big space – you can’t see the wall behind at all, but with no space the planks would start to run together.
THIS is BRILLIANT! I’ve been researching a few different pre finished reclaimed wood plank brands; some peel & stick, some nailed up, and although gorgeous, a bit more costly than what I’d like to spend (especially for a project I’ve not attempted before)! This is EXACTLY what I needed!
I plan on doing this in my (even more boring than your) entryway, which will give it that pop of life it so desperately needs ;) I have a side table that I’ve been wanting to paint a bright coral (possibly SW Begonia) and the colors on your planks are the perfect combination to pair with coral. I cannot that you enough for sharing this rad project!
BTW, any tips or hints to make this easier on a newbie like myself?
Yay! I am so glad you are going to try it! This wall really is easier than you would think. I would just recommend having someone else around to help out. Having the wood cut in the store also helps immensely though you will still need some sort of saw at home to cut the final piece by the ceiling and to cut your boards to the right length. And your table painted coral sounds gorgeous! Good luck! Let me know if you have questions.
What type of wood is the plywood you used? Maple, Oak…?
To be honest I don’t remember. I just went to Lowes and looked at the plywood options they had. I chose one that was the thin and had the amount of texture I wanted – not perfectly smooth but not that rough either. Sorry I can’t be more help!
I’ve got my paint and am ready to get started :)!! What are your thoughts on painting the 4×8 boards before cutting them? I was thinking of maybe doing the first coat, cut the strips, then dry brush the second coat.
Yours looks amazing. I have a really look wall, so I’ll have some extra cutting and joining to do. :)
Yay! You are going to love your wall! You could definitely paint your boards before cutting them if that is easier for you. For me, it is easier to visualize how everything is looking together when they are cut first. There is a chance that a little paint may chip off during cutting, but it shouldn’t be too hard to touch it up afterwards. Good luck! I would love to see a picture of your wall when you finish.
My daughter and I did this over the weekend on our walls. We bought everything Friday. And, I can’t say enough about Lowes! Having them cut the wood made everything so much better. I used to love chalk paint, but after purchasing this milk paint by General Finishes, I will NEVER GO BACK TO CHALK PAINT. Milk paint covered so much better and I loved the consistency better as well. We literally started painting at 10 on Saturday and was done and had my wall completed and my daughters was 3/4 done by 10 p.m. that night. Her wall was a lot bigger than mine so we were one 4 X 8 plywood short. We got that on Sunday and then finished her wall. Her wall was done with 4 foot 4 inch planks that were stair stepped in style. Wish I could show you pictures. Absolutely amazing. Now onto my cabinets with this MILK PAINT!
Yay! Thanks so much for sharing your experience! It makes me so happy when readers do something great in their homes and it sounds like both you and your daughter created some fabulous walls. I totally agree – General Finishes paint is wonderful. I do still love chalk paint for some projects, but this paint does cover much better and holds up so well. Thanks so much for commenting!
Love love love it. Just what I was looking for. So many helpful ideas. Thank you for being so generous with your advice. I am definitely subscribing to your blog.
Thank you Chris!
I love this DIY! I was looking on amazon for wooden planked walls, but to fit the wall I want this on in my new room, it would cost around $400! Yikes… Then I found this blog, and I am definitely doing this!!!
Jaycie, I am so glad you found this! You can definitely get a great wall for less than $400. And nobody will know you did it for less!
I do have a question-
Does the milk paint come as powder and you have to mix it with water, or does it come already mixed?
Jaycie, this milk paint is different from other milk paints that give a chippy, antique look. It is more like an acrylic paint. It comes premixed in a paint can like most other paints.
Love this!!! Unfortunately I can’t find the general finishes milk paint anywhere locally and Amazon wants over $30 per quart. Can u share how you were able to complete this project for such a low price?
Tracy, I used General Finishes milk paint with great results but you could get a similar effect with almost any paint. Latex paint samples would work but I think craft paints would work even better. They are super inexpensive, come in every color, and have a matte finish that would look really great for this.
I am pinning this page!!! I really want to do a wood plank wall in my bathroom and this is just the inspiration I need. Thank you :)
Thanks! Good luck with your wall – I love mine!
Was it necessary to sand the long edges of the individual pieces? I love the look!
Thanks! I don’t think we sanded the long edges and you shouldn’t need to unless there are splintery rough spots. It doesn’t need to be perfectly smooth and perfect since this is a somewhat rustic look.
Hi Carrie! Your wall is amazing. I plan to create this look in my home. How do you hide the finishing nails?
Thank you Netta! We didn’t actually do anything to hide the finishing nails but they aren’t very noticeable. If you look closely, you can see them but I’m ok with that. I feel like the nails go right along with the rustic, authentic look.
This is absolutely so cool. I read the whole article and I am certainly doing this. Thanks for the great step by step instructions. I don’t use a nail gun either and the ease of which you explained everything makes me feel like I can do it!!! Lowes here I come..lol. Great job.
Thank you Gail! I know you can do it!
How did you do this for $50? The paint is way more than that. How did General Finishes provide you with the paint to do it?
Hi Kim! General Finishes sent me the paint to try and you are right – buying all of those different paints would definitely take the cost over $50. But you can 100% get the same effect using other paints as long as they don’t have a glossy finish. If you use paint samples that are similar colors, you could definitely do it under budget!
Sooo, does ANYONE have ANY pictures to show/share with us of a plank wall, in which they did, that was inspired by Carrie’s plank wall where she also asked to be shared? I’d loved to see some of the work of others! Thanks!
Great question Jennifer! Several people have shared some on my Facebook page but I don’t know of an easy way to share them here!
I love love your plank wall! The colors are perfect. This is something like what I am wanting to do in our master bath behind the vanities, then add a smaller mirror.
Thank you Linda! And you vanity mirror idea sounds beautiful!
This is sooooo beautiful. I simply LOVE it! I would love to achieve this look. I have a wall with wooden planks (set at an angle). Its already pre-finished with a stain that does not go with the rest of the room.
Can I use this technique directly on the wall? The wooden planks are already stained, so can I use the this method without sanding? I am really want to avoid sanding as this wall is in the kitchen. I dont have the time (or equipment) to sand and then do it.
Yes, you definitely could do this on the wall without sanding! It will be a bit harder working on a vertical surface and you may need to use painter’s tape to tape off individual boards if you want them to each look different like my wall. Most of this technique is done with paint so working right over the current stain really shouldn’t be a problem. You might just need to add in a few layers of a lighter tan paint to some boards if you want to lighten the appearance of the whole wall. I have another post and video showing another similar technique for using paint to get the look of weathered wood. It might be helpful as well – https://www.lovelyetc.com/how-to-create-a-beautiful-weathered-wood-finish-with-paint/ Good luck!
Has anyone done this with cheaper paint/ If so what did you use? I’m wanting to do these colors.
It’s so beautiful! We love your wall so we just decided to make the same in the entrance of our house! My husband has just finished the wall, so now I have to paint it! I hope I will manage to do it! Thanks anyway for this gorgeous idea!
Christelle from France
I’m so happy to hear that! I hope you love your wall as much as I love mine – good luck with the painting!
I get sooo frustrated when all of these diy plank wall folks say that Lowe’s or Home Depot will cut the plywood–or any wood for that matter–that small. I have been told more times than I care to admit, that the employees are not allowed to make any cuts smaller than 12-18 inches…..so…..what’s the secret?
I am so sorry! I have heard that some home improvement stores are more accommodating than others. Both the Lowes and Home Depot near me have never given me any trouble – although their big saw was broken for 6 months which was very annoying. I can understand they won’t cut any tiny little pieces but I’m surprised they won’t cut a full sheet of plywood into strips for you. If I were in that situation and didn’t have a table saw, I would have them cut it in 12 inch strips and then look for a friend or even a handyman that could cut it down smaller. Good luck!
I love the look! I am finishing a basement and was wondering if you can build this wall on a studded wall or will I have to put it on drywall?
Good question. I think if you wanted to skip the drywall, you could do something very similar to this but I would use interlocking tongue and groove or shiplap style planks instead of simple cuts of plywood. That way you would eliminate the cracks in between so your wall would be all sealed up. Good luck!
Carrie,
Can you do the plank wall in a small bathroom or would you need to seal it for moisture reasons?
Thank you and I love your work!
Melissa Davis
Thanks for the compliment Melissa! I just did a wood wall in my master bathroom a couple of months ago and I feel pretty confident it will hold up just fine. It was painted a solid color though. For a wood wall that is a stain/paint combo like this one, a sealer would be a good idea to help protect it. I would use a matte sealer to keep the look of the rustic wood. I’m a big fan of General Finishes flat out flat. And here’s my bathroom wall if you want to take a look – https://www.lovelyetc.com/how-to-diy-a-herringbone-wood-wall-on-a-budget/
How beautiful that wall is! I am just too scared to try anything like this but I love looking at what you have done. You are so talented!! TYFS! Maybe I’ll work up the nerve to give one of your projects a try! Ha! Wish me luck!
You can do it! Once you get started, it’s so much easier than you imagine!
Can you please link me the video you mention in this post called “video tutorial for weathered wood paint finish”? I cannot find it on the post anywhere. Thanks
Sorry about that! Somehow the video had been deleted from the post but it is back now. It is a short tutorial showing how to drybrush paint and stain for different effects and it is back under the Video tutorial heading. Thanks for letting me know it was missing!