Gorgeous DIY nightstand makeover using a surprising Dollar Tree find
I love a good dollar store find as much as anyone else, but I never imagined I would find the perfect thing to really transform this nightstand at Dollar Tree. Ironically enough, it was a dollar tree find that really elevated this furniture flip to look much more high dollar.
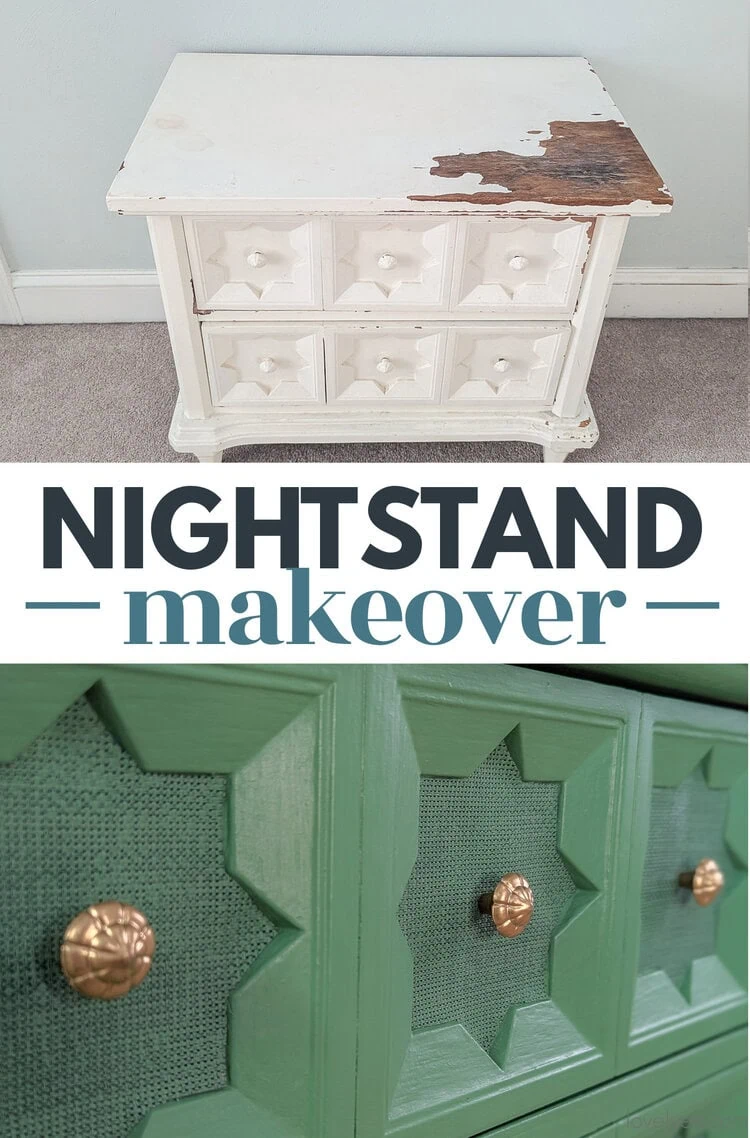
I’ve been on the lookout for a great nightstand for my son’s room and I found the perfect thing on Facebook marketplace for $25. Here’s how it looked when I brought it home:
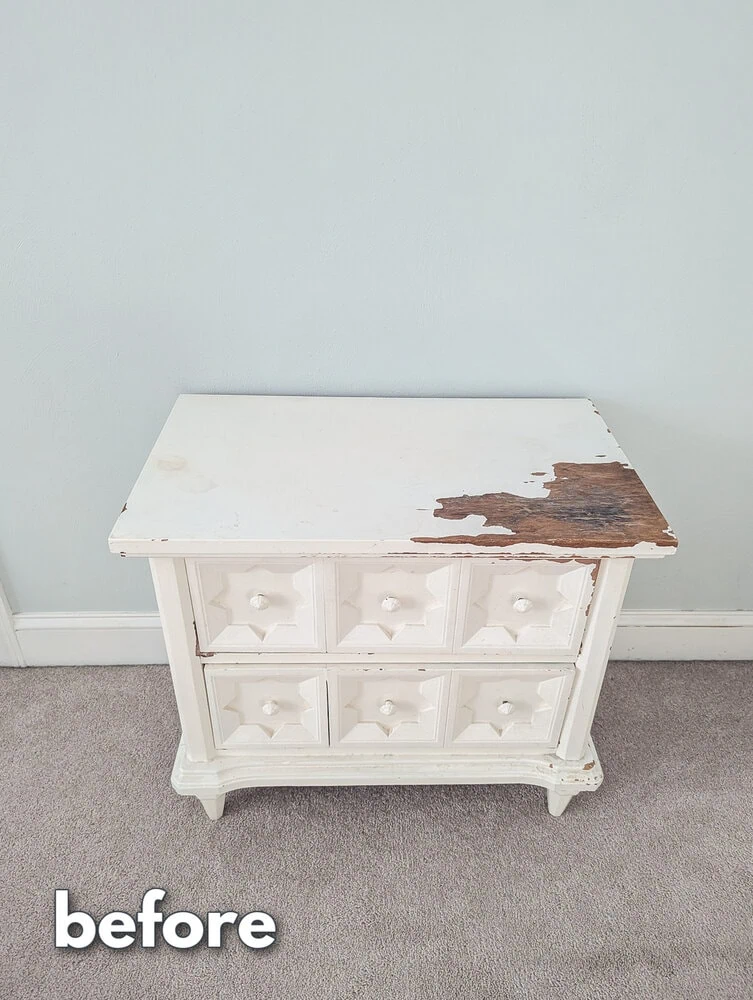
I love the proportions and those cute inset stars, but it did have some issues. The top had quite a bit of water damage and several holes and gouged areas.
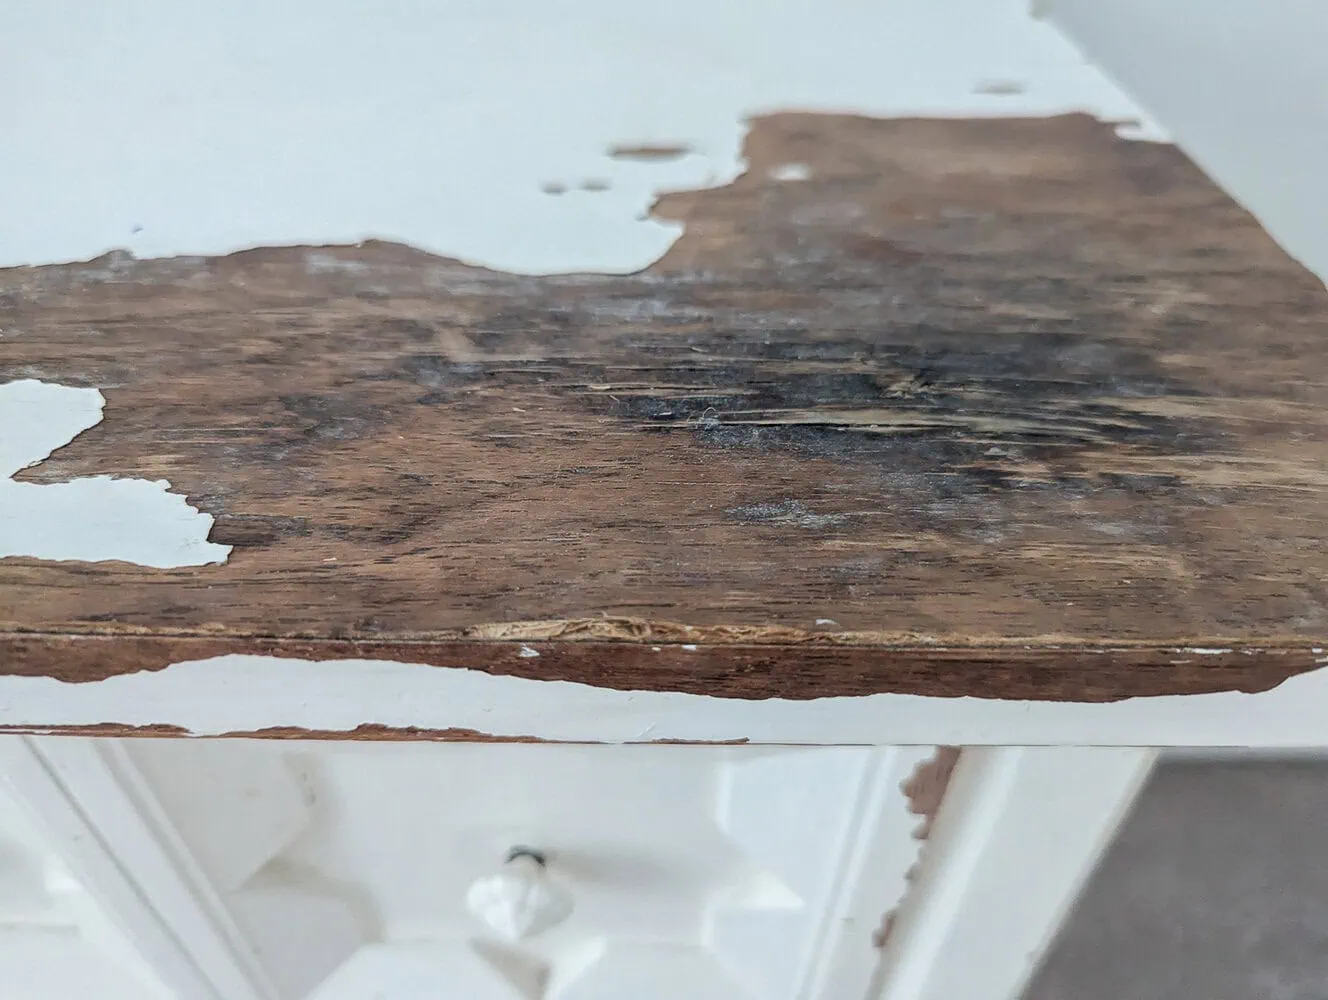
And unfortunately, this nightstand is not real wood so any thoughts I had about stripping off the paint for a stained wood finish were immediately off the table.
Luckily, I came up with a different plan and I love how it turned out.
I’m sharing how I completely transformed with damaged dresser with a beautiful shade of green along with my favorite trick for giving old hardware a beautiful gold finish and the dollar tree find that completely elevated the whole piece. And you’ll also find a video tutorial at the end of this post.
This post contains affiliate links which means if you make a purchase after clicking a link I will earn a small commission but it won’t cost you a penny more. Click here to see my full disclosure policy.
Materials
- Wood filler – I’ve really been enjoying this wood filler
- Dixie Belle Chalk paint in Kudzu – this is such a great bright green shade
- High quality paint brush
- Liquid Leaf – this is my secret weapon for giving hardware a gorgeous gold finish
- Furniture sealer – I used CrystaLac water-based polyurethane on this nightstand. This sealer is really easy to work with and gives a beautiful non-yellowing streak-free finish.
- Blue sponge applicator
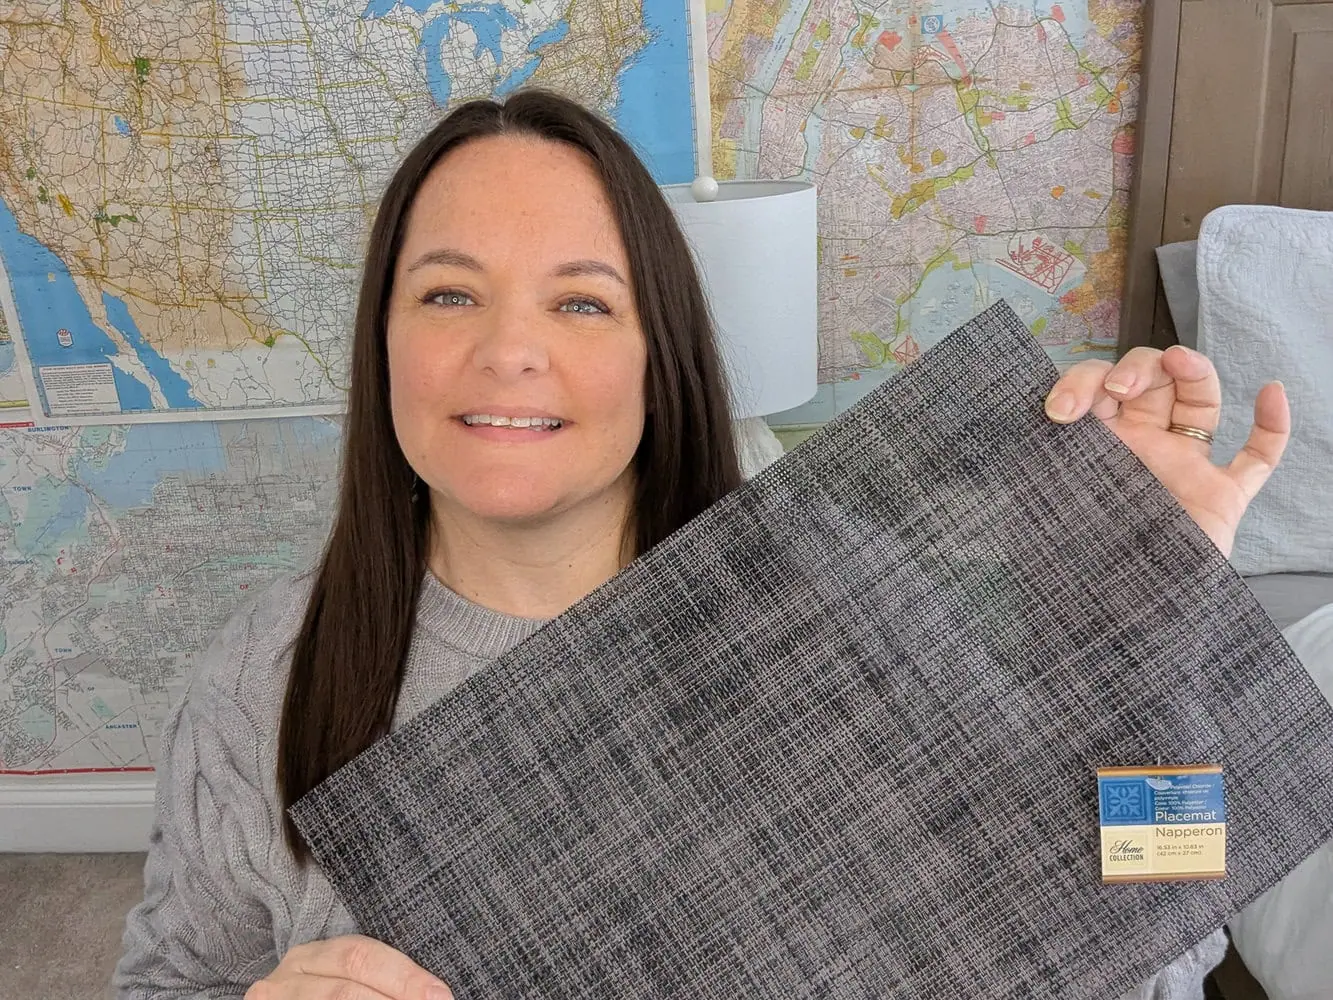
- Woven placemats – I got my placemats from Dollar Tree. If you need to texture an area larger than a placemat, this paintable wallpaper looks like a good option (but sadly isn’t $1).
- Spray adhesive – for attaching the placemats
- Orbital sander – for smoothing out any imperfections
Repairing the water damage
Before I could do anything with this nightstand, I needed to deal with the water damage on the top. I used wood filler to fill in all the holes and dings.
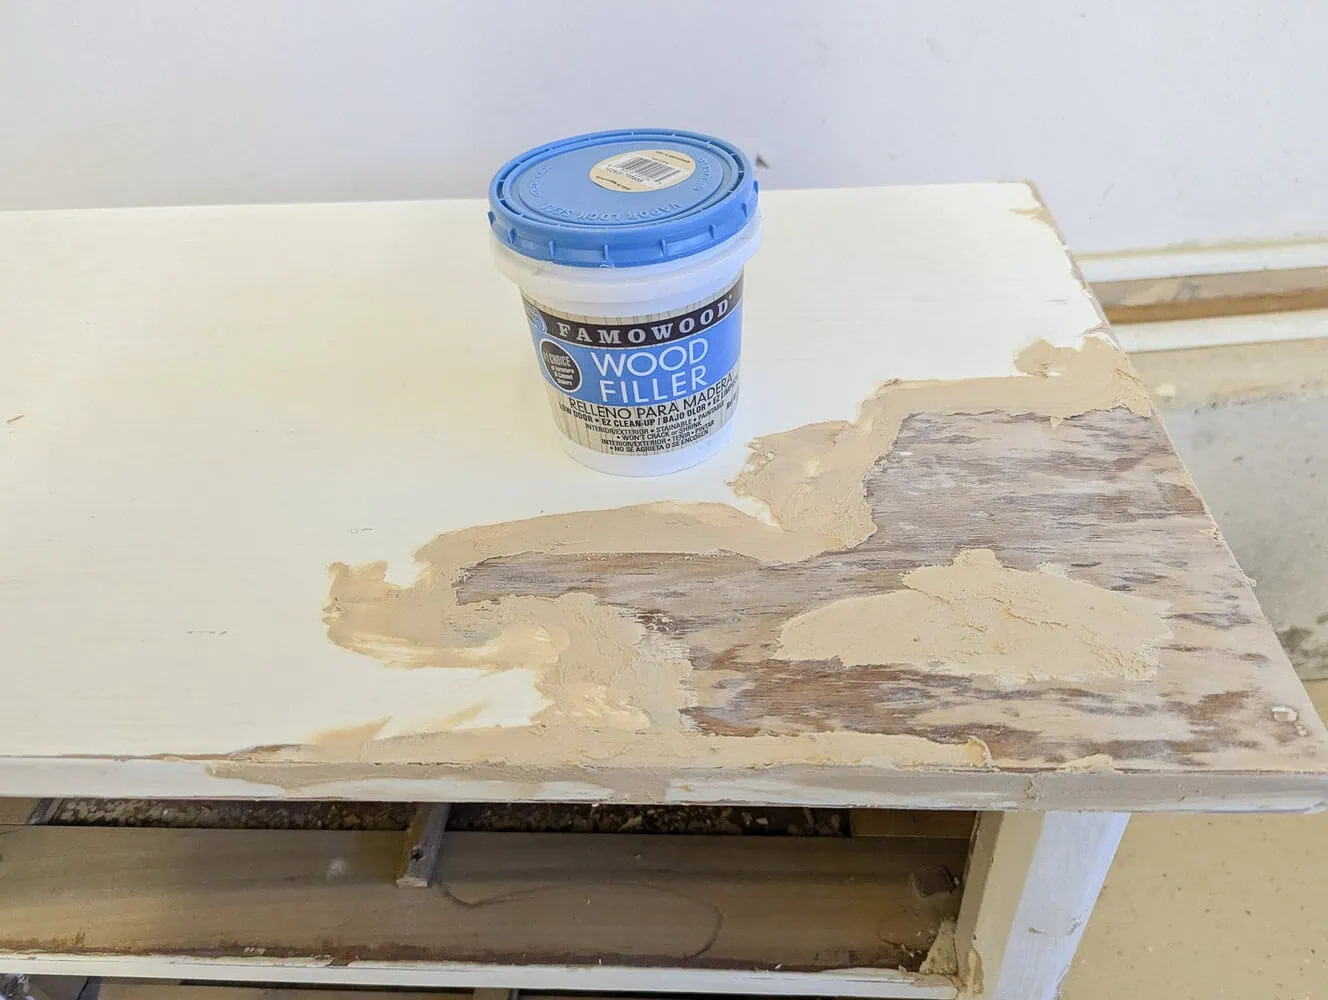
Once it was fully dry, I sanded it smooth with my orbital sander. I also lightly sanded the rest of the nightstand to smooth out old paint drips and other uneven areas.

Painting the nightstand
I cleaned everything well to remove all the dust and then it was time for paint.
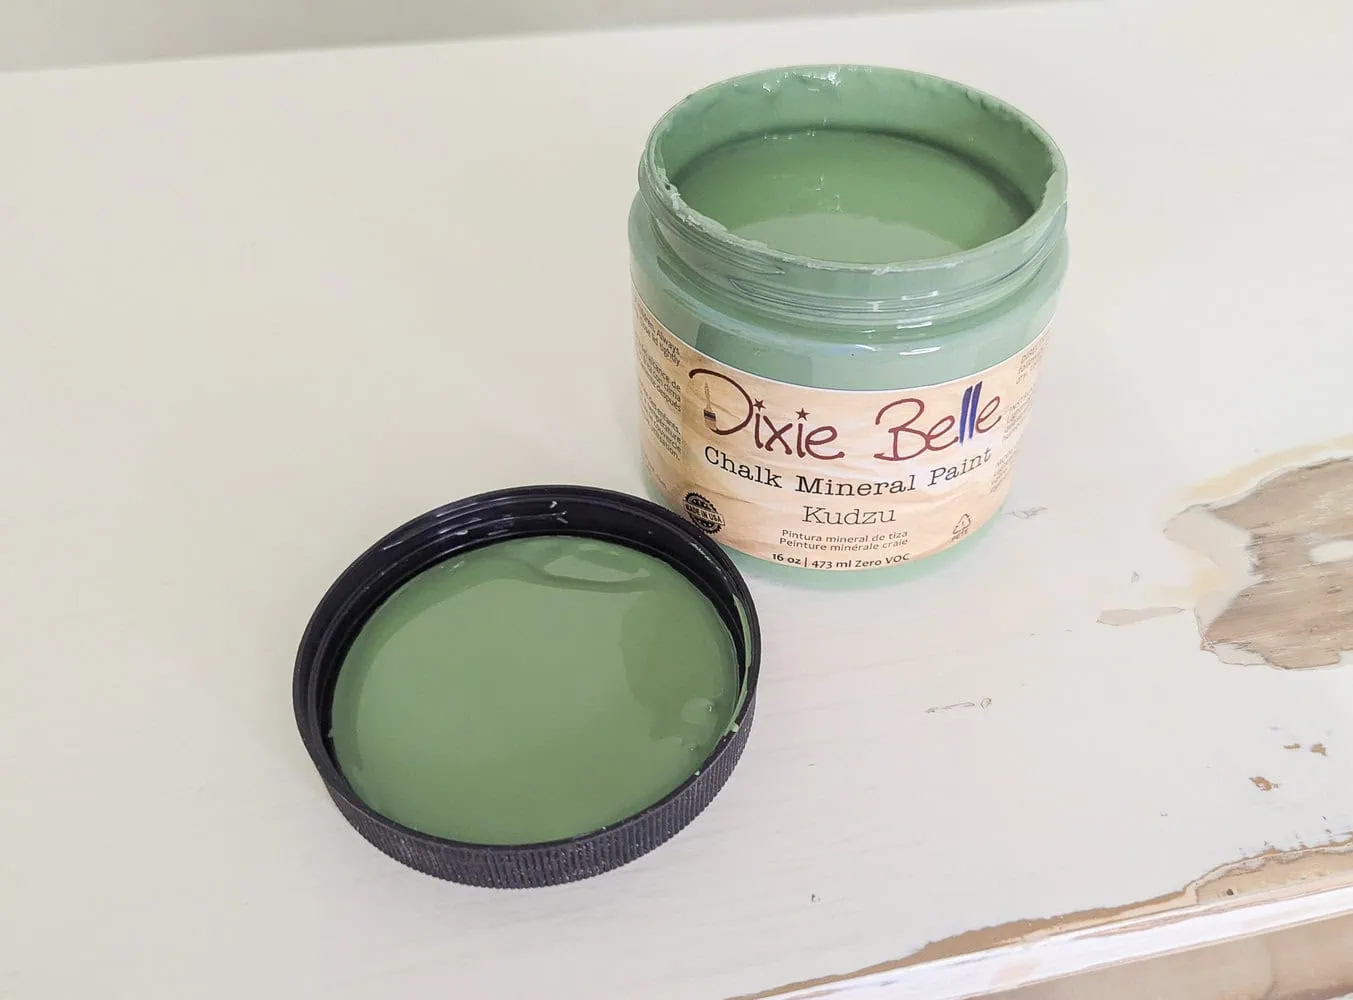
I knew I wanted to use a great shade of green for this nightstand I chose to use Dixie Belle chalk paint in the color Kudzu. This is a beautiful bright green color and it went on really smoothly.
I used a foam roller and my favorite purdy paintbrush to apply the paint. It took two coats of paint to get nice even coverage.
Sealing the nightstand
Once the paint was fully dried, I applied two coats of sealer to protect the finish.
I used CrystaLac water-based polyurethane to seal my nightstand. This sealer has become a recent favorite after performing really well when I tested all the most popular sealers.
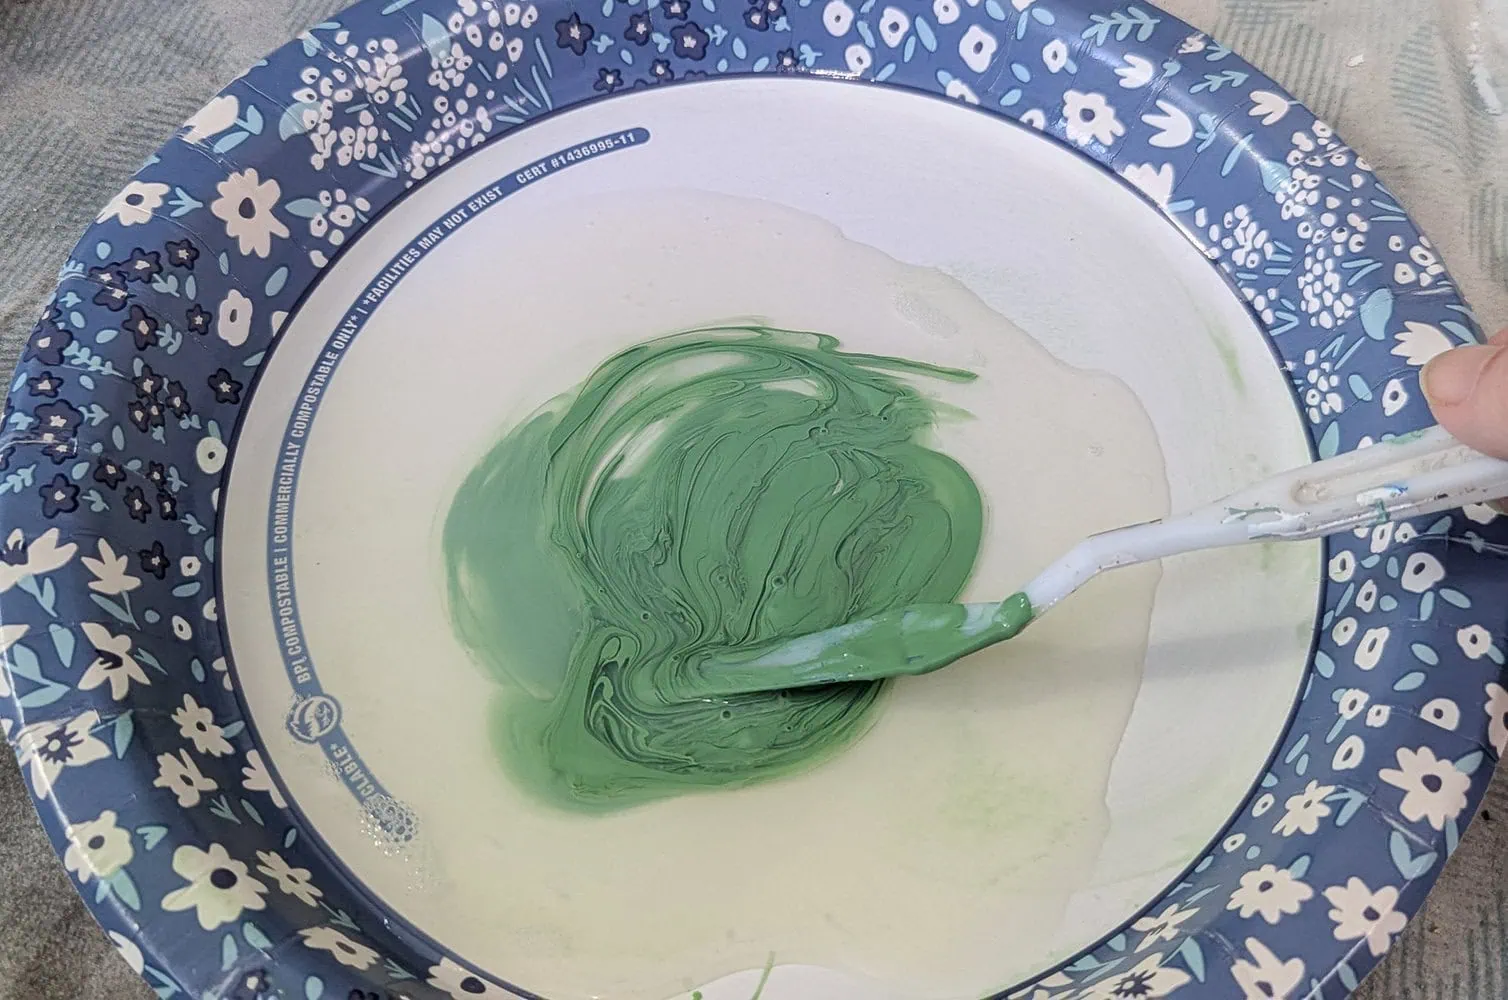
I mixed a little of my green paint into the sealer to prevent streaking and I applied the sealer using an inexpensive blue sponge applicator – my favorite for getting a super smooth finish.
Not sure when you need to use a separate furniture sealer? I have answers to all your furniture sealing questions in this post.
My Dollar store find
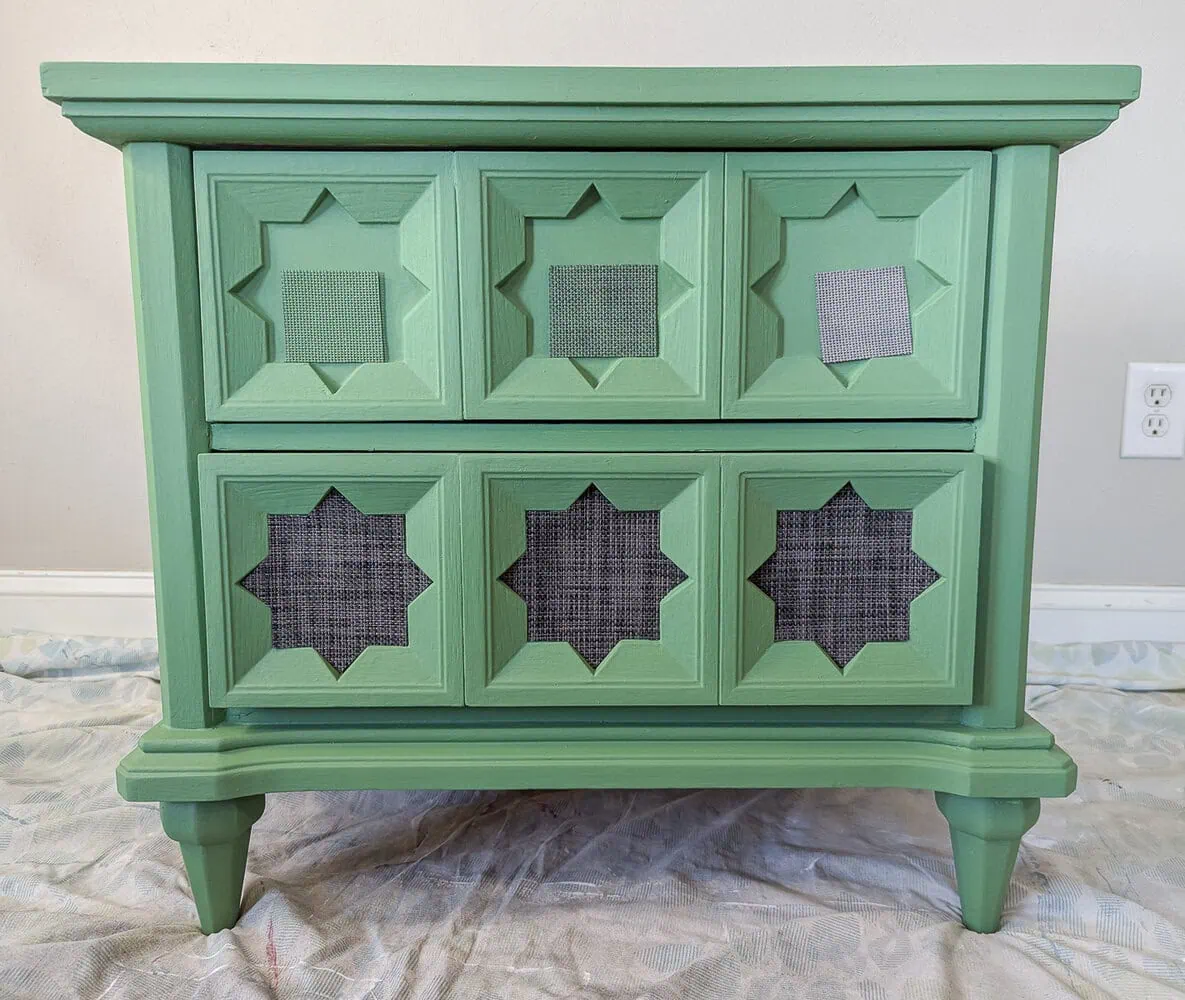
At this point, the nightstand was looking really nice but it really needed a little something more to make the most of those stars on the drawers. After considering different options, I decided what it really needed was a bit of texture in the stars.
I started looking at paintable textured wallpaper and there were some good options, but most of them were $25 or more. There was no way I was going to pay more for wallpaper than I paid for the entire nightstand.
I started trying to come up with other options and I found the perfect solution at the Dollar Tree. They had tons of woven placemats in all different colors and patterns. I’m not sure exactly what material these are made of, but they have a great woven texture.
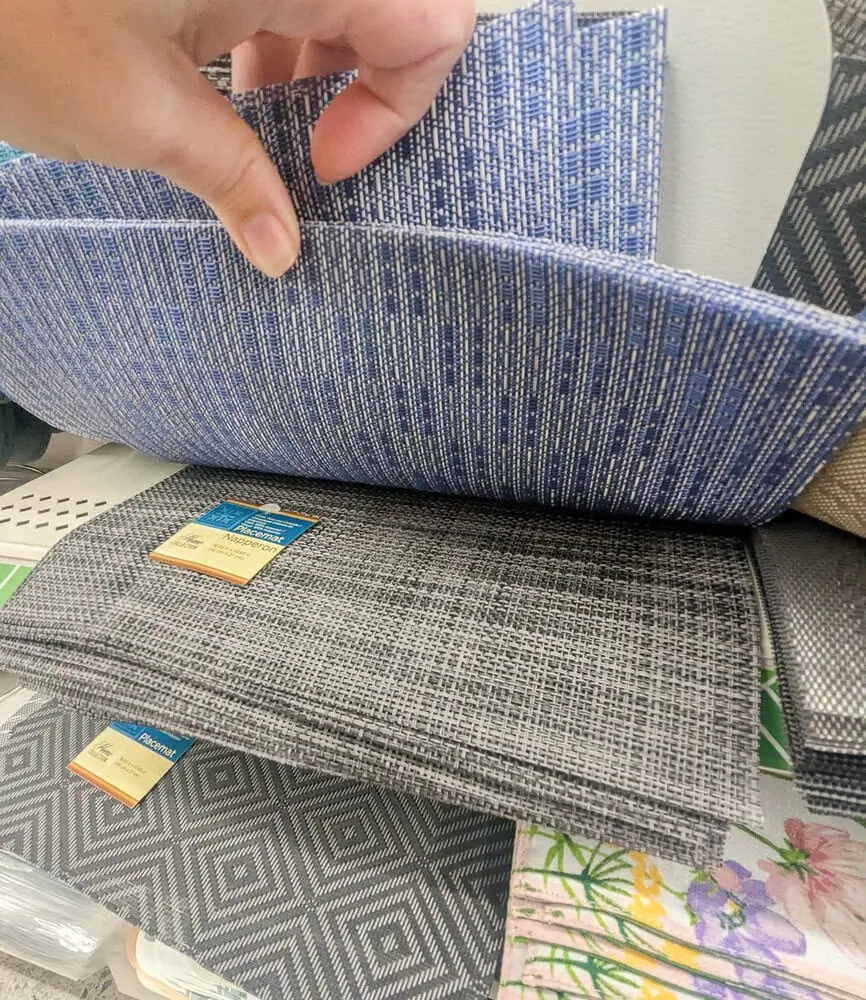
I wasn’t totally sure they would work for my nightstand, but I grabbed a few to test out. It turns out that these placemats can easily be cut into different shapes without unraveling and they are paintable which means they were perfect for what I needed.
Adding texture to the drawers
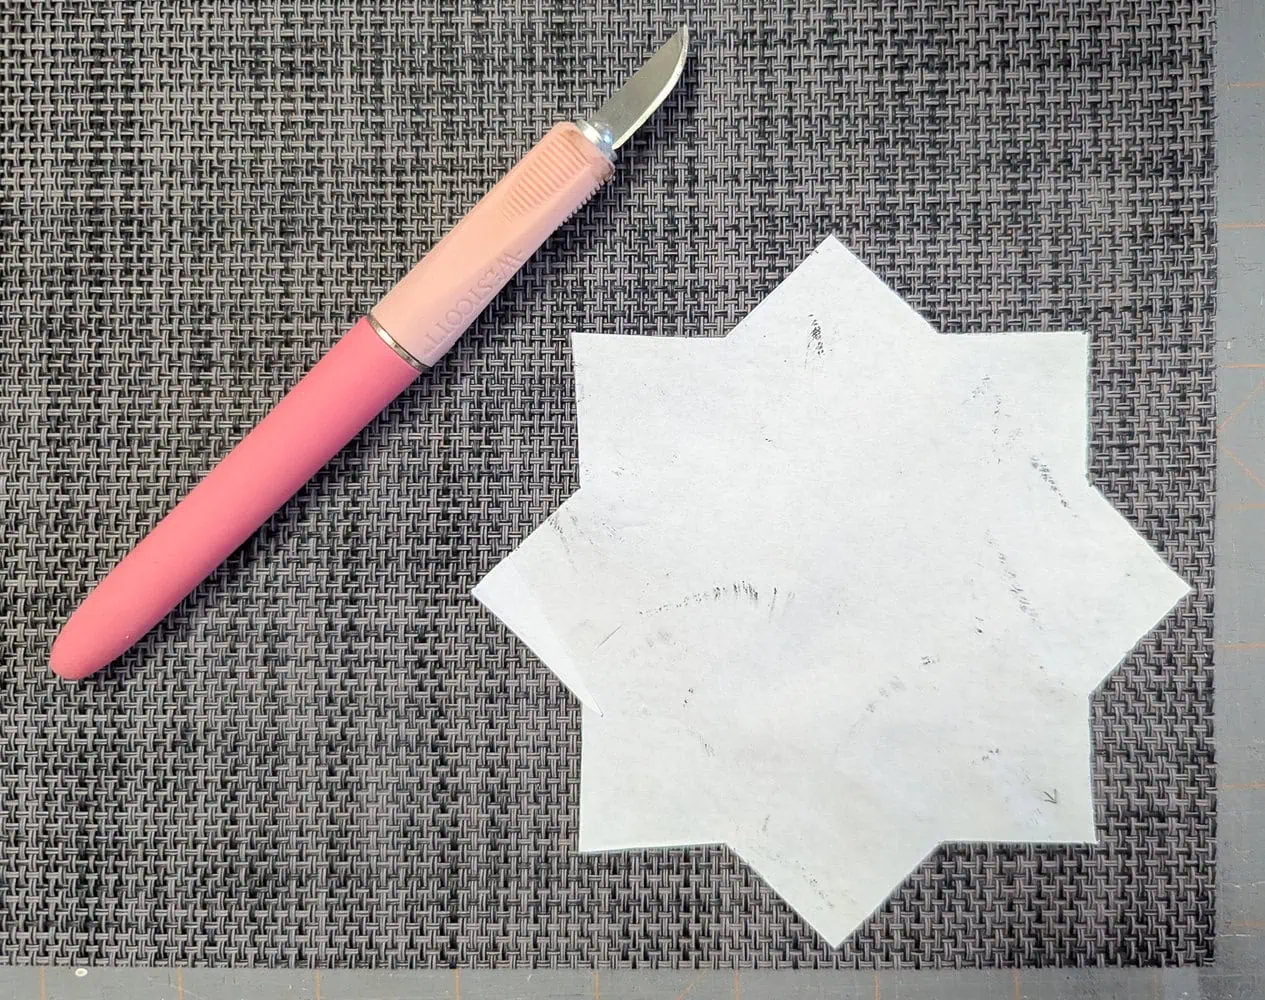
I created a pattern for the stars on my drawers using paper and used that along with a craft knife to cut the placemat to shape.
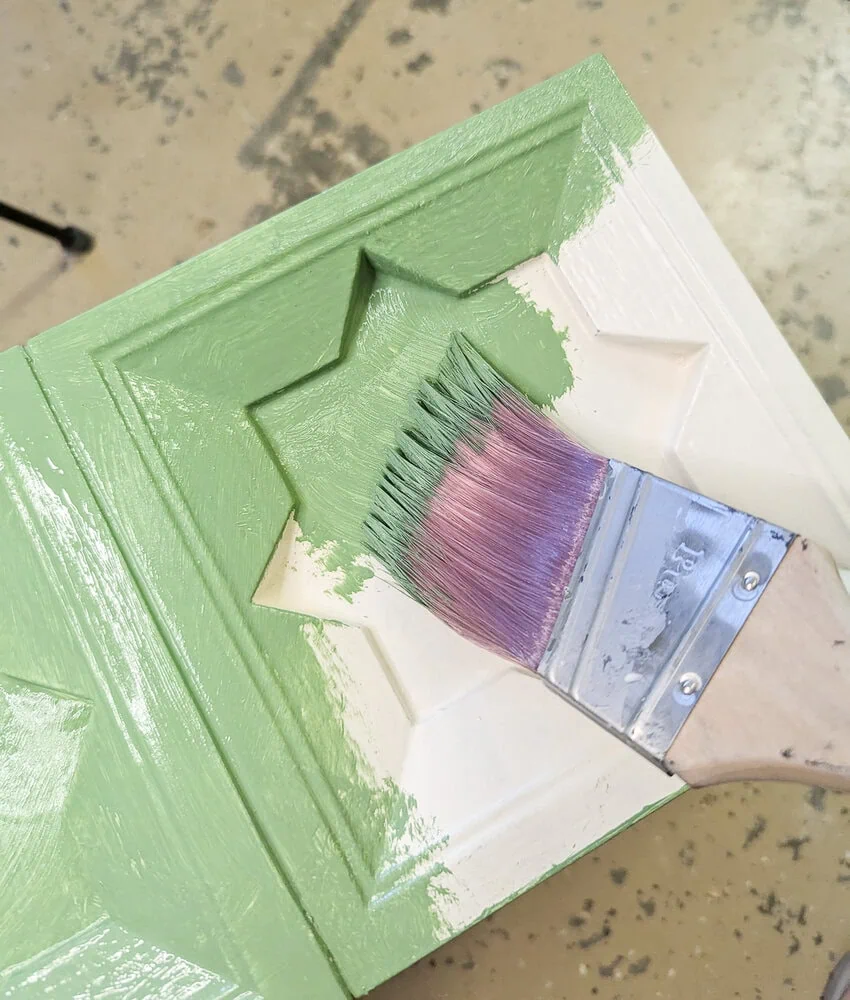
Once the stars were cut out, I did a few tests to decide what color to paint them. My original plan was to paint them the exact same shade as the rest of the nightstand, but when I tested that out, it looked kind of cheap and plasticy. Instead, I decided to do a paint wash to let some of the underlying color variation show through.
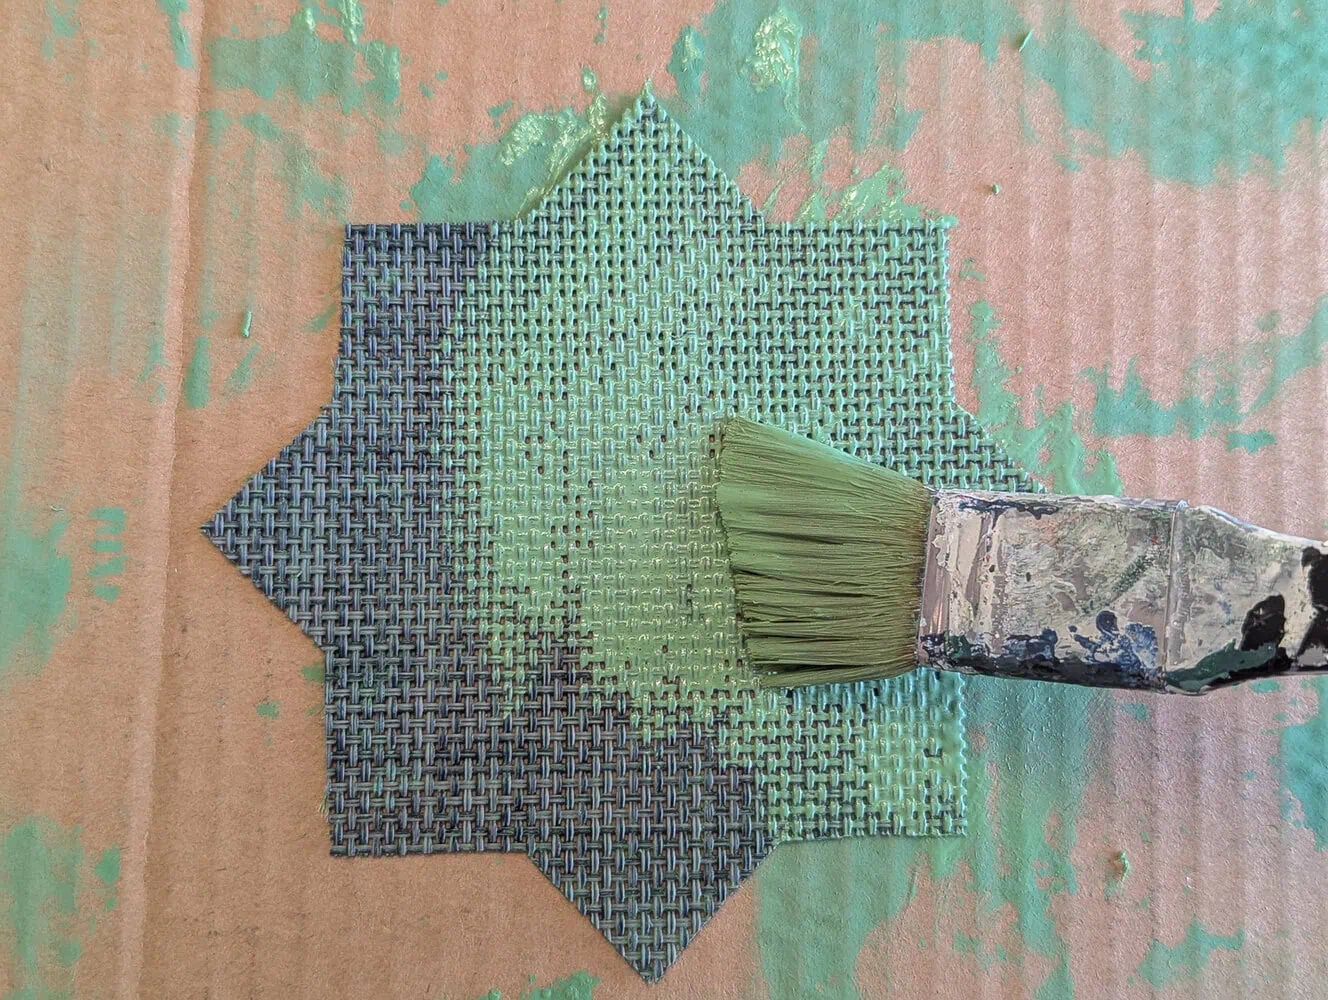
I mixed a little of my green chalk paint with water and brushed it on to each star and then blotted off the excess with a paper towel. I repeated this process four times until I had the color I wanted.
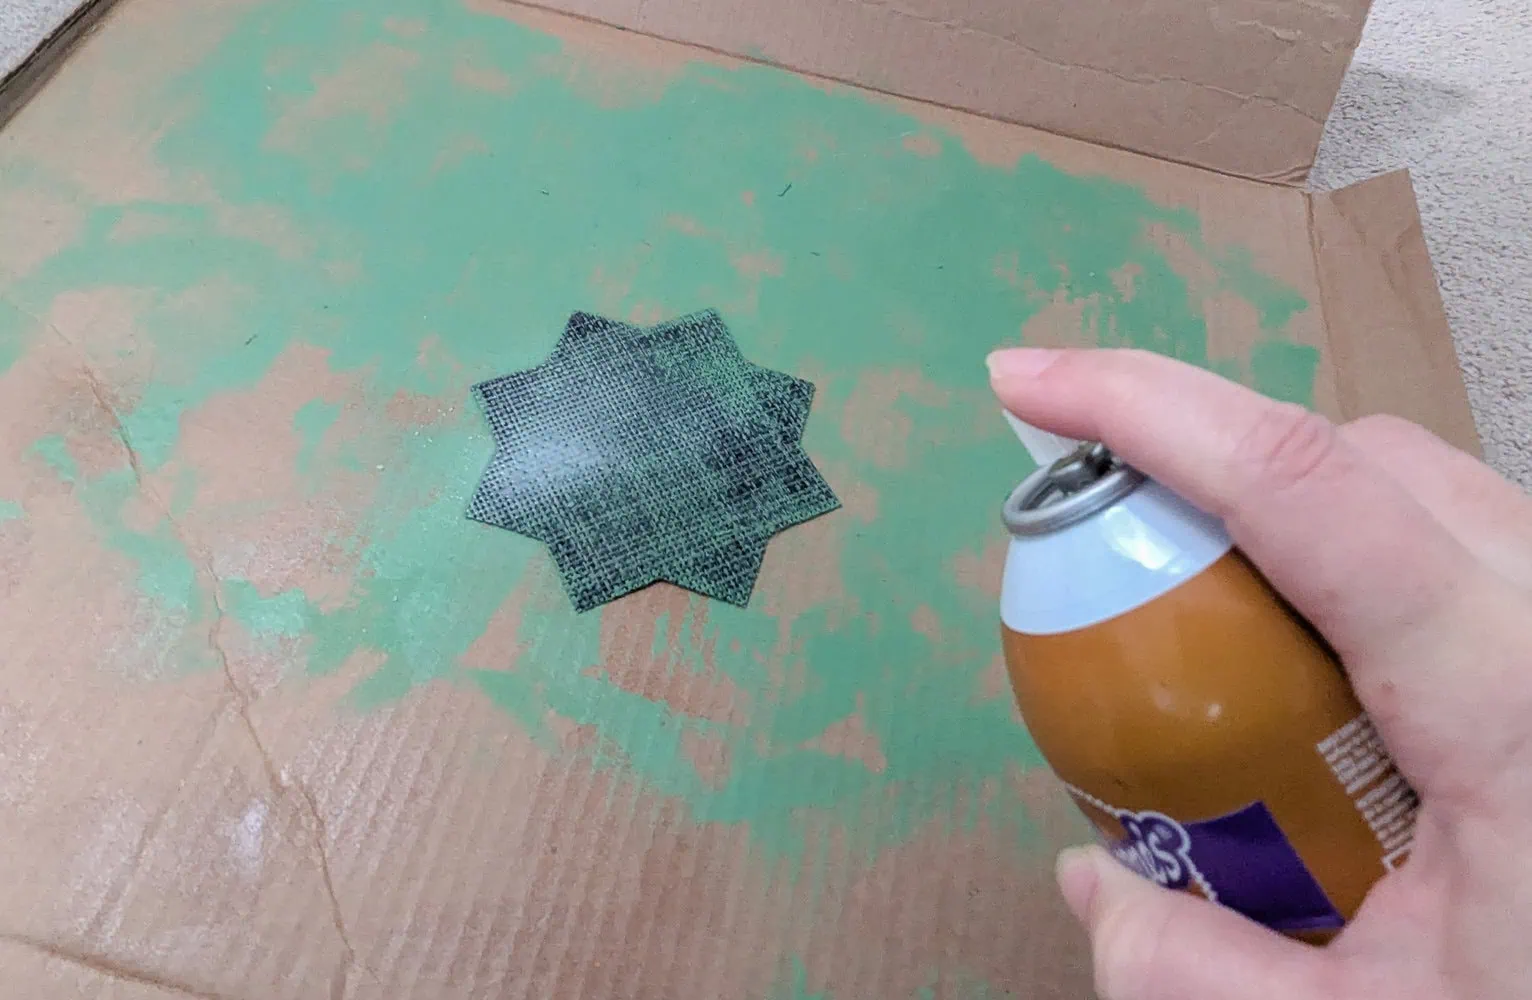
Then I used spray adhesive to attach the textured stars to the nightstand.
Stripping the hardware
I always like to reuse the original furniture hardware whenever possible on furniture makeovers and I actually really like the hardware that came with this nightstand. It had a great shape, but it was covered in many layers of old paint that had to go.
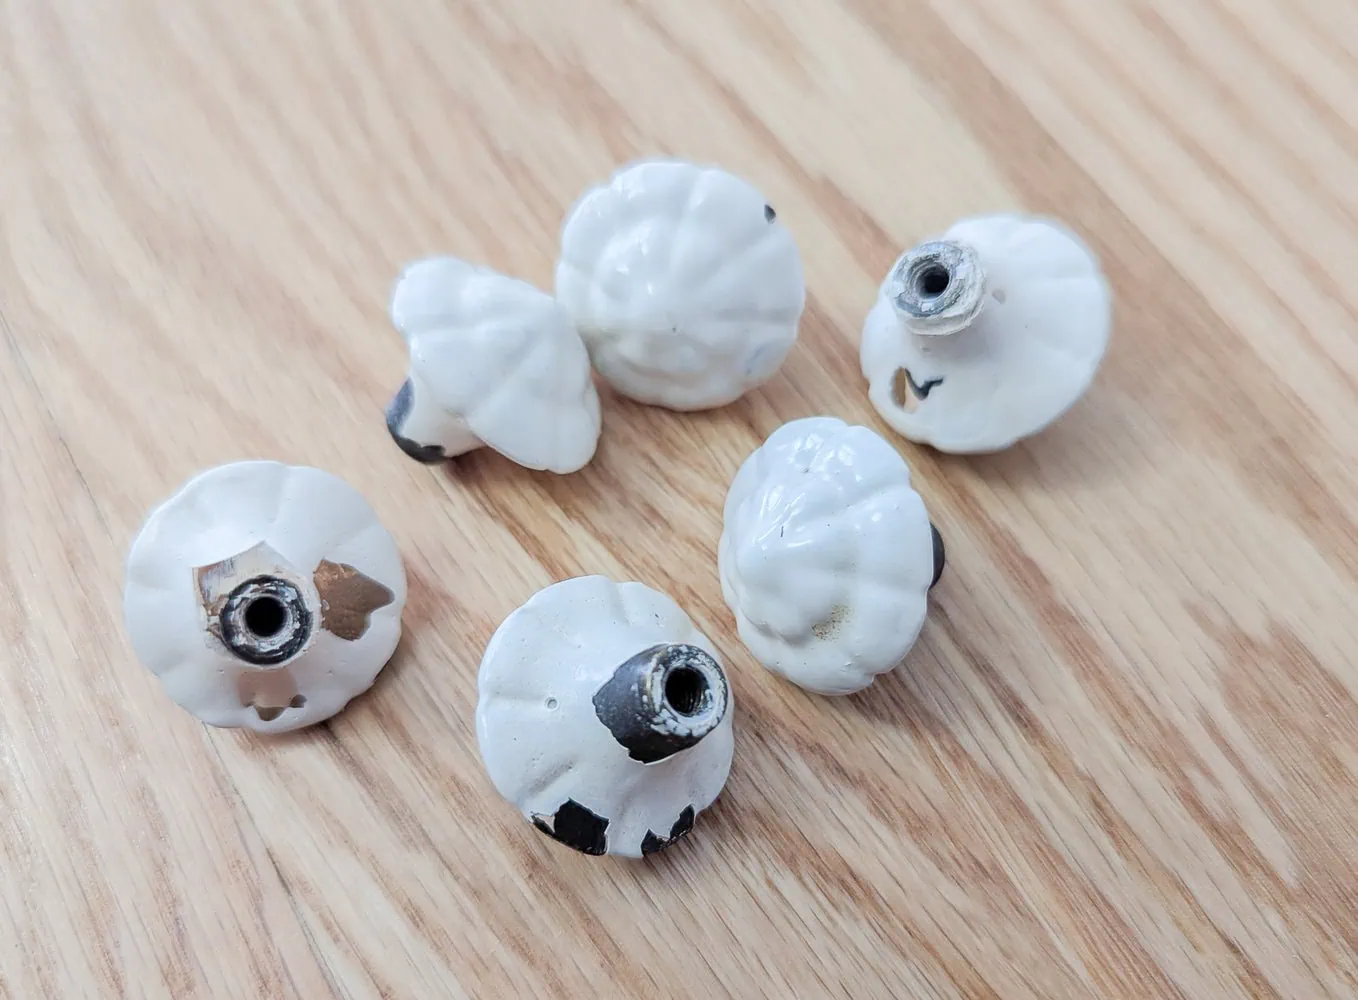
I used the boiling water method to remove the old paint. This is a great way to remove paint from hardware – it’s easy, doesn’t use harsh chemicals, and is very nearly free. You just fill a pot with water and a bit of baking soda and bring it to a boil. (Be sure to use a cheap pot for this that you don’t also use for food.)
Let the hardware boil for around fifteen minutes and when you remove the hardware the paint peels right off.
Gilding the hardware
Once the layers of old paint were stripped off the hardware, it looked fine but I didn’t love the finish. Instead I wanted to give it a gold finish to really pop against the green paint.
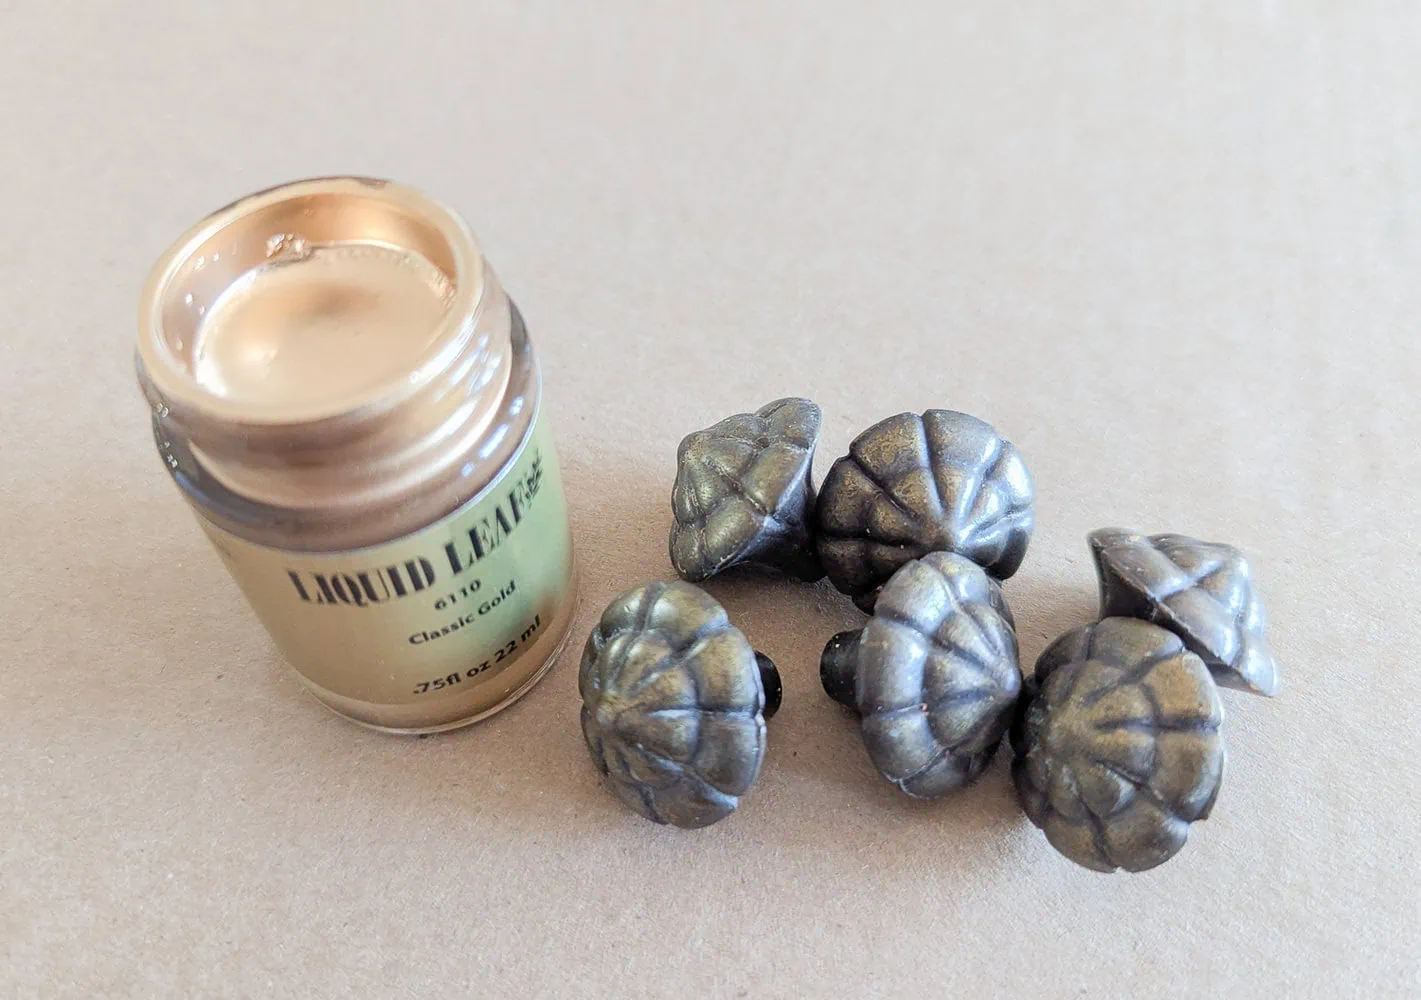
Now there are some really great gold spray paints out there, but I’ve found that nothing gives a better gold finish than liquid gold leaf. This is a liquid finish similar to paint that you can brush onto anything. It gives a brilliant gold finish similar to what you get with real gold leaf. It really looks and feels like you are painting with liquid gold.
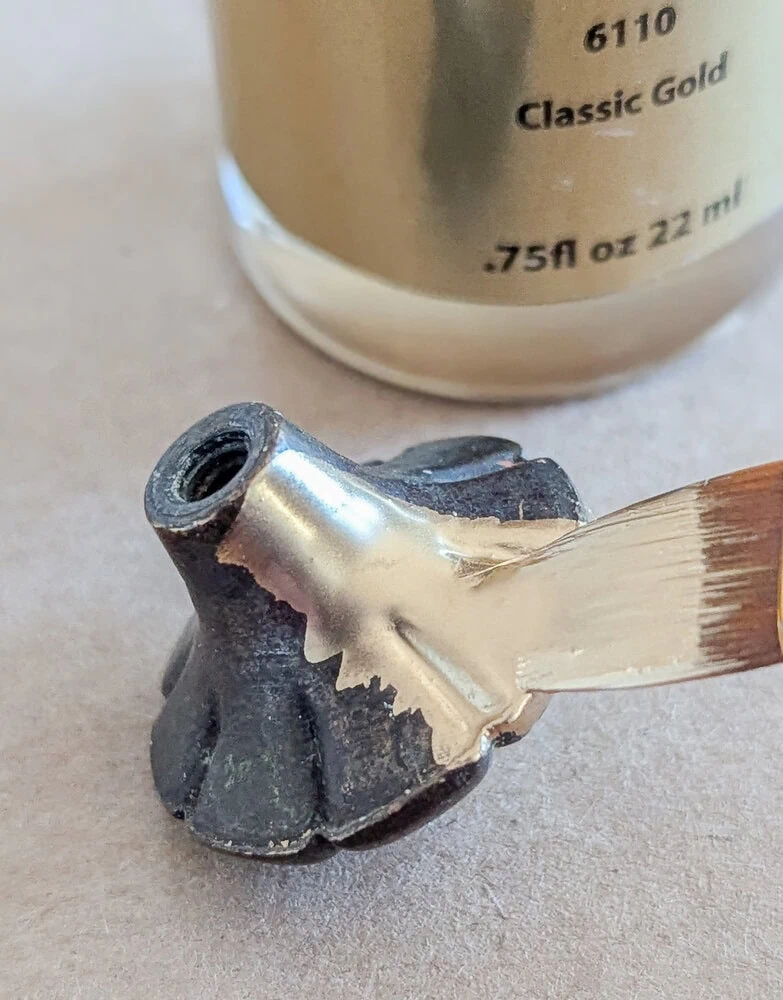
I only needed one coat of liquid leaf to get this brilliant finish. After your liquid leaf has dried, it’s a good idea to apply a sealer to prevent future tarnishing.
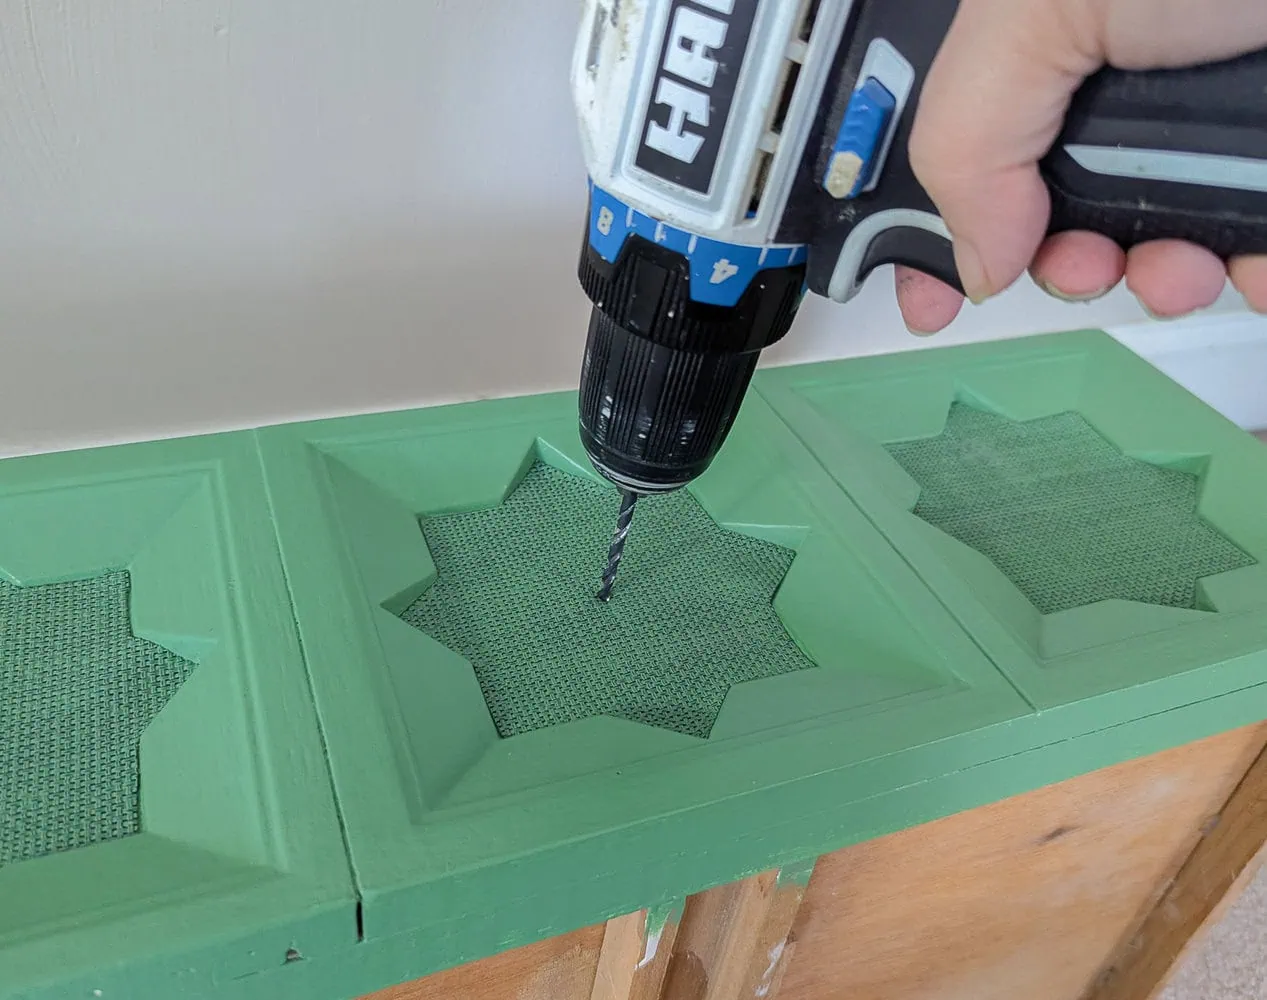
Reattaching the hardware
The last step is putting the hardware back on. I used a drill to gently drill holes through my placemat texture and then reattached the old hardware.
The finished nightstand
Here is the finished nightstand:

I really love how this turned out. I think the color and texture really complement the piece’s design.
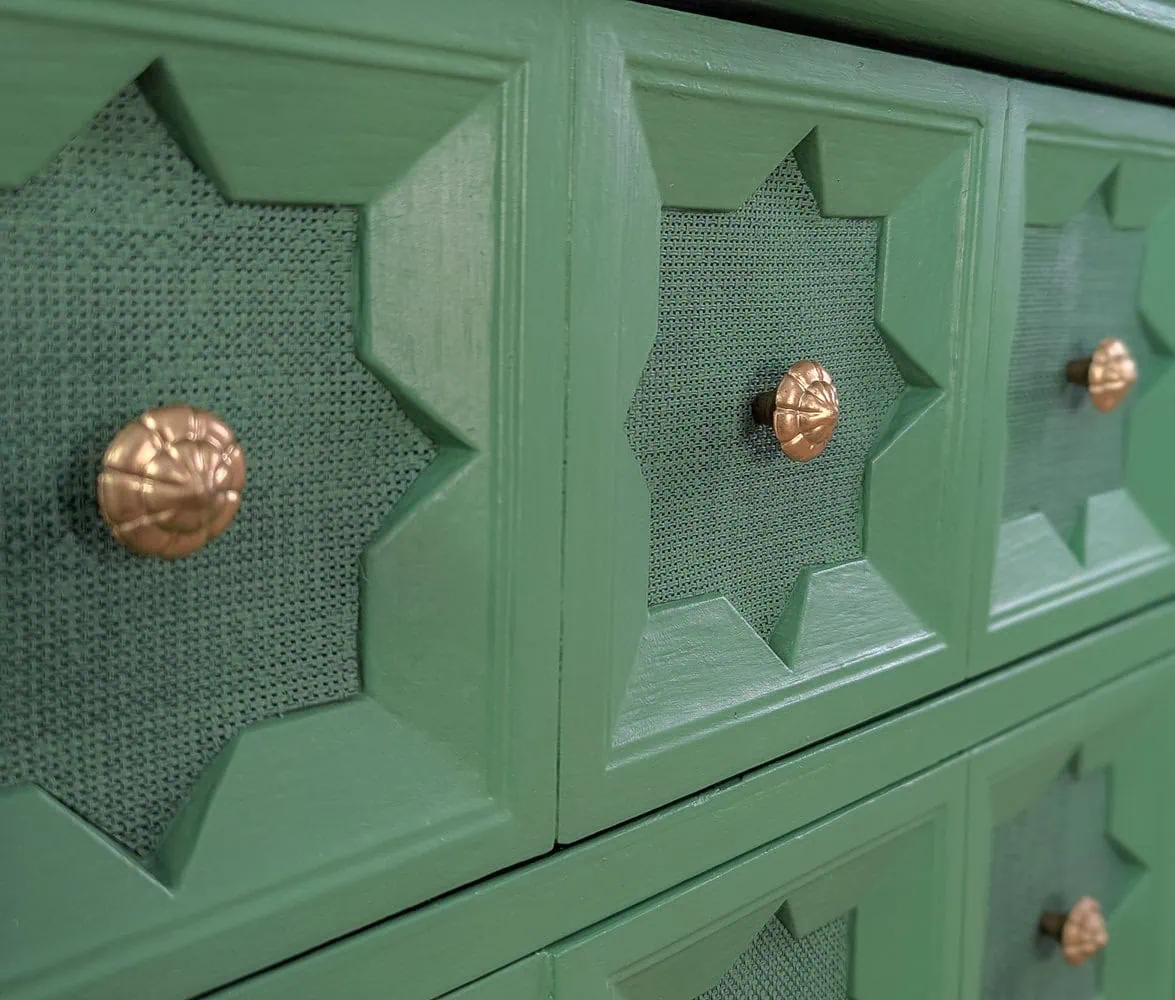
The texture on the drawers looks really beautiful and I would absolutely never guess it was really a Dollar Tree placemat!
Check out this before and after:
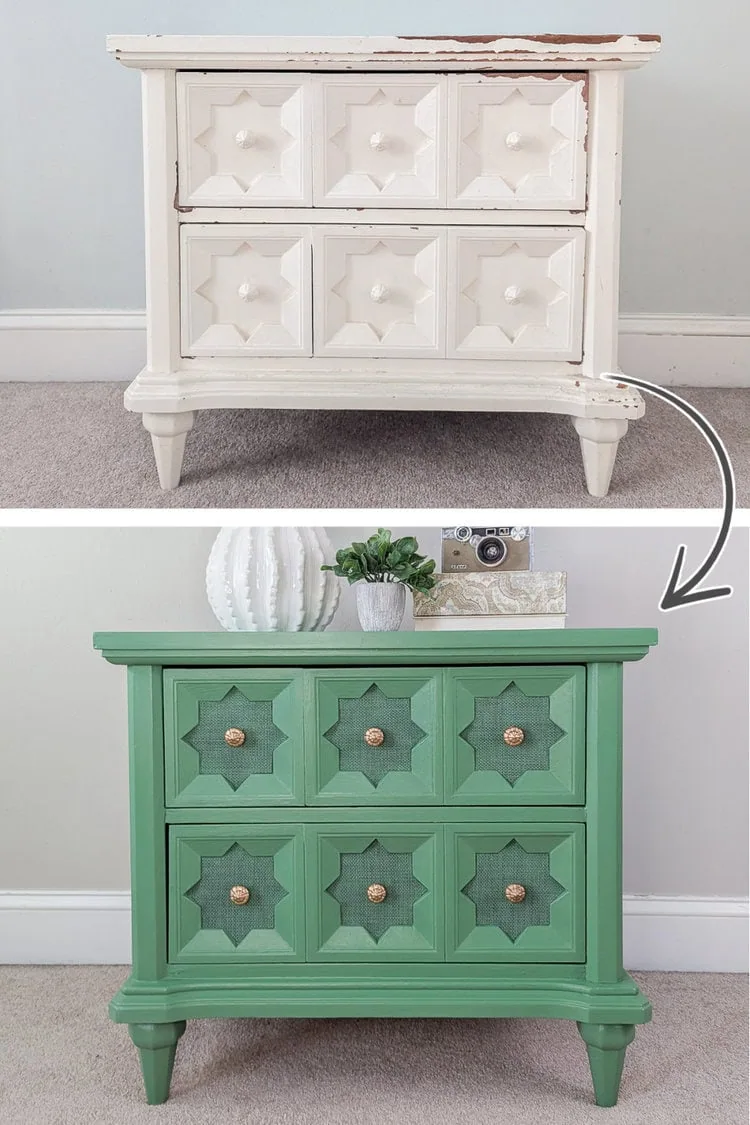
Not only is all the damage fixed, but I also love how much all the beautiful details stand out now. When everything was painted white, it all just faded into the background.
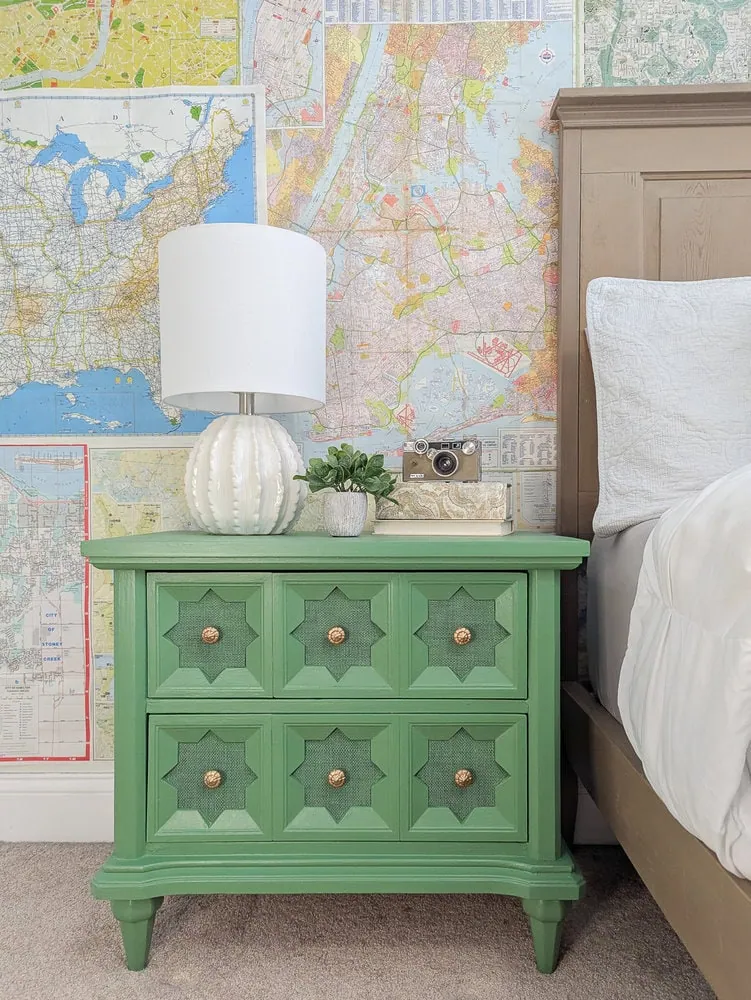
This nightstand is going in my son’s room. This room is getting so close to being finished and I can’t wait to share the final room reveal!
You can check out the tutorials for all the other projects in this room at the links below:
Video
Want to see this makeover in action? Just click play below to watch my Youtube video showing the whole process.
I’d love for you to subscribe to my Youtube channel!
I’d love for you to pin this post on Pinterest!

Wow Carrie,
Absolutely beautiful result. Very inspiring.
Thank you!
You nightstand turned out so good. I love that you included that placemat it adds nice texture.
Thank you Michelle!
Beautiful!!!
Thank you!
Really nice makeover, particularly the use of texture on the stars. Just all of it. Kudos for a job well done
Thank you!
AWESOME job ~ love me a good makeover
Thank you! Me too!
Oh my golly you did a remarkable job with that piece! WOW!!!! I love that color and every decision you made to make that sad unloved piece worthy of great new life. It looks so high end, love it.
Thank you so much!
Amazing makeover! Such a creative idea to use the placemats!
This is awesome! Love the color! So creative!
Thank you!