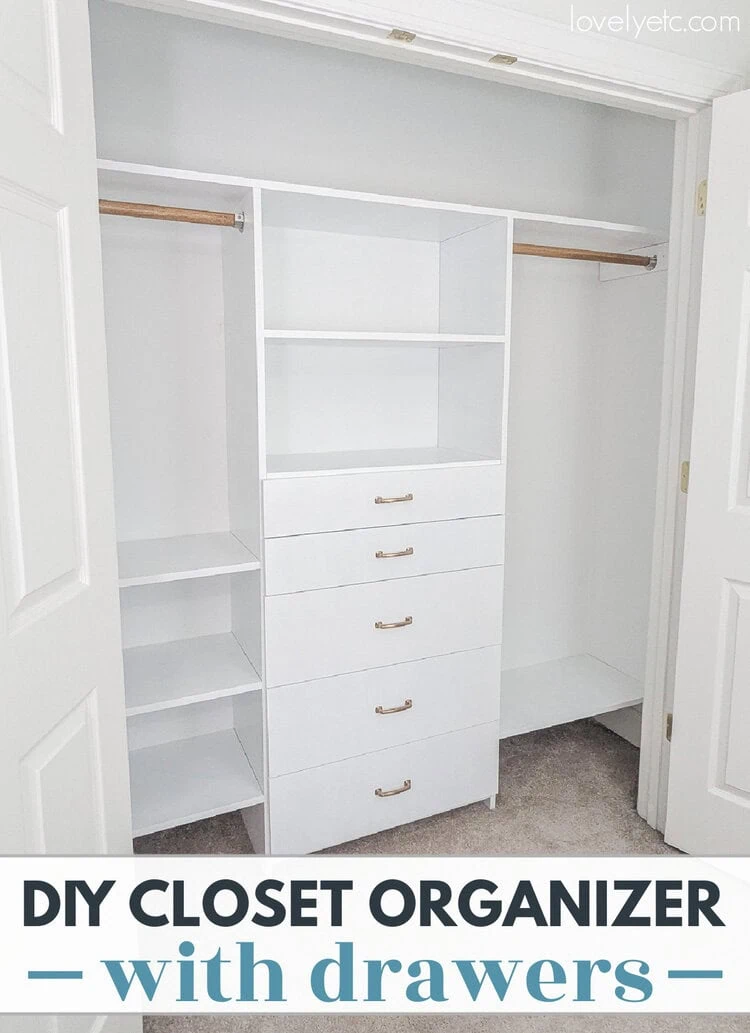
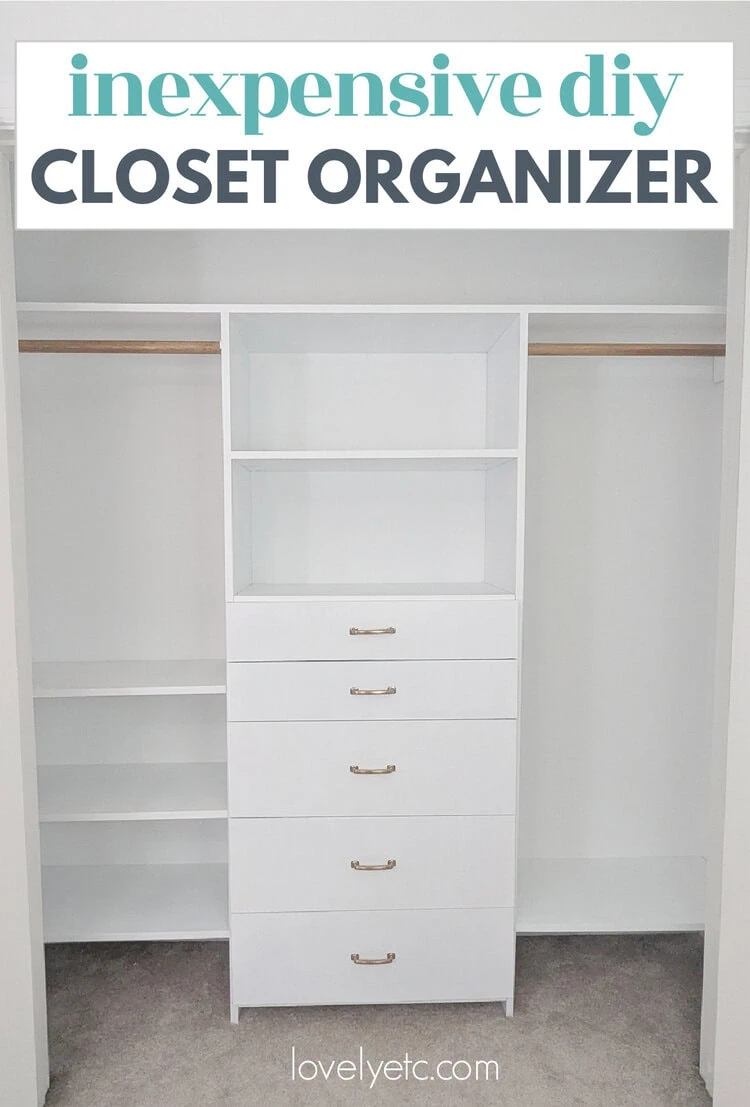
How to Build an Inexpensive DIY Closet Organizer with Drawers
This DIY closet organizer with drawers includes plenty of storage to make the most of your closet. With a step-by-step tutorial and video tutorial plus tips to customize this organizer to fit your own closet.
I’ve built several closet organizers over the years and I’ve decided that building a good closet organizer may just be one of the most satisfying DIY projects you can do.
A closet organizer may not be the most flashy or beautiful project, but it sure can transform how you use your closet! This time around, I’m working on my 12 year old son’s closet.
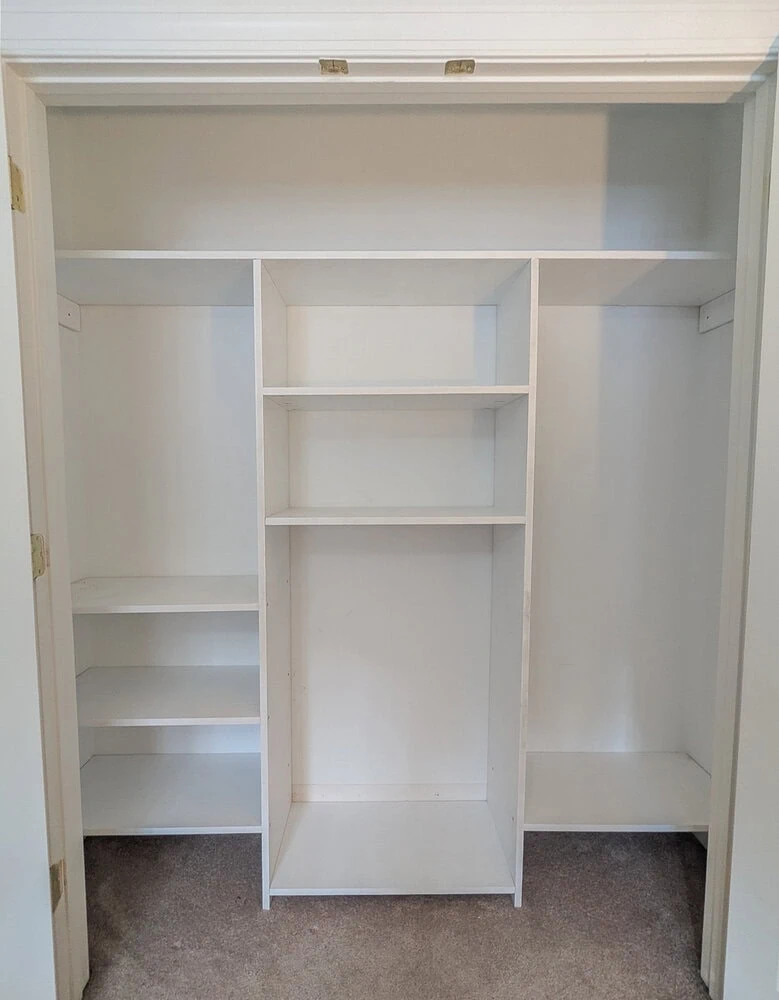
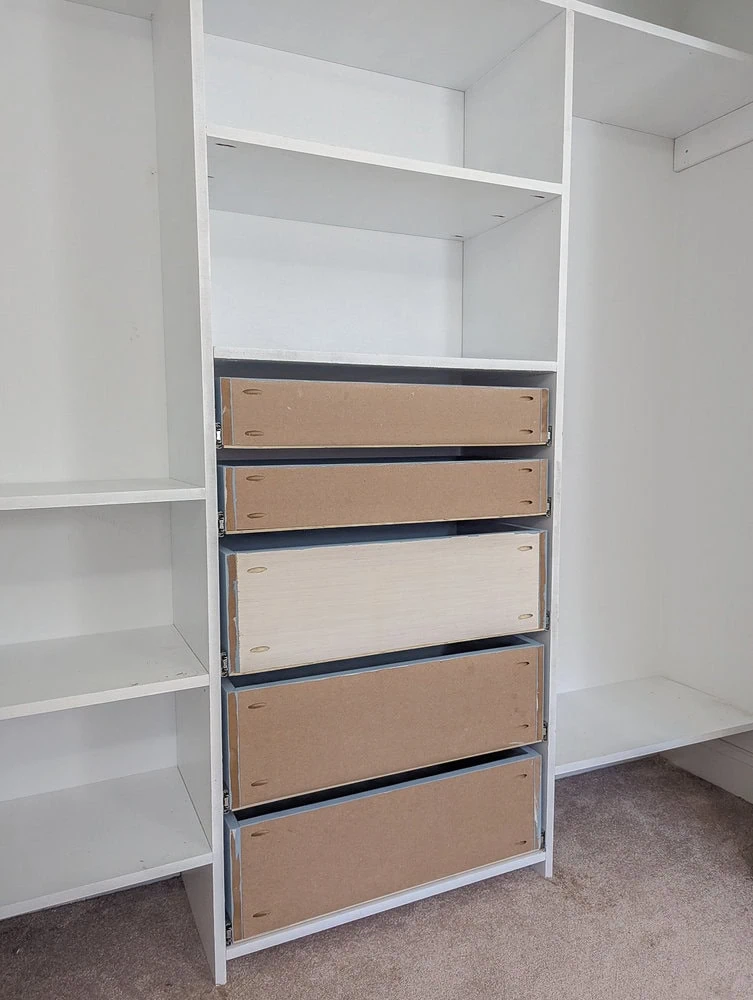
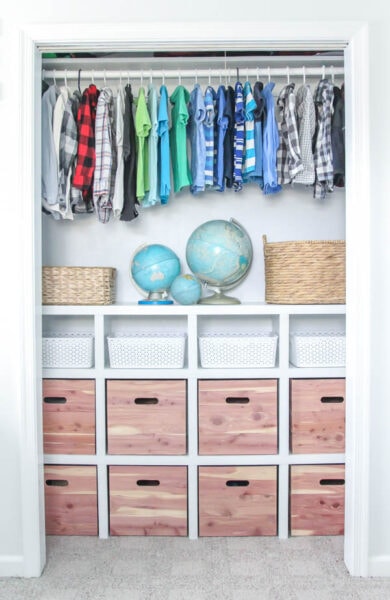
Here’s the before:
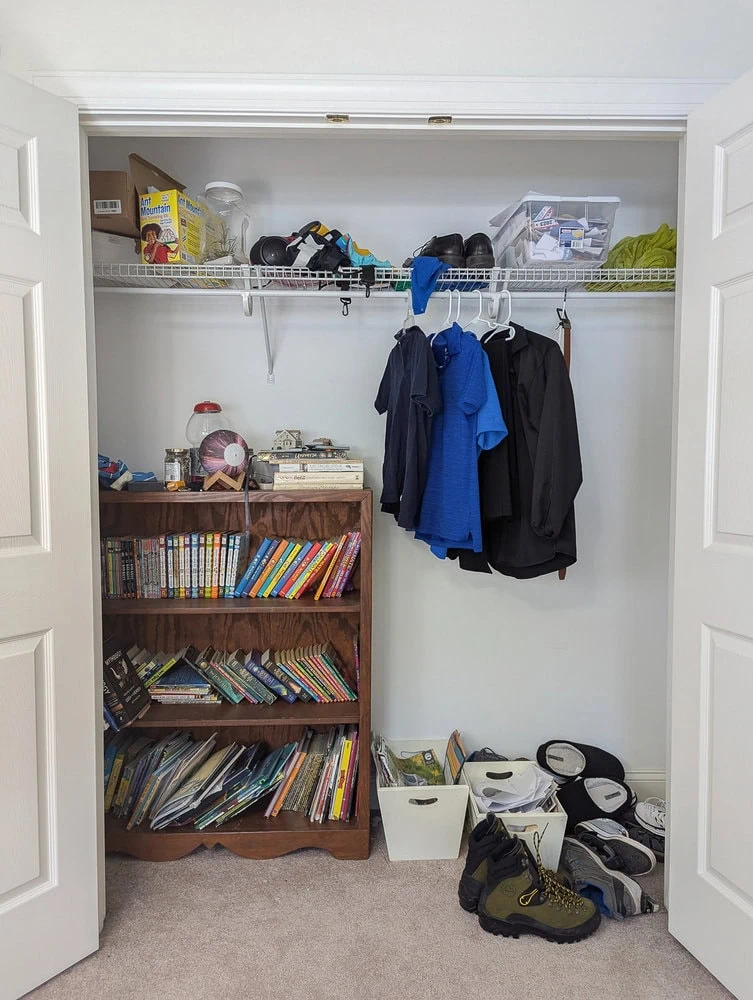
Talk about a TON of wasted space! This closet really only has space for hanging clothes and since he has exactly four shirts on hangers, that means all that vertical space is completely wasted!
I wanted to build a closet organizer that was packed with vertical storage including drawers and shelves, but would also work well if he (or someone else) needs more room for hanging clothes in the future.
I came up with a design that ticks all the boxes and I love how it came together! This closet organizer has:
- Plenty of drawer space for clothing
- Space along the bottom to store shoes
- Lots of shelves for extra storage of all kinds
- Plenty of space for hanging clothing including space for hanging longer items
- Room for a hamper
- Plus, it’s super easy to add or remove the side shelves depending on what kind of storage you need.
In this post I’m sharing everything you need to know to build this DIY closet organizer with drawers including a full materials list, step-by-step tutorial, and money-saving tips. Plus you’ll also find a video tutorial at the bottom of this post.
Looking for a DIY closet organizer that’s a bit faster and easier to build? You might want to check out this closet organizer I built a few years ago. The design is very similar, but it’s much easier (and cheaper) to build because it doesn’t include drawers.
This post contains affiliate links which means if you make a purchase after clicking a link I will earn a small commission but it won’t cost you a penny more. Click here to see my full disclosure policy.
Closet Organizer Build Plans
I am sharing the tutorial for building this closet organizer below and I’ve also created printable pdf build plans. The build plans walk you through exactly how to build this closet organizer including the tools list, materials list, cut list, visual cut list, and detailed step-by-step instructions with 3D renderings. The build plans also include more specific instructions for perfectly customizing this closet organizer to fit your specific closet.
Materials
- Three 3/4″ x 4′ x 8′ MDF sheets – you can use 3/4″ plywood instead if you prefer
- One 1/4″ x 4′ x 8′ sheet of plywood – for the drawer bottoms
- Two 1″ x 4″ x 14″ boards – These boards will be used to support the top shelf. Scrap wood would work well for this.
- Four 1″ x 2″ x 14″ boards – These boards will be used to support the lower shelves. Again scrap wood is great.
- Wooden closet rod – I found that a round 1.25″ wooden dowel is the same size as a wooden closet rod, but much more affordable.
- Two pairs of closet rod sockets – to support the closet rods
- 1.25″ Kreg pocket hole screws
- 1.25″ wood screws
- Five sets of 14″ side mount ball bearing drawer slides – I used this set of 6 drawer slides from Amazon. They’re a great deal and were really easy to install.
- Drawer handles of your choice
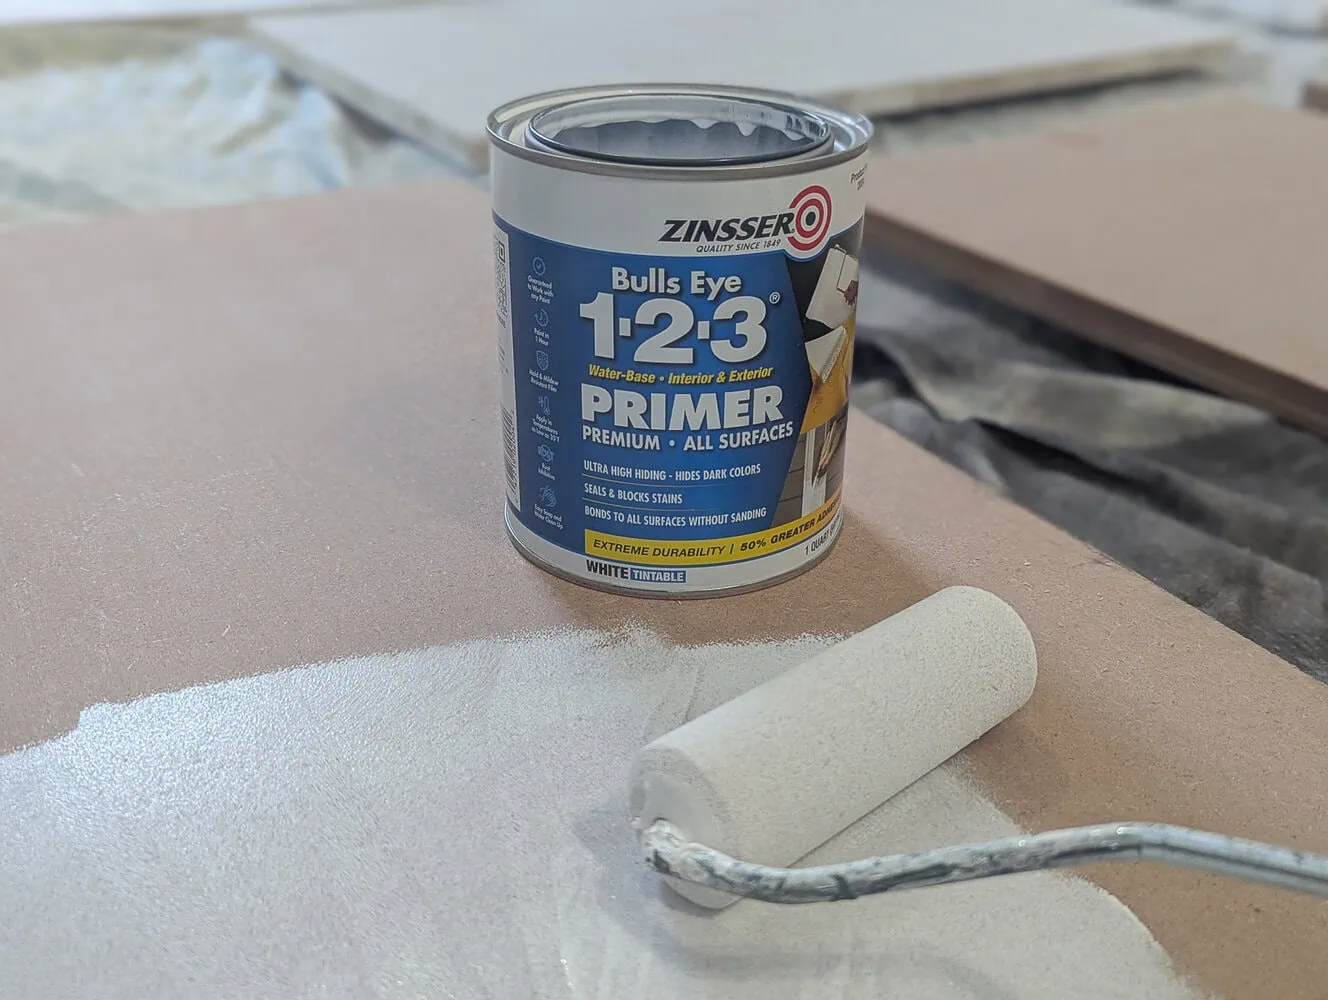
- Primer and White paint (or the paint color of your choice)
- Small foam paint roller
Tools
- Flathead screwdriver and needlenose pliers – if you need to remove old wire shelving.
- Circular saw – for cutting your wood to the correct size
- Oscillating tool – for cutting the baseboards in the closet.
- Kreg Jig – I used the Kreg K4 for this build. It’s a great pocket hole jig for a regular DIYer. But if you really only use your pocket hole jig occasionally, I recommend the Kreg R3 – it’s a smaller, less expensive Kreg Jig that is still easy to use.
- Nail gun or hammer and nails – for assembling the closet organizer. This is the nail gun I have and it is very easy to use and doesn’t require an air compressor.
- Orbital sander – for smoothing any rough edges
- Tape measure
- Drill – for putting everything together.
- Carpenter’s square
- Level
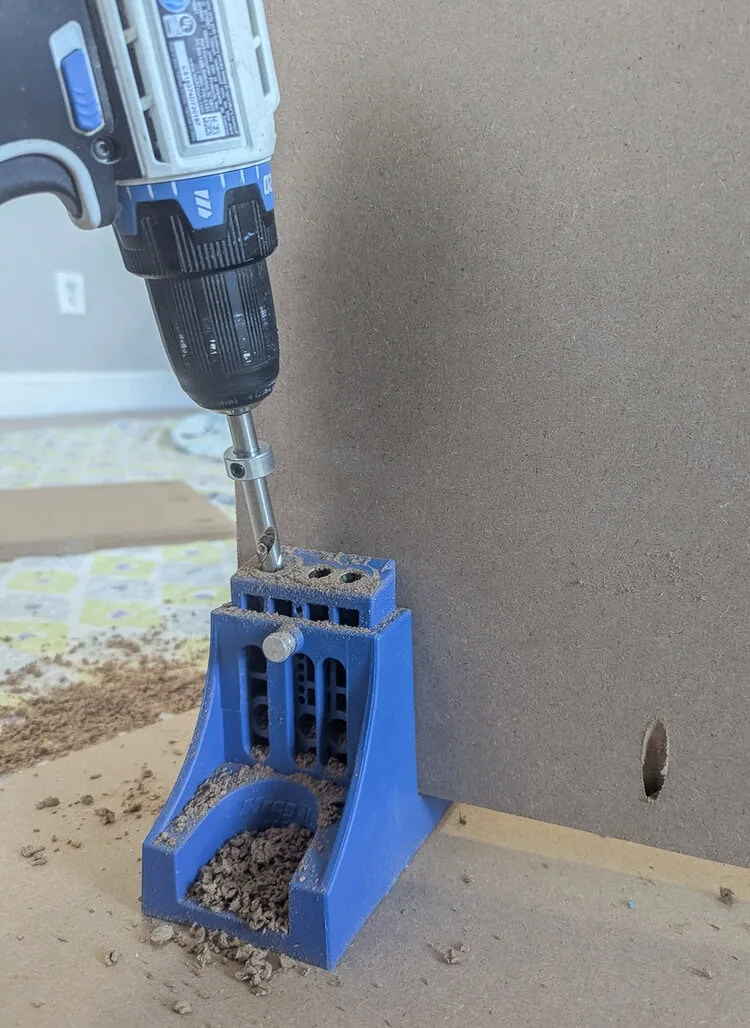
- Optional: Hardware Jig – this is completely optional but it makes it much faster and easier to drill the holes for your drawer handles in the right spot.
- Safety gear – hearing and eye protection and a good mask
How to make a DIY Closet Organizer with Drawers
Dimensions
My closet is a largish reach-in closet that is 84″ wide. The diagram below shows the dimensions of my finished closet organizer.

If your closet is narrower or wider, you can adjust the length of the top shelf and the side shelves. If your closet is significantly smaller (less than 68″), I would recommend you also make the center section narrower so you have plenty of room to access things on the two sides. To do this, you’ll also need to modify all of the drawer measurements.
I made my closet organizer 15 inches deep. After building several organizers and shelves, I really prefer 15″ shelves and drawers. They give a bit of extra room without being so big things start to get lost. But if your closet isn’t very deep or you want to save some money on materials, 12″ deep also works.
Wood Cut List
You can use this wood cut list to make a closet organizer exactly like mine. If you are making a slightly different size organizer, be sure to adjust the measurements accordingly.
From 3/4″ MDF or Plywood:
- 1 @ 15″ x 83 3/4″ for the top shelf (this shelf should be 1/4″ less than the closet width)
- 2 @ 15″ x 72″ for the vertical supports
- 7 @ 15″ x 27 1/2″ for the center and side shelves
- 6 @ 25″ x 8 1/4″ for the front and back of the large drawers
- 6 @ 14 1/4″ x 8 1/4″ for the sides of the large drawers
- 4 @ 25″ x 4 1/2″ for the front and back of the small drawers
- 4 @ 14 1/4″ x 4 1/2″ for the sides of the small drawers
- 3 @ 9 5/8″ x 28 1/4″ for the large drawer fronts
- 2 @ 5 7/8″ x 28 1/4″ for the small drawer fronts
From 1/4″ Plywood:
- 5 @ 14.25″ x 26.5″ for the drawer bottoms
Other Wood:
- 4 1″x2″ boards @ 14″ for side shelf supports
- 2 1″x4″ boards @ 14″ for top shelf supports
Choosing the right materials
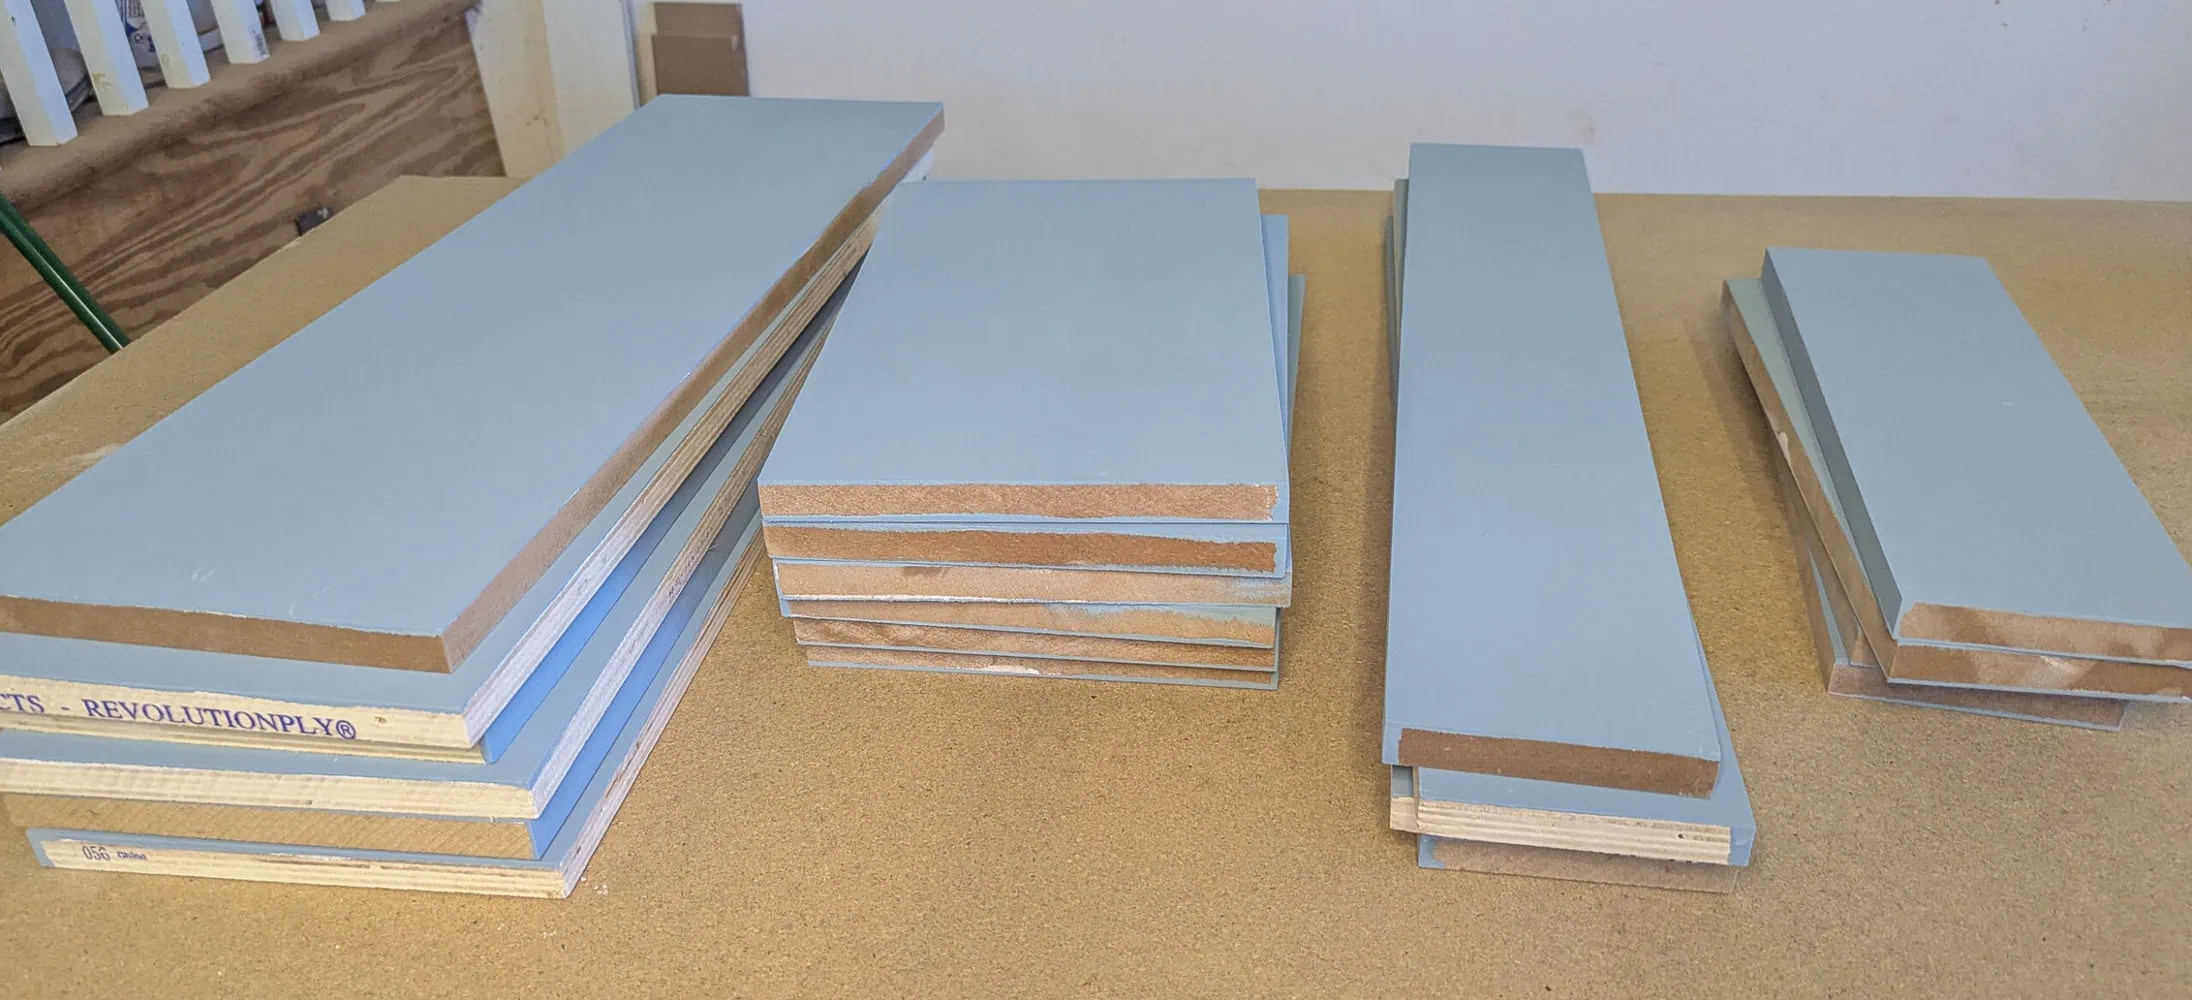
I used 3/4″ sheets of MDF for this project. I like to use MDF for closets because the boards are super straight and smooth and they’re often much less expensive than plywood. That changes often though, so it’s a good idea to compare prices when choosing your material. Last year when I was building closet storage shelves, MDF and plywood were basically the same price. This year, MDF had gone down quite a bit in price, while plywood had increased.
Demo
Once you’ve cleared out the closet, it’s time to remove whatever closet rod and shelves were there before.
If you have a wire shelf like mine, it can be a little tricky to figure out how to remove the supports since they are usually attached with nails rather than screws. I found the easiest way to remove these is to pry the nails out a bit with a flathead screwdriver and then grab them with needlenose pliers and pull them the rest of the way out.
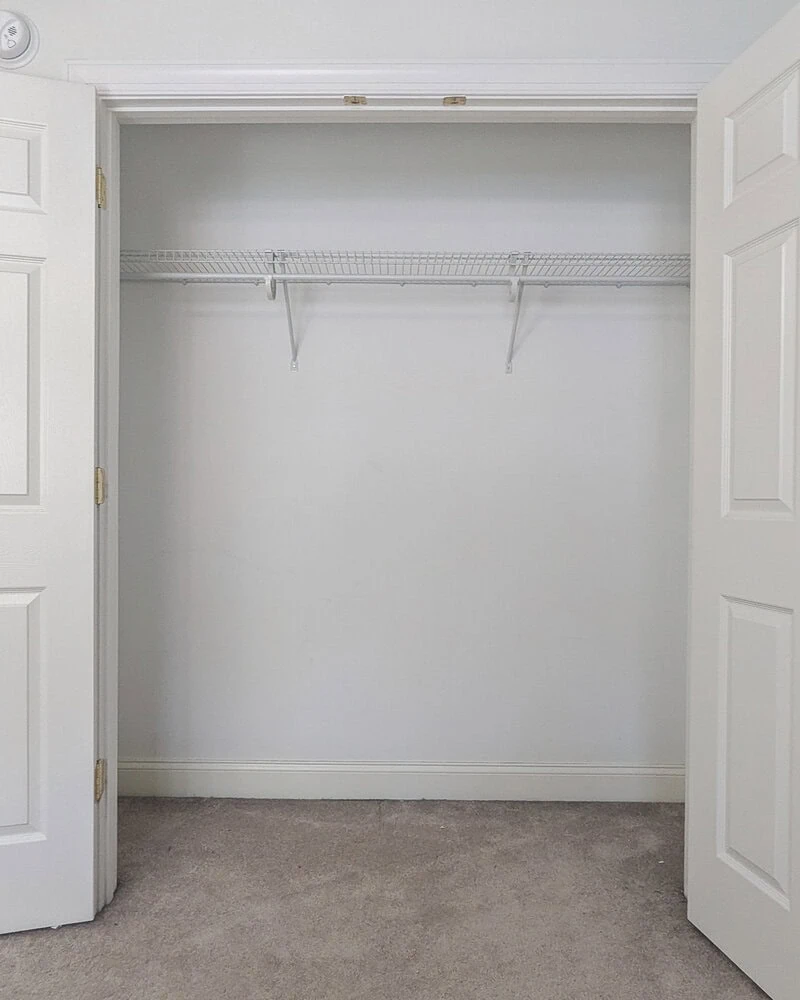
Once the closet is clear, you can patch any holes with spackling and touch up the paint if needed.
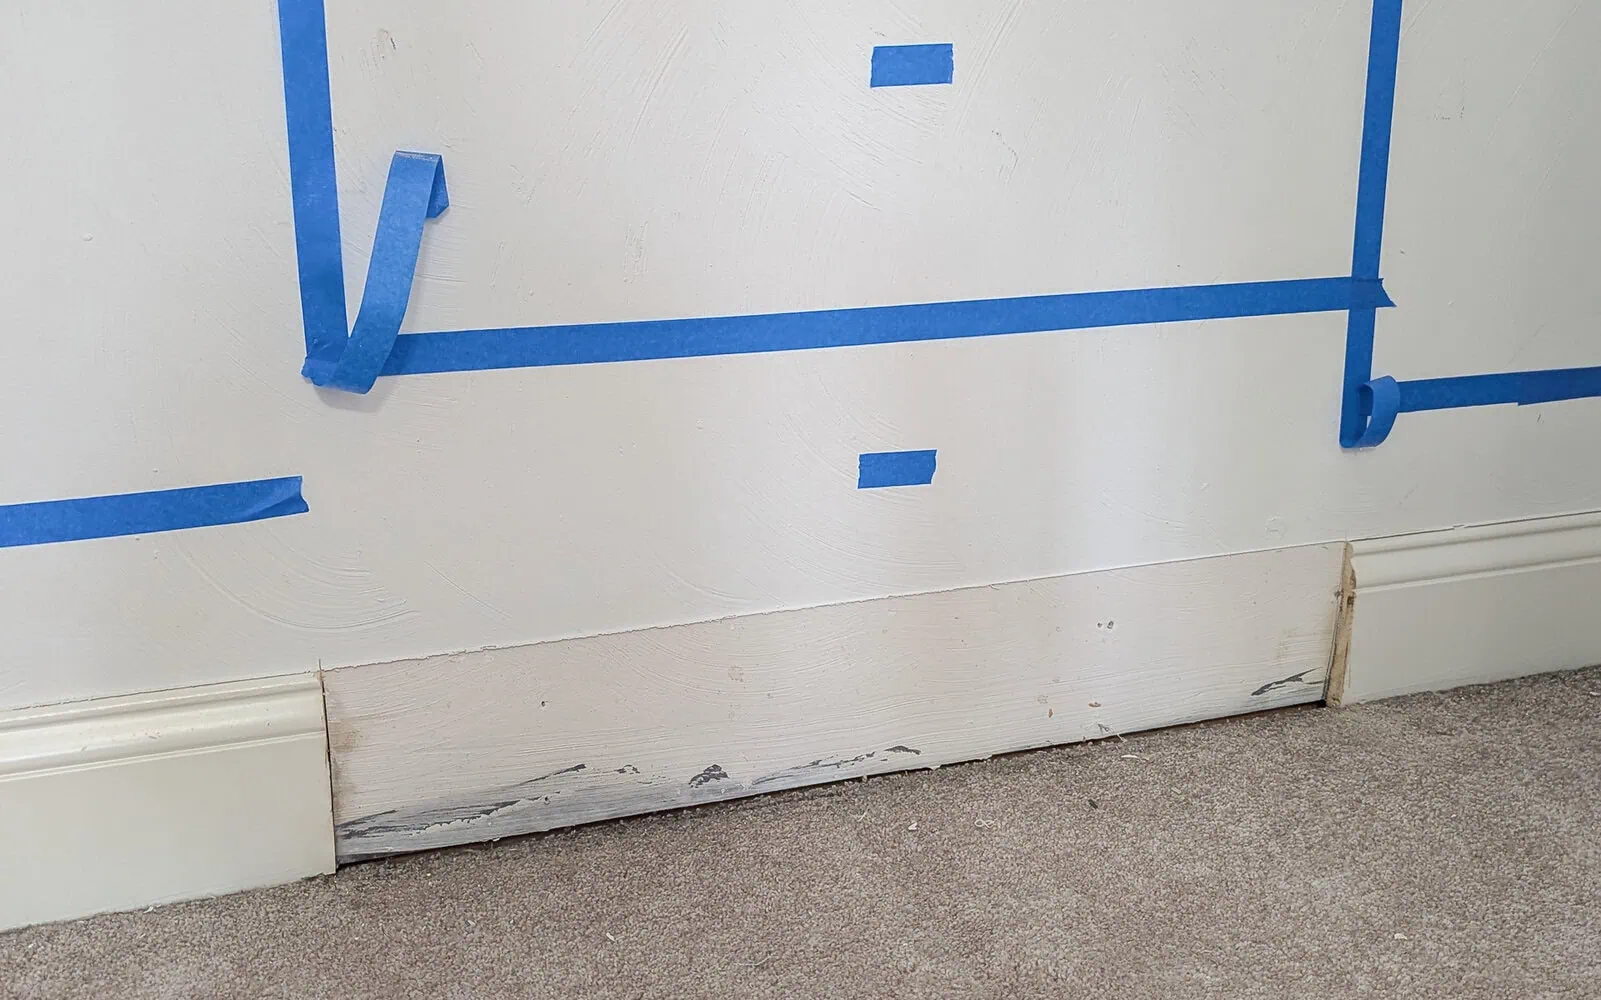
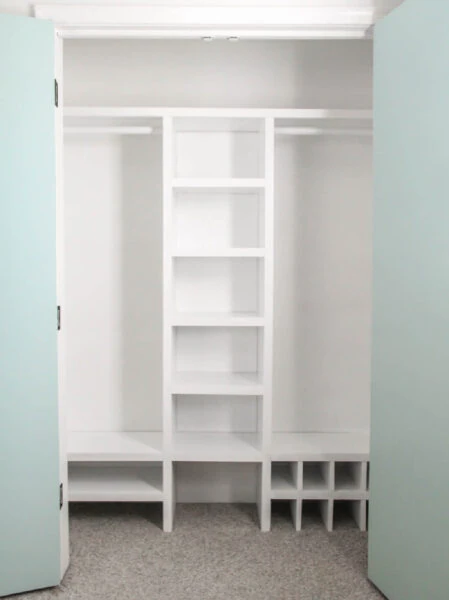
Fine tune the design
I always like to see the design I have in mind in the actual closet. That way I can make sure the dimensions make sense, it looks good, and everything is easily accessible. My favorite way to do this is to tape out the design using painter’s tape on the back wall.
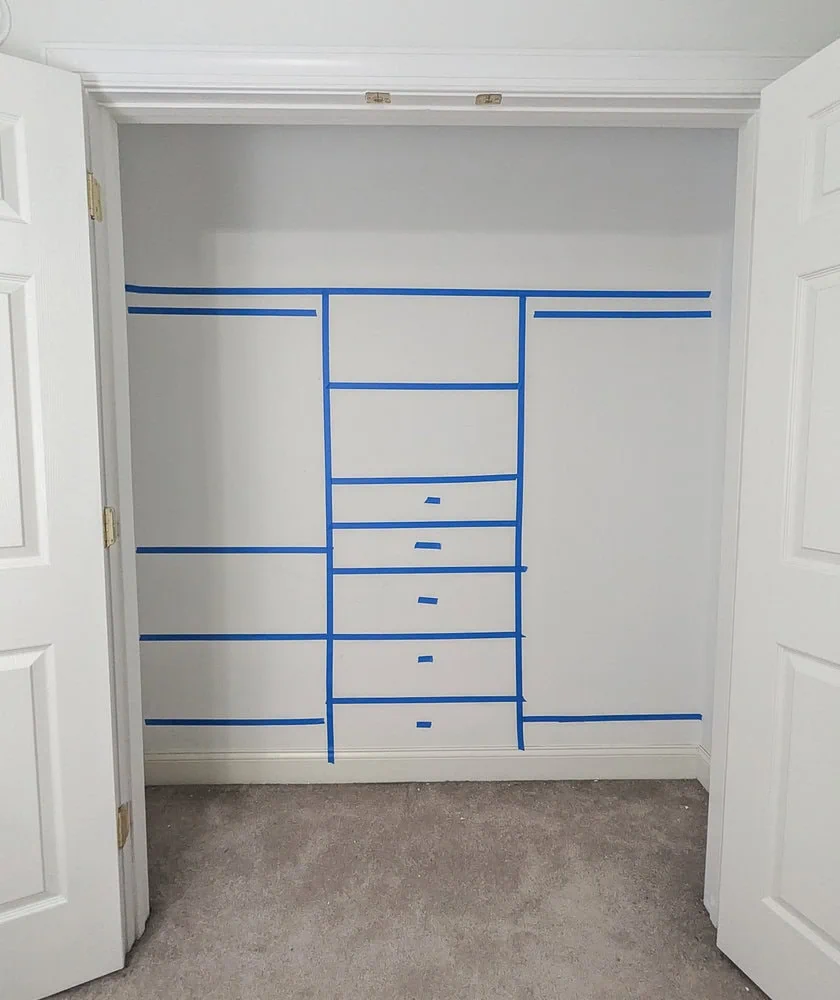
You’ll notice in my closet design, I added two extra shelves to the left side. For this closet, we really need lots of shelf storage and not that much room for hanging clothes.
If your needs are different, you can easily change how many closet shelves you add. If you would prefer more room for hanging clothes, you can leave just one bottom shelf on each side. Of if you want even more shelves, you can add shelves all the way up one side. It’s very easy to add or take away shelves to be just right for you.
Cut the pieces for the main frame
Once I had my design nailed down, I started cutting my MDF to size. (The measurements I used are listed above. Remember to adjust them if your closet is a different size.)
At this point, I cut out the pieces for the vertical supports and all of the shelves – basically everything other than the drawer pieces.
If you are using the printable build plans, you can use the visual cut list to help plan your cuts to waste as little wood as possible.
This is also a good time to decide how you want to finish the edges of your closet organizer. If you are using MDF, you can simply sand the edges smooth with 220 grit sandpaper. (Be sure to wear a mask). Then your MDF will be ready for paint.
If you are using plywood, you can either add edge banding or you can fill any holes with wood filler and then sand smooth.
Painting as you go
You’ll see in many of these photos that I prefer to paint my wood cuts before building whenever possible. I’ve found that it is much faster and easier that way and it saves me from having to get in crazy positions trying to paint all the nooks and crannies once everything is installed. But if you prefer, you can always build and then paint.
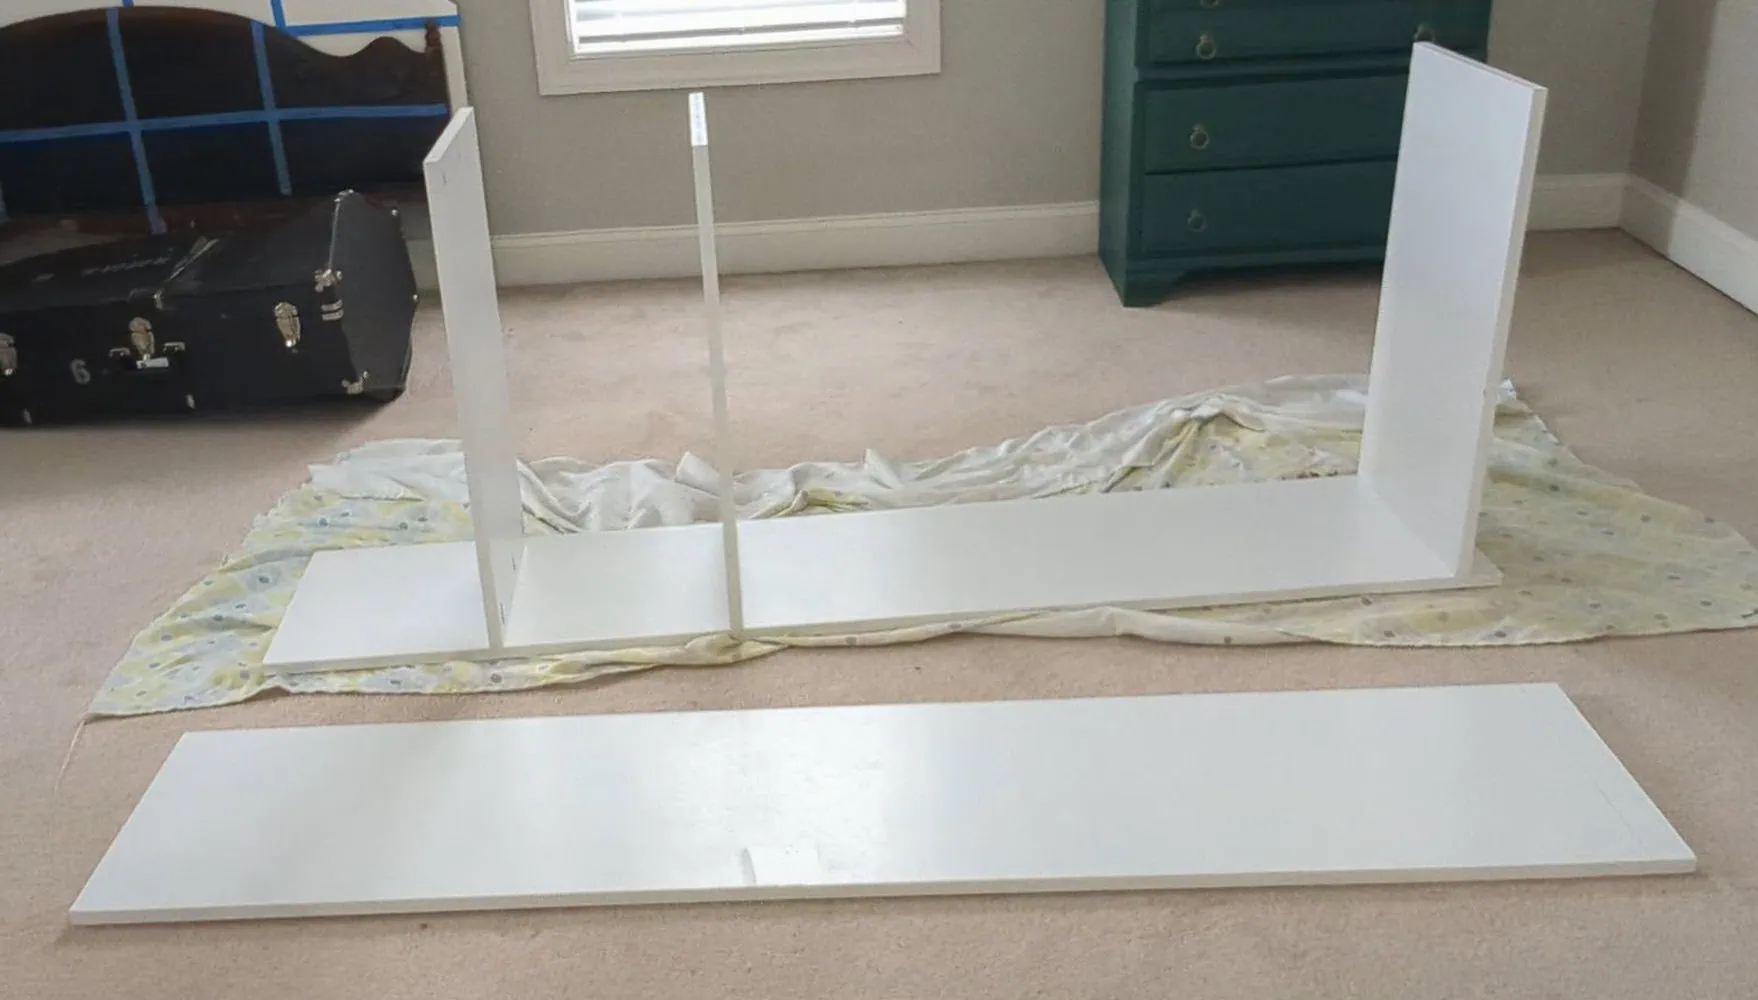
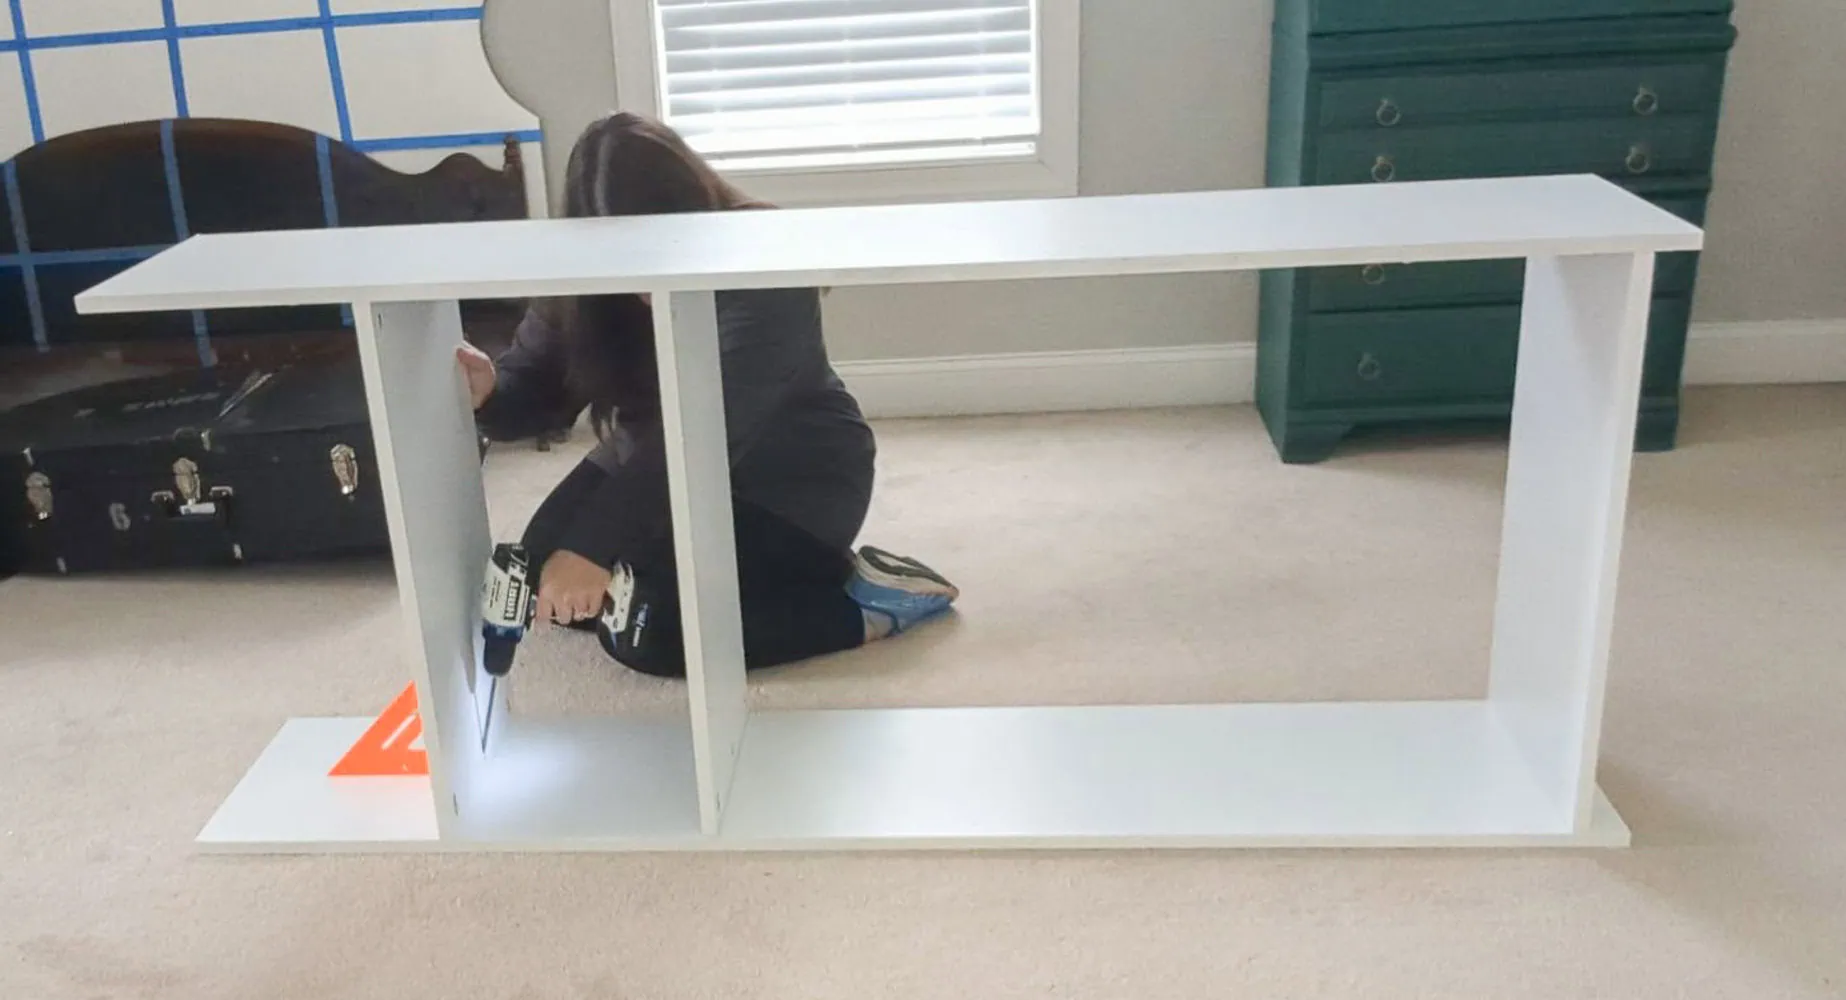
Build the center section
The center section is constructed using pocket holes. I drilled three pocket holes on each short edge of the three center shelves.
Once you’ve drilled your pocket holes, you’re ready to assemble the center section. The easiest way to do this is to lay one of the 72″ long vertical sides flat on the ground. Then measure and mark where each shelf needs to be placed. The lowest shelf will be 2″ from the bottom, the second shelf is 43 1/2″ from the bottom, and the top shelf is 58″ from the bottom.
I used pocket screws and wood glue to attach each shelf to this side.
Then I laid the other 72″ long piece flat on the ground, flipped the shelves over to be on top of it, and secured that side with pocket screws and wood glue.
Remove baseboards in closet
The center section of the closet organizer needs to be flush against the back wall of your closet. The easiest way to make that happen is to cut and remove your baseboards from that section of your closet.
Measure exactly where the center section will be so that it is centered and then use an oscillating tool to cleanly cut the baseboard in that area.
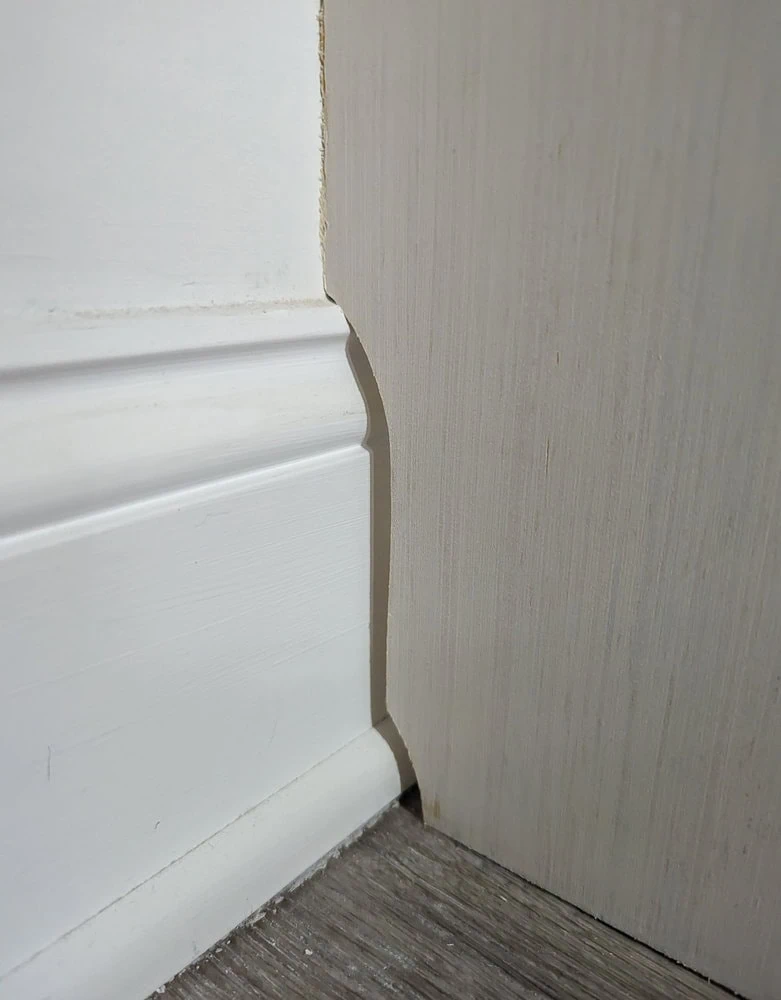
In the past, I have chosen to leave the baseboards intact and cut the closet supports with a jigsaw instead. The photo below shows how I did this for a different diy closet system. If you really want to keep your existing baseboards in place, you can use this method instead but it will be a bit more complicated for this closet organizer because the lowest shelf and drawers may also be impacted by the baseboards.
Once you’ve dealt with your baseboards, you can move the center section into place in the closet.

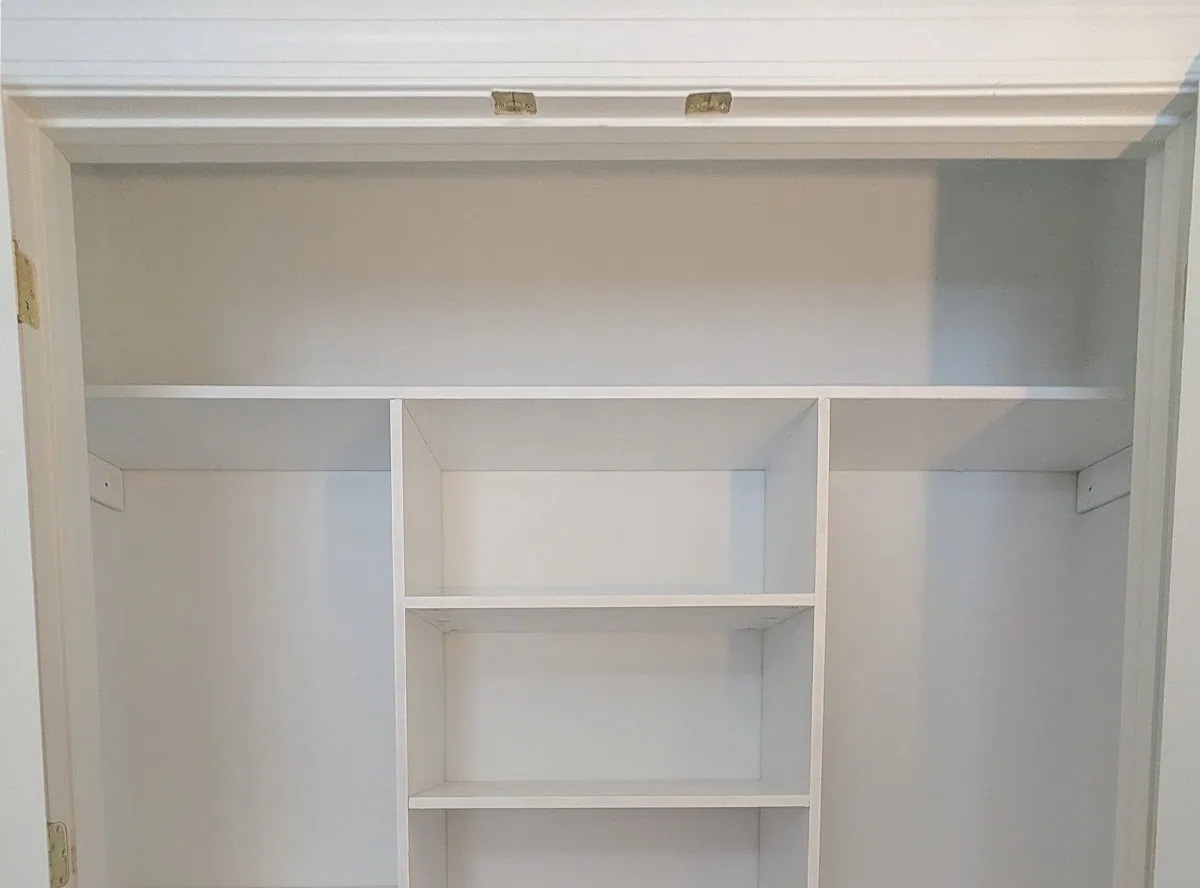
Install the top shelf
Next, you can move the top shelf into place. Getting that top shelf into place can be a real pain. (If you watch the video at the end of this post, you’ll see I really struggled with this!)
To make this go smoothly, I recommend two things.
- Make sure your top shelf is 1/4″ shorter than the width of your closet. If it’s the exact size of your closet, it’s going to get hopelessly wedged between the side walls as you try to maneuver it into place.
- Put your top shelf into place before adding your side shelves. This gives you a little more wiggle room to move things around as needed.
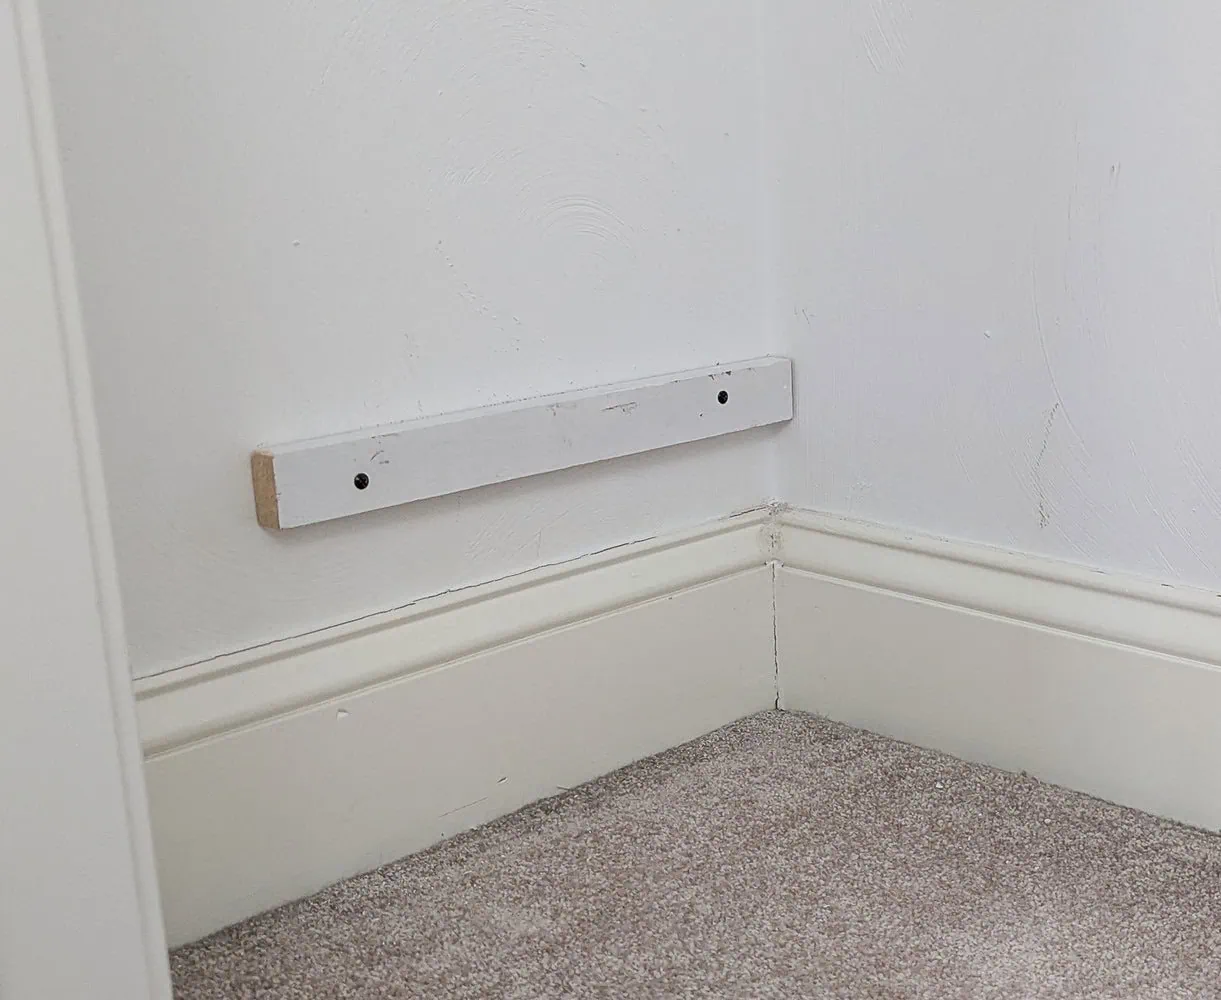
Once your top shelf is in place, you can add the 1″ x 4″ supports on each side wall. These will serve as shelf supports as well as a sturdy place to attach your closet rod brackets later.
If you can’t attach these directly into the studs, be sure to use drywall anchors. These boards will be helping support the weight of all your hanging clothes so they need to be sturdy.
Install the side shelves
Now, it’s time to add the side shelves.
To support the shelves on the wall sides, I used 1″x2″ boards. Again, be sure to either attach these directly to studs, or attach them using good drywall anchors.
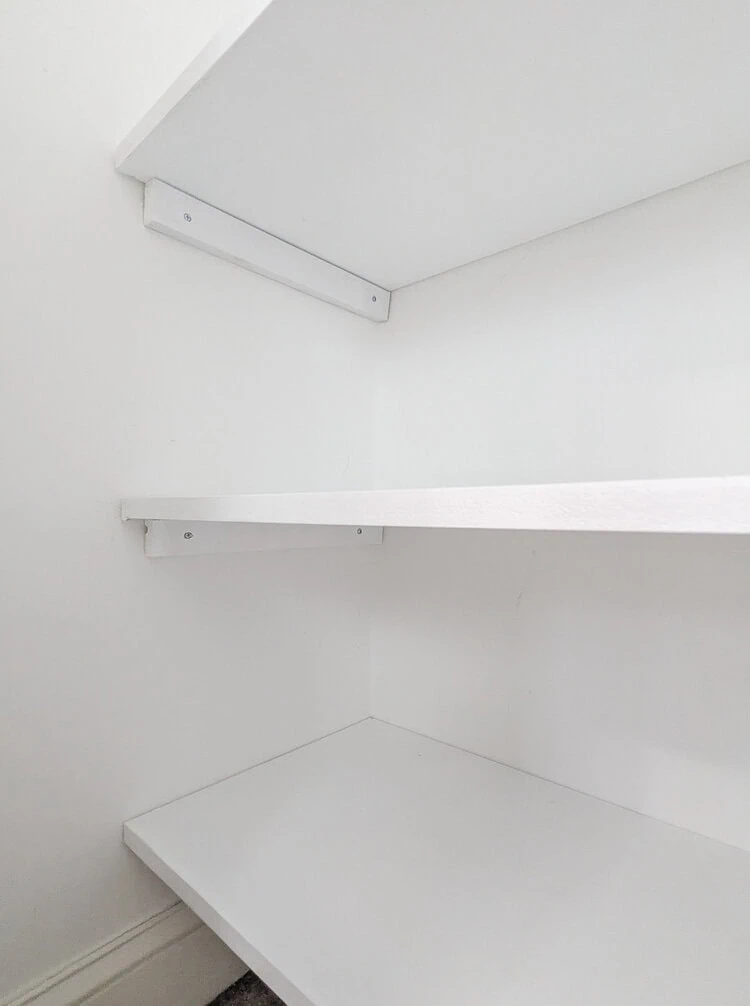
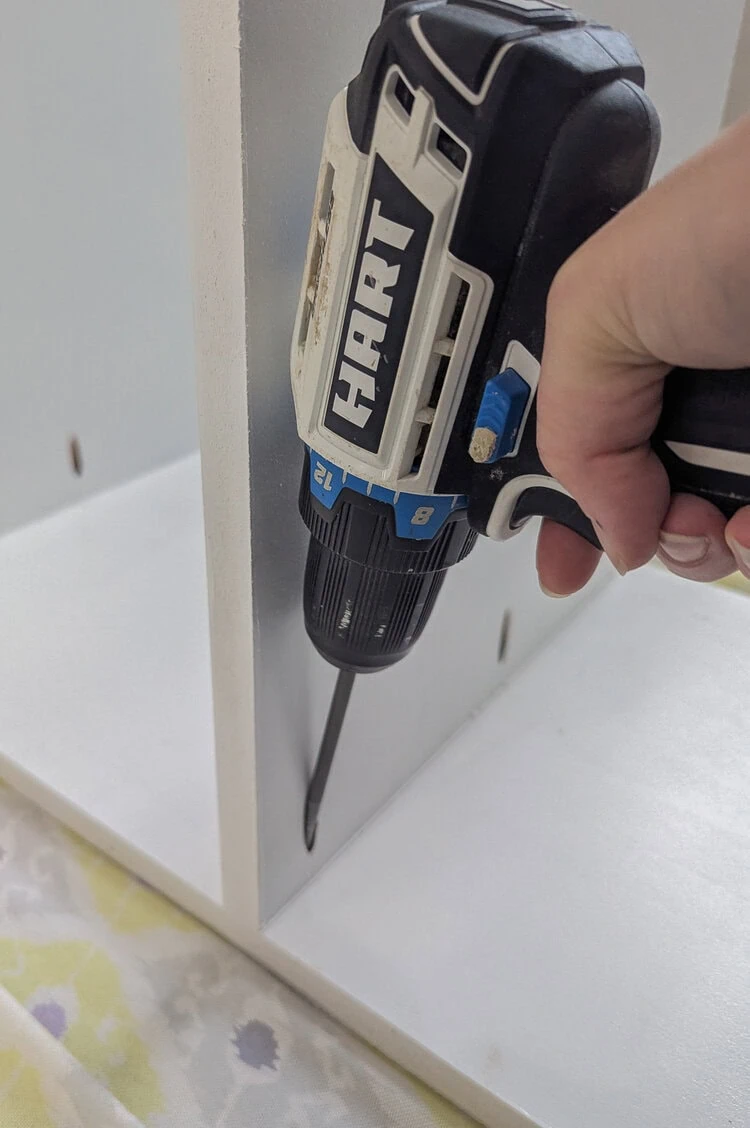
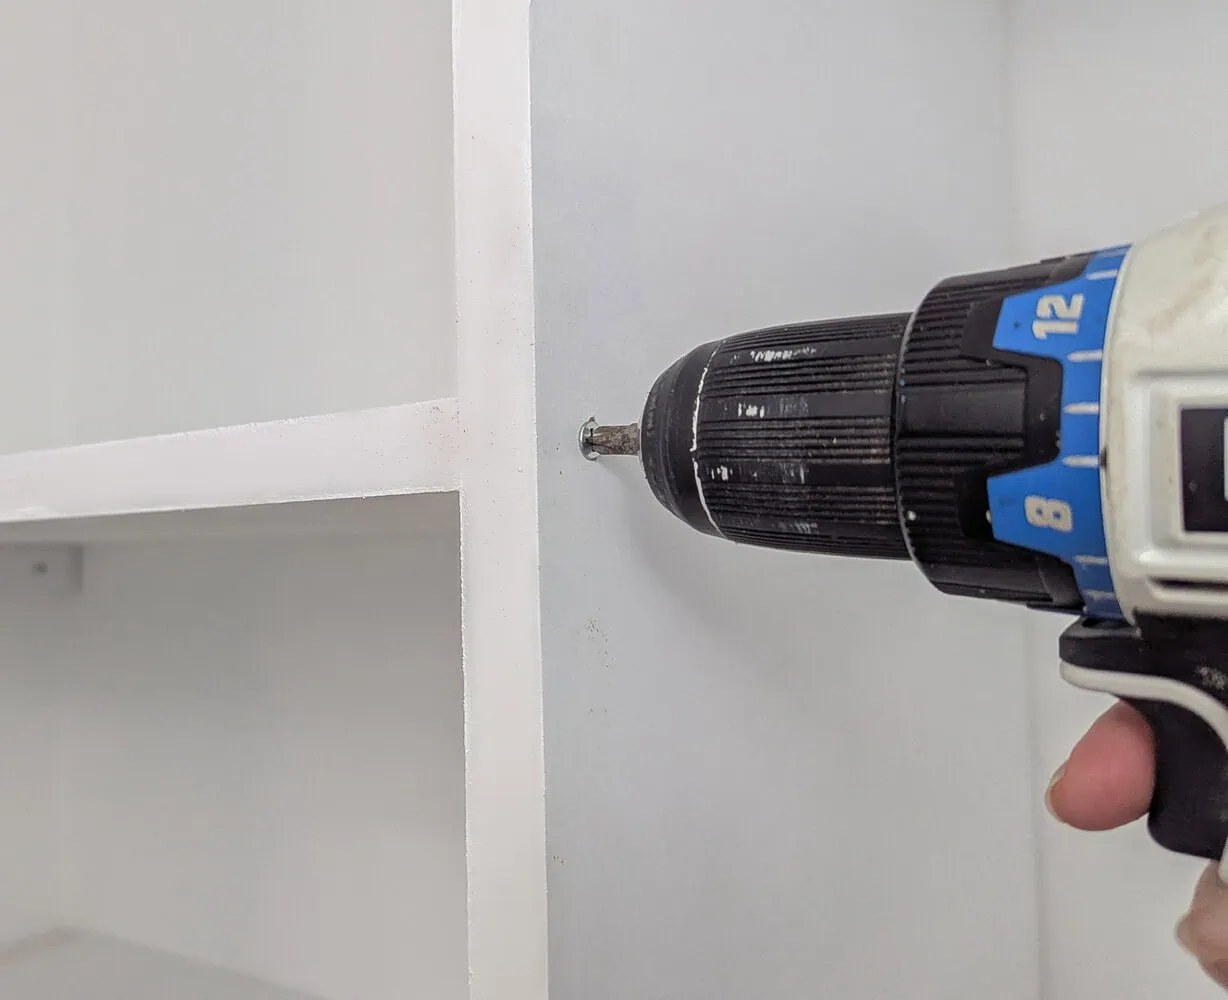
I didn’t use shelf supports for the side that meets the center of the closet organizer. Instead, for that side, I predrilled holes and then screwed wood screws directly through the vertical boards and into the shelf boards. These screws won’t be visible once the drawers are installed.
Anchor the closet organizer to the wall
I haven’t anchored my past closet organizers to the wall and they have been quite sturdy and had zero problems with moving around.
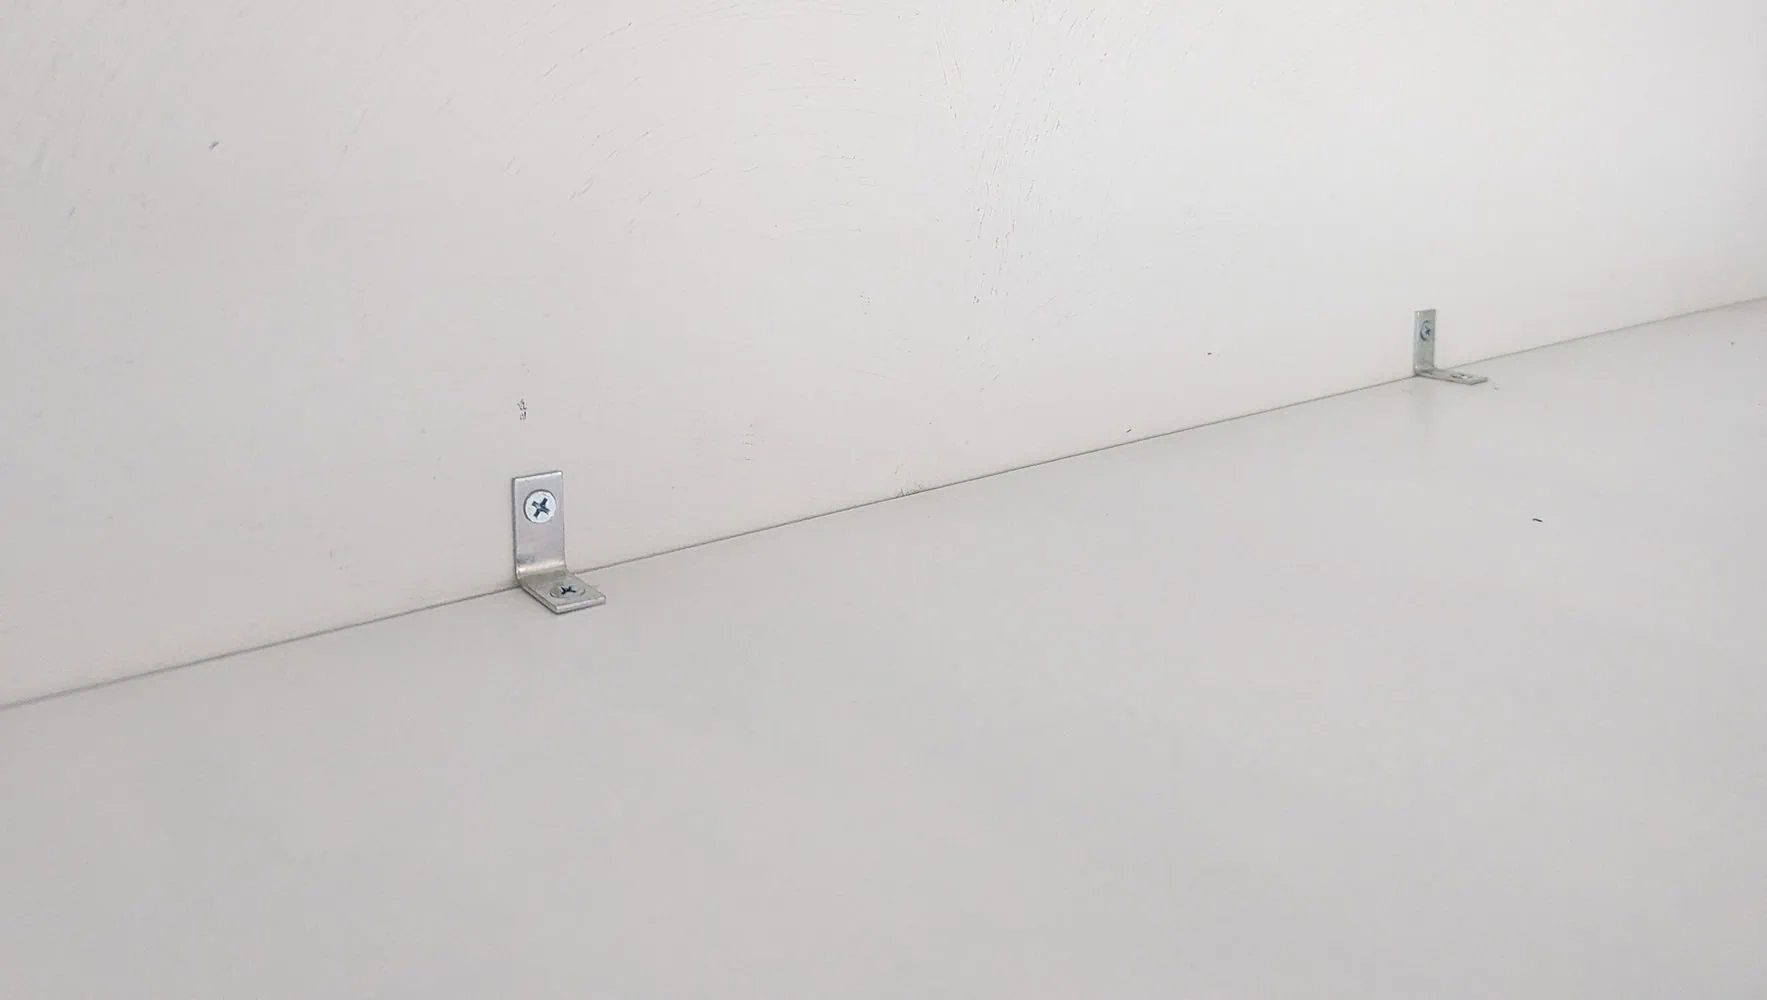
But since this closet organizer is going to have drawers, it will be much more front heavy, so it’s important to anchor it well.
To do this, I used a few nails to attach the top shelf directly into the two vertical supports. Then I used several small L brackets to attach the top shelf to the back wall of the closet directly into studs.
Now the basic frame is finished! Next step – building the drawers.
Build the drawer boxes
Note: These drawer measurements are based on using drawer slides that are 1/2″ thick which is pretty standard. If your drawer slides are a different thickness, you may need to adjust your measurements.
Start by cutting the wood for the drawers according to the wood cut list above. This organizer includes three drawers that are 8 1/4″ inches high and two drawers that are 4 1/2″ inches high. (This is the height of the drawer box. When we attach the drawer faces, they will be a bit taller.)
As you can see, I painted the sides of my drawers. This is completely optional. I built my drawers from a mix of MDF and plywood scraps so I really needed to paint them to make them look decent.
If you are just using MDF, you can simply sand the top edges of each drawer smooth. If you are using plywood, you can either add edge banding to the tops of your drawers or fill any holes with wood filler and sand smooth.
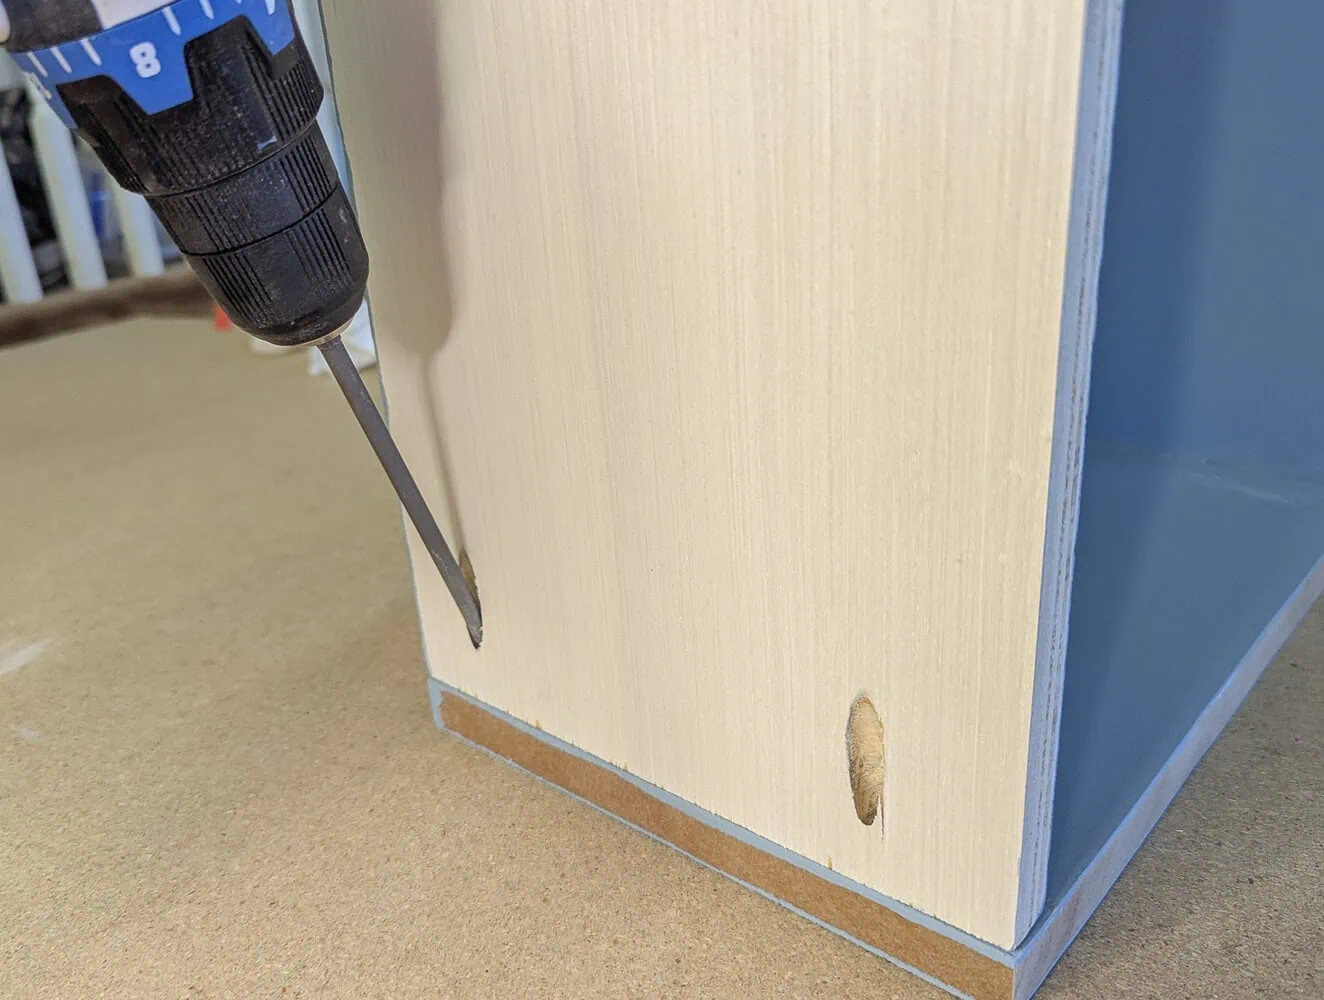
Start by drilling pockets in the front and backs of your drawer boxes (the longer pieces.) Once you add your drawer fronts, these won’t be seen at all.
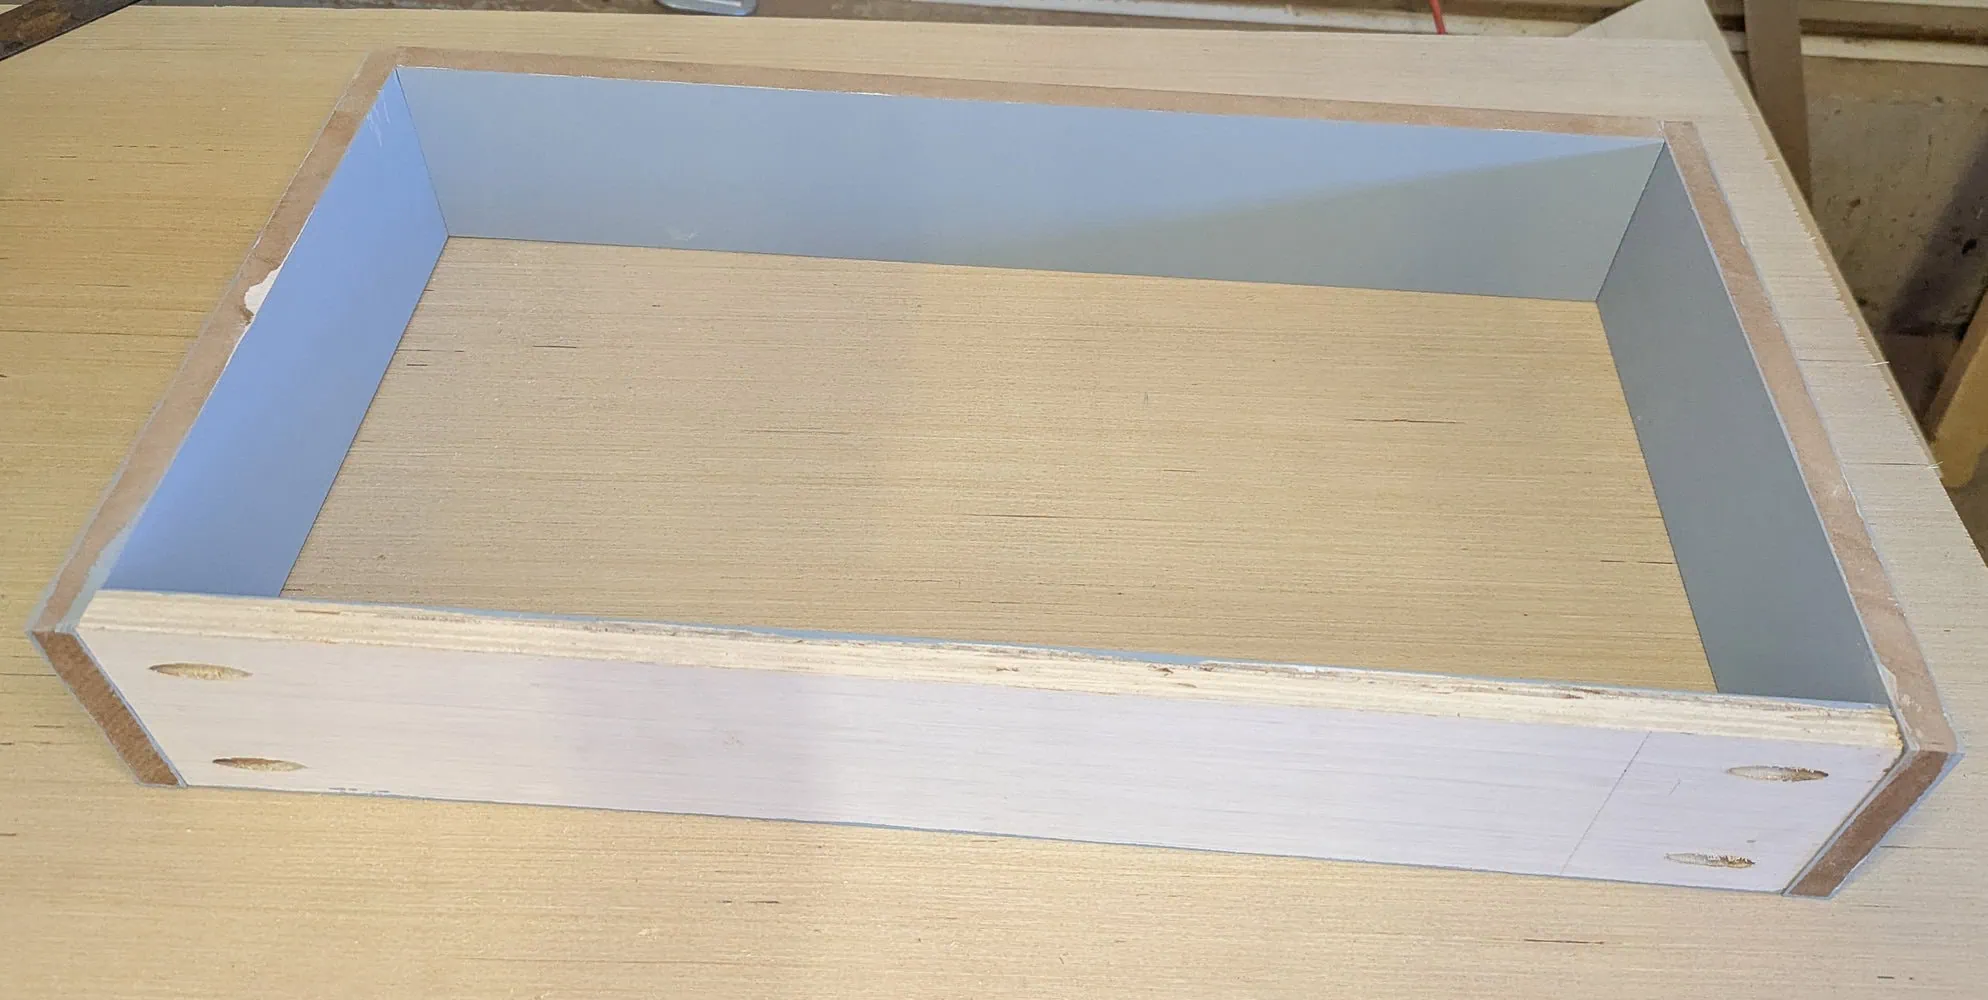
Then use wood glue and pocket screws to build your drawer boxes.
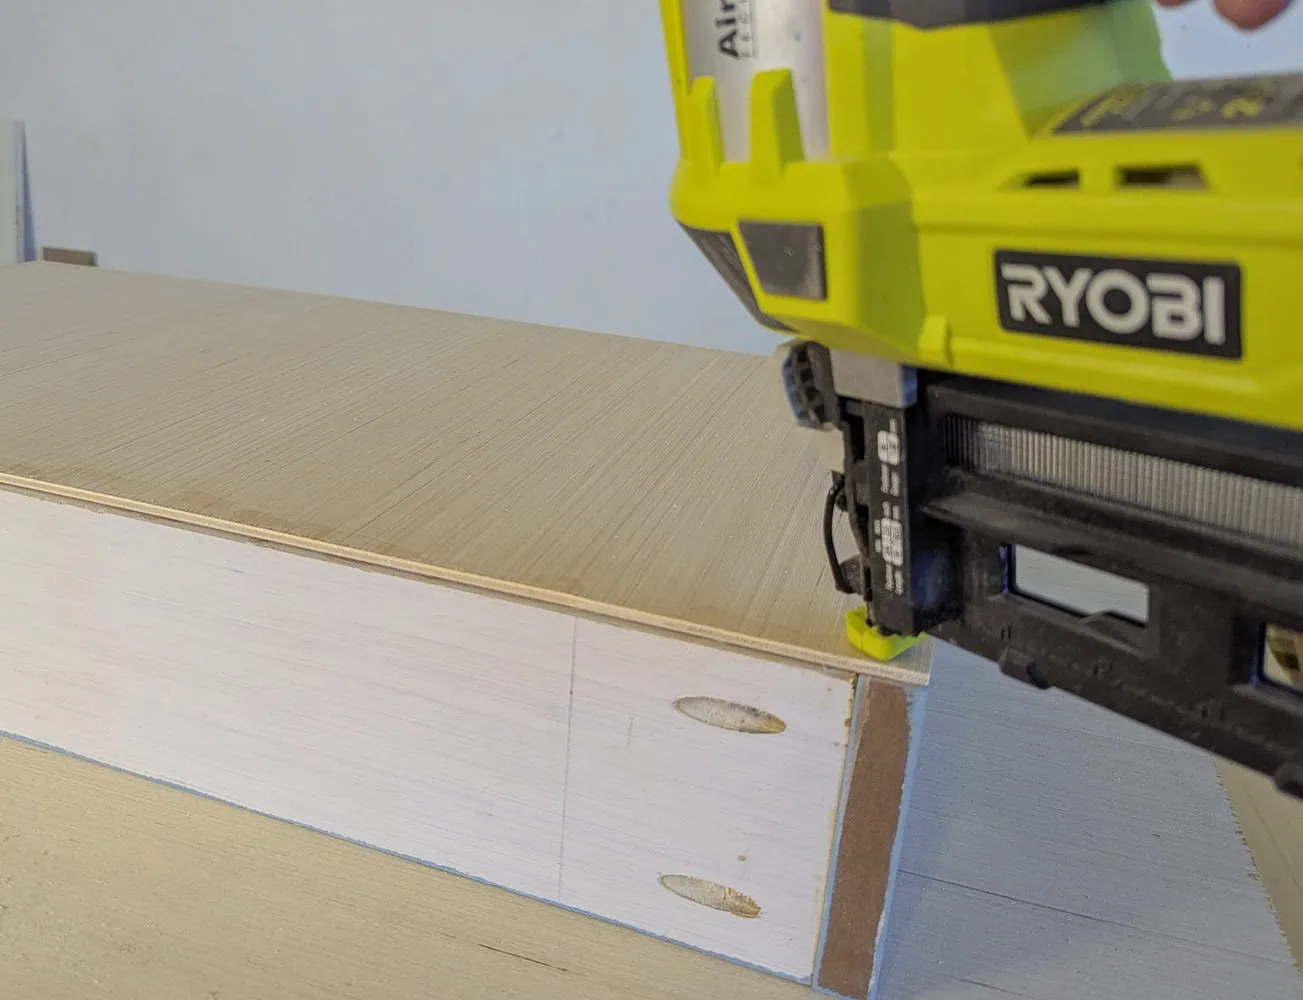
Check that your drawer boxes are square and then cut the drawer bottoms from 1/4″ plywood. Attach these to the bottom of your drawers using wood glue and nails.
This was my first time building drawers and I’m happy to report it turned out really well and wasn’t nearly as intimidating as I imagined. If you want more details on drawer building, I recommend this post from Anika’s DIY Life for tips on building the drawers themselves and this post from Woodshop Diaries for tips on installing the drawers.
Install the drawers
I used these ball bearing side mount drawer slides to install my drawers, and I found them really easy to use. Just remember that it’s really important to keep everything level as you are installing your drawer slides and drawers so that your drawers can open and close smoothly.
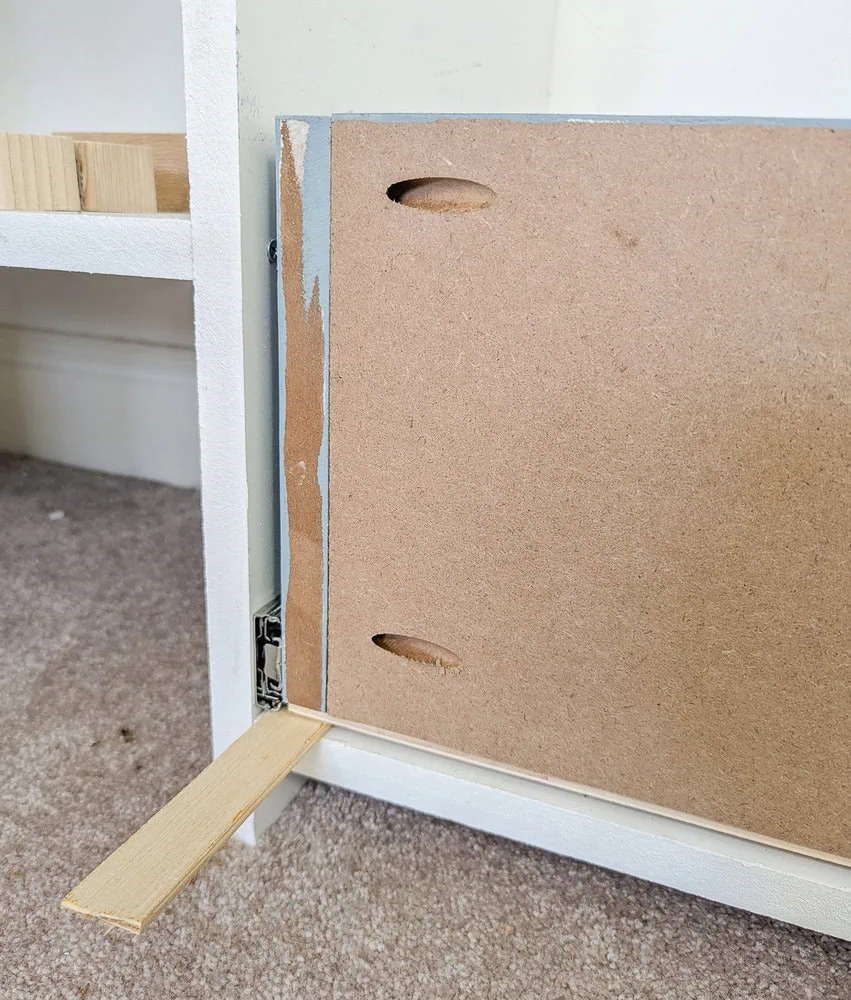
Start with the bottom drawer. I attached my drawer slides 1/4″ from bottom shelf board. I used a scrap of 1/4″ plywood to hold the slide at the correct height.
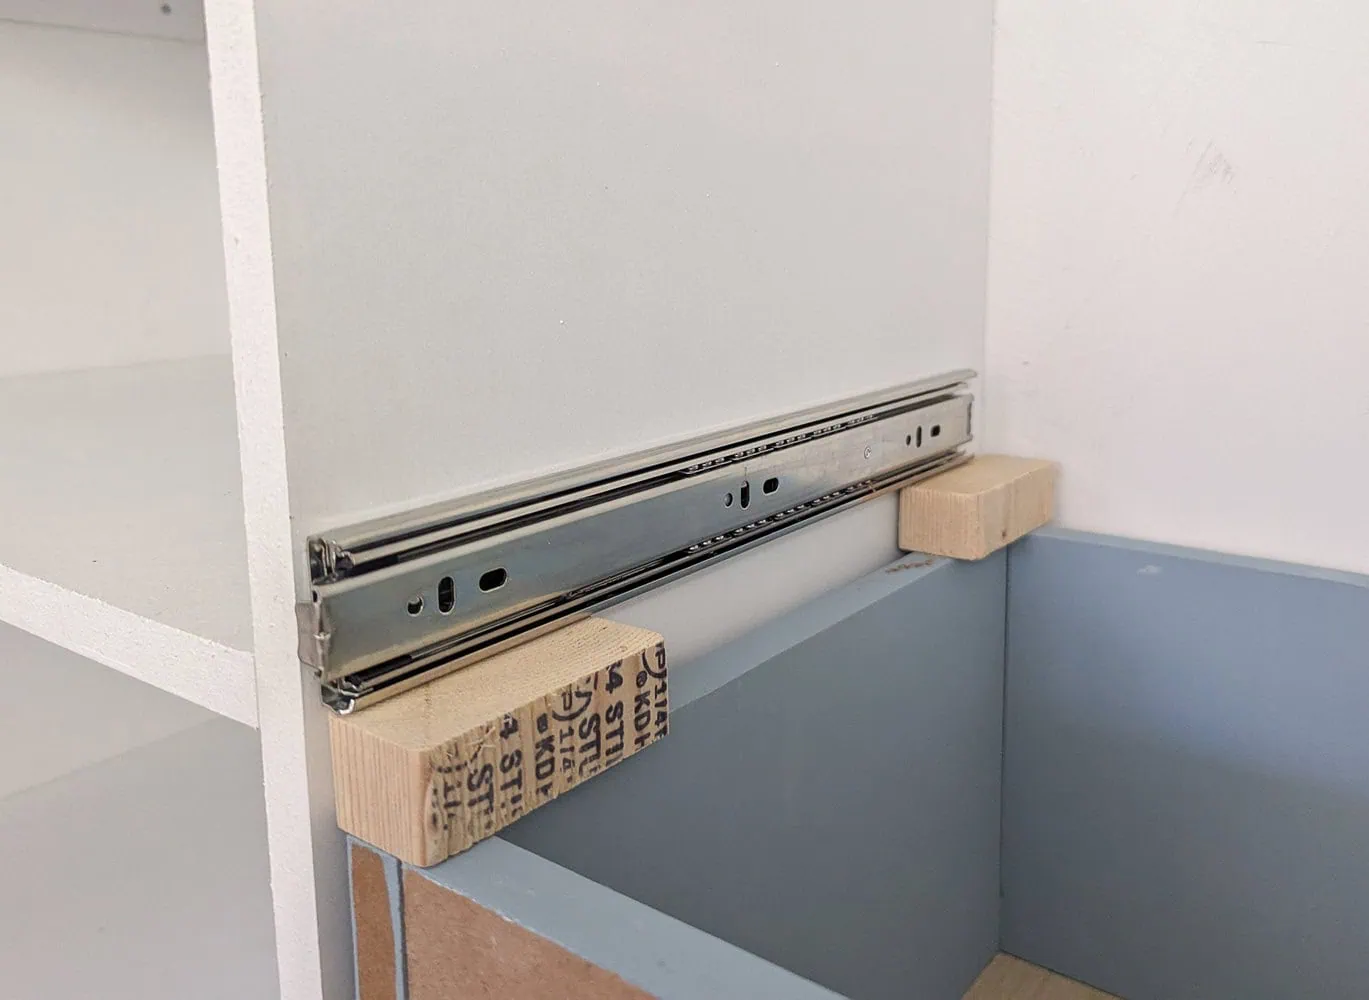
The rest of the drawer slides are placed 1 1/4″ from the top of the drawer below. It’s easiest to cut a few scraps of wood to this measurement and use them to keep your drawer slides and drawers at the correct height as you install them.
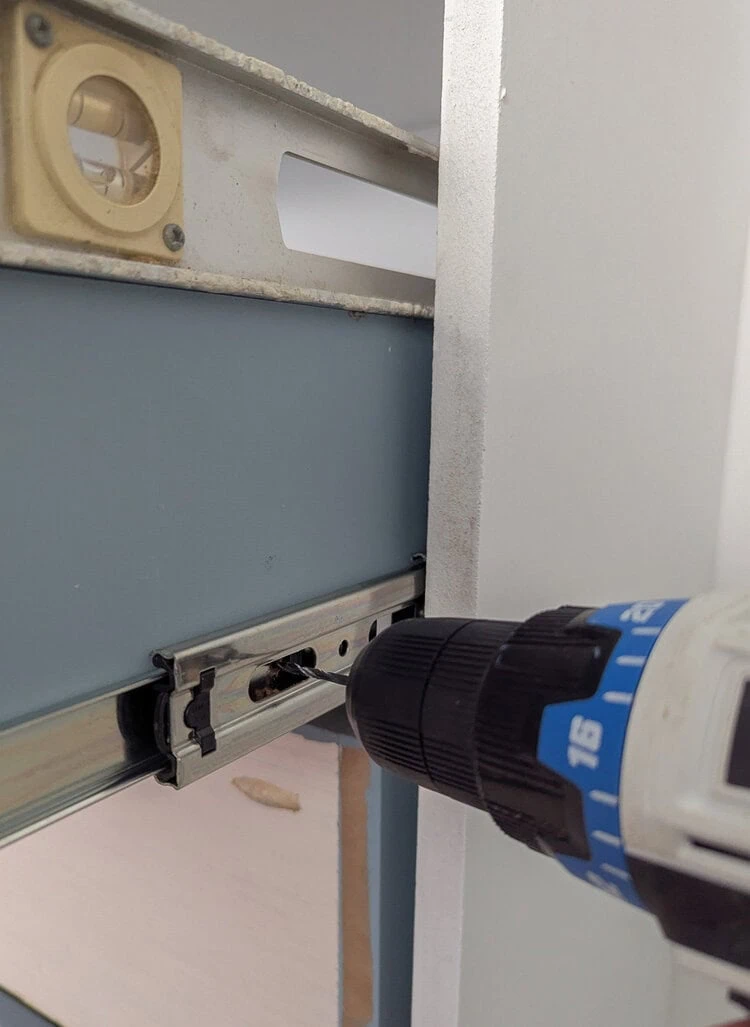
Predrill holes and screw your drawer slides into place using the included screws. Be sure to double check that they are level before screwing them in.
Then slide the drawer in place between the slides.
Predrill holes and attach the drawer slides to each drawer.
It works best to slide the drawer out a little and screw in the first screw on each side, then slide it out a bit more to do the second and third. Be sure to check that the drawer is level side to side and front to back. You may need to support the drawer when it is fully extended to keep it level as you attach the slide.
Your drawers may feel a little stiff the first couple of times you open and close them but then they should loosen up and move freely.
Install the drawer fronts
Cut the wood (or MDF) for your drawer fronts according to the wood cut list.
Sand, prime, and paint your drawer fronts.
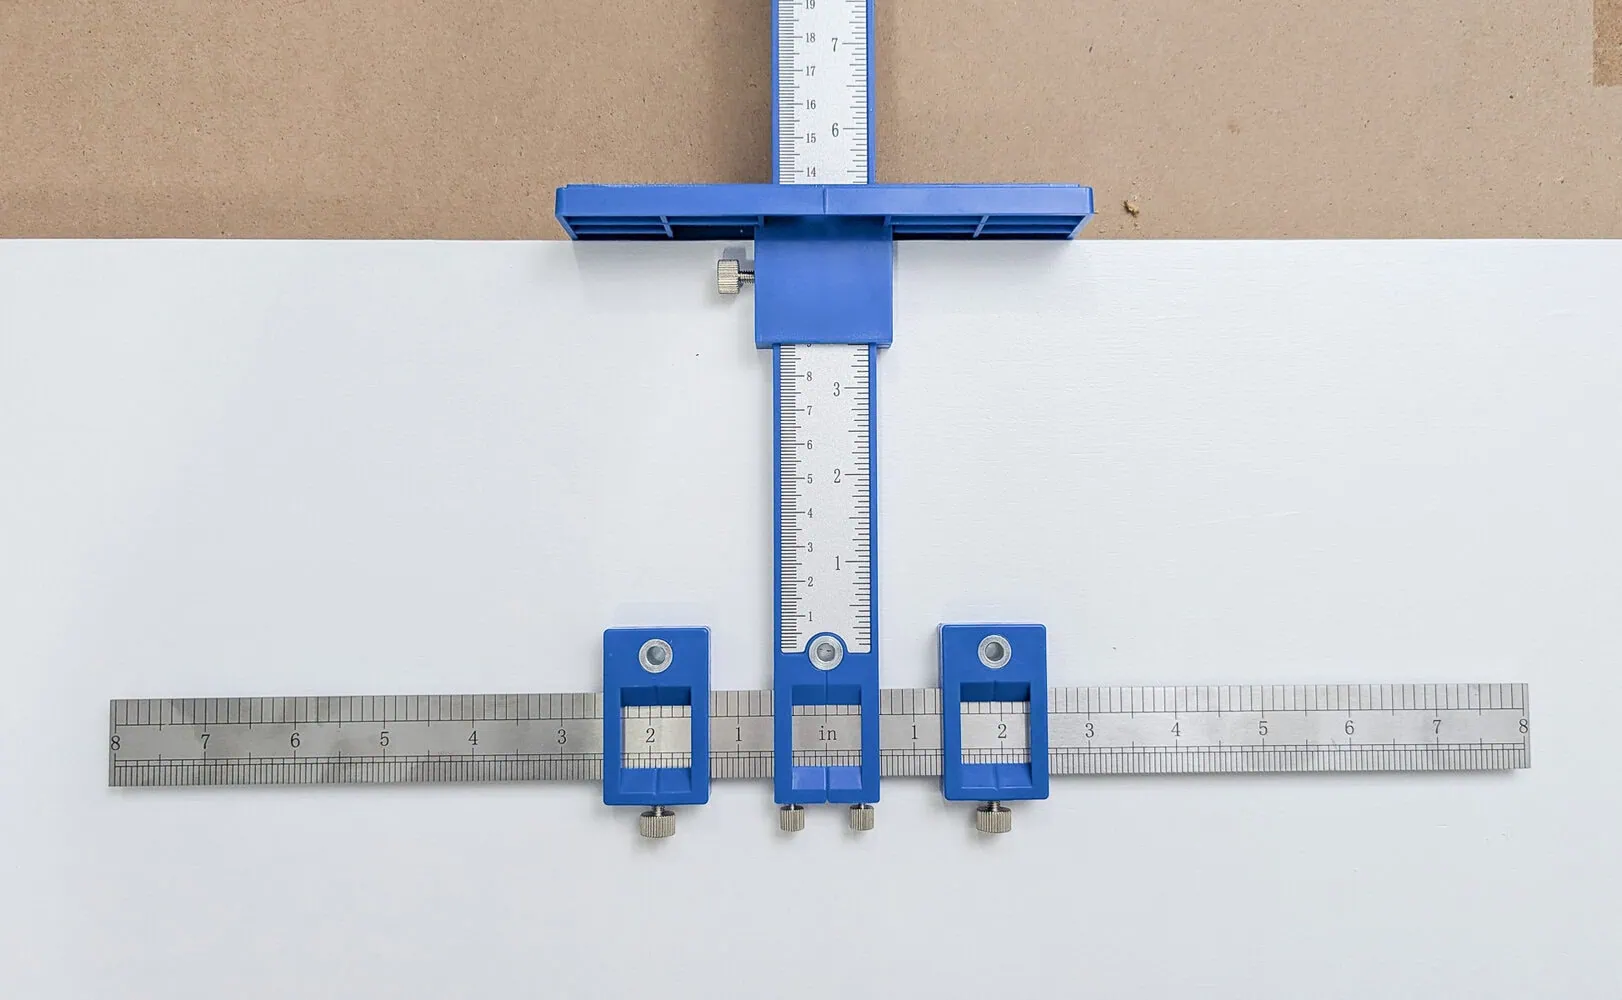
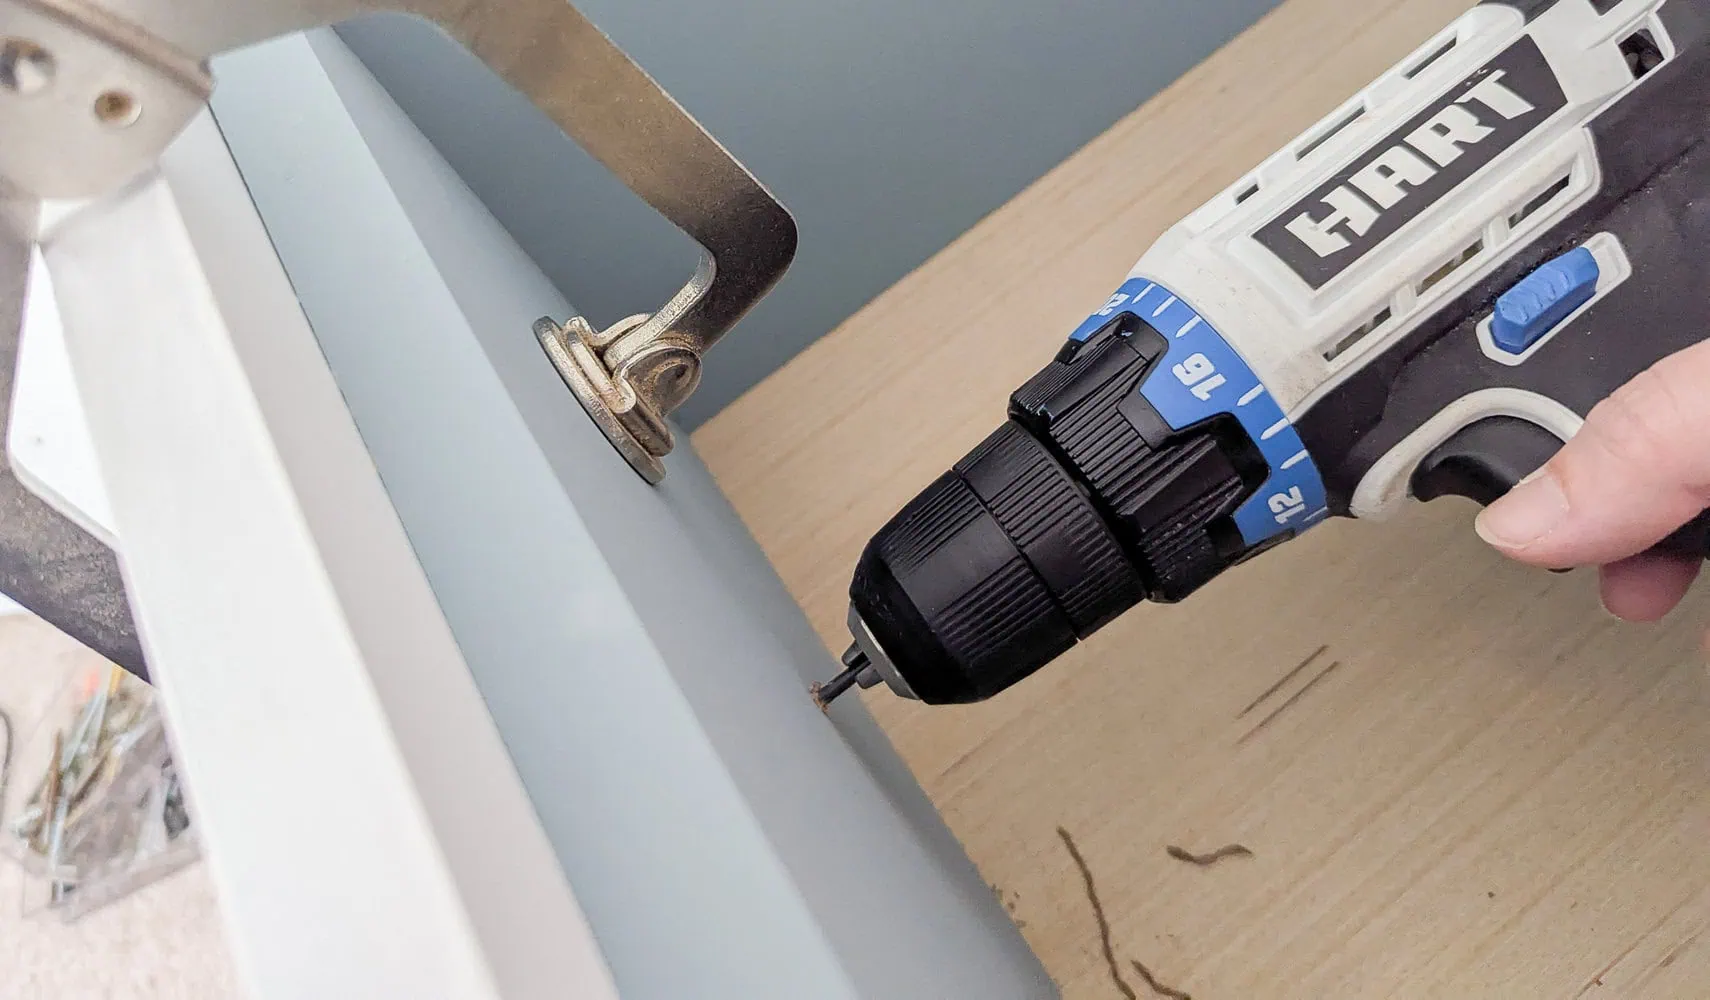
It’s easiest to drill holes for your hardware before installing your drawer fronts. Then you can use those holes to make installation easier.
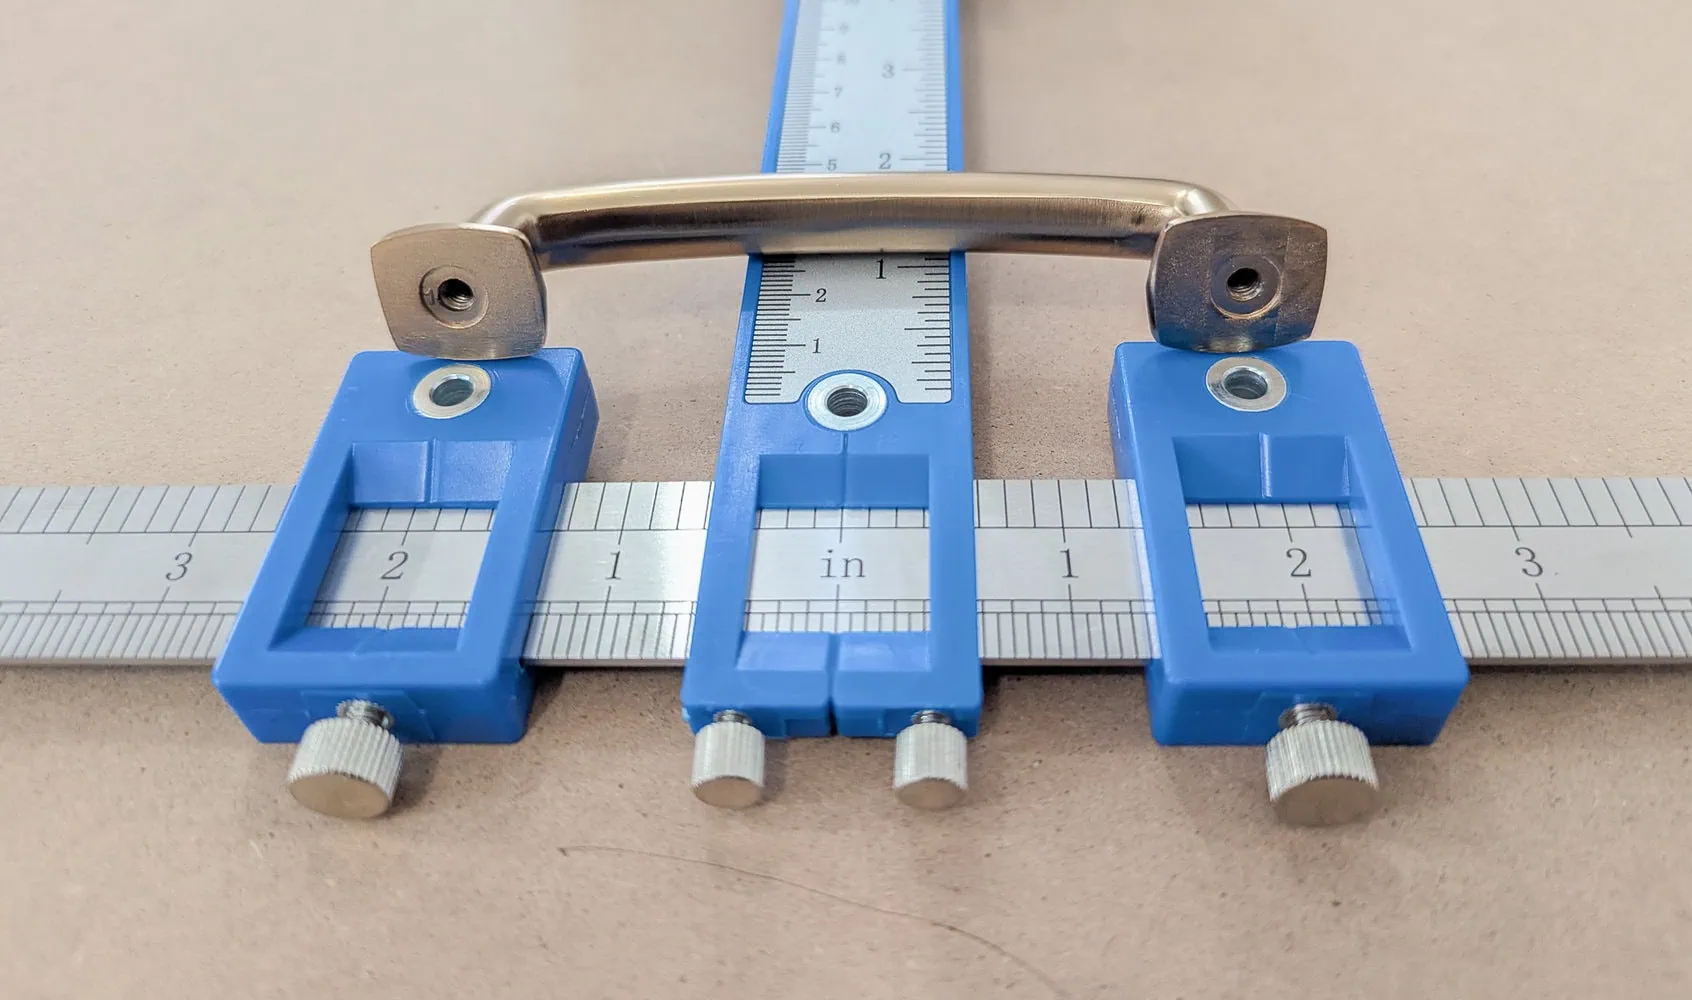
I used this hardware jig to drill my hardware holes and it was a huge help. You definitely don’t have to use a jig, but it’s pretty inexpensive and it makes it really easy to perfectly line up your hardware holes and drill them super fast.
Once your holes are drilled, mark where the drawer face need to go on the frame of your closet organizer – each drawer front should be centered and extend one inch above the top of the drawer box.
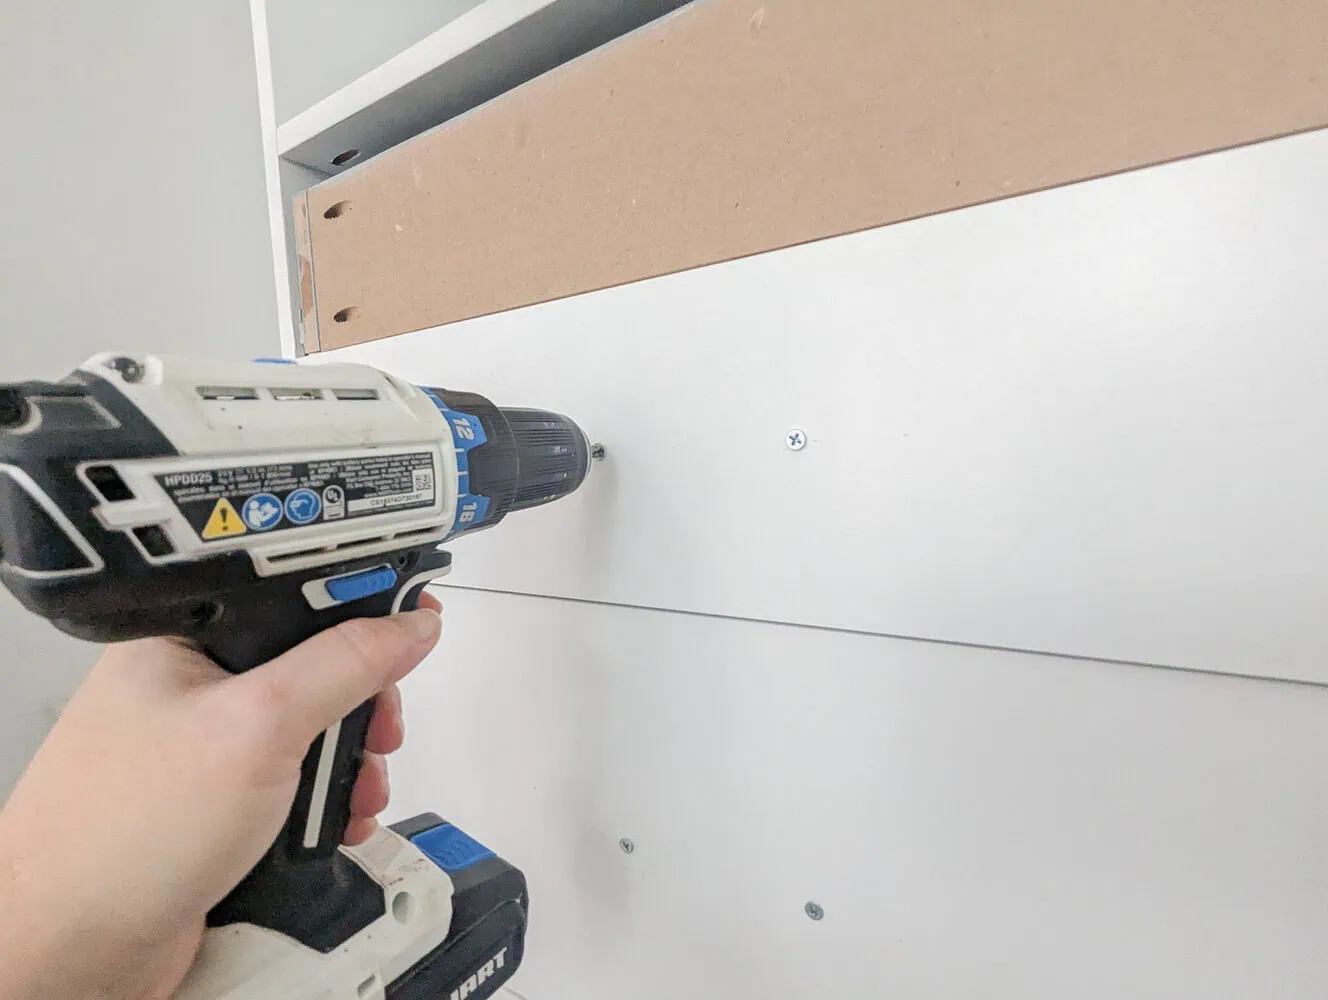
Apply wood glue to the back of the drawer front, line it up carefully, and then use the hardware holes you just drilled to temporarily screw the drawer front to the drawer box.
Then you can open the drawer and screw the drawer box to the drawer front with 1 1/4″ screws from the inside. These screws will stay there permanently.
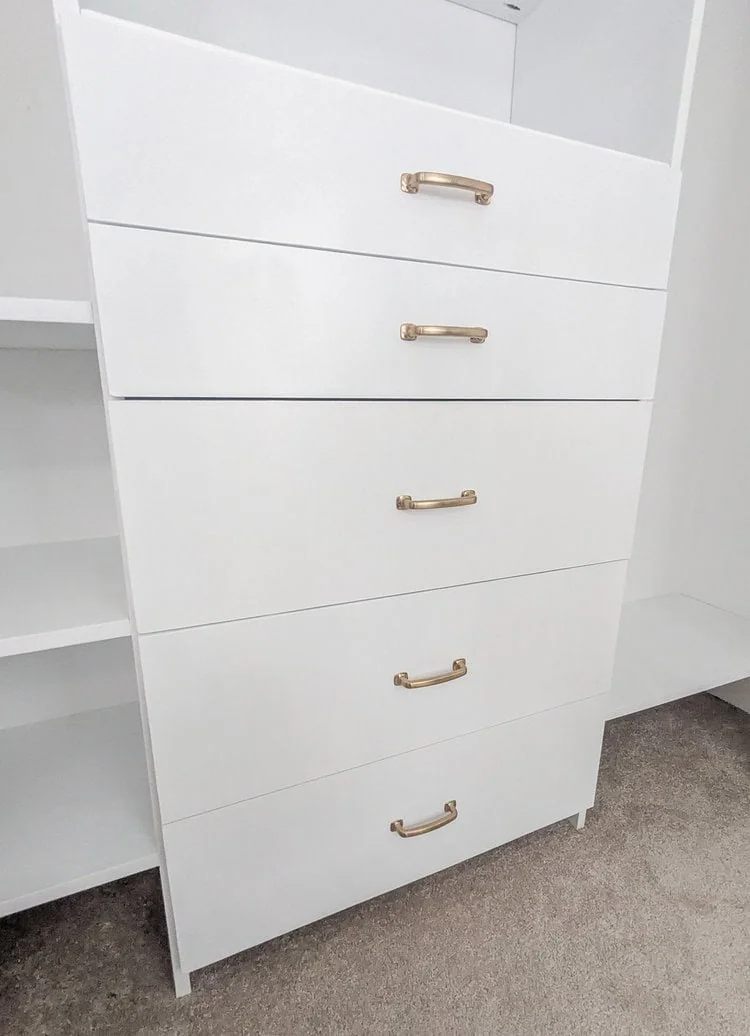
Install drawer handles
Now you can remove the temporary screws from the drawer fronts and install your hardware.
Drill hardware holes all the way through the drawer and attach your hardware using the extra long screws included.
I purchased my drawer handles from Habitat for Humanity ReStore for only $1.50 each! This is one of my favorite places to find cheap hardware. I also have a whole list of my favorite spots to find great hardware if you’re looking for more ideas.
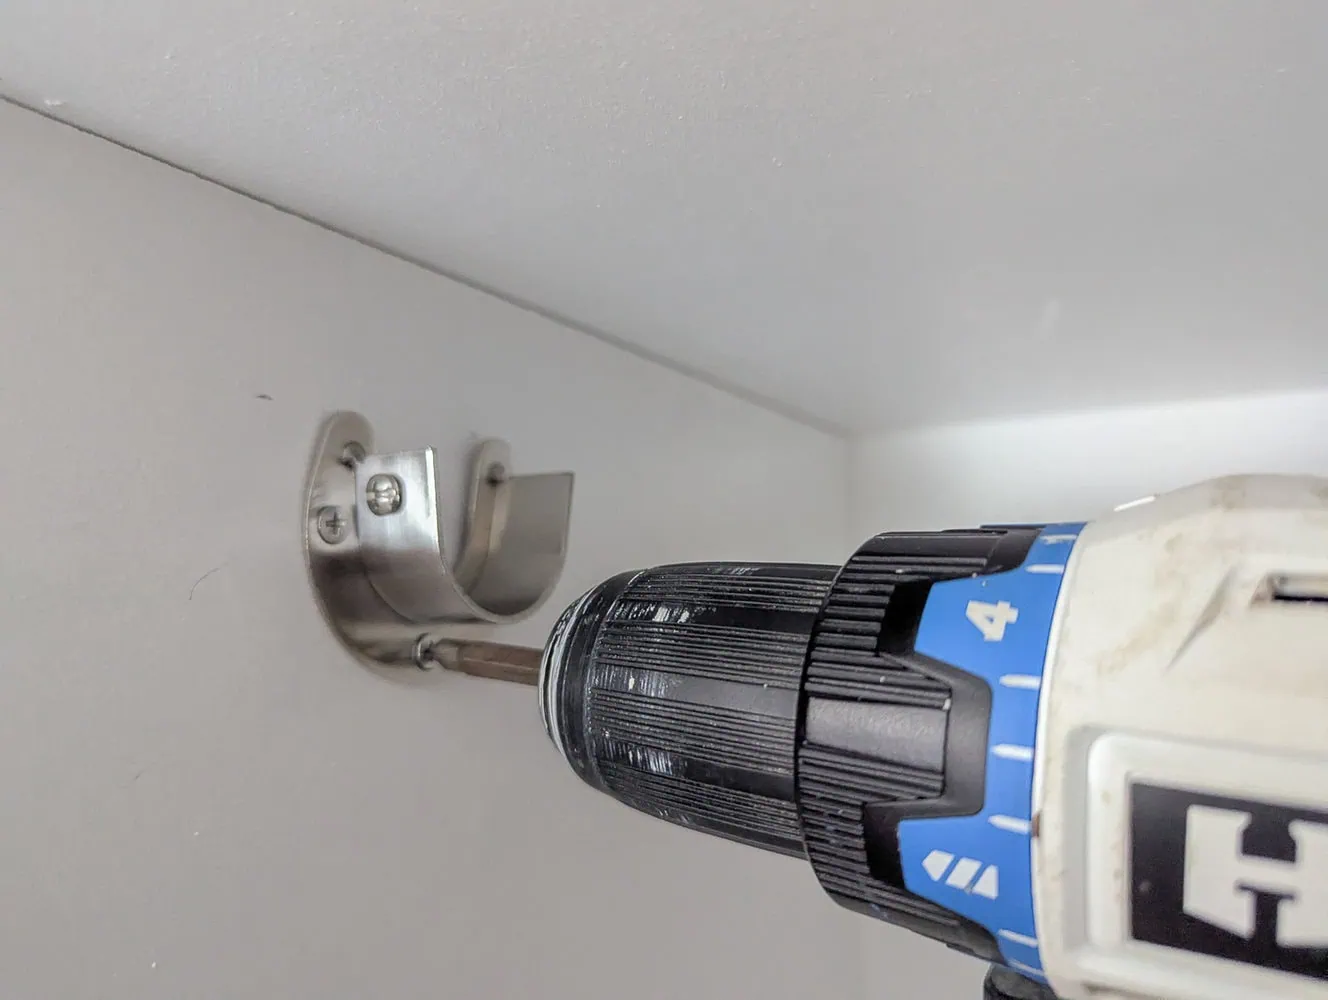
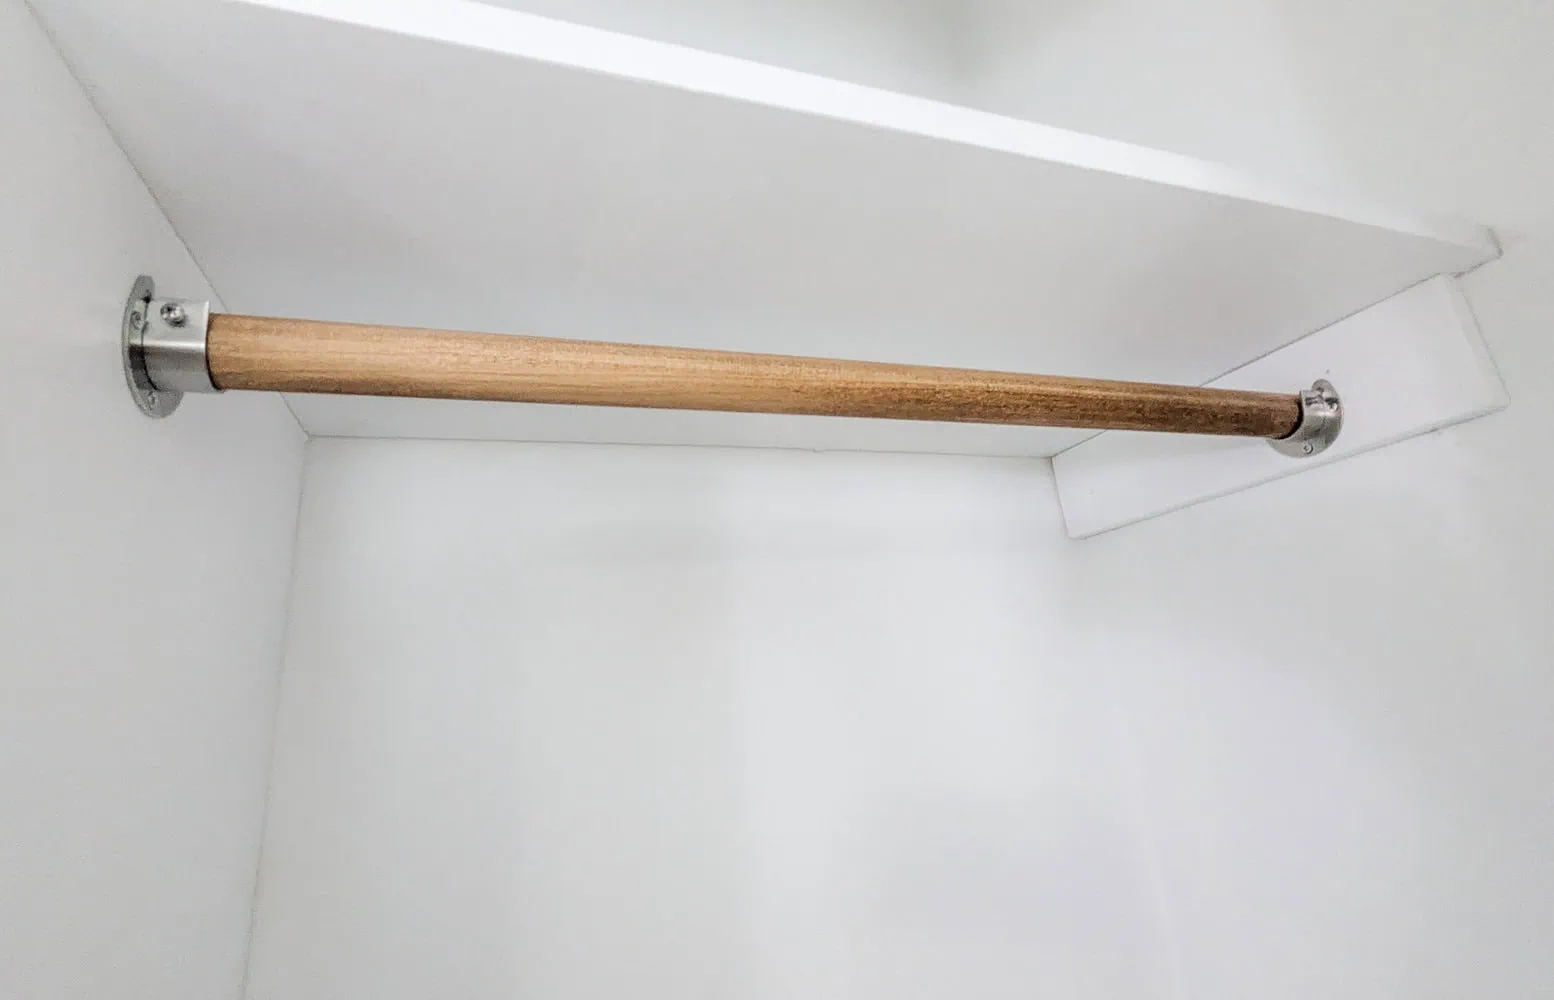
Install the closet rods
And finally, the last step – installing the closet rods!
Attach your two sets of closet rod brackets using the included screws. One bracket for each side will be on the 1″ x 4″ board we installed earlier to support the top shelf. The other will be on the tall vertical supports of the closet organizer.
The center of your closet rod brackets should be ten inches from the back of the closet and the top of the bracket should be at least 1 1/4″ from the top shelf.
Money Saving Tip: I prefer to use a wooden closet rod so I can easily cut it to the correct size (plus I love the way they look). At my local Lowes, 72″ wooden closet rods are $27 while 72″ wooden dowels are only $10! These are located with the wood trim and the 1 1/4″ diameter ones are the same size as a regular closet rod.
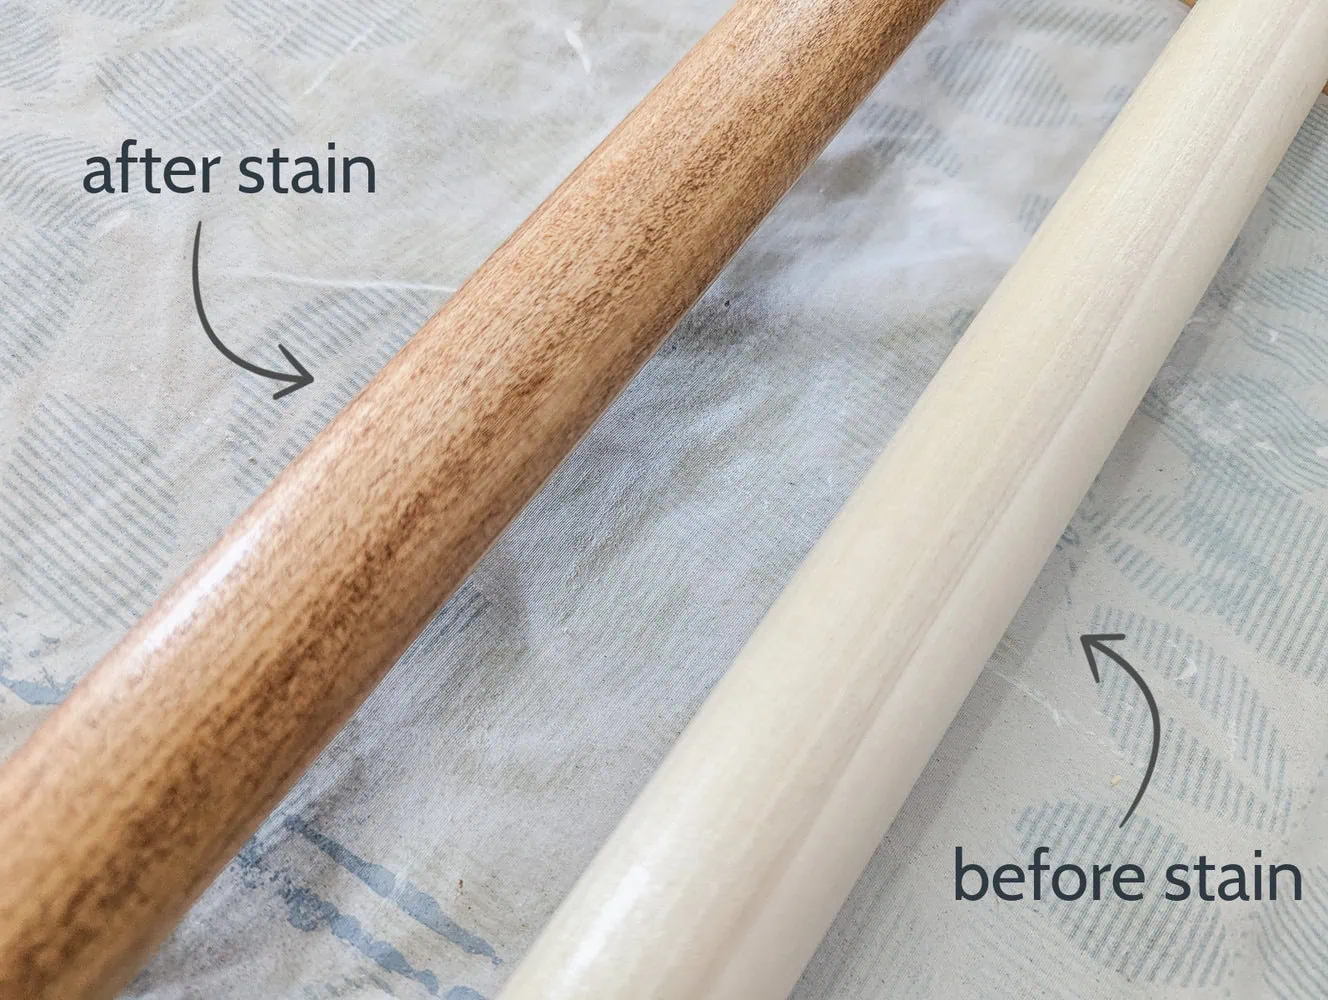
Cut your closet rods to size using a circular saw or miter saw. I finished my closet rod using Varathane gel stain in the color Ipswich pine.
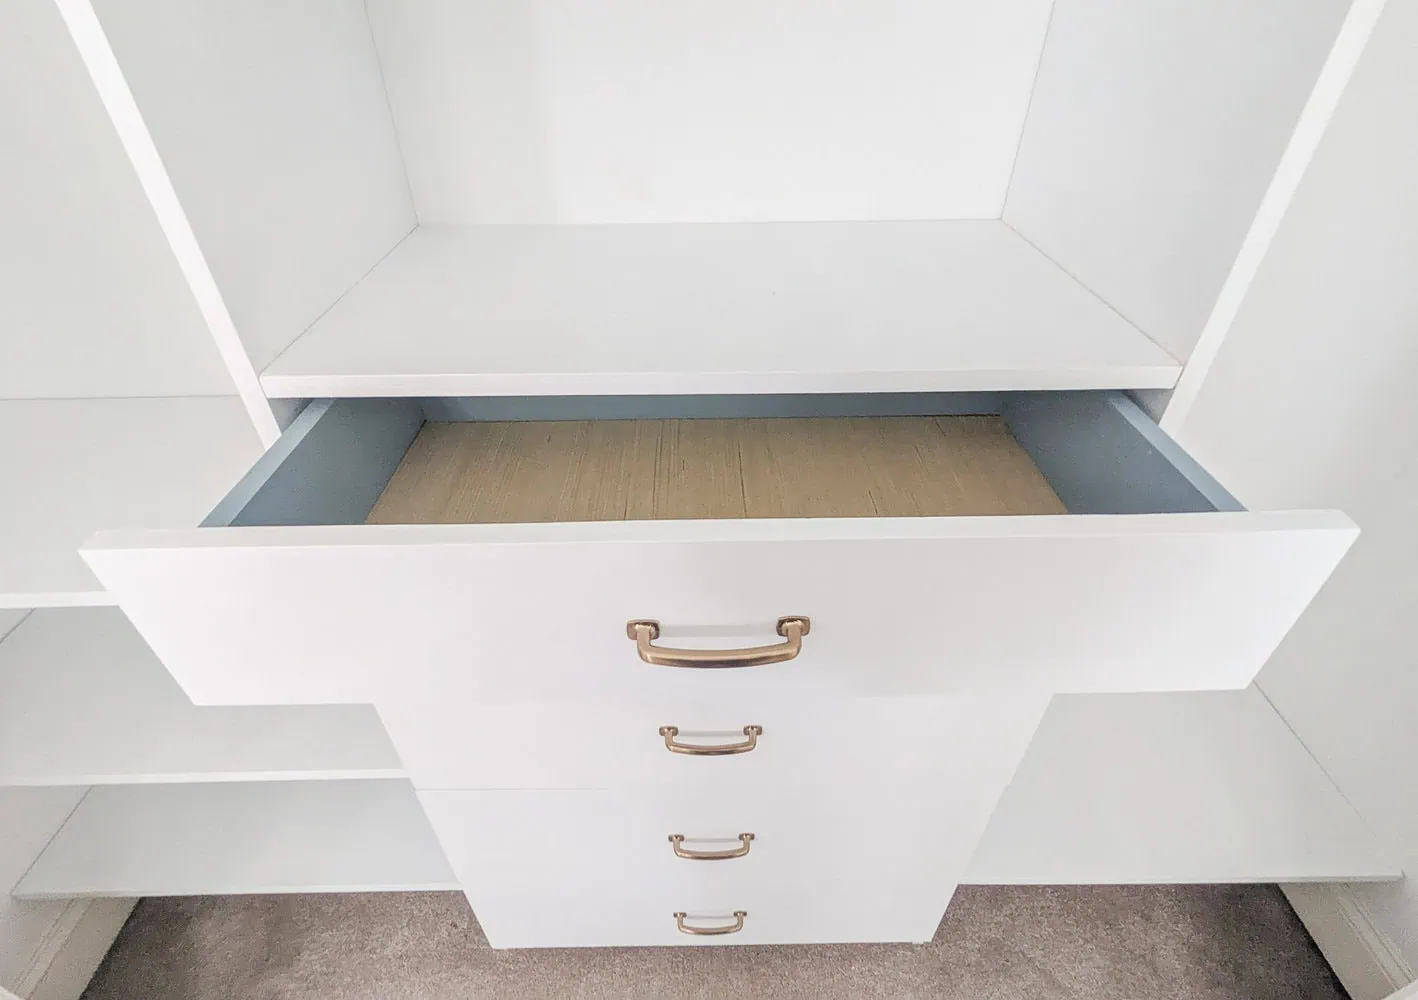
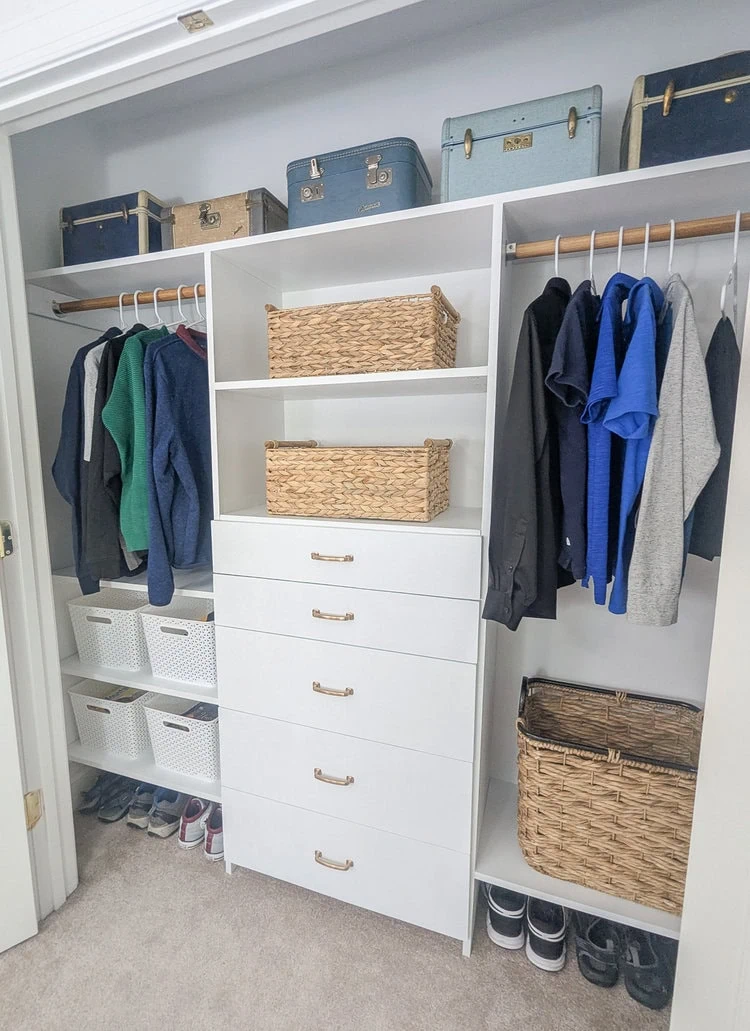
Finished Closet Organizer
And here’s the finished closet organizer!
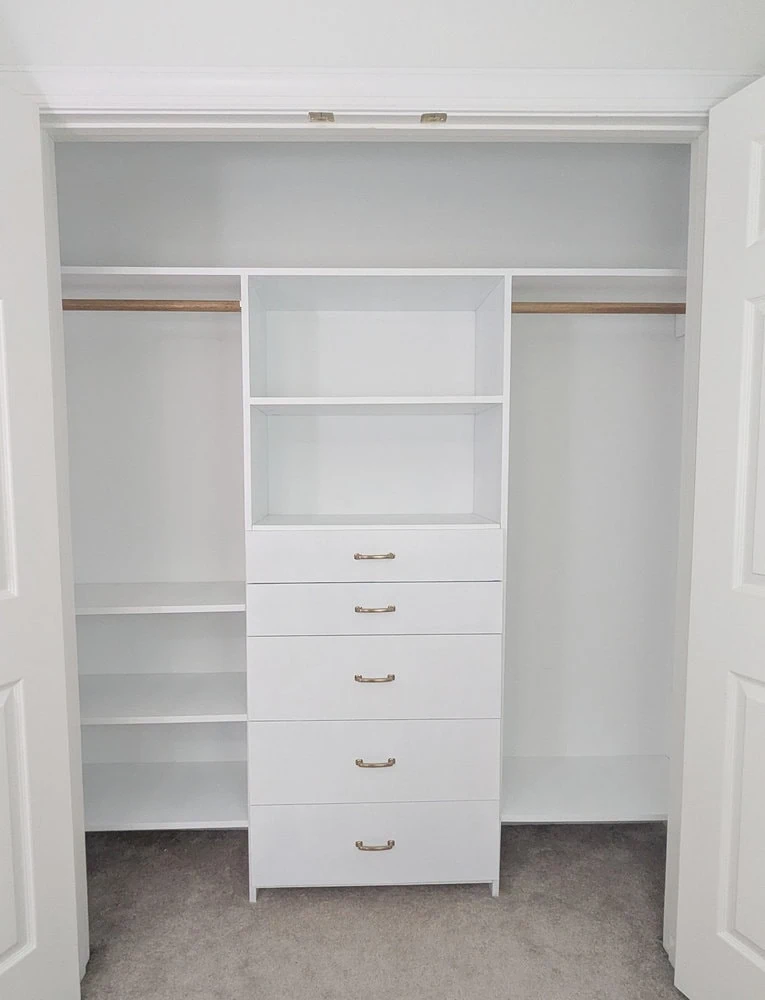
I love how it turned out! It looks beautiful, but more importantly it is so much more functional!
With the new drawers, we were able to move all of my son’s clothes from the dresser into the closet, which means now there’s plenty of space in his room for the bookshelf that used to be shoved in the closet.
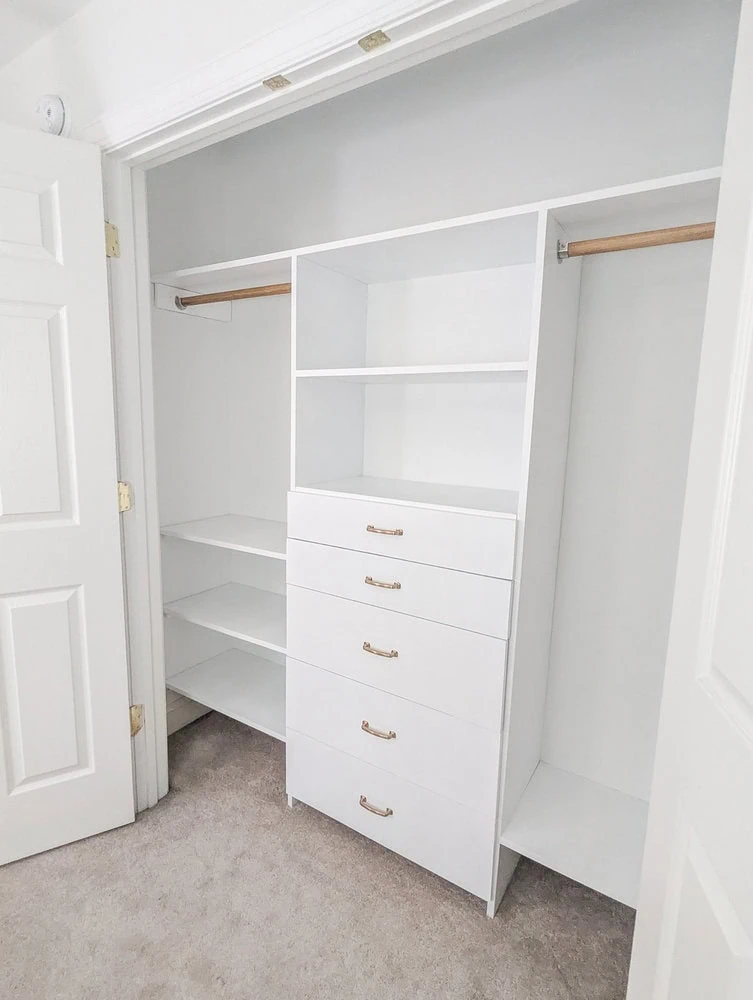
Before there was so much wasted vertical space. Now we can make use of the entire closet and it can hold so much more. My son and I are still figuring out exactly what should go where, but we’ve started filling the closet and there’s more than enough room for everything.
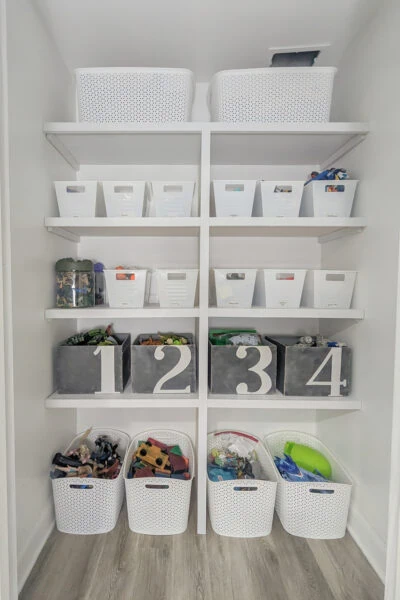
To help keep things organized, I added a hamper along with lots of other baskets and bins. And I even added my collected of thrifted train cases – these have always been one of my favorite alternatives to plastic storage bins.
Time and Cost
This closet organizer cost around $200 for all the needed materials. That cost will vary depending on what specific materials you choose and current wood prices. I’d say that’s a pretty amazing price for a completely custom closet!
This is a pretty time-consuming build since building drawers adds several steps. I would estimate it took around ten hours to build – depending on what kind of tools you have, it may take you more or less time.
Printable Build Plans
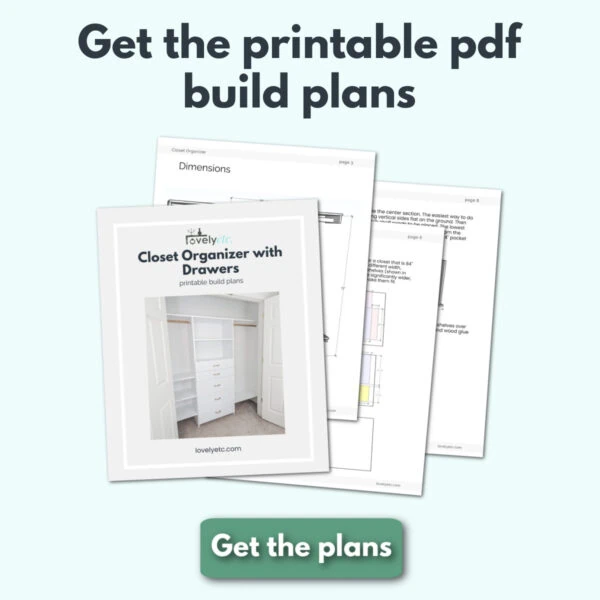
Remember, if you want a little more help, you can get detailed pdf build plans for this closet organizer here.
Video Tutorial
Just hit the play button below to watch my Youtube video of this project.

I’d love for you to subscribe to my Youtube channel!
Interested in more DIY closet ideas? Check out these other DIY closet tutorials I’ve shared:
I’d love for you to pin this post on Pinterest!

Where are his jeans and other pants or other sweats??
Good question! All of his other clothes are in the closet drawers – underwear, socks, tshirts, shorts, pants. And he has pjs and swimsuits in two of the baskets on the shelves. One thing I’ve learned is boys definitely don’t tend to have as many clothes as girls!
Carrie your projects always amaze me!!! I’ve followed you for years. This closet is just what my 2 daughters need. Is there a way to print these directions & shopping list etc? Thanks!!
Thanks Karrie! I don’t have any easy way to print the instructions right now but I’ve been meaning to make build plans for this – this is a sign for me to get on that!
I love this closet build-in! My husband and I are going to make this for my daughter’s closet. I have an odd question though – what if we wanted to change the carpet in the future. Would this be able to be removed and then reassembled again?
Thank you so much for the detailed plan! I can’t wait to get started on it!
Thank you and great question. If you want to replace the carpet in the future, you likely will need to remove the closet organizer and reinstall it. It may be possible to cut the carpet and pull it out from beneath the center section which is the only part that actually rests on the floor. But that would likely make it pretty complicated to install the new flooring anyway. It would probably be easier to ‘unanchor’ it from the wall at the top and either remove or simply prop up the organizer while the flooring is replaced.