How to Create a DIY Charging Station in any Drawer
A simple step-by-step tutorial for making a hidden charging station in a drawer.
As much as I love a big bold DIY, I’ve come to really appreciate those tiny little projects that solve everyday problems that are driving me crazy! Things like adding DIY drawer dividers to our junk drawer or finding a spot to display the influx of kid art during preschool.
My latest nagging problem? Our charging station.
We had a great charging station set up at our old house, but after we moved a year ago, the old routine wasn’t working anymore. I was finding my kids’ tablets and random chargers all over the house and it was driving me crazy. So I decided to take care of the problem once and for all.
I wanted a central place for charging all of the family devices and I wanted it to be hidden – no more random charging cords hanging out of every outlet.
I knew right away that the perfect spot for our family charging station was one of the top drawers in the dresser under the TV in our living room.

It’s a central location, is easy to access, and had plenty of space. I also love the idea of creating a hidden charging station in a nightstand drawer and I might just do that next for my husband and I to charge our phones at night. You could also use the same idea to create a charging station in a kitchen drawer though that’s a bit more complicated unless you already have a hidden outlet in your cabinets.
This is a super quick and easy project that only requires one tool, but even so, it has made such a big difference in how our home functions.
This post contains affiliate links which means if you make a purchase after clicking a link I will earn a small commission but it won’t cost you a penny more. Click here to see my full disclosure policy.
Supplies
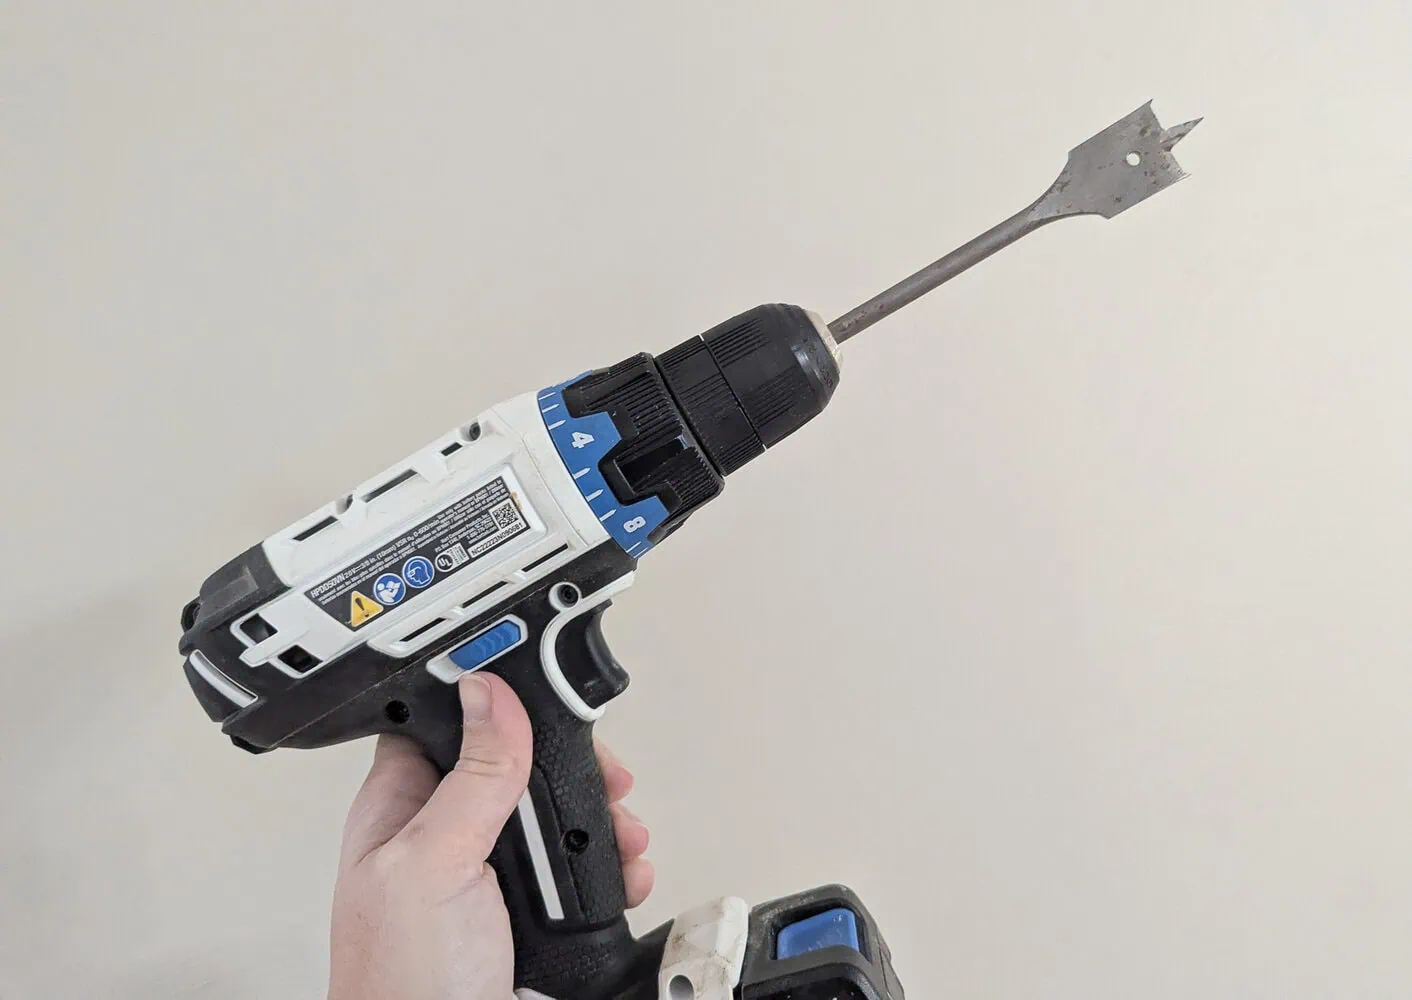
- Drill with a spade bit or hole saw – Either a spade bit or a hole saw attachment will work fine for this. You’ll need one that’s at least 1 1/4 inches to easily fit your plug through.
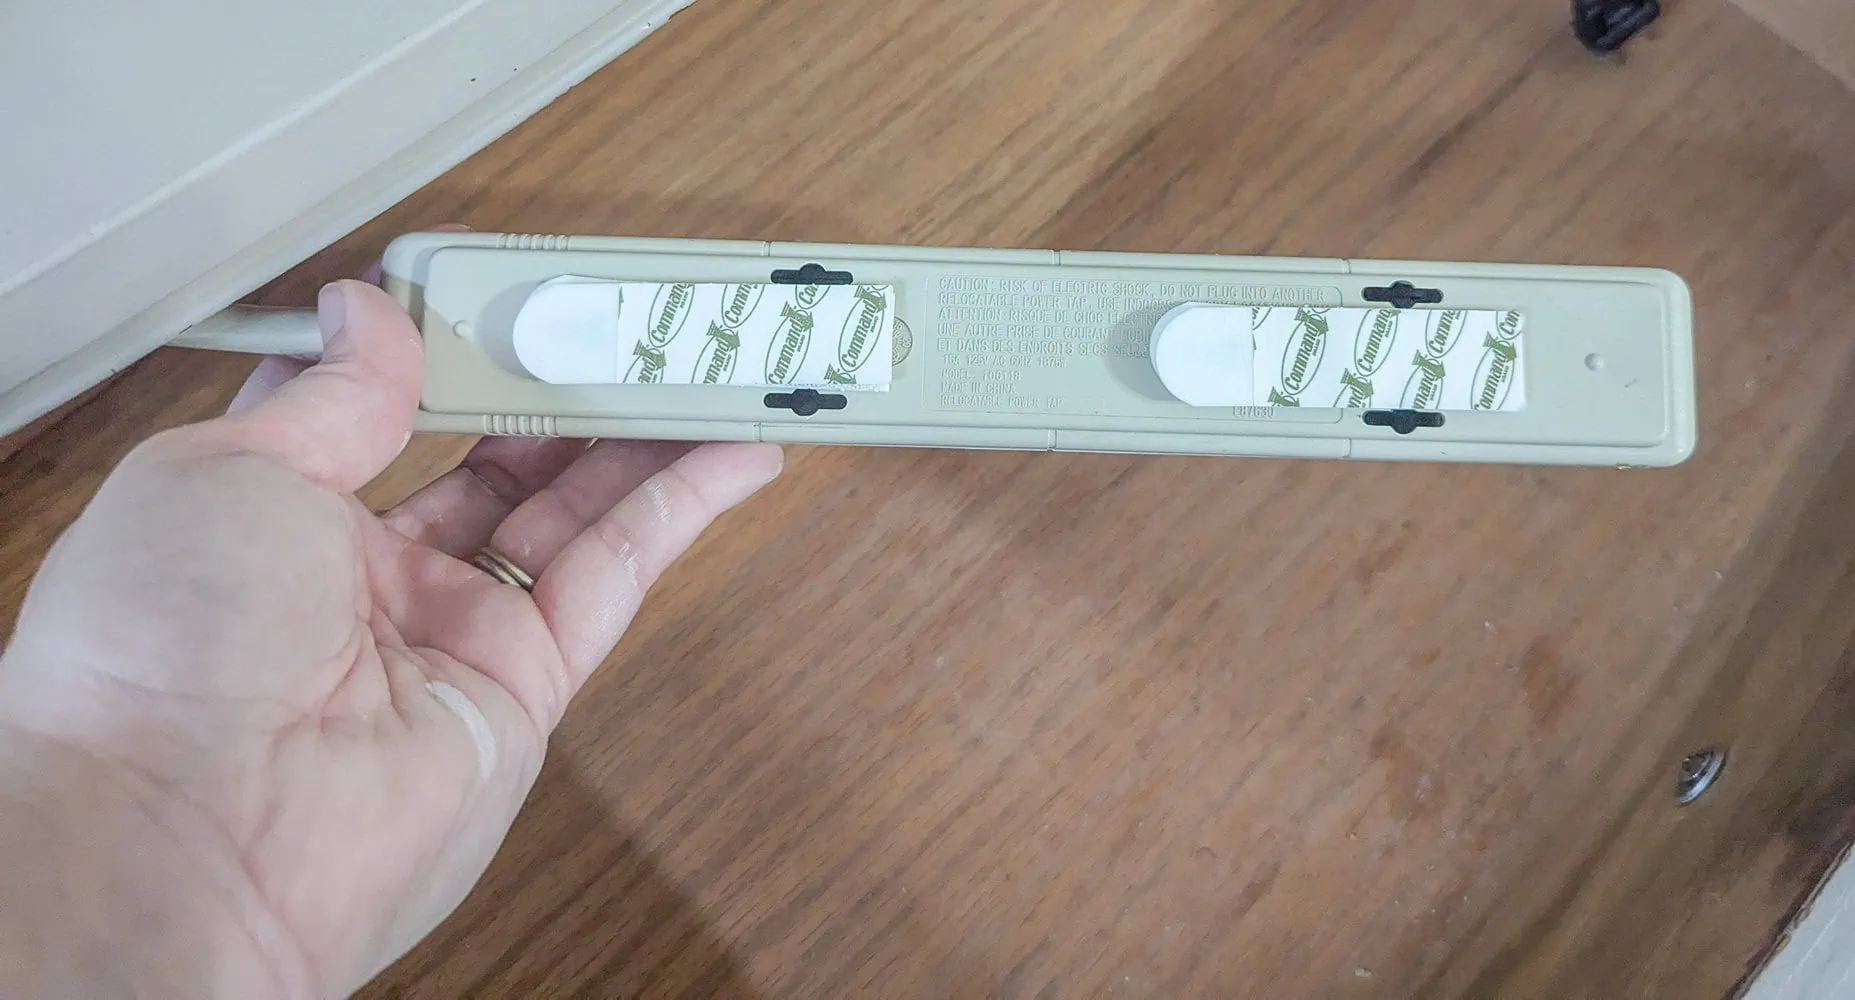
- Power strip – you can use a regular power strip or a recessed power strip
- Chargers – I bought a cheap set of these short charging cables to prevent cord clutter
- Command Strips – to secure your power strip
- Optional: Cord labels – these are great for labeling which cords are which or even who each charger belongs to.
- Optional: Small bins – these can be helpful in keeping all the devices in your drawer organized.
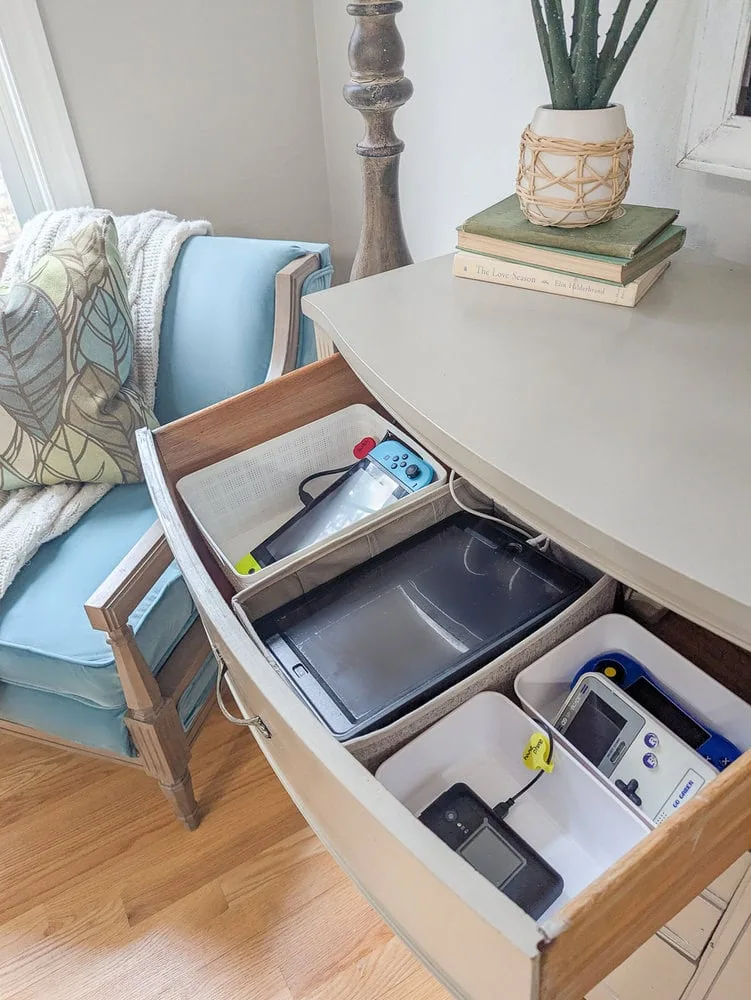
How to create a charging station in a drawer
The first thing you need is something to plug all your chargers into. This can be as simple or as fancy as you want.
I used a very basic power strip for my charging drawer. There are also special power strips with places to directly connect USB cords as well as special recessed power strips that attach directly into the side of your drawer. These install into the back or side of your drawer so that they look built-in.
Whichever type of power strip you choose, just make sure the cord is long enough to reach the nearest outlet.
Once you’ve chosen your power strip, you need to drill a hole in the back of your dresser or nightstand for the cords to pass through.
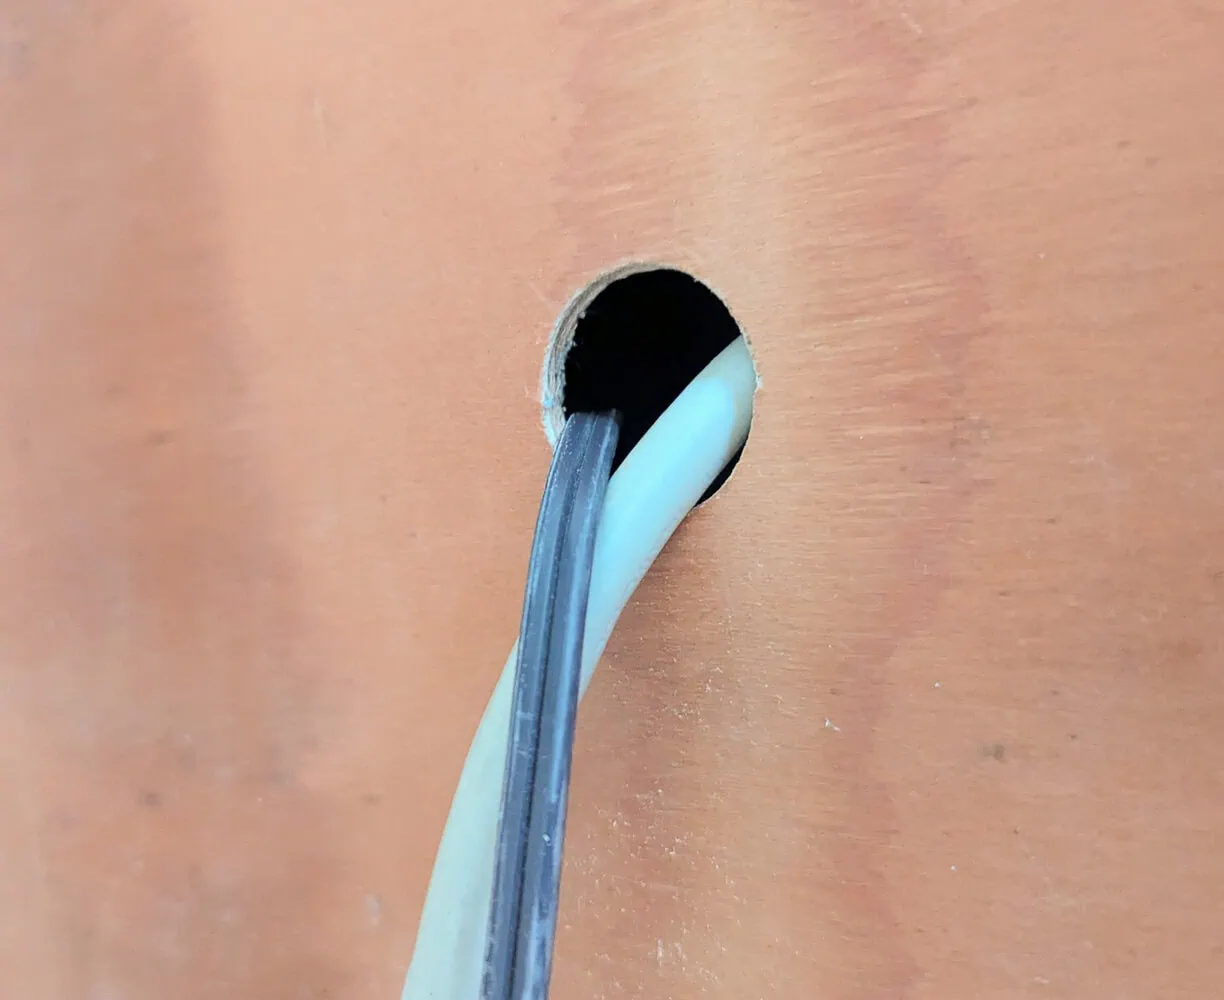
You can do this really easily using a drill and either a spade bit or a hole saw attachment. Both of these are special drill attachments that easily drill large holes in wood. They come in different sizes and you’ll want to use one that is 1 1/4″ or larger to make sure your power strip plug can easily pass through.
Remove your drawer and drill the hole in the back of your dresser.
Once your hole is drilled, you can feed the cord of your power strip through it. Then place the power strip in your drawer and slide your drawer back into the dresser or nightstand.
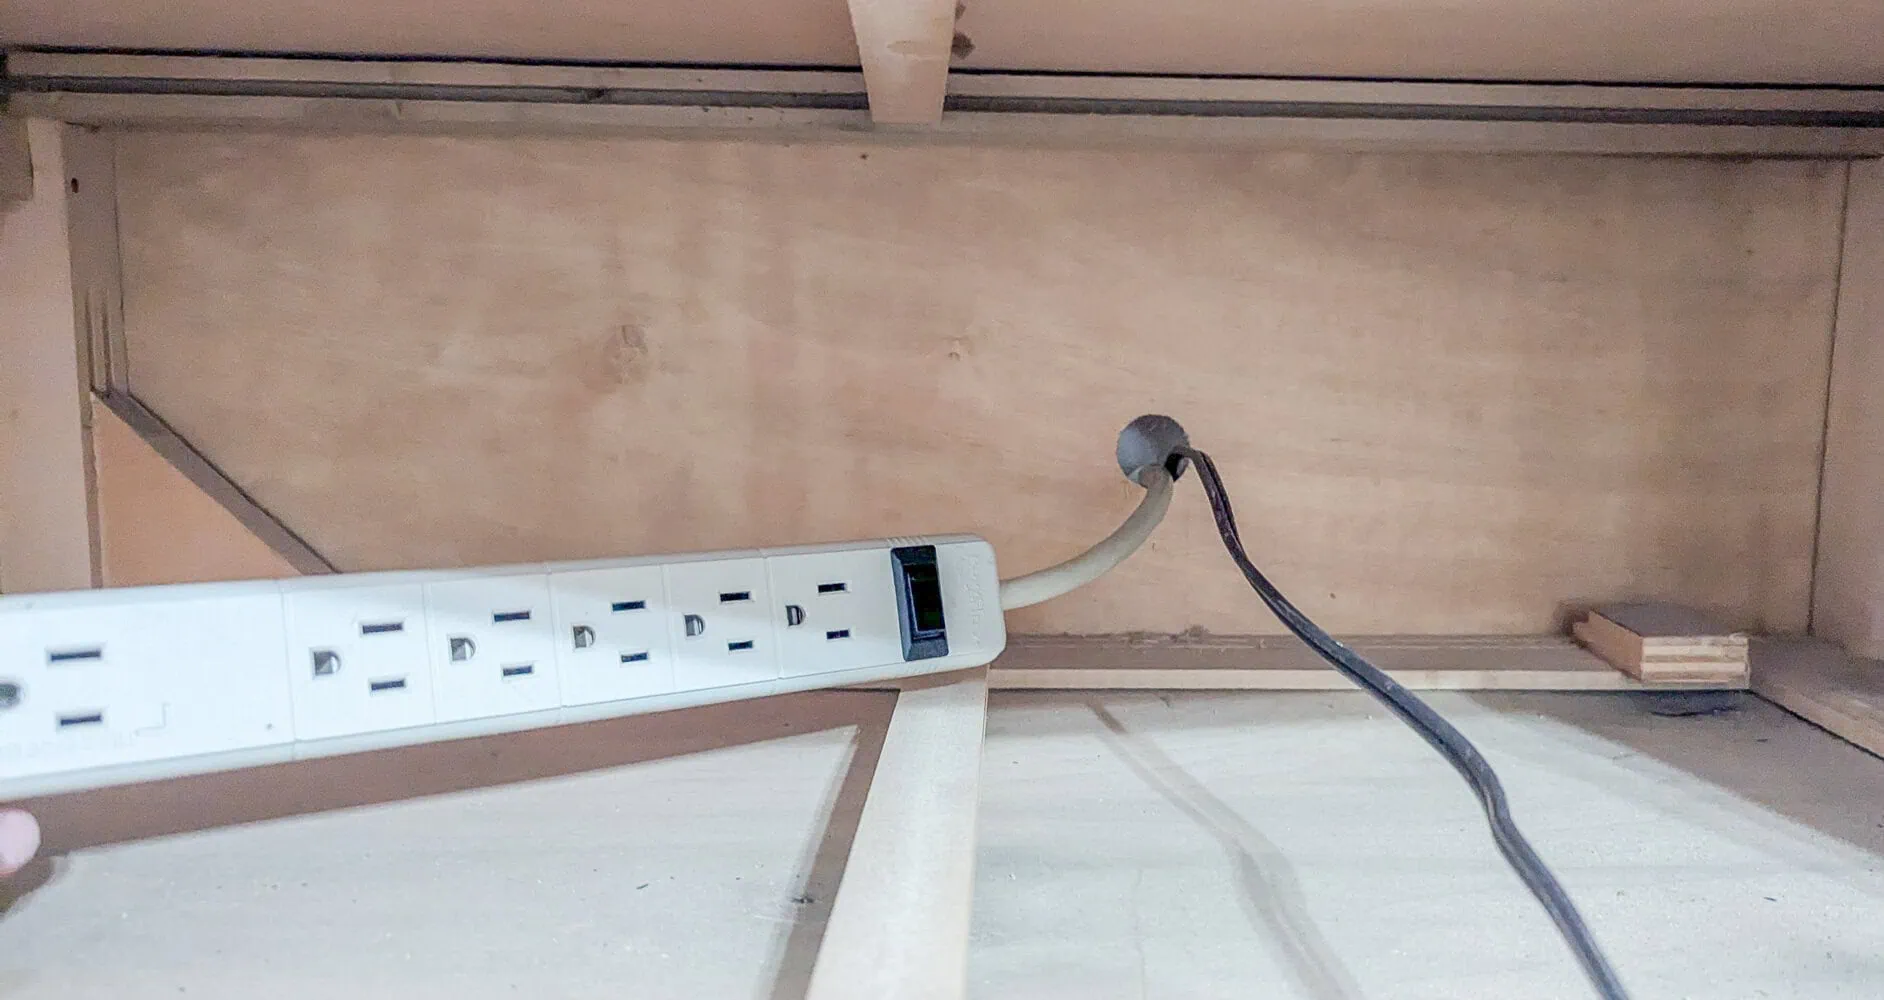
Next, I used two command velcro stips to anchor my power strip to the back of the drawer. You don’t have to do this, but it helps keep everything from sliding all over the place.
Now it was time to plug everything in. I decided to buy new charging cords for our charging station. You can obviously just use whatever chargers you already have, but many of our chargers had mysteriously disappeared so we needed new ones anyway.
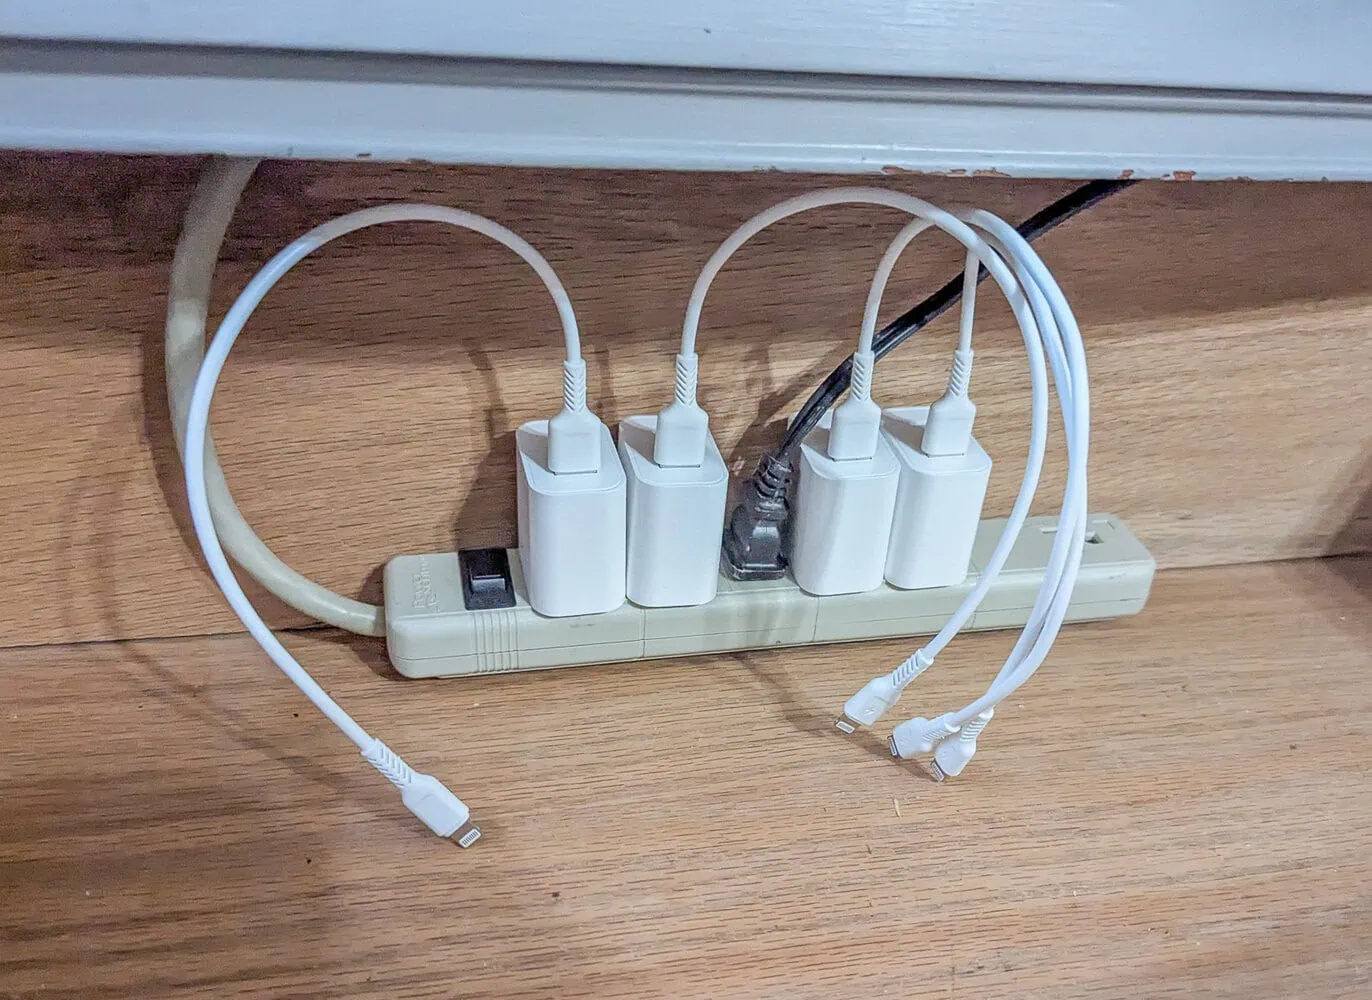
This also allowed me to get shorter charging cords – mine are 12 inches. I want these chargers to stay permanently in the drawer and using shorter cords helps keep everything neat.
Once my chargers were in place, I used these cord labels to label each of the chargers.
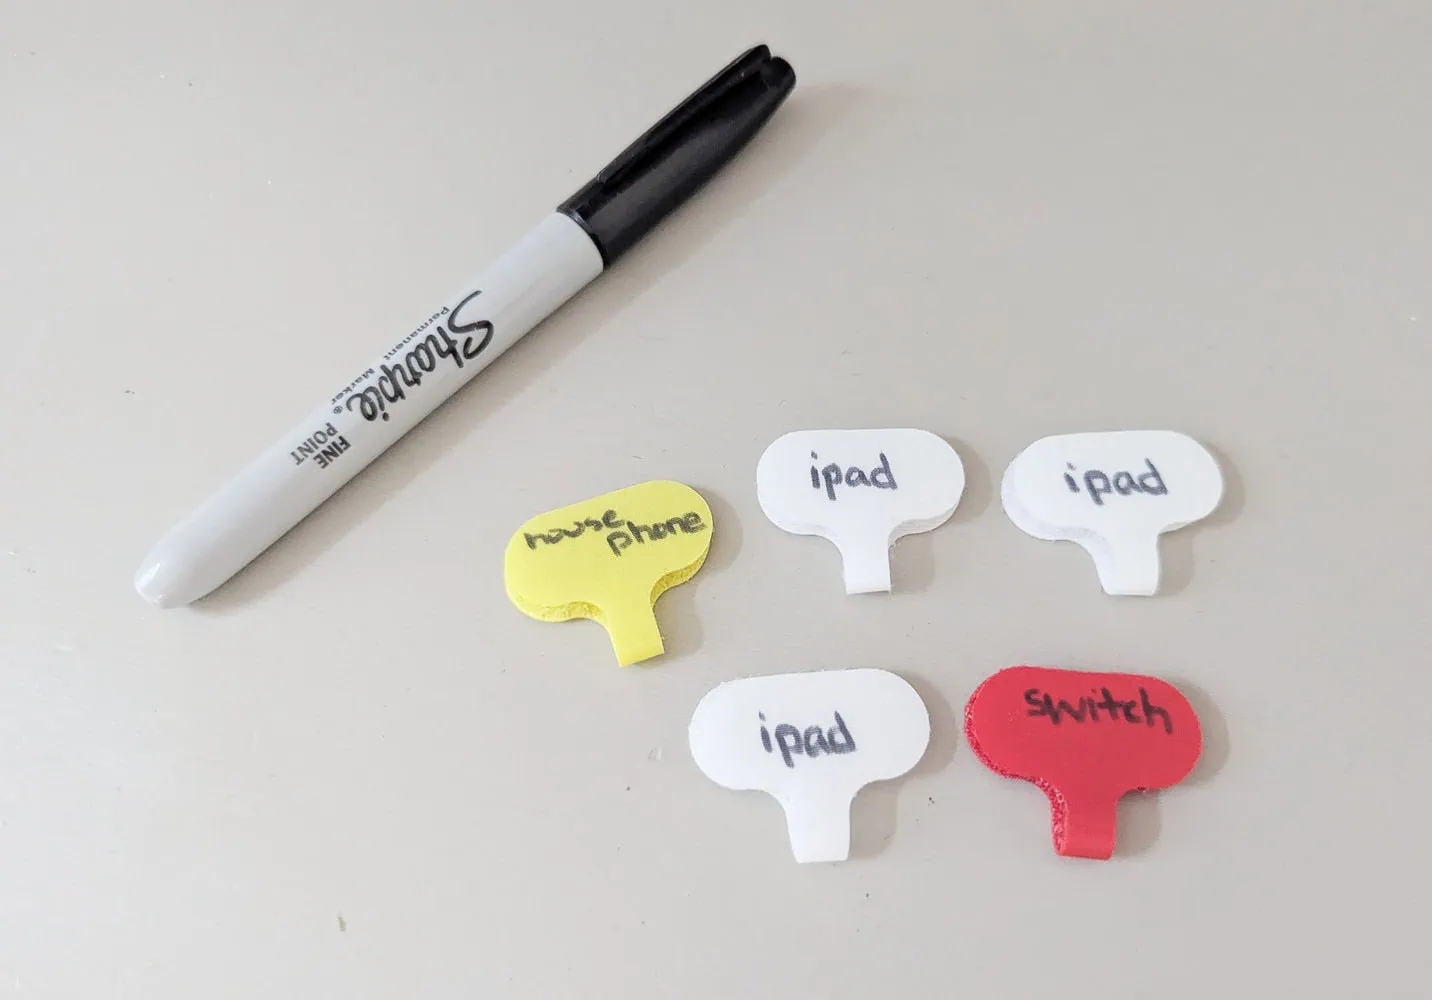
My kids aren’t great at remembering which chargers go to which devices and having them already labeled should keep them from asking me a million times which goes where. I also think the labels are another good reminder that these chargers don’t leave the drawer.
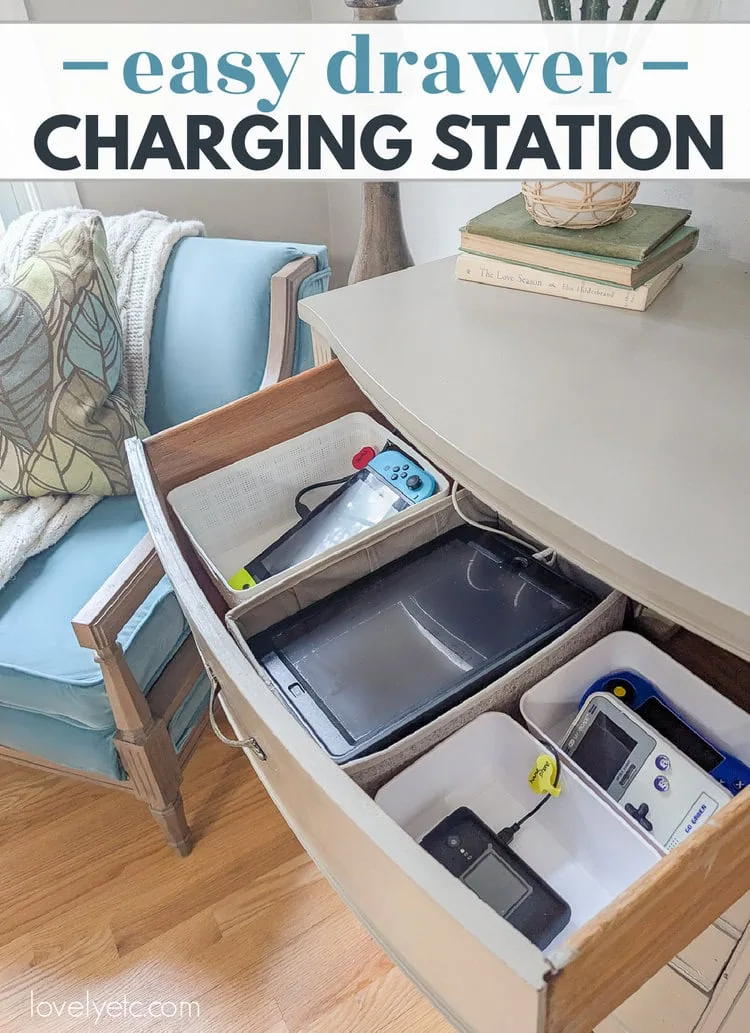
I also grabbed a few plastic bins to help corral everything. I’ve learned that everything having it’s own spot in a drawer is always a good thing.
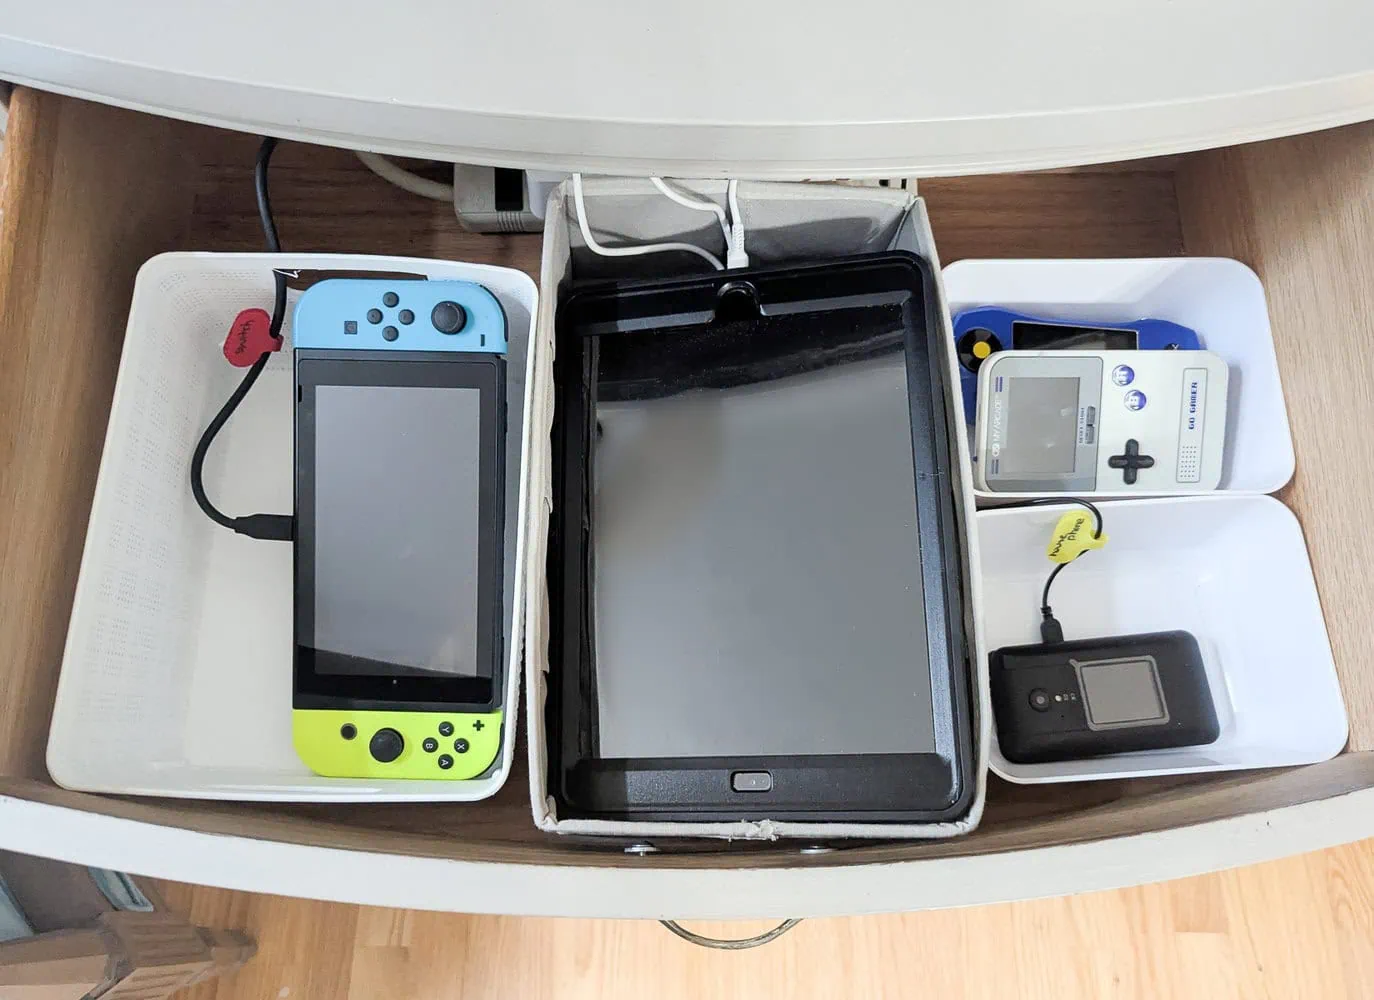
And that’s our finished charging station. It may not be the prettiest thing I’ve ever made, but it is making my life so much more pleasant. No more searching all over the house for missing chargers and no more piles of messy cords and devices on the counters.
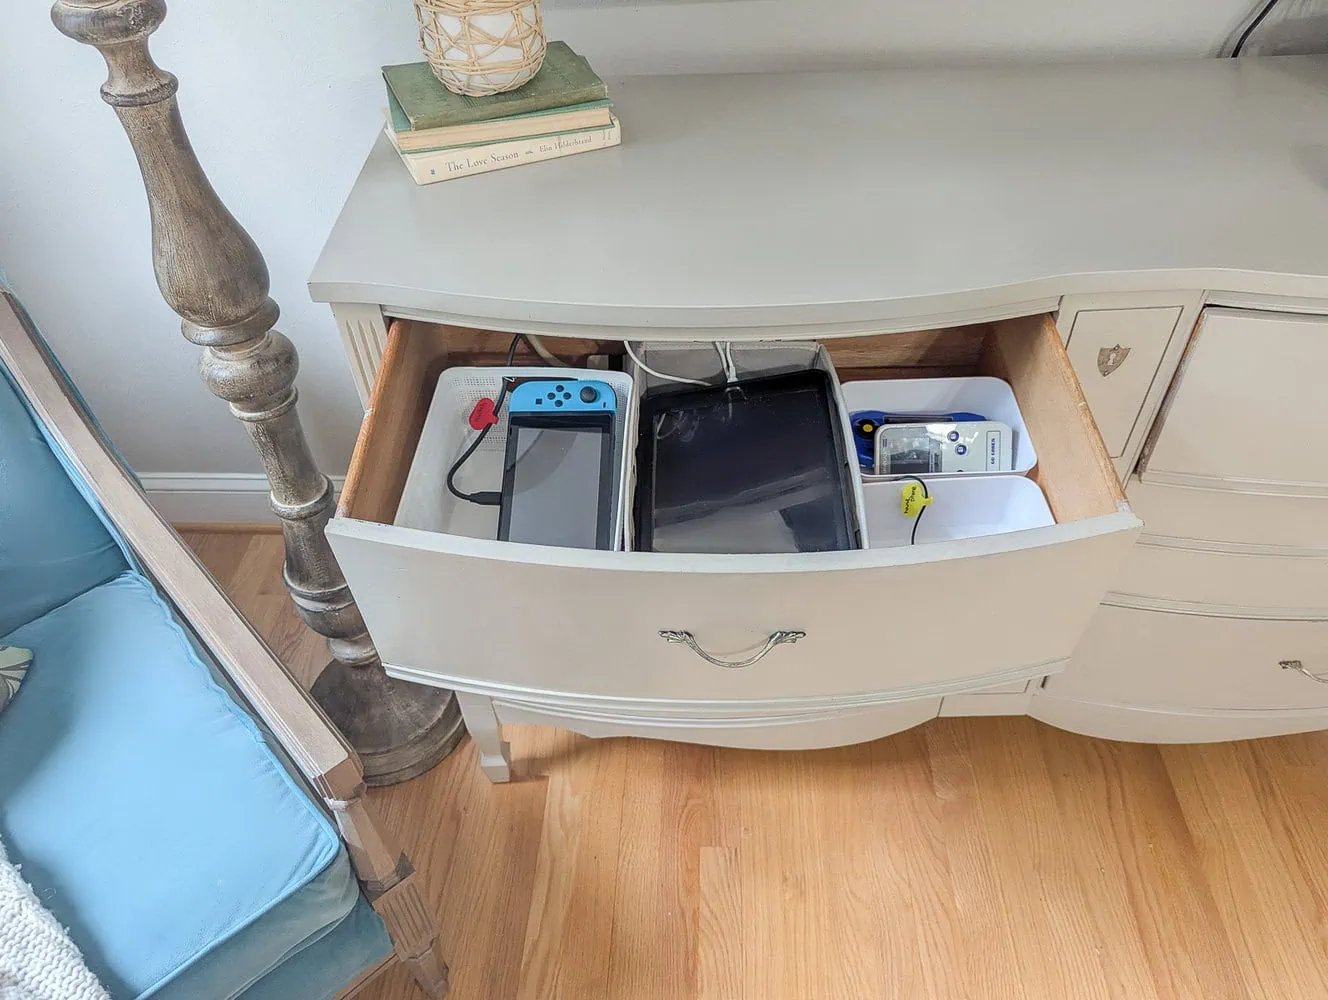
And when the drawer is closed, you can’t see a single cord!
This small project has already been such a breath of fresh air. No more cords all over the house and no more kids complaining they can’t find a charger to use. Next, I’d love to do the same thing in my nightstand for charging my phone at night.
I’ve love for you to pin this post on Pinterest!