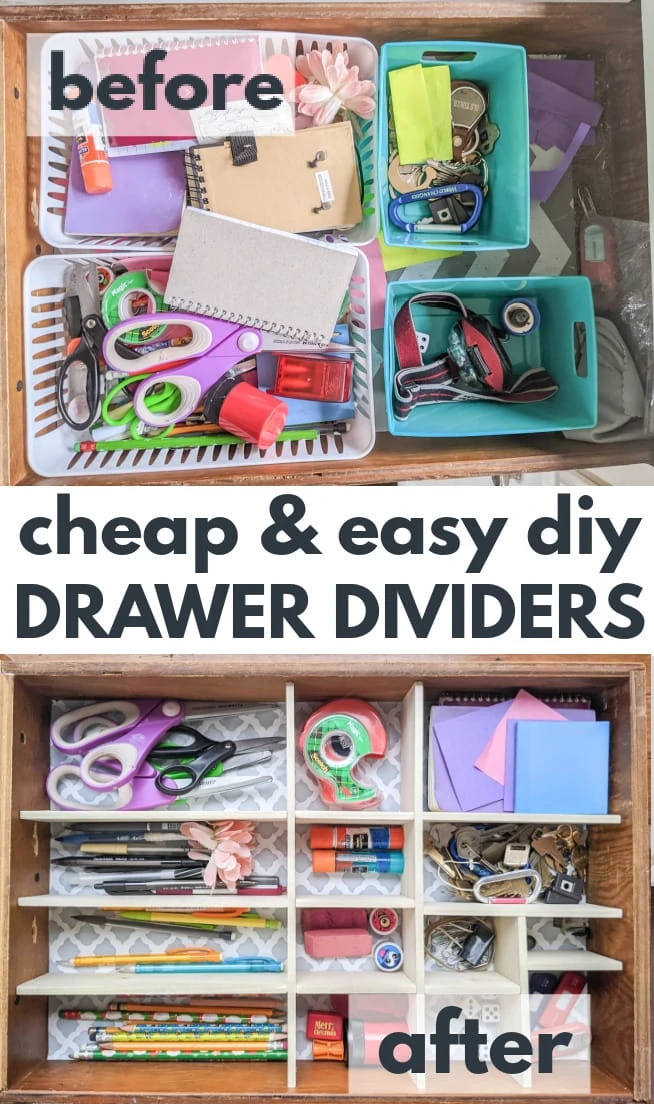
How to Make Cheap and Easy DIY Drawer Dividers
These DIY drawer dividers are the perfect way to organize your junk drawer, silverware drawer or any other drawers that need a bit of help. They are cheap and easy to make in any custom size you need to perfectly fit your own drawers.
Some of my kitchen drawers have been in major need of some decluttering and organizing for awhile now. In particular, my junk drawer and my silverware drawer need some major help.
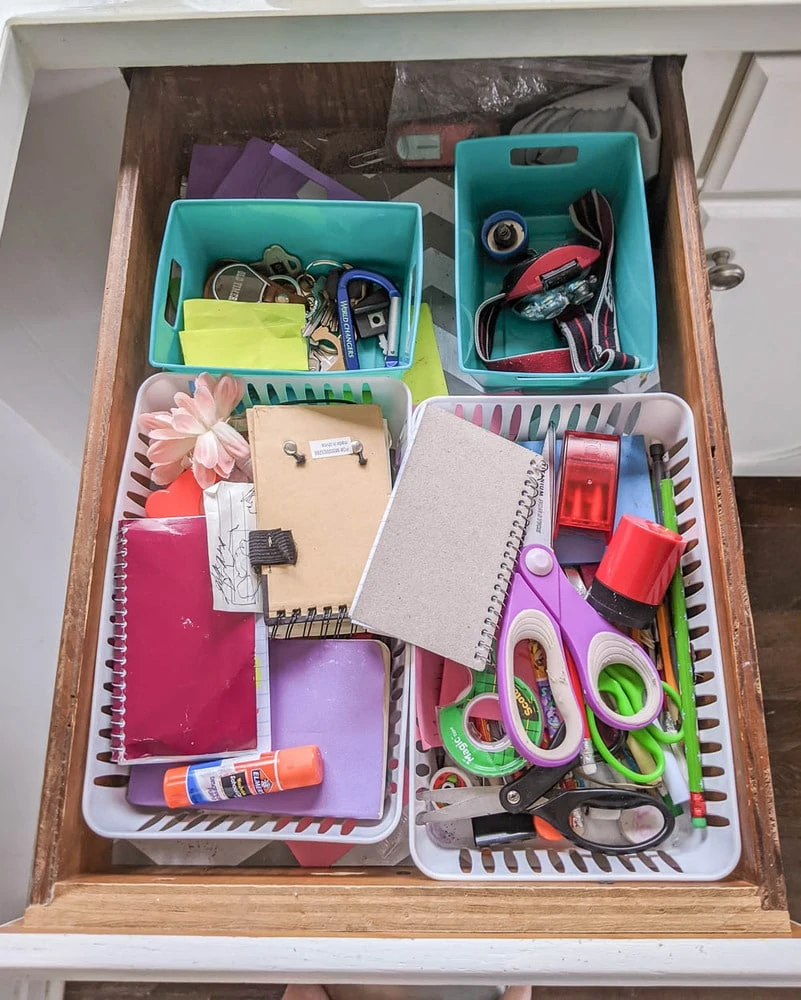
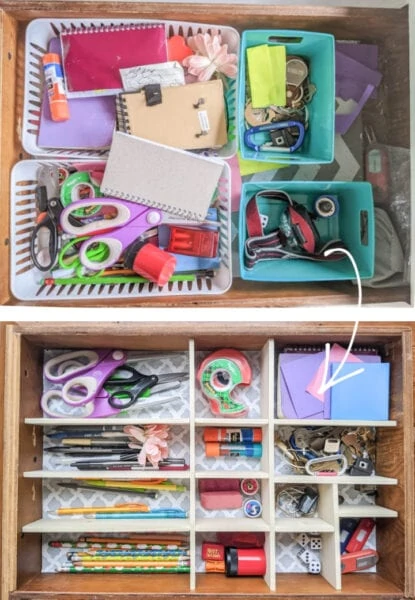
I’ve tried to organize my junk drawer before. This drawer is filled with all the typical junk drawer stuff: scissors, pencils, pens, flashlights, extra keys, tape, post-it notes, and more.
I bought inexpensive containers to help organize everything a few years ago, but the problem is none of the containers was quite the right size for my drawer or for what I needed to put in them. And so they ended up rearranging the mess instead of fixing it.
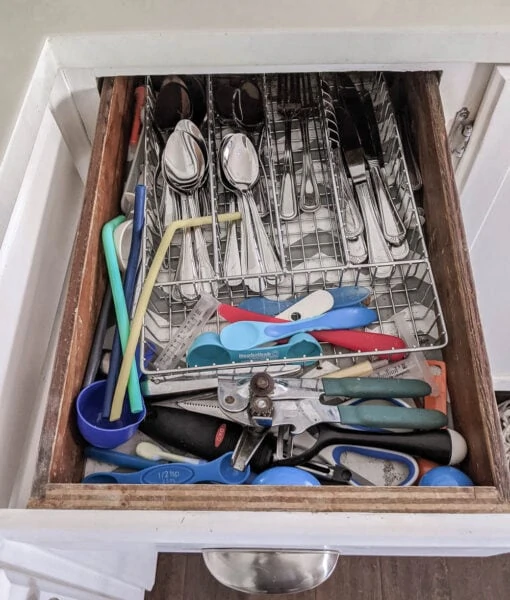
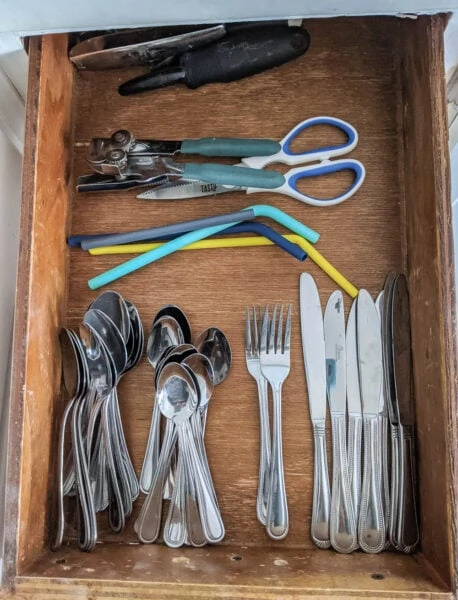
My silverware drawer is another problem area. I have a pretty nice wire silverware rack that works well for our basic spoons, forks, and knives.
But it isn’t really the right size for our drawer so there is tons of wasted space around it. And all of the other things we store in the silverware drawer really have no home.
I decided it was time to solve this problem once and for all. I considered buying all new containers that would fit my drawers better, but then I realized I could actually make custom wood drawer dividers for way less money and only an hour or so of time.
These drawer dividers are really simple to make using only a few basic supplies and you can easily make them to custom fit any size drawer. They are also removable for easy drawer cleaning.
I’m sharing the simple step-by-step tutorial below along with a video tutorial.
This post contains affiliate links which means if you make a purchase after clicking a link I will earn a small commission but it won’t cost you a penny more. Click here to see my full disclosure policy.
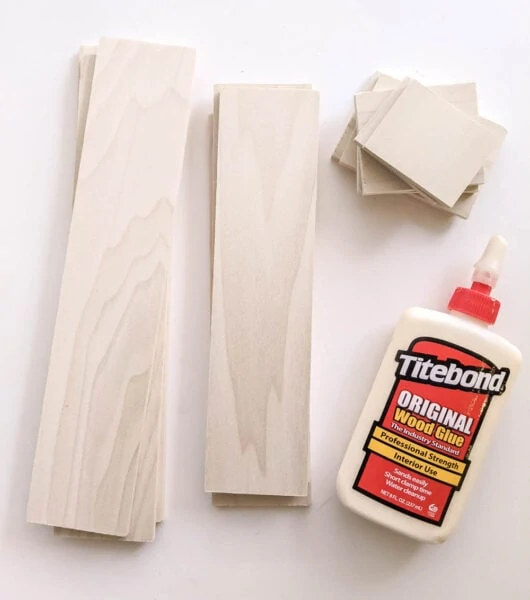
Materials
- wood – 1/4″ x 3″ boards are perfect for this. I used one and a half four foot long boards for each of my drawers. If you are working with larger drawers, you’ll probably need to use more.
- tape measure
- saw – I used my miter saw which is my favorite saw for making quick, straight cuts to wood planks, but any saw will work.
- wood glue
- washi tape or painter’s tape – optional, for designing the layout for your new drawer dividers
How to Make Easy Wood Drawer Dividers
Cleaning and Organizing your Drawers
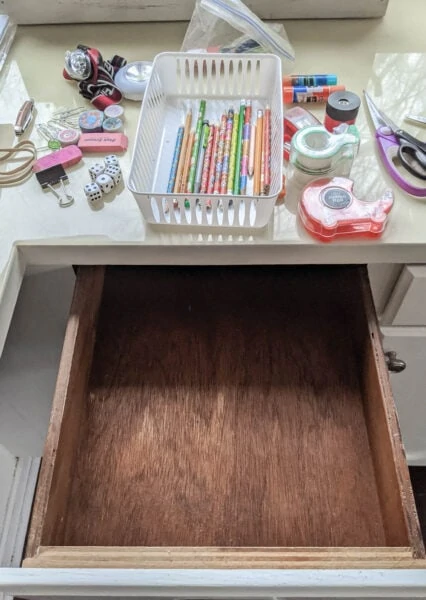
The first step is to take everything out of your drawers.
Once everything is removed, clean your drawer well. You can also add fresh contact paper to line your drawers if you want.
Remove anything that really doesn’t belong in that drawer and then start sorting everything that is left.
Designing the layout
The easiest way to figure out the rough layout for your new drawer dividers is to set everything back in the drawer where you want it to go.
Once I had a rough idea of how one of my doors to be organized, I tried two different methods of figuring out the exact measurements and layout for each drawer.
My silverware drawer was pretty simple, so once I had a basic idea of what I wanted, I drew a quick diagram of the layout.
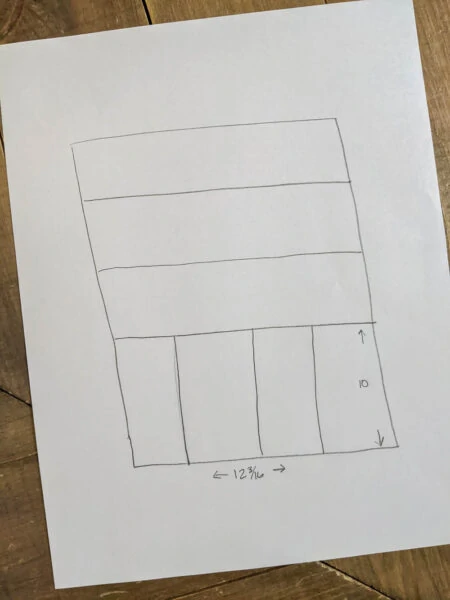
This diagram doesn’t need to be fancy, just a rough sketch. Then you can measure where you need to cut your wood and add those numbers to your diagram.
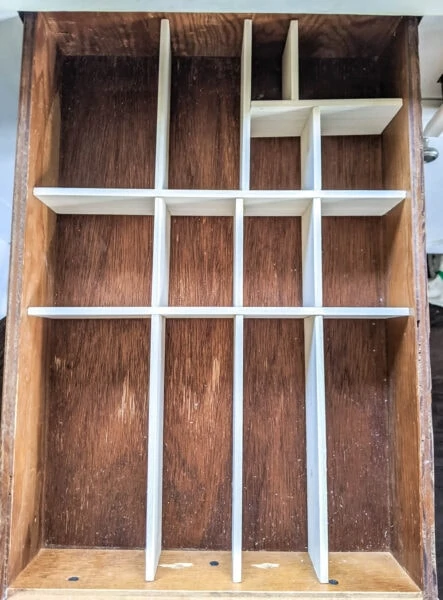
My junk drawer was a bit more complicated. There were a lot more compartments I wanted to make in different sizes.
After I had everything organized in there, I used some washi tape to mark where I wanted my drawer dividers to go. Painter’s tape would also work great for this; I just chose to use washi tape because it is closer to the same thickness as the wood I will be using.
Then I measured and cut a few pieces of wood at a time to make sure they each fit exactly.
Cutting your wood
I wanted this project to be as quick and easy as possible, so I bought precut wood boards from Lowe’s. I’m sure they have something similar at Home Depot or any other home improvement store.
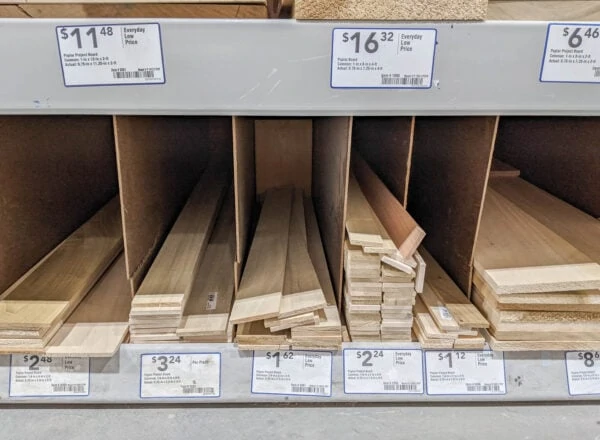
These boards are sometimes called project boards and you can find them with the pre-cut plywood.
The wood I used is 1/4″ thick, four feet long, and it’s a three inch board. This is the perfect width to go into a standard silverware drawer to make drawer dividers.
The sizing of these boards might be a little confusing if you’re not used to woodworking. These boards are labeled as three inch boards but they are actually 2 1/2″ wide. It’s just one of those weird things about how they label wood.
Even though these 3″ boards will fit most standard silverware drawers perfectly, it’s a good idea to measure how tall your specific drawer is before buying your wood.
Then all you have to do is figure out how long to make each part for your dividers and cut your boards to the right length.
I used a miter saw to cut my wood, but you could use pretty much any saw that can cut a quick straight line.
Assembling the drawer dividers
Once your wood pieces are cut, you can dry fit them into each drawer to make sure they fit well.
Then you’re ready for glue. One of the great things about these drawer dividers is you don’t need nails or screws to hold them into place. Wood glue works just fine.
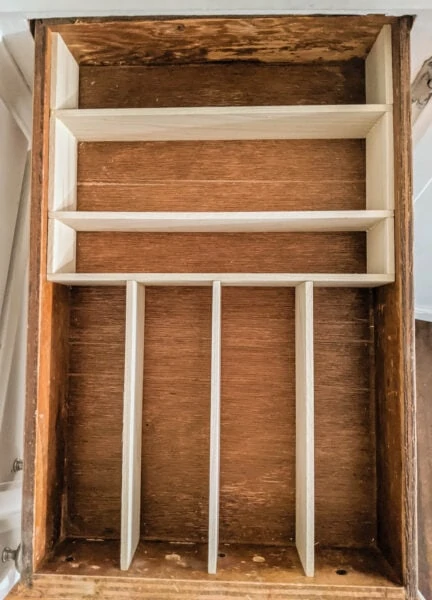
Just put a little bit of wood glue along each edge that you are gluing to another board, set your board in place, and then let it dry for a few hours before moving it around.
I’m making my drawer dividers removable so that I can easily change them up in the future if I want to. Also I think it’s going to be a lot easier to keep the drawers clean if I can remove the drawer dividers occasionally and wipe any crumbs and dust away.
To keep my dividers removable, I did not attach them directly to the sides of the drawers. I just glued the pieces of wood to one another.
Once the glue dried, I was able to easily remove and replace my drawer dividers when I decided to add some contact paper to my junk drawer.
If you would rather your drawer dividers be more permanent, you can always glue the outer edges directly to the insides of your drawers. But even though my dividers aren’t attached directly to the drawer, they still stay in place well since they are the exact same size as the drawer.
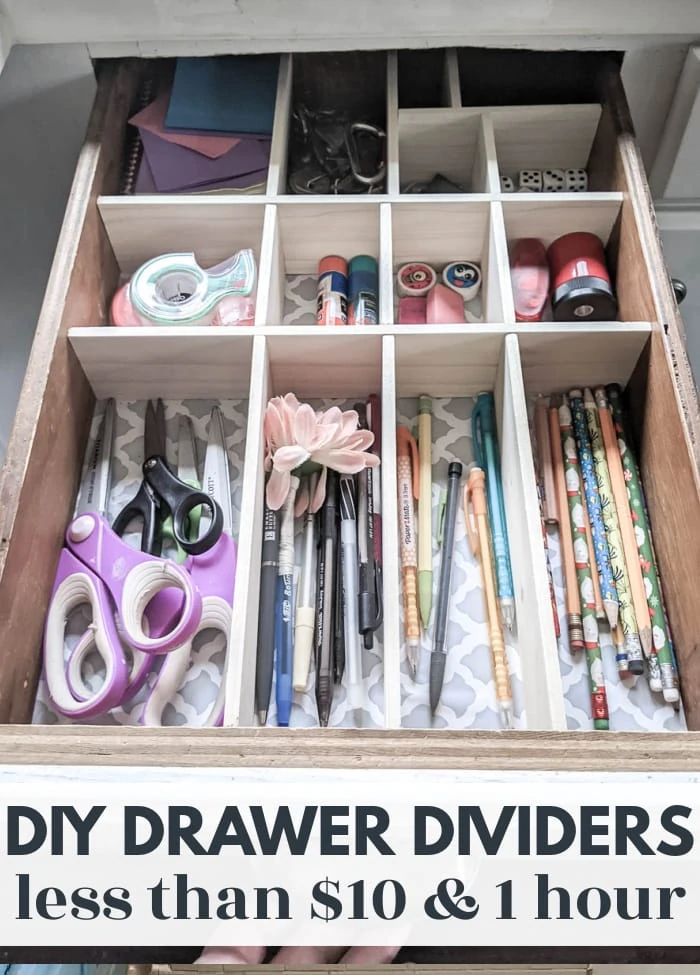
Finished Wood Drawer Dividers
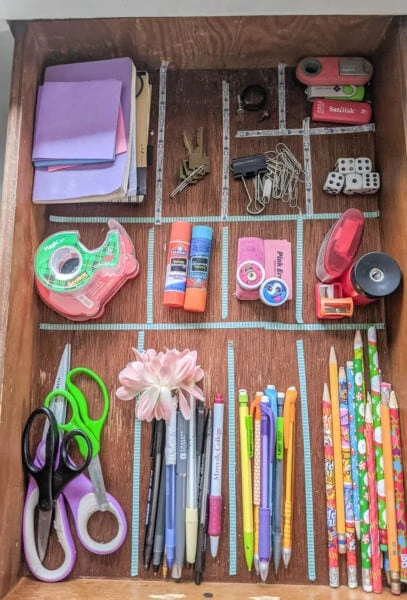
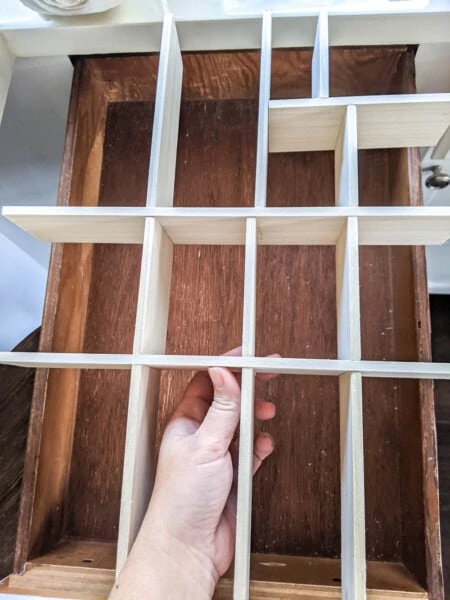
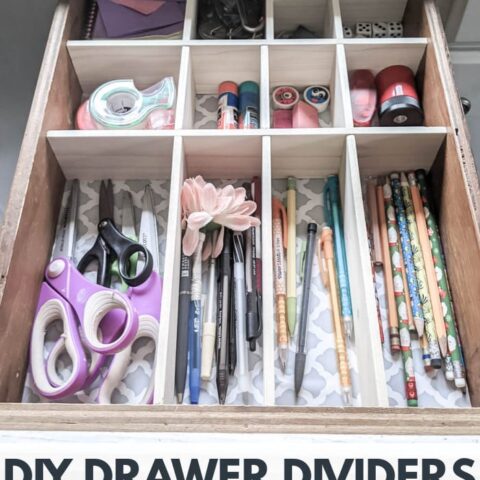
Here is my junk drawer. It is so much easier to find what we need in here now!
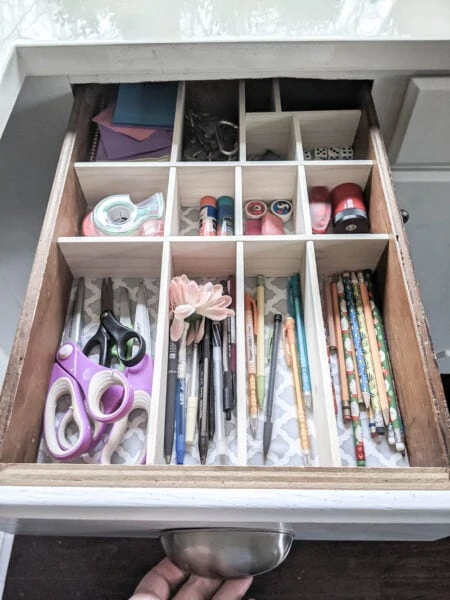
There are compartments for pens, pencils, scissors, tape, glue sticks, dice, and all the little things we use regularly.
And I even made a little compartment to throw in all the screws and mysterious little parts that I don’t want to throw away in case we need them one day.
(If you’re curious why all the dice, we have our kids roll dice a lot to figure out who gets to pick the first tv show, who has to do which chore, and other annoying decisions.)
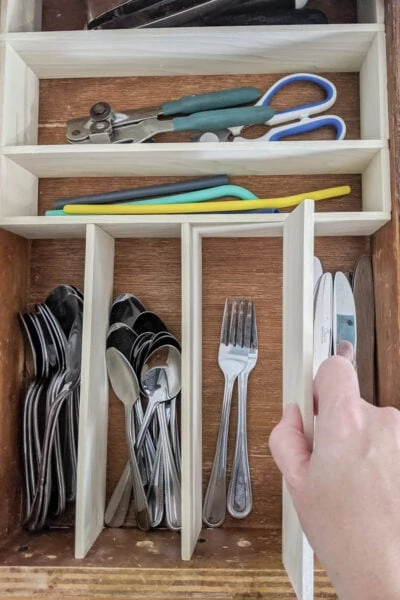
And here’s our freshly organized silverware drawer.
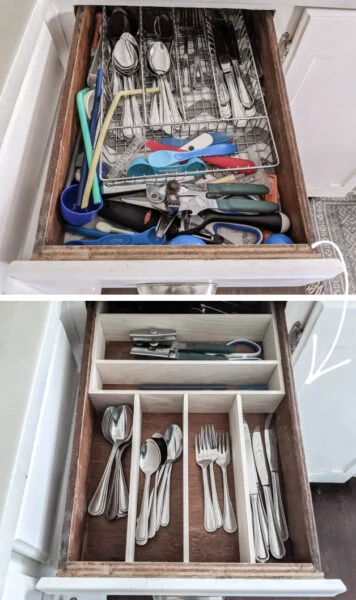
So much nicer. Nothing’s flying around when I open the drawer. And now the silverware we use every day is front and center followed by the other things we use a lot and at the very back are the things we only use every now and then.
It just makes so much more sense. And it’s so much easier to find what we need quickly.
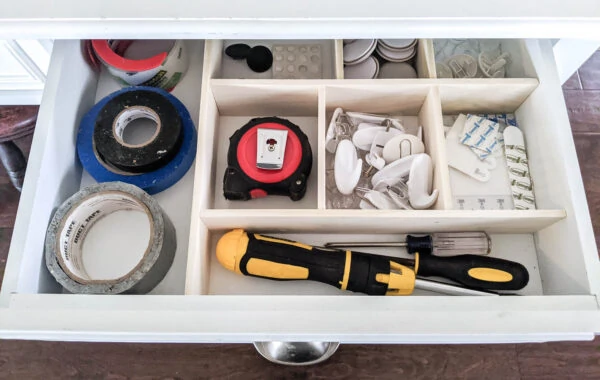
I am absolutely thrilled with how my drawer dividers turned out. In fact, I love them so much, I’ve already made another set for another junk drawer in our dining room. This one’s where we stash a few screwdrivers, the tape measure, command strips, duct tape and other stuff we use pretty regularly. (Along with my collection of heart shaped rocks which clearly needs a different home!)
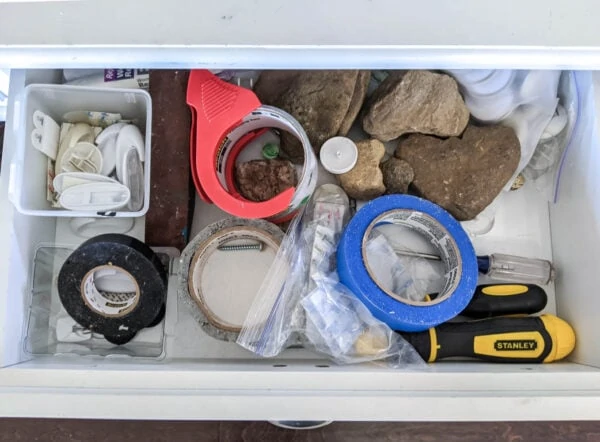
And yes, it was also a disaster. But not anymore!
I love that these were was easy and inexpensive and also completely custom to our exact drawers and the exact stuff we needed to put in them.
You really can’t beat that.
Video Tutorial
I’d love for you to subscribe to my Youtube channel!
Other simple organizing ideas I think you’ll love:
- How to make wood storage cubes in any size
- Turn any cardboard box into beautiful storage
- How to build cheap and easy DIY closet shelves
I’d love for you to pin this post on Pinterest!

How To Make Cheap And Easy Drawer Dividers
Organize your drawers with these super simple DIY drawer dividers. They can be used for your silverware drawer, junk drawer, or any other messy drawer. You can adjust the size as needed.
Materials
- Wood – 1/4″ x 3″
- Wood Glue
- Washi Tape or painter’s tape (optional)
Tools
- Saw
- Tape Measure
Instructions
- Take everything out of your drawers. Clean them well.
- Remove anything that doesn’t belong in that drawer. Organize the remaining items.
- *Optional-Add fresh contact paper to line the drawers.
- Set everything back in the drawer where you want it to go.
- Draw a quick diagram of the layout, or use some washi tape to mark the layout.
- Measure and cut your wood to length using a saw.
- Fit the wood in place to check that it fits correctly.
- Secure the wood pieces together with wood glue. If you want to make them removable, do not attach them to the sides of the drawers. If you want them to be more permanent, you can glue them to the drawer sides as well.
Recommended Products
As an Amazon Associate and member of other affiliate programs, I earn from qualifying purchases.


This is a fabulous idea Carrie. I love that they are removable. I’ve got a drawer I’d love to try this on. Thanks for the inspiration.
Thank you Michelle! I am loving them so far!
Hi Carrie! I did something very similar in our last house, and am getting ready to do it in the new kitchen we’re designing. I made a helpful modification for the long silverware dividers by cutting an elongated “half-moon” out of the center of each. This gives me space for my fingers to grab the last couple forks or whatever. I drew a pencil line on the long dividers, then used a Dremel to cut away the shape. I was able to stack them to check that they were the same, then sand lightly before inserting them into the drawer. Worked great!
This is a great tip – thanks for sharing!