I’m sharing everything you need to know to build simple DIY closet shelves that are perfect for storage closets, including what kind of wood to use, how to keep your shelves from sagging, and how to make them look amazing.
I know there are tons of closet shelves and organizers out there that you can buy, but I’m a huge fan of making DIY closet shelves and organizers.
It’s generally way cheaper than buying a premade kit. It’s a pretty easy DIY, even if you’re a beginner. And it’s the best way to really customize your closet to truly meet your needs. You can build your shelves to perfectly match your closet and perfectly fit the things you need to store.
I’ve built a few different closet organizers now including a simple closet organizer with cubbies that’s perfect for a kid’s room and a small closet organizer that’s perfect for an adult’s room.
This time around, I’m building some super simple DIY closet shelves. These shelves are great for any closet where you just need lots of basic storage for linens, pantry items, toys, craft supplies, or seasonal decor.
I’m building my shelves in these two closets in our family room.
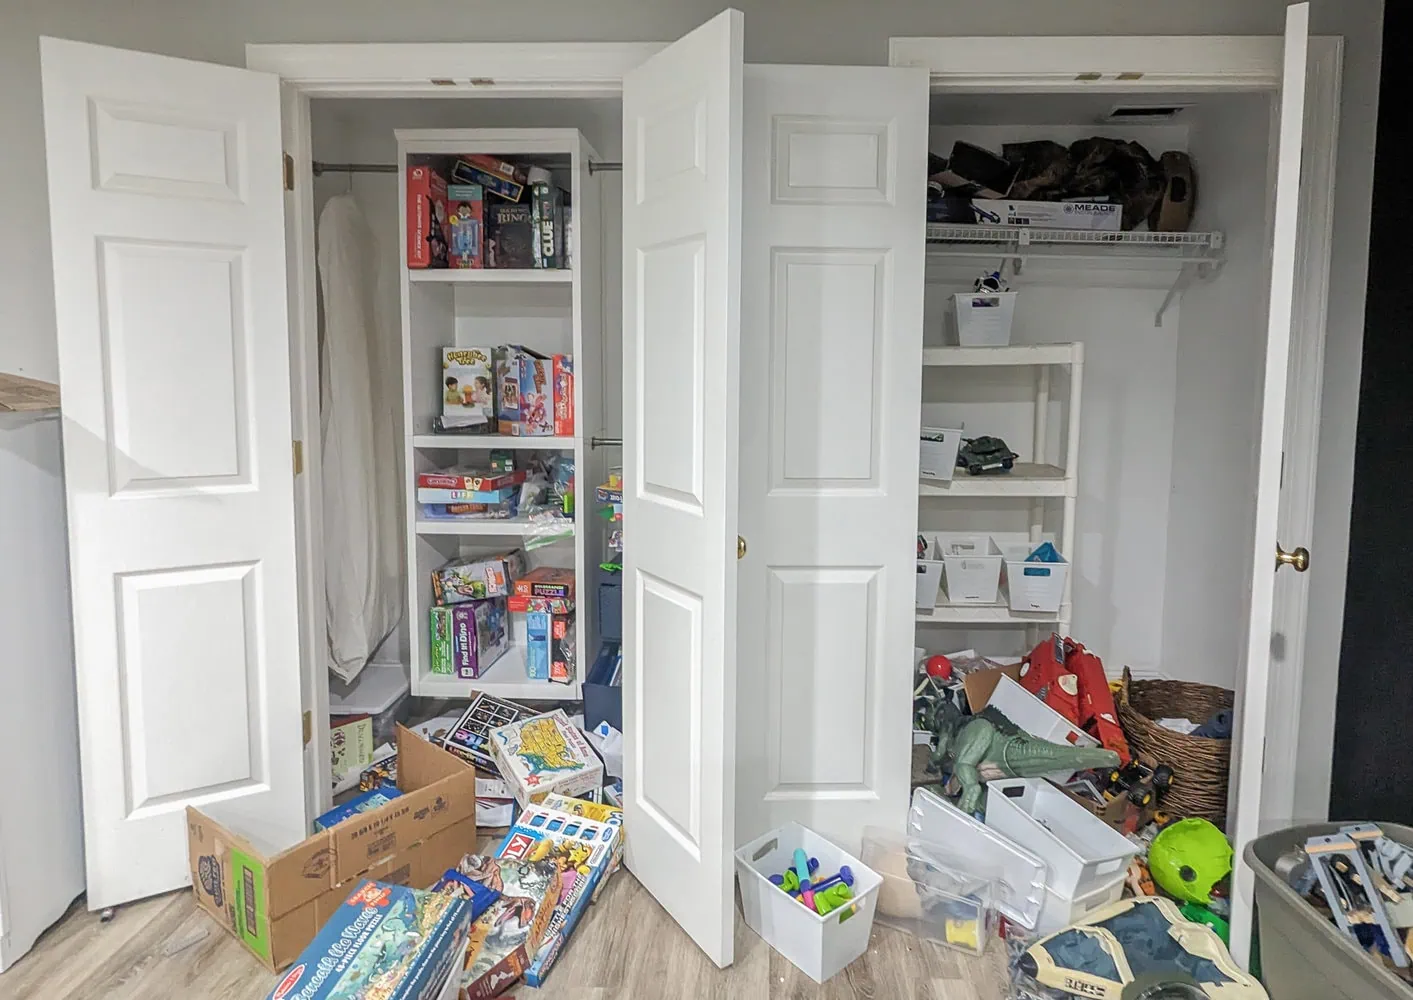
This is the main spot where our family stores all of our games and toys and as you can see, the shelves that were here when we moved in were not working for us. They were primarily set up to store extra hanging clothes, something we just don’t need. Clearly, my kids haven’t been doing the best job of putting things away, but to be fair, it’s really hard to put things away when there isn’t anywhere to really put them.
But with a few hours of work, that problem was solved. I was able to completely transform these closets and now they are loaded with usable storage and there’s plenty of room for everything to be put away. (And not on the floor!)
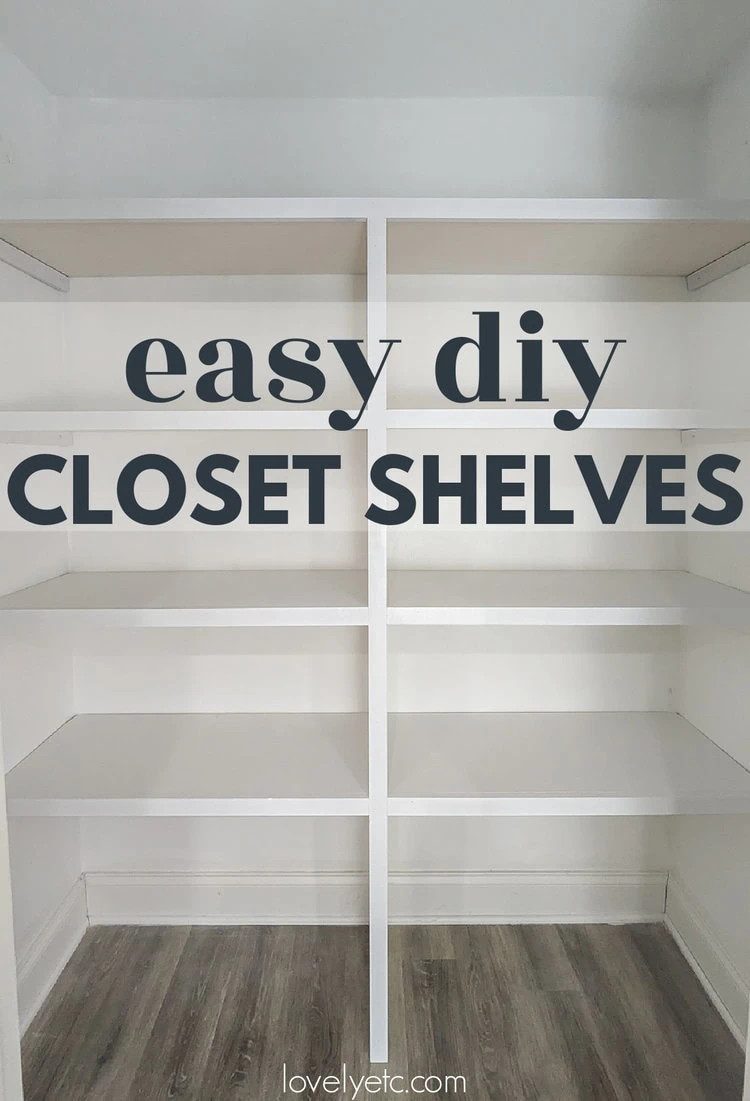
In this post I’m sharing a simple tutorial for building your own closet shelves that both look beautiful and are packed with storage along with lots of tips to make the process easier.
This post contains affiliate links which means if you make a purchase after clicking a link I will earn a small commission but it won’t cost you a penny more. Click here to see my full disclosure policy.
Types of wood to use for DIY closet shelves
I tend to spend way too much time thinking about what wood I should use for my projects and I’m betting I’m not the only one. So to help save you some time and angst, I’m sharing everything I’ve learned.
I recommend choosing wood that is 3/4″ to 1″ thick. This will give you thick, sturdy shelves that can support whatever you need to store. With that in mind, there are a few good wood options.
1. Wide wood planks
One option is to buy individual planks. I found several different types of wood planks at my local home improvement store labeled various things including wood panel, common board, and shelf utility board. These planks tend to come in widths up to 12 inches, which are great for shelves that don’t need to be extra deep.
Using wide planks for your shelves is the easiest, most straight-forward way to go, but it also tends to be the most expensive option unless you only need one or two shelves, and it doesn’t give the most flexibility when it comes to shelf depths.
2. MDF
I have used MDF (medium density fiberboard) for the last several DIY closet organizers I built. I like that MDF is always completely smooth and straight. It’s easy to work with and takes paint well. And it’s usually quite a bit cheaper than real wood.
MDF comes in 4’x8′ sheets like plywood and sometimes you can also find 12″ wide MDF shelf boards.
Of course, if you want stained wood shelves, MDF isn’t going to work. But if you are planning to paint your shelves anyway, choosing MDF is a great way to save some money.
Note: MDF is not the same as melamine. You may also see melamine shelf boards at your local store. They are usually one of the cheapest options, but I’m not a huge fan. Melamine is a type of plastic and while it has a lot of good qualities, it is more likely to bend or warp under a heavy load and also more likely to emit VOCs.
3. Plywood
The third option is buying sheets of plywood and cutting them down to size. Plywood generally comes in 4’x8′ sheets. When choosing your plywood, look for plywood with a smooth, even surface that is 3/4″ to 1″ thick.
You can rip your plywood into planks at home using a table saw or circular saw. Or you can have your plywood cut into planks in the store when you purchase it. This saves you a bit of work and also can make it easier to fit the wood into your vehicle to transport it home.
Which option will be cheapest for you really depends on how many shelves you need and what size they will be. If you really want to get the best deal, you’ll need to check prices and do a bit of math.
How deep and high should closet shelves be?
How deep you should make your shelves really depends on what you plan to store on them as well as how deep your closet is.
When building closet shelves, it can be tempting to make your shelves super deep to make the most of the space. This is usually not a great idea. When shelves are super deep, it doesn’t usually add a whole lot of functional storage; instead it just makes it much easier for things to get lost. You want to be sure that you can see everything easily without having to move things around, so it usually works best to store items in a single row.
For a standard closet where you plan to store clothing, shoes, and purses, 12″ shelves work well.
If you are storing larger items like linens, toys, games, or other miscellaneous, it works well to go a bit bigger and aim for 14 to 20 inches deep.
If your closet is extra deep, instead of installing super deep shelves, you might want to consider wrapping shelves around the sides of the closet in an L or U shape instead to make the most of the space.
For my own closets, I am making my shelves 15″ deep and 16″ apart.
How to keep shelves from sagging
When you are building DIY shelves there are a couple of things you can do to make sure they are sturdy and don’t end up sagging over time.
- Use the right wood. As mentioned above, I recommend using 3/4″ to 1″ thick wood for your shelves. This is thick enough to be nice and sturdy and support a good load without sagging.
- Use enough shelf supports. The general recommendation is to make sure shelves have a support at least every 48 inches. So if you are building closet shelves that are more than 48″ wide, you will need to add a support in the middle in addition to the two end supports. (My closets are both wider than 48″ so I’ll be showing you exactly how to support the middle.)
Supplies for DIY Closet Shelves
- 3/4″ plywood or MDF cut into 15” strips – My shelves are 15” deep but you can use whatever measurement works best for you based on your closet size. How many sheets of plywood you need depends on how many shelves you are making and how long they are; each sheet will give you three 8′ long 15″ strips or four 8′ long 12″ strips.
- 1″x2″x8′ furring strips for shelf supports – two 14.5″ pieces for each shelf, 2 boards will give you enough for one closet with four -five shelves. (You can also use common board for this, but furring strips tend to be cheaper and these don’t have to be the prettiest wood.)
- 1″x2″x8′ common boards – This will form the outer face of the closet organizer. Poplar or pine boards work well for this, but pine is usually much less expensive. How many you need will depend on how many shelves you are making and how long they are.
- Painters tape – This works great for helping figure out the placement of your shelves.
- Spackling and Caulk – for filling any tiny gaps and nail holes for a perfect finish
- Paint and small foam paint roller to apply it
- Screws and anchors – for attaching the shelf supports to the wall. If you are able to screw directly into studs, you can skip the anchors.
Tools
- Miter saw or Circular saw – for cutting your wood planks to the correct lengths
- Jigsaw – for cutting a notch in the bottom shelf so it fits around your existing baseboards
- Nail gun – You can also use a hammer and nails, but it will take a bit longer. This is the nail gun I have; it doesn’t require an air compressor and is very easy to use.
- Drill – for attaching the shelf supports to the wall
- Stud finder – I absolutely love this simple stud finder – it works so much better than the unreliable beeping kind.
- Level
- Measuring tape
- Ear and eye protection
How to Build DIY Closet Shelves
Clear the Closet
The first step is to clear everything out of the closet, including any current closet shelves and organizers.
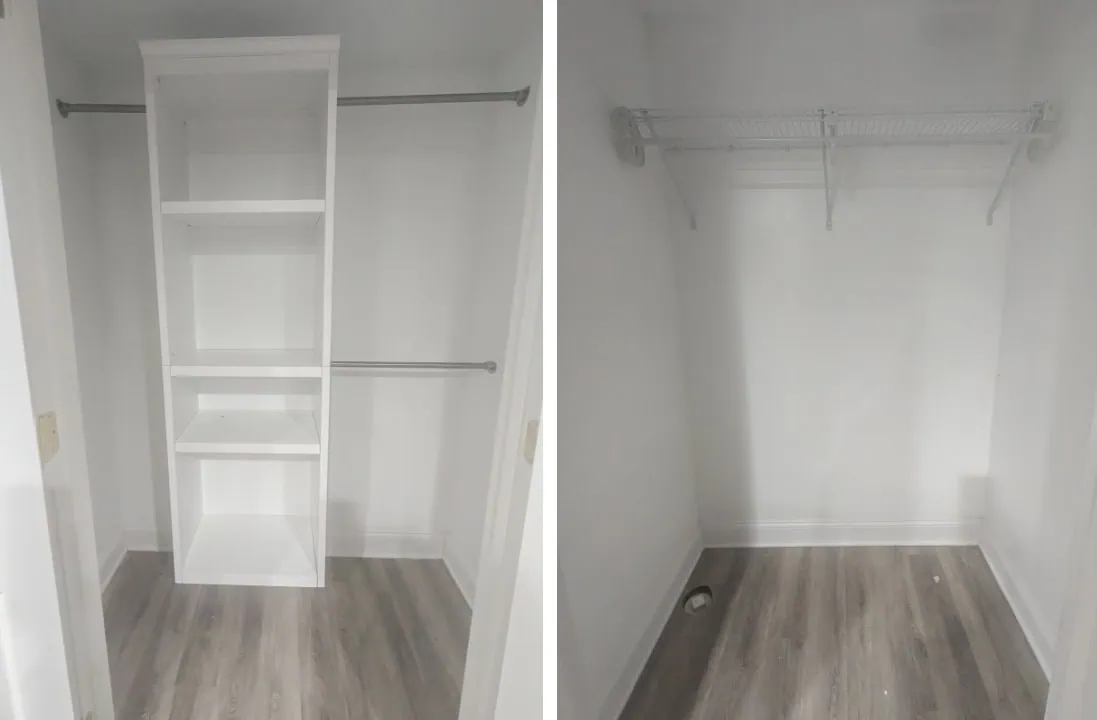
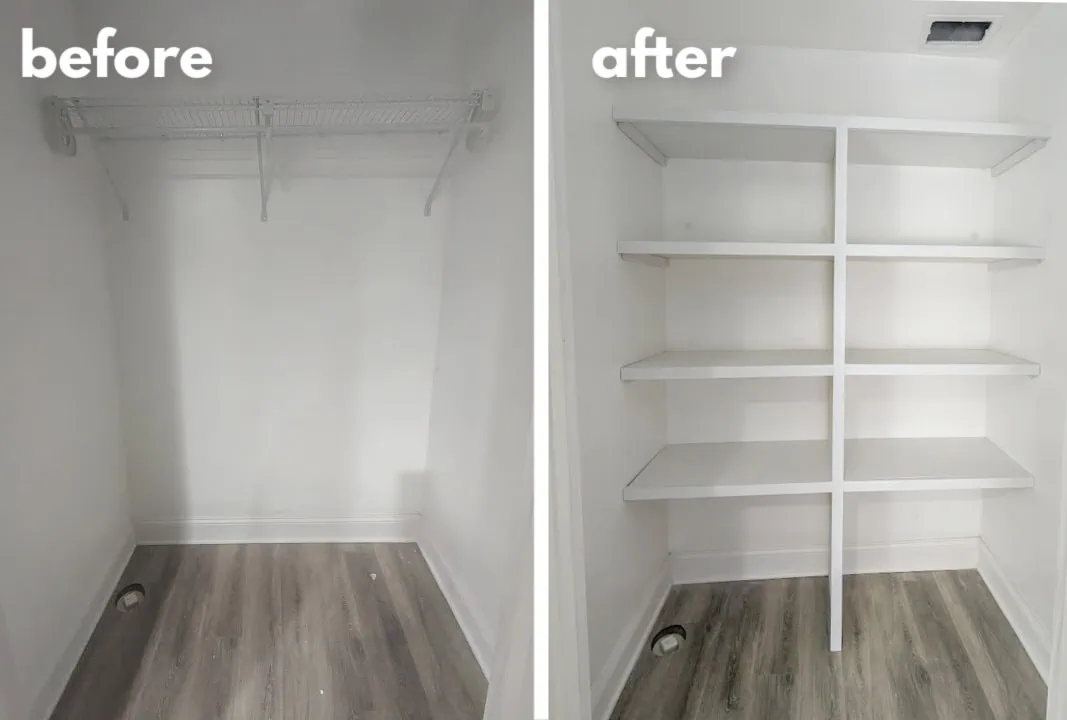
It might seem strange to remove closet shelves just to build new shelves, but having the right size and style of shelves for the things you need to store can actually make a huge difference in how much you can fit in your closet.
Once you’ve removed everything from the closet, you can patch any holes in the walls and touch up the closet paint if needed.
Decide the placement of your shelves
Before you start cutting any wood, it’s a good idea to take a minute and plan out how far apart you want your shelves.
I love to use painter’s tape to help really see how far apart the shelves will be and how easy it will be access the things on them. Think about what things you’ll be storing on these shelves and make sure you leave a little extra space between shelves so you can easily slide objects on and off. You can also think about how high you want the highest shelf to be.
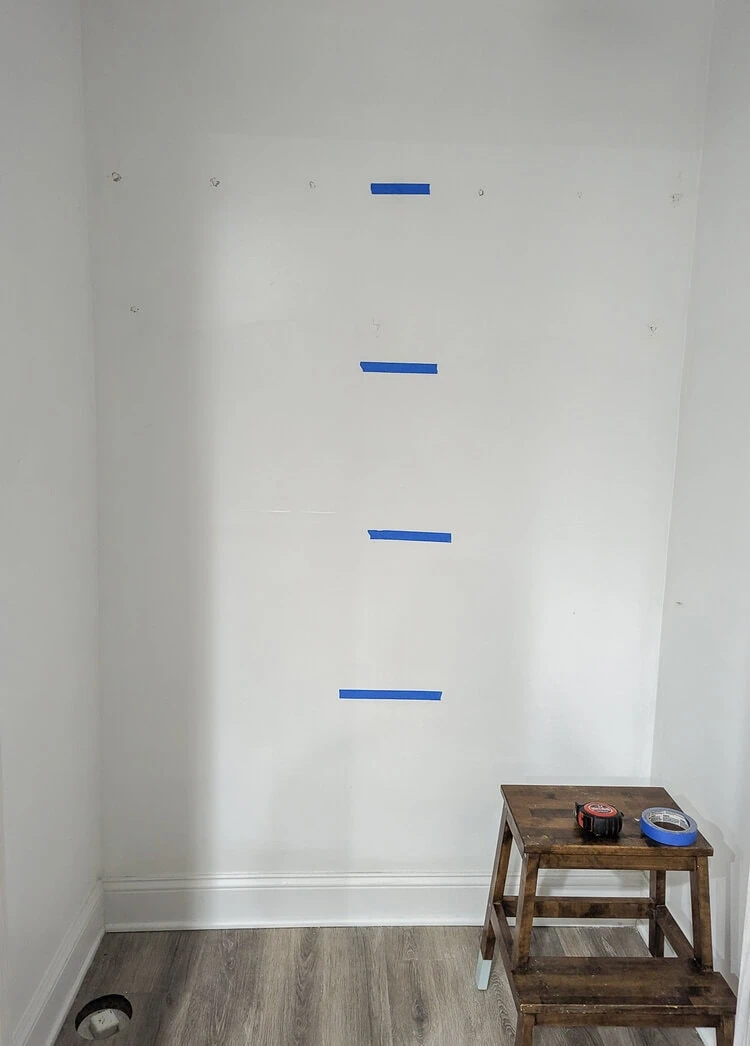
I decided to do four shelves in each of my closets, 16 inches apart. This gives lots of room for storage bins of all sizes and is big enough to store board games on their sides. If you are storing smaller items, you could probably fit five shelves in a standard height closet.
Cut and paint the shelf supports
You want to cut your 1″x2″ furring strips (or common board) to 1/2″ smaller than the depth of your shelves. My shelves are 15″ deep so I cut 14.5″ supports. You’ll need two of these for each shelf.
Since my closets are wider than 48 inches, I’m going to be adding some vertical supports to the middle later on. If you are adding shelves to a closet than is smaller than 48″, you won’t need those middle supports.
Instead you can add another 1″x2″ board along the back of the closet to give extra support. Just cut it 1.5″ shorter than the width of your closet (to leave room for the side supports).
At this point I went ahead and painted my shelf supports as well. I always like to prepaint all of my closet parts before installing them. It’s usually a lot faster to do it that way and saves a lot of contorting into awkward positions trying to paint inside shelves later.
Attach the shelf supports
Measure and mark where your shelf supports need to go based on how far apart you decided your shelves would be earlier.
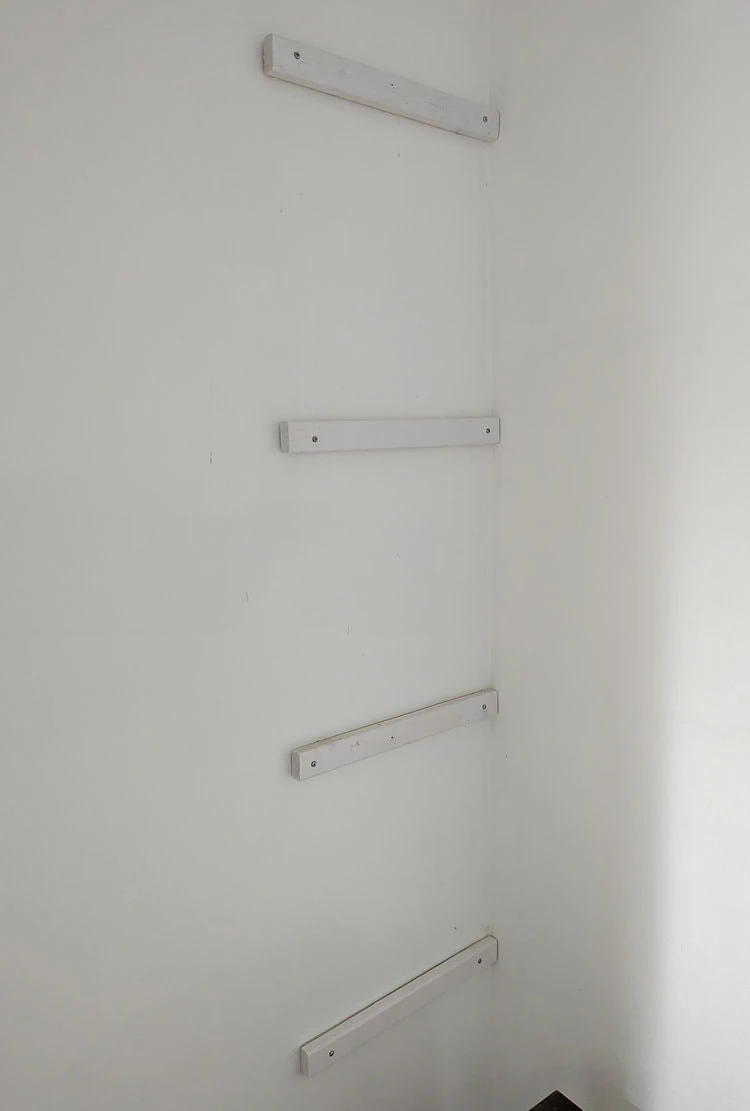
It’s important to attach these supports really well because they will be supporting most of the load of the shelves. If there are studs next to where your shelves will be, it is best to screw these supports directly into the studs. If you can’t find studs there or can only find one, you’ll need to use good drywall anchors that can hold a lot of weight.
Be sure to use a level as you work to make sure everything is nice and straight.
If you are adding 1″x2″ supports to the back wall (for smaller closets), go ahead and attach them in the same way.
Cut and paint the shelves
It’s best to measure the length of each of your shelves individually. I’ve found that most closets aren’t square and measuring for one shelf at a time ensures they all fit perfectly.
You can cut your shelves to length using a miter saw or circular saw.
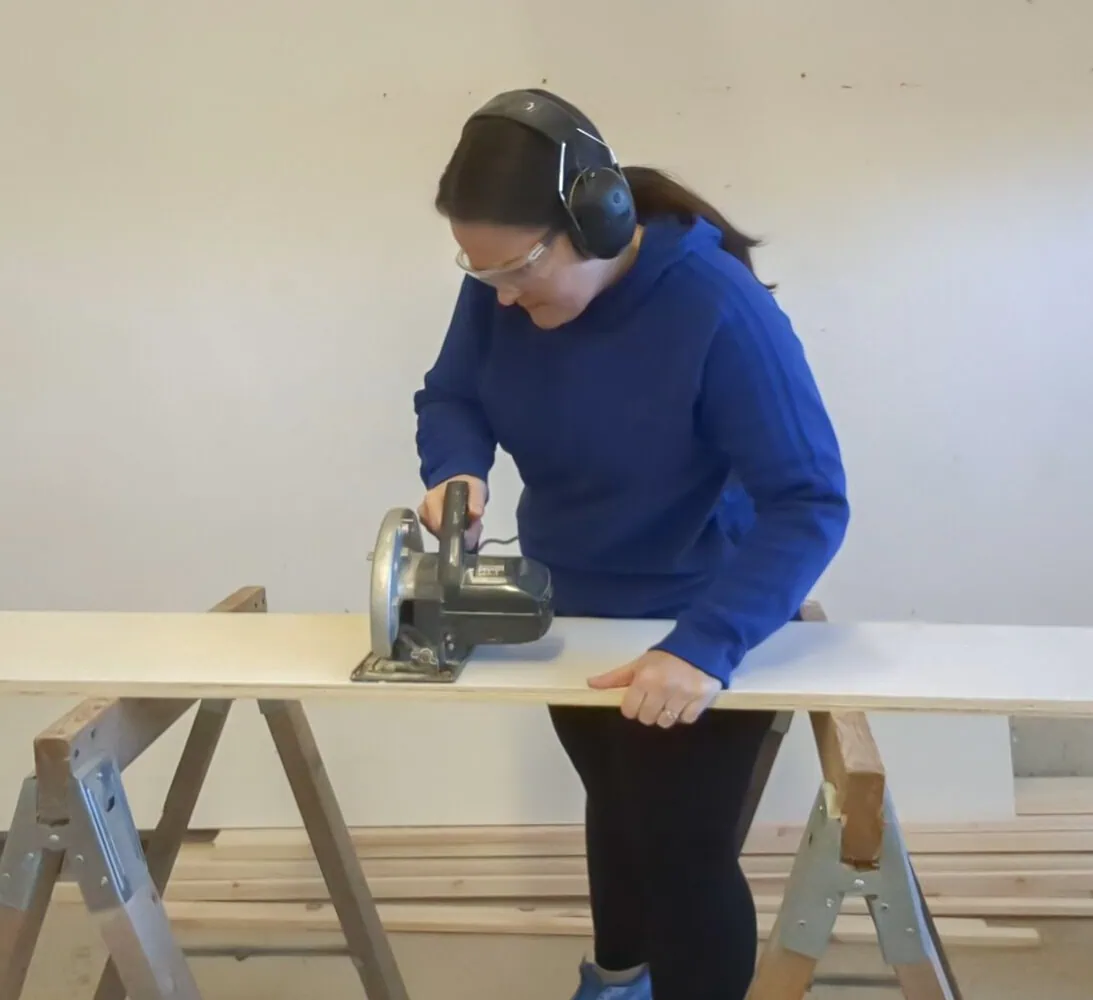
I’ve also found that it is helpful to cut a little extra off the two back corners of each shelf board.
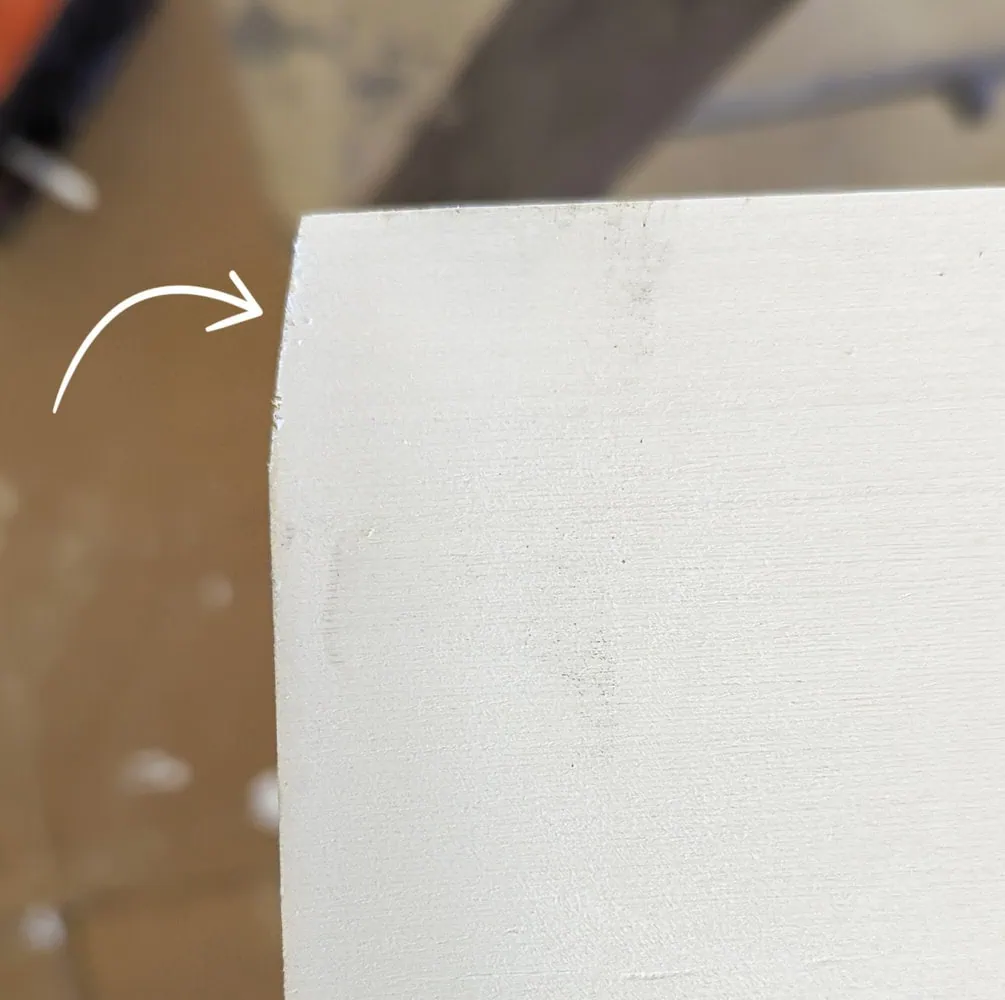
Most closets aren’t square and the back corners often tend to be more curved than perfectly straight. Cutting off just a bit extra will make it so much easier to slide the shelves into place.
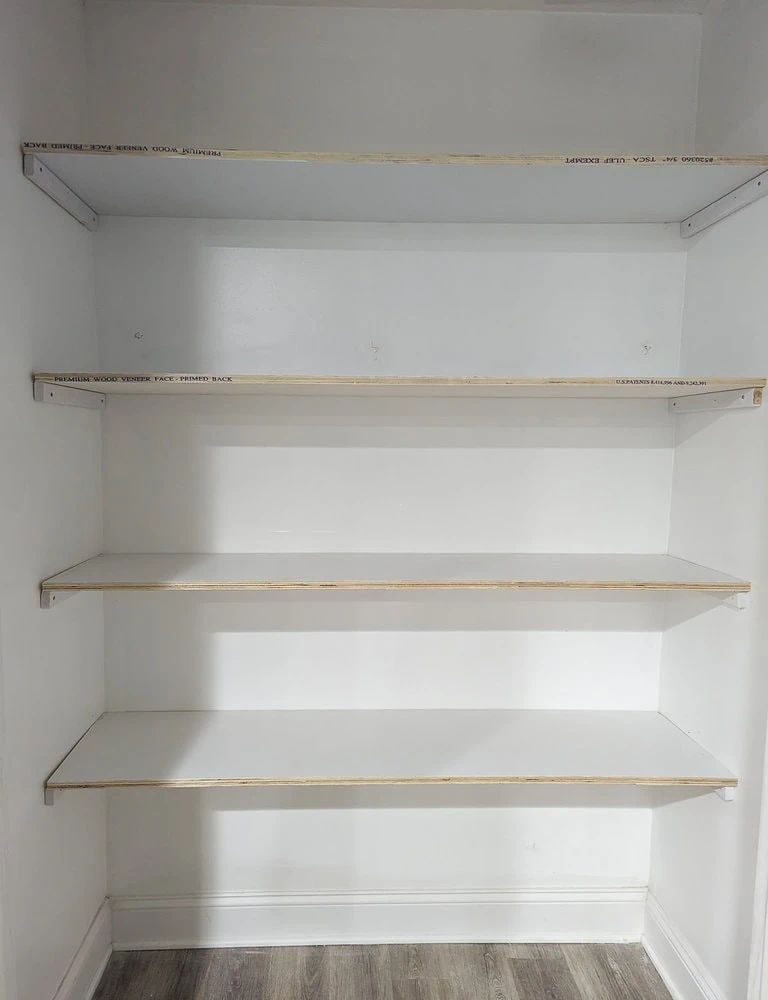
Cut and install middle supports
Once you’ve installed your shelf boards, the next step is to cut the middle supports I mentioned earlier.
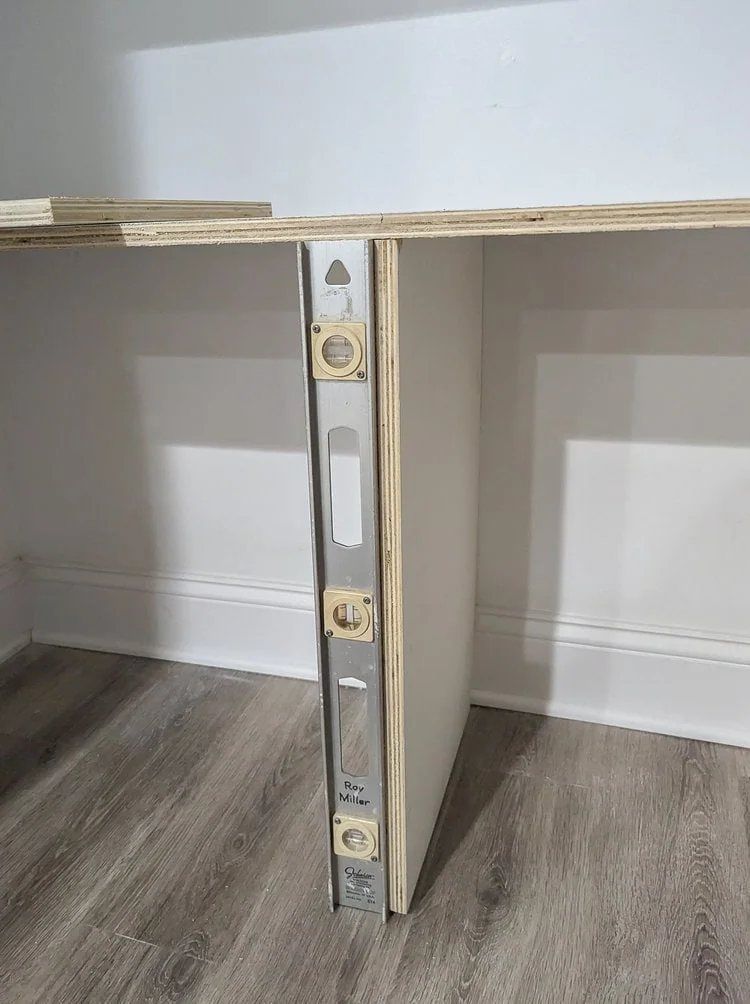
You can use a simple L bracket to support the center of your closet shelves instead, but I really prefer a more built-in look. I used extra plywood that was leftover from cutting the shelves to the correct length to make vertical shelf supports.
Measure the distance between each shelf and cut a 15″ wide piece of wood to the correct height and then slide it in to place. (If your shelves aren’t 15 inches wide, cut this to the depth and height of your shelves.)
I added a few nails into each support from the shelf above for extra stability. It helps to use your level while installing these to make sure they are straight.
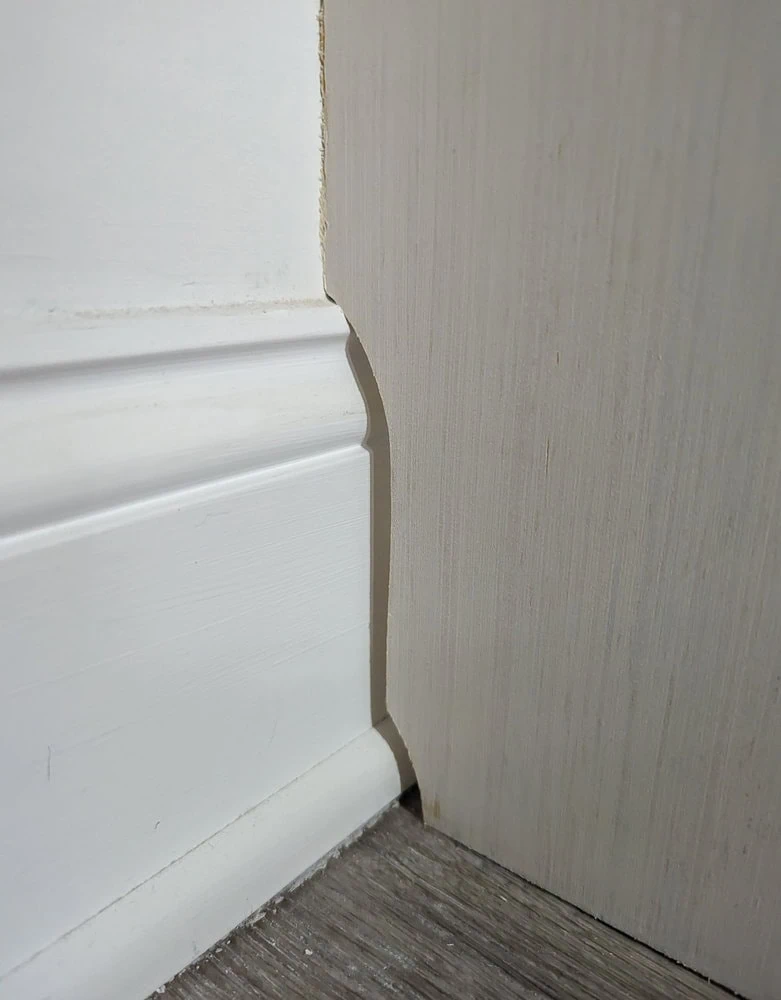
If your closet has any kind of baseboards or shoe molding, that’s going to get in the way of your bottom support. I drew a rough outline of my molding onto my bottom support and used a jigsaw to cut it out. Then I could slide that bottom piece flush with the wall.
This cut out doesn’t have to be perfect because it really isn’t visible from the front.
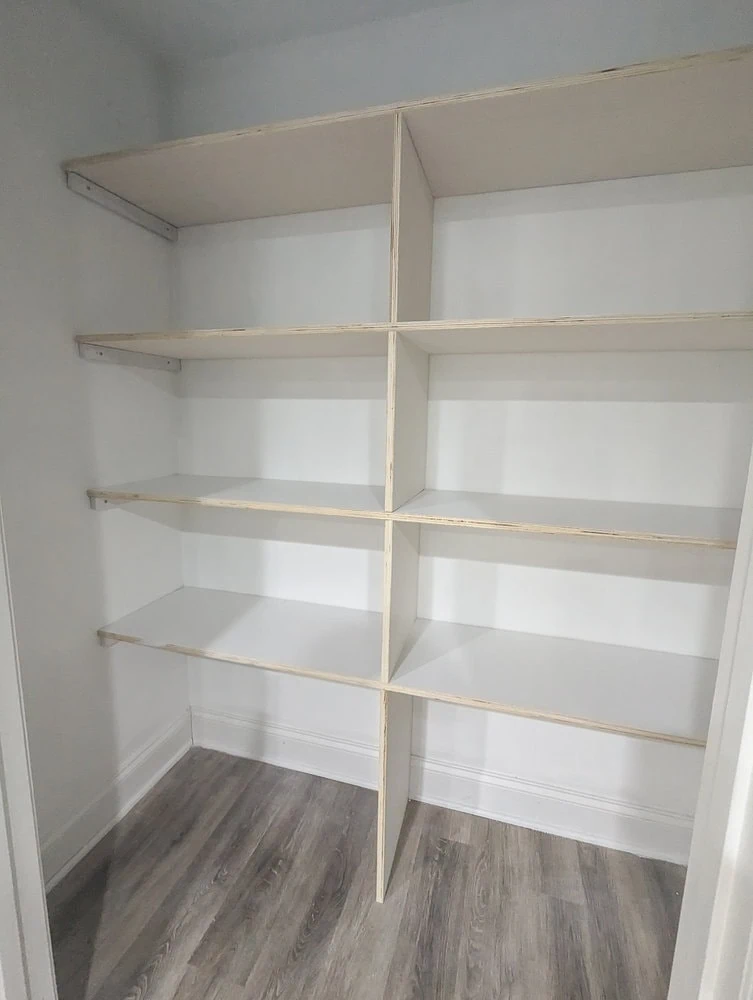
Once all the middle supports are in, you have a vertical line of support going all the way from the top to the bottom.
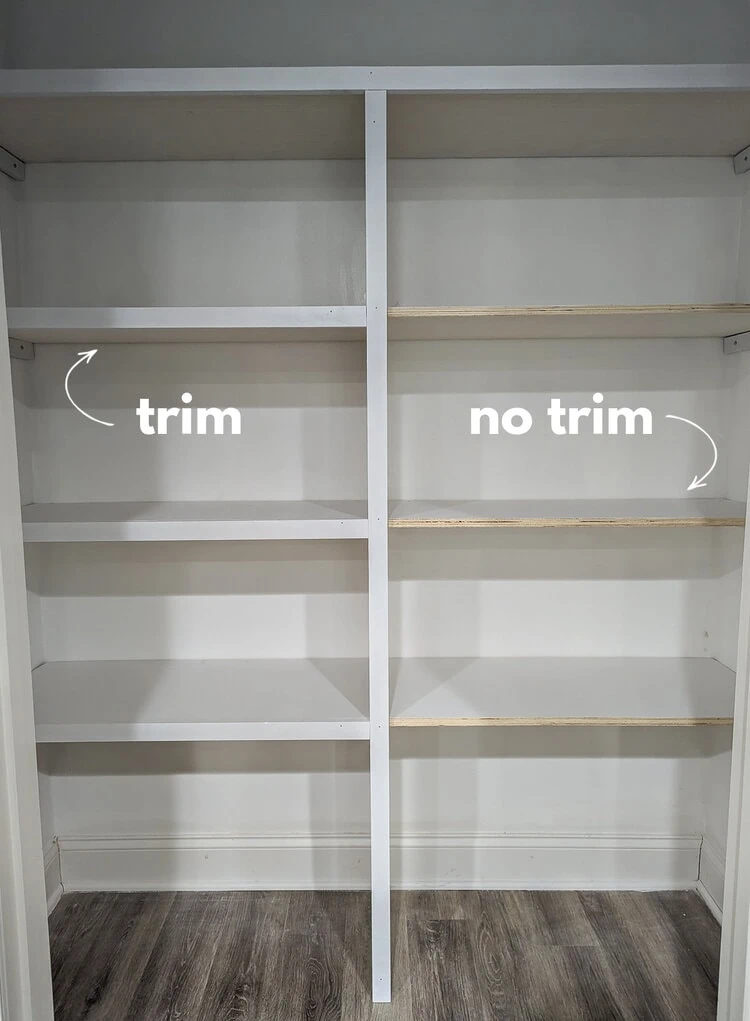
Decide if you want to add trim
At this point your shelves are functionally done. If all you want is some utilitarian shelves that hold stuff, you can stop right here.
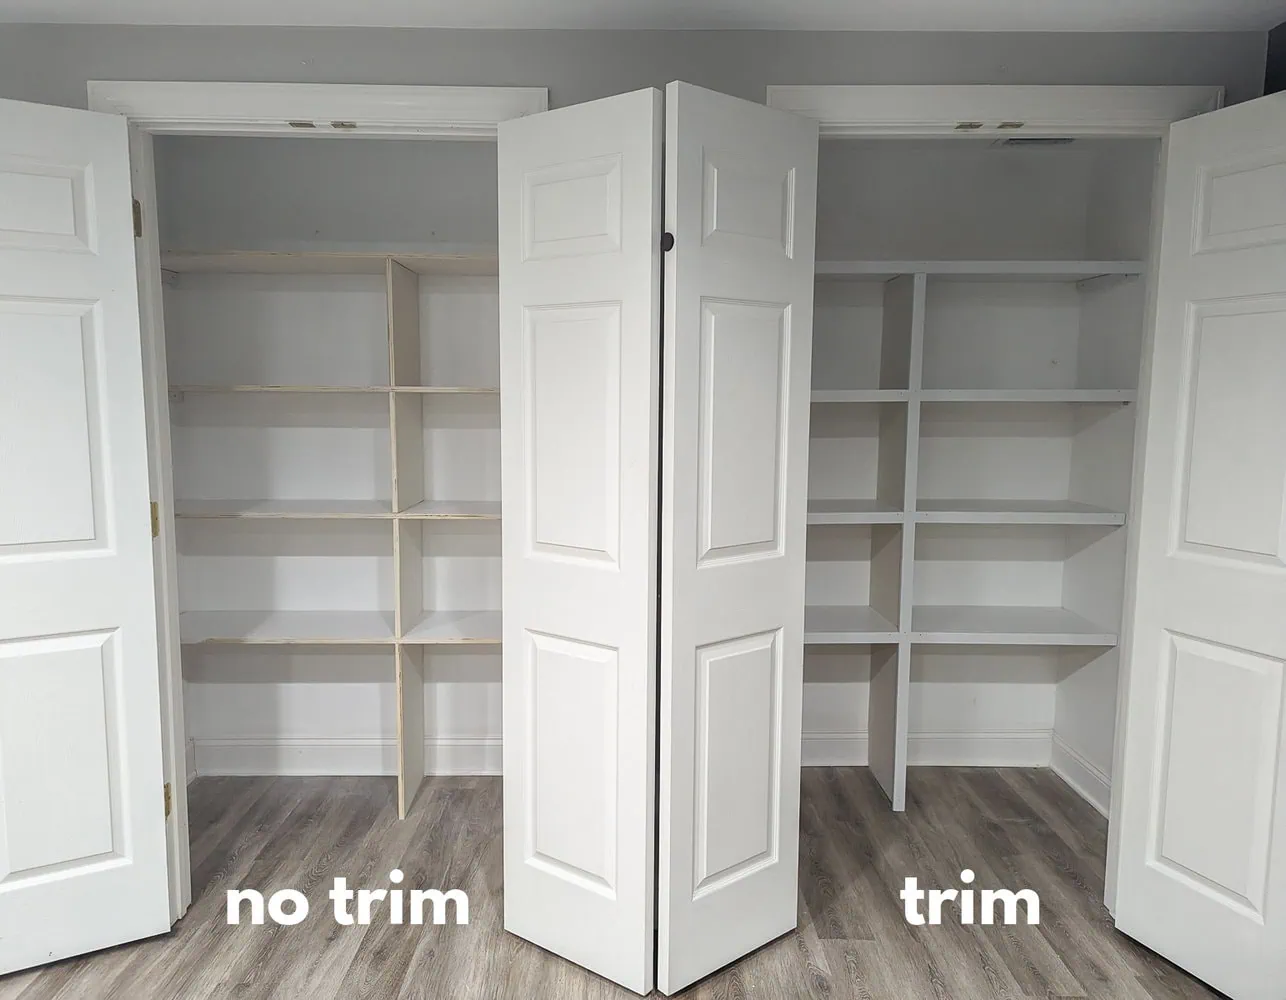
But I always like to add some trim to the front of my shelves to give them that custom built-in look. The wood for the trim costs about $15-$20 per closet but in my opinion it is well worth it. It makes the shelves look so much thicker and nicer.
Cut and paint the trim
I like to use 1″x2″ common board to trim out my shelves. It’s a bit more money than furring strips but is still very affordable and is much higher quality.
Again, it helps to measure each piece of trim one at a time to get accurate measurements.
Attach the trim to the shelves
I installed the trim across the top shelf first, making sure the top of the trim was even with the top of the shelf. Then I installed one long piece of trim over the whole row of middle supports. And finally I installed a shorter horizontal piece of trim on either side of that middle support for each lower shelf.
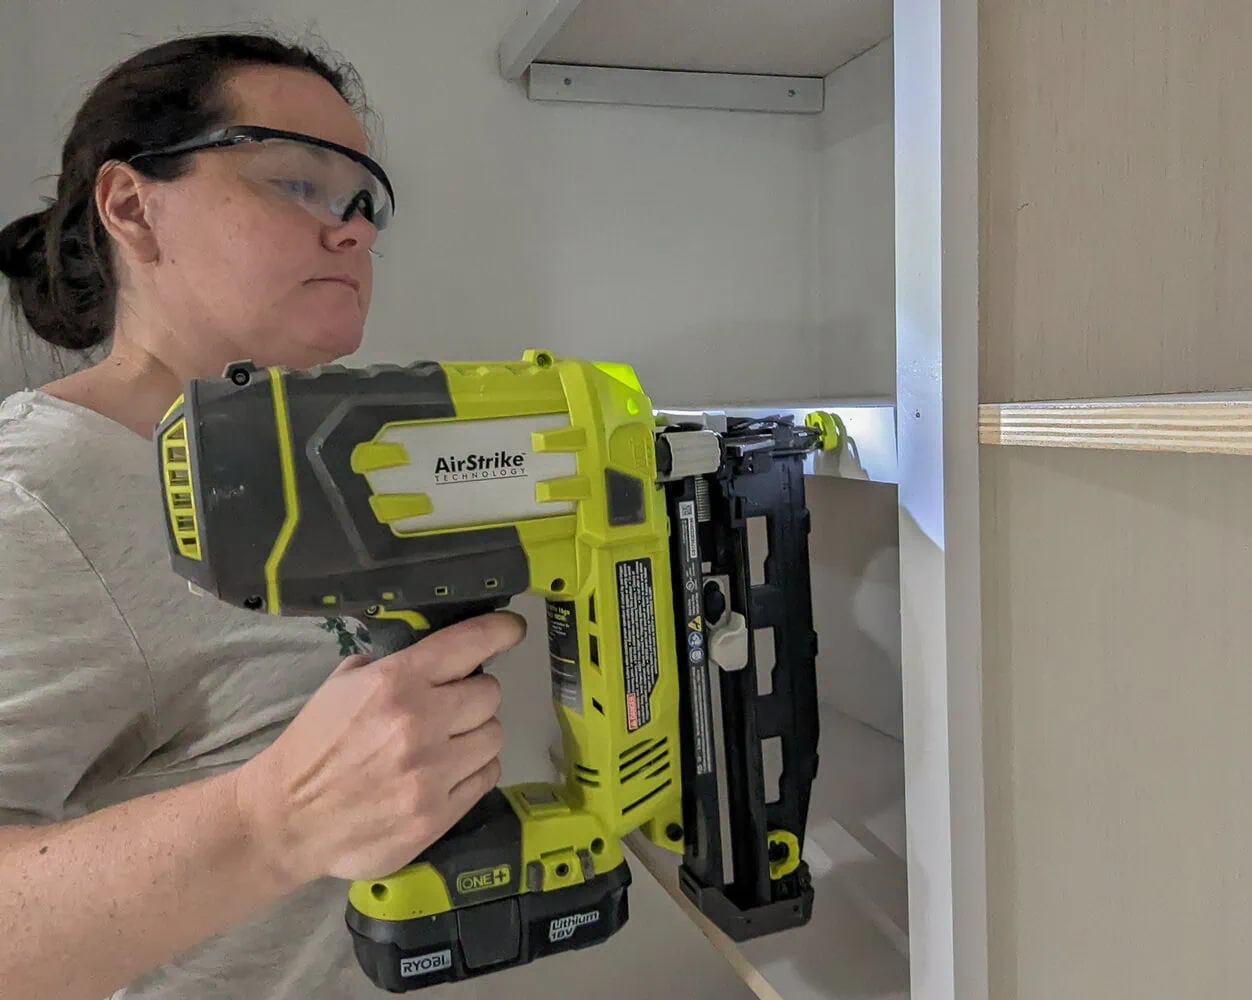
You can attach these using a nail gun or a hammer and finishing nails if you don’t have a nail gun.
Touch up any nail holes and gaps
The final step is to do final touch ups. You can fill any small nail holes from attaching the trim with spackling. And if there are any noticeable gaps where various trim pieces meet, you can caulk them to get a seamless finish. Finish by using paint to touch up anywhere needed.
Finished Closet Shelves
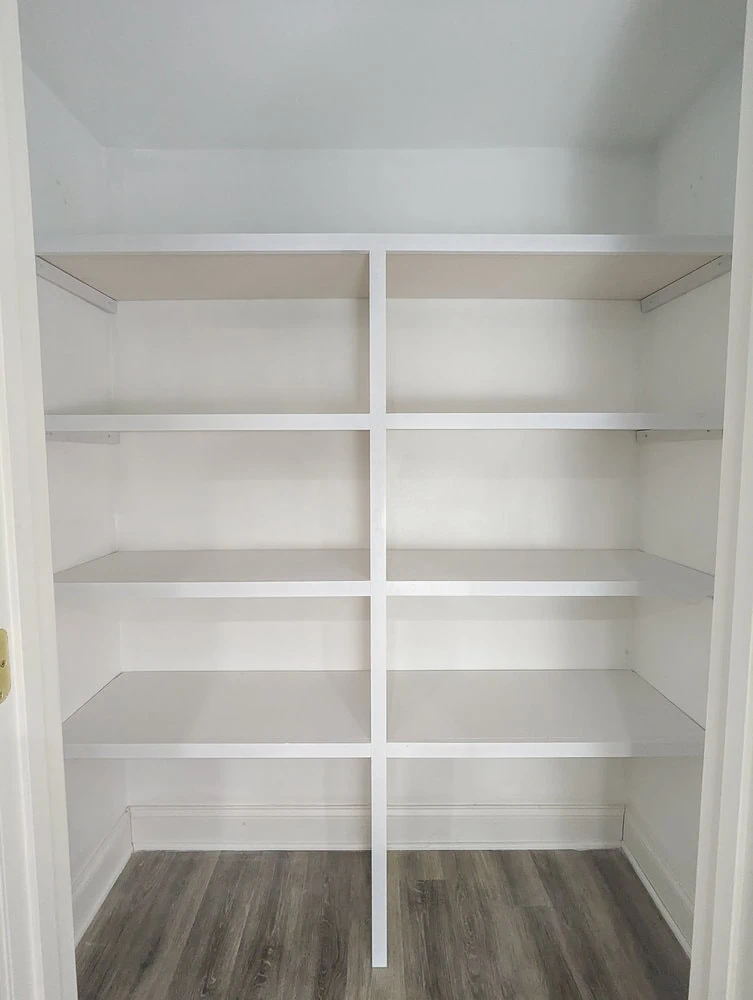
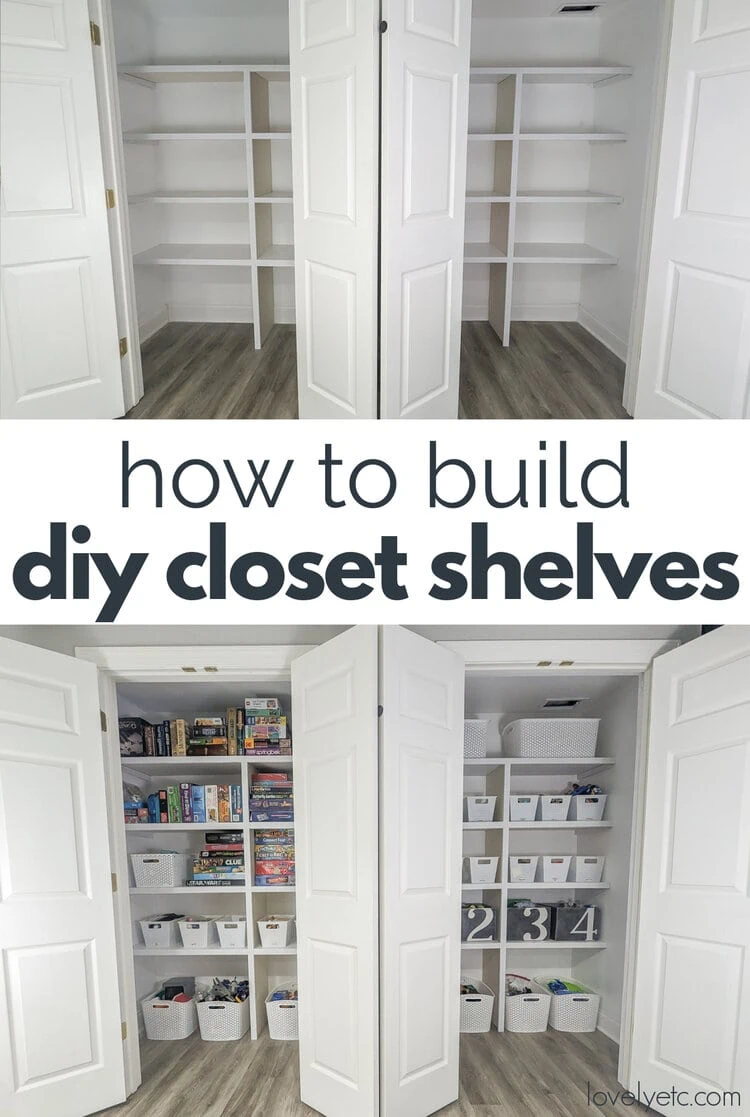
Here are my finished shelves. I am absolutely thrilled with how they turned out. Adding these shelves gave us so much more usable space in these closets!
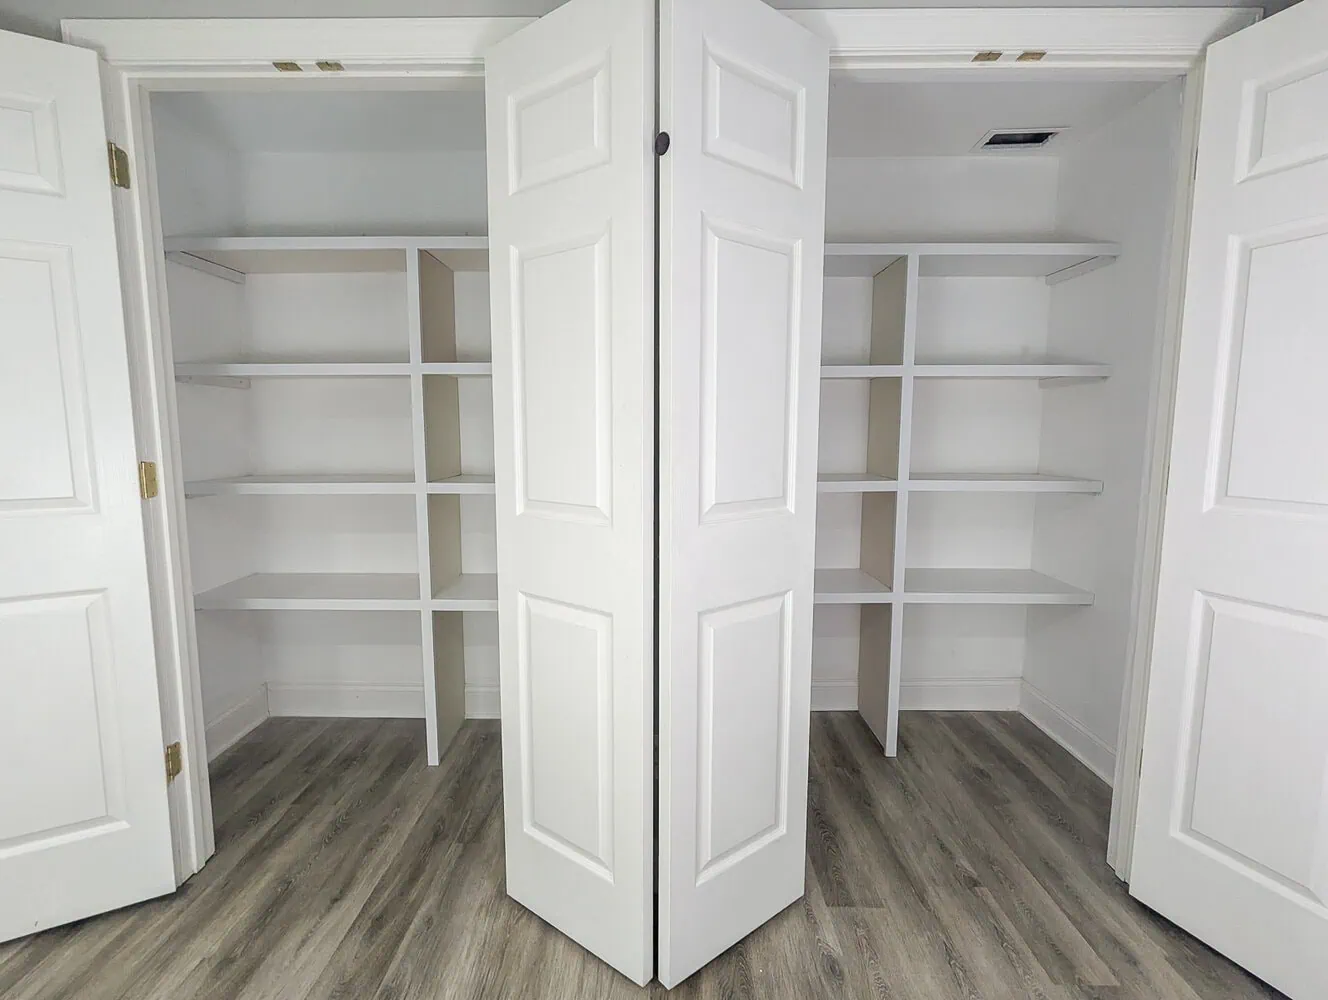
I love how clean and tidy these turned out. And that chunky trim really gives them a finished, custom look.
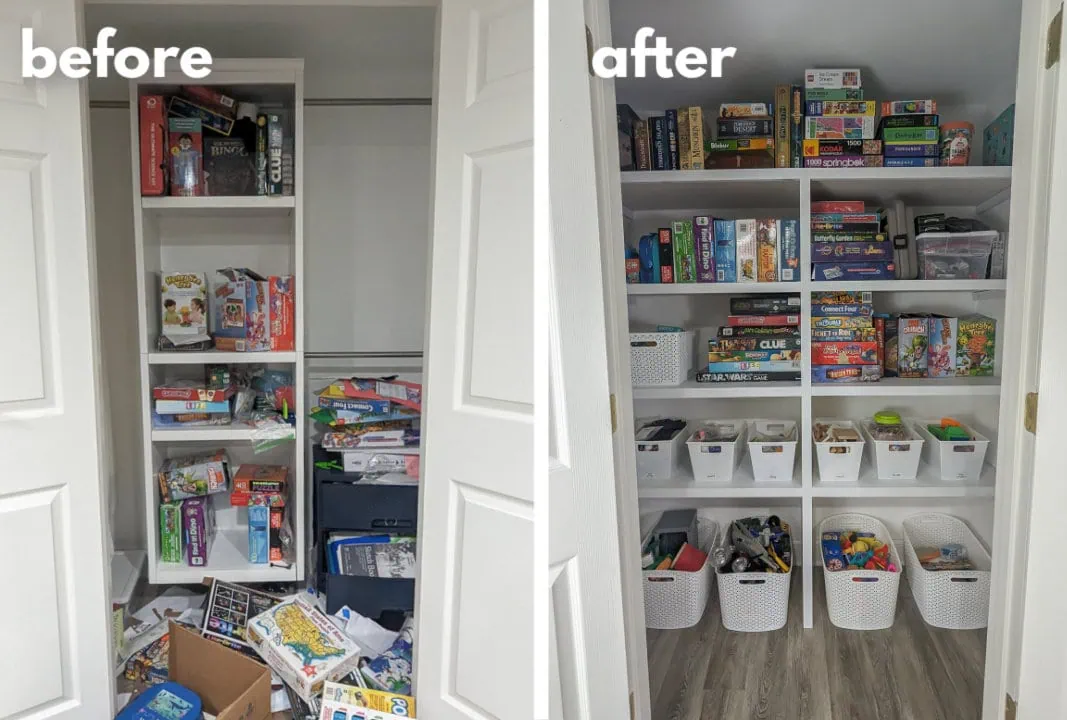
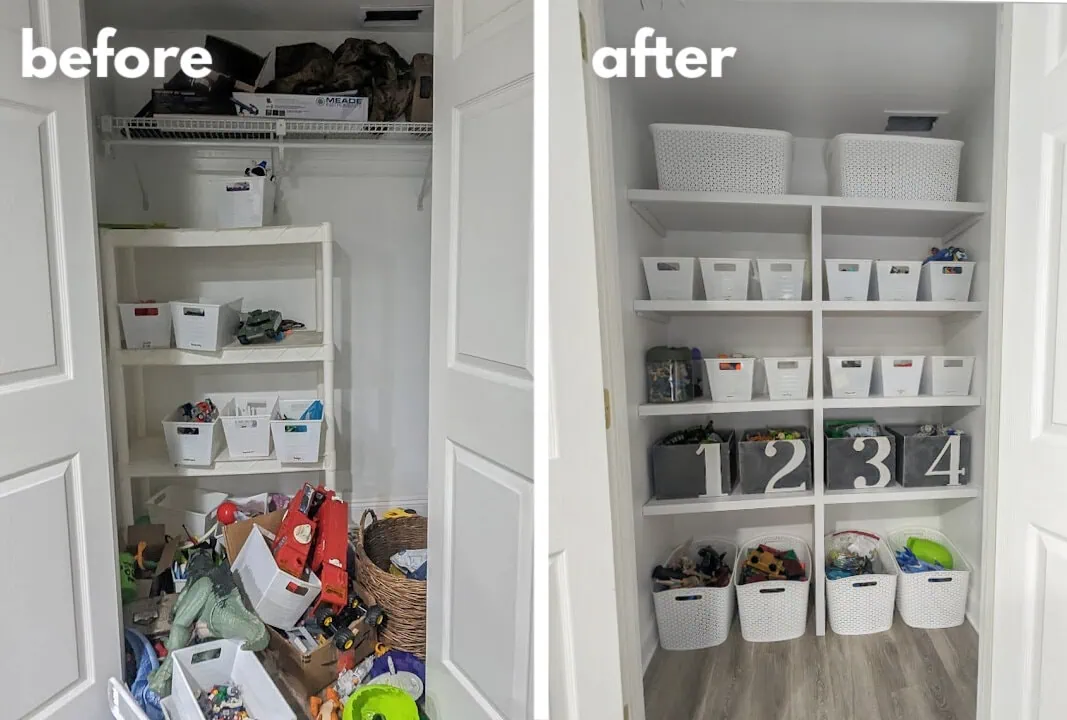
I was able to fit everything back in the closets that was there before (along with the stuff spilling into the floor) and also moved a bunch of other stuff from around the room into the closets including art supplies, adult puzzles and games, and even more toys.
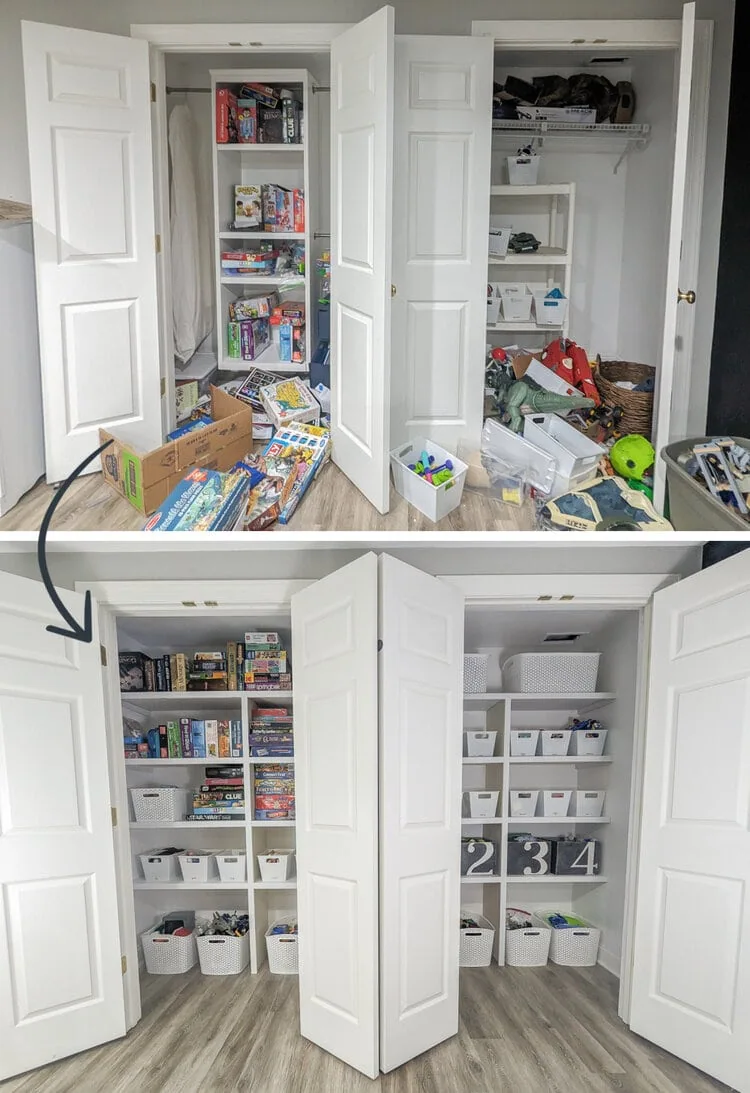
It really is amazing how much difference the right shelves can make in a closet! The left closet really had a nice closet organizer to begin with – it just wasn’t right for what we needed to store. Adding the right shelves tripled our storage space!
Organizing the Closet Shelves
I used inexpensive storage bins to organize and store all the toys and it has made a huge difference.
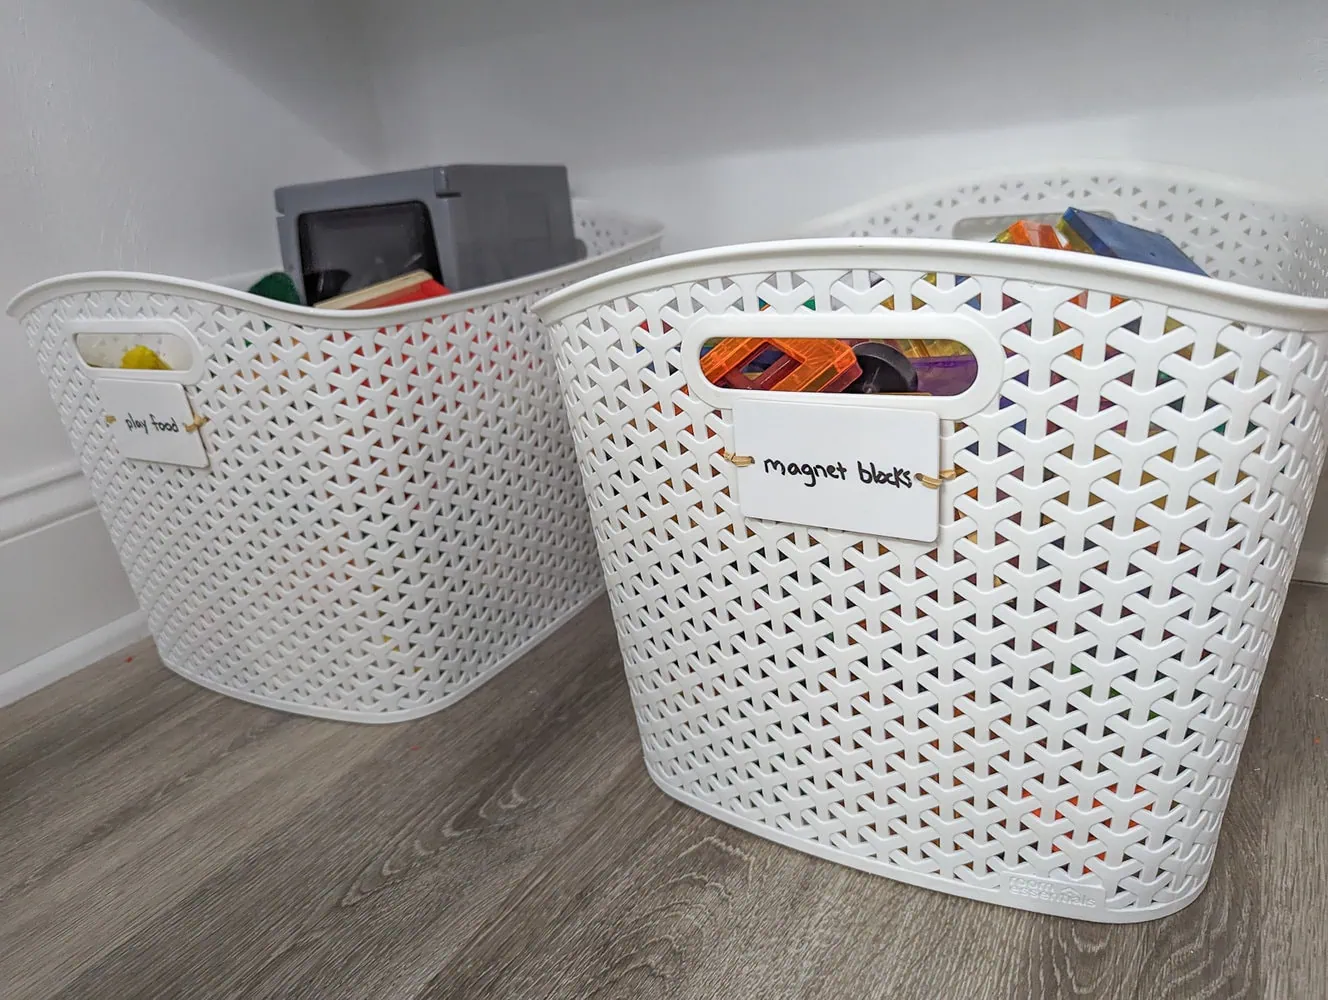
I have two cheap go-to storage bins that I like to use regularly. Using the same bins all over the house makes it super easy to move them from room to room as things change. My first go-to are these inexpensive Y weave baskets from Target in several sizes . I got these acrylic dry erase labels to label what was in them because I’ve found that labeling is key to making sure everyone in the house is able to put things back where they go.
And my second go-to is white plastic locker style bins from the Dollar Tree. They look great and you really can’t beat the price.
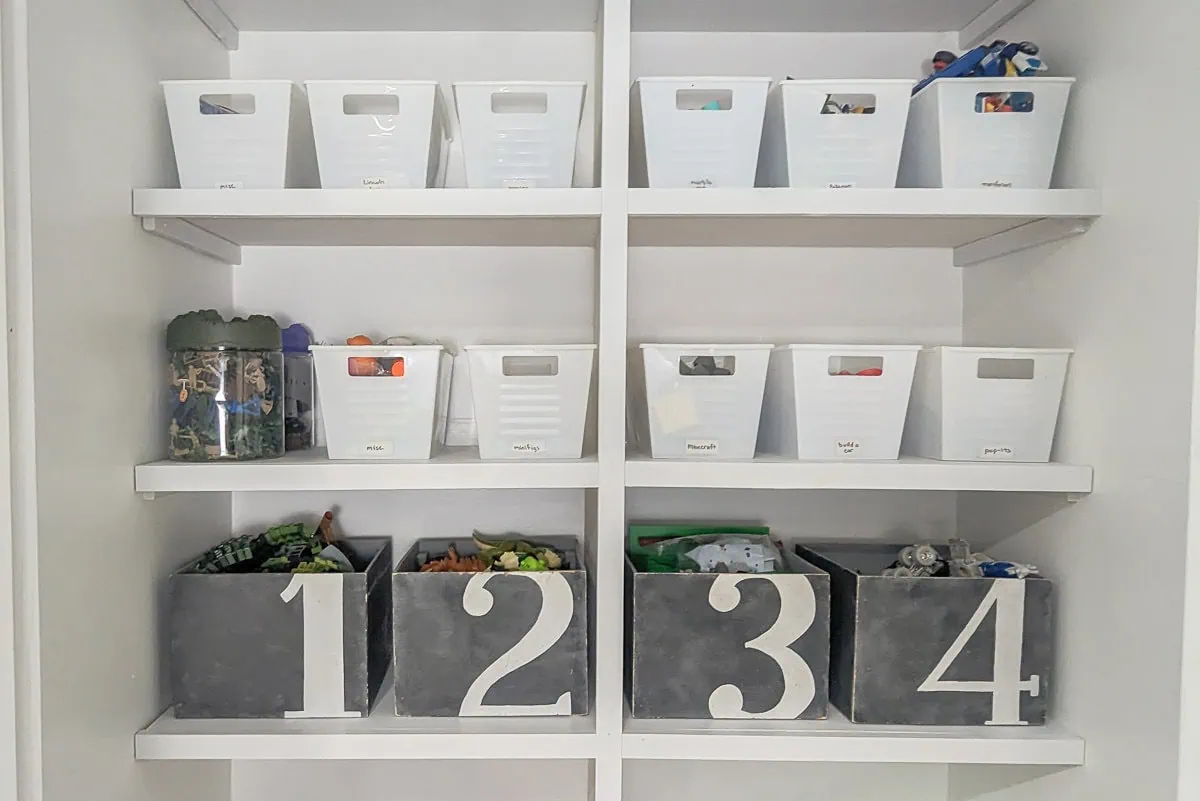
I also stored some toys in these DIY wooden boxes I made several years back. We’ve been storing toys in these for six years and they are still going strong!
I’m starting to think DIY closet organizers and shelves just might be my favorite things to build. I know they aren’t the cutest or flashiest, but they sure do make our house function better!
Want more DIY closet organization help? Check out these posts next.
- How to build a simple DIY closet organizer – this one’s great for organizing a small bedroom closet
- DIY closet shelves – this one’s great for a kid’s room
- 19 DIY Closet Organizer Ideas – if you need more ideas with all different layouts
- How to Convert Sliding Closet Doors into Hinged Doors
- 17 Beautiful DIY Closet Door Ideas
I’d love for you to pin this post on Pinterest!

Leave a Reply