How To Make A Wooden Box In Any Size
Easy step-by-step tutorial for making a wooden box in any custom size you want. Learn how to build a DIY wooden box to perfectly fit any shelf or spot in your home.
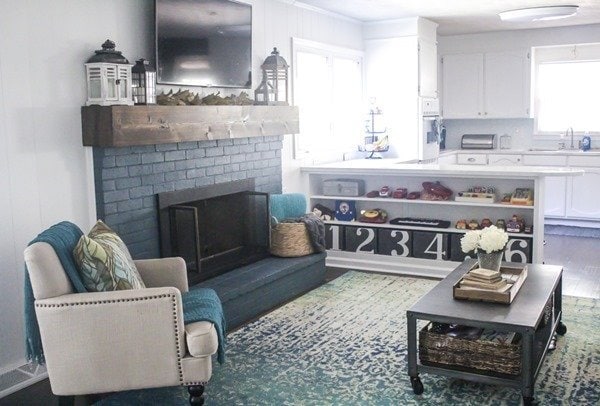
We have a built-in bookshelf in our family room where we keep most of our kids’ toys. Unfortunately, all of the tiny little toys my kids love to play with were getting a bit out of control.
So when I updated our family room a few months ago, finding sturdy wooden boxes to help organize it all was at the top of my to-do list.
I quickly realized that buying matching boxes would be pretty expensive and finding some in the exact size I needed would be nearly impossible.
So I turned to plan B: figuring out how to make a wooden box for myself.
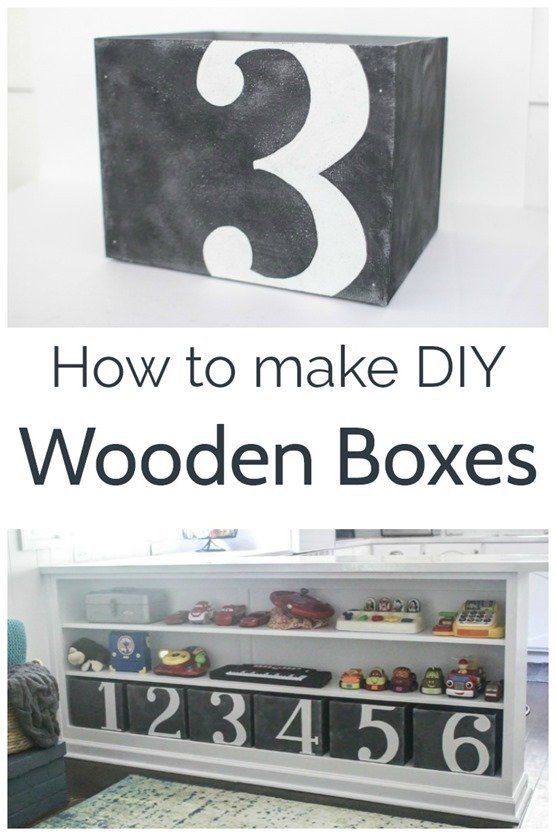
Making wooden boxes is a little more work than buying them, but it isn’t nearly as difficult as it seems.
And I love that I was able to build bins that perfectly fit our shelves rather than trying to make something not quite right work.
I was able to make these DIY wooden boxes for nearly free using scrap wood we already had on hand.
But even if you are buying all of the materials, the wood you need is incredibly inexpensive.
Or if you prefer the look of wood planks, I also have a tutorial for DIY custom storage cubes made from cedar planks.
Free Woodworking Plans
I put together woodworking plans for these wooden boxes to make it even easier for you to create your own.
The printable build plans include step-by-step instructions for building these boxes, a complete materials list, and woodcut lists for five common box sizes.
I am offering these woodworking plans free to my email subscribers.
You can subscribe to my email newsletter in the box below to get your build plans delivered straight to your inbox.
This post contains affiliate links which means if you make a purchase after clicking a link I will earn a small commission but it won’t cost you a penny more. Click here to see my full disclosure policy.
Materials for DIY Wooden Boxes
Wood Cut List
(This cut list is for one box 12” wide, 11” deep, 9” high. There are instructions below on how to easily adjust these measurements to make any size box or you can request the free build plans above with cut lists for multiple box sizes.)
- 2 pieces 1/4” plywood, 12” x 9”
- 2 pieces 1/4” plywood 10.5”x9”
- 1 piece 1/4” plywood 11.5”x10.5”
- Four 1”x2” boards 7” long
Other Materials
- wood glue
- primer and paint or stain if you prefer a natural wood look
- paint brush – these are my favorite all purpose paint brushes.
- pencil
- 150 grit sandpaper – for smoothing any rough edges
Tools
- table saw or circular saw – for cutting your wood to size. Another option is to have your wood cut when you buy it.
- hammer and 3/4″ finishing nails – you could also use a nail gun if you have one on hand, but a hammer will work just fine as well.
How to Make DIY Wooden Boxes
The first step of making DIY wooden boxes is cutting all of your wood. This is definitely the most time-consuming part of the whole project.
You can cut all of your pieces on a table saw or take the easy route and just have them cut for you at the store when you buy them.
I used 1/4 inch thick plywood for my boxes along with 1″x2″ boards for support at the inner corners.
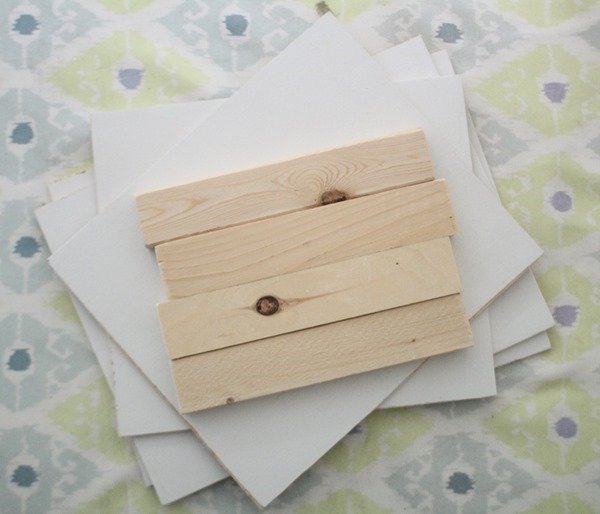
I made my boxes 12” wide, 11” deep, and 9” high because this worked perfectly for my bookshelves.
But I am also going to show you how to make these any size you need.
First, these are the measurements I used.
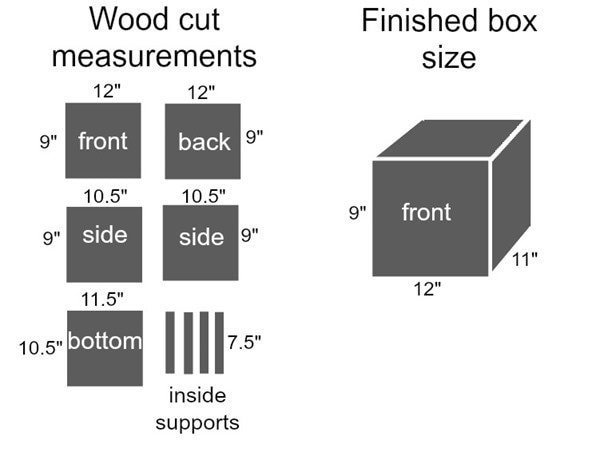
It is really simple to make these wooden boxes in any specific size you need.
The main thing you need to keep in mind is that you need to cut the two side panels of your boxes 1/2″ shorter than the front and back.
The bottom panel will also be 1/2″ smaller in both length and width than the overall box size because it will tuck up into the bottom of the box.
(Note, if you make your boxes using a different thickness of plywood, this will affect the measurements for the sides. If you use 1/2″ plywood, the side panels need to be 1″ shorter than the front and back and the bottom panel needs to be 1″ smaller in both length and width.)
I made a quick graphic to make it super easy to figure out your measurements for any custom-size box.
Just substitute the sizes you want for the height, width, and depth.
(If math makes your eyes roll back in your head, just look away. And yes, I was totally a math nerd in school and proud of it.)
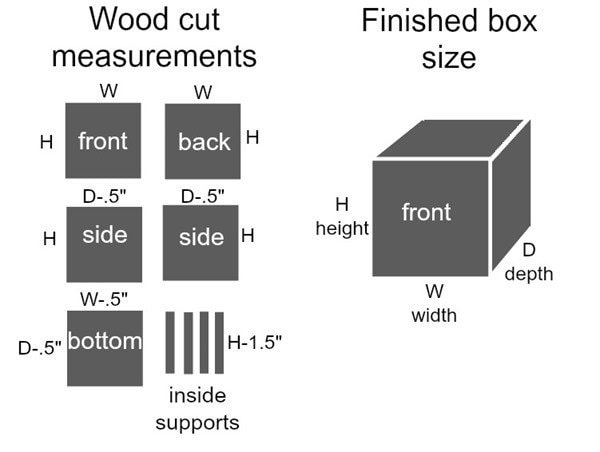
The 1″x2″s used for support don’t really have to be an exact measurement.
They just need to be around 1 – 2 inches smaller than the height of the box so they aren’t very visible.
Once all of the pieces are cut, sand any rough edges. I think it is easier to also go ahead and prime and paint or stain them before assembling.
At this point, I painted all of my pieces with a base coat of gray, but I finished painting everything once they were assembled.
Remember to paint both sides of each piece of wood unless you want the inside of your box to be bare wood.
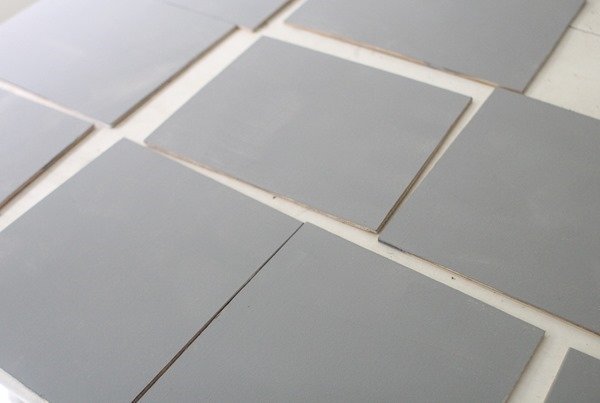
Then it is time to assemble everything. I made this before I had my nail gun, so I simply used a hammer and nails. You also need wood glue for this part.
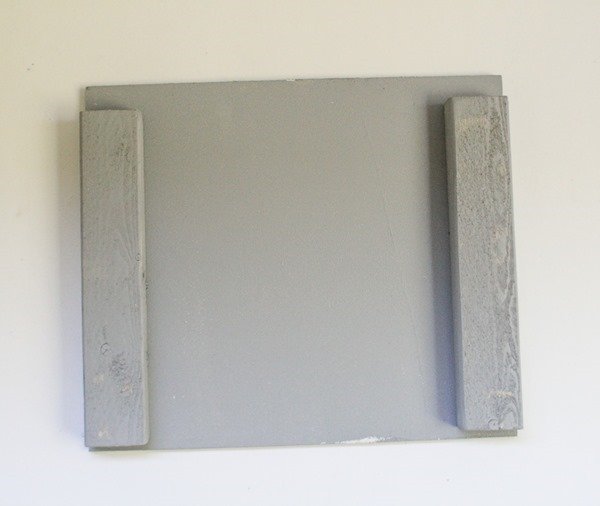
Lay one of the side pieces of your box face down on a table or flat surface.
Take 2 of your 1″x2″ support pieces and lay them against the outer edges of the wood as shown in the picture below.
Be sure to leave 1/4” of space below them so there will be room to slide in the bottom at the end.
Glue these down with wood glue.
Do the same thing using the second side and the other 2 supports. Let the glue dry.
After the sides have dried, lay the front of the box facedown on the table.
Using wood glue on the 1″x2″ supports, attach the two sides of the box to the front. Be sure to line up the edges carefully.
Apply wood glue to the final supports as shown below and carefully attach the back piece.
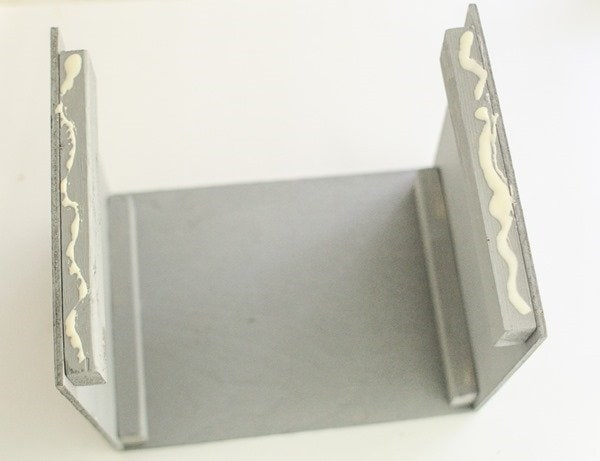
Once the glue dried, I also hammered four brads (small nails) into each side of the box.
The glue alone was probably plenty to keep the box secure, but I would rather them be too sturdy than not enough. (Especially since my kids are going to be using these!)
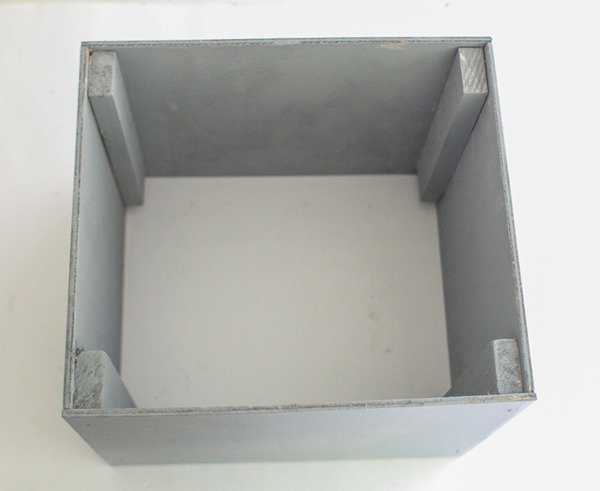
The final step is to attach the bottom of the box.
Flip the whole thing over so the bottom is facing up. (The bottom will be the end where there is a 1/4″ space at the end of each 1×2).
Add some wood glue to the bottoms of the 1x2s as shown below.
Then simply slip the bottom into place and use a few more brads to hold it in place.
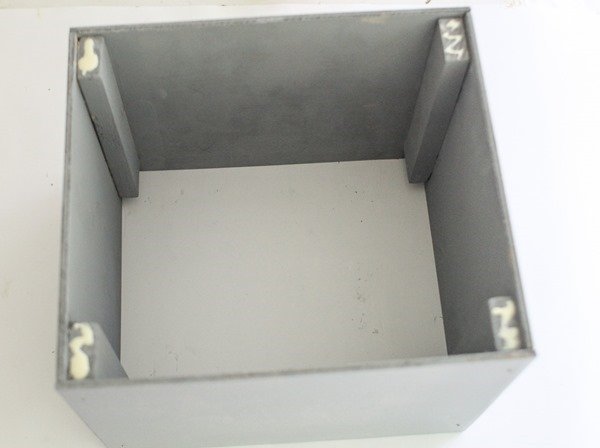
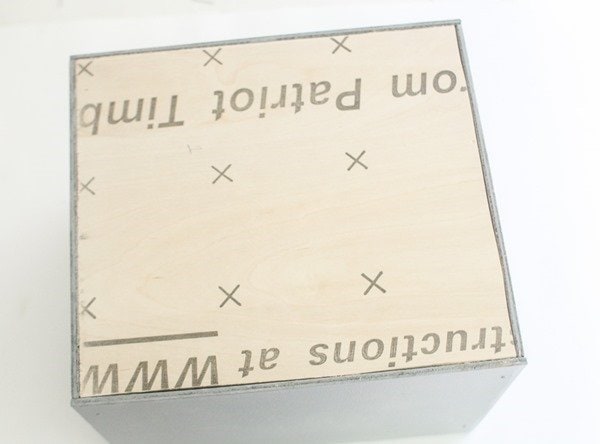
And that’s it as far as actually constructing the box.
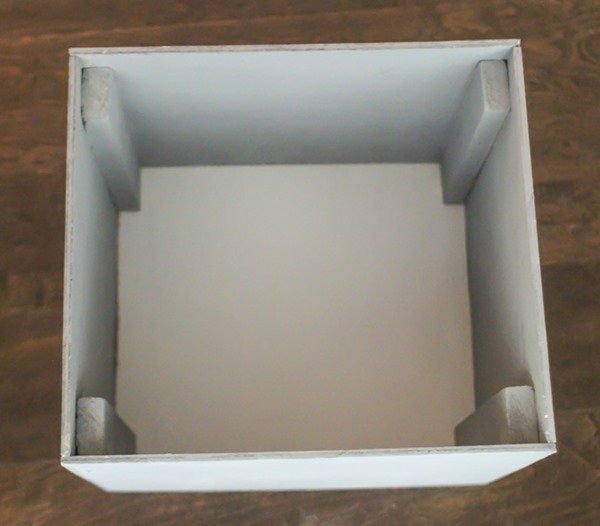
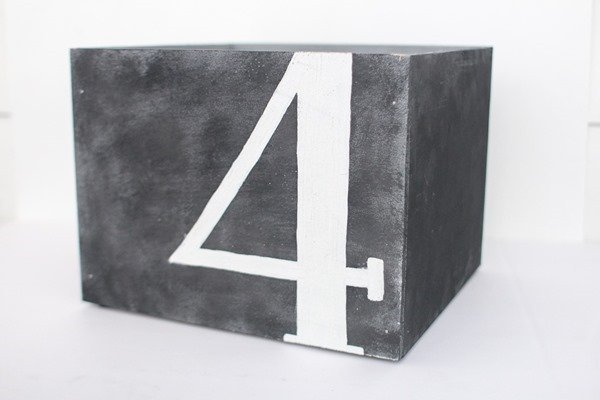
I dry-brushed several coats of charcoal gray paint onto my boxes, but they still looked a little plain.
My husband suggested adding the numbers which was the perfect solution.
The numbers add visual interest but more importantly, they make the bins much more functional.
It’s super easy to keep track of what belongs in each bin now.
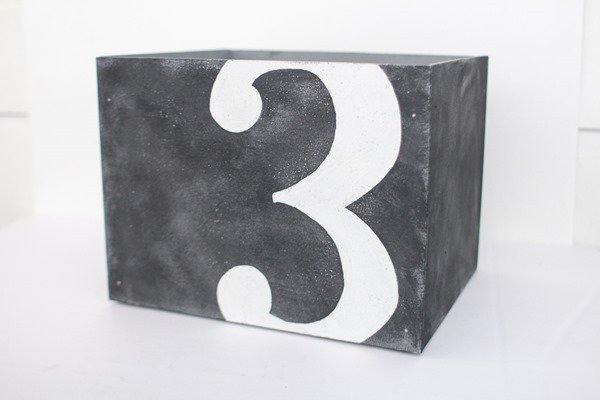
I chose to do over-sized numbers and I simply drew them on and painted them white.
But if you aren’t feeling confident in your number-drawing abilities, this pencil trick is a super-easy way to print out a font you like and then transfer it onto the wood.
Now I have six custom wooden boxes that perfectly fit our built-in shelves and they were inexpensive and look awesome.
And that is exactly why I love to DIY – you can create exactly what you want and you usually save money doing it.
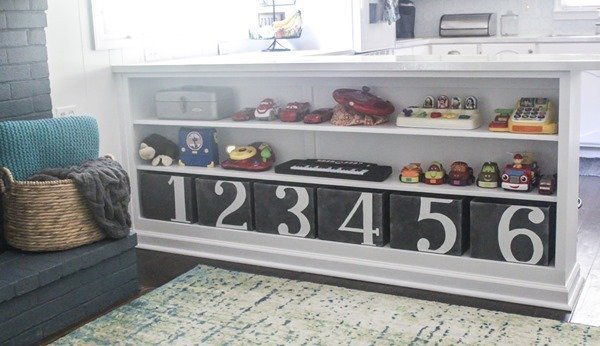
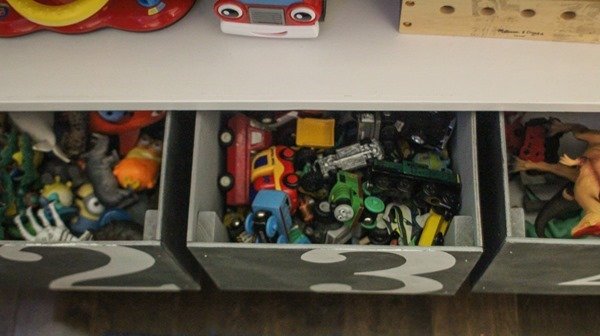
These boxes have definitely helped with keeping our overabundance of toys organized.
I’m not going to lie – there are still toys all over the floor more often than not.
But at least now, when I ask the boys to put the toys away, they know where to put them.
Here are a few more posts I think you’ll like:
How To Make A Wooden Box In Any Size
Make your own DIY custom wooden box in any size that you want with this easy tutorial.
Materials
- 2 pieces 1/4” plywood, 12” x 9”
- 2 pieces 1/4” plywood 10.5”x9”
- 1 piece 1/4” plywood 11.5”x10.5”
- Four 1”x2” boards 7” long
- Primer and paint
Tools
- paintbrushes
- pencil
- 150 grit sandpaper
- wood glue
- table saw
- hammer and brad nails or nail gun
Instructions
- Cut all of your wood pieces on a table saw to the measurements listed above. Or you can easily adjust these measurements up or down to make any size box.
- Once the pieces are cut, sand any rough edges.
- Prime and paint all the pieces. Or you can stain them if you prefer.
- Lay one of the sides of your box face down on a table or flat surface. Take 2 of your 1″x2″ support pieces and lay them on the outer edges of the wood.
- Glue with wood glue.
- Repeat with the second side and the other 2 supports.
- Let the glue dry.
- Lay the front of the box facedown on the table. Using wood glue on the 1"x2" supports, attach the two sides of the box to the front. Be sure to line up the edges carefully.
- Apply wood glue to the final supports and attach the back piece.
- Hammer four brads into each side of the box to further secure the plywood to the supports.
- Attach the bottom of the box using wood glue and nails.
Notes
These instructions can easily be adjusted to make a wooden box in any custom size you need.
Recommended Products
As an Amazon Associate and member of other affiliate programs, I earn from qualifying purchases.




I love how you explained the simplicity of a wooden box and how you can make it in any size you might need. My husband is looking for wooden boxes for storage in their industrial plant, so I thought I’d look for tips on how to make them before finding some to buy. We will keep these tips in mind as we search for a professional that he can get the boxes from to save time.
Good luck!
Hi. Thank you for posting these directions. Great directions! I am at the late stages of the project and I can see that the boxes will be awesome! Two comments, I do not think I would have been able to do this without the significant assistance f my husband who is mechanical engineer. Second, the project has taken us so many hours to make six, I can not imagine how someone could make one in one hour. Anyhow, love the directions!
I’m glad the directions helped but sorry you had so much trouble! Good job pushing through to get it done! As far as the time it takes, cutting all of the wood at the beginning and doing everything assembly-line style will cut down on the time it takes considerably.
Thanks! I’m trying to get into building and selling wooden flutes (such as Native American style) but the most popular wood is cedar and thus fragile. By including a basic, protective box I can help mitigate heartbroken feedback. Decent but inexpensive, pre-built boxes fall shy of the length of 21-24 inches (too bad wine bottles aren’t longer because their boxes are abundant). I can make a box this way and have the wife sew padding and voila! Thanks. I knew it went something like this but your tutorial is inspiring and prevents undue experimentation, like, “Doh… my supports are full length and so I didn’t leave some depth/room to install the bottom so now my plywood laminations will show”.
So glad it is helpful!
I just wanted to point out something that has likely confused some readers. When you are talking about the cutting of the boards for the sides of the boxes you said: “The main thing you need to keep in mind is that you need to cut the two side panels of your boxes 1/2″ shorter than the front and back”
While this is accurate for YOUR box, that is because you used 1/4″ plywood. As an example I had some 1/2″ plywood laying around I ended up using, so the side pieces for me had to a full ONE inch shorter. You might want to phrase it more along the lines of “the side panels need to be cut shorter by the same size that the combined front and back pieces width is.”
Luckily I caught it before I cut, and my boxes turned out great. Thank you for the article.
Thanks for pointing this out! I will update the instructions to mention that if you use a different thickness of wood, this will be different.
Hello, I am hoping that you have suggestions or even recommendation links for attaching handles to the box to avoid the need for a cutout. Thanks!
You could definitely do handles instead of cutouts. Simple bar handles or bin pulls would look amazing. You might want to cut a small piece of 1/2″ or 3/4″ thick wood and glue it to the box behind where the handles will be. This would give a bit more depth for the screws to go through and would also reinforce the area where the handles are. But you could also possibly just attach the handles without reinforcement using 1/2″ screws.
Thank you for this! I’m going to save these instructions. I need to make a wooden rectangle box for my daughter (stage prop) and I have no clue what I’m doing — DH and his dad don’t have time. So this looks amazingly simple if I can get the store to cut my wood for me!
Good luck! It really is pretty simple!
Wow your instructions are so easy to follow ( I have really been wanting to learn woodworking but I have never even cut a piece of wood… Most instructions leave me feeling intimidated and so I don’t try. After reading through this I feel confident enough to try… Thanks!
I’m so glad they are helpful! I agree a lot of woodworking info makes it seem very intimidating but anyone can do it with some practice!