How to make fabric storage cubes
How to make custom fabric storage cubes of any size and using any fabric. Simple, inexpensive step-by-step tutorial for fabric storage boxes.
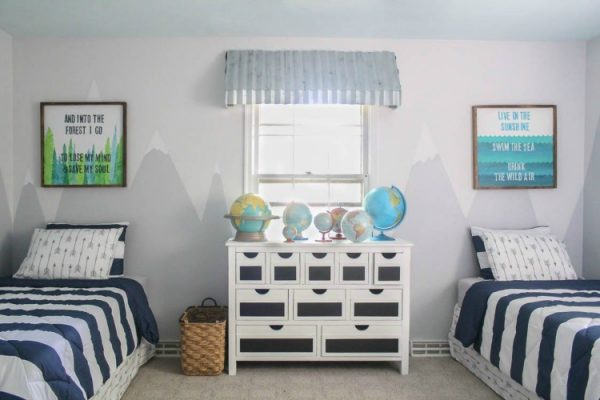
Well, my boys’ room makeover is rolling right along! As I shared last week, I’ve taken on the challenge of transforming my older son’s bedroom into a shared room for both of my boys as part of the One Room Challenge.
The challenge part? I only have six weeks to finish the whole room makeover!
This week has been all about building DIY closet shelves to create as much storage space as possible in their one small closet.
The whole closet system isn’t finished yet, but I do have one fun project to share today: custom DIY fabric storage cubes.

A major part of the closet plan is a section of built-in cubbies to hold clothes and shoes and those cubbies were in need of some stylish storage bins.
After doing a bit of online shopping, I realized that there were plenty of inexpensive fabric storage bins out there.
Unfortunately, I couldn’t find any that would work in the boys’ room. Everything was either too small, too expensive, or too ugly.
I’m putting a lot of work into this closet and I want it to look good by golly!
So I did what I always do when I can’t find what I want – I decided to make it myself!
And I am so glad I did, because these turned out gorgeous! They are absolutely perfect and I can’t wait to see them in the closet.
Plus they were inexpensive and you can make absolutely any size fabric cube using any fabric you want!
This post contains affiliate links; see my full disclosure here.
Supplies for DIY fabric cubes
- Foam board (you can find this at the dollar store!)
- Fabric of your choice – this one is very similar to the one I used
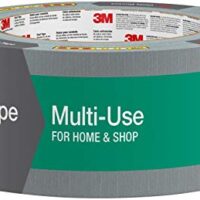
- duct tape
- spray adhesive
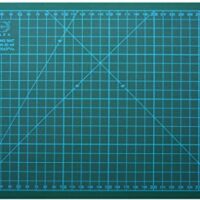
- craft knife and cutting mat
- Square ruler (optional)
How to make DIY fabric cubes
Ok, so the easiest thing to do would be to simply cover some cardboard boxes with your fabric (much like I did here), but that doesn’t always work as well when you need a specific size box.
I couldn’t find any boxes the right size, so I started from scratch.
You need to cut five pieces of foam board for each box. My boxes are exactly 13” x 13”.
In order for your cubes to perfectly square, you need to take into account the overlap of the foam board at the corners.
To make a 13” x 13” box you need two 13” x 13” squares (for the front and back), two 12.5” x 13” squares (for the sides), and one 12.5” x 12.5” square (for the bottom).

You can easily cut the foam board using a craft knife and cutting mat.
If you have a square ruler, it makes it much easier to keep all of the edges nice and straight.

I also chose to cut out a hand hold to make it easier to use.
I simply cut a pattern from card stock and then traced it onto the front piece, centered, one inch from the top.
Then I carefully cut it out with the craft knife. This way, I can trace the same shape quickly onto each box I make.

Once all of the pieces are cut, simply use duct tape to attach each of the pieces at the seams.
The front and back pieces will slightly overlap the side pieces.
You could possibly use a hot glue gun for this instead of duct tape, but I prefer to avoid hot glue whenever possible. (I’m not the only one who manages to always burn myself and ends up with a million glue strings everywhere am I?)
I also used some duct tape to reinforce the handhold. Just make sure to keep your duct tape as smooth as possible – big wrinkles can show through the fabric.

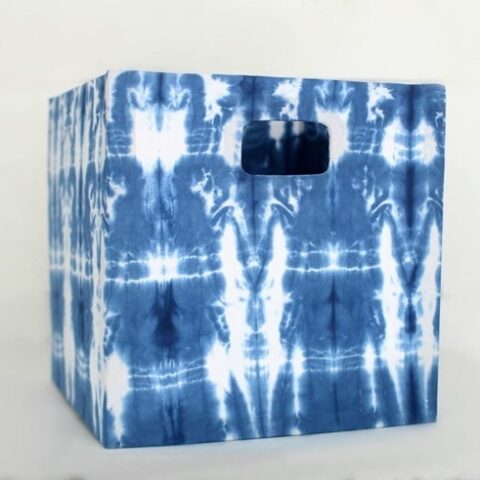
Ok so it may not look like much yet, but adding beautiful fabric is like magic.
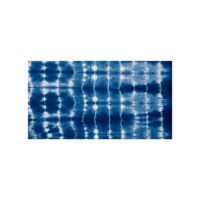
I chose this fun shibori print which I got for a steal at Joann Fabrics with a 40% off coupon.
I was able to make two large cubes using just a yard and a half of fabric.
I cut my fabric in half lengthwise so I had two strips of fabric that were 22” x 54”.
Then I wrapped each piece of fabric around one of my DIY boxes. I used spray adhesive to attach the fabric and it worked perfectly.
The last step was to use my craft knife to carefully cut several flaps in the hole for the handhold and then wrap the fabric flaps around the hole.

How gorgeous is that! You would absolutely never guess that this high-end storage cube was actually made out of foam board and duct tape.
These boxes are very sturdy – sturdy enough I feel comfortable letting my kids use them and that’s saying something.
And I love that you can make them the exact size you need with your absolute favorite fabric for a custom look.

*Update – I’ve finished the DIY built-in closet shelves for these boxes and it looks amazing!
I love the custom fit and the shelves were actually much easier to build than I imagined.
And I’ve also since built wooden storage cubes from cedar planks if you prefer the look of wood.
And here are all of the other posts about this makeover in case you missed something!
SHARED BOYS’ ROOM MAKEOVER
The Big Room Reveal! Boys’ Shared Modern Farmhouse Bedroom
How to Make Fabric Storage Bins (you are here)
Inexpensive DIY Closet Shelves
Painting Furniture White: Secrets to the Perfect Finish
How to Make a Bed Skirt from a Flat Sheet
How to Make Gorgeous Farmhouse Window Awnings

How to make fabric storage cubes
Make inexpensive fabric storage cubes using any size fabric cube with absolutely any fabric you want!
Materials
- Foam board
- Fabric of your choice
- Duct tape
- Spray Adhesive
Tools
- Square ruler
- Craft Knife and cutting mat
Instructions
- Cut five pieces of foam board for each box using a craft knife and cutting mat: two 13” x 13” for the front and back, two 12.5” x 13” for the sides, and one 12.5” x 12.5” for the bottom.
- Cut out a hand hold pattern on card stock.
- Trace it on the front piece, centered, one inch from the top.
- Cut it out with a craft knife.
- Use duct tape to attach each of the pieces at the seams.
- Add duct tape to reinforce the handhold, keeping it as smooth as possible.
- Cut your fabric in half lengthwise, so you have two strips of fabric 22” x 54”.
- Wrap each piece of fabric around one of the DIY boxes and adhere with spray adhesive.
- Use the craft knife to cut several flaps in the hole for the handhold and wrap the fabric flaps around the hole.
Recommended Products
As an Amazon Associate and member of other affiliate programs, I earn from qualifying purchases.
-
 DAFA Professional 36" x 24" Self-Healing, Double-Sided Cutting Mat, Rotary Blade Compatible, (36x24), (24x18), (18x12), (12x9) Sizes, for Sewing, Quilting, Arts & Crafts
 -
X-Acto #1 Precision Knife | Z-Series, Craft Knife, with Safety Cap, #11 Fine Point Blade, Easy-Change Blade System
-
3M Multi-Use Duct Tape, 2930-C, 1.88 Inches by 30 Yards
-
Gorilla Heavy Duty Spray Adhesive, Multipurpose and Repositionable, 11 ounce, Clear
-
Indian Batik Wind Cave Tie-Dye Stripe Navy/White

These are awesome girl!
Thanks Ashley!
These are so fun, Carrie! Definitely needing to get better organized this summer…pinning these for my to do list!
Thanks Kristi! I love how they turned out!
I love this idea! Not only is it useful and inexpensive but they are so pretty!
Thanks Mary Beth! I love that you can make them with any fabric you want.
Those are so awesome Carrie!! Well done!
Thank you Vanessa!
Nicely done, Carrie! Love the custom fit and LOVE the fabric! Susie from the Chelsea Project
Thank you Susie! I agree – that fabric is amazing!
I love your creativity, these are so cute!
Julie @ Love My Simple Home
Thank you Julie!
how creative and I love the fabric choice!
Thanks Laura!
That fabric!!! It’s amazing. I love the print and the vibrant blue tones. It almost looks like it’s tie-dyed. I can’t wait to see more and how your room takes shape. Love your style.
Thank you Sue!
Why didn’t I think of that?!! Storage cubes are so expensive! Good work!
Thank you Natalie!
Oh these are so cute!!! Can’t wait to see your finished room!
Thanks Nicole! The room is really coming along now!
I’m wanting to make these because I can’t find matching cube bins either.
Is there fabric inside or on the bottom? I’m not understanding how 22″ will cover all 5 sides and the inside. Thanks :)
Hi Michelle, I basically cut the fabric into long strips and wrapped them around the sides. The bottoms are not covered (and nobody ever turns them over to see the bottom anyway). And the insides are not totally covered. The fabric extends about 6 inches down the inside sides. Doing it this way you can see the white foamboard if you look inside the box when it is empty. But if it is at least half full of stuff, the white gets covered. If you want to the inside to be more uniform you could use a bit more fabric so you could cover it as well.
These boxes look really awesome. Thanks for sharing these with us.
Thanks for the tutorial – I am looking forward to trying this. Have you tried making bigger boxes with craft foam ie 2ft x 2ft?
I haven’t but I think it should work!
thanks for the great tutorial! I have a delightful library of floor to ceiling shelves but I need to be able to hide SOME stuff! This was just the thing to get me started – I’m going to make them a little longer so that I can hang file folders inside, but I still think the foam core will hold up. Thanks for the inspiration!!!
That sounds wonderful – I hope it works well for you!
Hi
How many yards of fabric did you buy to do this project? Thanks!
It took 1.5 yards of fabric for two boxes, so for all 8 boxes, I used 6 yards. I would recommend getting a half yard extra just in case.