Who’s ready to see how far $100 can stretch? It’s reveal day and I am so excited to share what I was able to accomplish with only $100 in our family room.
I’ve spent the past four weeks trying to work some magic in my family room with a miniscule $100 budget. That’s right – a whole room with only four weeks and $100 dollars to work with. Sound crazy? Yeah, it pretty much is. But the $100 room challenge was dreamed up by Erin of Lemons, Lavender, and Laundry and I love a good challenge so I had to join in.
Plus, it really helps me get things done! Back in January I finally got myself in gear to transform our main bathroom as part of the $100 challenge. It was a ton of work but now it’s one of my favorite spaces in our house. So I decided to tackle the challenge again and this time I set my sights on our family room. We spend most of our time in this room; it’s the room where we do our TV watching, toy playing, blog writing, and yes, far too often we even end up eating dinner in here.
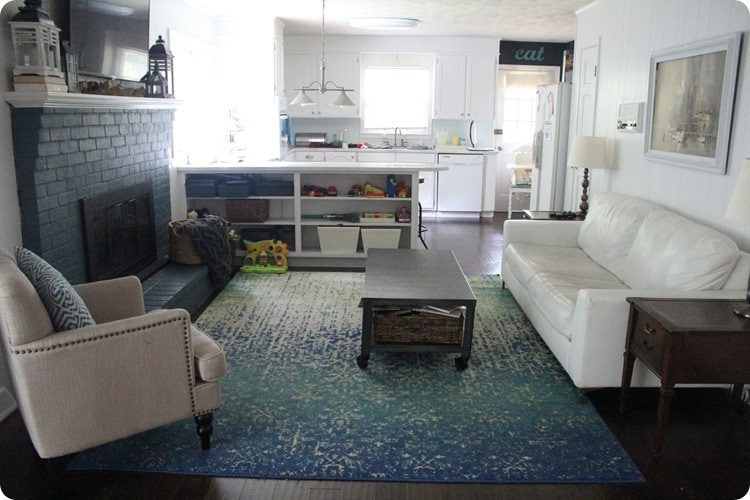
And while this room wasn’t terrible before, there was also some major room for improvement. Okay, ready for some before and after photos? (Because seriously isn’t that the best part of any project?)
Before
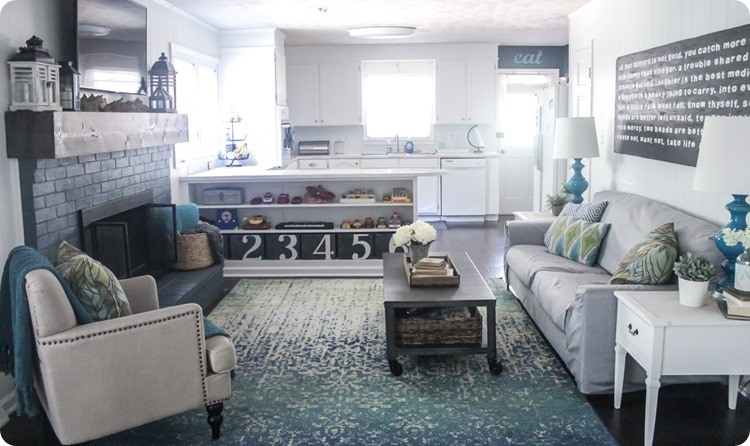
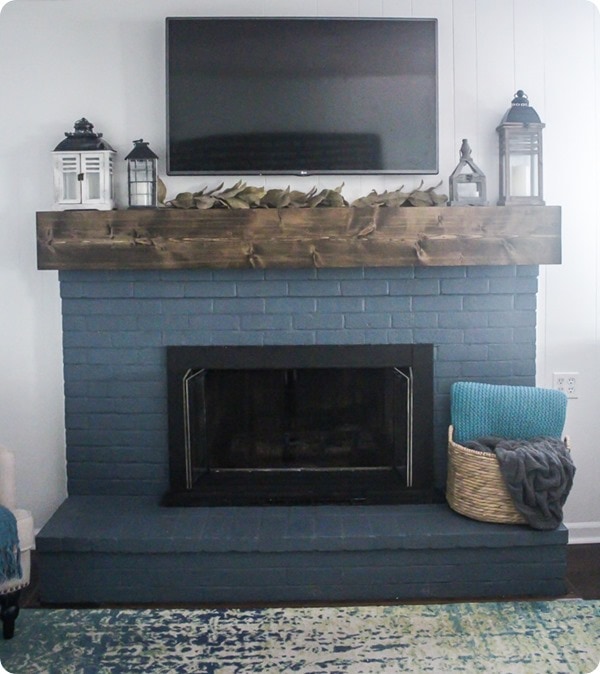
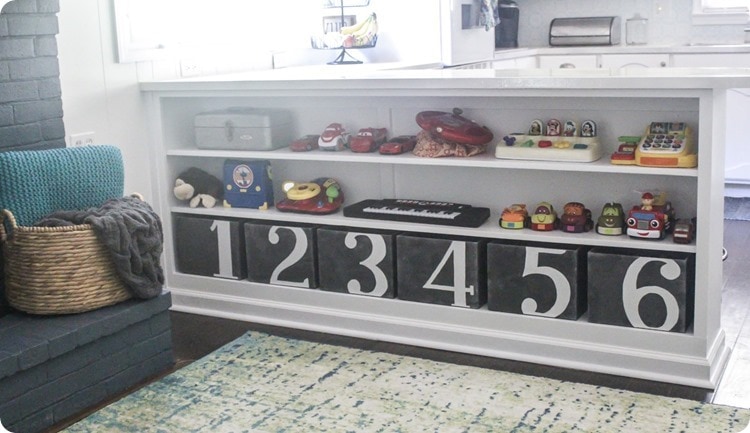
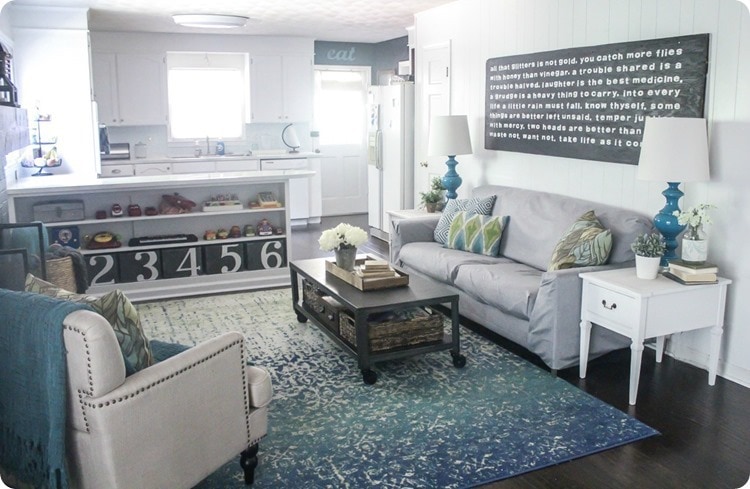
After
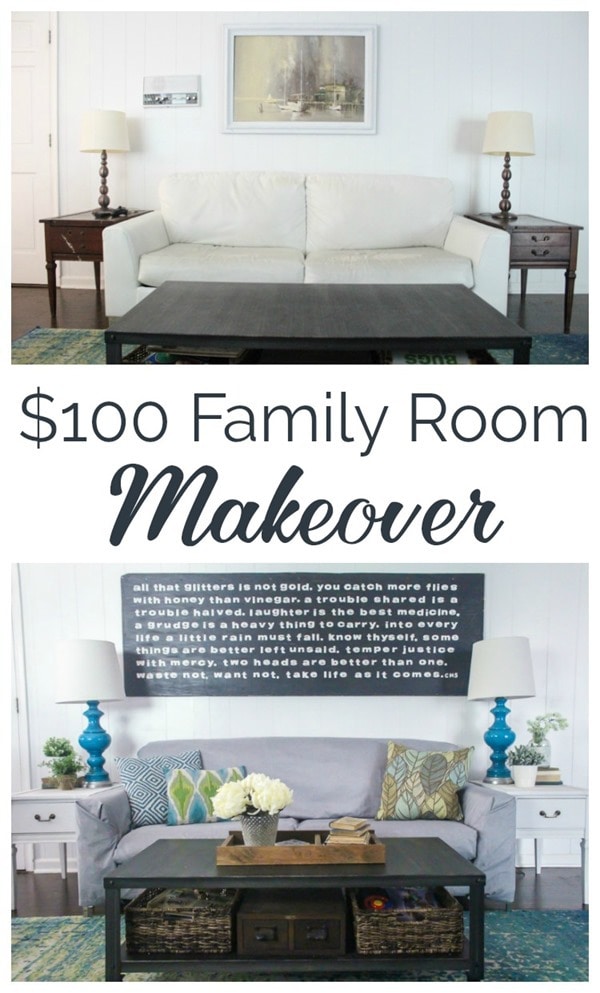
So much better! As you can see, I used all the same furniture, the same rug, and kept the same layout. But the details make all the difference.
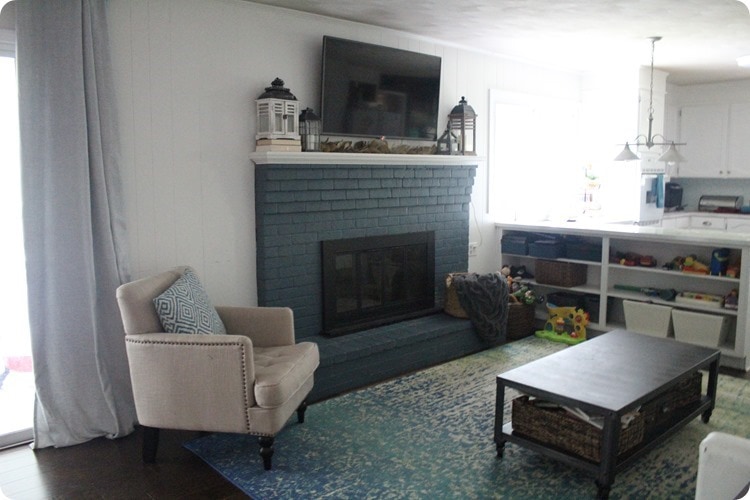
Before
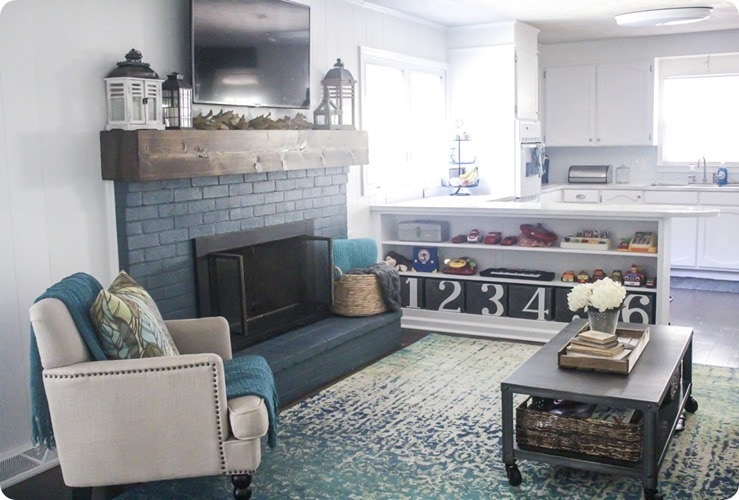
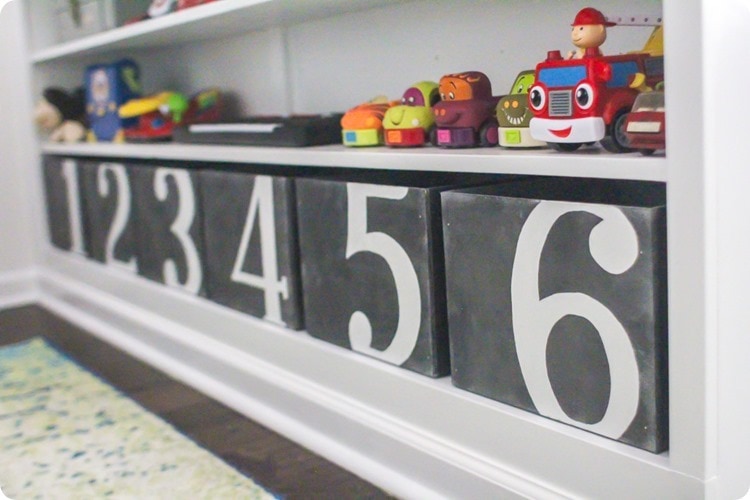
So what exactly did I do? I built a new mantel for the fireplace, added new trim to the built-in shelves, built new DIY toy bins, and removed the ugly pendant light that was hanging down over the peninsula. (I still need to replace the light at some point, but for now just having that ugly one gone is a huge improvement.)
The new fireplace mantel was a pretty simple DIY and it fits the size of the fireplace so much better. This alone made a huge difference in the room.
I also added new trim to the built-in shelves to help them look like real built-ins instead of leftover kitchen cabinets. I never realized before just how big a difference a bit of trim can make!
I’ve wanted matching bins or baskets to help contain the toys on these shelves for awhile but buying a whole set of matching bins gets expensive fast. So I made DIY wooden bins using scrap wood from my basement. I love the graphic punch the numbers give, plus they help with keeping the things inside organized.
There were some big changes on the other side of the room as well.
Before
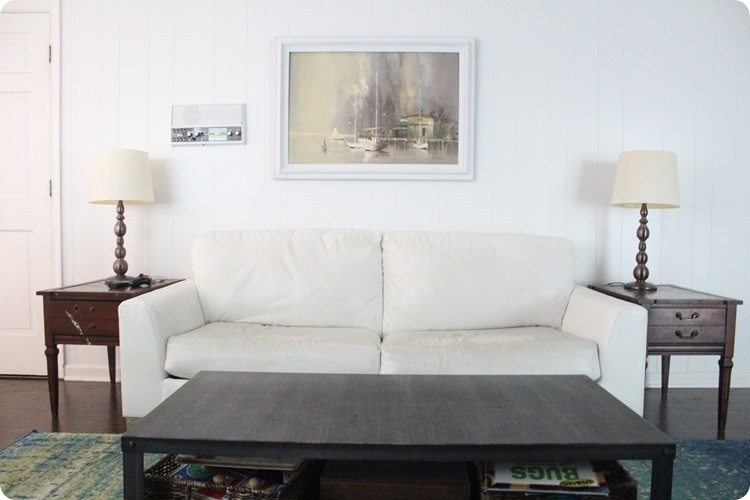
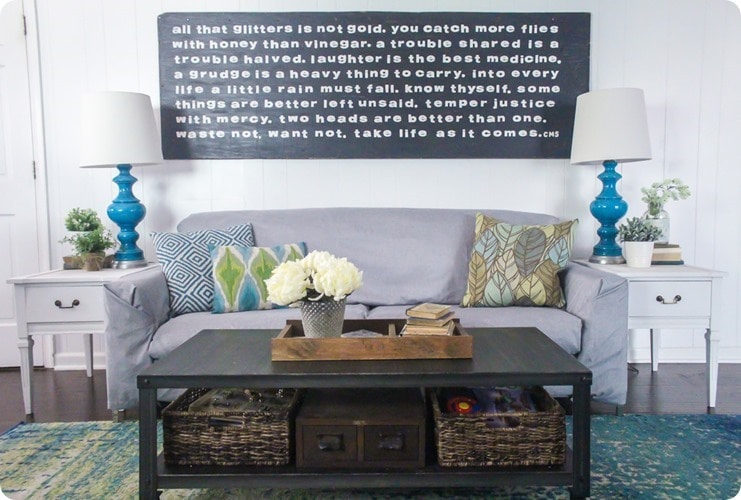
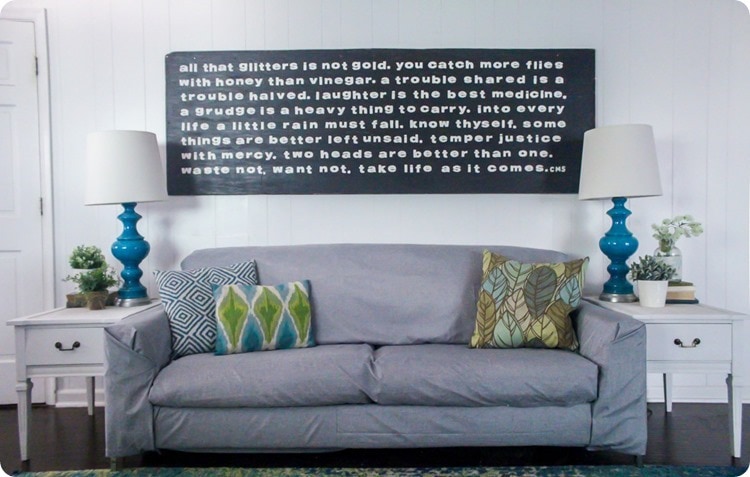
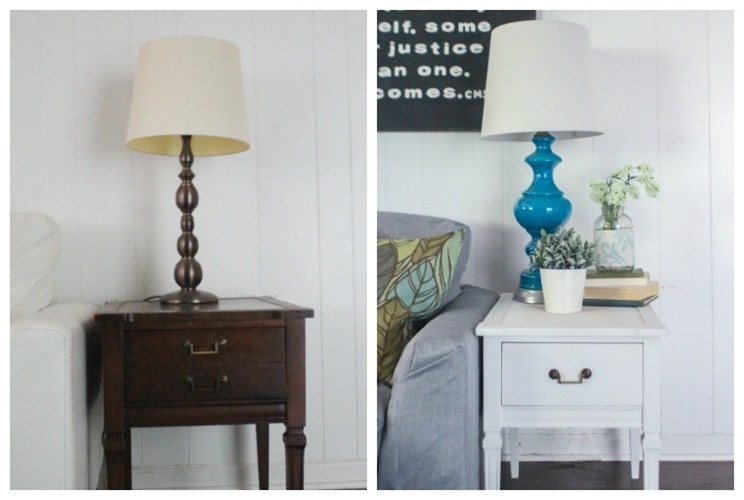
I pulled that crazy 1970s intercom out of the wall, painted the end tables, made a temporary slipcover for the couch, and pulled in different art, lamps, and accessories.
That huge awesome sign is a DIY project from several years ago. It’s actually been stored away in the basement for a few years because I didn’t have a wall big enough for it. But then I realized that if I got rid of the intercom, this would be the perfect spot. It looks fantastic up there and also perfectly hides the hole where the intercom used to be.
The couch slipcover is a bit wrinkly looking, but it is a huge improvement over the couch before. And it was free! Our white couch has developed a serious peeling problem over the past several months; the faux leather is peeling right off and it looks horrible in person. When I was trying to think of a cheap solution, I remembered these gray curtain panels I wasn’t currently using. I didn’t want to permanently sew them since I will probably use them for something else at some point, so I simply pinned them to the couch. I know this slipcover isn’t perfect but it’s pretty darn good considering it was both free and no-sew!
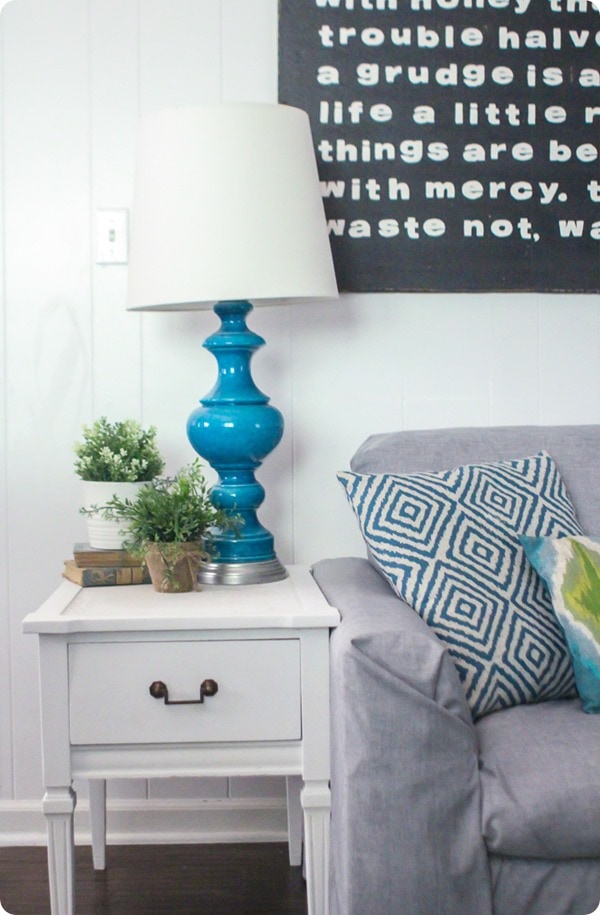
I brought in these blue lamps from another room. (These were a Goodwill find many years ago!)
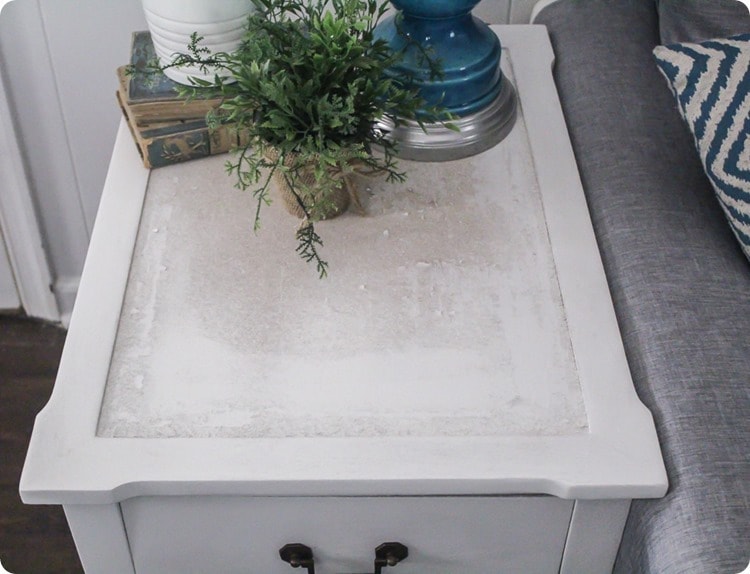
I painted the end tables that were already here white. And since one of the tables was missing the hardware, I changed the hardware placement so I could use one pull on each end table. Unfortunately I did run out of time to finish the tops of the end tables.
The tops were originally a weird faux leather that I removed. I have plans to do something cool in the recessed area with paint sticks but haven’t had a chance to do it yet. I did include the cost of the materials in my final budget though. (Update: you can see the finished tables here and they are awesome!)
Pretty good huh!
Here’s the final budget breakdown:
Wood, wood veneer, and wood glue for mantel: $53
Stain for mantel: free, already owned
Wood and trim for bookshelves: $25.50
paint for bookshelves: free, already owned
Wood for toy storage: free, already owned
Finishing nails for toy storage: $1.60
Paint for toy storage: free, already owned
Lamps: free (Stole them from another room)
Paint and wood filler for end tables: free, already owned
Paint stirrers to make new tops for end tables: $20 (yes, you can get paint sticks free, but I needed a lot so I ordered 100 on Amazon.)
Fabric for slipcover: free, curtain panels that I already owned
Huge wooden sign over couch: free (DIY project from several years ago)
Pillows, blankets, accessories: free, gathered from other rooms
Grand Total: $100.10
Just barely squeaked in on budget! And with all I managed to accomplish, I definitely count this $100 room challenge as a triumph!
See everything related to my $100 family room makeover right here:
Getting rid of the ugly(adding trim to bookshelves and removing an old intercom)
How to make wooden boxes any size
And in case you missed them, you can see my other $100 room makeovers here:
$100 Modern Farmhouse Bathroom Reveal
Unfinished Basement to Industrial Home Gym on $100 Budget
Ready to see what everyone else managed to pull off with their $100 budgets? You can see all the reveals at the links below!

cassie bustamante says
love the thick wood mantle, carrie! it looks awesome!
Carrie says
Thanks so much Cassie! I love it too!
Elizabeth Jones - Jonesville says
I’m sure everyone will say this, but love that mantle! Great job!!
Carrie says
Thank you Elizabeth!
Gabby says
This looks great! I love those numbered bins. Yeah for DIY!
Carrie says
Thank you Gabby! I love those bins too!
Emy says
Those numbered bins are amazing! I love how this room turned out. The aqua lamps are so pretty!
Carrie says
Thanks Emy!
Megan Donahoe says
Yay for big mantles!!! Your details make this room pop!!! Love it!
Carrie says
Thank you so much Megan!
Melissa says
Wow! Those numbered bins are so good! The huge sign is amazing! Everything looks so bright and fresh. Great job!!!!
Carrie says
Thank you Melisa! Those are two of my favorite parts of the room as well!
Brittany Serowski says
i”m totally jealous of your mantel! It looks so fantastic and definitely like you spent way more than you did!!! What you guys did was genius! If I had a fireplace to re-create that I certainly would! But everything in your family room looks perfect! Love how it turned out!!
Carrie says
Thank you Brittany! It really is amazing what a little money and some work can do!
Melissa says
It’s perfect!! I can’t believe the changes you made for $100. I’m loving that DIY sign above the couch and it fits that space like a glove. Of course I love the mantel, but those DIY bins are pretty fantastic too. Super nice job for $100 and 4 weeks Carrie!
Carrie says
Thank you so much Melissa! I’m so happy with it!
Rebecca says
Stunning makeover!! That mantel is GORGEOUS!!!
Carrie says
Thank you Rebecca!
Liz says
It looks fantastic! I still love the mantel so much! And the blue lamps are perfect in the room. I love the rug! Do you have a link for it??
Carrie says
Thanks Liz! The rug is on Amazon here –> http://amzn.to/2yi1yhi. I got mine on sale from a daily deal site called Zulily and I have seen it for sale at rugsusa for a cheaper price as well.
Deneen says
The whole room looks great, but gonna have to give the prize to the mantle!!! And I think the little side table or sooooooo much better white (I love clean white paint) And the blue lamps…It’s all so good :)
Carrie says
Thanks so much Deneen!
morgan says
this is such a great example of how much accessories matter. bravo!!
Carrie says
You are so right Morgan! I used to have more accessories in here but they slowly got moved out of reach of my little kids. We’ll see if that happens again. :/
Natalie @nelidesign says
Carrie, I think this room is my favorite of this challenge. Seriously, you did A-LOT!! And it’s all awesome. You inspired me on plenty of things and I can’t wait to see your boxes tutorials! I know it was already there, but can you tell me where you got that rug? sooo pretty!
Carrie says
Thank you so much Natalie! Honestly, this room was a lot of work – mostly because of the tight deadline but I am so happy with how it turned out! I got my rug for sale at Zulily a few years ago. It is this same one on Amazon – http://amzn.to/2yi1yhi. I have also seen it on RugsUSA which has killer sales every few weeks.
Lindsay Brown says
The mantle and trim look amazing! Have you considered some simple potlights to replace the pendant?
Carrie says
Thank you Lindsay! The trim is such a small thing but it made such a huge difference! I would really love to put in some small potlights throughout the room but that’s going to require an electrician so it isn’t in the budget right now.
Gretchen@BoxyColonial says
Wow–huge improvement! I love the toy bins, and that mantel is definitely stealing the show!
Carrie says
Thanks Gretchen! I love it so much!
Erin @ Lemons, Lavender, & Laundry says
Oh. My. Goodness!!! You did SO much in here: mantel, cabinet trim, pulling out lights and intercoms, wall art, lamps, tables, slip cover!!! I cannot believe you came in only 10 cents over budget (which doesn’t even count as over budget, IMO). I am BEYOND impressed with this room! I also can’t wait to see the paint stick treatment for the tops of the end tables. I am SO glad you decided to join another round of the $100 Room Challenge!
Carrie says
Thanks Erin! I’m so glad I joined in too. This challenge is such a good idea and right up my ally!
Meredith @ The Palette Muse says
I still can’t believe the transformation in this room! I thought it looked great to start with, but all the changes you’ve made really work together to make it pop! Love the art over the couch, those blue lamps, and especially your new mantle!
Carrie says
Thank you so much Meredith!
grammy goodwill says
I love how the cabinet looks now. That trim and those numbered crates make such a difference. That’s my favorite addition, but the couch and tables look good, too.
Carrie says
Thank you so much! That cabinet honestly makes the room feel somewhat finished for the first time.
Rachael @ This is our Bliss says
You’re so right! It’s ALWAYS all in the details! I can’t believe how fresh and updated the space looks with the same furniture, rug and layout! The lamps and pillows really make your rug pop! And I agree, the trim you added made a world of difference. Beautiful job, Carrie! I love your space ;)
Carrie says
Thanks so much Rachael!
Darcie says
I love the color of your brick fireplace and assume you painted it. I’m painting mine soon. Can you please tell me the specific paint color you used? Thanks!
Carrie says
Hi Darcie! Thanks, I did paint my fireplace myself! I mixed the color myself using DecoArt Chalky Finish Paint 1 part Legacy and 2 parts Relic. This post talks all about the process: https://www.lovelyetc.com/how-to-paint-a-brick-fireplace-the-right-way/
Lila says
Amazing! Love those bins with big numbers, can´t wait ’til the tutorial!
Carrie says
Thank you! I actually have the tutorial here: https://www.lovelyetc.com/how-to-make-a-wooden-box-in-any-size/ Looks like I forgot to link to it in this post!