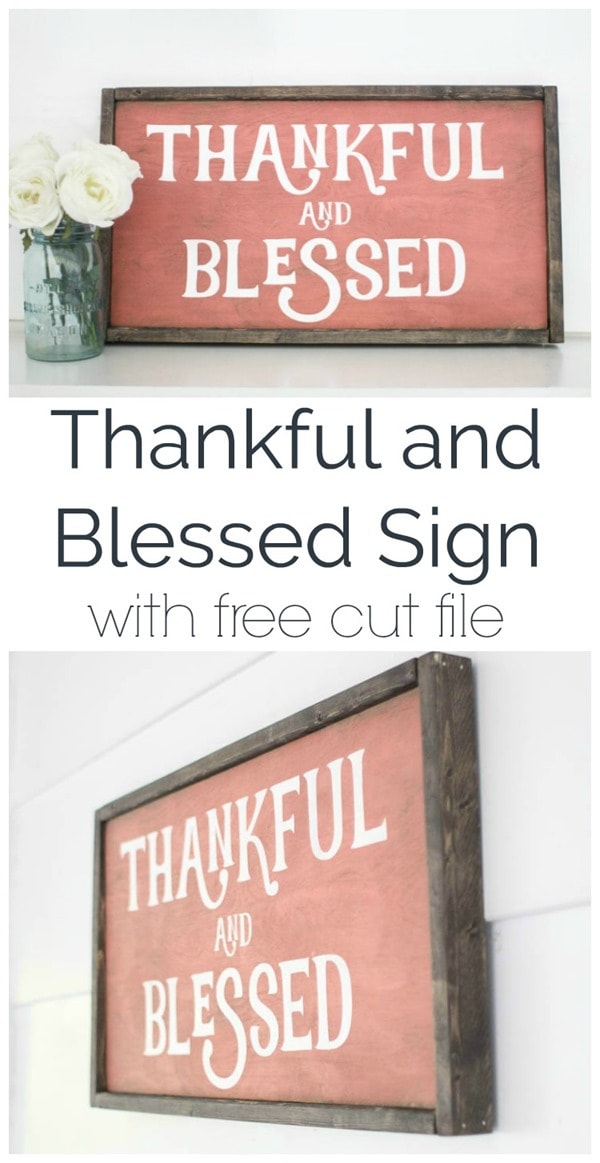
I’m sharing a sweet DIY painted sign today that’s absolutely perfect for fall. I actually was selling this Thankful and Blessed sign in my Etsy shop for a short time. But I quickly found out that the etsy shop was way more time consuming than I imagined and I had to put the shop on hold indefinitely. But I adore this sign way too much to have it disappear just because I am not currently selling it. So I decided to give you guys all the details to make your own including free cut files to use with a Silhouette cutting machine.
This post contains affiliate links; see my full disclosure here. This sign design and files are to be used for personal use only – not for commercial purposes or resale.
Materials for Thankful and Blessed Sign
Wood Cut list
- 1/4 or 1/2 inch plywood 12″x24″
- 1″x 2″ board for frame, two pieces 13.5 inches long and two pieces 24 inches long
- Tools
- Paintbrush or small foam roller
- Finishing nails and hammer
- Foam paintbrush
- sandpaper (150 –220 grit works well)
- rag
Other materials
- Paint for background – I used Sherwin Williams Dishy Coral – I adore this color for fall
- White paint for letters
- Silhouette cutting machine
- Vinyl or reusable stencil material
- Stain of your choice – I used Minwax English chestnut
- Mineral Spirits
- Painter’s tape
How to make the thankful and blessed sign
Okay, so first a note about the the Silhouette. For those that don’t know, the Silhouette is a cutting machine that can cut vinyl, cardstock, iron-on transfers, stickers, and lots of other materials.
You can make tons of things with a Silhouette but so far I have mainly used mine to cut stencils. You can cut a stencil from regular vinyl sheets that can be used one time or you can cut it from reusable stencil material if you want to reuse the same design several times. (Hint: I found that these work great as reusable stencils and they’re much cheaper than the official reusable stencil from Silhouette.)
So why use a Silhouette at all? Well, I’ve made tons of DIY signs without one and they turned out fantastic. But it is sooo much easier and faster using my Silhouette Cameo. Seriously, it does almost all the work. But if you don’t have one, I have a ton of DIY signs you can make without one right here.
OK, sorry for the long explanation. This is totally not sponsored by Silhouette in any way. I just wanted to explain why I’m suddenly talking about a DIY tool I’ve never mentioned before. On to the tutorial.
This is a really simple one. (Normally, I take lots of pictures while I am making a project, but I didn’t take any process pics since I originally made these to sell. Luckily, the tutorial is pretty simple, so I think you’ll be able to follow along with just written directions no problem.)
Use a brush or a small foam roller to paint the plywood with your background color. (This is where I used Sherwin Williams Dishy Coral). You will probably need two coats. Once the paint is dry, lightly sand it to reveal a bit of the wood grain. Lightly wipe stain all over the wood and then immediately wipe off the excess using a rag dipped in Mineral Spirits. The stain will stick to all of the exposed wood and bring out the wood grain, but the mineral spirits will keep it from making the paint too dark.
Cut your stencil using the Silhouette. You’ll be making two 12×12 stencils that go together to make the full pattern.
Use painters tape to attach your stencil to the wood. (Or if you are using vinyl, simply stick your stencil to the wood.)
Use a small foam brush to gently dab the white paint onto the stencil. This may take two coats as well. Remove the stencil before the paint completely dries.
To make the frame, stain your 1x2s. Then simply use a couple of finishing nails to hold each corner together. (It helps to brace the frame against something like a wall as you hammer in the nails.)
Slip your sign into the frame and you’re done.
I adore this sign and I can’t wait to hang it up this year. (And yes I am really glad that I didn’t sell them all!)
Happy sign making!





Leave a Reply