How To Make A Super Cheap Hanging Light
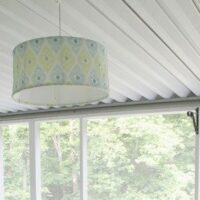
Great lighting is usually sooo expensive…but I’m learning that you can make gorgeous DIY lighting for very little money. This DIY hanging light is a great example of that.

It’s time for another Repurpose, recycle, reuse project, and this month I managed to both repurpose and reuse.
I reused an old worn-out lampshade that I just couldn’t throw away and I repurposed an indoor/outdoor tablecloth from TJMaxx into an awesome lampshade cover.
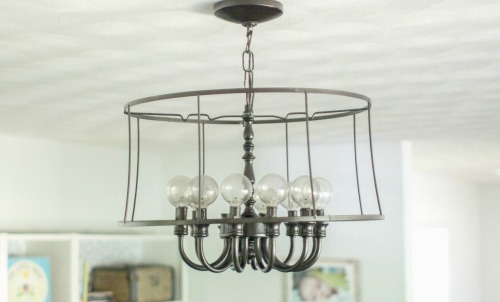
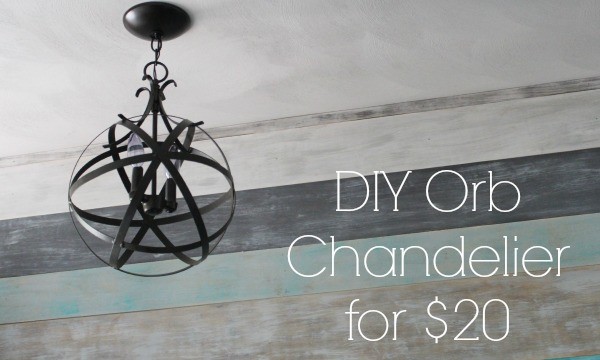
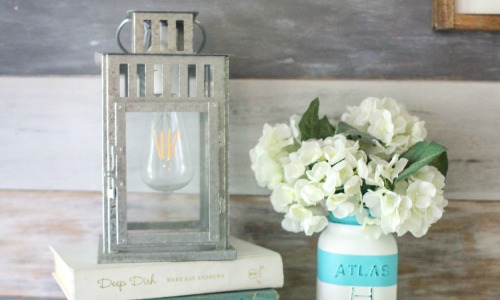
I’ve been on a bit of a DIY lighting kick lately. It started with my DIY orb light fixture in the foyer and continued with my vintage camera lamp.
And now I’m back with a super cheap hanging pendant light that you can hang literally anywhere.
Seriously, all you need is a wall outlet nearby. I decided to hang mine out on our huge screened porch.
That baby is four hundred square feet of screened-in goodness and only has one little tiny light fixture way down on the end.
What I’m learning from all this DIY lighting I’ve been tackling lately is that wiring a light really isn’t so scary.
I mean, yes, you need to be extremely careful because electricity is dangerous. But it is soo doable.
This post contains affiliate links. See my full disclosure here.
Materials for DIY hanging pendant light

- old worn out, ugly lampshade – if yours still has the ugly pleated fabric, simply remove it
- fabric of your choice
- white fabric for lining
- hot glue gun
- Lamp Cord

- Pull Chain Socket
- Lamp Loop
Instructions
I chose to wire my light before recovering the shade but you can definitely recover the shade first if you would like.
As always be very careful when working with electricity and of course, do not plug in your light while you are still working on it.

First screw one end of your threaded nipple into your loop. (Threaded nipple is just what you call that little tube with the ridges on the outside – I have no idea why they chose to call it that.)
Thread one end of your lamp cord through the middle of your loop/nipple and slip the whole thing into the hole in the top of your lampshade.
Pop your pull chain socket apart – very easy to do – and screw the base into the free end of the threaded nipple.

Pull several inches of the lamp cord apart into two strands and make sure you have a half inch or so of exposed wire at the ends.
If not use sturdy scissors to carefully strip away some of the plastic.
Then tie the two strands into a knot like you were going to tie your shoes.

Carefully attach the two exposed wires to the socket by wrapping them around the two screws on the sides and then tightening the screws to secure them.
Snap your socket back together.
And that is it as far as wiring!

Now it is time to recover your shade (if needed).
*Update: When I originally did this project, I made up my own way to recover the lampshade using hot glue.
It was fine – but up close you could definitely tell that it was a DIY job. (And not in a good way.)*
Since then, I’ve learned that it really isn’t that difficult or expensive to make a lampshade the ‘real’ way using any fabric you want.
I’ve got a full tutorial on how to do it right here if you’re interested. If not, keep reading for the lowdown on how I made my original version.
To make the lampshade, I used a scrap of white fabric to line the inside, hot gluing the top and bottom edges to the lampshade frame.

Then I used a little of my tablecloth fabric to cover the outside. I cut my fabric a few inches taller than the actual shade.
I folded over the top and bottom edges of the fabric to make a hem using hot glue.
To keep the edges neat, I folded the hemmed fabric over the top and bottom of the shade and glued them on the inside.


The great thing about this type of light is that you don’t need to worry about where you have overhead lighting wired in; this can be used anywhere.
If you are using this inside, you can simply use a hook that screws right into the ceiling to hold it up.
I was hanging mine on a metal porch ceiling so I chose to use some command hooks to hold the fixture and also keep the cord where I want it.
The light weighs very little so I am pretty sure the command hooks will hold it.
So far, so good!

And as always, be sure to check out my fellow bloggers’ inspiring repurposed, recycled, and reused projects.
Every month I come away with some great new ideas!

Repurposed Thrift Store Chandelier from Life as a Thrifter
Repurposed Hose Caddy from Bigger than the Three of Us
Basket Hanging Light from Thrifty and Chic
DIY Magazine Coasters made from a Pottery Barn Catalog from All Things G&D
Have you ever wired your own lamp or light fixture? Now that I know how simple it is, its like a whole new world of DIY possibilities has opened up!
Do you have any dark, dreary rooms that could use a cheerful hanging light?
Or an ugly lampshade hanging around, waiting to be useful again – it may just have a new purpose now!
Here are some of my other favorite inexpensive DIY lighting ideas:
How to Turn a Lantern into a Lamp

How To Make A Super Cheap Hanging Light
Make a gorgeous DIY hanging light for very little money.
Materials
- Lampshade
- Fabric
- White fabric for lining
- Lamp Cord
- Pull Chain Socket
- Lamp Loop
Tools
- Hot glue gun
Instructions
- Screw one end of the threaded nipple into the loop.
- Thread one end of the lamp cord through the middle loop and slip it into the hole on top of the lampshade.
- Pop your pull chain socket apart.
- Screw the base into the free end of the threaded nipple.
- Pull the lamp cord apart into two strands leaving a half inch of exposed wire at the ends.
- Tie the two strands into a knot.
- Wrap the two exposed wires to the socket around the two screws on the side.
- Tighten the screws to secure them.
- Snap the socket back together.
- Cover your lampshade with new fabric if needed.
Recommended Products
As an Amazon Associate and member of other affiliate programs, I earn from qualifying purchases.


This is WONDERFUL! I have GOT to try this!
Thanks Holly!
The sunroom looks so lovely and that shade is perfect in there!
The sunroom looks so lovely and that shade is perfect in there!
Thanks Ashley! It is definitely our nicest, most relaxing room in the house.
Such an awesome light, Carrie! I’m so impressed that you DIY’ed the whole thing! Thanks so much for sharing!
~Abby =)
Thanks Abby! I’m definitely getting more fearless in my DIY attempts!
So happy I found your idea through Thrifty Thursday! My “inspiration” family room has hanging light very similar to this and, knowing how pricey these can be to buy, I figured it was one feature I simple wouldn’t be able to incorporate for a while. But I have made other lampshades, so why oh why didn’t I consider this!? Thanks again for sharing!
Thanks Stacy! They are pricey but you can definitely make your own! Here’s to getting the family room of your dreams – on a realistic budget. :)
underwriters knot
Definition
An approved knot according to code that may be tied at the end of an electrical cord to prevent the wires from being pulled away from their connection to each other or to electrical terminals.
hope this explains why you tie wire into knot xx
It does! Thanks Chris!
this turned out so beautiful! Love the tablecloth :) …and I’m so jealous of your porch!
Thanks Alicia! The porch is definitely the best part of our house. If we ever move, it is by far what I will miss the most.
I love everything about this! Thanks for the tutorial to make it so easy!
Thanks Amber! It really is so much easier than I would have thought to make!
Love your hanging lamp shade and great tutorial. I would love if you shared some of your talents with us on Merry Monday Linky Party tonight at 6pm PST. I also love your orb light too.
Thanks Erlene! I will definitely stop by. :)
The lamp looks fabulous – you have inspired me to try making my own for the dining room :) Thanks for sharing all the great tips x
That is awesome! Good luck with your light!
Carrie, great tutorial and what a nice touch to your gorgeous front porch. I’m definitely pinning this for future reference – thanks!
I so need one of these!
We’d love to have you link up with the Caffeinated Crafters this week!
http://www.chaosandlove.com/caffeinated-crafters-link-party-2/
Thanks Jess! I think I could use a few more myself!
Beautiful space! That hanging light turned out lovely!
Thanks Carmen! I am loving having it there.
I love how that turned out! I’d like to make two to hang over our bedside tables instead of the standard reading lamps. I like how you did the lining the other way around over the wires for a nice, tidy finish.
Thanks! These would be perfect over nightstands!
Love the orb light!!! Where did you get the actual metal sphere??
Thanks! I got mine from Marshalls but there is a very similar one you can buy online linked in this post – https://www.lovelyetc.com/2014/04/easy-inexpensive-diy-orb-chandelier/.
Hanging lights are now getting popular and everybody is talking about it. These lights are the the best way to decorate your home beautifully. They look great in any room. Thanks for sharing
Hi Carrie,
I love your ideas and finished projects! You make it very clear in your tutorials, so it’s easy to do ourselves.
Keep up the good work!
Thanks.
Thank you so much Chris! I really appreciate you taking the time out of your day to comment!
Love the porch,what is the Material? Looking to redo our ceiling and want easy maintenance.
Thanks! I was told our porch was added using a porch kit in the 1970s. The walls are just wood and screen and the ceiling is a coated metal. It works great, but I’m not sure where exactly you could get something similar now.