Easy Handpainted Live in the Sunshine Sign
I’m sharing an easy trick to create a gorgeous hand-painted sign for summer.
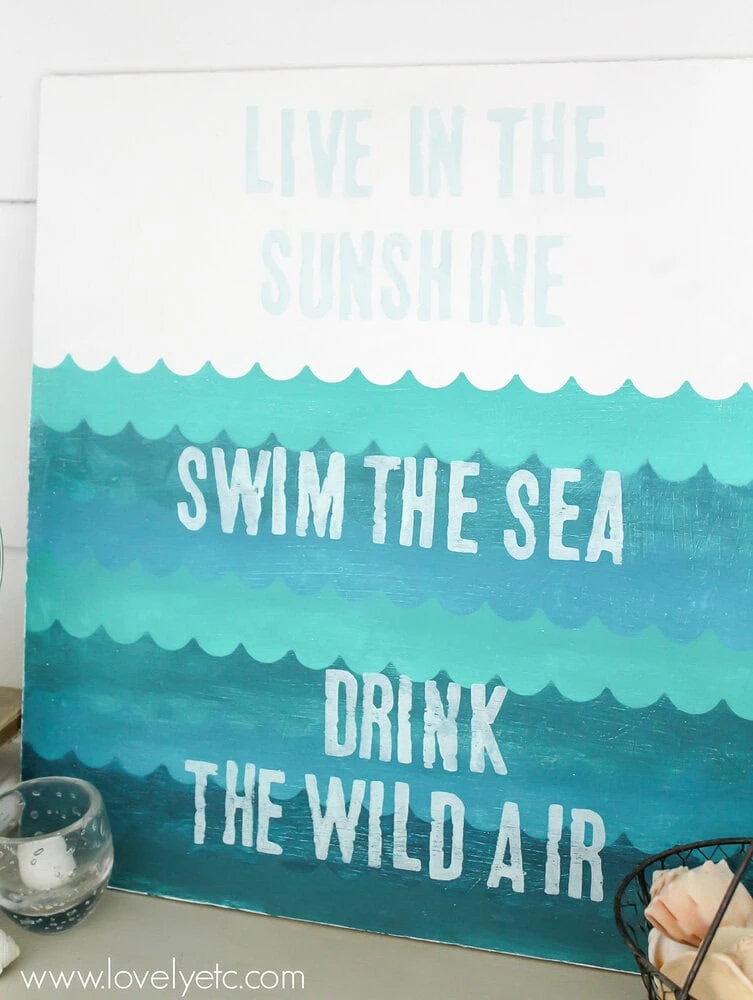
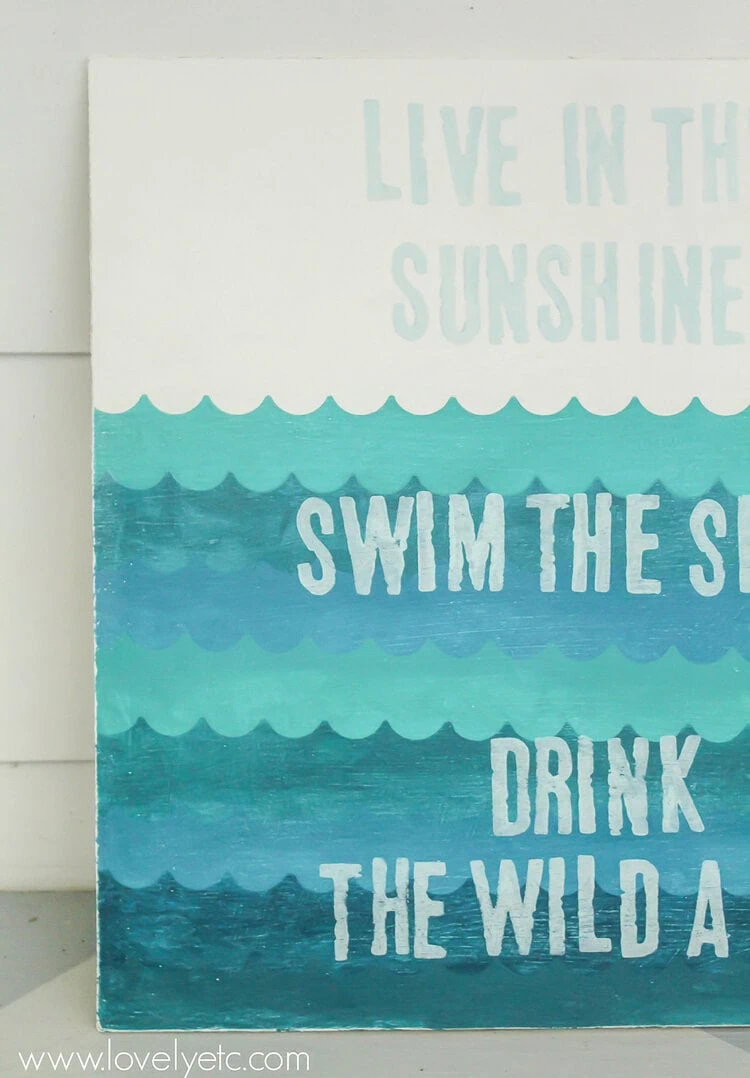
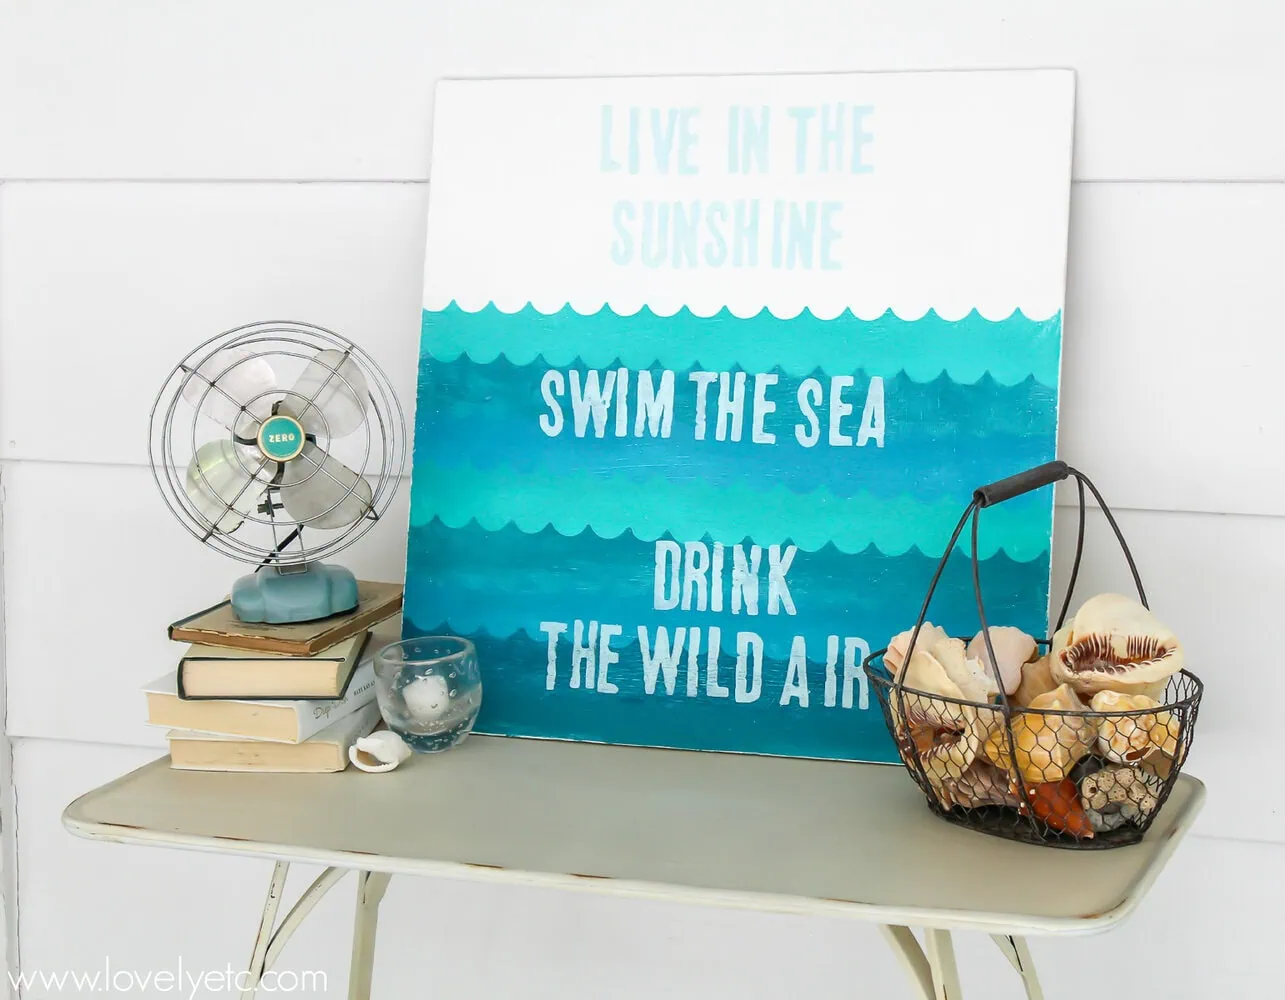
A couple of years ago I painted a wooden sign using one of my favorite quotes by Ralph Waldo Emerson. “Live in the Sunshine, Swim the Sea, Drink the Wild Air.” Which happens to perfectly express my plan to make this the best summer ever.

I loved that simple sign, but sadly, I sold it back in the days when I could more easily convince myself to part with the things I created. Ever since then I have been meaning to make another for our own home…but of course it couldn’t look exactly the same.
Who wants to make the same thing twice? So I put a little twist on it. And I love, love, love this latest version.
This post contains affiliate links which means if you make a purchase after clicking a link I will earn a small commission but it won’t cost you a penny more. Click here to see my full disclosure policy.

This sign was super easy to make. I started with a 2’ x 2’ square piece of plywood. You can pick one of these up precut at your local home improvement store for $5–$10. (Pay attention to the grain of your plywood; they carry some plywoods with a very heavily textured grain and others that are quite smooth. Just know that the more heavily grained wood will give your sign a more rustic look).
I primed my plywood and painted it white.
Then the fun began. I gathered up my Frog Tape Shape Tape, my alphabet stamps and all of my various turquoise and aqua paints (a borderline embarrassing amount as I shared on Instagram).
The awesome part about using FrogTape’s Shape Tape for this project is painting the waves is sooo fast and easy. I was able to paint the entire thing in a matter of minutes.
Update: It seems FrogTape no longer makes their Shape Tape and it is super difficult to find these days. Another quick and easy way to get a similar look is to use a scallop stencil like this one. Or you could use a wave stencil like this one for a great artistic look.
Put a piece of scallop shape tape across your sign about one third of the way down from the top. The bottom of this piece of tape is going to form your first wave. I chose to paint under the shape tape all the way to the bottom of my sign to give my wave colors a little more depth.
I was really happy when I pulled up the tape to see my lines were really crisp with no bleed through to deal with.

Position another piece of tape a few inches below the top of the waves and paint a second turquoise color below that piece. You don’t have to paint each wave all the way to the bottom but you do want to make sure you paint enough that it will cover the entire area above your next wave.
The thing that makes this super easy and fast is that the sea is all about imperfection. You don’t need to worry about your tape being perfectly straight or your paint covering everything completely. I just painted one coat of each color and I love how the colors underneath peak through.
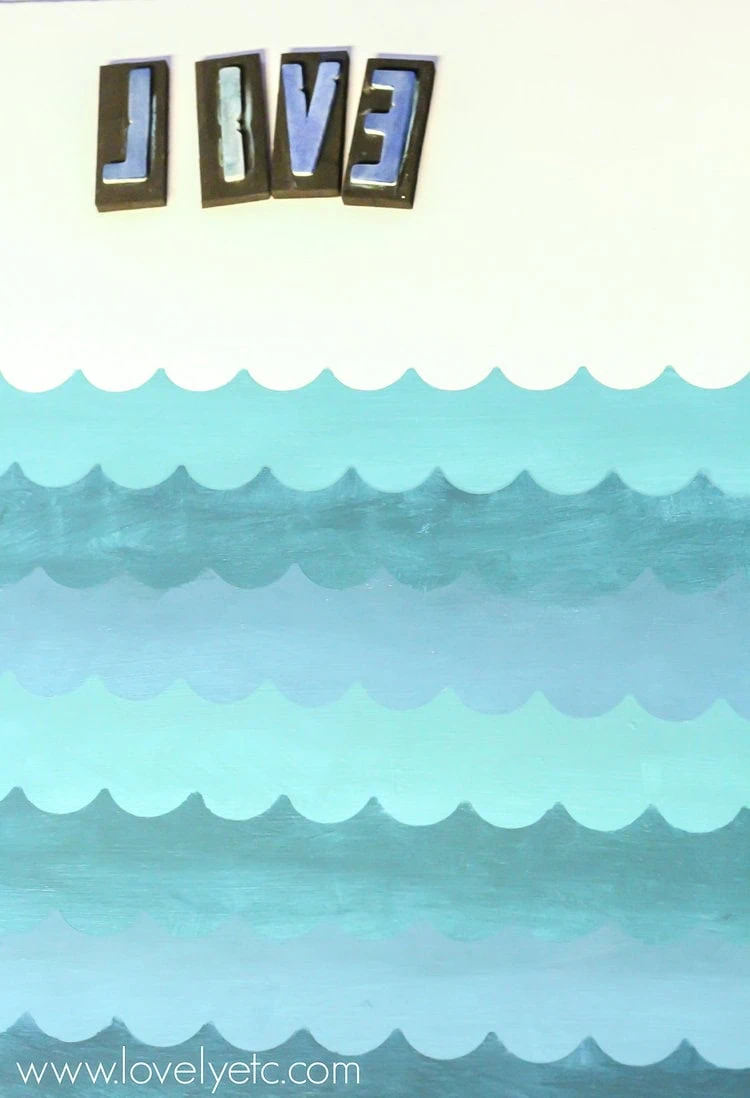
Once all the waves are done, it is time for the words. I used my favorite alphabet stamps with a very light blue paint for the letters.
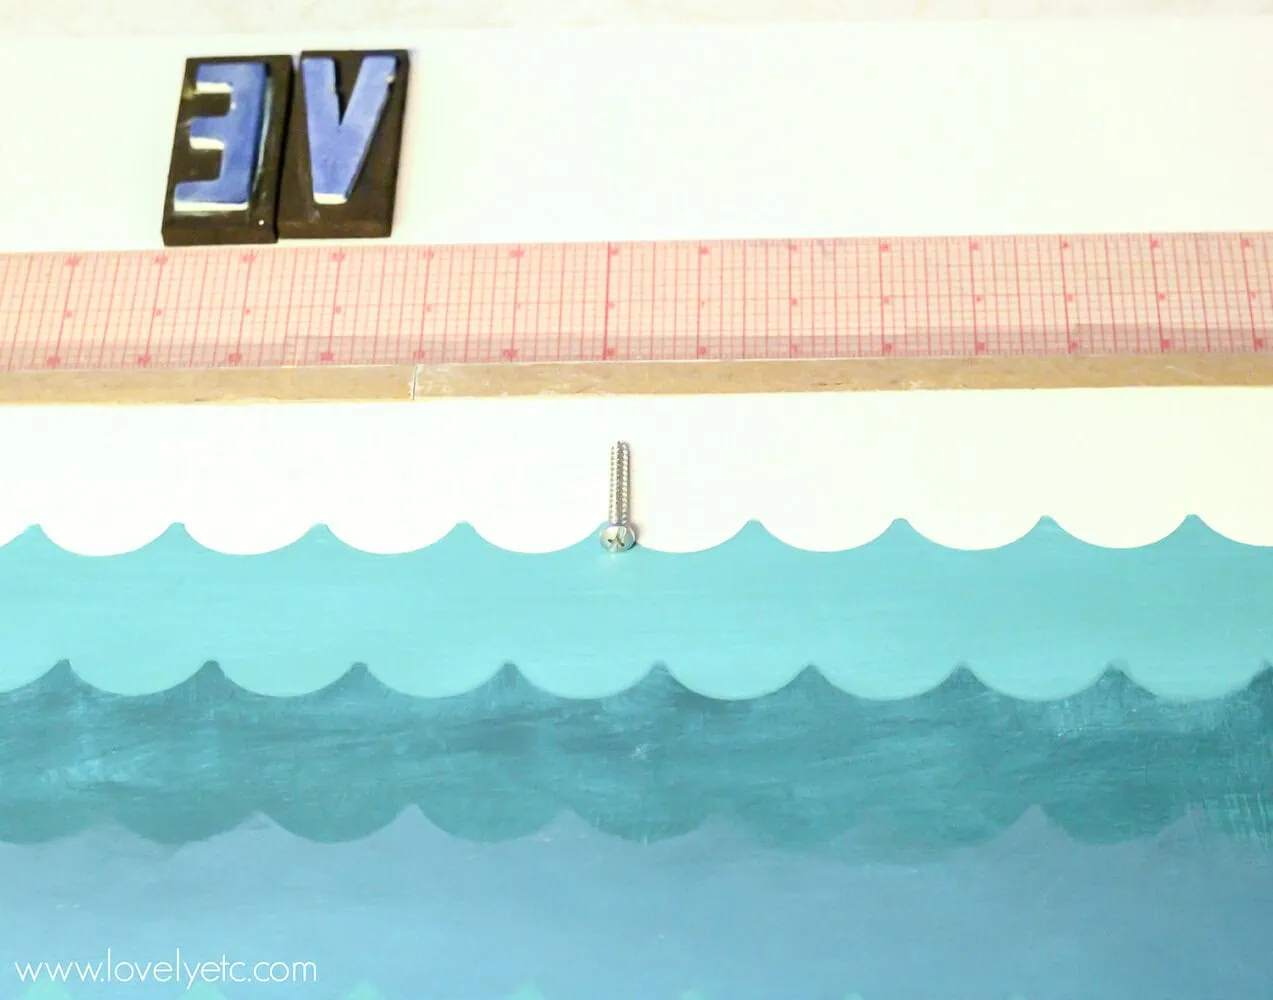
Even though the words don’t need to be perfect either, it is nice if they are more or less centered and straight. To do this, I taped a ruler to the sign to be my straight edge and measured to the center of the board (which I marked with a nearby screw). I started by stamping the center letter of the first line at the center mark and went from there.
And, as always, I couldn’t resist a light sanding at the end to bring out the texture.
Did I mention I love it? Although it does have me yearning for a trip to the ocean. I decided earlier this week that I will get to the beach this year – even if I end up driving five hours each way for one afternoon on the shore. My soul needs to hear those waves and feel that breeze.
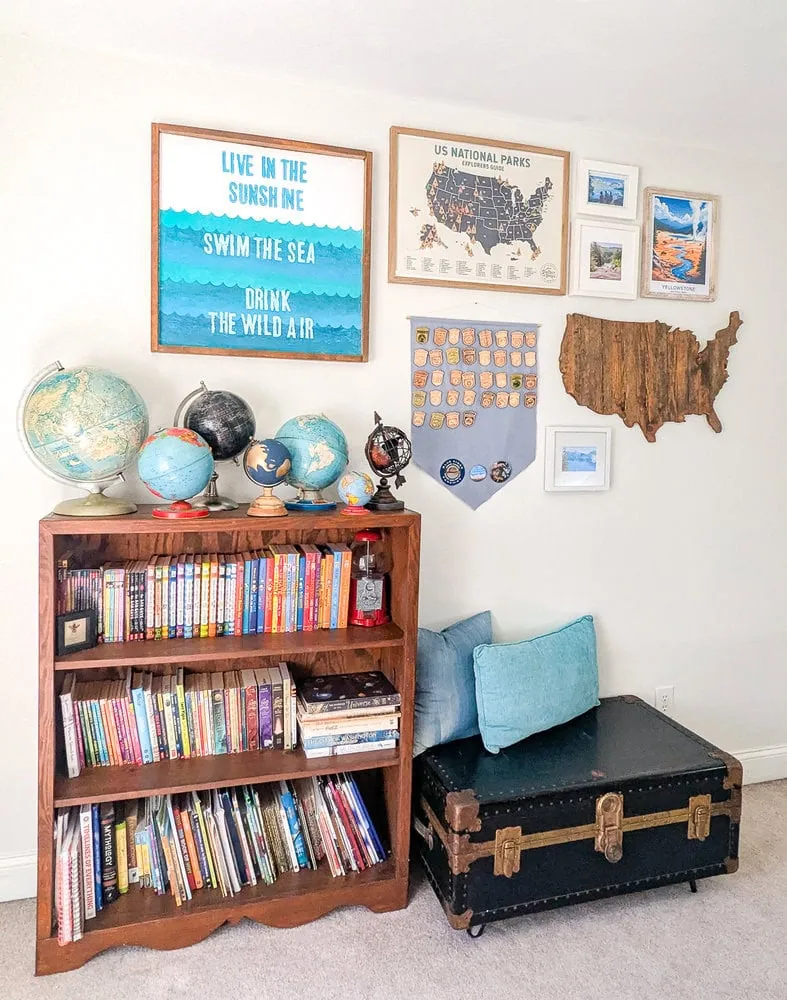
I’m thinking this sign may kick off a new gallery wall in the family room. But until that happens, I just had to play around with it and see how it looks with some of my favorite summer accessories.
Update: It’s been over ten years since I first painted this sign! In that time, I added a wooden frame, darkened the top line of text, and it has hung in a few different rooms in our home. It’s currently part of a gallery wall in my oldest son’s room and I’m still loving it!

I really, really like your new version! May I ask where you got your alphabet stamps? Those are really cool…what size are they?
I haven’t been to the beach in forever! Not this summer either, I’m afraid.
Thanks Cecelia! I actually got my stamps at an estate sale. They are by Making Memories and each letter is 2 inches high. They seem to be discontinued now but I have seen them on ebay a few times. There is also a similar stamp set for sale on Etsy -https://www.etsy.com/listing/109183908/giant-distressed-alphabet-rubber-stamp?ref=related-0
Awesome shape tape!! I had no idea!! Thanks for sharing and your sign turned out beautifully!!
Thanks Elizabeth! The shape tape really is pretty cool.
So cute — love the colors! Love that the tape comes in different designs/shapes :)
Thanks Kelly! You can’t go wrong with turquoise!
This is seriously SO cute & creative! Love that quote too!
Thanks Danielle!
Oh emm gee – I love this! The colors are especially awesome!
Thanks Amy! Turquoise is definitely my thing!
Love it and that tape will make it much easier for me!
Thanks Debbie! The tape definitely helps!
I LOVE this! It’s so pretty and the colors are so fun. I had no idea that the tape even existed. Love the scallops!
Thanks Alyson! Scallops are definitely awesome!
Love this cute project. I’ve used Frog Tape for a few projects and love it!
Thanks Paula! FrogTape is pretty awesome stuff!
Love this, Carrie! So calming!
Thanks Kristi! It is definitely a good reminder to me of what I want my life to be like. :)
I love this idea! I have a big square cut out of our drywall in the basement that leads to the crawl space so we couldn’t drywall over it. I want to add something like this to cover it up. I’ve even thought about chalkboard paint. Thanks for the tip on the grain and texture of the plywood, I don’t want to end up with the wrong one!
Sami, a big wooden sign would be an awesome way to cover the hole! Plus the best part is you can personalize it with any sayings or colors you want to go with your room!
I LOVE this – it’s absolutely gorgeous! Pinning for sure to have it in my “repertoire” when we finally move and I’m ready to start decorating. Thanks so much for sharing – found you at the Retreat link up!
Thanks Kelly! I bet you will have your house practically all decorated when you move!
Such a pretty sign and reminder to enjoy the summer! Thanks for linking up with The Creative Collection, I hope you’ll join us again tomorrow! :)
Thanks Mariah! I adore summer and definitely want to remember to enjoy every minute. This sign is the perfect reminder.
This came out so beautiful! Thanks for sharing. Hello from the Creative Collection Link Party!
Thank you Melissa!
Beautiful and original ideas for the home!
Thanks!