How to make cute DIY farmhouse Christmas ornaments
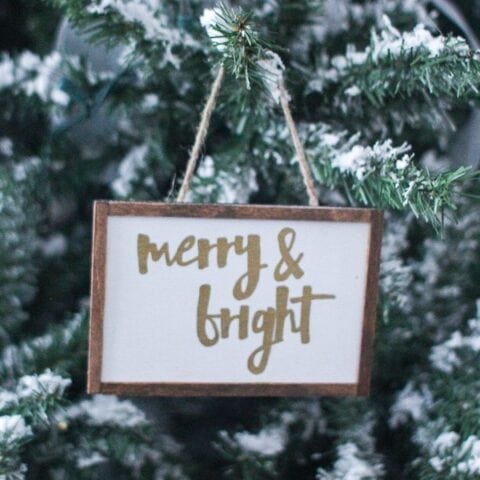
These adorable DIY farmhouse Christmas ornaments are quick and easy to make. They look just like mini wooden signs and chalkboards and are perfect for decorating your tree or giving as gifts.
One of my favorite Christmas traditions is making a few handmade Christmas ornaments to add to our tree every year.
This year I made a batch of farmhouse Christmas ornaments based on one of my favorite things to decorate with – painted wooden signs.
I decided a group of mini wooden sign ornaments would make the perfect addition to our Christmas tree.

And as an added bonus, I’m teaming up with a bunch of other crafty ladies to share 31 days of handmade Christmas ornaments. So you not only get to check out my take on modern farmhouse Christmas ornaments, you also get to see a bunch of other really creative ornament ideas at the end of this post.
But first, the tutorial for these cute little ornaments.
This post contains affiliate links which means if you make a purchase after clicking a link I will earn a small commission but it won’t cost you a penny more. Click here to see my full disclosure policy.
Materials for DIY Farmhouse Christmas Ornaments
- small 3″x5″ wood rectangles – I found mine at Michael’s with the wood pieces, but these from Amazon are similar
- small wood craft sticks – to make the frames, these are often labeled as ‘skinny craft sticks’
- printout of text – you can design your own or download the ones I used below
- paint – I used cream and dark gray craft paints, chalk paint or leftover latex paint will also work just fine
- pencil or piece of chalk
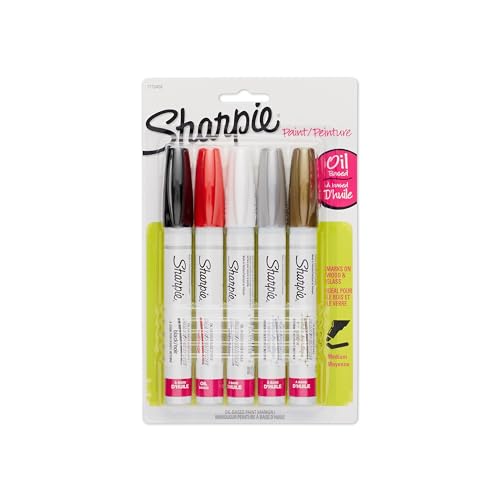
- Sharpie oil paint pens – I used white for the chalkboard style signs and gold for the white signs
- sturdy scissors
- Stain and rag to apply it
- small paintbrush
- white craft glue or wood glue – for attaching the frame
- twine – for hanging your ornament
How to make DIY Farmhouse Christmas Ornaments
Guys, these are super easy and inexpensive to make, especially because the rectangles of wood are already cut for you!

Paint the signs.
First, paint the wood whatever color you chose. I did some with a dark charcoal gray to mimic the look of a chalkboard.
I painted the others with a creamy white.
Make the frames.
While the paint dries, you can cut your wood sticks to size to make the frame.
So, I have a confession to make. I cut all of my little pieces with my jigsaw and then I realized they are basically skinny popsicle sticks.
I could totally have just cut them with scissors! I just might be addicted to my power tools.
Ok, so once you cut your sticks, use a rag to stain them. This goes super fast because they are so tiny.
Easy trick for lettering the signs.
I’ve got a few tricks to share for getting gorgeous writing on your signs. If you have awesome handwriting and confidence that you won’t mess up, grab your paint pens and go for it. But for the rest of us, there’s a super simple way to get perfect lettering.
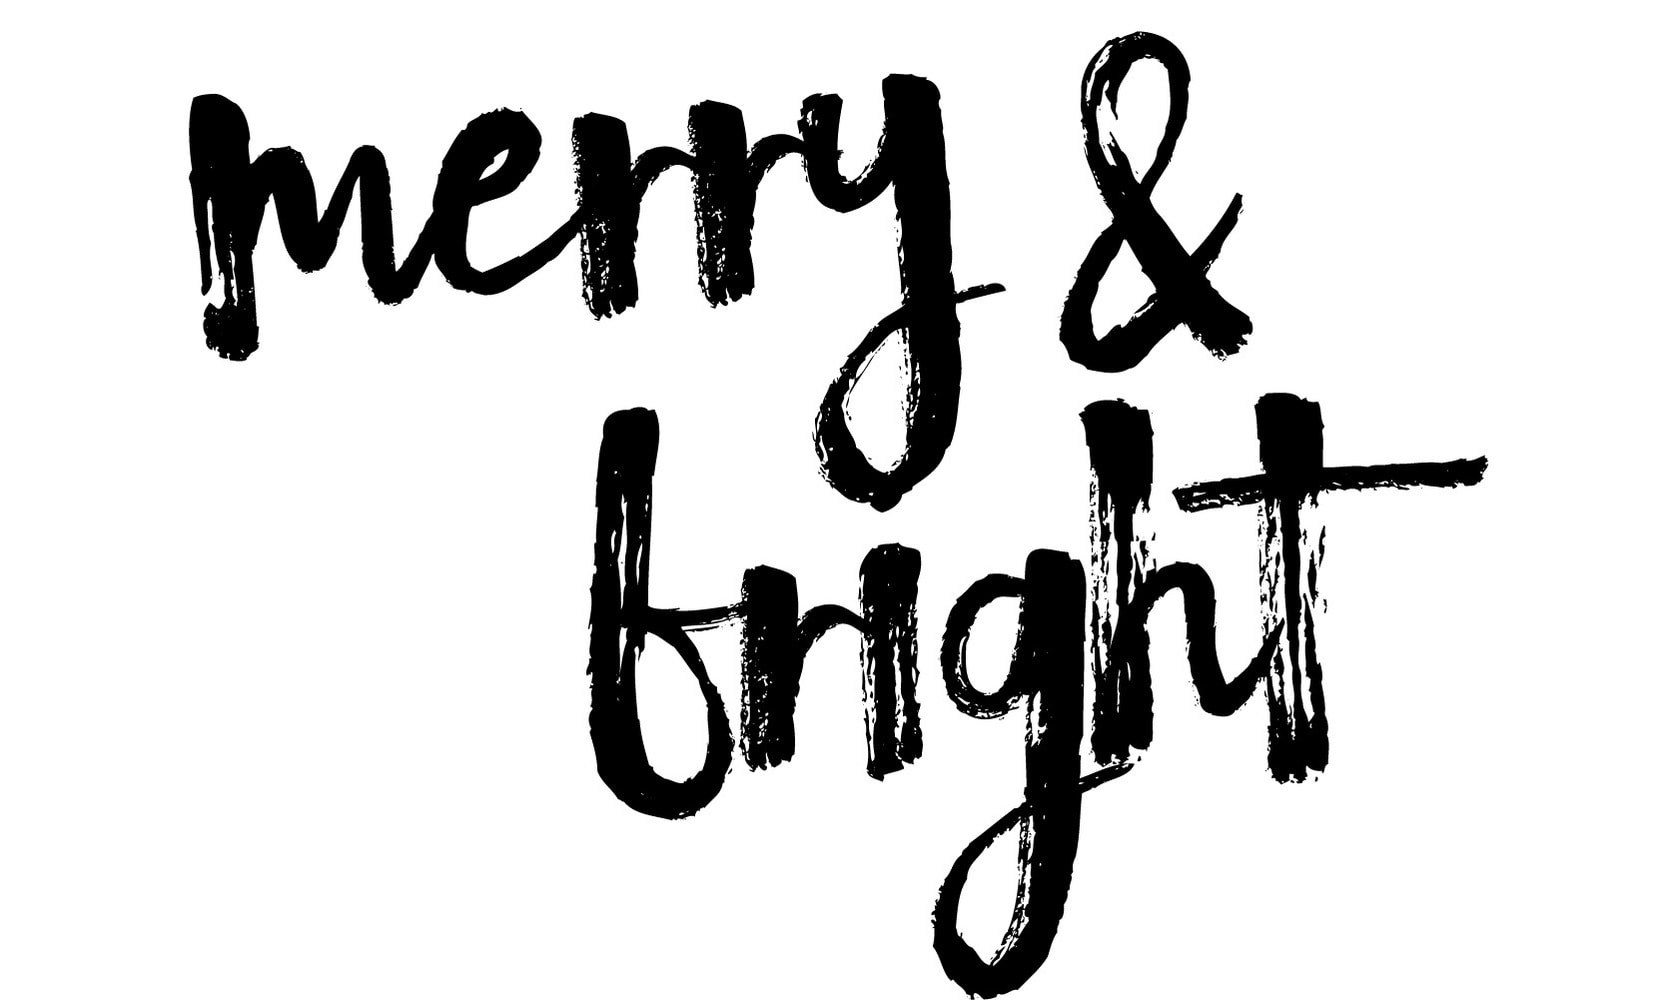
Simply print your design out in whatever font you choose.
If you want to use the same designs I used, you can download them here:
Or you can easily print out any other design you choose. These ornaments would also be beautiful personalized with your family’s names.
Rub the back of the printout with chalk if you are making a dark sign or pencil if you are making a white sign. Tape it to your painted wood and trace the letters with a sharp pencil.
Remove the paper and the design will be perfectly transferred to the wood surface.
(If you want a little more explanation of this step, I have a full tutorial for transferring designs to wood here.)

Then fill in the writing with a paint pen and you are good to go.
I’m a big fan of Sharpie oil paint pens. I’ve used other brands and some of them don’t work well on wood or dry out after only a few minutes.
The Sharpie oil pens write on almost anything and the gold paint pen I used has been in my drawer for almost a year and still worked like it was new.
Just make sure to use the oil type, the water ones don’t work as well on things like wood.

Attach the frames.
Glue the pieces of your frame right on top of the front edges of your sign. It helps to use a few pieces of tape to hold them in place until the glue dries.

Cut a small piece of twine and glue it to the back of your ornament. Hang and enjoy!


I’m so happy with how these turned out! I think they would also look adorable added to a simple wreath or as a special name tag on a wrapped gift.
I’ve been trying to choose a favorite but it’s a tough call. I love how the dark ones look like mini chalkboards, but I think the white and gold color combo is beautiful.


Easy DIY Farmhouse Christmas Ornaments
These easy DIY farmhouse Christmas ornaments are some of my favorites! They are quick and easy to make using the attached free printables and will look gorgeous on your Christmas tree or as the finishing touch on a wrapped gift.
Materials
Tools
- Pencil or piece of chalk
- Scissors
- Small paintbrush
- Rag or foam brush to apply stain
Instructions
- Paint the wood rectangles white, gray, or another color of your choosing.
- Cut the wood sticks to size for the frames.
- Use a rag to wipe stain onto the frame pieces.
- Print the designs you want to use for your ornaments. You may use the free printables linked in the Materials list or create your own.
- For ornaments with a dark background, rub a piece of chalk all over the back of the printout of your lettering. For ornaments with a white background, color with a pencil all over the back of the printout of your lettering.
- Tape the printout to the front of your ornament face up, so that the chalk or pencil side is touching the wooden ornament. Trace the letters with a sharp pencil. Remove the paper and the design will be transferred to the painted surface below.
- Fill in the lettering on your ornament with a paint pen in your choice of color.
- Glue the frame pieces directly onto the front of your signs.
- Glue a loop of twine to the back of each ornament.
Recommended Products
As an Amazon Associate and member of other affiliate programs, I earn from qualifying purchases.


Ready to see lots more fresh ornament ideas? Here’s the mother lode!
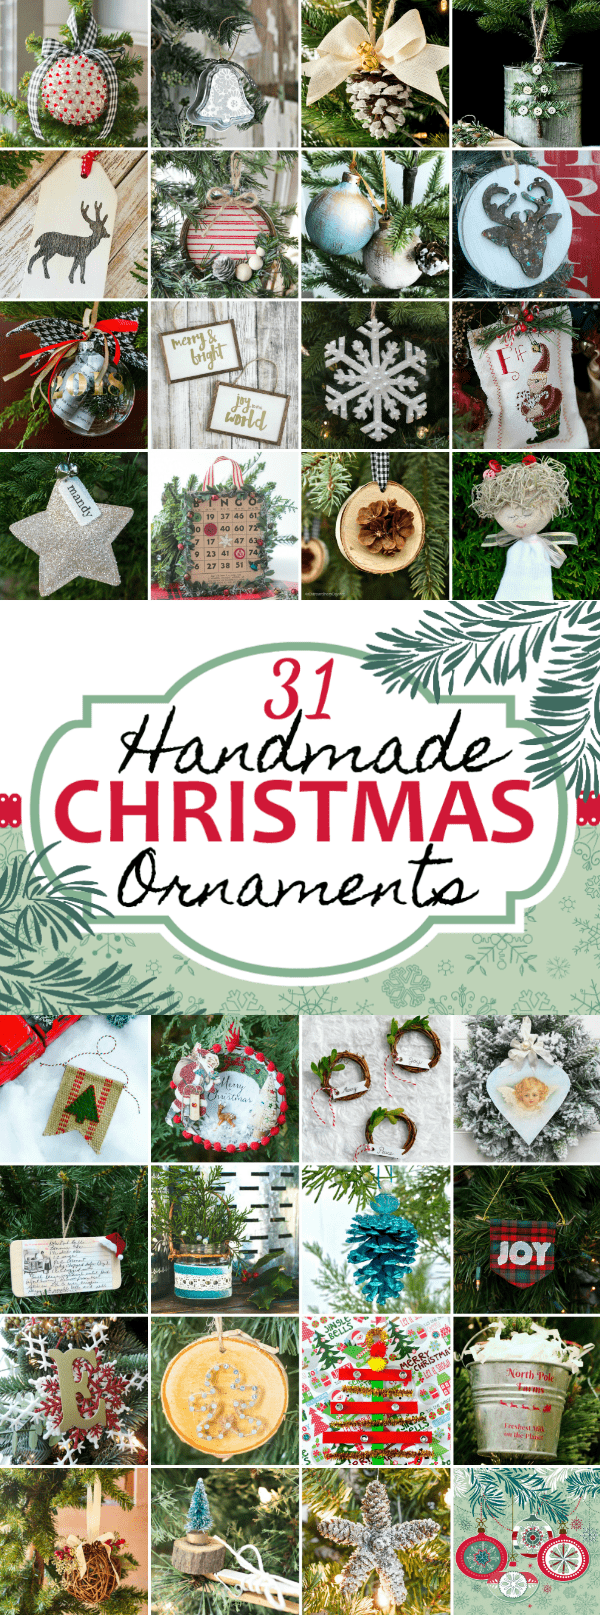
Find each ornament at the links below:
Day 1 – Pet Scribbles | Day 2 – Yesterday on Tuesday
Day 3 – Cupcakes and Crinoline | Day 4 – An Extraordinary Day
Day 5 – Celebrating Everyday Life | Day 6 – Hunt and Host
Day 7 – Love of Home | Day 8 – Celebrate Creativity
Day 9 – Petticoat Junktion | Day 10 – What Meegan Makes
Day 11 – Atta Girl Says | Day 12 – Sweet Pea
Day 13 – Exquisitely Unremarkable | Day 14 – Imparting Grace
Day 15 – In My Own Style | Day 16 – 504 Main by Holly Lefevre
Day 17 – Inspiration for Moms | Day 18 – The Chelsea Project
Day 19 – I Should Be Mopping the Floor
Day 20 – My Uncommon Slice of Suburbia | Day 21 – Hearth and Vine
Day 22 – Shabby Art Boutique | Day 23 – Remodelando la Casa
Day 24 – Domestically Speaking | Day 25 – Swoodson Says
Day 26 – Stone Gable | Day 27 – My Creative Days
Day 28 – The Crafting Nook | Day 29 – Knick of Time
Day 30 – Lovely Etc. (that’s me!) | Day 31 – Live Laugh Rowe
I’d love for you to pin this post on Pinterest!


I love what you created! These are going to look great on your tree this year.
Thank you so much Paula!
Okay, these might be my favorite of the whole month’s worth of ornaments! I LOVE these, and I never would have thought of using those little sticks like that. I’ve pinned this to my Christmas board, and I’m going to be using your tutorial. Thank you for a wonderful idea!
Thank you so much Richella! Honestly, I really love them too and want to make a bunch more!
Every year I look forward to your ornaments, and you’ve done it again. I adore these!
I hope you’ll come share them a Talk of the Town on Tuesday evening. I’d love to feature them!
Thank you so much Angie!
These are super cute and I love that you can use them anywhere in the house. They would also be perfect for adorning gifts, so you would be giving a gift with the gift. Fun!
Thanks Patti! I love the idea of these on a gift – like an extra little surprise!
Cutest little farmhouse Christmas signs!
Thanks Maryann!
Oh my goodness, I am in love with these! So beautiful!
Thank you Kristin!
I adore everything chalkboards and fonts. These two ornaments are just my style. Thanks for the great tutorial, too.
Thank you so much Diane!
Love. Love. Love these!! Carrie… I think I need to make some with the chalkboard look for my tree. It seems I’m going to have a hint of a black and white theme so these would be perfect. Thank you so much for sharing HOW to make the lettering. I stink at this modern calligraphy style so your tip is fabulous. Thank you!
Thanks for joining in the fun, again, Carrie! It’s a blessing ALWAYS to have you hopping with us! xo
Thanks Diane! I love the idea of a black and white theme for your tree – can’t wait to see it! And thank you so much for putting this hop together and inviting me. I always end the month feeling so inspired for Christmas!
Well, these are just the sweetest! Perfect!
Thank you Kim!
These are great and thanks for the oil pen tip!
Thanks Kim!
I want a tree covered in these, I love them!
Thank you Stephanie! I want a tree covered in them too!
So cute and perfect for Christmas Trees and more
Thanks Mary Beth!
Wow! They are so beautifully crafted. Thanks for sharing :-)
Thank you so much!
So many wonderful adorable gifts to make for loved ones, including friends. Can hardly wait to start making.
Have to get some supplies then off I go.
We are getting a new bed/mattress very soon so we need to get our room ready and there’s lots to do to freshen it up, get it ready, so exciting for us. Have had our old bed for about 20 yrs. We’re downsizing mattress and bed size to queen. Figure whatever we get now will surely last us rest of our lives, we’re 76 and 77, ya think, lol.?.
So glad you bloggers shared your incredible ornaments so we can be prepared. So great the ones I picked are inexpensive and quick to make, necessary element so thanks.
Happy daze
Thanks JaneEllen! Good luck with your bedroom refresh – I really want to freshen up our room next year too.
What craft store did you get the rectangles at? I’ve been to Hobby Lobby and Michaels, but haven’t had any luck!
I am 90% sure I got them at Michaels a few months ago. Maybe they don’t carry them anymore which stinks. I did some searching online and I found something that looks very similar on Etsy and Ebay. You do have to pay shipping but both shops say you can combine shipping so you should be able to get several for a reasonable price. Etsy: https://www.etsy.com/listing/225157837/rectangle-laser-cut-out-unfinished-wood
Ebay: https://www.ebay.com/itm/Rectangle-Unfinished-Laser-Cut-Out-Wood-Shape-Craft-Supply-BSC11/322390014060?var=511351096740&hash=item4b0ff1386c:m:mhqRr180DEIwuq5ESUiSrrA Sorry you had to run all over, I hate that!
Oh, I love these! The perfect project to use the pieces from the scrap pile, which means free! :)
Yes, free is always the best price!
Love these! Can you share the size of the wooden rectangles that you used?
Leslie, they are around 3 inches by 5 inches.
I love these & want to make for my craft nite! What size were the wood pieces- it looked looked like Etsy had several different sizes. Thanks!
Sorry for the late reply – I hope it isn’t too late for your craft nite. The wood I used was around 3 inches x 5 inches. I was recently in Michaels and saw they had them in stock there as well.
I just love these and I’m saving this idea for next year! Thanks for the inspiration! Pinned!
Thank you Susan! These are definitely some of my favorite ornaments.