DIY Mini Mason Jar Christmas Ornament
Learn how to make an adorable DIY Mini Mason Jar Christmas Ornament with this easy tutorial. The vintage aqua color is so pretty!
I adore my aqua mason jars. Adore.
I also happen to love anything tiny. (Oh how I wish I had a fancy doll house with tiny little furniture as a child!)
So creating a little tiny aqua mason jar ornament to hang on my Christmas tree seemed like the perfect idea.

This post contains affiliate links which means if you make a purchase after clicking a link I will earn a small commission but it won’t cost you a penny more. Click here to see my full disclosure policy.
Materials
- clean baby food jar – you could also use the jars from oui yogurt.
- white school glue
- blue and green food color
- water
- small bowl or plastic cup for mixing
- gray and black paint – small acrylic craft paints work great for this, but any leftover paint you have on hand will also work
- paintbrush
- craft wire – for creating the jar handle
- wire cutters
How to Make a Mini Blue Mason Jar Ornament
I started out with an empty baby food jar.
It’s getting a bit harder to find little baby food jars these days as more and more baby food is packaged in plastic, but there are still jars to be found.
If you don’t have baby food yourself, you can always ask if any friends of family have empty baby food jars hanging around. And the small jars Oui yogurt comes in would also work well.

The first step was turning it the perfect shade of aqua. I got some help from this tutorial by Craftberry Bush to create my perfect aqua coloring.
In a small bowl, mix together one teaspoon of white glue (like school glue), one and a half teaspoons of water, 2 drops of blue food coloring, and 1 drop of green food coloring.
Pour a very small amount of this mixture inside your jar and slowly swish it around to coat the inside.
Set your jar upside down on several paper towels and let it dry.
It will take awhile to dry – it took my jars a full day and night to really get dry. (Which makes me think I may have gone a bit overboard with the amount of coloring I put inside.)
One word of warning – this type of coloring is not permanent. It will wash out with water.
Which is great news if you mess up and need to start over. But not great if you want to put flowers or something inside.
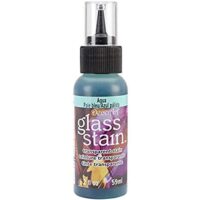
If you would prefer a more permanent coloring you can use a transparent aqua glass paint like this.

While the jar is drying, paint the lid with a couple coats of matte gray paint. Either craft paint or chalk paint works well for this.
When that dries, dry-brush a little matte black paint onto the lid and then wipe off the excess with a clean cloth. This gives a beautiful aged metal look.
To make the little handle, I just bent a piece of wire to make a loop around the top of the jar and then bent it over to create the handle, twisting the wires together on the opposite side.

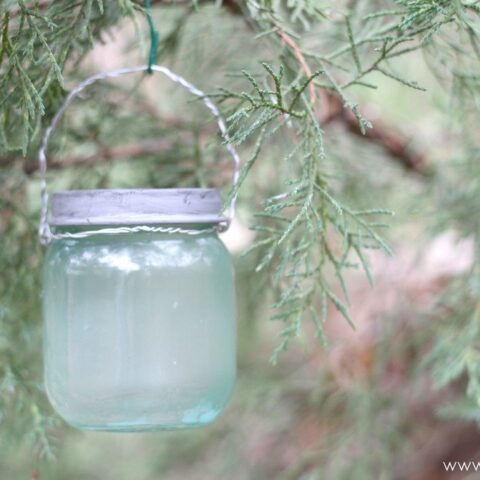
Slip the handle onto the tiny jar and then screw the lid on and you have the perfect little vintage inspired ornament.

I wanted so badly to add the “Ball” logo to this jar so it would match my real Ball canning jars, but it didn’t work out. I tried several different methods including using hot glue to spell it out, but nothing looked authentic. So in the end I left it logo-less.
But I still love it anyway – even if it isn’t name brand!
And now for my fabulous co-crafters’ handmade ornaments. As always, there are some amazing ornaments in this group. Seriously, that little car snow globe ornament is perfect!

Yarn Ball Ornaments | All Things G&D * Wood Burned Snowflake Ornament | Cherished Bliss * Vintage Jello Mold Ornament | Whats Ur Home Story * Simple Popsicle Stick Sled | Serendipity Refined * Mini Mason Jar Ornament | Lovely Etc. * Snow Globe Ornament | It All Started With Paint * Wispy Feather Ornament | The Happier Homemaker * Pom Pom Wreath Ornament | Remodelando la Casa * Hardware store Christmas Tree Ornament | Thrifty and Chic * Burlap and Reindeer Ornament | Bigger Than The Three of Us * Glitter Polka Dot Glass Ball Ornament | May Richer Fuller Be * Deer Head Ornament | Mom 4 Real
DIY Mini Mason Jar Christmas Ornament
Create a little tiny aqua mason jar to hang on your Christmas tree with this simple tutorial.
Materials
- Clean Baby Food Jar
- White School Glue
- Blue and Green Food Color
- Water
- Small bowl
- Gray and Black Craft Paints
- Wire
Tools
- Wire Cutters
- Paint Brush
Instructions
- Mix together 1 tsp of white glue, 1 1/2 tsp of water, 2 drops of blue food coloring, and 1 drop of green food coloring in a small bowl.
- Pour a small amount of this mixture inside your jar.
- *Slowly swish it around to coat the inside.
- Place your jar upside down on several paper towels to let it dry.
- While the jar is drying, paint the lid with two coats of matte gray paint. Let dry.
- Dry-brush a little matte black paint onto the lid. wipe off excess with a clean cloth.
- Bend a piece of wire to make a loop around the jar top and twist the wires together to make the handle.
- Slip the handle onto the jar and screw the lid.
Notes
*This type of coloring is not permanent. It will wash out with water. If you would prefer a more permanent coloring you can use a transparent aqua glass paint.
Recommended Products
As an Amazon Associate and member of other affiliate programs, I earn from qualifying purchases.
Want even more DIY ornament inspiration? You can see all of my DIY ornament tutorials right here.

This is so cute, Carrie! I can’t believe how authentic both the jar and lid look. Well done!
Wow, this is really cool! I wonder if this idea would be good on old vases (just to use as decor). You got me thinking!!
Thanks Ashley! Could definitely work with old vases!
So many things to comment about on this post! First, congrats on your new contributor job at Domestically Speaking! So well deserved!
Second, I adore all things tiny too and sooooo wish I had a tiny doll house when I was little! I actually stumbled across an odd storefront here in Chicago that turned out to be a doll house maker and I spent hours inside just loving the craftsmanship and tiny adorable-ness of it all!
Finally, you know I’m a crazy mason jar person and this idea is AMAZING!!!
:) Linda
Thank you Linda! I would LOVE to spend a few hours browsing in a real dollhouse shop! I know they are totally impractical – but they are just so magical!
So cute. I think I’ll try them and try to add the Christmas silhouettes
Elaine, sounds like a great idea! I’d love to see it if you do!
Adorable! I love how the color on the jar and lid turned out and hey, congratulations on being a contributor writer over at Domestically Speaking!
Thanks Cristina!