DIY play kitchen from an entertainment center
My son’s DIY play kitchen is finished and it is gorgeous! If only our real kitchen looked this good!

You guys this little upcycled kitchen actually landed me in the pages of Better Homes and Gardens magazine. How crazy is that!
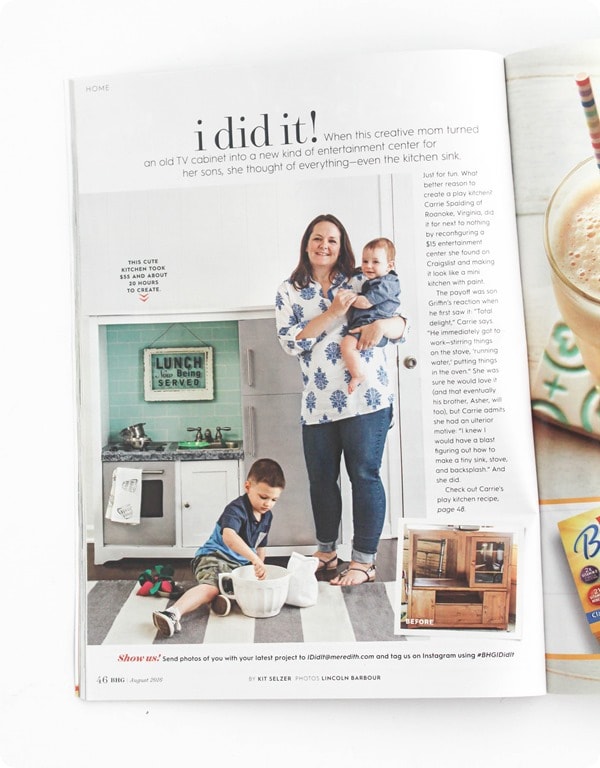
If you want to see what it’s actually like to be a in a photo shoot for a huge magazine, I have lots of behind the scenes details right here. (I also used some of the photos taken at that photo shoot in this post. All photos not taken by me are noted.)
But even better, this was my 2 year old son’s Christmas present and he adores it. He has played with it every single day since he got it (and I’m hoping it’s getting him all ready to do some cooking for me when he gets bigger!)
From Entertainment Center to Play Kitchen
Here is the before – a run of the mill entertainment center we bought off Craigslist for $15. Nothing fancy, but a nice sturdy entertainment center.

There are a few things to keep in mind when choosing a piece of furniture to repurpose as a toy kitchen. First, the whole thing needs to be fairly sturdy – anything a toddler plays with is going to take some abuse. Also, the ‘counter’ height needs to be a good height for your child with a little room to grow. As far as the general shape, you can play around with that by moving and removing drawers and cabinets (which I did) but it helps if you can get a general idea of how the piece will work as a kitchen.
Before I could get to any of the fun stuff, I did a bit of restructuring.

I knew I wanted a fridge and freezer where the tall cabinet was – which meant the lower cabinet needed to line up with the upper cabinet. I also wanted to incorporate a stove. Every entertainment center is different, but mine was pretty easy to take apart and reconfigure.
I removed the drawer and all of the cabinet doors as well as the backing (which had a huge hole cut out for a TV). Then I unscrewed the cabinet dividers on the lower half and moved them closer to the middle to form the fridge and the stove. To complete the fridge and freezer, I used a small saw to cut the edge of the ‘counter’ behind where the fridge door would go and then cut new fridge, freezer, and stove doors from a sheet of 3/4 inch plywood. (I know some of that is confusing, but the picture should help.)

I replaced the backing with a fresh piece of hardboard from Lowes. To keep things easy, I just had them cut it to size in the store.
I used a jigsaw to cut holes for the sink and faucet. I simply traced the shape I needed cut onto the counter using a permanent marker. I used a large drill bit to drill a pilot hole and then slipped my jigsaw blade into that hole and cut out the shape I had drawn.
Then, finally I was able to get to the fun stuff!
Pretty much all of the finishes were created using paint – including the backsplash, countertop, stove top, and stainless steel appliances. You can find all my tricks for creating those here.
The sources and cost breakdown of everything else is listed below. (After a few more beautiful pictures!)
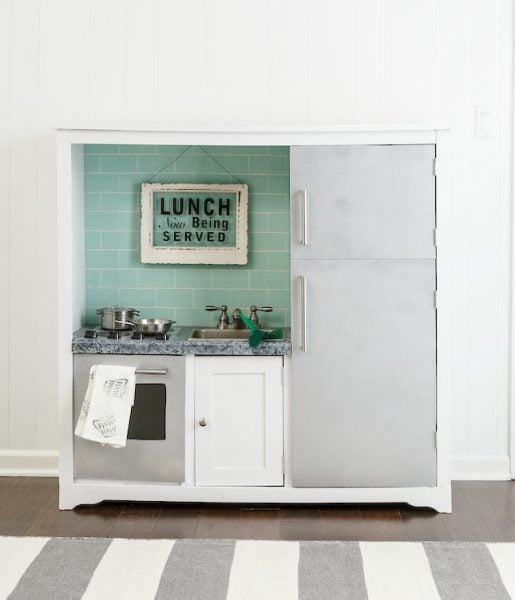
photo by lincolnbarbour.com
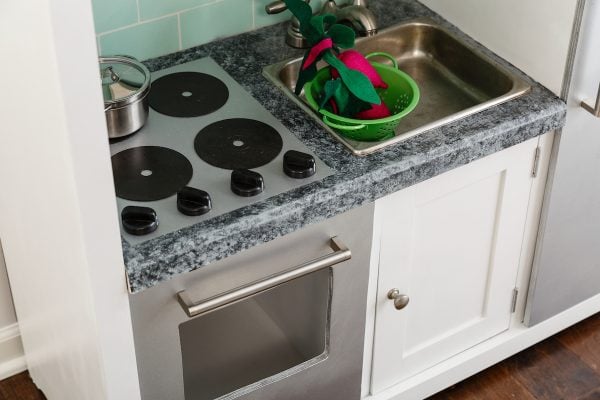
photo by lincolnbarbour.com
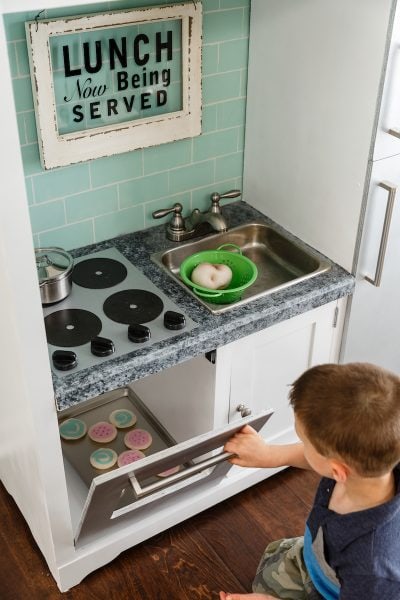
photo by lincolnbarbour.com
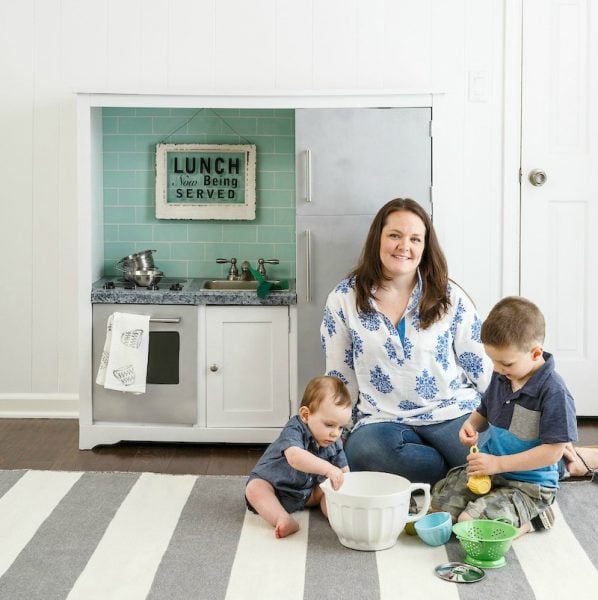
photo by lincolnbarbour.com
Materials and Cost
(Contains affiliate links)
entertainment center – $15 Craigslist
3/4 inch plywood for fridge and oven doors – $15
hardboard for backing – $12
handles for fridge and oven – $2 (As-is section at Ikea)
sink – a stainless steel pan from the Goodwill $.50
faucet – already owned (This is a real faucet I got at a yard sale years ago to use in our bathroom but sadly it wasn’t compatible with our sink. The Habitat for Humanity Restore is a great place to look for something similar).
stove eyes – painted CDs we owned
stove knobs![]() – $4 from Amazon
– $4 from Amazon
hinge for stove – $3
paint for countertop (black, gray, and silver craft paints), backsplash (Laurentien Fusion Mineral Paint), appliances (Krylon Chrome spray paint![]() ), and cabinet (Champlain Fusion Mineral Paint) – already owned, painting tutorials are here.
), and cabinet (Champlain Fusion Mineral Paint) – already owned, painting tutorials are here.
Total: $54.50
(Also, those adorable little metal pots are from Ikea, but you can also find them on Amazon if you don’t have an Ikea nearby.)

And in case you are wondering, my two year old son loves it! It is definitely getting lots of play every single day.
Now to get to work on our real kitchen…
More projects you just might love:
![]()
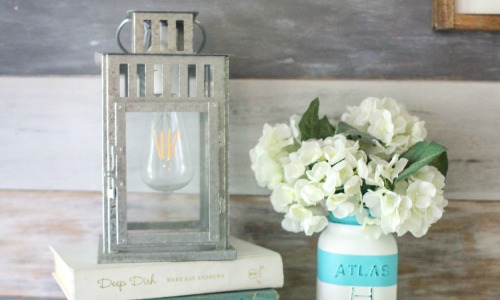
Turn a Candle Lantern into a Lamp

so adorable! i love the backsplash you created!
Thanks Cassie – me too!
carrie this is awesome.. we paid $50 for a plastic kitchen which has fallen apart already… the boys would love this they like to cook like daddy does thanks for sharing xx
Thanks Chris! There were a few times when I questioned why I didn’t just buy a regular toy kitchen but in the end I am so glad I didn’t. I love this kitchen and I know Griffin loves that it looks like the real thing.
Great job!! It’s adorable!
Thanks Kathleen!
This turned out incredible! I would love to make something similar but my daughter is too old!
Thanks Gilly! I am so happy I did it!
Carrie, this is fabulous! What a clever, beautiful project!! You never cease to amaze me!! I’m envious of Griffin!! :)
Thanks Kathi! I am envious too! I need to the grown up version.
This is seriously one of the coolest transformations I’ve seen in ages! You have some lucky kiddos with such talented mama! (pinning it to the BHG DIY board this weekend!)
Thanks Kim! I hope they feel lucky to have me as a mom. :)
I can not tell you how grateful I am that you shared your ideas. I just recently purchased an old desk to use for this purpose. I can’t wait to get started. My great-granddaughter will love it! Thank you.
Wonderful! I am glad my ideas can help! Your great granddaughter is a lucky little girl.
Hi Carrie, we have the exact same entertainment center and are attempting to create this as well! My husband is trying to figure out what exactly you did for the oven. What type of hinges you used, etc…would you mind explaining how you did that part please?
Alexis, How fun! This was a very fun but also frustrating project for me. I figured out the building side as I went and I am not great at explaining it but I will do my best. For the oven, I added a small strip of wood to the frame and then attached the door to it with a long basic hinge. I know that isn’t a great explanation so I took a picture with the oven door open that you can see here – https://www.lovelyetc.com/wp-content/uploads/2015/12/IMG_4154.jpg The door stays closed with a magnetic closure at the top. I hope that helps.
OMG! I’ve been wanting to do this since my daughter was born and finally have some time this summer. I’ve seen the idea several times on pinterest and finally got my hands on a FREE entertainment center… that had a weird lay out.
I couldn’t figure out how to get all the things i wanted (stove, fridge etc)
Until low and behold… your blog with the EXACT SAME ENTERTAINMENT CENTER. I LOVE HOW YOU MOVED EVERYTHING AROUND. I will be using this as a guide. Thank you! It looks great and I hope mine turns out as good as yours!
Lindsay, Yay! How awesome for you that you found a free entertainment center! And funny that we ended up with the same one – it takes a little work, but changing the layout is definitely doable and makes a huge difference. Have fun with your kitchen!
You did an outstanding job on this. I love how it all turned out. My favorite part is the backsplash.
Thanks – I love the backsplash too. I would love to have a backsplash like this in my real kitchen.
This is such a creative project. You got to repurpose an old piece of furniture, and turned it into such a fantastic gift. And knowing that the gift was handmade makes it so extra special, because it’s one of a kind.
Thanks Mary! I totally agree. I love saving things that nobody else really wants and this project was so fun to work on. And now, I’m sure it will be passed down to our grandkids some day!
This is so cool! You did a wonderful job on it! This makes me wish that my girls were small again so I could make them a play kitchen my self. They would of loved it. My small grandkids already have several play kitchen, not repurposed or as cool as this, but I’m sure their parents don’t want another or I would make one. Looks like a fun project!
Congratulations on the feature! That is awesome!
Thanks Linda! I know how you feel – I wanted to make a play kitchen fr years before I actually had kids to play with one. And now I’m dying to fix up an old dollhouse even though I’m not sure my boys would care at all!
What a fun repurposed project!
Thank you DeDe!
Oh if only my girls were little again! I would have so much fun making one of these play kitchens for them. This is soooo adorable!
Thank you Linda!
Sooo cute! I had seen someone else repurposed kitchen that was similar to yours, purchased an old entertainment center, then saw your cute project. Turns out the entertainment center I purchased is almost exactly like yours! Thank you for all the cute ideas! Curious to know what to you used as the stove and refrigerator handles. It saws from the ‘as is’ section in Ikea but what are they??
What great luck that you already have an entertainment center! The stove and fridge handles are long cabinet handles – I think they are often called bar pull handles. You can find tons of options if you google or you can also probably find them at your local home improvement store. The two I used for the stove and fridge are around 9 inches long and the one on the freezer is about 7 inches. I hope that helps!