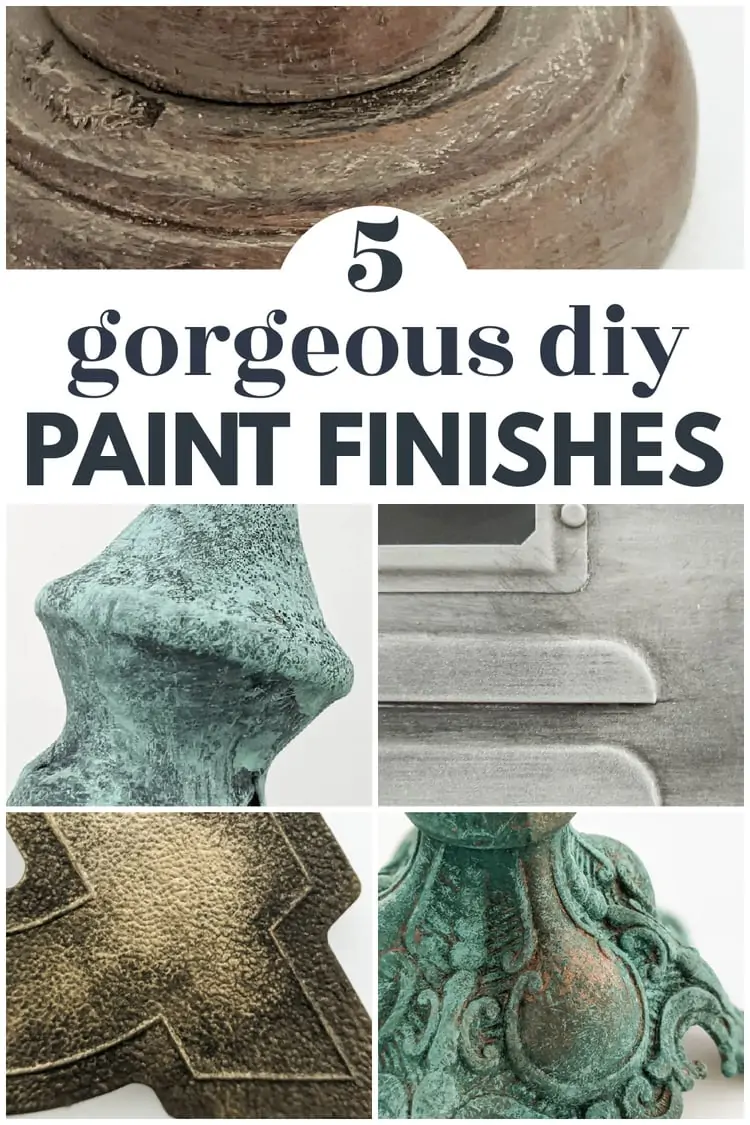
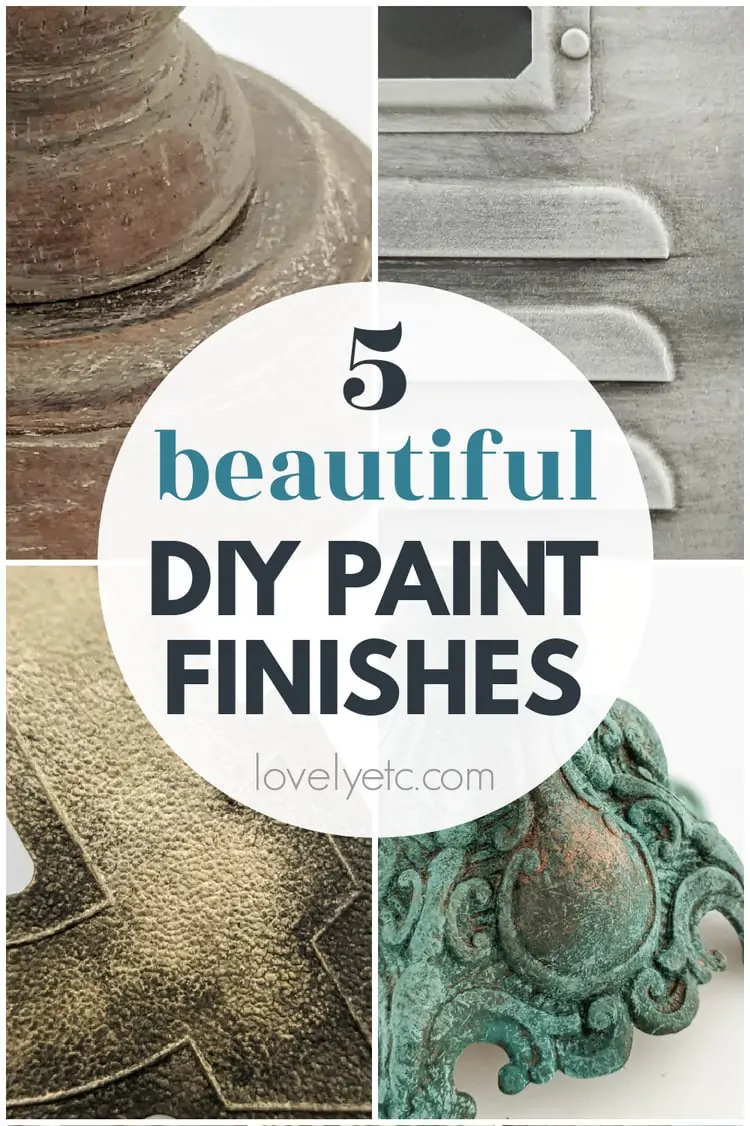
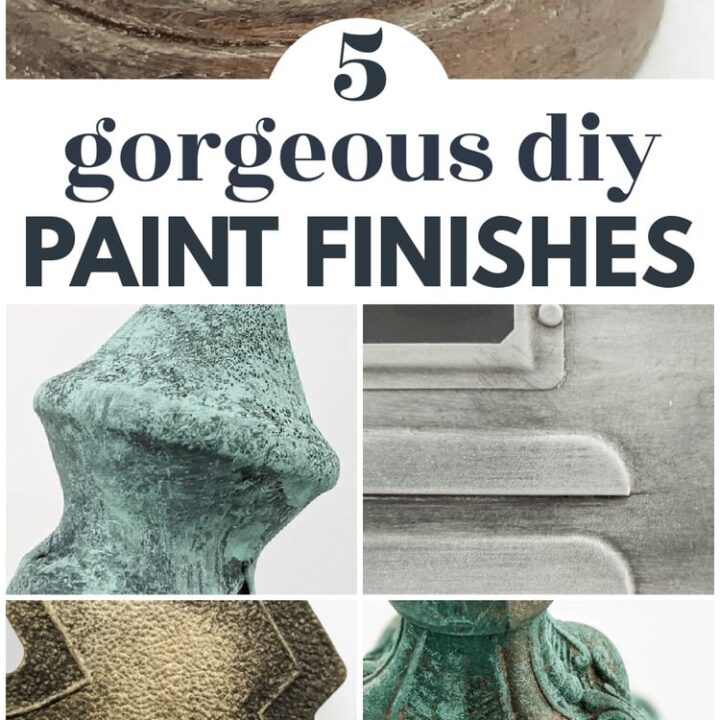
5 Gorgeous Paint Finishes to Transform Your DIYs and Crafts
These five paint finishes with step-by-step instructions make it easy to completely transform your secondhand finds and craft projects. There’s a finish here for every project including vintage metal paint finishes, a weathered wood paint finish, and a copper patina paint finish.
I’m a huge fan of finding unique home decor for dirt cheap at yard sales, estate sales, and thrift stores. I find loads of stuff with potential and a lot of times a fresh coat of paint is all it takes to create something amazing.
Even just a quick coat of spray paint can completely transform things, but when I discovered layered, textural paint finishes, it was love at first sight.
I love how they can give something bland and boring tons of character and make things that are cheap and generic look beautiful and interesting.
Plus, the best thing about layered, textured paint finishes is you don’t have to worry about creating a perfect, flawless finish. The beauty is in the flaws so it is literally impossible to mess up.
And if for some reason, you don’t like how something turns out, you can just keep adding layers of paint until you love it.
So technically, a lot of these layered paint finishes are actually faux finishes.
I feel like faux paint finishes have gotten a bad rap. Faux finishes are so much more than sponge painting and over-the-top venetian plaster.
A faux finish is basically any time you use paint to achieve a specific look. If you distress your paint to look weathered, that’s a faux finish. If you layer several colors to look chippy and old, that’s a faux finish. And if you paint plastic to look like beautiful metal, that’s a faux finish.
Like anything, faux paint finishes can certainly be overdone. But when you learn how to do them right, they can look absolutely amazing.
This week I raided my stash of thrifted treasures just waiting for a makeover. I updated five different items with five different paint finishes – a metal patina finish, a vintage steel finish, a copper patina finish, a farmhouse wood finish, and a vintage brass finish.
And I was able to turn my mediocre thrift finds into real showstoppers.
Even better, I created all five paint finishes using ONLY paint. No waxes, no glaze, no sandpaper, no fancy paint additives. Just paint and a paint brush.
Today I’m sharing all five paint finishes including the exact paints and techniques I used so you can easily replicate them. And I also made a video tutorial of the whole process because sometimes it’s easier to get the nuance when you see it in action.
This post contains affiliate links which means if you make a purchase after clicking a link I will earn a small commission but it won’t cost you a penny more. Click here to see my full disclosure policy.
Paint Finish Basics
Before we get into the specific paint finishes I used, I wanted to share a few painting basics that are important to know. Once you have these basics down, you can combine them into infinite combinations to create all kinds of paint finishes.
Painting Techniques
Faux finishes involve some fun paint techniques. When you are painting something with a smooth, flawless finish, you need to use long, even brush strokes. But when you are creating a faux finish, you get to loosen up and just see what happens.
Dry brushing. Dry brushing is when you load a very small amount of paint onto your paintbrush. Then wipe off any excess paint on a paper plate or paper towel until your brush is mostly dry. When you brush the paint onto your project, paint will cover some areas and leave others bare. If you are painting something with a lot of texture and details, the paint will usually hit the high areas but not settle in the grooves.
Stippling. Stippling is when you dab or pounce the paint onto your project in an up and down motion rather than brushing it back and forth. Stippling is often done with a mostly dry paintbrush, just like dry brushing. This is a great way to add texture and layers to a piece.
Color wash. You can create a color wash by mixing water with any water-based paint. The more water you add, the more transparent the paint will become. When you brush on the color wash, you can create a transparent wash of color over your entire project. You can also use a clean cloth or paper towel to move the wet paint around or blot some of the excess away for a less uniform look.
Wiping. Okay, wiping isn’t really a technical term. But I often use a clean rag or paper towel in combination with any of the paint techniques above. You can use it to remove excess paint, blend paint colors together, soften harsh lines from dry brushing, and wipe paint away to reveal layers of color underneath.
Paint brushes
You can accomplish most paint looks with just two or three types of paint brushes.
- A paint brush for very smooth finishes. I like these paint brushes for getting a really smooth finish. Foam brushes also work well for this.
- A chip brush for distressed, textured finishes. Chip brushes are super cheap and the rough bristles really help add texture when you are dry brushing or stippling paint.
- It may also be helpful to have a few artist’s brushes. I’m not talking about anything fancy. Just a few small paintbrushes for when you are trying to paint small, detailed areas.
Types of Paint
There are many, many types of paint you can use. Choosing the best paint matters a lot when you are painting furniture or cabinets or floors. But when you’re painting crafts and home decor, it isn’t such an important decision.
You can use craft paint, chalk paint, leftover house paint. Just about anything will work, but there are a few things to keep in mind.
- Choose a paint sheen that makes sense for your project. If you are painting something that is supposed to look aged and weathered, it really needs to have a matte finish. Chalk paints always have a matte finish and acrylic craft paints also almost always have a matte finish unless they are labeled as satin or gloss. And if you are painting something to look metallic, you really need to use a metallic paint with some real shine to make it look authentic.
- Choose a paint that will stick to your surface. Chalk paint and acrylic craft paints generally stick to just about anything without primer. Latex house paint and metallic paints do not. If you are going to use a latex paint or metallic paint in your project, it’s a good idea to start with a base coat of primer so your paint has something to stick to. You can also do a base coat of acrylic paint or chalk paint in place of primer. The chalk paint will stick to your project and then the metallic/latex paint will stick to the chalk paint. (Note – this is fine for little home decor projects, but I don’t recommend it for furniture. It likely won’t last well.)
Alright, now let’s see these paint finishes!
Metal Patina Paint Finish
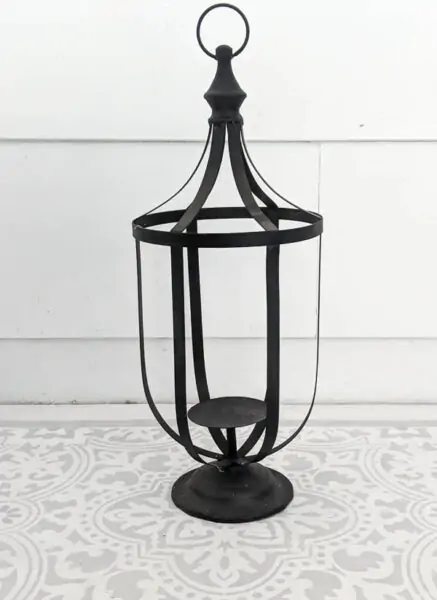
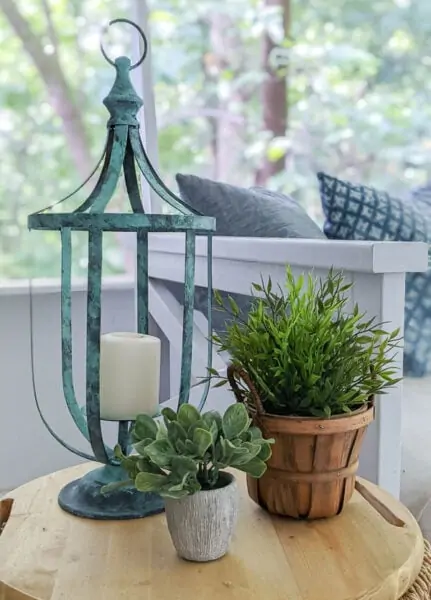
First up is this metal candle lantern I found at a yard sale last weekend for $3. The black finish is fine but it’s pretty generic. I decided to give it a bit more character with a quick and easy 2 step patina.
Paint Colors:
- Light blue-green matte acrylic paint or chalk paint
- I used a mixture of Americana Decor Chalky Finish Paint in Refreshing and Americana Decor Chalky Finish Paint in Keepsake. Dixie Belle Chalk Paint in the colors The Gulf and Mermaid Tail would also work well. Or you can look for craft paints in similar colors.
The Process:
The most important step in this finish is finding the perfect blue-green shade for the patina. I didn’t have quite the color I was looking for on hand, so I mixed two different paints to create the perfect shade. If you aren’t really sure what color to go for, you can find tons of inspiration if you google ‘patina’. Or you can just channel the Statue of Liberty or the old pennies in your change jar.
Since my lantern is already black, I just used the original black finish as my base color. If you are painting something with a color that won’t work, you can start by simple painting everything black or dark gray.
Once you have your paint color ready, use a chip brush to dry brush paint onto your surface. Load a small amount of paint onto your brush, wipe off as much as possible on a paper plate or paper towel and then pounce or stipple it onto your project randomly. The idea is to leave some areas bare of paint.
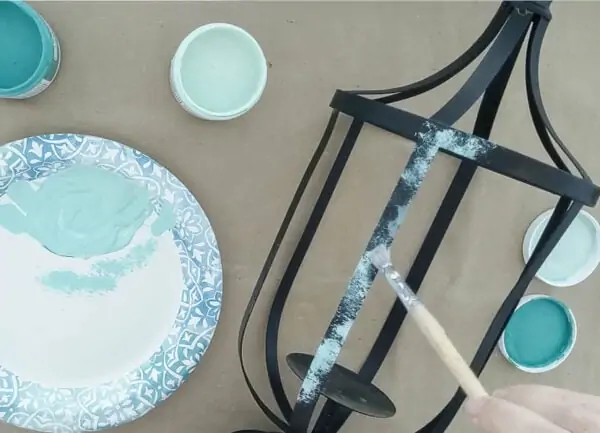
As I dry brushed the paint, I followed with a clean, dry paintbrush with no paint on it. I used this paintbrush while the paint was still wet to help soften the edges of the dry brushing.
The paint should dry within a few minutes. Once it is dry, use the exact same paint color to do a color wash. You can mix a little water into your paint, but an even easier way is to dip your paintbrush in water and then without drying it, dip it into the paint.
Brush the wet paint over the surface of your project. Allow it to dry for a few seconds and then wipe off any excess paint with a clean paper towel.
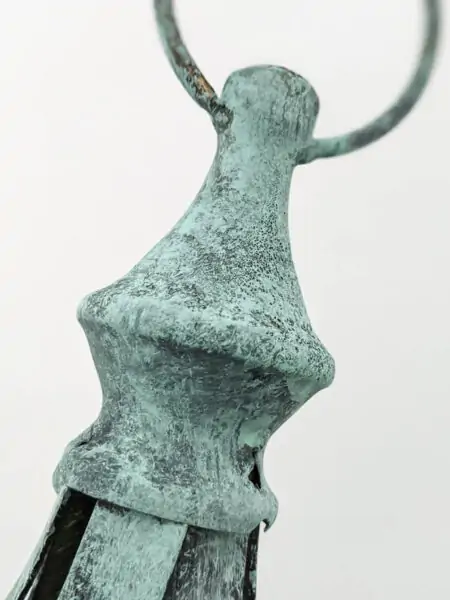
And here’s my finished lantern. Pretty darn cute for a one color, two step paint finish.
Vintage Steel Paint Finish
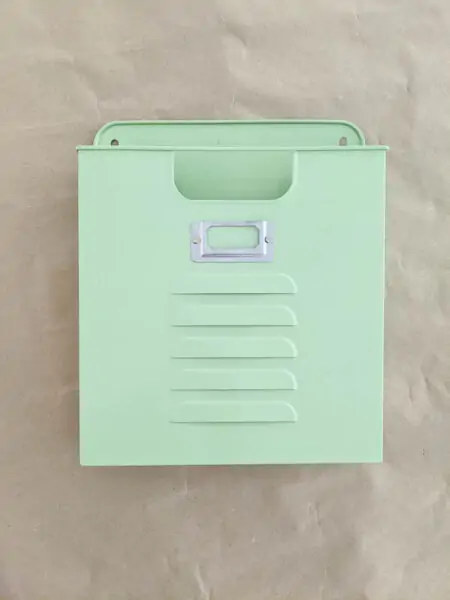
I found a few of these locker style wall pockets at a yard sale a few years ago. It’s cute as is, but I knew it would look amazing in a vintage steel finish that mimics the look of old lockers.
Paint Colors:
- Chalk paint or matte acrylic craft paint in gray
- Chalk paint or matte acrylic craft paint in black
- Acrylic craft paint in silver
The Process:
Since this is a metal look, it works best to use a foam brush or a paintbrush with very smooth bristles for this. This will help give a very smooth paint finish, free of a lot of brush strokes.
Start by painting the entire surface with a coat of matte gray paint.
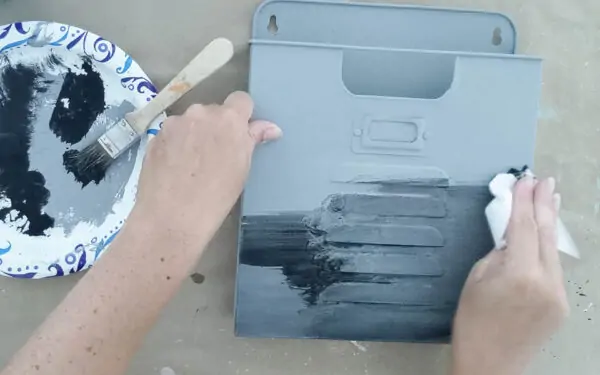
Once the gray paint has completely dried, the next step is a color wash of black paint. Using a wet paintbrush, brush black acrylic paint onto your project, working in small sections.
Immediately after you paint each section, use a clean rag or paper towel to blend the black with the gray paint and remove the excess.
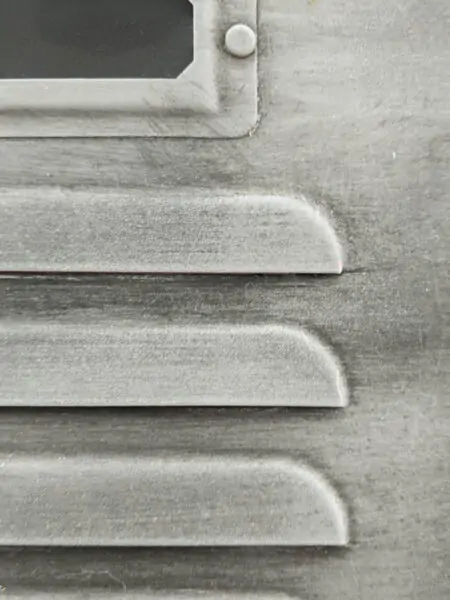
The final step is to add a bit of silver paint. This step is really subtle and hard to see in photos, but it makes a real difference in person. The silver gives a bit of the shine real metal would have.
Wet your paintbrush with water and then dip it in the silver paint. Brush it over the surface you are painting randomly and immediately use a cloth or paper towel to blend the silver and wipe away the excess.
These locker bins definitely look like they were always meant to have this finish.
I actually shared a post a few years ago about painting plastic to look like vintage metal. That technique was similar but used slightly less accessible materials – automobile primer and chalkboard paint. You can easily find both at your local home improvement store, but you aren’t likely to already have them at home.
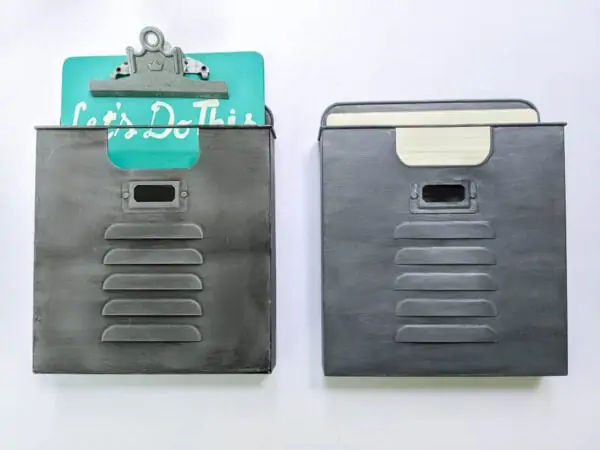
The bin on the left is painted using the old method and the bin on the right is painted using this new method. I think both turned out well. The bin painted using the old method looks a bit more authentic but the new method was cheaper and easier.
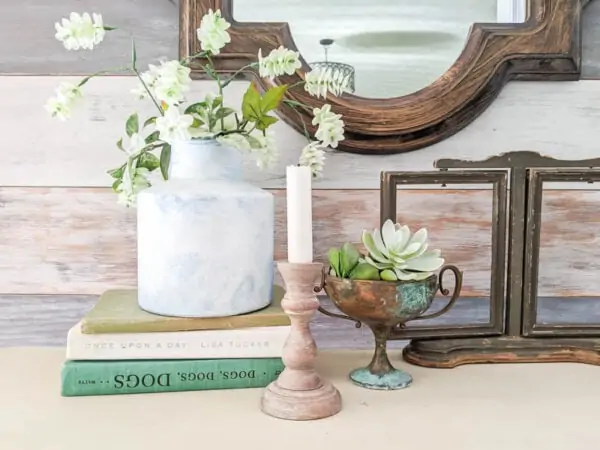
Farmhouse Weathered Wood Paint Finish
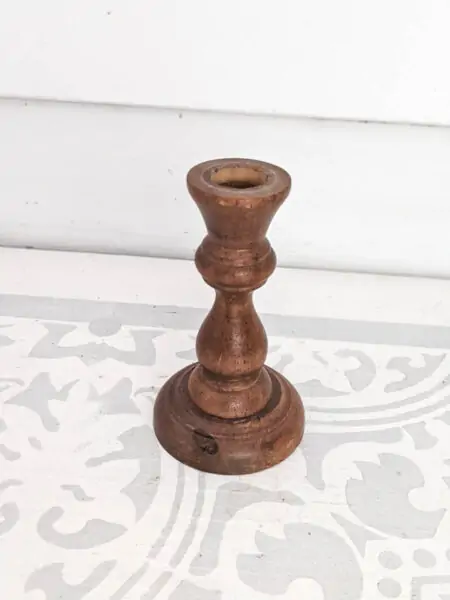
I find these little wooden candlesticks all the time at thrift stores. This candlestick looks perfectly fine as is, but the plain wooden finish is pretty blah.
In fact, I’ve had this candlestick for a few years and never been compelled to pull it out of storage and actually use it. So it seemed like it was time for a quick makeover.
I love wooden candlesticks with a light wood, weathered, farmhouse feel so that’s the look I decided to go for.
Paint colors:
- Chalk paint or matte acrylic craft paint in white
- Chalk paint or matte acrylic craft paint in tan
- I used a mix of Dixie Belle Chalk Paint in French Linen and Acrylic Craft Paint in Burnt Umber
The Process:
This finish is incredibly easy. It’s just two steps.
Start by dry brushing white paint onto the candlestick using a chip brush. Use a clean rag or paper towel to help blend the paint and remove the excess.
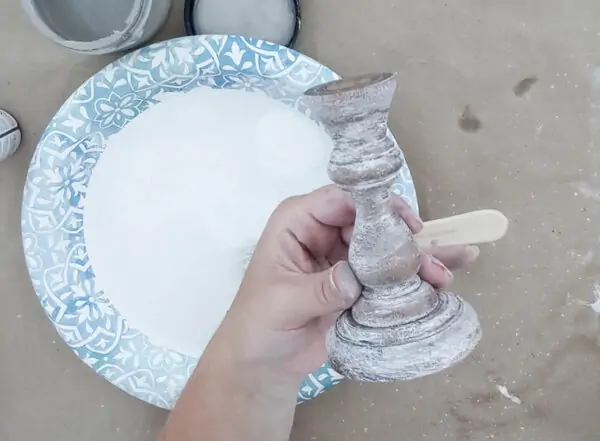
Once the paint has dried, dry brush tan paint over the white and use a rag or paper towel to blend. The rag will also help wipe away some of the paint to reveal the original wood tone underneath.
I didn’t have a great light tan, so I mixed a couple of colors together to create one.

And that’s it! If you aren’t pleased with your finish after these two steps, you can just add more layers of paint until you have a color you like.
If you have want to give a weathered wood finish to something that isn’t actual wood, I shared another weathered wood paint finish a few years ago that can be used on any material, even if it isn’t wood.
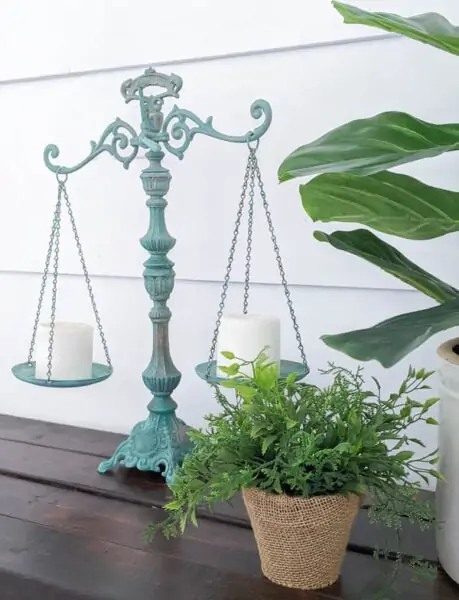
Copper Patina Paint Finish
This finish involves a few more steps than the others, but it’s also absolutely gorgeous and is my new favorite finish.
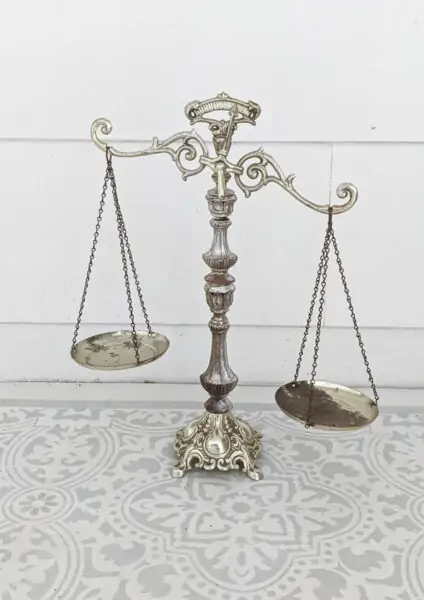
I picked up this antique balance at a yard sale for just two bucks! I love the shape and detail, but the gold finish was super gaudy and also not in the best condition. So I wanted to give it a makeover that would fit the style while also making it a bit less over the top.
Paint colors:
- copper metallic paint
- I used Americana Decor Metallics in Copper, another good option is copper spray paint
- antique bronze metallic paint
- Acrylic craft paints in dark brown and black
- Very light blue-green matte acrylic paint or chalk paint
- Bright blue-green matte acrylic paint or chalk paint
The Process:
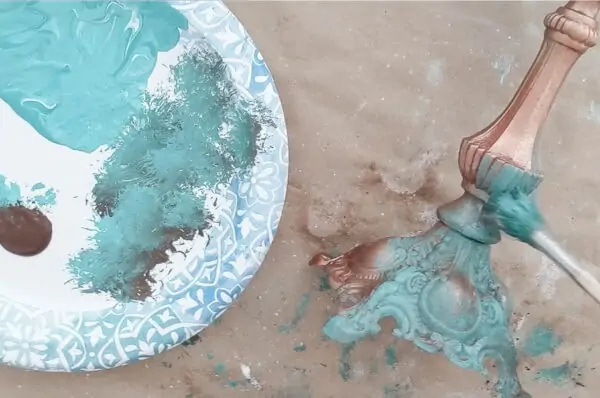
The first thing I did was paint my balance with a base coat of chalk paint. Any color will work for this, this layer of paint is simply acting as primer, giving the metallic paints something to stick to.
Of course, you can also use actual primer instead; I just had chalk paint on hand. If you are painting something that is less slick and shiny like wood, you can skip this base coat step.
Once the base coat has fully dried, paint everything with a coat of copper metallic paint and let it dry. Spray paint works great for this, but metallic craft paint is also fine.
Once the copper paint was dry, it was a bit too bright and shiny for the aged, patinaed look we’re going for. As copper ages, it not only develops that gorgeous blue-green patina, it also darkens and loses some of the pink tone.
So the next step is to dry brush antique bronze metallic paint over the copper finish to darken it a bit. I also mixed a tiny bit of brown acrylic paint with my bronze paint to make a it a bit darker.
Now the copper base is finished, it’s time for that gorgeous patina.
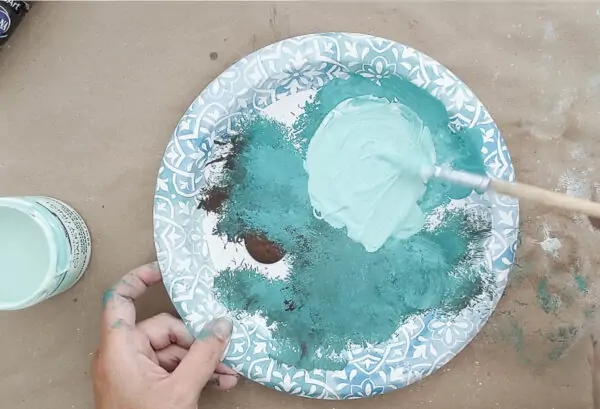
To create my patina color, I used a light blue-green chalk paint and a brighter blue-green chalk paint. (The same two colors I used earlier to paint my lantern.)
Using a paper plate as a palette, I mixed a little of the light color with the brighter color to make a nice saturated blue-green.
Then I poured some brown acrylic craft paint onto a separate section of the paper plate. I loaded a bit of the blue-green paint onto one side of my chip brush and the brown paint onto the other side of my paint brush. Then I blotted the excess paint on the paper towel and started stippling the paint onto my balance.
I tried to make sure I was getting paint into the grooves of the balance as well as on the high points and used a paper towel to help blend and blot the paint as I went.
You could also simply mix a bit of brown paint into the blue-green paint, but keeping the two separate helps give a more varied, authentic-looking finish.
The final step is to mix the two shades of blue-green again, but with much more of the lighter color this time.
Stipple it onto your piece, but more sporadically. You want to add additional dimension without completely covering the previous layers of paint.
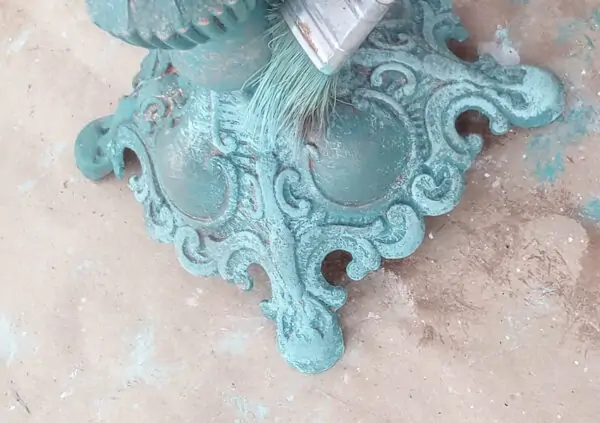
I tried to keep this lighter paint mostly concentrated in the more detailed areas. Again, you can use a paper towel to help blot off excess paint and blend harsh lines.
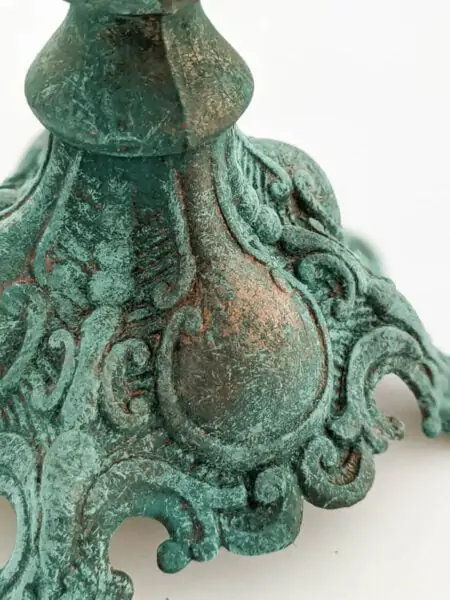
I originally intended to have way more of the copper color showing through, but this piece had a mind of it’s own! Of course you can make your own patina as heavy or as light as you want.
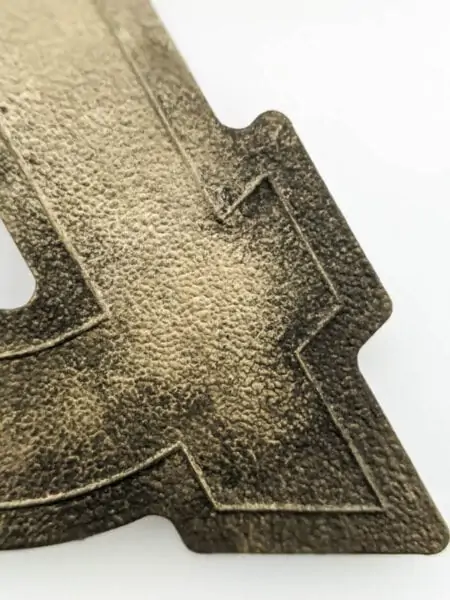
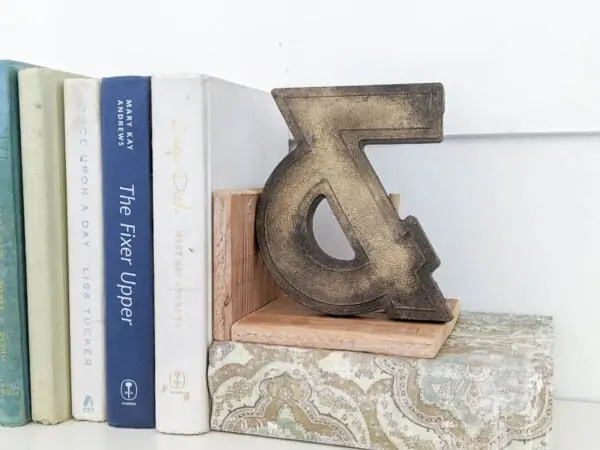
Vintage Brass Paint Finish
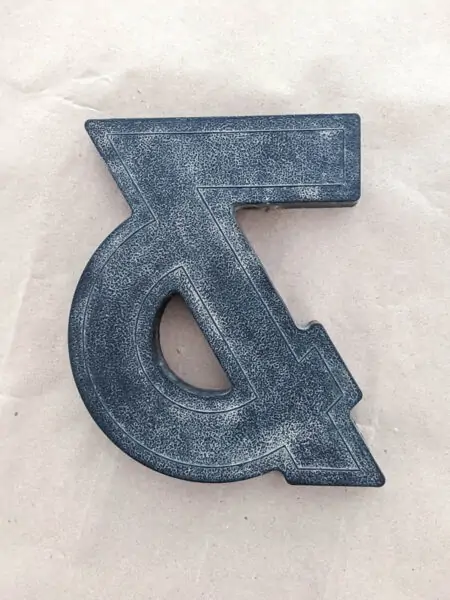
Finally, I had this cute little plastic ampersand I got from a flea market that was selling tons of vintage marquee letters. While the shape was really cool, the dirty plastic finish was not. I debated what to do with this little piece for awhile and finally settled on a vintage brass finish.
Paint colors:
- Vintage brass metallic paint
- Chalk paint or matte acrylic craft paint in dark brown
- Chalk paint or matte acrylic craft paint in black
The Process:
If you are painting something slick and nonporous like plastic or metal, start with a base coat of primer or chalk paint to give your metallic paint something to grip. (I didn’t do this and regretted it when my metallic paint was struggling to adhere.)
Paint the entire surface with a coat of vintage brass metallic paint. (Spray paint would work for this step, but I don’t recommend it because you will also need some brass paint that you can brush on for a later step.)
Once you have a good base brass color, it’s time to make it look aged.
If you look at authentic vintage brass items, they are usually brighter on the smooth, raised surfaces and darker around the edges and in detailed sections. So for my ampersand, I tried to concentrate the darker layers of paint around the edges and keep the center a bit brighter.
I started out using some of my antique bronze paint around the edges, but quickly realized it just wasn’t dark enough. So I mixed dark brown craft paint and black paint and then dry brushed it around the edges, using a paper towel to blend it.
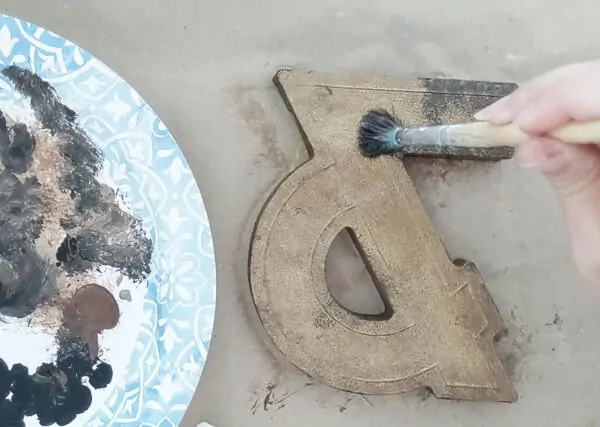
Then I added more vintage brass paint to the center section to keep it from getting too dark before adding more black and brown along the edges.
You can repeat these two steps as many times as you need until you are satisfied with the results.
VIDEO TUTORIAL
I also put together a Youtube video of this project for those of you who prefer video. You can watch it below.
I’d love for you to subscribe to my Youtube channel!
Other DIY ideas I think you’ll love:
- Trash to Treasure: 20 Amazing Upcycled Projects
- How to Paint Fabric for Beautiful DIY Projects
- How to Easily Transfer Lettering and Designs onto Any Surface
I’d love for you to pin this post on Pinterest!

Google Web Story: 5 Gorgeous Paint Finishes to Transform Your DIYs
5 Gorgeous Paint Finishes to Transform Your DIYs and Crafts
Let me show you how I updated five different items with five different paint finishes – a metal patina finish, a vintage steel finish, a copper patina finish, a farmhouse wood finish, and a vintage brass finish. You can learn how to create the same paint finishes!
Materials
- acrylic paint or chalk paint in white, tan, gray, black, silver, and a light blue-green shade
- copper, antique bronze, and vintage brass metallic craft paint
- Paper Plates
- Paper Towels
Tools
- Paint Brushes - artist’s brushes, chip brushes, foam brushes,
Instructions
Metal Patina Paint Finish
- Use a chip brush to dry brush the blue-green paint onto your surface. Add a small amount of paint onto your brush, wipe off as much as possible on a paper plate.
- Follow with a clean, dry paintbrush with no paint on it to soften the paint lines.
- Once it is dry, use the exact same paint color to do a color wash. MIx the paint with water and brush the wet paint over the surface of your project. Allow it to dry for a few seconds.
- Wipe off any excess paint with a clean paper towel.
Vintage Steel Paint Finish
- Use a foam brush or a paintbrush with very smooth bristles to paint the entire surface with a coat of matte gray paint. Let dry.
- Use a wet paintbrush to brush black acrylic paint onto your project in small sections. Use a paper towel to blend the black with the gray paint and remove the excess.
- Wet your paintbrush with water and then dip it in the silver paint. Brush it over the surface randomly.
- Use a paper towel to blend the silver and wipe away the excess.
FARMHOUSE WEATHERED WOOD PAINT FINISH
- Dry brush white paint onto the candlestick using a chip brush.
- Use a paper towel to help blend the paint and remove the excess. Let dry.
- Dry brush tan paint over the white and use a rag or paper towel to blend.
COPPER PATINA PAINT FINISH
- Paint your item with a base coat of chalk paint in any color. Let dry. This gives the metallic paint something to stick to.
- Paint the entire thing with a coat of copper metallic paint. Let dry.
- Dry brush antique bronze metallic paint over the copper finish to darken it.
- Add a bit of the blue-green paint onto one side of your chip brush and the brown paint onto the other side. Blot the excess paint on the paper towel and start stippling.
- Stipple blue-green paint onto your piece sporadically.
- Use a paper towel to help blot off the excess paint
VINTAGE BRASS PAINT FINISH
- Start with a base coat of primer or chalk paint.
- Paint the entire surface with a coat of vintage brass metallic paint.
- Mix dark brown craft paint and black paint. Dry brush it around the edges, using a paper towel to blend it.
- Add more vintage brass paint to the center section.
- Add more black and brown along the edges.
- Repeat these two steps until you are satisfied with the results.
I love each and every one of these transformations. It always amazes me what a little paint will do.
Thank you! Me too! I know it may sound cliche, but paint is really amazing.