How To Make A Stencil The Cheap And Easy Way
Learn how to make a custom stencil in any design you want the cheap and easy way. No Cricuit, Silhouette, or other expensive cutting machine required.
I love using stencils for DIY projects. They make it so easy to get perfect results whether you’re stenciling a sign, stenciling a wall, or even stenciling a kitchen backsplash.
There are tons of gorgeous stencil designs available these days, but sometimes you just can’t find the perfect stencil for the project you have in mind.
Maybe you want to make a personalized stencil for making wedding decor. Maybe you want to recreate a gorgeous stenciled floor you saw in a magazine. Or maybe you have a super original idea in mind.
Whatever the project, making your own stencil exactly the way you want it, is actually pretty easy.
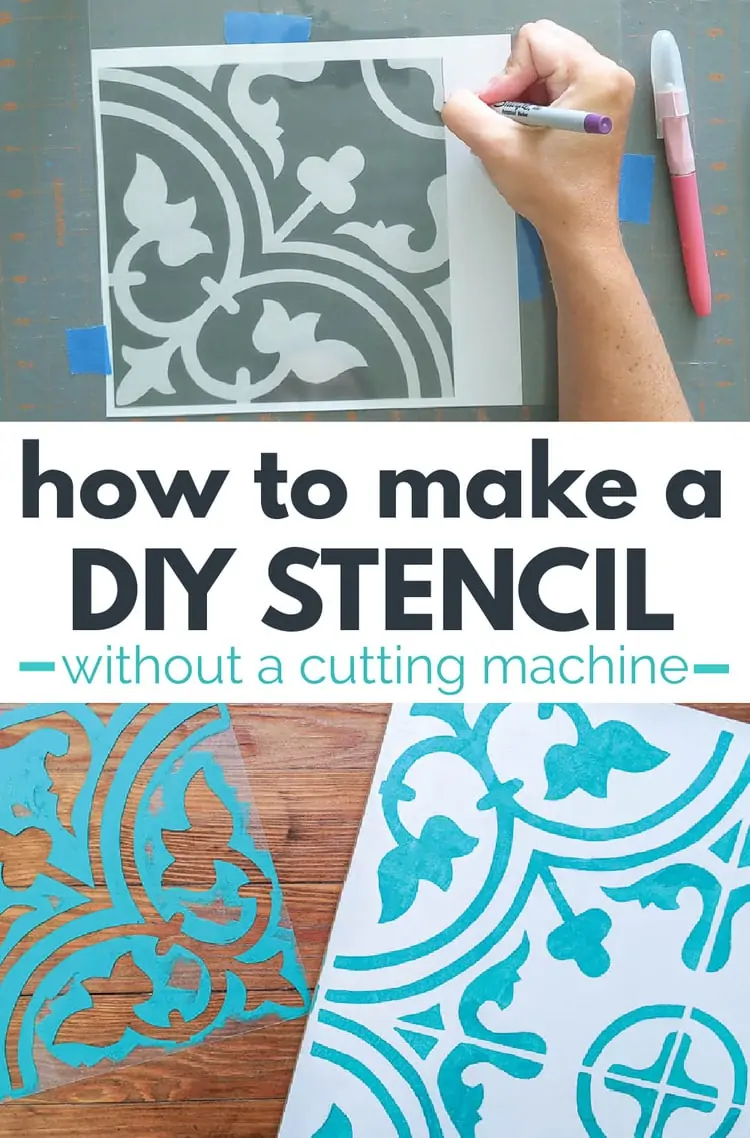
Of course you can always make reusable stencils using a Cricuit or Silhouette cutting machine, but luckily, even if you don’t have a cutting machine, it’s still quite easy to make a DIY stencil. All you need are a few very inexpensive supplies. (If you already have a Cricuit and want to use it, I found this tutorial for making a stencil using a Cricuit very thorough.)
In this post I’m sharing simple step-by-step instructions, helpful tips and tricks, plus a video tutorial to make it incredibly easy to tackle this project on your own.
Before we get started, I do want to point out there are times when making a stencil may not be the best choice. If you are planning a DIY project that you are only going to make once, you’d be better off not using a stencil at all and just doing a simple transfer instead.
If you don’t know how to do a pencil transfer, I have step-by-step pencil transfer instructions you can check out. It’s incredibly easy and all you need is a pencil or a piece of chalk.
Using a transfer will be much faster than making a stencil to use only one time. Stencils are best for when you are planning to use the same design multiple times, like when you are making multiple signs with the same design or when you are using one stencil to create a repeating pattern.
This post contains affiliate links which means if you make a purchase after clicking a link I will earn a small commission but it won’t cost you a penny more. Click here to see my full disclosure policy.
Materials
- Stencil blank – these are clear, thin sheets of plastic that you can cut your stencil from. I used this 12″x12″ set from Amazon which is super affordable. You can also get 12″x24″ sheets or even a 12″x48″ roll for making larger stencils.
- Craft knife – for cutting out your stencil design
- Cutting mat – this is a must when using a craft knife to protect your work suface
- Marker – for tracing your stencil design onto the stencil blank. A super fine tip Sharpie is perfect for this.
- Printout of your stencil design
- Tape – to attach your design to your stencil blank
How to Make a Stencil
Choosing a stencil design
When you are choosing a design for your stencil, it’s best to choose something that isn’t overly detailed. Something with lots of clean lines will be easier to make into a stencil and also easier to use as a stencil. Very small details are often lost in the stenciling process.
Also keep in mind that a stencil will only show the outline of your design; details inside the image will be very difficult to include.
Once you’ve chosen your stencil design, you can print it out. Be sure to print it the same size you want your finished stencil to be.
(You can also make stencils from all kinds of designs including things found in magazines, book covers, even photos.)
Making a text stencil
There are a few extra things to keep in mind when making word and letter stencils.
You will need to be careful with certain letters that have small circles and other shapes in the middle. Typically stencils connect the inner shapes to the rest of the stencil with a small connecting line.
If you just cut the letters out without these lines, the small inner shapes would be lost and your stenciled text would be very hard to read. When you are planning your stencil design, don’t forget to include these lines. You can see some examples below.
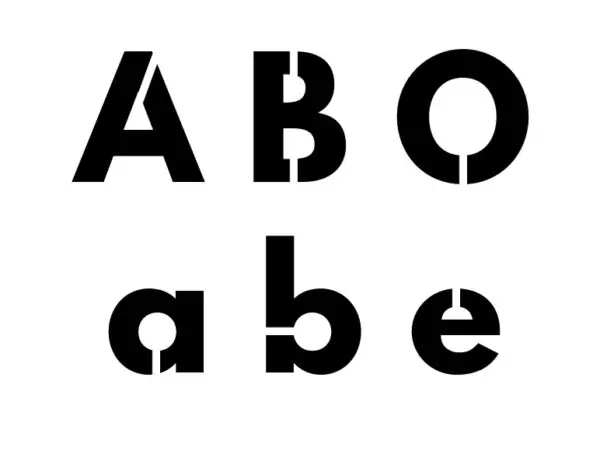
Once you are finished stenciling your project, you can easily make those stencil lines disappear. Just use a small paint brush or a toothpick and paint to fill in the small gaps in the letters.
The best material for making stencils
I highly recommend using thin, clear plastic for making your stencil. You can buy stencil blanks on Amazon or in craft stores pretty affordably in many different sizes. And even though we aren’t using a Cricuit or Silhouette to make our stencil, their stencil blanks will still work fine.
You can also make your own stencils using adhesive vinyl, but mylar plastic works much better if you are planning to use your stencil more than once.
I do not recommend using cardboard or card stock to make stencils. I’m generally all about being frugal and using what you have, but it’s very difficult to get nice clean stencil lines with a cardboard stencil, especially if you are planning to use it multiple times.
Plastic lays more smoothly against the surface you are stenciling, it keeps paint from seeping underneath, and it never gets soggy. In general, it just gives much better results.
Cutting out your stencil
Place your plastic over your design. Try not to place your stencil design too close to the edge of the plastic. When you are stenciling, having a bit of extra plastic around the edges will help keep you from accidentally getting paint where you don’t want it.
Tape the design to the plastic so that it doesn’t move around as you are working and then carefully trace the design onto the plastic.
Place your plastic on top of your cutting mat. (Don’t forget the cutting mat or you may end up with your stencil carved right into your tabletop!)
Make sure your craft knife has a nice sharp cutting blade so you can cut through the plastic smoothly. This will help make sure you get nice clean stencil lines.
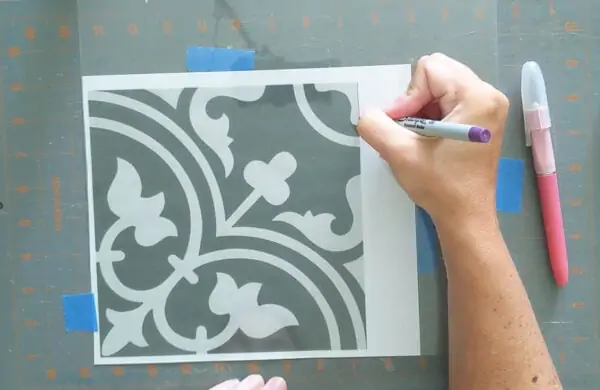
Trace around the lines of your design very carefully and slowly with your craft knife. You might need to go over some areas twice to cut all the way through the plastic; just be sure to follow the same line exactly.
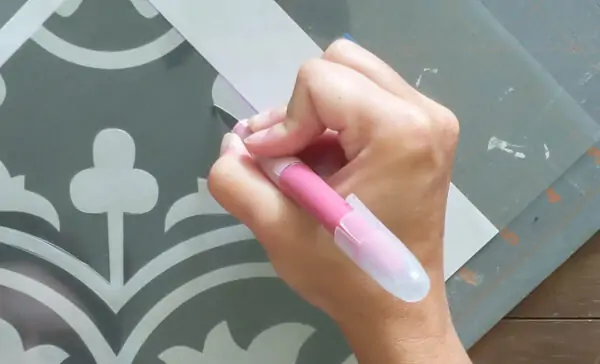
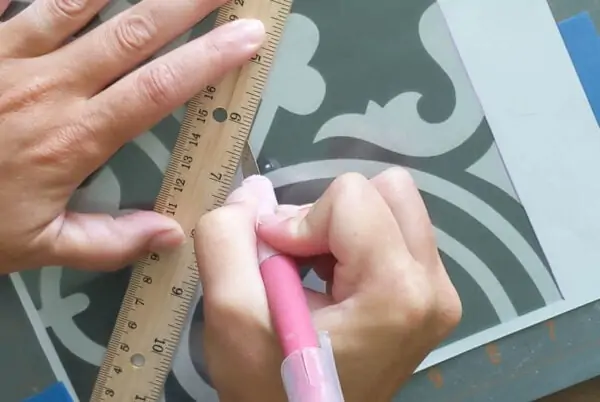
Anywhere you’re cutting a straight line, it really helps to use a ruler to keep your lines perfectly straight.
Making a stencil with a repeating design
If you are making a stencil with a repeating pattern to be used on walls or floors, adding registration marks will make your stenciling project much, much easier.
Registration marks are guides that will help you line up your stencil perfectly for a seamless repeating pattern.
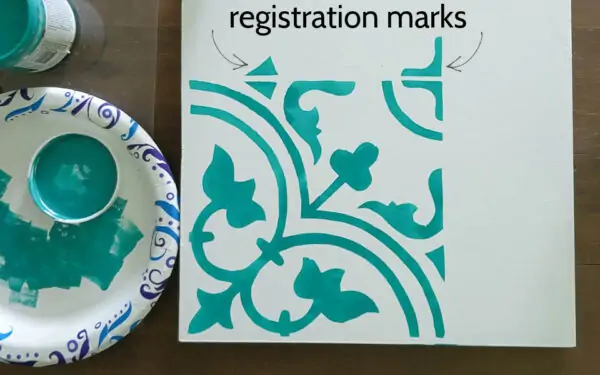
Adding them to your stencil is easy. Once you have traced one complete stencil design onto your plastic, move your paper pattern to where the next repeat of the design would begin.
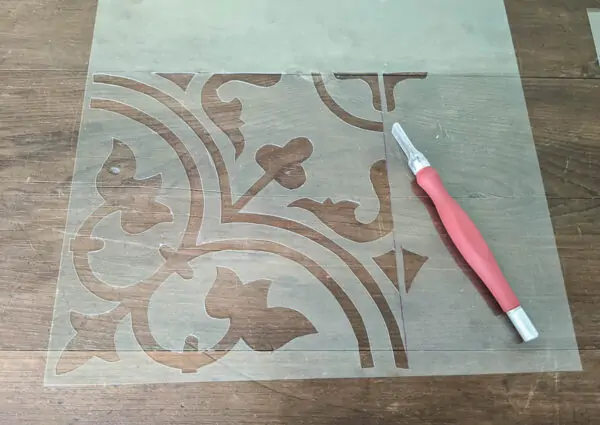
Trace a few of the stencil elements/lines onto your plastic and cut them out. When you are stenciling, you can line these lines up with the previous section you have stenciled to keep everything evenly spaced and straight.
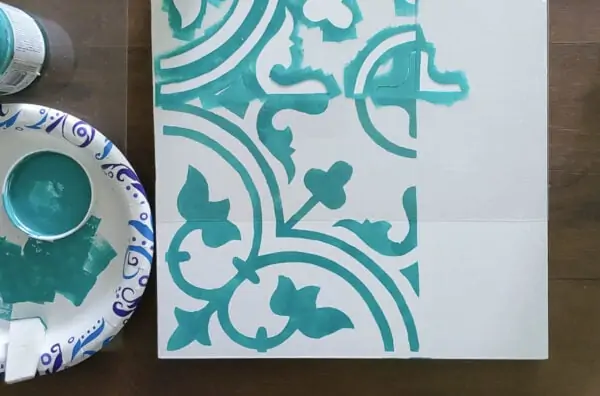
Completing the Stencil
When you are finished cutting your stencil, if you find any spots that aren’t perfectly smooth or exactly right, you can always go back with your craft knife and clean those parts up.
Now you’re ready to get stenciling!
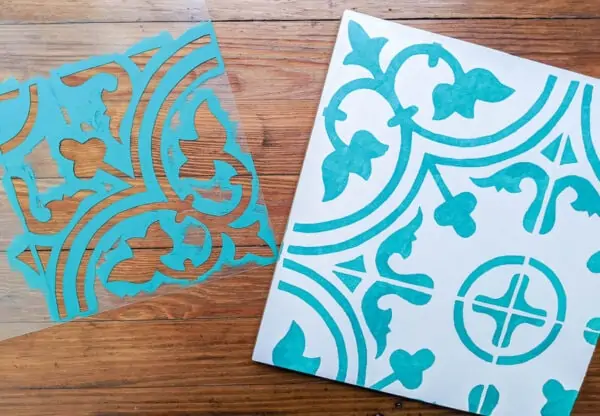
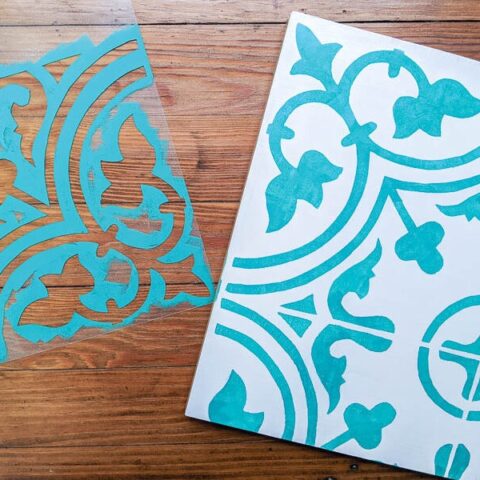
I’m hoping to use this stencil for an upcoming project, but for now I just stenciled a sample board to get an idea of how it would look.
Below is another example of a DIY stencil I made; I used this one to make several DIY signs and it worked great.
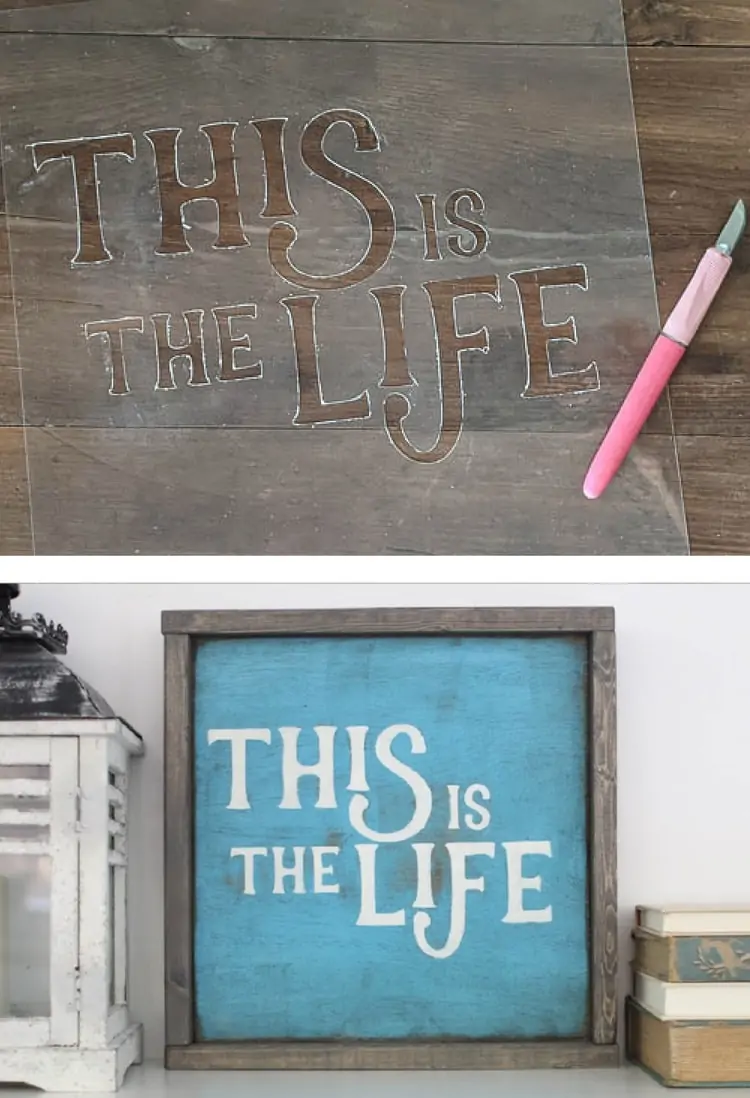
Stenciling itself is pretty easy, but there are a few things you need to know to get nice clean, perfect stencil lines. If you haven’t done a lot of stenciling before, I have another post all about the materials and tricks to use for perfect stenciling.
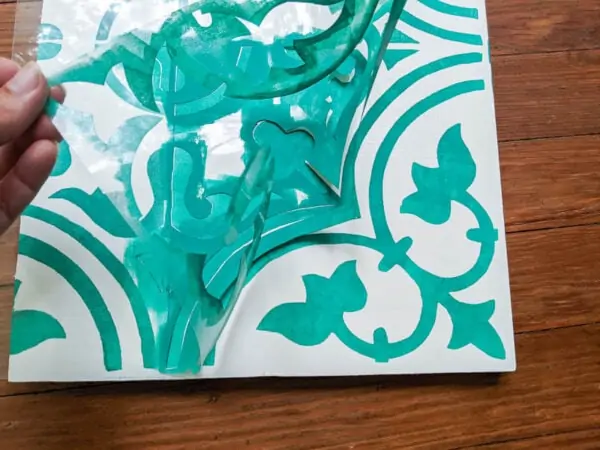
Video Tutorial
I also put together a Youtube video of this project for those of you who prefer video. You can watch it below.
I’d love for you to subscribe to my Youtube channel!
Other stenciling ideas I think you’ll love:
- How to Clean Stencils the Fast and Easy Way
- How to Stencil on Wood with Beautiful Results Every Time
- The Best Backsplash Stencils for Every Kitchen
I’d love for you to pin this post on Pinterest!
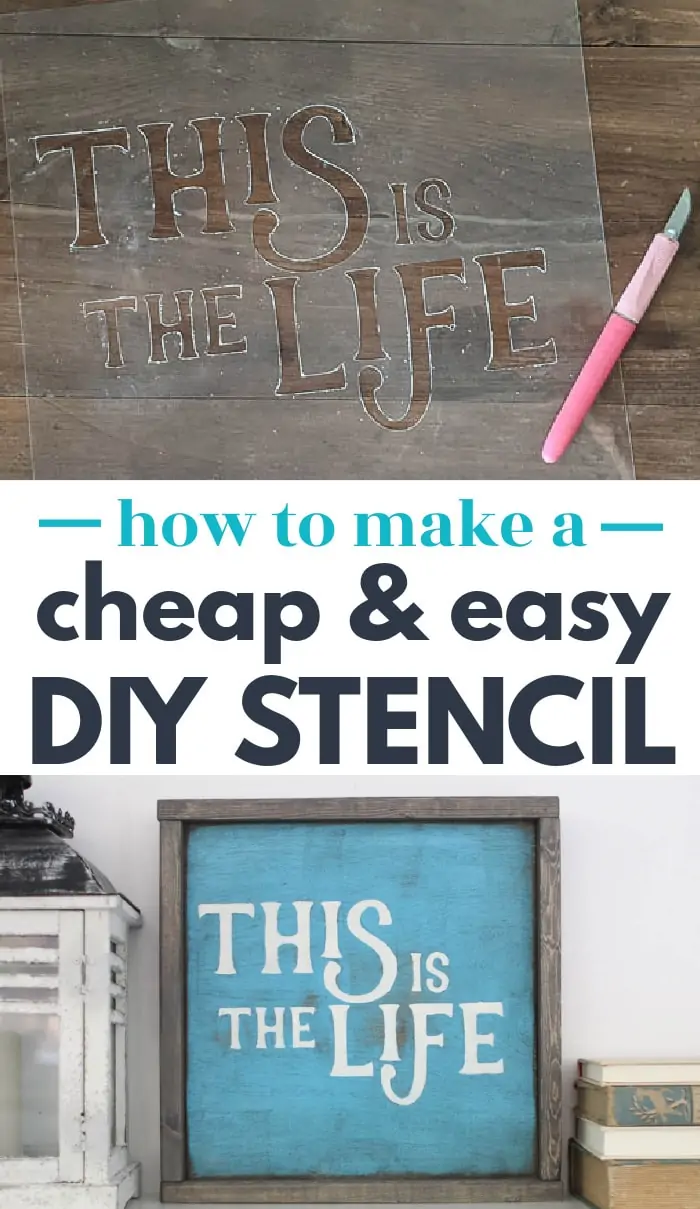

How to make a stencil the cheap and easy way
Learn how to make your own stencil in whatever design you want is easier than you think with the included step-by-step tutorial. Think of the possibilities!
Materials
- Stencil blank
- Cutting mat
- Marker
- Printout of your stencil design
- Tape
Tools
- Craft knife
Instructions
- Choose a stencil design. Try to choose a design not overly detailed.
- Print out your design in the same size you want your finished stencil to be.
- Tape the design to your plastic stencil blank. Trace your design onto the plastic with a marker.
- Place your plastic on top of your cutting mat and use your sharp craft knife to trace around the lines of your design very carefully.
- A ruler will help keep your lines perfectly straight.
- Clean up any cuts that are not smooth using your craft knife.
- Now you are ready to stencil!
Recommended Products
As an Amazon Associate and member of other affiliate programs, I earn from qualifying purchases.
-
ZHluja 15 Sheets 7.5 mil Acetate Mylar Sheet 12 x 24 inch Transparent PET Blank Stencil Sheet for Cricut, Silhouette, Craft Template Material (Flat Packaging)
-
DIYSELF 1 Pcs Craft Hobby Knife Exacto Knife with 11 Pcs Stainless Steel Blade Kit, 1pcs Steel 15CM Ruler for Art, Scrapbooking, Stencil (Purple)


What a great post you have. I discovered this after using a Costco pie lid for a stencil.
I used a board under the lid tacked down and struggled make the cuts into that plastic
with three different blades, my fingers were aching even with a glove on. Wish I would
have seen this earlier. Thank you for posting.
Hi! Suppose I have a rectangular stencil and I want a fairly intricate stencil pattern cut into it that would be too tiresome for me to do by hand. Is there a way that you recommend for getting the stencil cut?
If you know someone that has a cricuit or silhouette cutting machine, they could cut it for you. You could also go on etsy and look for a shop that offers custom stencils.