How To Turn A Vintage Camera Into A Lamp
Learn how easy it is to turn a vintage camera into a lamp.
I bought my first vintage camera from a yard sale six years ago for $8.
It was a Kodak Brownie Hawekeye with attached flash and I thought it was just about the coolest thing in the world.
Sometime that very same day I also thought wouldn’t it be amazing if I could turn that big ole flash into a light somehow!
Well, here we are six years and thirteen vintage cameras later and I have finally done it!

This year of being bold is really paying off big time! All the little ideas floating around in my head that usually die a slow death are actually happening! This is huge!
Disclaimer: I couldn’t really find any instructions out there on how to do this so I made up my own. I am no electrician. The majority of my knowledge of electricity comes from third grade science class. Although it was gifted third grade so maybe that counts for something. Please be extremely cautious when working with anything electrical. My lamp works perfectly and nobody was electrocuted in its creation but I cannot promise you will have the same results. (Though I certainly hope you do!)
How to Turn a Vintage Camera into a Lamp
This post contains some affiliate links – when you buy the stuff you like, you also support Lovely Etc. at no additional cost. See my full disclosure here.
Supplies I used for this project:
- Vintage camera with flash (Mine is a Kodak Duaflex but almost any camera will work. You can find these inexpensively at yard sales or for slightly more at antique stores or on ebay. The camera I used was bought from ebay several years ago for $15.)
- Keyless Socket- candelabra size

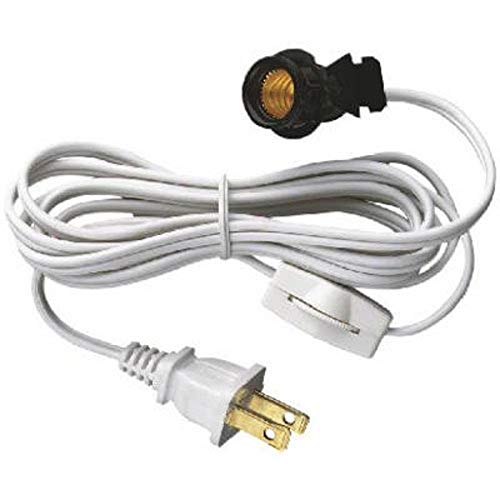
- Candelabra Base switch cord
- Nightlight bulb
- Sturdy scissors
- Electrical tape
- Small screwdriver
What to Do:
Note: This is what worked for my camera flash. You may need to make small adjustments for your own model.

First, remove the flash from the camera. There is a small knob on the side that you unscrew to do this.
There is a small screw on the back of the flash. Unscrew it to open the flash casing. Inside are some metal parts attached with two small screws.
Remove those.
Take your keyless socket. Remove the cardboard tube. Use your sturdy scissors to remove the plastic casing. (This is to make the socket small enough to fit into the hole in the flash.)
You should really wear safety goggles for that part.

Take the candelabra base switch cord and cut the cord from the candelabra base.
Use your scissors to strip the casing from the last two inches of wire.
Your cord should now have two copper wires showing on one end.
Wrap one of the copper wires around each of the screws on the keyless socket.
Use electrical tape to securely wrap the keyless socket, making sure all exposed metal and wires are covered.

Slip the socket into the back of the flash. Screw the brass parts we removed earlier back in.
You can bend these as needed to fit around the new socket. Be sure that there is plenty of electrical tape between the new socket and this metal.
Reattach the back of the flash. The cord can simply hang out the bottom of the flash through the crack where the two halves join.

Use electrical tape to cover your cord. (This is just for decorative reasons – a black cord blends in much better than white).
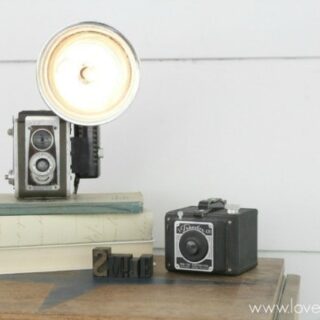
Plug it in and turn on the switch!

All in all, this project took less than an hour including figuring out how to do it. I cannot believe I waited six years to try this!

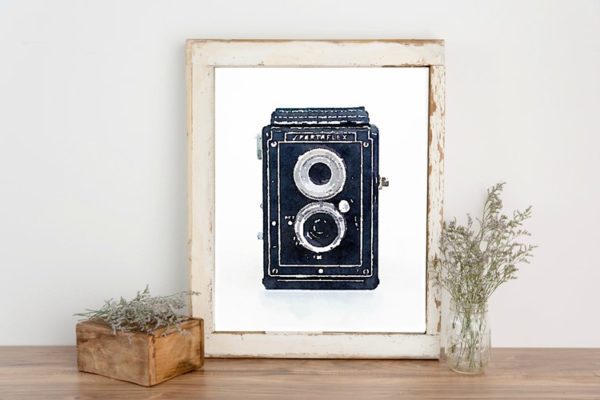
If you made it this far, I’m pretty sure you are also going to love these free vintage camera art prints I made as well.
These are watercolor vintage cameras and you can get your own free set right here.
And if you are looking for more awesome junk upcycles, I’m sharing my top 20 trash to treasure projects right here.

How To Turn A Vintage Camera Into A Lamp
Turn a vintage camera into a unique lamp that will be such a statement piece.
Materials
- Vintage Camera
- Keyless Socket
- Candelabra Base Switch Cord
- Nightlight Bulb
Tools
- Sturdy scissors
- Electrical tape
- Small screwdriver
Instructions
- Remove the flash from the camera by unscrewing the small screw on the back of the flash.
- Remove the metal parts that are attached with two small screws.
- Take your keyless socket and remove the cardboard tube.
- Use scissors to remove the plastic casing.
- Take the candelabra base switch cord and cut it.
- Use your scissors to strip the casing leaving about 2" of wire.
- You will see two copper wires. Wrap one of the copper wires around each of the screws on the keyless socket.
- Use electrical tape to securely wrap it, covering all exposed metal and wires.
- Slip the socket into the back of the flash.
- Screw the brass parts back in.
- Reattach the back of the flash.
- Use electrical tape to cover your cord.
- Plug it in and turn on the switch!
Recommended Products
As an Amazon Associate and member of other affiliate programs, I earn from qualifying purchases.


Google Web Story: How to Turn a Vintage Camera into a Lamp
Carrie! This is SO cool! I’ve never seen anything like it! You’re so creative! ;)
Thanks April! I’m just so excited it worked!
Love this idea! Now if I can just find a vintage camera. Maybe I can buy one of yours!
:) Linda
Thanks Linda! I do have quite a few cameras around here!
This is really cool! Seriously, love it. Great job!
Thanks Ashley! I am so happy I finally went for it and made this!
This SO cool! How creative!! Unbelievably impressive!!
Thanks Holly! I’m so thrilled with it!
This is seriously so amazing. My favorite repurpose project to date, I think! Incredible job, Carrie!
Wow, Carrie, your creativity always astounds me. This is such a fabulous project. Pinning!
Thanks Krista! This camera was begging to become a lamp and I’m just glad I finally got the guts to do it!
I’m in love with this. :)
Thanks Bethany! I think I am in love with it too!
Wow Carrie this is really incredible! Absolutely LOVE this.
Thanks Chelsea! I’ve been wanting to try this for years – so glad I finally did!
Ah! This is so, so cool! Thanks so much for sharing with us at The Makers. :)
Awesome idea…Love it so much that I’m featuring it tomorrow evening on the Hit Me With Your Best Shot Party! Can’t wait to see what you’ve been up to this week!
~Ariean
Thanks Ariean!
This is such a brilliant idea! One of those “why didn’t I think of that!” moments – I adore the way your vintage camera lamp turned out!!!
Thanks Brynne! It really seems like this lamp was meant to be doesn’t it.
When I saw your feature over at the Makers Party, I had to do a double take. I cannot believe how amazing a camera looks as a lamp!! Great work, looks beautiful. Off to go find a vintage broken camera…
Thanks Trisha! I am super happy with how this project worked out!
This is AMAZING!
Thanks Andrea!
Thank you for these excellent instructions! We found your site and made the lamp tonight with a vintage Brownie Camera I’ve had for many years. I wish I could send you a photo of what we made – so you can see! THANKS again!
Rebecca, Yay – I am so glad my post helped you make your own camera light! I wanted to make one myself for so long before I finally went for it! I definitely wish I could see pics too.
How Bright is this small lamp?
It isn’t super bright – it is similar to a bright nightlight.
I love this idea and how you’ve shared it with links to the products to put it together!!
Have you tried different watt bulbs? I’m thinking that it could get very bright and hot with the reflector and not pointed down to a surface.
Thanks for your great blog!
Thanks! Good point about the different bulbs – so far I have only used it with a small nightlight bulb and it hasn’t been a problem.
Thanks for this!
I’m a long time vintage camera collector, and I’ve always wanted to do this with my flash unit.
Carole, I’m glad you liked it! I wanted to do this for so long too and I’m so happy I finally did!
Hi Carrie! I just bought that same camera off ebay! :) I’m wondering if I could use a salt lamp cord on it like the one here: https://www.amazon.com/TGS-Himalayan-Original-Replacement-Dimmer/dp/B01EMLYJ68/ref=pd_sbs_328_1?_encoding=UTF8&psc=1&refRID=XRN5QG8269TWW1CRNGBH It looks small enough. What do you think? THANK YOU!!!!
Yay, congrats on your camera purchase! That cord set might work but it will probably need a bit of modifying – mainly removing the metal wing things since they would be in the way. Any light that says it works with a nightlight/candleabra base should work though.
Thanks for the response! :) I also bought a 25 watt Edison bulb to use. It turns on and looks rad as heck! I hope the wattage is fine… :/
So happy it worked well for you!
Very cool idea I’ve got a few cameras to try this with. I’ll put pics up on my pinterest page.
This is such an awesome creative DIY project. Your projects are so fun to do Carrie; always look forward to your next one!
Thank you so much Linda!
As everyone who has left comments has said – really amazing! Thank you so much for sharing this. So creative, and so beautiful.
Just out of curiousity, what is the other little camera beside your creation?
Thank you! The other small camera is just another camera from my collection. It is the Time Traveler 120 from the Pho-Tek Corporation.
I did it. I bought the camera first and then I found your pin. Thank you very much
Yay! I hope you love it!