A simple gift tutorial: magnetic chalkboard

I love giving handmade gifts for Christmas. They are unique, customizable, and affordable – what’s not to love? A sweet magnetic chalkboard can make a great gift for anyone from a child to a busy mom to a young couple.
Last week I shared a great magnetic chalkboard I made from an old silvery tray, but not everyone has the perfect metal tray sitting around waiting to be made into a chalkboard. This version can be made with materials anyone can find at their local home improvement store.
(You can also use this tutorial to make a basic non-magnetic chalkboard. Just skip the sheet metal and paint the glass or mirror the frame came with.)

Materials:
-
Sheet metal – This can be found at Lowes or Home Depot. It is generally in the plumbing section. At my local Lowes, a 2 ft x 3 ft sheet is around $10. One sheet can make one giant chalkboard or two medium sized ones.
-
Frame – you can use a new frame or easily find one at a thrift store and refresh it with some paint
-
Chalkboard spray paint
-
Spray primer
-
Tin snips – also available at home improvement stores for $4 or $5
-
Marker
-
You may also need a hammer and some small nails

Using a marker, trace the glass or cardboard from the frame onto the sheet metal. (If your frame does not have glass or cardboard, you can trace the opening of the frame. Just make sure when you cut it, to cut it slightly larger than your traced shape so that the metal will fit into the lip of the back of the frame. If it is exactly the same size as the frame opening, it will fall right through the front of the frame when you try to attach it.)

Use tin snips to cut out the shape you traced. These are fairly easy to use though it does take a bit more effort than cutting paper.

Warning – Be smarter than me and wear gloves while cutting sheet metal! The cut side can be very sharp. I have cut myself more than once this way – please be smart and just wear gloves.

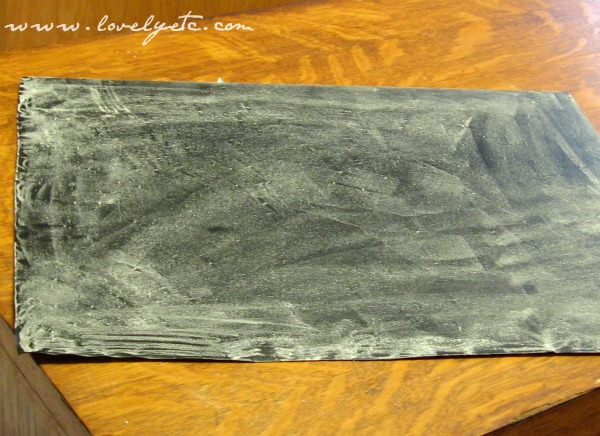
I like to spray the metal with primer first to help the chalkboard paint adhere to the metal better.

After the primer dries, paint your metal with chalkboard paint using very thin coats. The above picture was taken after the first coat of paint. I usually use four very light coats of paint.
Follow the directions on your chalkboard paint – typically you have to wait twenty-four hours and then prepare the chalkboard paint for writing by rubbing chalk all over the surface and then wiping it off.

Attach the metal to the back of your frame. I usually just use a hammer and some small tack nails to attach the metal to the frame. Two or three nails in each side is plenty.

And you are left with a great gift – a magnetic chalkboard. Both cute and practical. Give it to someone on your Christmas list or keep it for yourself.
Ok, this was my first real project tutorial so I have to wonder… how did I do? Did everything make sense? Was it mind-numbingly boring? Too detailed or not detailed enough? And did I commit a huge faux pas by showing blood on my blog? (I hope no one passed out or anything).
Over the next few weeks, I am planning to share more simple gift ideas and some great Christmas decor. I will also be hosting my very first giveaway in celebration of my birthday next week so be sure to stop back by.
I am sharing this project at Get Your DIY On.

This is a wonderful idea, now I just need some frames or make some. Awesome idea thanks!
It looks fantastic! It’s a great gift for almost anyone.
Dee
This is really cute, great idea!!
Carrie, thanks for sharing this beautiful blackboard with us over at tiarasandbowties.blogspot.com. Your tute was very informative, great first time! By the way, the blood didn’t bother me one bit… after I got back up from the floor passed out (ha ha)
xo
kim
Carrie, thanks for sharing this beautiful blackboard with us over at tiarasandbowties.blogspot.com. Your tute was very informative, great first time! By the way, the blood didn’t bother me one bit… after I got back up from the floor passed out (ha ha)
xo
kim
What a great idea… I like the thought of giving this as a gift. My mom would love this.
Jeanna @ dramaqueenseams.com
Hi Carrie, what a great idea for an unique Christmas gift. Thanks so much for sharing. I have recently found your blog and am now following you, and will visit often. Please stop by my blog and perhaps you would like to follow me also. Have a wonderful day. Hugs, Chris
http://chelencarter-retiredandlovingit.blogspot.com/
I love this and am super excited to put one together !!
I love this and am super excited to put one together !!
This would be a perfect Christmas gift. It looks adorable. :)
Thanks Charlene – I think it makes a great gift too! (And I can’t believe I am starting to think about Christmas already!)
This is so cute Carrie!! What a great gift idea:) Thanks so much for sharing it at the Get Your DIY On Chalkboard Challenge!! Hope you are able to make it back with a thrifty Halloween project (if you haven’t already!!). Have a fabulous week:)
Krista
This is a great idea! I’ve made some chalkboard and a magnetic board just not an all in one. Love this idea, and I think my two youngest grandkids would love one.
Thank you Linda! These are great for kids and adults alike!
Do you think you could combine this with your extra large DIY plain chalkboard? I’m wondering though if I should attach the sheet metal to the plywood just to give it a little more stability and maybe not so much flex. What do you think? :) Thanks so much! This is so awesome and I’m excited to make it ASAP!!!
Yes, that’s a great idea! You definitely could make this an extra large version with the frame like my extra large DIY chalkboard. I think a plywood backing would be a good idea because the sheet metal alone is very flexible. You could basically just follow the instructions in the large DIY chalkboard tutorial but add sheet metal over the plywood/hardboard and paint that with the chalkboard paint.