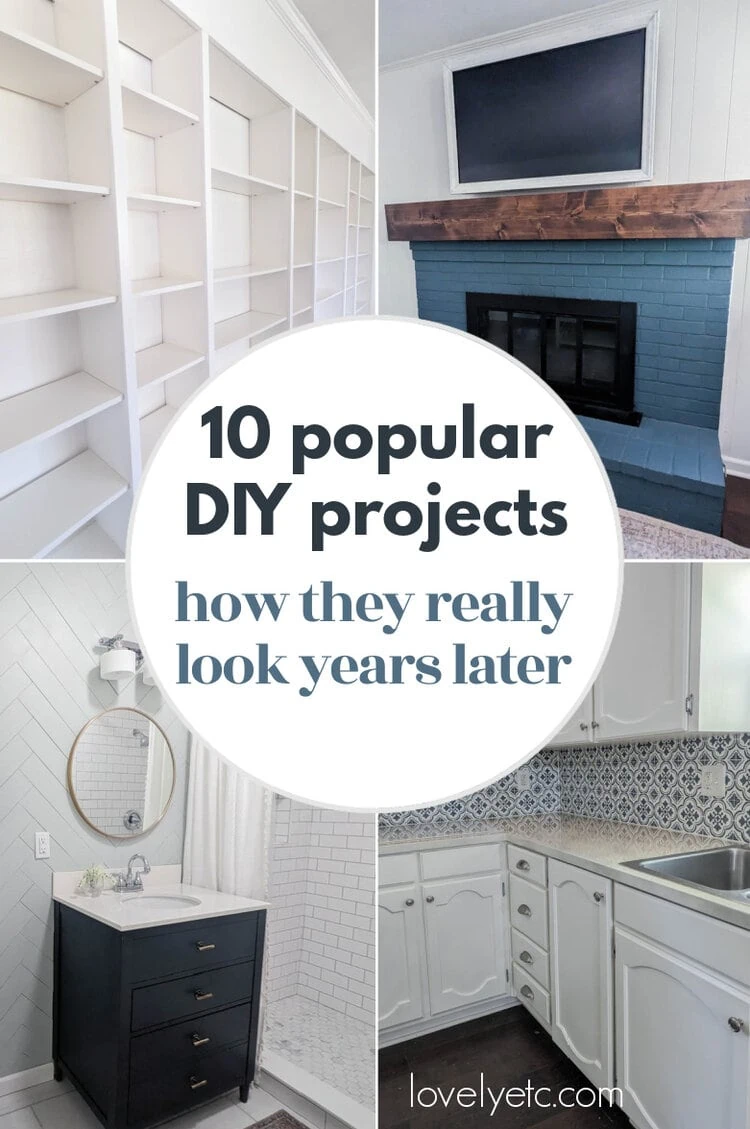
10 Top DIY projects 3+ years later: how they’ve really held up
I’m sharing a final update on how ten of my most popular DIY projects have held up over the years, including my painted cabinets, painted floors, and DIY built-ins.
There are big changes happening around here! After fifteen years living in our beloved brick ranch, we decided it was time to move on to a new house.
Of course this move is very bittersweet. We’ve loved this house and I have spent many hundreds of hours fixing things up around here. But it feels like the right time and I am excited to start making a whole new house our home!
But before I move on to sharing all about the new house and all my plans for it, there are a few DIY projects around here that definitely deserve a final update before we move on.
Like most online DIYers, I love to share my projects when they are shiny and brand new. But I’ve also always made it a point to share how my projects hold up over time. Because who cares how great your project looks when it’s new if it’s a total mess after just a few months of real life!
Many of these DIYs have been around for 5, 7, even 11 years at this point and I’m excited to share a final update on how they have truly held up over that time. I mean, how often do you get to hear an update on how a DIY project has lasted more than ten years later!
For this final update, I’m focusing on ten popular DIY projects that I’ve gotten lots of questions about and that have been around for at least three years. If you have questions about other projects and how they’ve held up, feel free to ask in the comments!
I’ve captioned all of the photos in this post so that it’s easy to tell which photos are recent and which aren’t. All of the updated photos were taken within the last few weeks, so you’ll probably notice that things look a bit different than usual since everything is half packed.
Also, I decided to write a separate post updating how my painted laminate countertops are looking after seven years of use. (I had a lot to share and this post is plenty long enough as it is.) If you’ve ever wondered if painting countertops is a crazy idea, you should check out that post next.
Now on to the updates, beginning with the newest projects and moving down to the oldest.
This post contains affiliate links which means if you make a purchase after clicking a link I will earn a small commission but it won’t cost you a penny more. Click here to see my full disclosure policy.
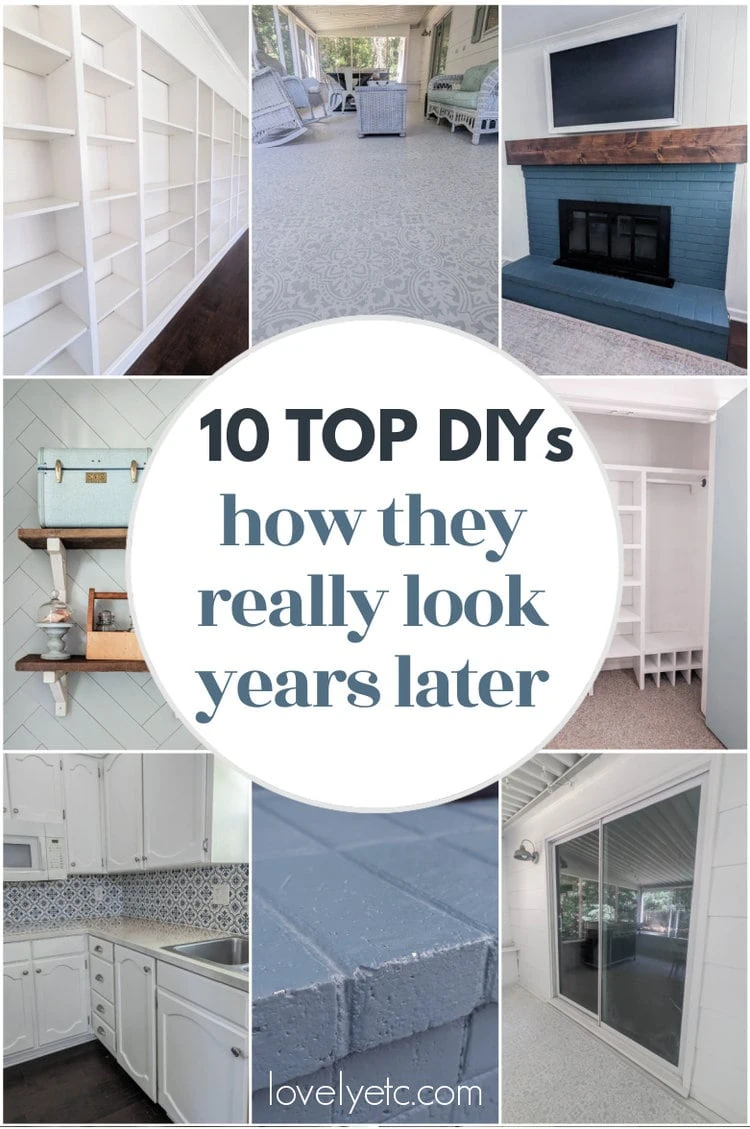
Painted sliding doors and aluminum windows – 3 years later
Our 1970s ranch still has the original aluminum windows as well as two sets of aluminum sliding glass doors. The old windows are actually surprisingly energy efficient, so there hasn’t been a real reason to replace them. But they definitely weren’t the prettiest.
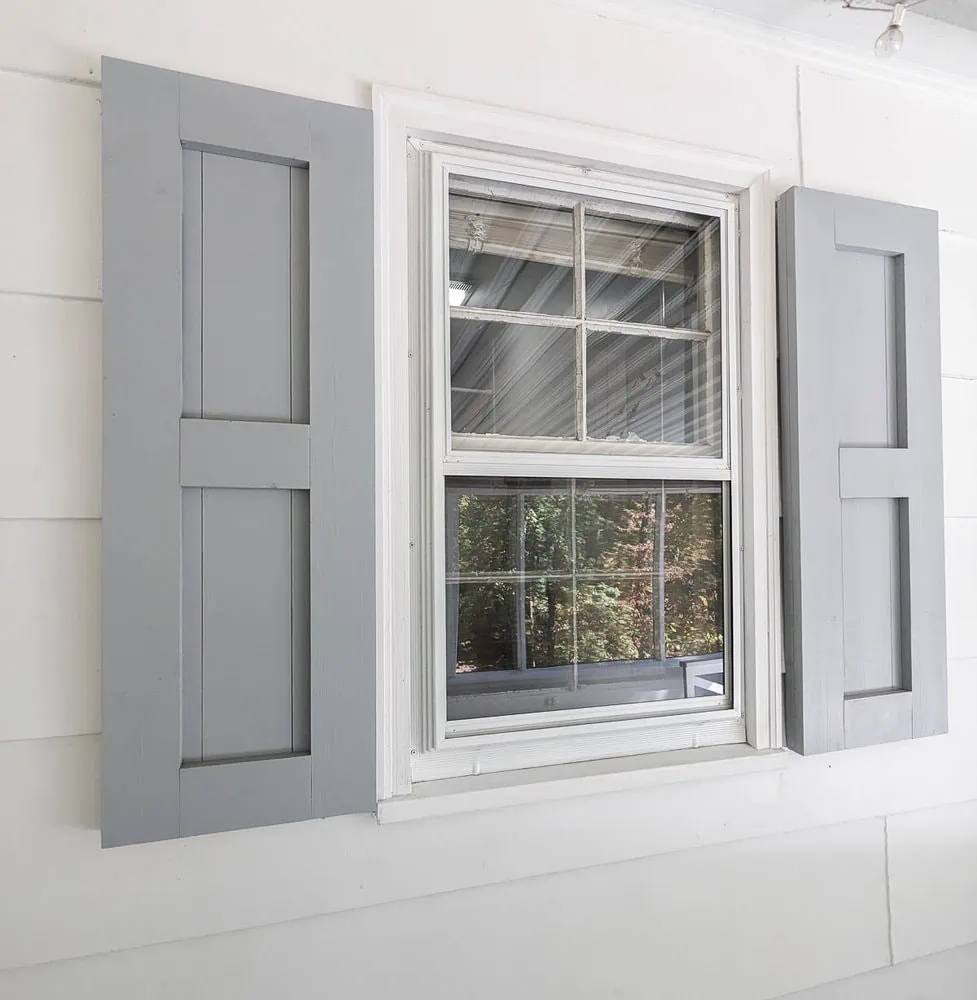
So I gave them a bit of an update with some simple white spray paint. I didn’t paint all the windows in our house, but I did paint the two aluminum windows on our back porch as well as the frames of our sliding doors.
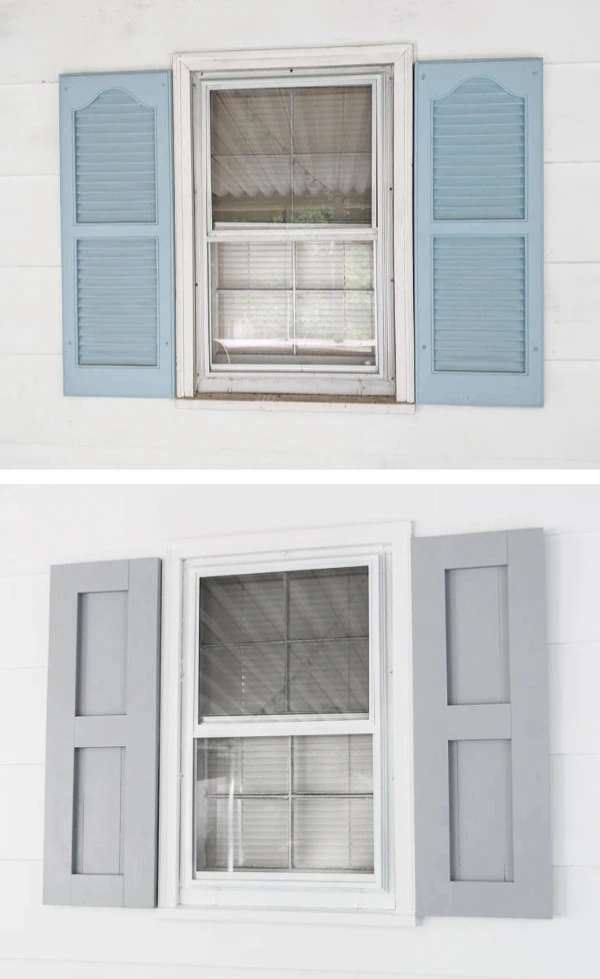
It was super cheap and easy to do and while the difference was subtle, it definitely gave them a more updated look.
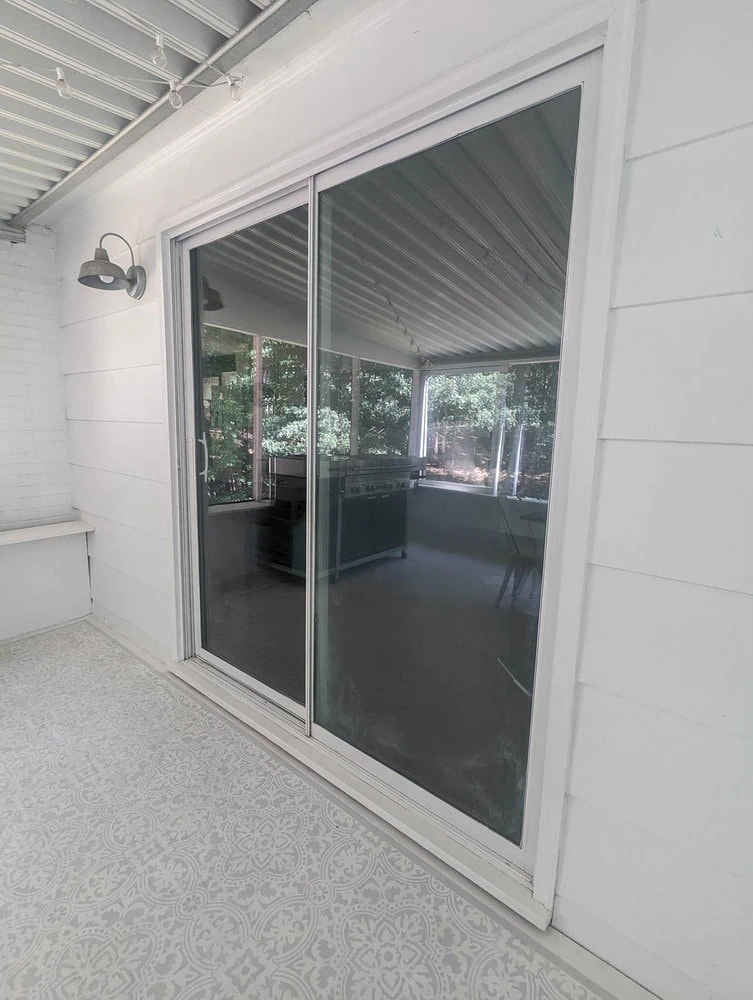
After three years, the paint on the aluminum windows still looks perfect. Honestly, you would never know they were painted.
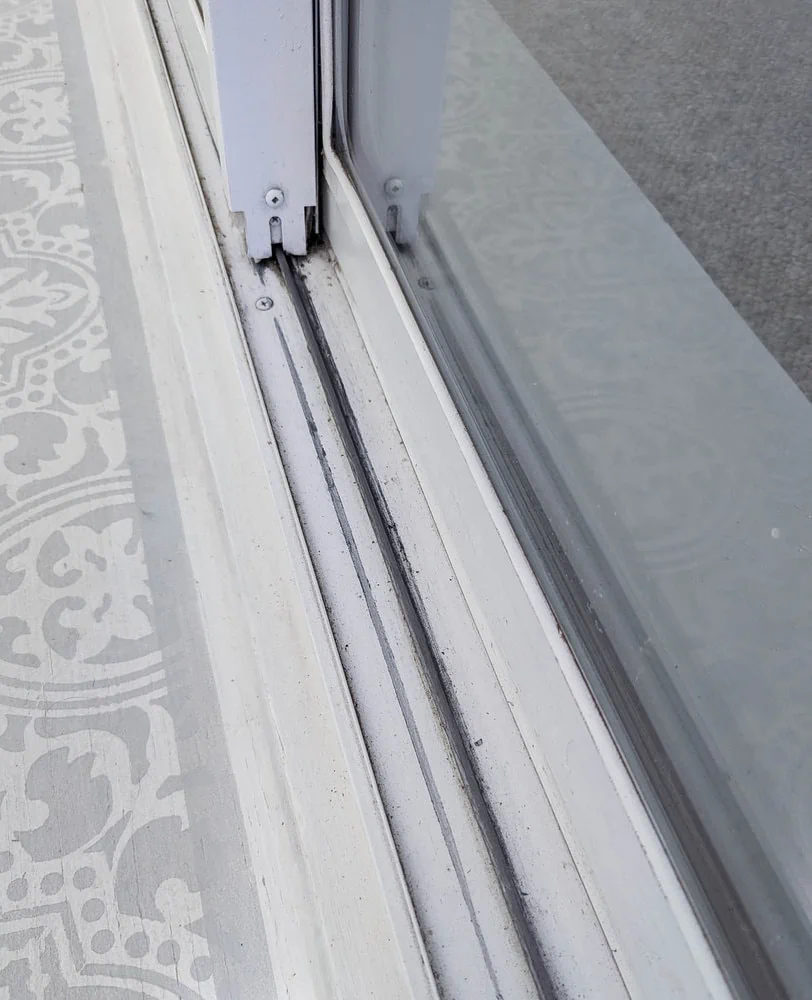
The paint on the sliding glass doors also still looks amazing, but the paint along the bottom of the door track has rubbed off quite a bit. Because it is along the floor, the color difference really isn’t noticeable at all. But if I had used a more high contrast color like black, it would probably be quite noticeable.
Overall, I’m really happy with the difference this super small change made and if we were staying in this house longer, I would probably paint the windows along the front of the house as well.
Herringbone wood wall in bathroom – 3 years later
I’m a huge fan of a wood accent wall. In addition to the herringbone wall in our master bathroom, I also have a geometric wood wall in my office and a weathered wood wall in our entryway (that’s been there almost ten years now!) And yes, I left all three accent walls in place while our house was on the market.
But the herringbone wood wall is the only one I’m giving a full update on because I’ve gotten several questions about whether a wood wall is really a good idea for a bathroom.
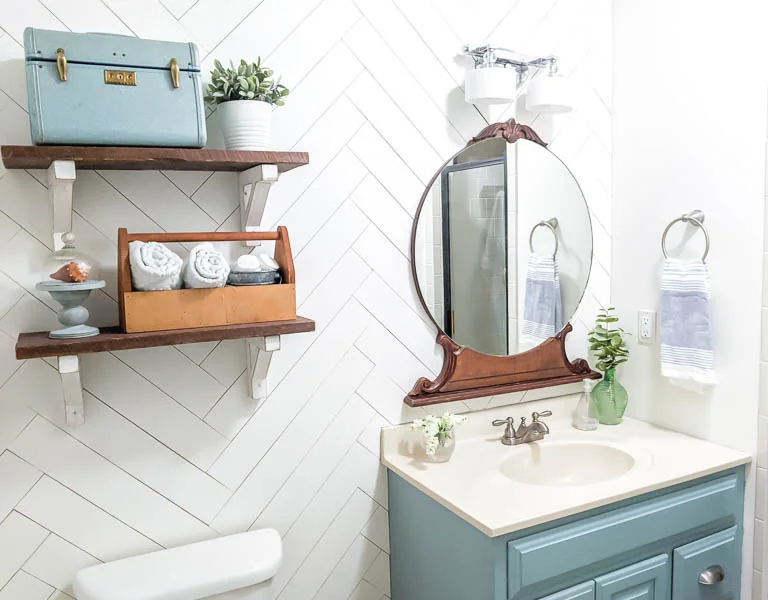
I think a lot of people are afraid to use wood in a place that gets as much moisture as a bathroom. We all know that wood can warp and be damaged by water and steam – both of which bathrooms are notorious for.
However, I think many people are a bit too afraid of using wood in bathrooms. Our first house was a 1922 bungalow with original wood floors throughout, including in the bathroom and they still looked beautiful. And the majority of bathrooms include vanities, cabinets, and shelves made from wood.
You absolutely can use wood in a bathroom as long as it is appropriately protected from moisture using either paint or a good sealer.
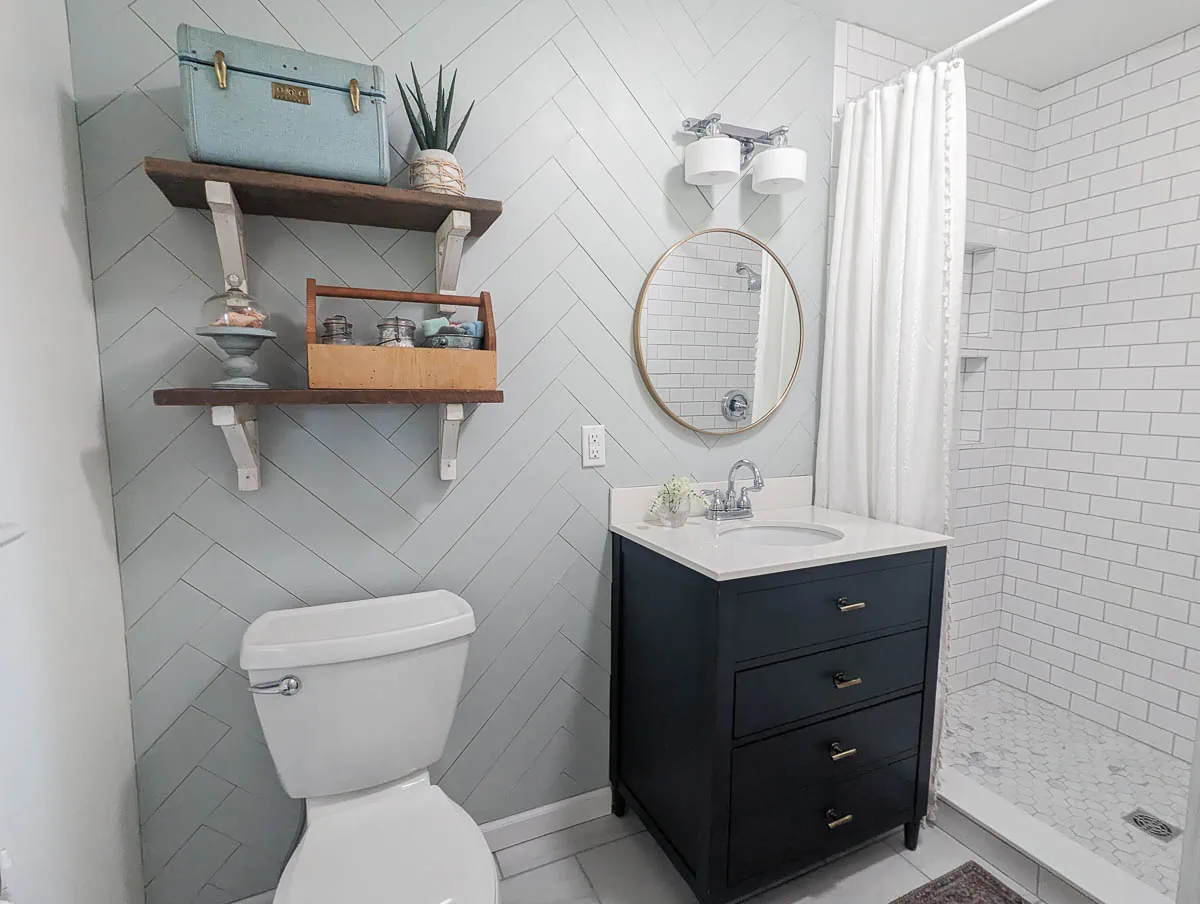
I installed the herringbone wall in my bathroom using just finishing nails so that it can easily be removed in the future if so desired. Even without using any glue, the wood is still in perfect condition with no warping or bowing three years later.
I repainted it a few months ago when I redid this bathroom and also replaced a few planks to fit around our new vanity. Otherwise, it looks exactly the same as when I installed it. And I still love the texture and warmth it adds to this small space.
Based on my experience, as long as you properly paint or seal the wood, a wood accent wall in a bathroom is a great idea.
Stenciled porch floor – 4 years later
When we first moved into this house, the screened-in porch had a huge Astroturf rug covering the floor. After removing that, we were left with an ugly plywood floor and I turned to my favorite cheap and easy solution – paint.
I originally painted a checkerboard pattern on the floor, and when it was ready for a fresh coat of paint ten years later, I updated it with a white and gray stenciled pattern.
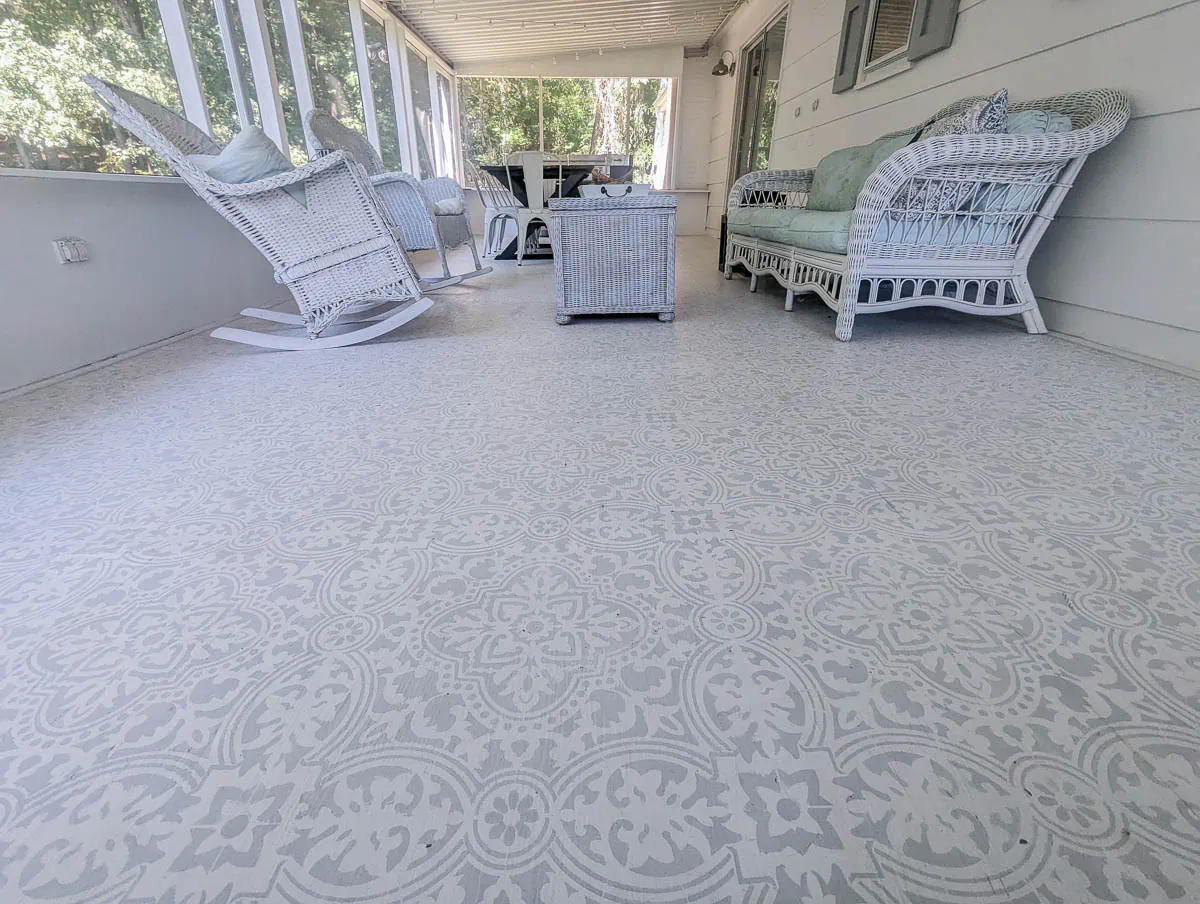
I love the look of this floor. The stenciled pattern is beautiful and unique but is also subtle enough to fade into the background. And the light floor and walls really help draw all your attention to the beautiful outdoors framed by the windows.
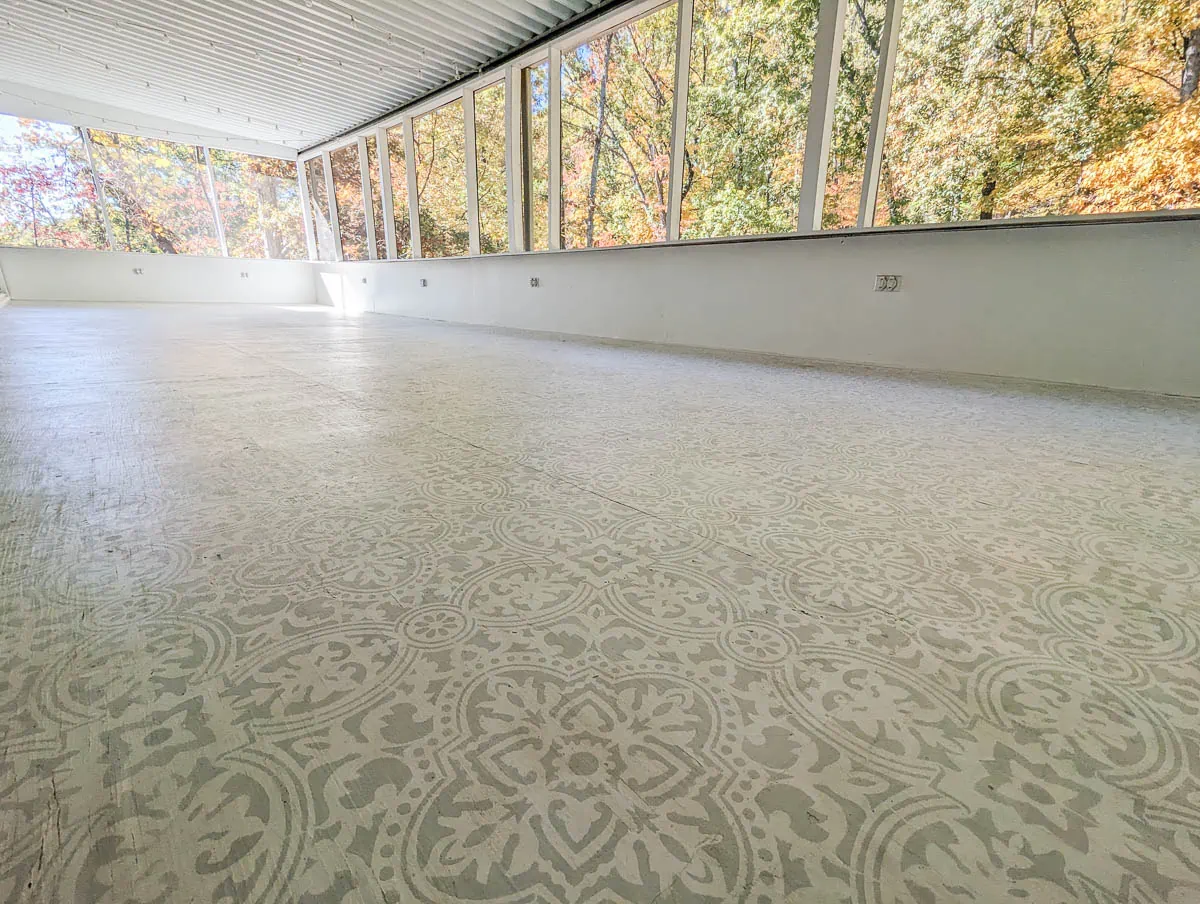
But I have to admit, I was nervous about how easy it would be to maintain a mostly bright white screened in porch surrounded by trees. There’s definitely a reason that most decks and porches aren’t painted white.
Thankfully, I’ve been pleasantly surprised to find that keeping the mostly white porch clean hasn’t been a huge issue. Every spring there is a huge influx of pollen coating everything and I typically spend an entire day in May clearing the pollen from all the surfaces on the porch including the floor. But I had to do that before everything was white too, so cleaning really hasn’t been the big issue I feared.
The rest of the year I’m able to keep things pretty clean and fresh just by sweeping occasionally – but I’m sure this would vary based on the environment where you live and how much dust, pollen, etc. is in the air.
There is a bit of wear and tear evident on the porch floor. There are a few places where the paint has been rubbed or scraped off, probably from moving furniture around or from my kids riding their scooters in here.
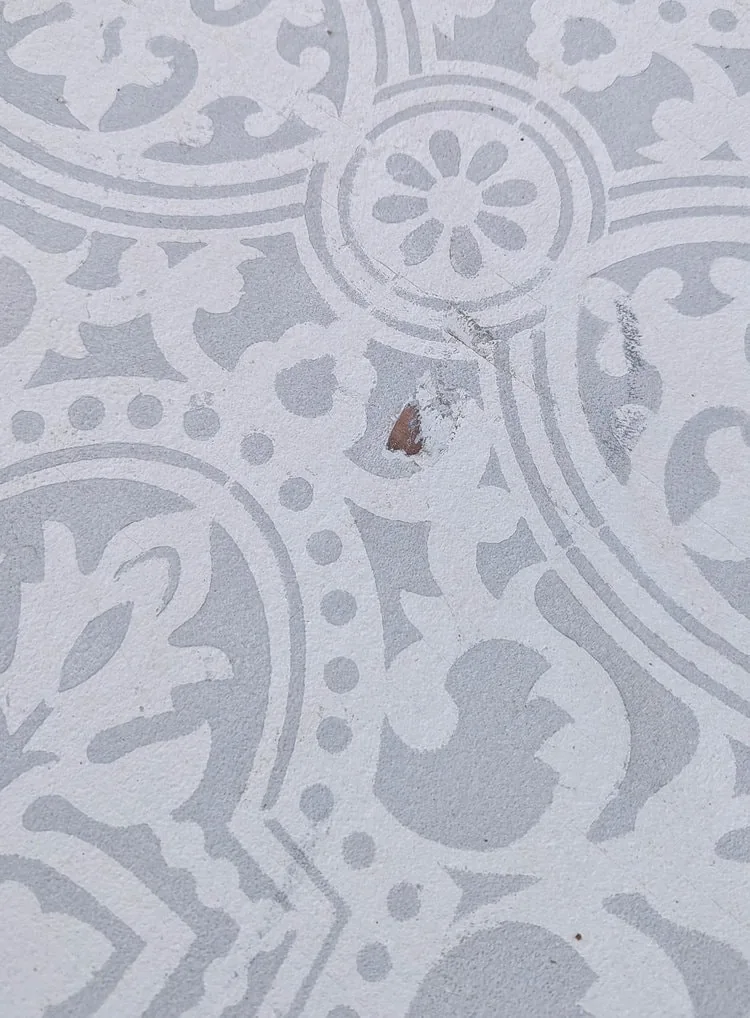
Overall, it is still in very good condition and I’m really happy with this beautiful floor, but I would imagine it will probably be ready for a fresh coat of paint or some other flooring within the next few years.
Stenciled Kitchen Backsplash – 4 years later
It’s been four years since I painted and stenciled our kitchen backsplash with this tile stencil. (And it was stenciled with a different stencil for three years before that.)
I love the look of our stenciled backsplash – it has the personality of a statement tile backsplash for way cheaper.
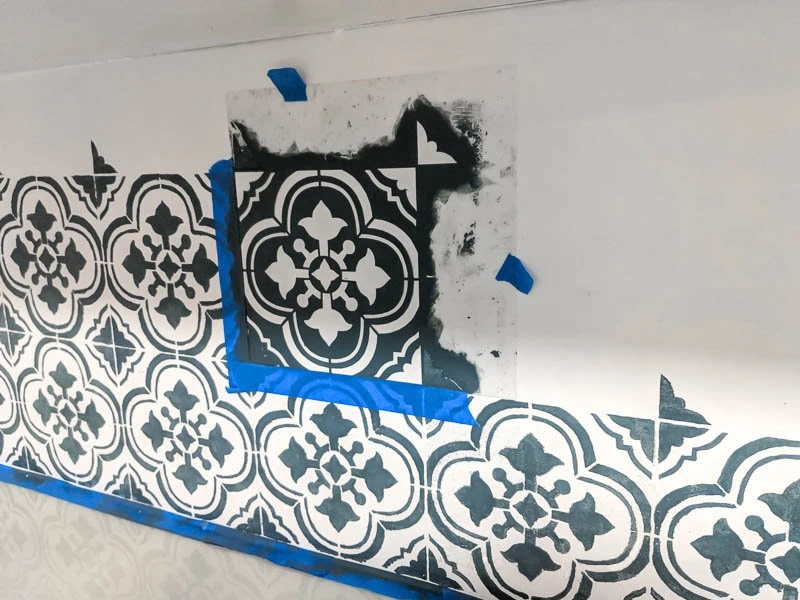
If you get very close, you can definitely see some small imperfections in the painted design. These were there from the beginning and while they aren’t noticeable unless you are really studying the backsplash, I’m a perfectionist so they drive me a bit crazy if I start looking closely.
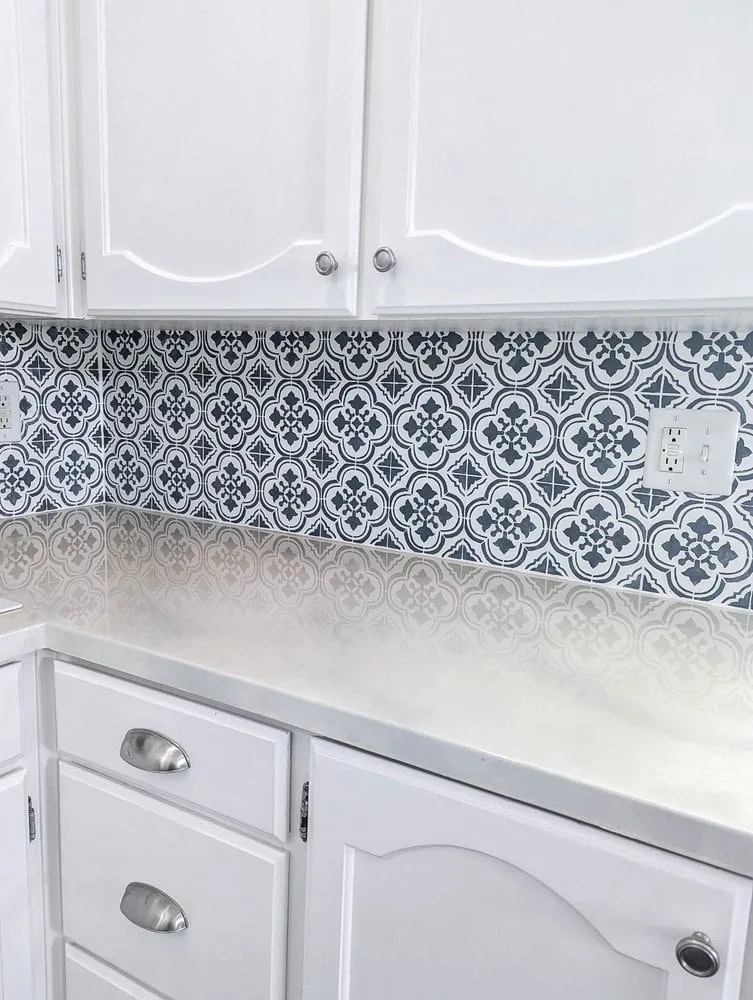
As far as how it has held up, most of the backsplash looks exactly the same as it did when I finished painting it four years ago. There is one small area where I had a vintage scale on the countertop and the metal scraped off some of the paint on the backsplash.
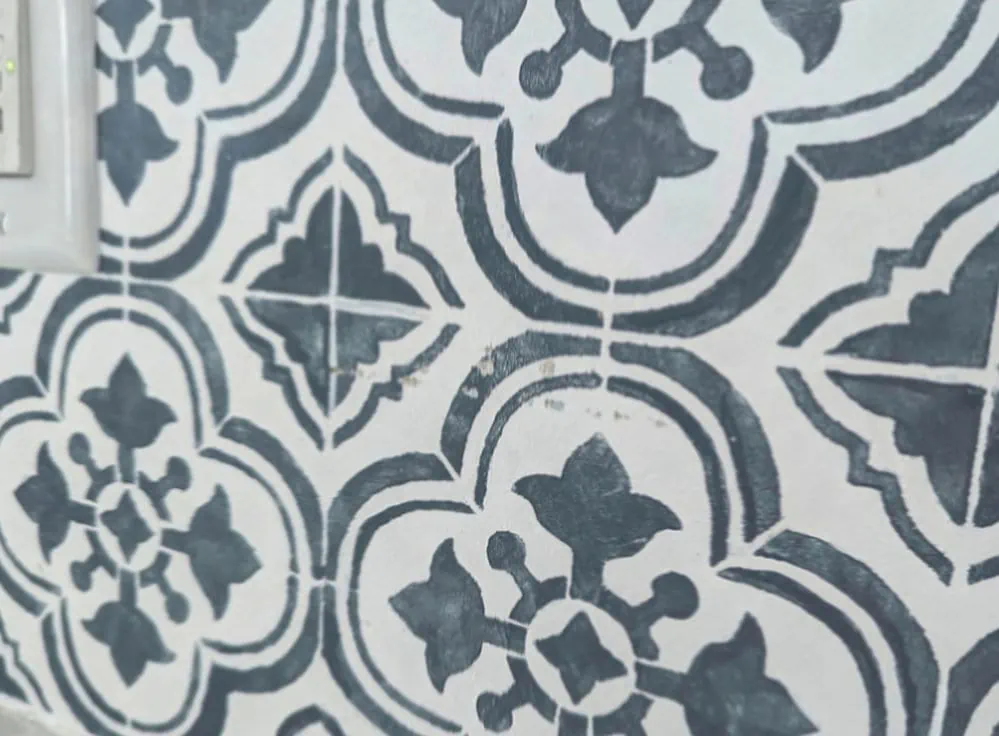
As far as cleaning, I simply wipe it down with a damp cloth when needed. Because I used semigloss paint, it wipes clean very easily.
All in all, I would definitely consider painting another backsplash in the future. It’s a super affordable way to create a beautiful look.
Built in IKEA Billy Bookcases – 5 years later
The built-in bookcases in our living room were the first big built-in project I ever tackled. Since I already had a bunch of IKEA Billy bookcases, I decided to use them as the foundation of my built-ins. Also, it seemed less intimidating than starting from scratch. I have a super detailed tutorial about how I put these together if you’re interested in tackling something similar.
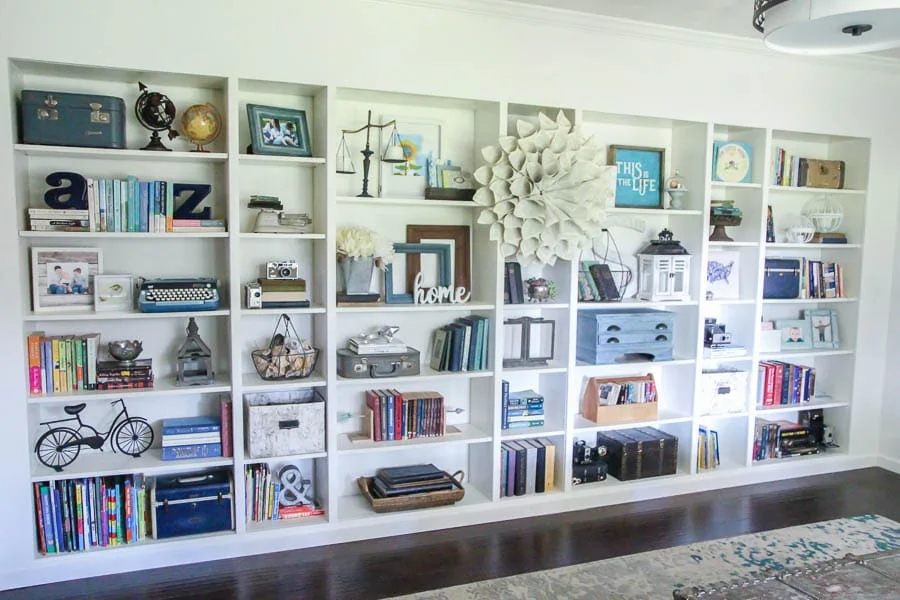
These built-ins gave this plain jane room so much character and personality as well as giving me a great place to store our book collection and display my favorite treasures.
It has also held up really well. With the shelves empty, you can see a few small areas that could probably use a paint touch-up, but overall it still looks great.
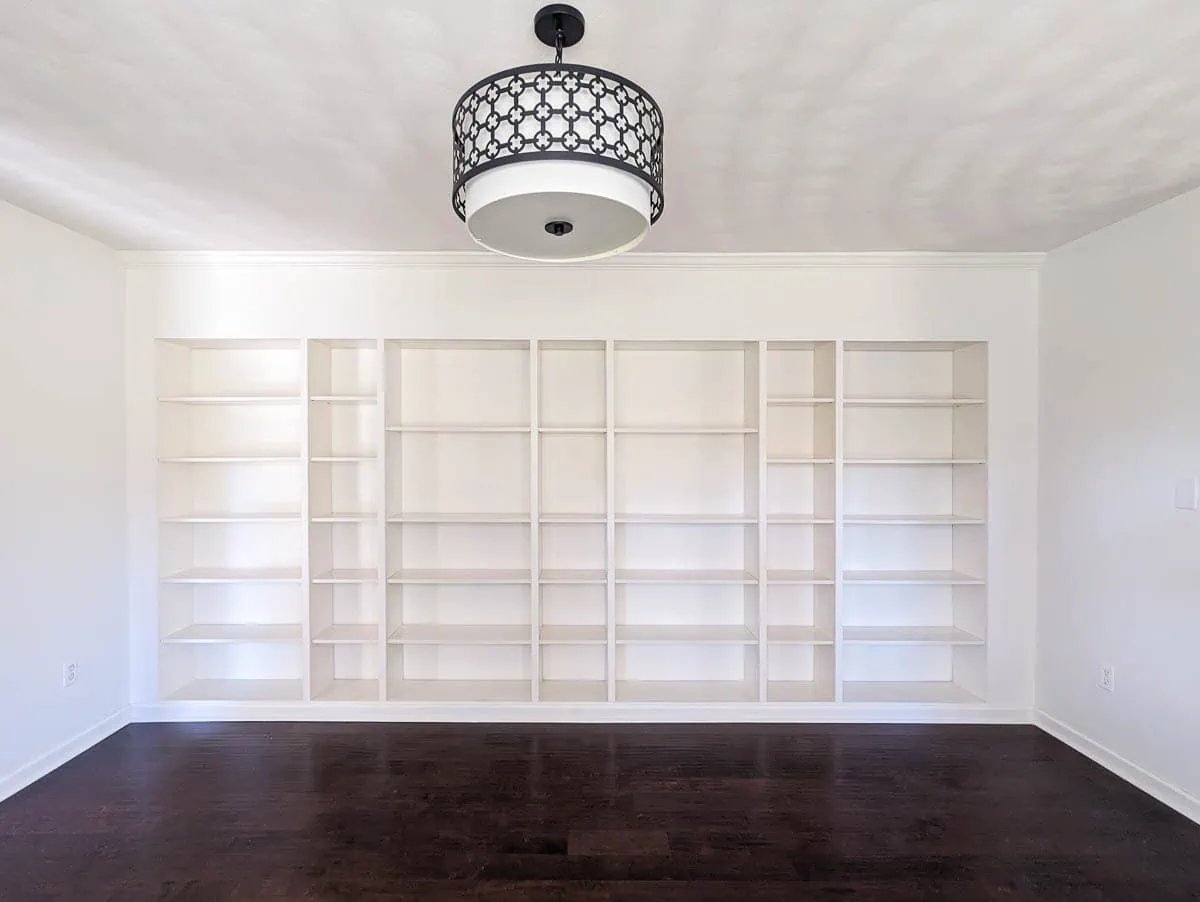
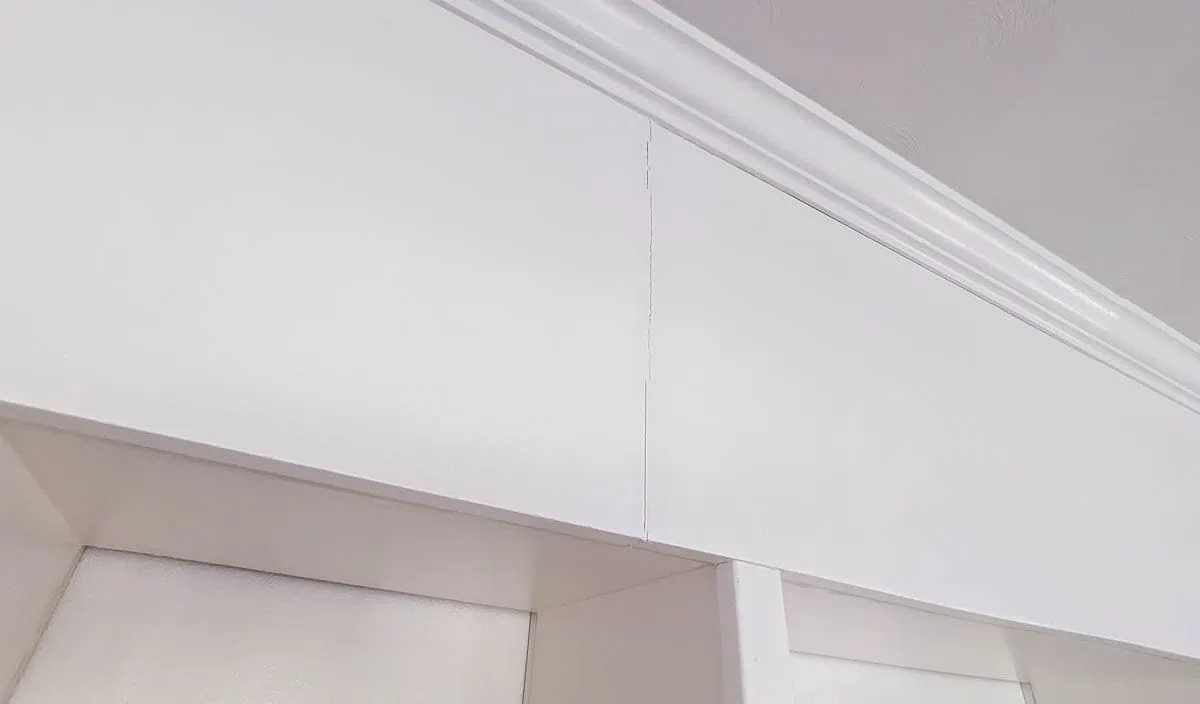
However, there is an annoying seam above the bookcases that I don’t love. Because my wall of bookcases is so wide, I used two long pieces of MDF to encase the top portion of the bookcases. Where they meet, I used caulk to disguise the seam.
Unfortunately, it turns out this was not the best way to deal with this. As the wood expands and contracts throughout the year, the caulk has cracked and does not look nearly as smooth and beautiful as I would like. If you look very closely at the photo above, you can see the little crack right below the light fixture and the photo below shows a closer look.
If I were doing this over, I would probably use some thin wood lattice to create a wainscoting look along the top of the bookcase that would cover this seam. Other than that, I wouldn’t change a thing and I’m excited to create some new built-ins in our new house!
DIY closet organizer – 6 and 2.5 years later
Two of the most popular projects I’ve ever shared are the inexpensive DIY closet organizers I built in our small bedroom closets.
I built custom closet shelves in my sons’ shared bedroom six years ago and then built a DIY closet organizer into our small master closet two and a half years ago.
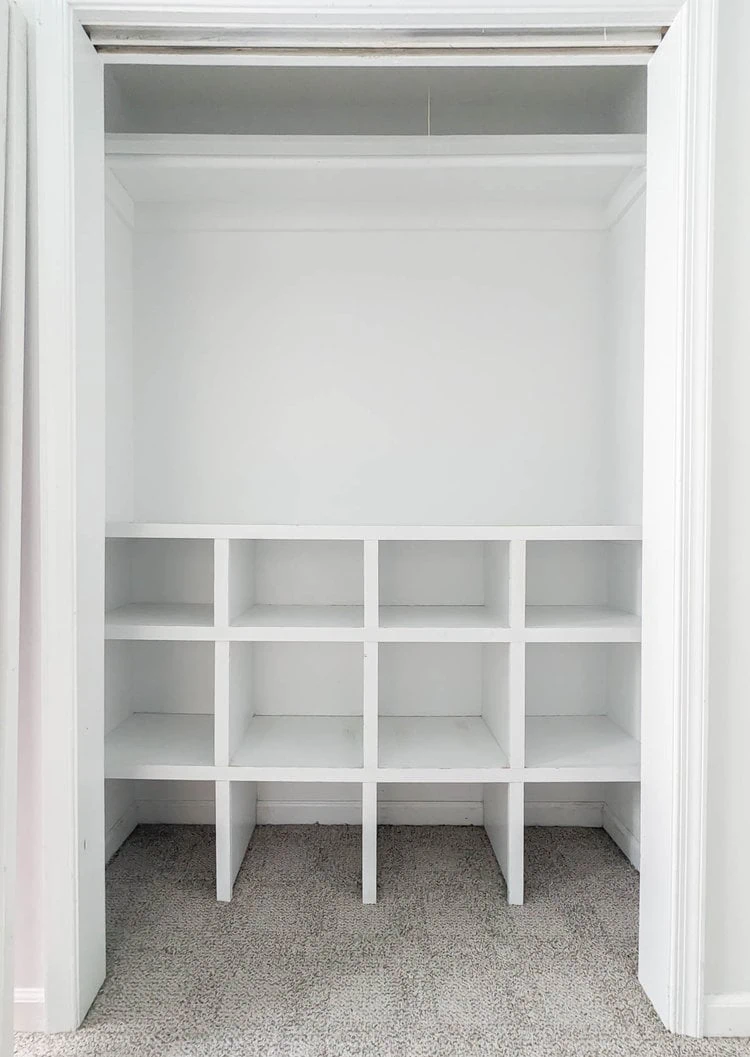
Both of these bedrooms had small closets that needed to fit all the clothing and shoes for multiple people and adding these closet organizers made such a huge difference. They allowed us to store more clothing, looked much nicer, and made it way easier to find what we needed.
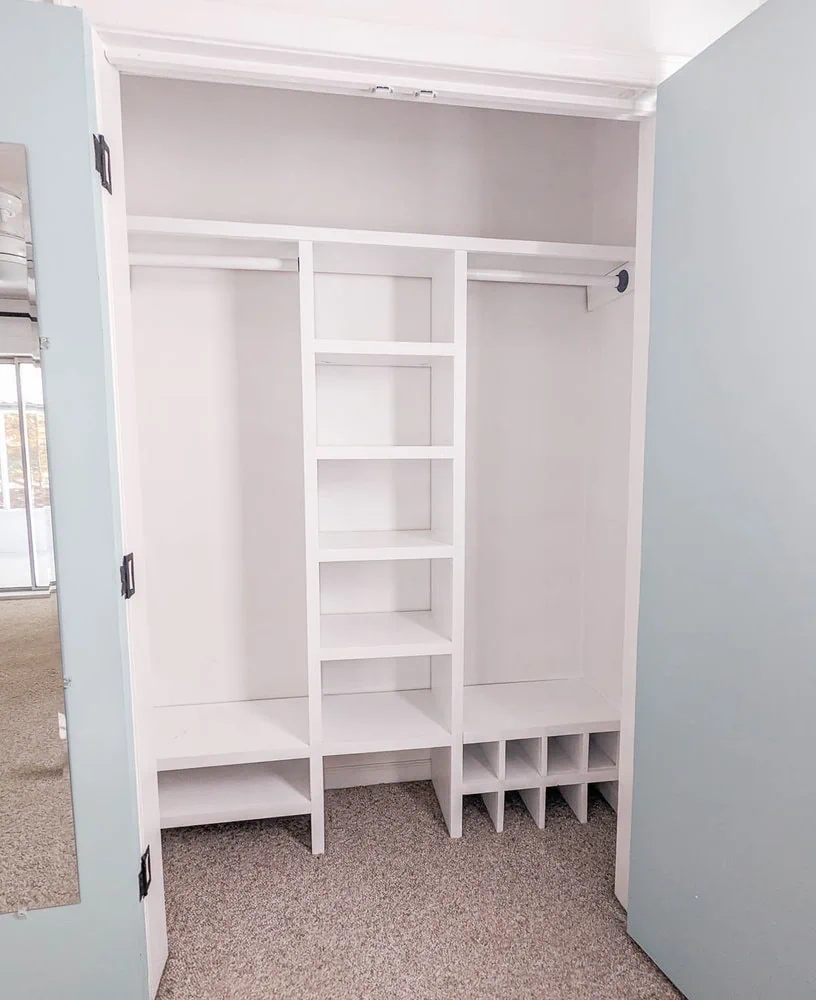
Now that a few years have passed, I’ve been super happy with how well these closet organizers are holding up, especially considering one of them has been used by three small boys for the past six years.
Despite catching my kids trying to hang on their shelves like monkeys a few times, everything is still sturdy and overall looking good.
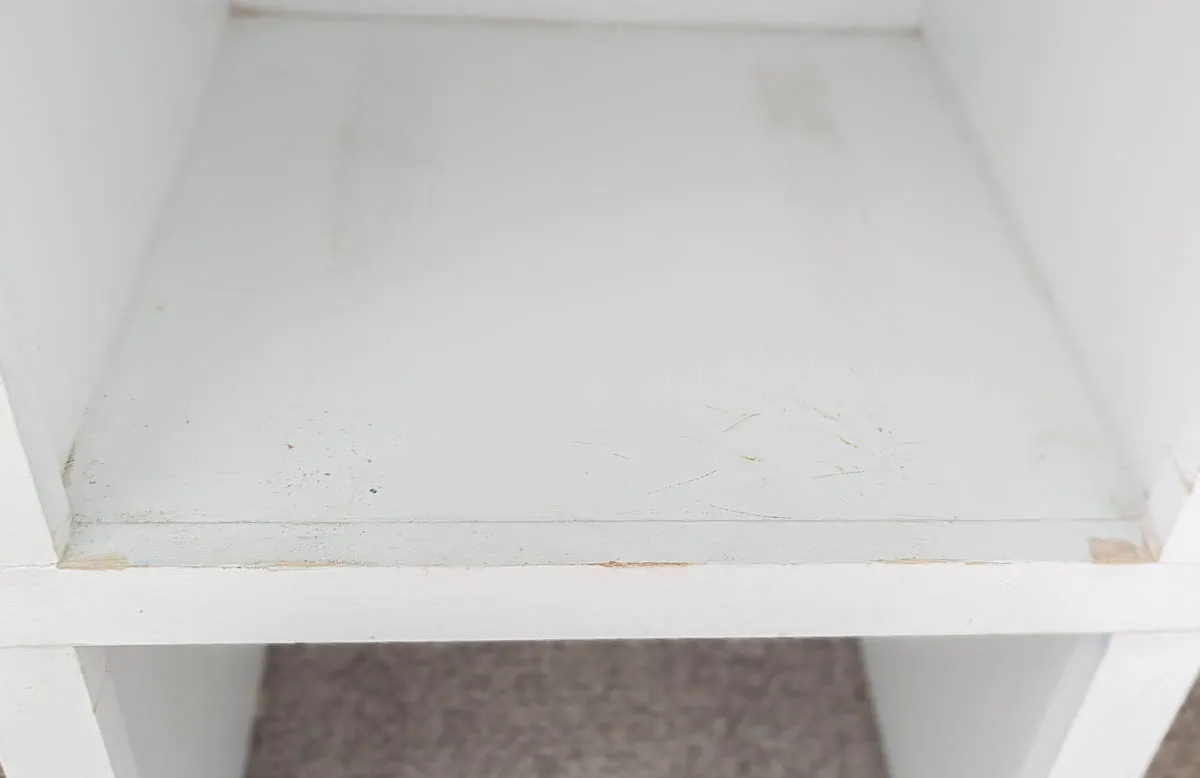
There are quite a few paint scuffs in the boys closet from pulling the cedar storage boxes in and out, but it is nothing a fresh coat of paint can’t fix. And the master closet basically looks as good as new.
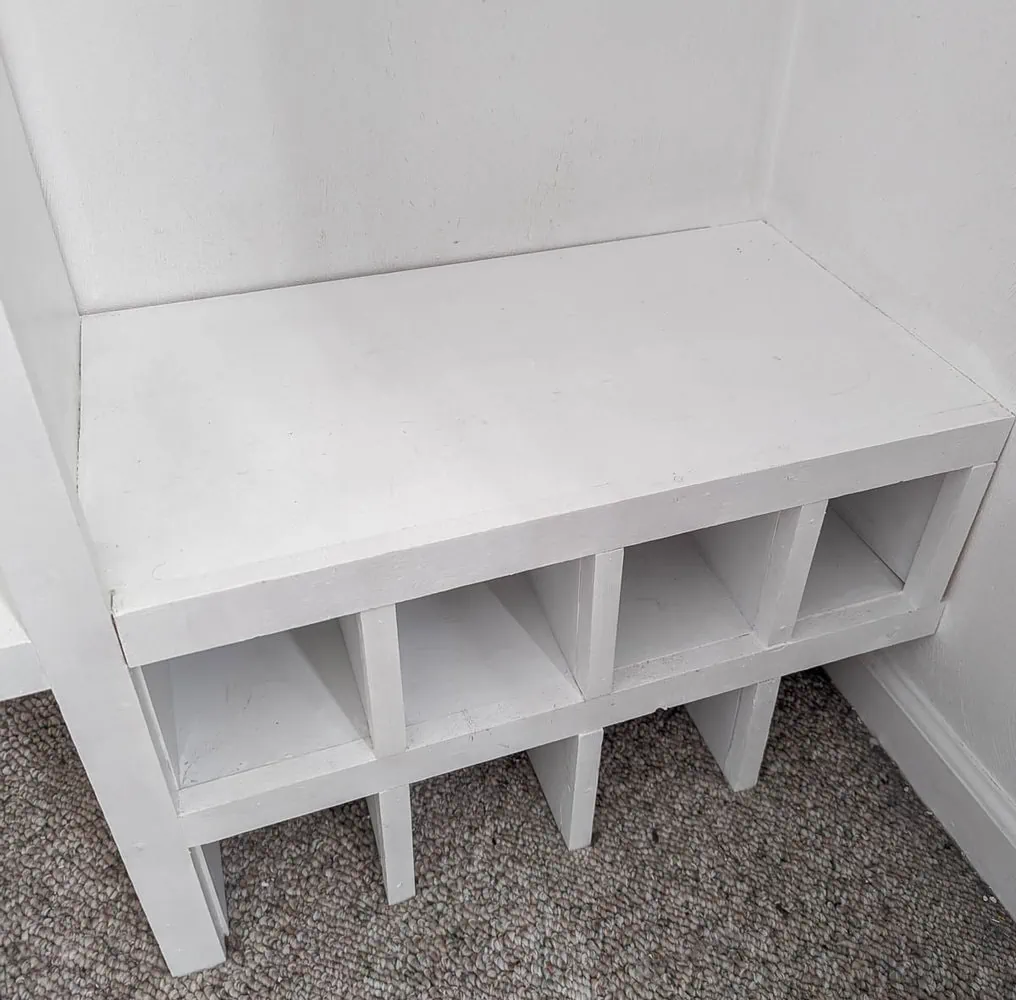
I’ve gotten several comments since I built the master closet organizer about how the fact it goes all the way to the floor will make updating the flooring in the future difficult. This is a fair criticism, especially because the carpet in the bedroom and closet is due for an update.
Because the closet organizer sits on the floor, you would probably need to disassemble it a bit to remove the old carpet and install new flooring.
If I were redesigning this now, I wouldn’t take it all the way to the floor for this reason.
Other than that, I still love both closet organizers and wouldn’t change a thing. They added so much function to our home and I can’t wait to start building out the closets in our new house.
DIY Wood Mantel – 6 years later
I loved that our home had a wood-burning fireplace, but it definitely wasn’t the prettiest fireplace. I started by painting the brick and then decided it also really needed a new mantel. The original mantel was just way too small and insubstantial for our big, blocky brick fireplace.
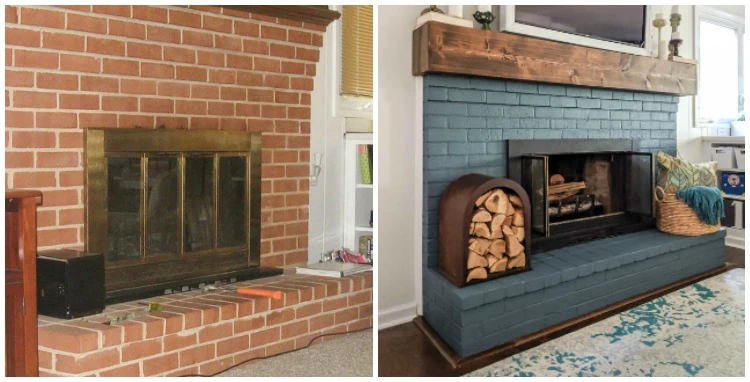
I built a new mantel using inexpensive pine lumber with veneer on the ends to give the look of a large wood beam.
I’ve gotten a couple of questions over the years about how the mantel has held up since it is made from pine. Pine is a very soft wood that scratches and dents a lot more easily than hardwoods; that’s why it isn’t often used on furniture.
But since this is a mantel, not a table, it has held up great. The wood is rarely touched and even if it were, this is a rustic mantel so scratches and imperfections would just add to the character.
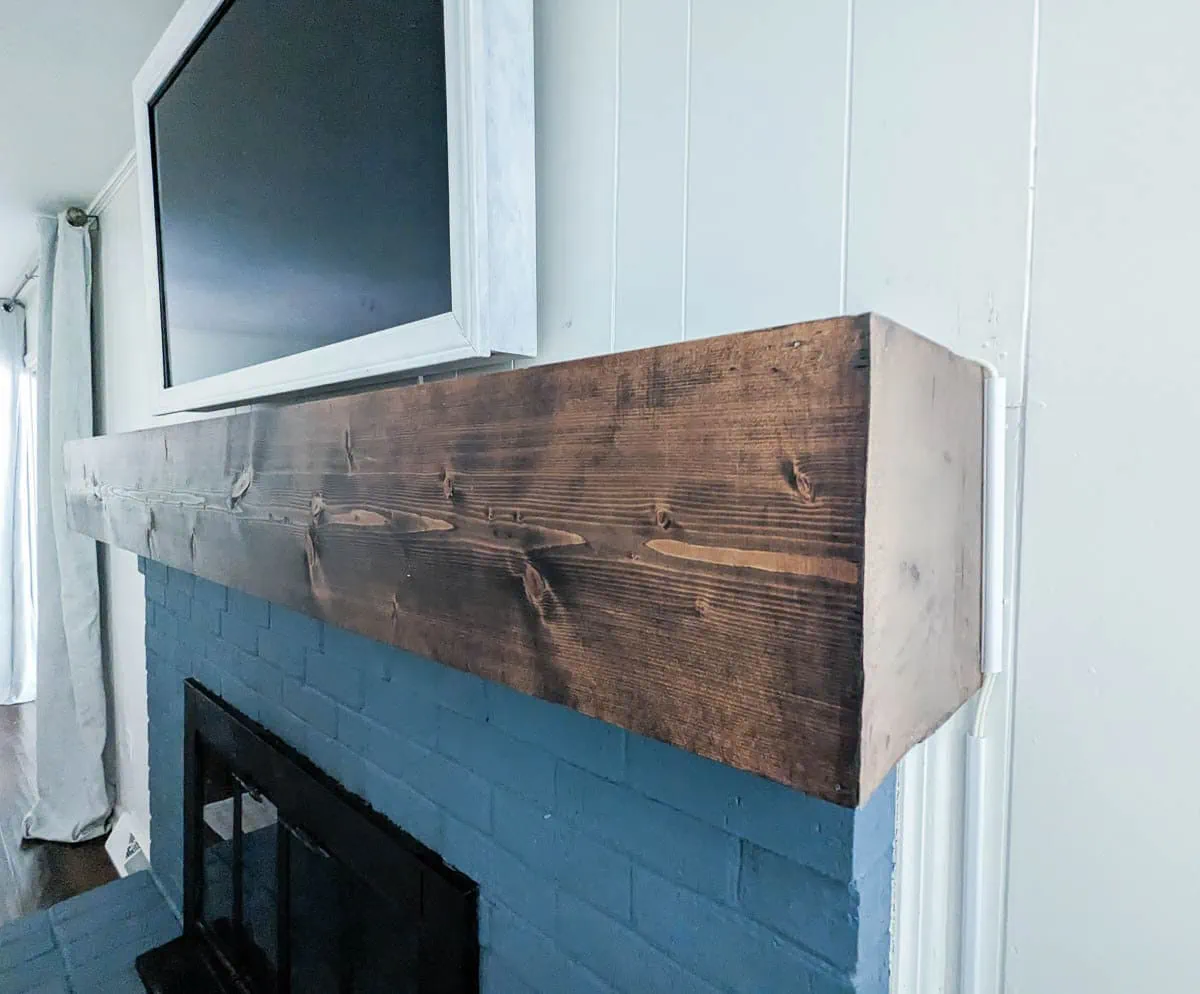
Overall, the mantel looks exactly the same six years later and if I were rebuilding it, I would do it again the exact same way.
Painted brick fireplace – 7 years later
I know painting a brick fireplace isn’t exactly groundbreaking. People have been painting brick for decades. But because painting brick is a pretty permanent change, a lot of people still question if it is a good idea and how well it actually lasts.
I originally painted our brick fireplace white before deciding to be a bit more bold and paint it a deep blue. It’s been seven years since I painted it blue and I love it just as much now as I did the very first day.
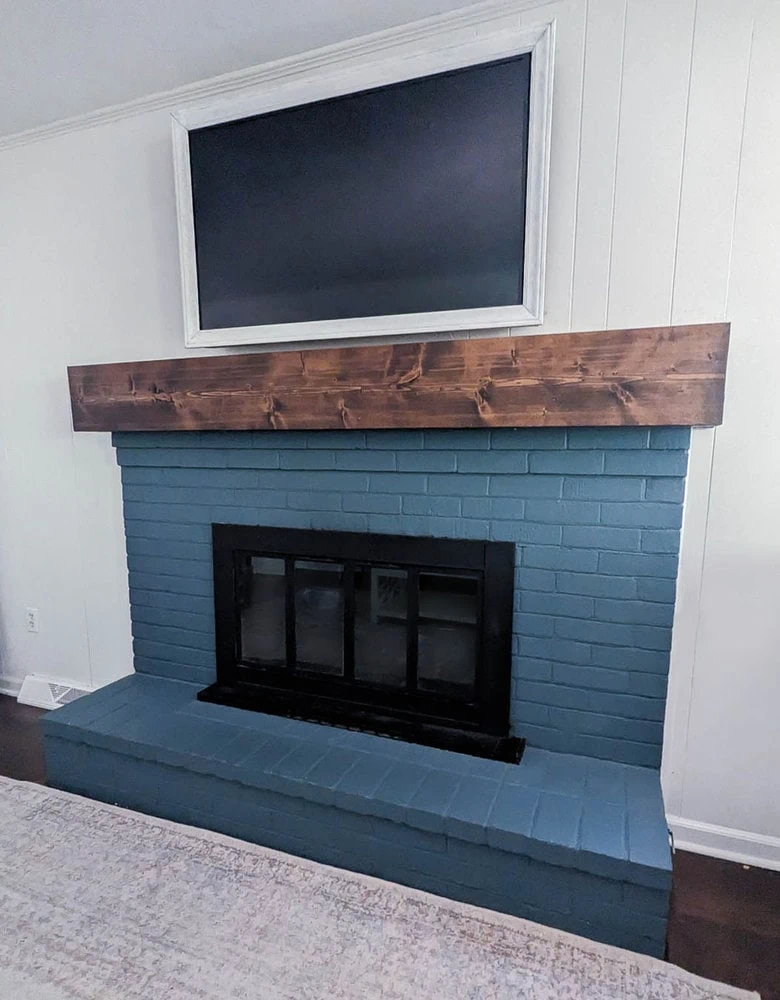
Personally, I don’t think all brick is equal. I’ve seen lots of really beautiful old brickwork and I’ve also seen some very ugly brickwork. Our own fireplace had very orangey-red bricks and sloppy mortar lines, so I had no qualms about painting right over it.
I will admit, though, that painted brick is not completely maintenance-free. The paint on our brick fireplace does chip from time to time when a stray toy or firewood log hits it. I also noticed several chips where our firewood holder had been sitting when I moved it while packing.
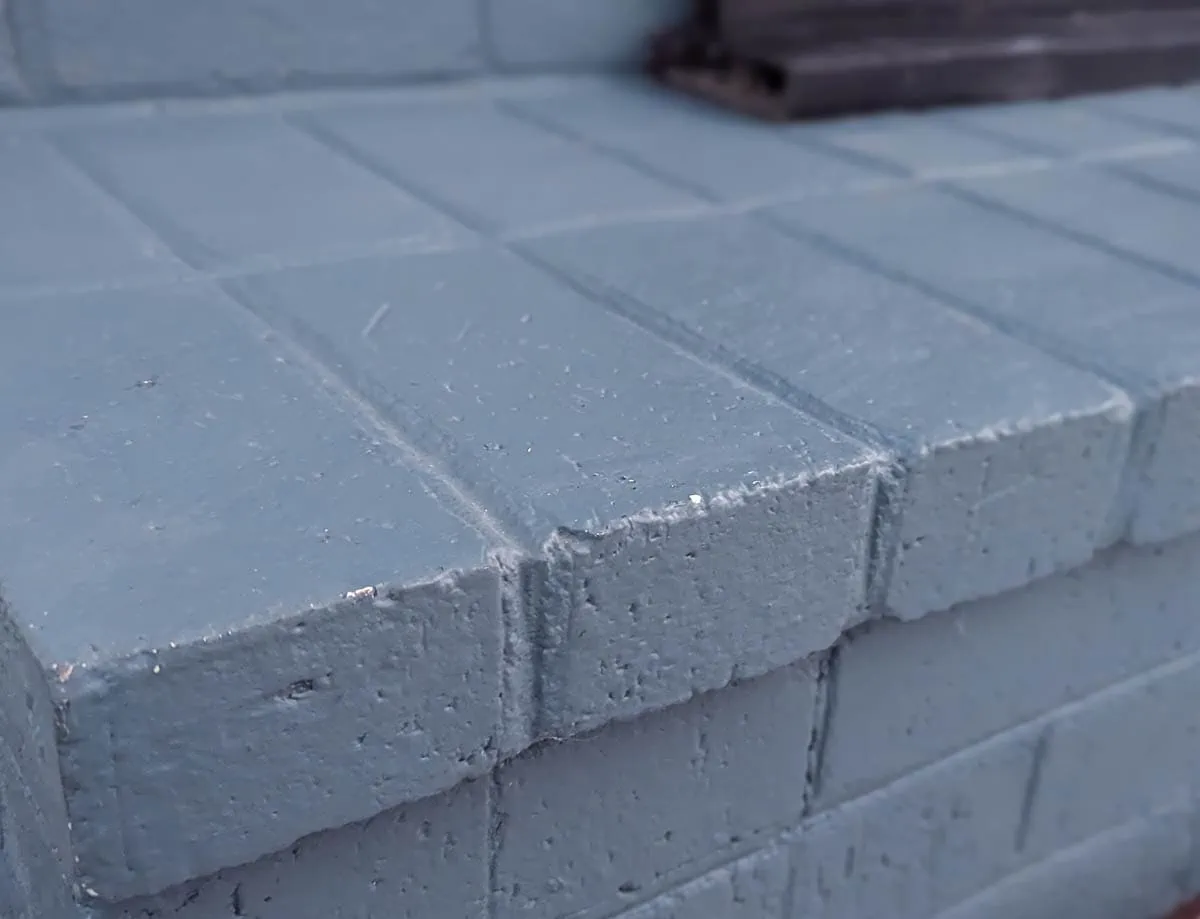
Luckily, touching up paint on brick is super easy. Unlike touching up cabinets, you don’t have to worry about getting a smooth finish, so as long as you use the right color and sheen of paint, your touch ups will be undetectable.
If we ever have a brick fireplace again in the future, I would 100% consider painting it again. Though I would also be open to leaving it unpainted if the brick is nice.
Painted kitchen cabinets – 7 years later
Painting my oak kitchen cabinets white is one of the most impactful projects I’ve done in my entire house. Even if I hadn’t made any other changes, that alone completely updated the look and feel of my kitchen.
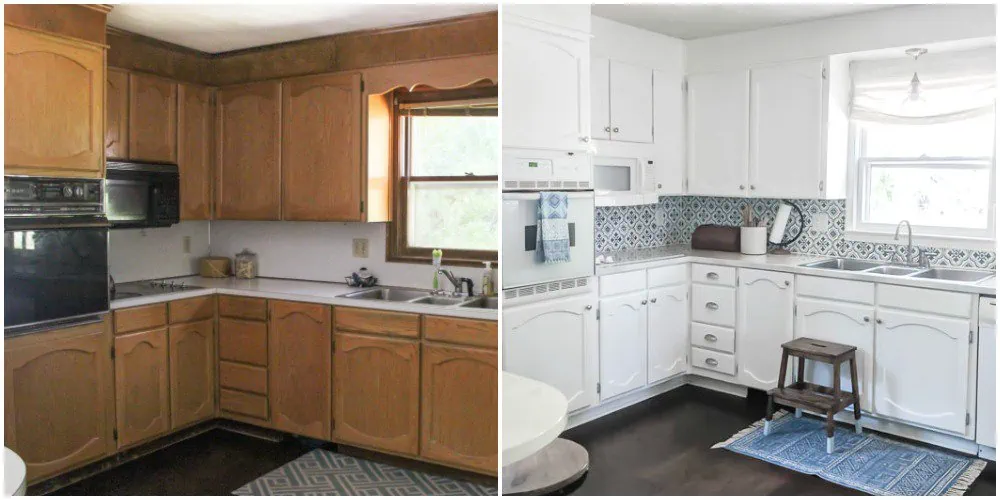
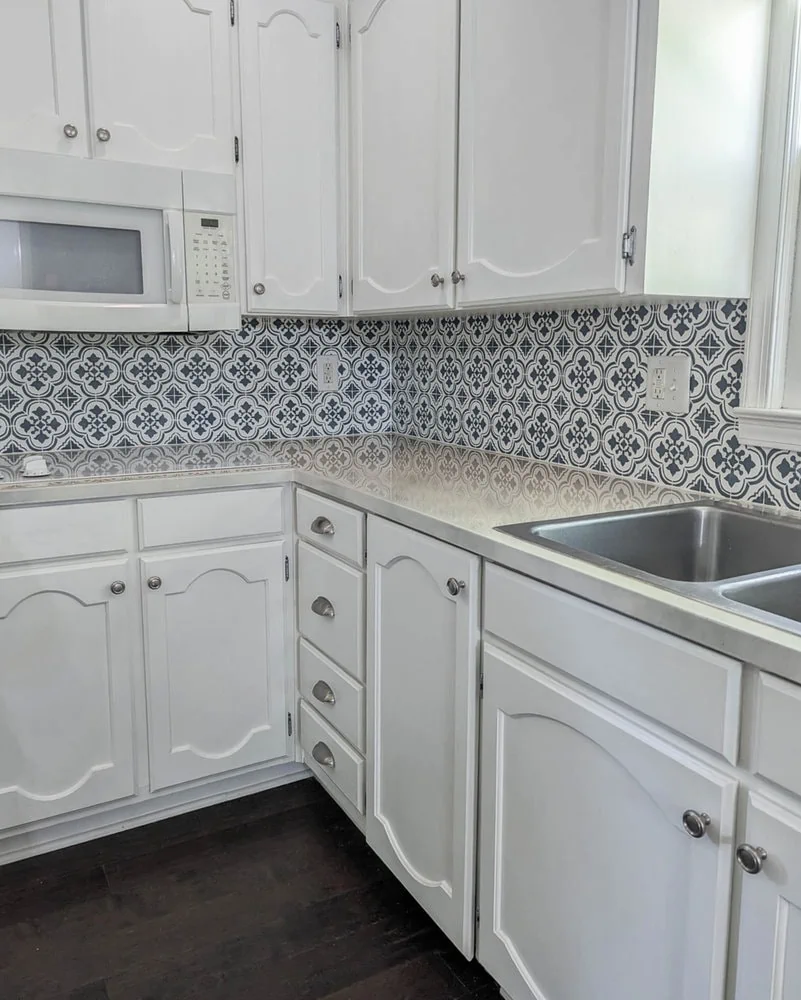
Seven years later, my cabinets still have that same original bright white paint finish. I’ve seen many people say that they don’t want white cabinets because it will involved too much cleaning.
I’ll admit my white cabinets definitely show spills and splatters more easily than the old wood finish. But while spills may stand out a bit more, they aren’t actually any more or less dirty than before. If something gets spilled, I clean it up, same as before.
As far as how I clean them, it depends on what needs to be cleaned. For small messes, I often just use a damp paper towel. For more stuck on stains, I typically use a magic eraser.
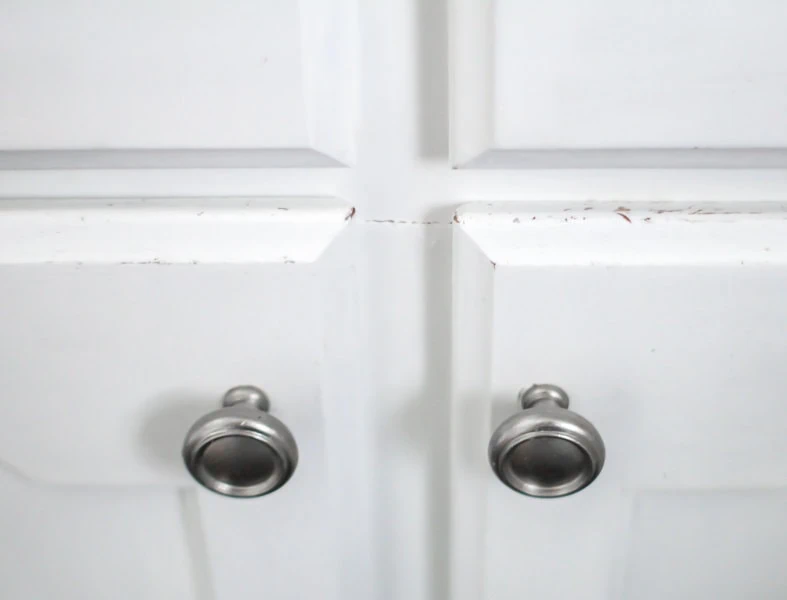
As I’ve shared before, my cabinets have had some paint chipping. And while I haven’t completely repainted the cabinets, I have touched up the small chipped areas twice.
I don’t have any current photos of what the chipping looks like because I touched up the paint right before listing the house for sale, but below is a photo of the cabinets before the first time I touched up the paint.
I have a post that explains in detail how to touch up cabinet paint without making it look messy. It isn’t difficult and typically takes less than an hour of work to get everything looking new again.
Of course, it would be nice not to have to ever deal with chipping, but that’s really just the nature of painted cabinets. Over time, paint chips.
Doing those small paint touch ups has kept my cabinets looking as good as when they were freshly painted for seven years now. You really can’t beat that!
I would paint cabinets again in a heartbeat. It can make a huge difference in your space and while it has needed a little maintenance, overall it has held up exceptionally well for the past seven years.
Super cheap DIY curtain rods – 11 years later
It’s hard to believe it’s been eleven years since I made the super cheap curtain rods in my living room and dining room. And yes, I am still using the same curtain rods today!
I actually just finished updating my tutorial on making these DIY curtain rods since it has been so long. When I first published that post in 2012, all the materials for three extra long curtain rods came to $14; now 11 years later, it’s more like $31.
Talk about some major inflation! Of course, the cost of curtain rods that you buy in the store has also gone up, so this DIY version is still a great inexpensive alternative.
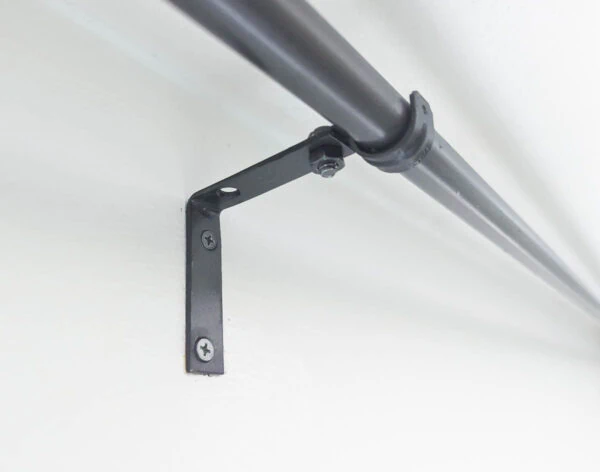
My curtain rods have held up really well over the years. In fact, I would say they’ve actually held up better than some store-bought curtain rods I’ve used. There’s none of the annoying sagging that can happen in the middle with expandable curtain rods.
Even with the price increase, as we are getting settled into our new house, if I have bare windows in need of curtain rods, I will absolutely be making more of these.
Those are the top DIY projects in this house that I felt really deserved one last update. Overall, they’ve all held up really well, though there are definitely a few things I would do differently.
And now I’m pretty pumped to start working on our new house, personalizing things and making things work for our family. Here’s to a whole new batch of updates in the future!

I’d love for you to pin this post on Pinterest!
