Painted Checkerboard Porch Floor: A how-to plus how it looks five years later
I painted the floor of my screened porch five years ago, not too long after we moved into this house. Which means I can’t give you a tutorial full of play by play pictures.
But I can give you something even more valuable: the truth about how it has held up to five years of wear and tear and the elements. Plus I will share how I painted it to begin with.
But first, let’s start at the very beginning, a very good place to start. (Are you singing along yet?) Why did we paint the floor to start with? This is what our porch floor looked like when we moved in:

And under that nasty green carpet was a plain old plywood floor.

There was no question the carpet had to go. It was dated, ugly, dirty, and stained. But we didn’t have a lot of options as far as replacing it. Basically we needed something light, durable, and most importantly cheap.
Which left very, very few choices. So we went with paint because paint pretty much fixes everything.
At first I was concerned that the existing wood needed something more than paint to make it weatherproof. But then I remembered that the entire rest of the porch was constructed of painted wood.
And that most older homes, including our previous house, had painted wood porches. So I went with it.

After patching and sanding the porch floor, I primed it using a latex interior/exterior primer. When I saw that huge expanse of white floor and how your eye was drawn to every tiny imperfection in the wood (of which there were many), I decided a pattern was the way to go.
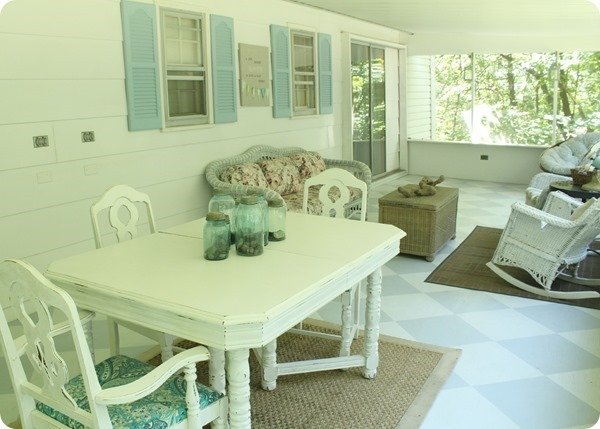
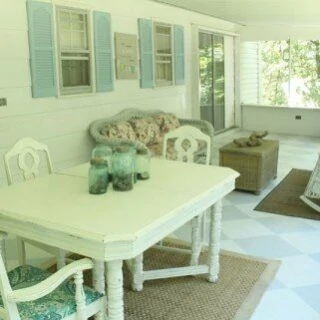
I wanted something classic so I went with a diamond checkerboard pattern.
(Incidentally, while researching inspiration for painting this porch I came across my very first décor blog – Young House Love. I pretty much thought it was the coolest thing ever and an obsession with blogs was born).
Creating the diamond checkerboard pattern seemed super simple…until I actually got ready to do it. Not as simple as it seems – particularly when you are doing it on an angle.
And let’s face it – the whole checkerboard thing is not nearly as awesome when made of squares instead of diamonds.
First I painted the entire porch the lighter of the two colors I used – a very light grayish blue. Then, I created a grid on the floor using a chalk line. Then I used painter’s tape to tape off each diamond by taping corner to corner on the grid. ‘

***The most important thing to remember is that when you are taping, you need to tape along the outside of each diamond you will be painting. (Similar to how if you paint stripes, you tape along the outside of the stripes you will be painting).
You want your painted diamonds to go exactly from corner to corner so your tape edge should line up exactly with the corners. Once you have taped off your diamonds, the ones you are painting will look bigger than the other ones but that is simply because the tape is partially covering the diamonds that will remain the first color. (I know this is confusing and I wish I had some pictures of the process to share).***
Once everything is taped off, you can wipe off your chalk lines. Then, using your second color, fill in every other diamond. (The ones you taped along the outsides).
Once the floor was painted, I really wanted to use a sealer on it because I could see that would make it much easier to keep clean. Unfortunately, I was unable to find any sealer that was non-yellowing and appropriate to use both outside and on floors. So I did not end up using any sealer.

So how has it held up for the past five years?
- The floor continues to be gorgeous. I still very much love this floor and think it is one of the absolute best, most beautiful things I have done in my home.
- Even without sealer the paint has held up fantastically. There is one tiny strip that is about a quarter inch by three inches where the paint has chipped off. And that is it – for the entire 400 or so square feet.
- Unfortunately, I was right that it was going to be tough to keep the floor clean. Every spring I spend an entire day scrubbing down the porch – floors, walls, and furniture. The downside of being surrounded on three sides by gorgeous views of nothing but trees is that everything develops a thick coat of pollen in spring. But a scrub with some warm water and Murphy’s oil soap does the trick. The rest of the year I simply keep it swept clean.
- The lack of a protective sealing layer does mean the paint has gotten scuffed/stained in a few places. In particular there are some major scuff marks where we used to have a metal hammock frame. This is why I now make sure to keep a rug under our two rockers.

What would I do differently if I could do it all over again?
- First of all, I would very much paint my porch floor again. It was and still is beautiful and classic and one of my most favorite parts of my home.
- But… if I were doing this all over I would go ahead and use an oil-based primer and possibly an oil-based paint as well. Even though the paint I used has held up just fine, I have since become quite a fan of oil-based primer for certain projects where you need an extra durable finish.
- I would yet again look for a possible sealer to use. I have since looked into several products but still haven’t found one that would work. Everything I have seen is either appropriate for floors but yellowing or crystal clear and not recommended for use on floors. (The sealer I used on my interior painted floors is crystal clear and for floors but not recommended for use outdoors). But regardless of whether or not a potential sealer is out there, I would still totally paint it anyway.
- I love the light colors I chose. But I will admit if you went with darker colors, scuff marks and dirt would be less noticeable. Also, with a darker color, it might not be a big deal to use a sealer that will cause some yellowing.

So for anyone out there considering painting your porch, I say go for it. It is one of those projects that really takes some time but will last for many, many years. Long after you have completely replaced your furniture and décor (and even your grill if you are like us), your floors will still be going strong.
Have you painted a porch before? What tips would you add? And does anyone out there have a top secret sealer you would recommend?
How to paint a checkerboard pattern on a floor
See how to paint a classic checkerboard pattern on an interior floor or porch floor.
Materials
- Porch and Floor Paint - in 2 colors, one lighter than the other
- Painter's Tape
- Chalk line
- Paint Brush
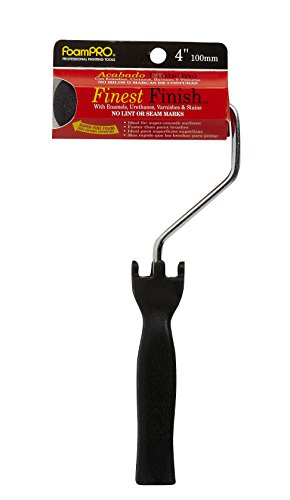
- Paint Roller
Instructions
- Start by patching and sanding the porch floor.
- Prime it using an oil-based interior/exterior primer.
- Choose 2 paint colors for your checkerboard pattern.
- Paint the entire porch the lighter of the two colors.
- Create a grid on the floor using a chalk line.
- Use painter’s tape to tape off each diamond by taping corner to corner on the grid.
- Once everything is taped off, wipe off your chalk lines.
- Use your second paint color to fill in every other diamond.
- Remove the painter's tape.
Recommended Products
As an Amazon Associate and member of other affiliate programs, I earn from qualifying purchases.


great timing! I just posted today about pulling up the nasty carpet on OUR porch….to reveal a plywood subfloor. We’re still deciding what we’ll eventually do with it; painting it is in the running, so it’s great to hear that yours has held up well. And it looks fabulous!
It really does look beautiful. I’m still reading and appreciating your porch details. Thanks!
it looks amazing and so glad it has held up well!
it looks amazing and so glad it has held up well!
Oh how wonderful. I love how it looks and the fact that it’s held up so nicely for you. Someday I too will have a checkered painted floor – just love the look.
I love painted floors, especially checkerboard…what about Waterlox Marine Sealant?
That is a good idea – I’ll have to look into it. Although at this point after several years, the floor is so ‘broken in’ I might have to just repaint it before it is fresh enough to seal!
Beautiful, I love this.
Thank you!
really like this for a kitchen or side entrance to a house for a mud room. my wooden floors are scratched but i would not attempt to do anything with them, since the are 200 yr old plus floors.
Wow, how lucky to have such old, historic floors!
Our original home is 428 sq. ft. and we have added on, but it isn’t finished. I couldn’t wait for new carpeting in the livingroom that is original to the house. I pulled the carpet up last spring and put down throw carpets. I told my husband I wanted to keep the plywood floors, sand them and make them look pretty. He absolutely did not want me to do this, until I just showed him your plywood floor designs. I think I just want to fill the little holes and seams and some how make the flooring look glossy without a lacquer or varnish. I want to do my kitchen and bathroom the same way.I may have to look into rubbing some type of oil into the wood.
Wow, that sounds beautiful. I don’t know exactly what would achieve that finish but I do think that plywood can have a really beautiful grain and can look amazing.
Carrie, I have the same porch set-up you had those many years ago-including that same homely, wrinkled green astro turf!! Surprising! We’re going to paint the plywood subfloor, too, following your directions, but I have questions. One, would you suggest the Varathane Crystal Clear as a sealer now? Have you had any experience with the Waterlox Marine Sealant mentioned above? Second, we don’t think we want to do the (gorgeous) stenciling. Any thoughts about a (light) forest green solid color? Thank you for this website, and for any thoughts you have for us. We’re old but excited to do this project.
Jane, I am sure you will be just as happy to get rid of your astroturf as I was! After a little looking, I see that there is now a Varathane Crystal Clear Spar Urethane that should work well for this. It is still water-based but is formulated for outdoor use. I haven’t tried the Waterlox Marine Sealant. It might be a great solution – I would just want to make sure that is goes on clear and is appropriate for use over paint. And I think a forest green would work great for an indoor/outdoor type of space. The downside of using a solid color though is that all of the seams and imperfections of the plywood will be much easier to see. But, it will still be a million times better than astroturf!
My house has a screened porch that is 8’ wide by 41’ long. The house is painted a concrete gray with pale white trim. The ceiling is only 8’. I want a stencil that is subtle to the eye. I have a bonnet metal roof. Very Bahamas looking. The floors are wood. And have been sanded. But not to perfection. I need a few stencil pattern ideas. And do you paint the floor dark, then stencil light??
By the way, hang curtains on your porch and close during pollen season. Soooo helpful.
Hi Melanie, that sounds like a fabulous big porch! I have a list of my favorite floor stencils in this post: https://www.lovelyetc.com/tips-painting-stenciling-floor/ If you want it to look subtle, I would just use 2 colors that are pretty similar. And you can paint the dark or light color first.
What about painting an existing linoleum floor in a high traffic area.
Hi Diana, I haven’t done that before but I know that some other bloggers have. Here is one tutorial I found: https://realitydaydream.com/painting-linoleum-floors/ As long as you prepare the floors well and can get the paint to adhere well, it should work.
Carrie, I Love, Love, Love your porch floor! I’ve been thinking of doing this to my concrete porch for years
now ,and the time has come.
I want an aged, black and white look. I’ve used Benjamin Moore’s Jet Black on my pillars, front door and wooden lattice, and i would like to use this colour on the floors. Any ideas for how I could I achieve a more muted affect? Thanks for help. xo
That sounds lovely! For a more muted effect, you could use two colors that are fairly similar – so the jet black along with a gray. Or you could paint your checkerboard and then lightly sand the whole thing to make it look more aged.