The Absolute Best Floor Stencils plus Tips for a Perfectly Stenciled Floor
I have been getting lots of questions about my stenciled floors, so I thought it would be helpful to share everything I’ve learned about choosing the best floor stencils along with some of my top tips for stenciling your own floors.

This post contains affiliate links which means if you make a purchase after clicking a link I will earn a small commission but it won’t cost you a penny more. Click here to see my full disclosure policy.
Choosing the best floor stencils
What type of stencil you need will depend largely on what type of floor you are stenciling. Stenciling tile floors is a bit of a different process from stenciling other floors like plywood, concrete, vinyl, or even hardwoods.
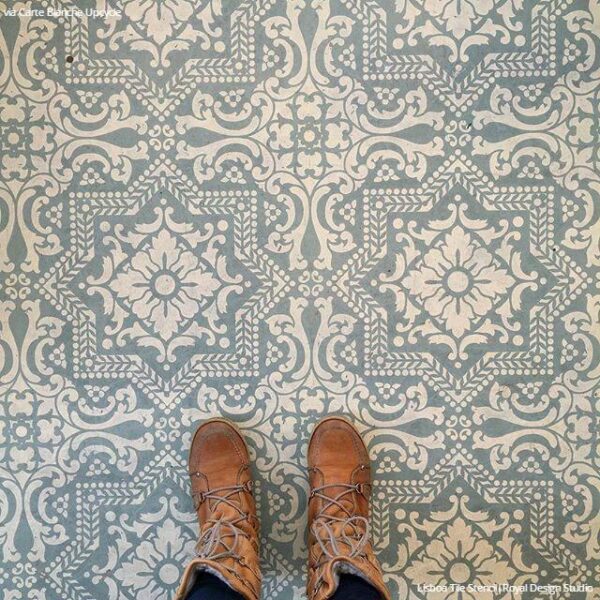
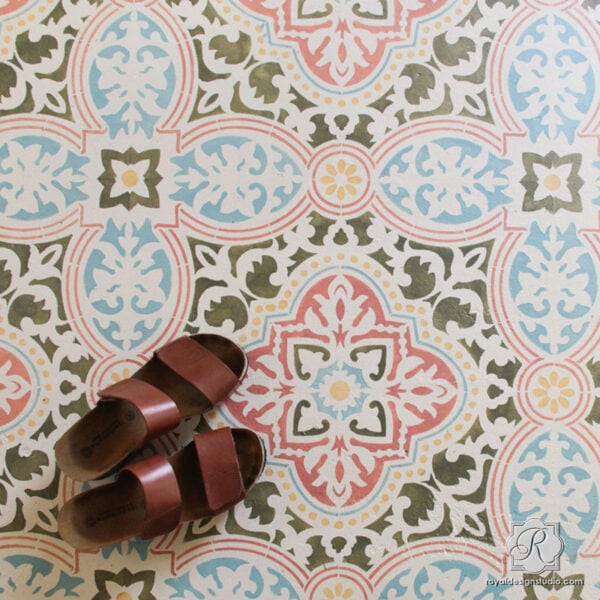
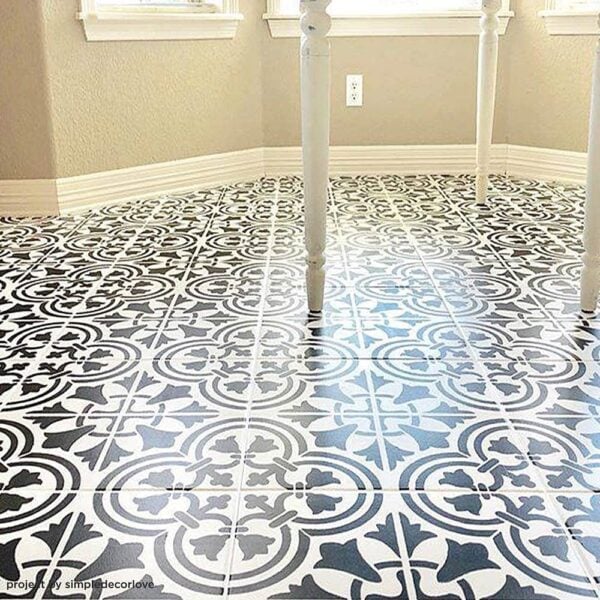
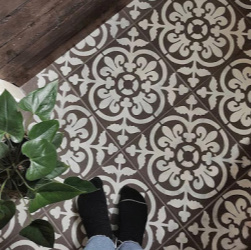
Floor stencils for tile floors
If you are stenciling a tile floor, you can get the look of expensive patterned tile by stenciling each tile individually.
You want to choose a stencil that is the same size as the tiles on your floor so that it matches up well. Many tile stencils are available in multiple sizes for exactly this reason. You can find my top picks for tile stencils below.
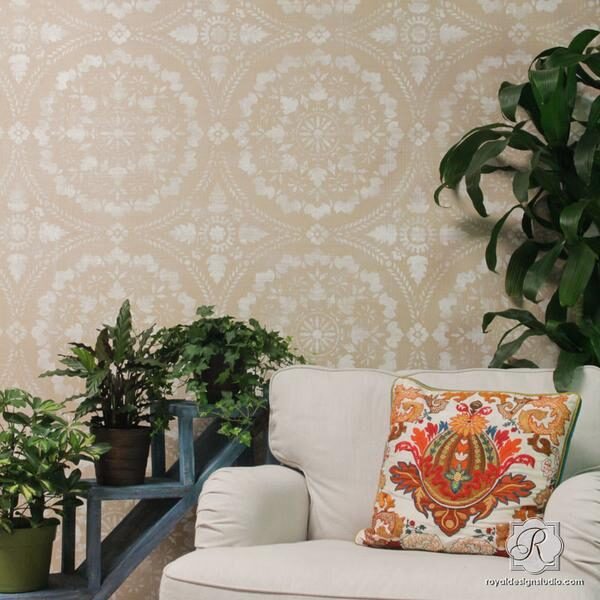
Floor stencils for other floor types
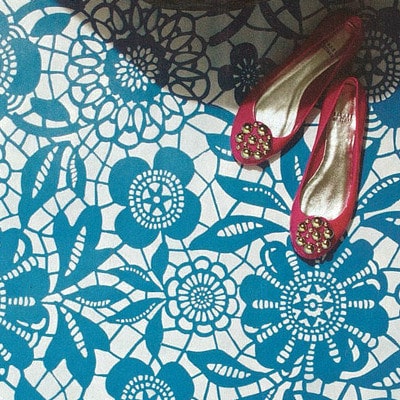
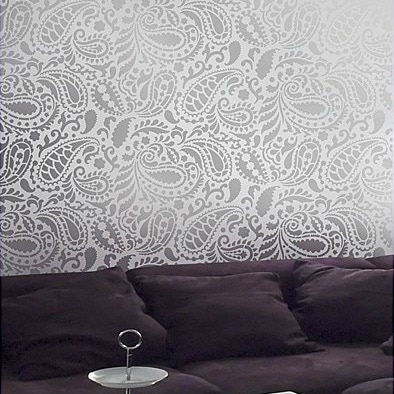
Any wall stencil can technically be used as a floor stencil, but there are a few key details that make some stencils perfect floor stencils, while others are not.
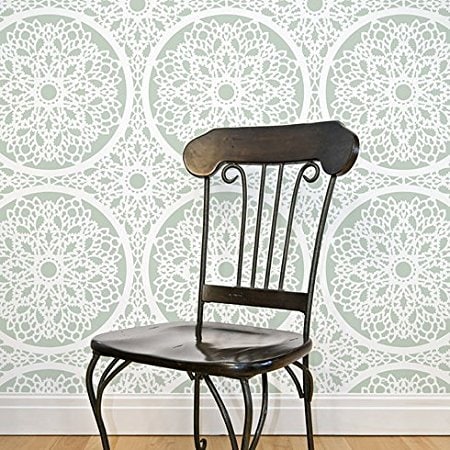
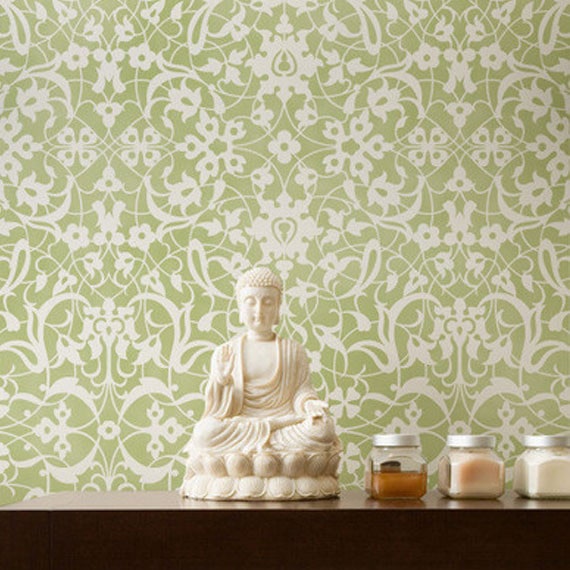
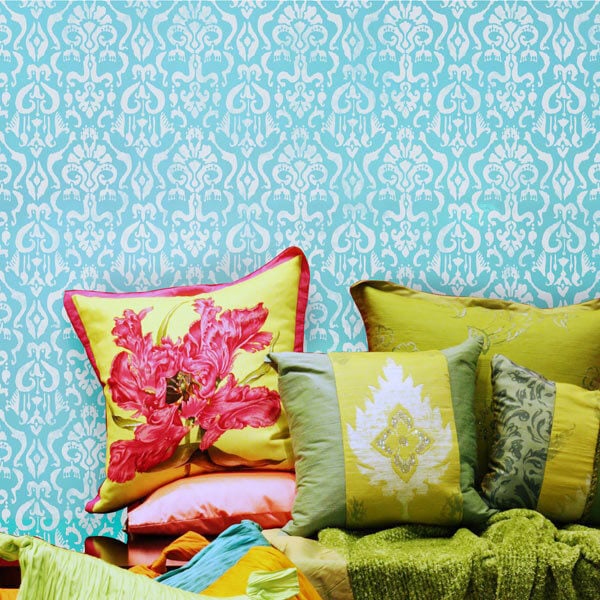
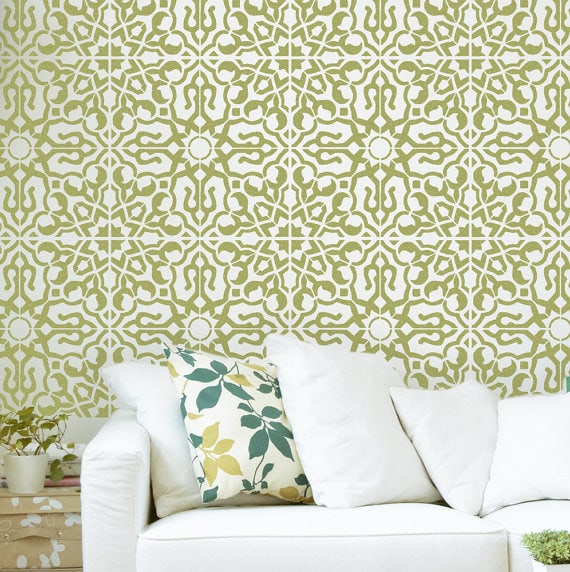
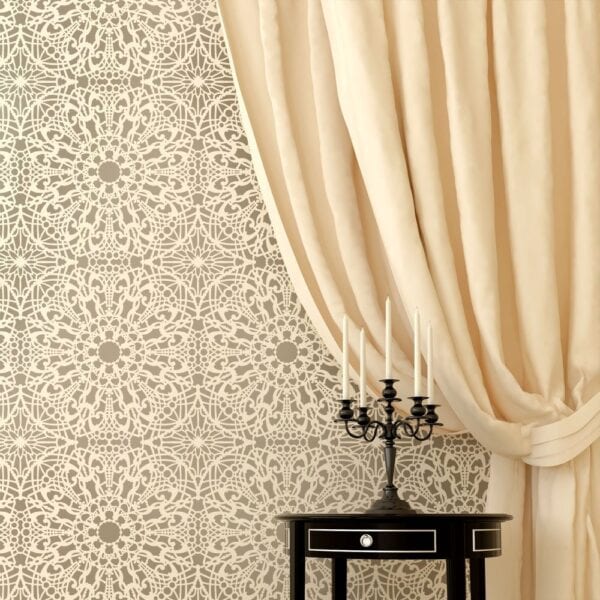
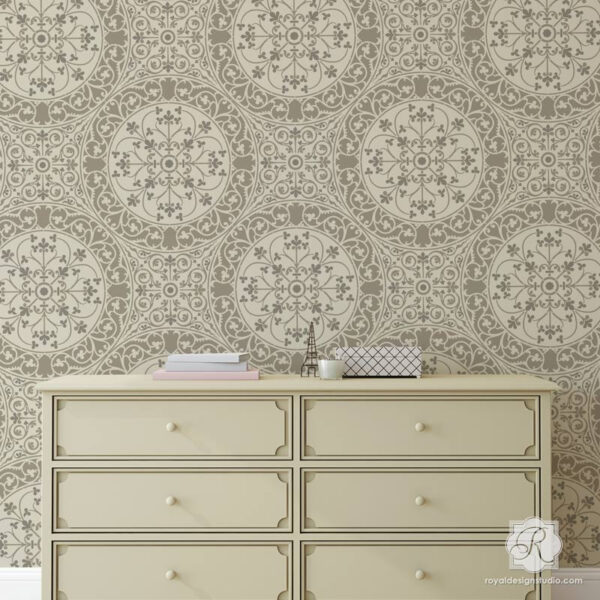
The best floor stencils are big. I’m talking about the actual physical stencil itself; ideally it should be at least 20” x 20”. This makes it much faster and easier to stencil a large area like a floor.
They have a large repeating pattern. A teeny tiny pattern will get lost on a large surface like a floor.
They have enough detail to hide any imperfections in your floor surface (or your paint job). Also to hide stray crumbs in the future. That’s why I haven’t included stencils with lots of very crisp, straight lines.
Those patterns can be beautiful on a floor, but any tiny mistake or imperfection will stand out like crazy. This includes tiny flaws in your painting, but also the flaws that are inevitably part of the old floors you are stenciling over.
Plus, the beauty of using a stencil is that it’s easy to paint a very detailed pattern quickly. And all of those details add interest as well as hiding problem spots.
The best floor stencils are beautiful and stylish (of course). Painted floors can always be repainted, but once you’ve put in the work to paint them, you’ll want to keep them around for awhile.
A great floor stencil will have a beautiful pattern that flows with your decorating style without being overly trendy. The great thing is there are plenty of gorgeous stencils out there these days so whether you love farmhouse style, traditional decor, or something more modern, there’s a stencil that’s perfect for you.
The Anatolia tile stencil I used to paint my porch and the paisley stencil I used to paint my subfloors hit all of these points but there are also plenty of other stencils that I think would make gorgeous stenciled floors. (If only I had enough rooms to use them all!)
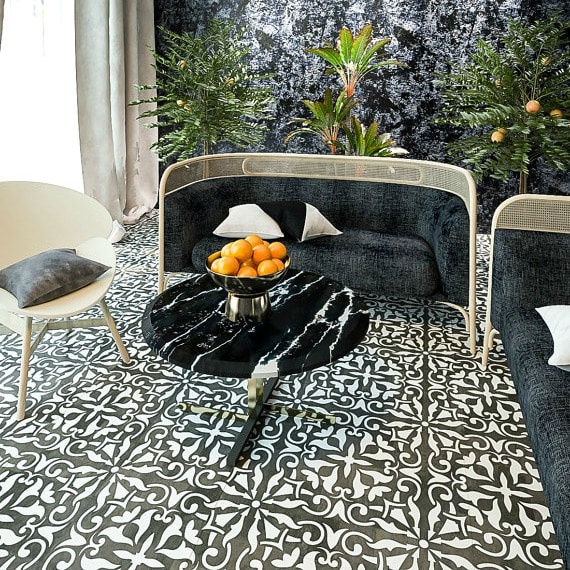
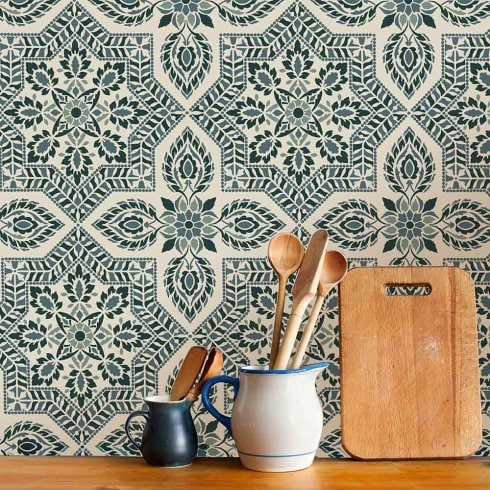
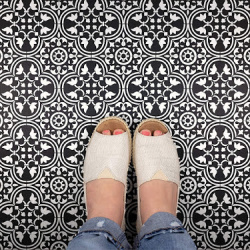
The Best Floor Stencils
I’ve gathered the best floor stencil options I could find below. And I’ve noted which stencils work best for tile floors so that it will be easier to find options that will work well for your specific floor.
(Just click the link below each picture to see more info about each stencil.)
|
|
|
|
|
great for tile floors |
|
|
|
|
great for tile floors |
|
|
great for tile floors |
|

great for tile floors |
great for tile floors |
|
|
great for tile floors |
Tips for Perfectly Stenciled Floors
Okay, so now that you’re drooling over all of those gorgeous floor stencil choices, I also have some great tips to make the actual stenciling process go smoothly.
Since I first shared my stenciled floors, I’ve gotten tons of questions about the exact process I used. Even though I shared a tutorial of the entire painting process, you guys want more!
Mostly I think everyone just wants to know that if they take on a big project like this, it’s going to turn out well. And I completely get that, so here are my honest answers to the questions I have been asked the most about painting and stenciling floors.

What kind of paint did you use to stencil your floor?
I used porch and floor paint which I highly recommend. I used Valspar porch and floor paint, but almost every paint line makes a porch and floor paint.
Porch and floor paint is great because it is self-leveling and is specifically formulated to hold up to the wear and tear of people walking all over it. (You can read about my entire floor painting process and all of the specific materials I recommend right here.)
Did you use a brush or a roller to paint the stencil?
I used a small foam roller ![]() to paint the stenciled area. Make sure to use a roller made for smooth surfaces – they often say they are for doors and trim. Roll your roller in the paint but be sure not to overload it – you do not want it dripping paint.
to paint the stenciled area. Make sure to use a roller made for smooth surfaces – they often say they are for doors and trim. Roll your roller in the paint but be sure not to overload it – you do not want it dripping paint.
Before painting over the stencil, you need to remove any extra paint. I just used a paper plate with several paper towels on top and rolled the roller over it a few times. It is important you don’t have too much paint on your roller so it doesn’t squish under the stencil.
Then lightly roll your roller over your stencil. This goes MUCH faster than you would think.
If you are nervous, you can always practice first on a scrap piece of wood or even a piece of poster board. This will help give you an idea of how much paint you need to use before you actually start painting your floor.

How do you keep from smudging the paint when you move the stencil?
When you have your stencil in place, secure it to the floor with a few pieces of painter’s tape. As long as you don’t overload your stencil with way too much paint, the paint actually dries pretty quickly.
When you are ready to move the stencil to the next section, gently untape it and lift it straight up and then place it gently at the next section. As long as you don’t slide your stencil through the fresh paint, you shouldn’t have smudging problems.
How often did you clean your stencil?
Cleaning the stencil was honestly the most annoying parts of the whole process. I definitely did not clean it in between each section – that would have taken f.o.r.e.v.e.r. However, I did have to clean it a few times during the process.
After awhile, dried paint starts to build up around all of the edges of the stencil which begins to make your stenciled design look less crisp. When I noticed that happening, I would stop and clean my stencil.
I’ve done a lot of stenciling projects since completing this floor and thankfully, I’ve since learned a trick that makes cleaning stencils super easy. Put your stencil in the bathtub and spray it with Goof Off Household Cleaner. After a couple of minutes, lightly scrub the stencil with a scrub brush. The paint should fall right off.
I’ve got a whole post about the best way to clean paint and spray adhesive from stencils if you want more details.
What paint colors are best for stenciled floors?
What paint colors you use are totally up to you. In general I think neutral colors are a great idea because neutral floors will allow you to have more freedom when you are choosing furniture and decor for your room. Plus you are less likely to get tired of neutral colors than something very bold.
But, that being said, it’s your house so choose whatever colors you want! If you’ve always wanted some bold turquoise floors, this is your chance to give it a go without blowing a ton of money.
The other thing to consider is that you will need at least two different paint colors – one for the background and one for the stencil. You can choose two colors that are very similar to one another for a more subtle look or two high contrast colors (like black and white) for more drama.
Want more specific ideas? I gathered a bunch of my favorite painted and stenciled floors here and there are quite a few low- and high-contrast example.
By the way, I used the Valspar colors Chimney Smoke and Crucible for my own stenciled floors. The two colors are fairly neutral and not too high contrast.
Do you have any regrets about stenciling your floor?
Not a single one.

In fact I loved it so much, I recently stenciled our screened-in porch floor as well.

If you haven’t yet, be sure to check out these other posts for more answers to your questions about painting floors:
Amazing Painted Plywood Subfloor: A How To
Painted Plywood Floors Update: The Good, The Bad, and The Ugly
Painted Plywood Subfloor: Three Years Later, The Final Update
15 Gorgeous Painted Floors: Ideas for Every Type of Flooring


Young House Love did a post on this this morning and I totally thought of you! Love your floors!!
Thanks Julia. I saw their post – theirs looks great too. It is just such a great inexpensive solution.
When you laid your stencil down did it matter what area you started. I seen videos on starting from the center of the room which is confusing to me.
I think it is best to start in one of the corners. If you are using a repeating pattern stencil, you won’t really be able to tell in the end where you started. If you are using something with more of a tile type pattern, it might be helpful to start in the middle to make sure it is symmetrical. That way you won’t end up with a tiny sliver on one side.
This makes me think of the old fashioned lineloium floors that I just loved ! I have hard wood floors or I would do this ! love love love !
Thanks Sarah! I really love these floors too…but hardwoods are pretty awesome as well. :)
Did you paint over hardwood, sub floor, or concrete?
Subfloor. :)
could you do this directly onto concrete?
Definitely, as long as you check that the primer you use is appropriate for concrete.
I interested in painting some subfloors in my house. Could you provide more specifics about the floor patch you recommend? I cannot find “DAP Power Patch.” Is it a wood filler? Could you provide a link to the specific product?
Jeremy, I went and double checked my container. It is Dap Presto Patch, multipurpose patching compound. (There is another presto patch that is for drywall, be sure to get the multipurpose.) I bought mine in a tub at Lowes near the other patches/wood fillers/concrete fillers. Here is a link to the product site. http://www.dap.com/product_details.aspx?BrandID=134&SubcatID=22 Hope that helps – sorry for the confusion.
How is the presto patch holding up to the wear and tear of foot traffic? Is there any cracking at all? I’m 1/2 through a 2 room sub floor reno. Agreed, flexible floor patch and leveler is not suitable as a top finish coat. I’m trying to sand it so i can put a smoother 2nd coat of something else as it looks awful and i know it will show through the paint. Sanding it is a bit of a nightmare. I currently have a test patch drying of 1/4 DAP fast and final, and 3/4 Dap flexible floor patch and leveler. Just the 1/4 of fast and final added made it as silky and smooth as butter but we’ll see tomorrow how it holds up to various stress tests.
Presto patch is holding up well so far. I hope it works out for you as well! The flexible floor patch and leveler was a nightmare to sand and never really got smooth. Good luck!
I cleaned my stencil in the bathtub and it wasn’t too bad. Soak for a couple minutes in warm water and scrub lightly with a potato brush or other soft bristled brush and dry with a bath towel.
Awesome Tracy, thanks for the tip! I will have to try that since I may or may not have a few stencils laying around that I never got around to cleaning!
My upstairs floors in my 110 yr old house seems to be kind of rubbery. Like an old hotel or store would have. Could stenciling work on this type of flooring? What would I use as a base coat?
Hey Rita, I emailed you. Hope it helps.
I have 12 x 12’s sticky tile in my laundry room. if I remove it, how do I get rid of the stickiness on top of the concrete? We’ve had this for about 14 years and is starting to come up in certain spots. so to save money I’d like to not put in another tiled floor therefore I was thinking of painting it. Your floor turned out so beautiful, I’d love to do that to my laundry room. what are your thoughts/suggestions?
Tracey, I’m really not sure. I have experience getting rid of carpet that has been glued down buy not sticky tile. I’m sure the answer is out there though and once the sticky gets dealt with, the painting is the easy part!
How did you remove carpet glued down? I put indoor outdoor carpet in my garage when we gave it to the teens with a pool table and tv. Now it’s mine again and I don’t know how to take out the rug which is now dirty and ugly!
Removing glued carpet is the worst! But I did find a method that works really well – I share all the details here: https://www.lovelyetc.com/how-to-remove-glued-down-carpet/
I just did this… I used industrial strength Goop Gone. very liberally… then 60 grit sand paper. it came off pretty well! Just painted my concrete floor today. Now I want to decide on a stencil pattern
Thanks for the tip!
You ARE AN ANGEL for taking the time to post this! I knew I’d find some advice online but, this is more than I expected! Your floors are BEAUTIFUL. My cat ruined my white dining room carpet and I just ripped it all up. My poor husband.. So, since I can’t afford the hardwood right now I was considering painting mine as well. I will head to the store next week. Thank you again-
Thanks Genesis! This is definitely one of the most worthwhile projects I have done in our home. Good luck!
Going to try stenciling a floor this weekend, do you have any tips for cleaning up mistakes or smudges? Im sure once i get going ill get the hang of it, but im a little concerned the stencil may shift or paint may bleed around the edges and cause blemishes.
Jake, If you notice slight imperfections while the paint is still wet, a lot of times you can carefully wipe them away with a wet paper towel. I did this quite a bit while stenciling and it worked great (as long as you are using a water-based paint like latex.) If you don’t notice the problems until later, you can just paint over any mistakes with the base paint color before sealing everything. Good luck with your floor!
Carrie, love what you did! Our carpets have been down since 1980. always made due ,because it is the color of dirt. We live on an island,,,sand, sand & more sand! Must be 100’s of pounds of sand under them, even with the best of vacuums. Not sure what to do with all the furniture in our cabin while ripping out carpet & the whole process. Guess my question is, how do you think your ,primer, paint, stencil project will hold up with pets & sand?
Thanks Barbie! First of all, I wish I was there on an island right now – sounds amazing! And moving the furniture can be a big pain, but it helps if you can do just one room at a time. I think the floors would hold up well as far as sand goes. And as for pets, I think it probably depends on your particular pet. We had a small-medium sized dog the first year we had our floors and had no issues. He was a pretty mild mannered dog though, so I can’t say for sure about a large, rambunctious one. WE do also have a toddler now though and he hasn’t caused any damage. I just wrote a follow up post this week on how the floors are holding up after three years of being painted if you haven’t seen it – https://www.lovelyetc.com/2015/06/painted-plywood-subfloor-three-years-later-the-final-update/ It talks about the wear and tear and cleaning aspects.
I realize this is an old post, but hoping you see my question anyway. What paint did you use for your stencils, was it a floor paint you tinted yourself? What did you tint with? I have my subfloor painted and am taping off a runner space to stencil.
Jeannie, I just used porch and floor paint in the color I wanted. They tinted it in the store to the color I chose. I was doing a huge floor so I just got a gallon of paint in the stencil color, but you can also just get a quart of porch and floor paint for a smaller area.
Hi Carrie, Here’s a painted floor I did a couple years ago, I have painted a watermelon floor in 3 of the houses I lived in. One in a small bedroom, one in a art airbrush room (more like a closet!) and this one in a playroom. I love it and get lots of comments on it. Hope this link works, it my facebook page. https://www.facebook.com/sue.pearson.5283/media_set?set=a.65279771488.60424.613196488&type=3 Love your floor!
Sue, that is such a fun floor! Very creative and just such a happy design – makes me think of warm summer days. Thanks for sharing!
Use lace curtain as stencil.
That would definitely be a cost-effective solution! I don’t think the stenciling would be as crisp as it is with a ‘real’ stencil, but it might end up looking really cool regardless.
Just finished my floor and I love it! Thanks for all your tips and tricks. I definitely wouldn’t have tackled it without your ideas. Here is a picture of our new bedroom floor: https://twitter.com/jennycloud33/status/747509968555868160
I am trying to figure out where else to paint the floor now:)
Jenny, Wow! It looks amazing! I’m so glad you went for it. And I totally understand about wanting to paint all the floors now!
Carrie,
Do you know or have any experience with painting tiled floors? I’m hoping it’s the same as cement but I don’t know. Any help? Thanks!
Kaye
Kaye, I haven’t personally painted a tile floor before but I know that it can be done. I think the most important thing is to clean the floor really well and use a good primer and paint. I have seen a few good tutorials like this one – http://www.lovestitched.com/my-tutorial/how-to-paint-tile-floors-a-tutorial/
Hi, what sheen did you use for the porch paint. I went to Lowes and they wanted me to get oil based floor paint but it only came in gloss and the girl there said i would have to sand it to get the poly to stick. I sanded it like she said to and it looks terrible. super patchy because the shine came off in some places more than others. I wanted the latex porch paint, but it only comes in satin. would satin latex work with poly without having to sand to get the poly to stick? or do i need flat porch paint ( And what brands would that come in because Lowes doesnt carry flat porch paint)? When I get the correct latex porch paint should I sand the oil paint all the way off or could i cover it with oil based primer and then the latex paint? I just want to use the paint sheen you did because your floors don’t look glossy and I like that.
thank you for any help you can give me!
Michelle, I am sorry you have had such a hard time. I feel your pain because I have definitely been led astray by a few people working the paint desk at Lowes as well. (Most are awesome – but some have no idea what they are talking about.) I did use latex porch and floor paint in satin sheen. I didn’t need to sand it at all before sealing. I can only imagine what a paint that was! To get things back on track you will need to use oil-based primer over the oil paint you have already used. Then you will be able to switch to latex paint. Latex paint can go over oil primer fine. (It is just the reverse that isn’t true.) I hope that helps!
This article was a great help, thank you so much. I chose to go freestyle though with just wadded up paper to dip in the second contrast color, I chose a nice medium blue, over a beige. You have to replace the paper you are using frequently as it starts leaving bits behind after getting wet with paint. I was going over particle board with a couple of bad seams I planed , and it hid the imperfection pretty well. I also went over my paper blotting with a shoelace dipped in black , and drizzled and snaked and slapped it around and finished with some droplets of a bright color just for fun. It turned out Great!! I am very happy with it and it looks like a Jackson Pollock painting
Autumn, that sounds gorgeous! Love your freestyle approach!
It’s many years later but I just wanted to let you know i found your tutorial, updates and ideas incredibly helpful. We want to paint our subfloors. I purchased the DAP elasto patch, as per Lowes employee, and then got home and saw the fine print recommending we do not use. Then, i see your comments that it didn’t work. I’ll try the DAP Presto Patch instead…back to the store except not asking for help this time!
As a side note, a quick question: how long did you wait between taping down the stencil and letting it dry and moving it again. You have a very large floor and I can imagine it took a long time. I’m assuming you used painters tape? Trying to figure out if I am going to do a stencil or not. The room is 12×12 but we would eventually want to paint the vinyl tile in the other room the same – that room is 25×20, so time will def be an issue! Thanks for any feedback and, again, excellent tutorials!
Thanks Jenny! I didn’t wait long at all – maybe 1 minute? I taped down the stencil, painted it, then lifted it and moved it pretty quickly. When you stencil you really don’t need to use much paint on your foam roller so it isn’t very wet/smudgy when you move the stencil. Good luck!
I just painted my bathroom vinyl floor, using Behr Porch & Patio Paint. I want to do a stencil but don’t want anything too elaborate or busy. Can I stagger the stencil?
Hi Debra, you can definitely stagger the stencil. You can do whatever you like – just paint a boarder, create a scattered pattern. You could even choose to only use part of the stencil. Another idea if you don’t want it to be busy is to keep the stencil colors very similar so there isn’t a lot of contrast.
I love this info, there’s some really helpful tips, thank you! You recommend 20″x20″ as the best size for floors but the biggest floor stencil I could find here was only 14″x14″. Do you have the larger sizes now?
Hi Rachel, Yes, there are definitely larger stencils available. Almost all of the ones I linked in the post are 20″x20″. Many stencils come in a variety of sizes, so you may need to make sure you are choosing large or extra large size. One of my favorite sources for really large floor (and wall) stencils is Royal Design Studio – https://royaldesignstudio.refersion.com/c/31ed7
Hi Carrie … Great floor !! I am waning to do this on our porch and I am having a hard time determining where to start the first stencil … could you help ??
Tanja, I am about to stencil our porch floor as well and this is a great question. If you are using a random pattern stencil it doesn’t really matter where you start. But if you are using a tile type of stencil, you don’t want to end up with weird slivers of ’tile’ on one side. You can measure the length and width of the floor and do some math to figure out how many stencils will fit along each side so you perfectly center the first stencil. Or you can just start at the door or another focal point and work out from there. Good luck!
How do you get the stencilling done around tight places like a toilet in a small bathroom? Please tell me I don’t have to take the toilet out…
Good question. It can be really tricky to stencil around tight spots like a toilet. Taking out the toilet would make the stenciling much easier but then you have all of the added work/cost of dealing with the toilet so I wouldn’t want to do that either. Most stencils are flexible so you can do some areas by simply bending the stencil. I have also saved harder to reach areas for last in the past and then cut my stencil into smaller pieces that are easier to use. It is much easier that way but it does make it harder to reuse the same stencil for future projects.
Thank you so much for sharing this! I am going to be stenciling the floor of my walk in closet soon, so this post is ever so helpful! I was surprised to see you used the color Crucible, it’s one of the colors I’m considering for the base ;-) Love the way your floors turned out.
Thank you! And good luck with your closet – I would love to see it when finished!
Hi Carrie,
I just want to thank you so much for all the great tips you’ve shared on stenciling plywood floors. Your posts gave me the courage to actually tackle this! I’m about half way through sanding and wood filling, with a small test of zinsser primer to see what unevenness ends up showing and what doesn’t. My subfloor started out very uneven, huge gaps etc – but is gradually smoothing out.
So I just wanted to say a huge thank you! Hopefully I’ll be happy with the result and will send pics. This has been an exhausting but fun adventure :)
Thanks!
I am so glad to hear that my tutorial helped! It sounds like your floors are off to a great start and I would love to see them when they are finished! All the work will be so worth it!
What did you do about your gaps below the baseboards?
I added white shoe molding and it finished it up nicely!
have you ever tried spray adhesive on the underside of the stencil? I saw a tutorial using that. supposedly stencil “sticks” making it impossible/difficult for paint to spread under stencil…..
Yes, I have! I use spray adhesive with stencils for lots of small projects like signs but not for floors. Spray adhesive is great for holding your stencil in place but I don’t find that it necessarily helps with keeping the paint from spreading. Stenciling floors is actually a lot easier than stenciling a lot of other things because you can simply lay your stencil on the floor and it stays in place pretty well. I actually just stenciled my porch floor and it went really well without bothering with adhesive. I do still think spray adhesive is great for stenciling projects though.
The picture of the porch stenciling, was it in multiple colors or just white? It looks super gud!
Thanks! It is a white background with light gray stenciling. There is more info here: https://www.lovelyetc.com/how-to-paint-the-most-beautiful-porch-floor-ever/
We were looking for a stencil that is not too busy or floral. We are looking to do a monochromatic look with griege colors with the darker color on the bottom. We are repainting an already painted linoleum tile (12×12) floor (not sheet linoleum). We like the larger pattern (23.5); it won’t look as busy. Do you recommend matching up to the existing linoleum tile size 12×12 or does it matter if we use 23.5 size since it’s linoleum ?
I think you can do it either way. If you match the stencil to the size of the tile, it will look like it’s meant to be that way. But if you do a larger pattern, I don’t think the different tile size will be noticeable, especially since the stencil is probably a repeating pattern.