How to Paint Laminate Countertops to Look Like Marble
This simple step-by-step tutorial will show you how to paint your kitchen countertops to look like marble, including the exact materials and paint you need.
I am so excited to share my painted countertops with you guys!
Painting our old laminate countertops was a huge risk and I wasn’t exactly sure how it would turn out. But I hated our old countertops and there was absolutely no way we could afford to replace them, so I decided to just go for it.
And this time, the risk definitely paid off!
We have been using our “new” counters for a few weeks now and they look amazing – you would absolutely never guess that they were painted.
Update! We used these painted countertops for seven years! That’s about six years longer than I expected, but they ended up working so much better than I originally thought. Of course, they weren’t perfect so I put together a final update sharing how they were actually holding up seven years later. If you’re considering painting laminate countertops, I would definitely head there next.
This is how our laminate countertops looked before paint.
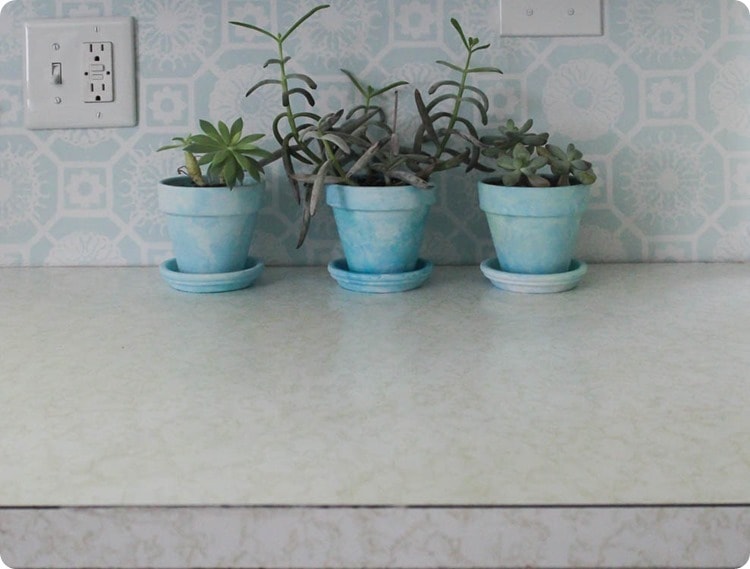
I’m sure most of you have seen these white and gold laminate counters at some point or another – just probably not in the last decade or two! They were terrible!

I actually think laminate countertops can be amazing. They’re incredibly durable and there are some really beautiful patterns and finishes out there. Sadly, ours definitely did not have one of those beautiful patterns.
Aside from the terribly gold squiggly lines, the black edges that wrapped around everything managed to make the whole kitchen look cheap.
I lived with these countertops for eight years because I knew we couldn’t afford to replace them.
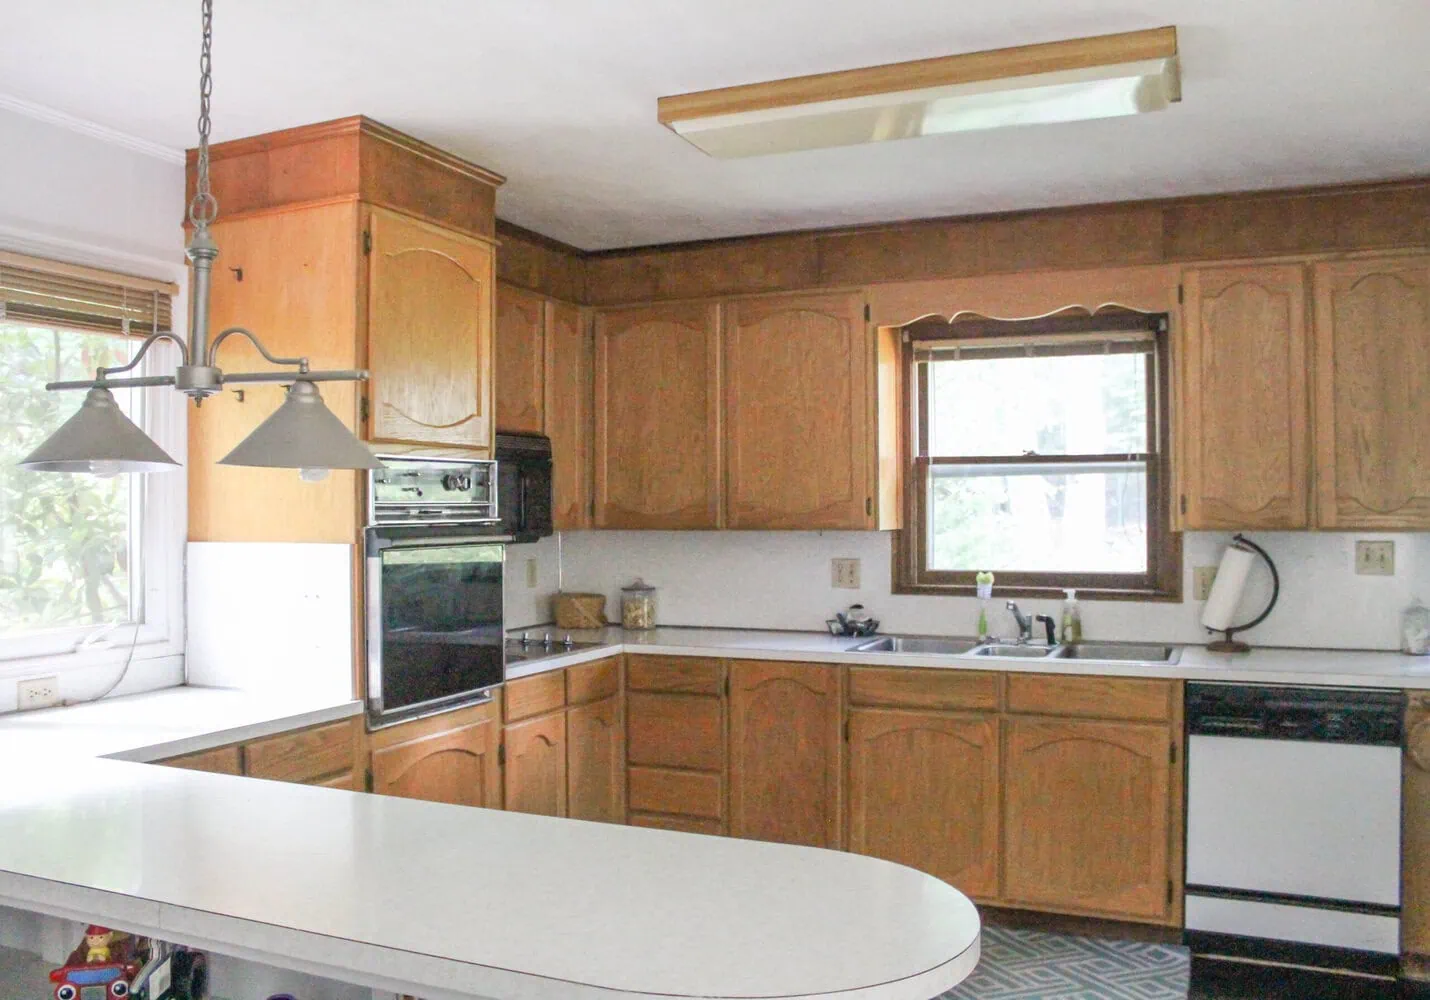
this is how our kitchen looked before our budget makeover
We are blessed to have a ton of counter space in our kitchen which is great for cooking, but makes replacing all the counters incredibly expensive.
I looked into replacing them with laminate, butcher block, and even concrete. But even though butcher block and concrete can be done more affordably, the amount we would need was really going to drive the price up.
Which led me to paint.
At this point, I pretty firmly believe that paint can save almost anything. I’ve painted floors, walls, cabinets, a backsplash, light fixtures, sliding doors – pretty much everything. And while a few times it hasn’t worked out, in the long run 95% of the time it has been amazing.
And this – this was definitely one of the amazing times!
This is a very inexpensive and beautiful way to update your countertops, but it does take time and attention to detail. And there are a few tricks you really need to know before you start.
Because this is a very detailed tutorial, I am breaking it down into two parts below:
- How to paint laminate countertops
- How to seal painted countertops
And if you don’t care about the tutorial and really just want to see more beautiful after pics, you can just skip to the end!
This post contains affiliate links which means if you make a purchase after clicking a link I will earn a small commission but it won’t cost you a penny more. Click here to see my full disclosure policy.
Painting Laminate Countertops
Materials
- Oil-based Primer – I used Zinsser oil-based primer.
- Small foam paint roller
- Sandpaper
- An orbital sander is optional but will make things go faster
- White paint and two or three shades of gray paint – craft paint or paint samples are fine for this
- A feather, a few round paintbrushes, a painter’s sponge – for creating the marble look
*The materials list for sealing the countertops are in part two below.
The best paint for painting laminate countertops
Before we get into the step-by-step tutorial, let’s talk about the paint for a minute.
When it comes to paint for this project, pretty much any paint will do. I used white paint that was left over from painting my bathroom and some gray paint samples I had on hand.
I realize that probably sounds crazy. Why do they sell those pricey countertop paint kits if any paint will work?
The secret is that the real work is done by the primer and the sealer, not the paint.
Each material has it’s own job. The primer’s job is to prepare the countertop for paint and make sure the paint adheres to the laminate well.
The sealer’s job is to protect the paint from wear and tear.
The paint’s job is simply to provide the pigment or color for our countertop makeover. That is something that any decent paint can do.
The reason countertop paint kits are pricey is they include everything you need to do all of those jobs. Also, they simplify the process of figuring out what paint you need to buy.
Using a countertop kit is completely fine, but I prefer using a separate primer, paint, and sealer because it lets me have more control over how my countertop will look in the end.
So when you are choosing paint for your counters, any type of paint will work. It really doesn’t even matter if the paint sheen is matte or semi-gloss, because the shiny topcoat will cancel all of that out anyway.
How to paint your counters to look like marble
You could choose to paint your counters to look like just about anything – granite, a solid white or black slab, or marble which is what I chose.
Our kitchen receives very little natural light, so a big goal of my super cheap kitchen renovation was to bounce as much light around the room as possible and marble is perfect for that.
Plus, I just think Carrera marble is incredibly beautiful.
There are lots of variations of marble – it can be more white or more gray, with a heavy pattern or light. I chose to make my counters very light and keep the grain very subtle.
I did a search online and found a picture of a marble slab I liked and used that as my guide.
Protect the rest of the kitchen
Before you get started painting, be sure to use painter’s tape to protect anything around your counters that you don’t want painted.
In my case this included the backsplash, the sink, and the cooktop.
Prep your countertops
The first step in the actual painting process is sanding. Lightly sand the entire countertop with 100-150 grit sandpaper.
This will help roughen up the slick laminate surface and help the primer and paint stick. I know a lot of people hate sanding and you may be tempted to skip this step, but it’s really important for helping your primer and paint adhere well.
Prime your countertops
Use a small foam roller to roll a coat of oil-based primer over the counters – don’t forget to do the edges as well.
We are using oil-based primer because it is best for surfaces that may try to resist paint like super-smooth counters. A good oil-based primer will stick to just about anything.
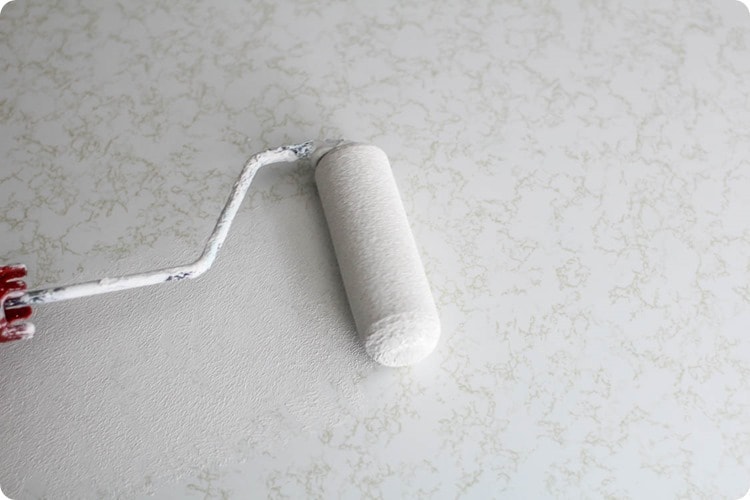
Allow the primer to dry completely and then lightly sand the surface with 220 grit sandpaper.
Paint the base coat
Use a roller to roll a coat of white paint over the entire countertop and allow it to dry. (And don’t worry, you can use either oil-based paints or water-based paints over oil-based primer so you really can use any white paint.)
Add the marble detail
Once the white paint is dry, it’s time to start adding the variation found in a natural piece of stone.
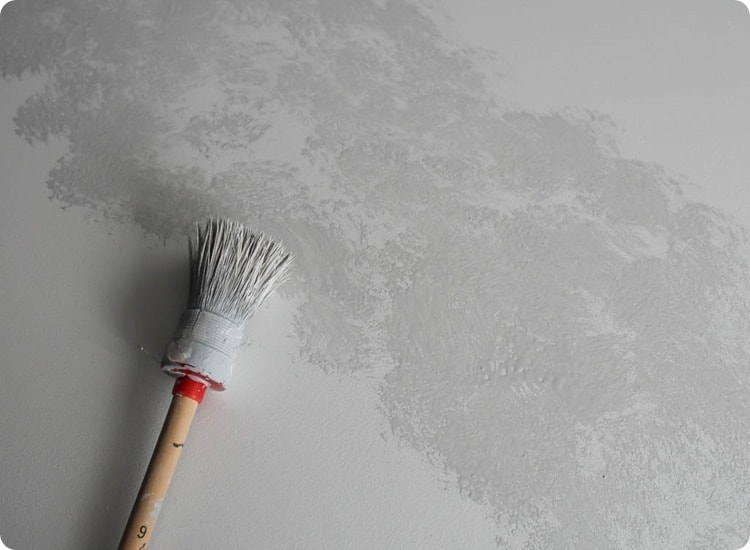
I dabbed my medium gray paint on randomly in patches with a round brush and then blotted it with the sponge.
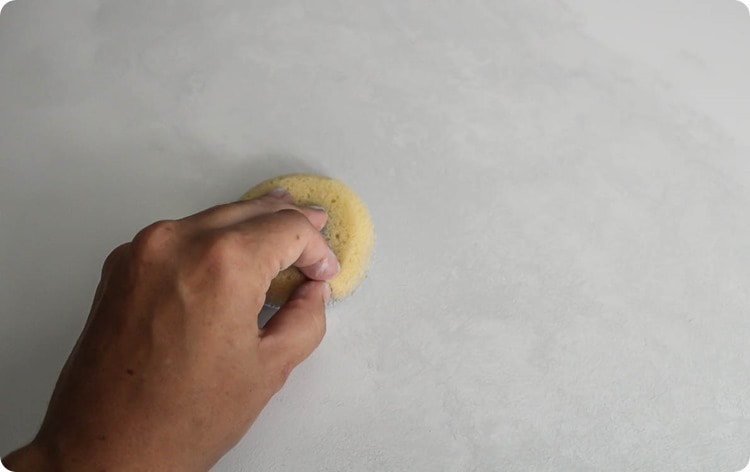
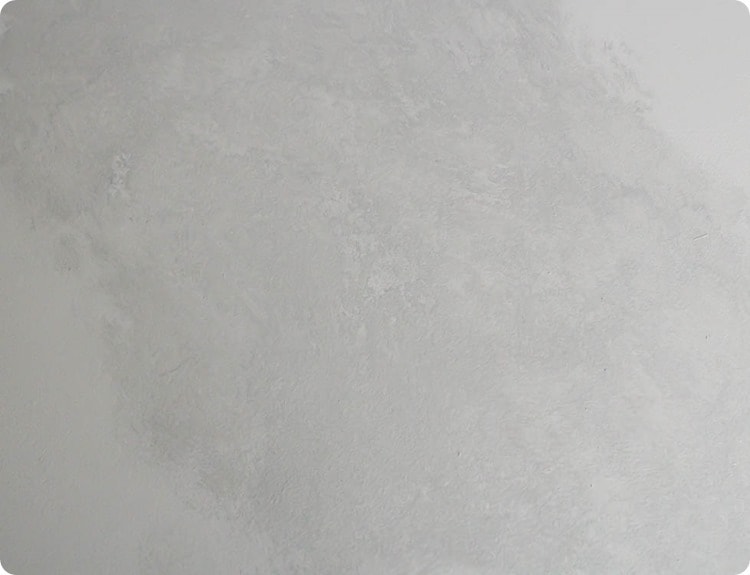
Then it is time to add the grain. Using a feather gives the most realistic grain pattern. (A fake feather from a craft supply store works great.)
Just dip the tip of the feather in the darker gray paint and lightly draw it across the counter.
Allow for lots of turns and movement in the line.
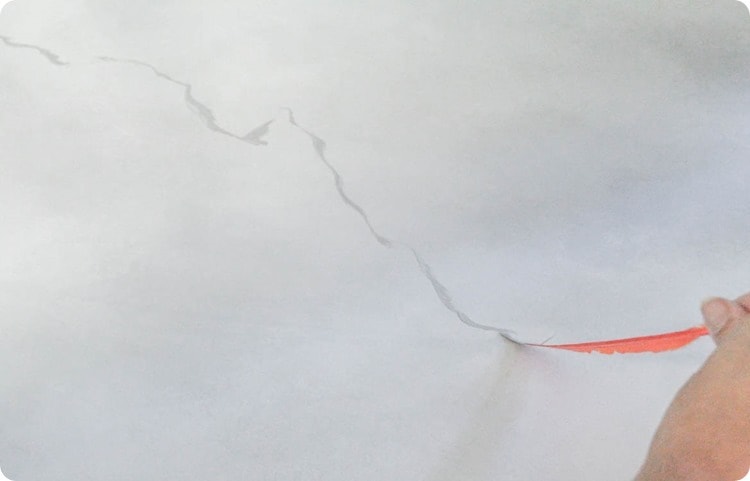
I chose to soften my lines a bit by brushing a clean paintbrush over my paint lines.

Then use a round brush to dab more of the medium gray paint on and spread it around with the sponge.

Repeat the brushing and sponging with the lighter gray paint.
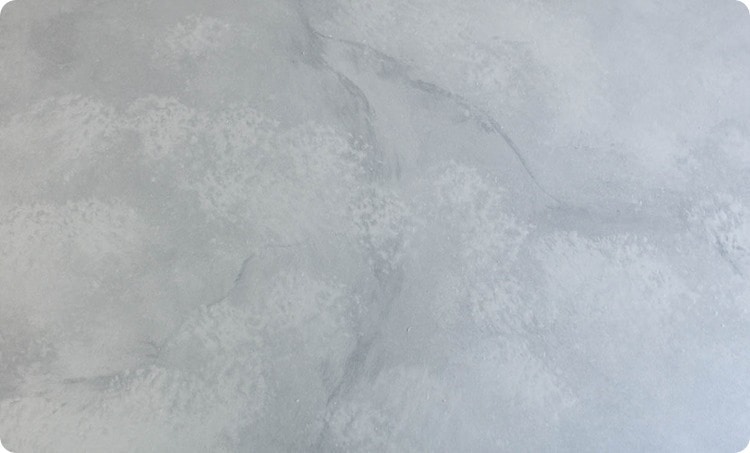
Continue to sponge the paint on creating lighter and darker areas until things look the way you want them to.

The best part about painting counters is that you can easily fix any mistakes you make by simply painting over them.
My first attempt at drawing on grain lines was terrible – the lines looked more like lightning than marble. So I painted over them and started over.
If you find your counters are looking darker or lighter than you wanted, just add more layers of paint until it looks right to you.
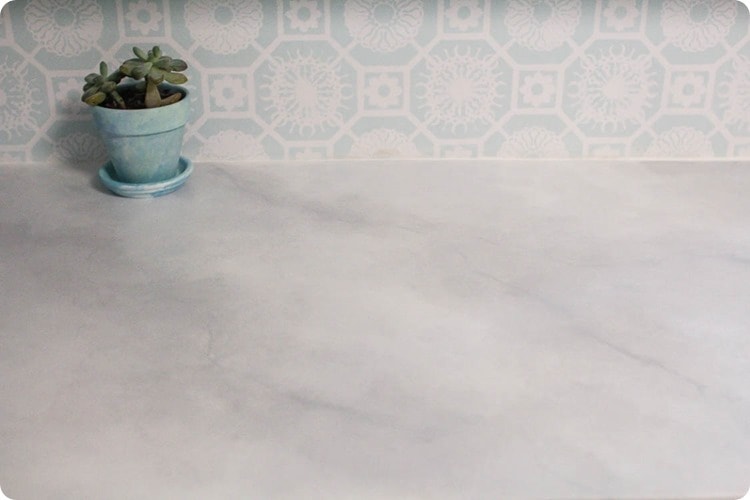
And then you’re ready for sealing.
Sealing Painted Countertops
Materials
- Level
- Envirotex Lite– this is a high gloss polymer sealer that dries to a crystal clear, very hard finish
- Two disposable containers to mix the sealer in – I used buckets from the dollar store
- Two paint stirrers
- A measuring cup or disposable plastic cup
- A cheap paintbrush
- Plastic dropcloth and painter’s tape
- A butane torch – sounds weird, but this is essential to getting air bubbles out of the finish
- Disposable gloves
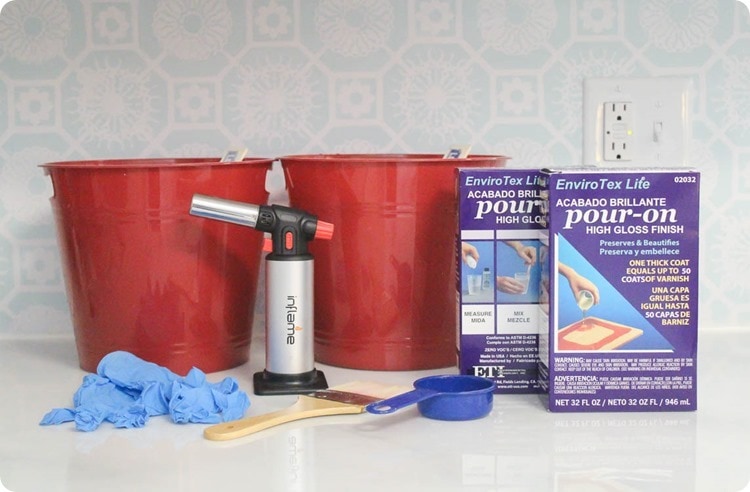
This is where the real magic happens. Before sealing, my counters looked really cool – but they also looked very much like painted countertops.
This sealer is what gives them the glossy, realistic look.
The Best Sealer for Painted Countertops
I chose to use Envirotex Lite rather than a regular brush-on polycrylic sealer for several reasons.
Both are crystal clear and non-yellowing. But the resin is much, much thicker than polycrylic which makes it more durable and also more realistic looking because of the depth it adds to the paint job.
It is self-leveling and dries to a perfectly smooth finish – something I have never quite been able to accomplish with polycrylic. This sealer is also heat resistant which is important in a kitchen.
It does, however, require a bit more preparation and attention to detail. Also, I did this on my own but it would be much easier to do as a two-person job.
How to Seal Painted Countertops
I am going to give you the basics of the process as well as some tips I picked up along the way that made all the difference in my finished product.
(But please, read all of the instructions that come with the Envirotex Lite before beginning.)
Prep your countertops for sealer
Before beginning, use a level to check that your countertops are level in all directions.
Because the resin is self-leveling, it may pool or run off lower areas if your counters have settled too much.
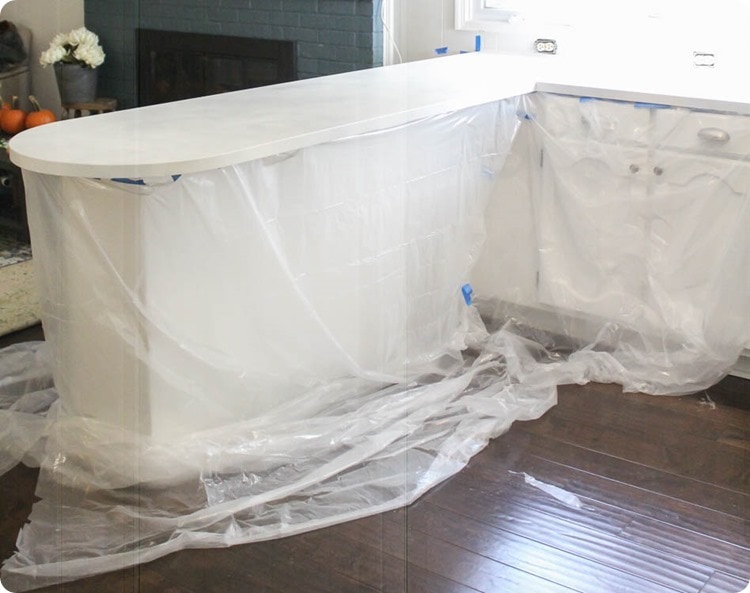
Be sure to protect your cabinets and floor completely with plastic drop cloths and tape before beginning.
In order for the sealer to self-level, it has to be able to drip freely off the edges. Anything that isn’t protected will end up covered in sealer.
In a few areas, my dropcloth slipped and cleaning the sealer drips off the cabinets was a huge pain. I was able to get it off using a scraper and rubbing alcohol, but I wish I had been able to avoid that extra hassle.
Also, wear latex gloves and old clothes. If any of the sealer gets on your clothes, it will harden and you won’t be able to wear them again.
Prepare your sealer
Do not skimp on sealer! I ended up doing two coats on my counters. Near the end of the first coat, I was running out of product and was trying to make do with what I already had on hand to save time and money. Big mistake.
I ended up having to do a whole second coat to fix some areas that were not smooth which clearly cost twice as much time and money!
Be sure to have plenty of product on hand before you start.
For reference, my countertops are 51 square feet give or take and I used 3 gallons of resin, but probably would have only needed 2 if I hadn’t run out.
Envirotex Lite comes in a kit with two different bottles. These need to be mixed together to make the final sealer.
This is a chemical process and it is very important that you follow the instructions included with the product exactly.
One of the important steps is measuring equal amounts of each liquid. I started out using a measuring cup, but quickly realized it was way too small. So I used a disposable drinking cup instead and just drew a line to use as my measurement line.
Also, the mixing process alone takes several minutes. It is much easier to mix enough for the whole counter at once rather than rushing to mix a bunch of small batches.
Pour on the sealer
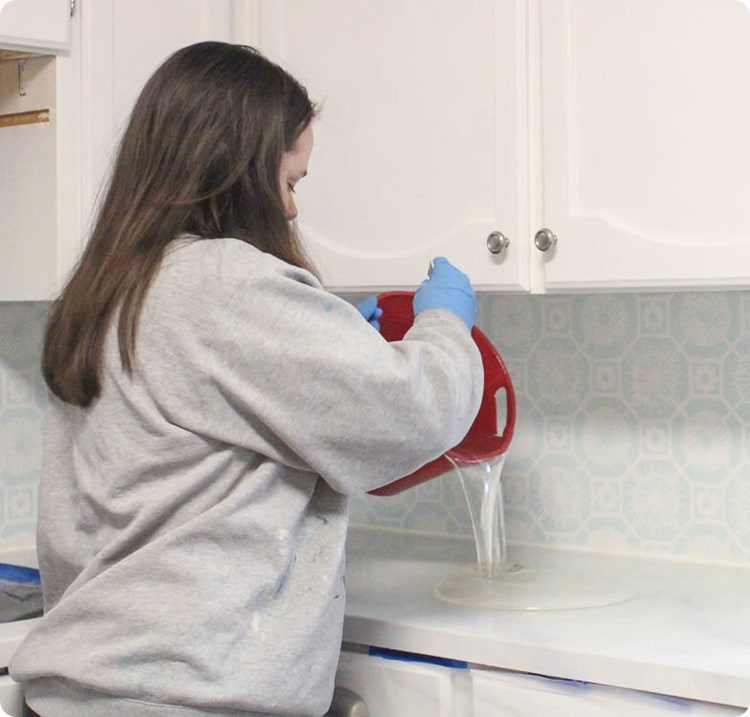
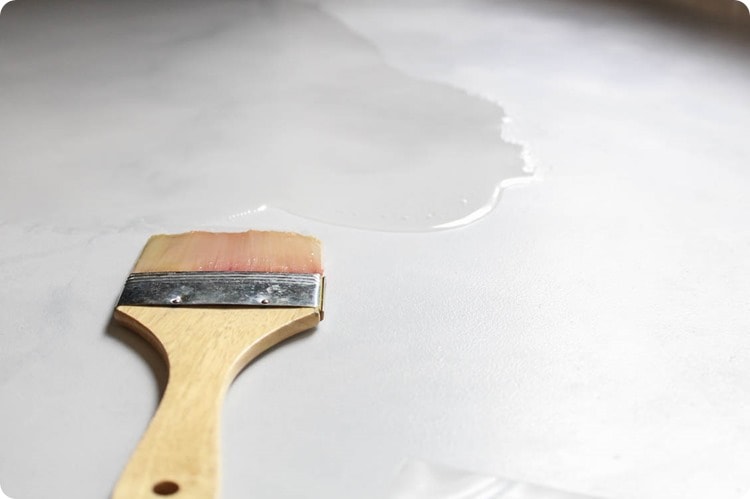
Once everything is thoroughly mixed, pour it onto your counters. Use an inexpensive paintbrush to spread it around to cover the entire surface including the edges.
Double-check that it reaches all the way back to the wall.
Remove any air bubbles
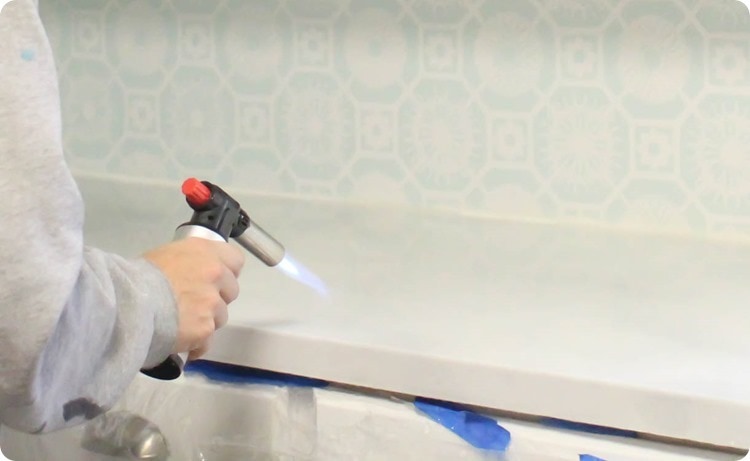
The directions say to use a butane torch after fifteen minutes to eliminate any bubbles. This is such an important step.
There will be tiny bubbles everywhere and when you point the torch at them for a second, they disappear like magic!
A hairdryer will not work for this – it must be a butane torch. (It is the carbon dioxide that takes care of the bubbles. )
The other option is to use a straw to blow on all of the bubbles. Do not attempt the straw method! I tried to do it this way on a smaller project because I’m cheap and I didn’t have a torch.
It was a huge mistake. It took way too long and was really difficult. That may be fine for a very small project, but if you are doing your kitchen countertops, just buy the torch.
I used a torch for the second coat and it was 1000 times easier and so worth the cost.
Allow the sealer to harden
You can’t let anything touch the counters for at least 8 hours including dust or water.
At this point they will be dry to the touch but they won’t reach full hardness for a full three days.
If anything does mess up the finish of your counters – dust, water drips, or whatever, you can fix it fairly easily by adding another coat like I did.
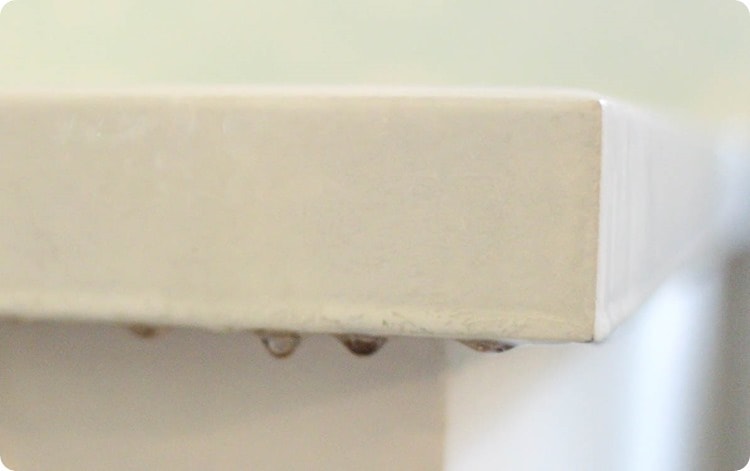
If you end up with lots of drips along the bottom, you can easily scrape them off with a paint scraper.
They come off more easily during the first day before they have completely hardened.
Laminate Countertops After Painting
Ready for some after pics?!
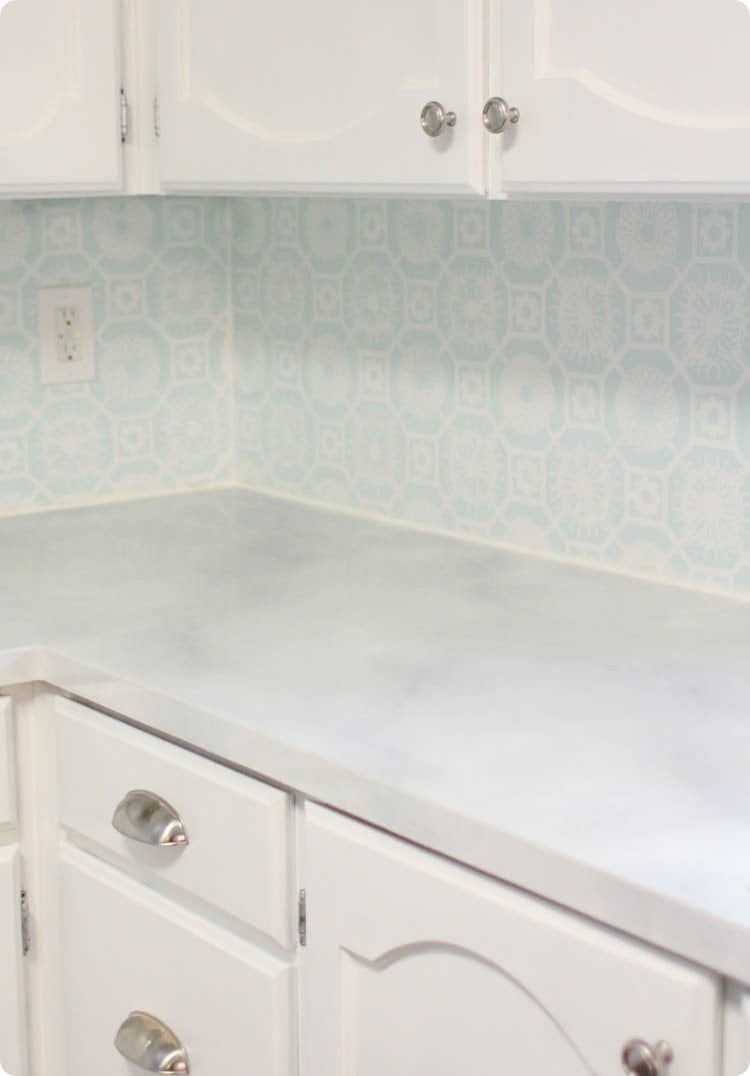
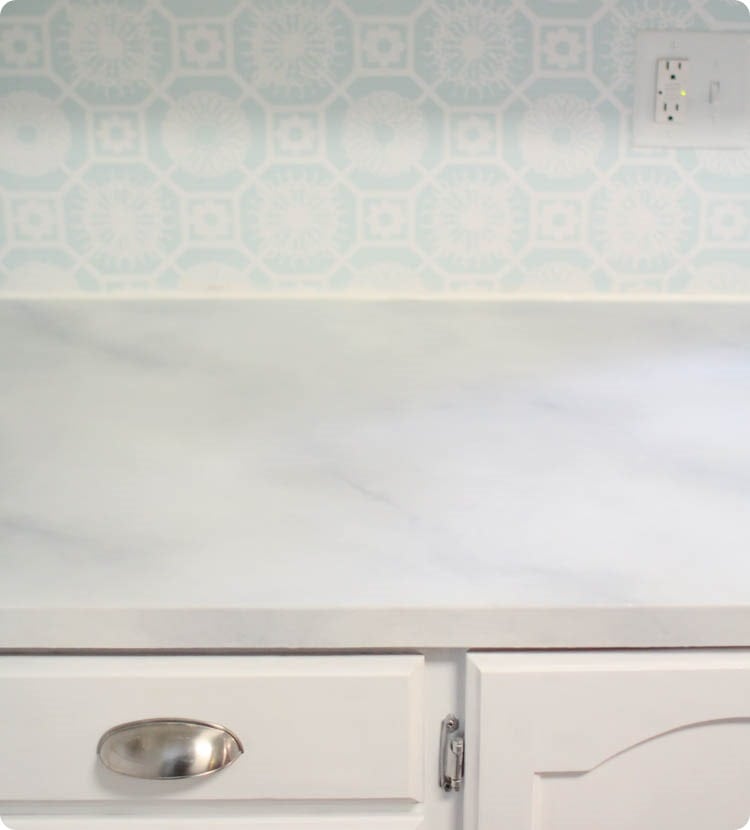
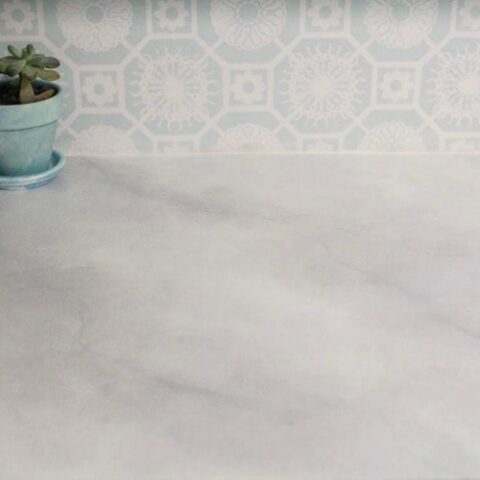
I really love how shiny and beautiful these are! And I’m so glad those ugly gold squiggles are gone for good!
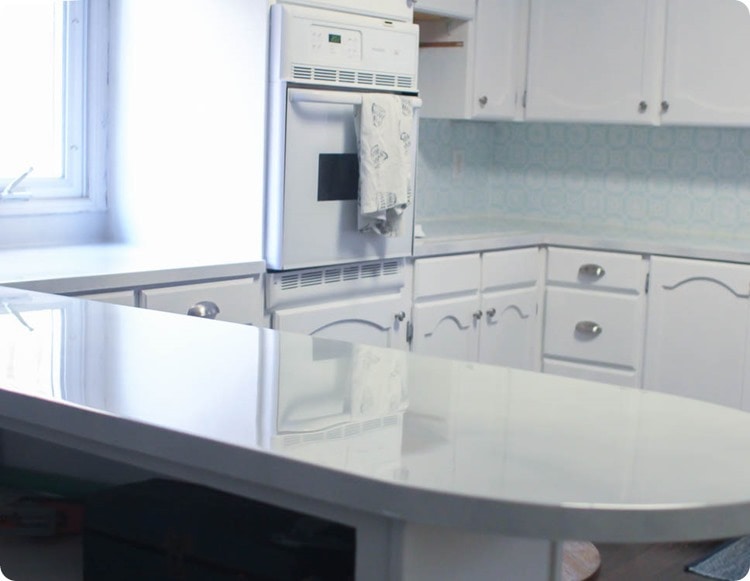
As far as taking care of these beauties, don’t set anything hot directly on them – it can yellow the resin. (This includes leaving a Crock-pot cooking on the counter. Long story, but luckily there was a happy ending.)
Also, as with most counters, don’t cut directly onto the counter.
Update – I’ve received many questions about my painted countertops, how they are holding up, and whether I would do it again so I wrote a full update answering those questions and more!
How much do painted countertops cost?
Ready for the final cost breakdown?
It would have been half as much if I hadn’t had to go back with a second coat. (Lesson learned!) But, all in all, it was still a tiny fraction of the price of replacing our counters.
Your cost will depend entirely on how much countertop you are dealing with. Our kitchen has 51 square feet of counter.
- Paint, sandpaper, and tools – all things we already had on hand, $0
- 3 gallons of Envirotex Lite – $254
- Latex gloves and dropcloth – $14
- Butane torch and butane – $23
Total: $291 ($5.70 per square foot. On average laminate countertops cost $40-$65 per square foot and marble is $125-$250.)
It was so worth the cost!
Thinking about painting your countertops? You should definitely check out these posts next:
- I shared an update 3 years after painting our countertops with all the details of the good, the bad, and what I would do differently.
- I shared another (final) update 7 years after painting our countertops with more info on how they’d held up plus a full video walkthrough.
- I have another post full of inexpensive DIY countertop ideas if you’re looking for more inspiration.
I’d love for you to pin this post on Pinterest!
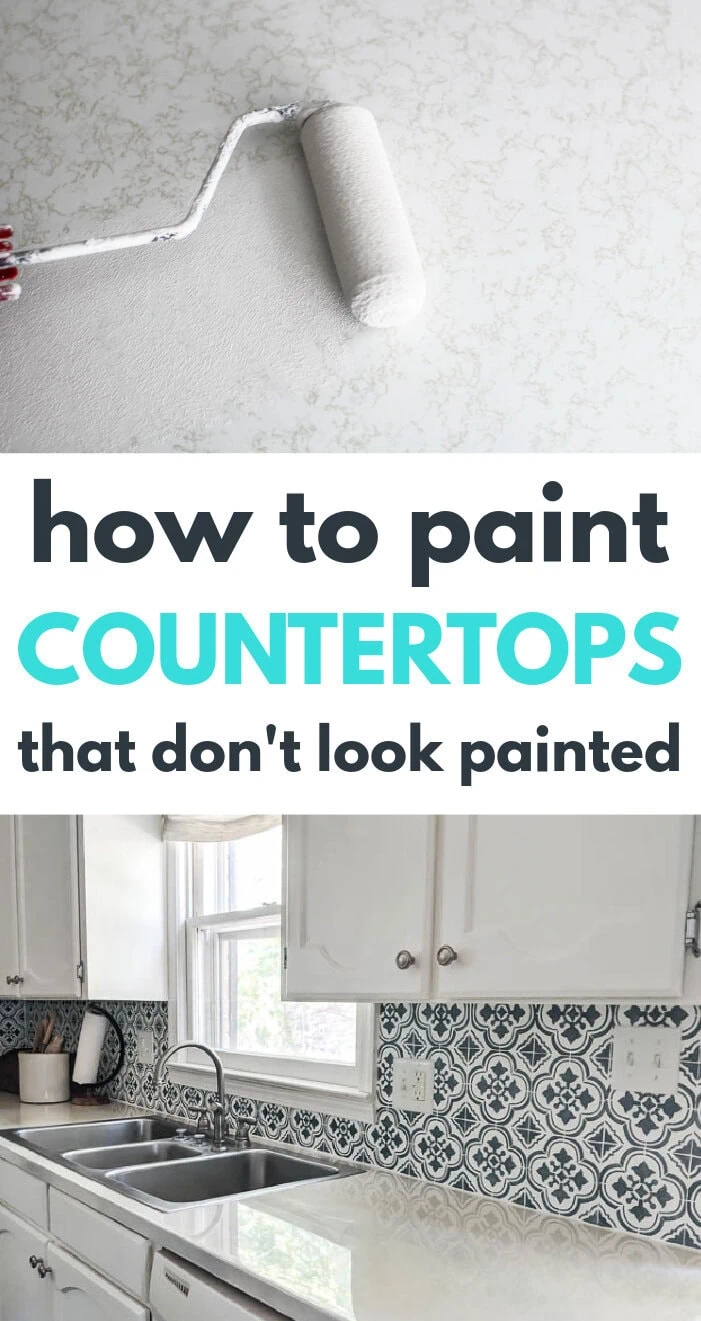
How to Paint Countertops to Look Like Marble
Learn how to paint your kitchen countertops to look like marble. I'll be sharing the exact materials and paint you need.
Materials
- Oil-based Primer
- Small foam paint roller
- Sandpaper
- White paint
- Gray paint
- A feather
- Paintbrushes
- Painter’s sponge
- Envirotex Lite
- Two disposable containers
- Two paint stirrers
- A measuring cup
- Plastic dropcloth
- Painter’s tape
- Disposable gloves
Tools
- Palm Sander
- Butane Torch
- Level
Instructions
- Use painters tape to protect anything around your counters you don't wanted painted.
- Lightly sand the entire countertop with 100-150 grit sandpaper.
- Use a small foam roller to roll a coat of oil-based primer over the counters.
- Allow the primer to dry completely and then lightly sand the surface with 220 grit sandpaper.
- Roll a coat of white paint onto the countertops and allow it to dry.
- Dab medium gray paint in random patches with a round brush and then blot with the sponge.
- Dip the tip of the feather in the darker gray paint and lightly draw it across the counter.
- Use a round brush to dab more medium gray paint on and spread it with the sponge.
- Repeat the brushing and sponging with the lighter gray paint.
- Continue to sponge the paint on creating lighter and darker areas.
- Protect your cabinets and floors with plastic drop cloths before applying the resin topcoat. Also be sure to wear old clothes and disposable gloves for this part.
- Use a level to make sure your countertops are level.
- Mix the Envirotex Lite according to the package instructions.
- Pour it onto your countertops and use an inexpensive paintbrush to help spread it to cover the entire surface.
- Wait fifteen minutes and then use a small butane torch to remove the tiny bubbles from the finish.
- Do not allow anything to touch your countertops for at least eight hours. They will be fully hardened after three days.
- If there are any drips of resin on the underside of your countertops, you can scrape them off with a paint scraper.
Recommended Products
As an Amazon Associate and member of other affiliate programs, I earn from qualifying purchases.
-
Chalk Paint Brush Set – 3 Pcs Chalk Paint for Furniture Natural Bristle Painting & Waxing Brushes, Painting Stencil, DIY Furniture, Home Decor, Card Making, DIY Art Crafts
-
Butane Torch Kitchen Blow Torch - Chef Cooking Torch Lighter Adjustable Flame With Safety Lock Culinary Torch For Creme Brulee, Baking, BBQ Butane Gas Not Included
-
Environmental Technology 32-Ounce Kit Lite Pour-On, High Gloss Finish
-
TopSoon Plastic Drop Cloth 9-Feet by 12-Feet Clear Tarp Plastic Painting Tarp Plastic Sheeting Waterproof Patio Furniture Cover
-
SKIL SR232301Corded Multi-Function Detail Sander with 12Pcs Sanding Paper & 3Pcs Additional Detail Attachment
-
Foam Roller Set,4-Inch Mini Paint Roller Cover Refills, Small Roller Nap, Foam-Covered Ends, High-Density Foam Covers for Roller Frame and Paint Roller Kit, Pack of 11


Carrie, you worked so hard at this!!! It looks great and your kitchen is looking so lovely! You are so inspiring how you keep plugging away at your job list….it WILL get done! Great job!
Thank you Shana! I have to remind myself of that all the time – it will get done eventually, just not nearly as fast as I would have liked!
Very impressive!
Looks AMAZING!! This whole blog is so inspiring!
Thank you so much Rita!
Thank you so much for this Carrie! I have some country blue from the 80s on my counter tops and have wanted to change them for years. I am definitely going to try this. They look beautiful and for a great price. I would love to know how they hold up over the years.
Thanks Kelly! I have had them for close to a year so far and they have held up well but not perfectly. Some areas look slightly yellowish to me where the sun has hit them. Other people still say they look great but I’m a perfectionist so I notice.
My sister and I painted her counter tops to look like granite. The painting part was easy and fun, and they looked amazing after we finished. OUR biggest mistake was the sealer, polyacrylic. It yellowed and turned the whole thing into a giant disaster. She is having new counter tops installed next week. Some projects are better left to the pros.
You did an amazing job and I have my fingers crossed that your tops will remain gorgeous for many years to come. Thanks for sharing, just wish this tutorial was available when we did my sisters.
Thank you Mary! The sealer really is the tricky part. I would love to get new countertops in the future so if these can hold up for another year or two, I’ll be thrilled!
That is a fabulous job, thank you for giving me the confidence to know that it can be done. can I tell you a trick that I used on my grandma’s floor? I used mineral makeup as a metallic enhancer. I have several colors, so to enhance the theme of the room, I added 2 spoonfulls of my loose powdered shimmer shadow to my epoxy, mixed well, and poured. For the second coat, I used a different color that also enhances the color theme, poured in the direction of the swirls, then poured the crystal clear over it all. It turned out like 3d marble. Perfectly beautiful.
Shannon, That is a fantastic idea! Thanks so much for sharing – I will definitely file that one away for future use!
Do you have pictures or a link to your counters?
I painted our Formica countertop in our 2nd bathroom. The resin part was a disaster. It was awful. Now I’m too scared to attempt it again. I’m thinking of using General Finishes poly.
Oh no! I’m so sorry to hear that. I haven’t tried General Finishes for a painted counter but I really like it for furniture. Good luck!
How long did you wait between painting and applying the sealer?
I believe I waited a couple of days between. As long as the paint is fully dried, it should work fine.
Such a gorgeous project! I was just wondering if the self leveling epoxy would work since my countertops have a built-in backsplash lip? Should I use a different product?
The epoxy could still work up to the backsplash lip. But if this is one of those backsplashes that is around 4″ high, it would be very difficult to get it to dry smoothly along the vertical section. In that case, I would probably pour the epoxy on the horizontal section and allow it to fully dry. And then seal the more vertical section with a polyacrylic sealer in a similar sheen (semigloss or gloss). As long as the sheen is similar, you shouldn’t even be able to really tell there is a difference.
How did you deal with pouring the resin around the sink? Did it self-level ok? I’m doing a similar project in my bathroom and want to make sure that I don’t get resin all over the sink!
Hi Madison, The resin did ok for me around our sink. We have an older sink that has a lip that sits on top of the counter so I taped that off with painters tape and covered the sink and it worked fine. An inlaid or drop in sink would be a bit more tricky but I would do the same. Carefully tape off and cover the part I don’t want covered. Good luck!
Can you give me more details on taping the sink- I just ‘finished’ doing my countertop and I didn’t use enough on my epoxy pour- it’s sealed up but it’s not even and the edges are rough so it’s driving me crazy…. I had pulled out my sink for the first attempt but thought I was going to call it ‘good enough’ because I needed my kitchen back. Now I want to do a second coat but don’t want to pull out the sink again. How long did you leave the tape on the sink edge? Did the epoxy seal over the sink edge (would I be able to replace my sink if needed or would it then require the entire countertop be replaced?) any advice on how to tape around the sink would be great as that’s the only ‘hold up’ on my doing a second pour (knowing now that I needed more than I thought….)
Oh man, I’m sorry you are having to do a second pour. I had a similar situation though I was able to add more epoxy before I had put everything back in place. We have an older drop in sink so it has a bit of a lip that rests on top of the counter. It has been almost six years since we painted our countertop and I was having a hard time remembering exactly how I taped out sink so I went back and examined all the photos I took of the process. It looks like while I did tape the sink before painting the countertops, I did not use painter’s tape when pouring the epoxy. I just let it flow up to the edge of the sink. Looking at the sink now, I can see that the epoxy goes right up to the edge of the sink with a tiny bit of overlap. I think I could remove the sink now to replace it without any problem. But it might leave the edges of the epoxy around it looking a bit scraggly. I hope that helps.
This looks amazing and I’m truly thinking about giving it a try in our kitchen! Since its been some time since you did this how is it holding up? Any new changes or suggestions?
Hi Aimee, it has been around two years now and I really need to write an update! The countertops are still holding up really well but the sealer (resin) has yellowed slightly in one section. I really don’t know why – it is near the stove so may be related to heat? Otherwise they are holding up really well. If I were going to do it again today, I would definitely still paint them, but might try using a good water-based sealer instead of the resin I used. Pouring the resin was by far the most difficult and messy part of this and I’m not totally convinced it was worth it.
I’ve had those same ugly countertops. It looks like a lot of work, but so worth it! Just gorgeous!! #upcyclesharin50k
You are so right Adele. It was a lot of work, but I am really glad I did it.
Wow Carrie these are gorgeous who knew you could do this with paint! I definitely want to try it now ❤️☺️
Thank you Christina!
Thanks for sharing these detailed plans. I have a house that needs counters updated and this may be the perfect solution
Thanks Tara! Good luck!
Dear Carrie,
I would like to known if you placed your toaster on the bare counter or you placed something under the items? Did you use felt or plastic tips underneath the microwave or roster oven?
Jeannette, Great question. I try not to keep a lot of things on our kitchen counters since they are already magnets for clutter. We don’t use our toaster often so I keep it in a cabinet unless it is being used and our microwave is mounted over our stove. We do have a few things on the counter though including a metal breadbox and it hasn’t caused any problems for our counters. And my kids color and do craft projects and play at our breakfast bar constantly and it hasn’t been a problem at all – the counters are very durable.
Hello! First time home owner that is DIY-ing a mid-century home. My counters look almost identical to what yours did and wondering how they are holding up? I looked into the Stone Coat Countertops company but feel they are specialized in design and what they do can be done with other/cheaper products. I have not heard of the epoxy bran d that you have used and wondering how you liked it.
Thank you!
Hi Lindsey, It has been a couple of years since I painted our countertops and I am still so glad I did. Overall they still look beautiful, but they definitely are not perfect. There is one section that has yellowed a bit – it isn’t super noticeable to others, but I can tell. Also, when the light hits the countertops, I can see a few light scratches on the surface. But overall, they still look amazing and are super easy to clean.
Wow, it’s a great idea to paint the countertop!! I like the before and after images of countertop and will suggest my friend Anna do the same (as she is considering to remodel her kitchen countertop). Thanks for sharing the great idea.
Carrie, I love the countertops after painting them! I’m thinking of giving mine a try. I’m curious how you were able to hide the laminate seams on the front edge of your countertops.
Thank you! I just painted right over them so now the countertop looks more like a solid surface. Getting rid of those seams made such a huge difference.
Carrie, Your counters turned out beautiful.
I also did mine a couple of years ago. I used the Stone Coat Counter epoxy and all the specific tools and paints they recommended. I watched every youtube video they have on doing a white marble counter, wrote down the procedure so I would have it handy so I would get perfect results (the perfectionist in me lol). I even did a sample piece BEFORE I made the commitment to do my counters as I wanted to make sure I would like the results. I loved how my sample turned out!
I was going to go over the laminate in my kitchen but found my counters were not level. VERY IMPORTANT for this procedure.
That is one important step to check and make sure your counters are level.
My son built new counters for me out of mdf and removed the old uneven counters.
Due to the cabinets not being level due to the settling in our 50’s home on the side of a mountain, We had to shim the counters to make them level so when we poured the resin on the counter it would not run off on one side since as these epoxy resins are self leveling.
I followed every step to the T and love the results!
But a couple of months after I had completed the process I started noticing the color seemed more beige like and then I thought it was just me, until my son mentioned it to me one day and I told him I thought I was being too picky and thought it was just me. And a friend of mine who saw them right after also noticed without me pointing it out. Now I knew it was not me. And the yellowing is not just in a corner by the stove either. I have a peninsula and the whole top looks more beige or ivory color than white with the marble veining I had put in, but not the white as it started out and should be. And the sides of the counter where the resin runs down and coats too, is still white with the gray veining of marble?? I have 2 separate counters that I put this on. One L shaped on left side of stove to the sink and then the L shape peninsula which is the larger side of the counter on the right side of the stove. The right side of the stove which is the larger peninsula side has yellowed more or turned more beige than the Left side of the stove And it is just not by the stove, and it seems to be worst the closer you get to the back splash. I did both counters exactly the same procedure, and at the same time. I contacted the Stone Coat and they think it is the ammonia in the base paint gassing off?. They said maybe my paint was not dry when I applied the resin but I know it was dry and I let it dry longer then they recommended so that to me makes no sense. I uses Behr paint for the primer as they specified and rustoleum paint and primer for the veining that they actually have you put in the first coat of resin, as they specified. I let the base paint dry for 26 hours to be sure it was dry. The only thing I did different from my sample which has not yellowed was to use their white color in my resin mixture to be sure it was very white. Even though it has yellowed I do still love my counter tops but would really love it if they were white like I started with. I do think over the 2 years since I did them the color has continued to get more beige. But it is better than the green counters that was in the house when I moved in! I read your post and thought I would share my experience maybe it will help someone!
If I were to do it again I would not use the color they say to ad in to the epoxy resin. :)
Thank you so much for sharing your experience! It sounds like we are similar in our perfectionist tendencies! And that is a very good point about making sure your counters are level – I am going to add that to the instructions.
Hi I was wondering if you have had any issues with staining? I used this resin and had a glass of dark wine on the counter that must have had some on the bottom because I have a ring now that I cant get out. Have you had anything like this happen?
Yes, I have had a few times when the counter has been stained pink by pink lemonade mix. Each time I wasn’t able to fully clean off the stain at one time. But after a few weeks of repeated cleaning, the stain completely faded. I’m not sure if a wine stain would work the same, but it is definitely worth a try.
How long did you wait in between the first and second coat of Envirotex?
I believe I waited 24 hours but it has been a little while so I’m not 100% sure. I would just be sure to wait the amount of time listed on the instructions.
You mentioned contact paper in a marble design then sealer I wonder if anyone has tried that or if there’s any information on that rather than the paint although I kind of thinking I will do the paint and have fun but this is a thought thanks
I would love to know this too! I did a quick search and didn’t really find anyone who had done this type of sealer over contact paper. I may have to try it in my camper redo this summer!
We just got finished restoring our counter tops with contact paper and epoxy finish. The contact paper we used was specifically designed for counter top coverage we used a light grey and white marble finish so the paper was extra glossy to start, but they look great. Still waiting for the sealer to dry and yeah I’ll have to agree that was difficult even with 2 people especially to get the sides even and straight I think I’ll have to do another coat on them, I saved just enough for that.
I also have a lot to clean up because he decided to use the cabinets and drawers to hold the plastic over the counter after he was done pouring and didn’t pay attention to all the drips that were still on the sides, it’s all over my silverware and utensils, so that should be fun to clean.
Even with my impatient husband and his mess I have to clean-up it was worth it, I’m happy with how they turned out. Thank you!
Thanks so much for sharing your experience! Your countertops sound beautiful. Any my sympathies on the mess, lol.
Hi there. I have the same countertops too and am researching the best way to paint them. Yours look great! I’m curious what you did with the metal portion between the counter and wall. Did you have to remove them or could you paint over them too?
I ended up removing mine because I also removed the backsplash. But if I hadn’t removed them, I definitely would have painted right over them. Good luck!
Hi – Just curious, my laminate countertops have a rounded edge, they are not a clean cut 90 degree angle. Do you think the resin will still work the same? I assume yes, I’d just hate for everything to run off the edge. Also, I realize that may be a silly question. Also, did you remove your sink when you did it, or did you leave it in and tape around it?
I just left my sink in and taped it off with painter’s tape and it worked well. As far as the rounded edge, that might make things more difficult. Some of the resin will run off the edge and that’s ok. I don’t think it will all run off anymore than it does off a vertical edge. But it may be tricky getting the resin to stick to the underside of the curve. Then again, it may not be noticeable at all if it isn’t on the underside. I’m sorry I can’t be more helpful!
This is our weekend project coming up and your blog as BY FAR been the easiest to understand and follow! Curious as to your thoughts on skipping the paint? If the primer is already white, would we really need to go over it again with a white paint?
Love your posts :)
Thank you Gabby! You might be ok to skip the paint since the primer is white and will be protected by the top coat. But primer and paint are made differently and serve different functions. When primer is formulated, they aren’t intending for it to be visible so I would worry that the pigment may not be as stable as paint. There is probably a better technical explanation, but basically I would really worry that the primer would not hold up the same way as paint. And you really don’t want to have to redo everything later on. So I would still paint even though it seems redundant.
My countertop has a raised metal band around the edge. Your description says that in order for the sealer to self-level, it has to be able to drip freely off the edges. The raised band won’t permit this (and it would be a major pain to remove. Will the Envirotex Lite still work? I’m wondering if it would level up inside and below the bands.
I think it should still work and might actually work even better this way since the mess will be contained. It should still self-level within the lip. I have used Envirotex Lite before on a small typewriter desk makeover with small contained sections and it worked great – https://www.lovelyetc.com/off-map-typewriter-table/ Good luck!
Looks amazing! I plan to do this as well to revamp our early 90s kitchen! How did you protect your sink? Our sink is already installed and this is my biggest concern. Will the resin level over it? Thank you!
We have an older style sink that rests on top of the counters. I used painter’s tape to protect the edge of the sink and it worked well. If you have a sink that is mounted underneath you countertops, I would use plastic dropcloth to protect the sink itself and use painter’s tape to carefully tape off where the edge of the sink meets the edge of the counter.
How would this work on countertops that have a bubbled edge and aren’t perfectly level at the edge?
Painting would still work fine, but I’m not sure about the pour-on topcoat. If the bubbling isn’t too raised from the surface, it might still work and cover the bubbling, but it would really depend on the condition of the surface. But you could still paint the counters and seal them with a brush on water-based sealer.
Hi! Just wanted to comment that I just completed this project after reading your blog and I absolutely love it! It is a huge improvement. I will say that we made 3 batches at once for a big countertop cover and that was a little too much at once for the drying time. Even moving fast we hit the limit right by the stove and ended with sludge. Also by last countertop the thickness was setting in and pulling all the hairs from our cheap brushes. Live and learn-2 batches at max! Everything else looked amazing though. Thanks for the inspiration and advice!
Yay, I am so happy to hear you love your countertops! Thanks so much for sharing! And also thanks for the tips – I’m sure that will help others looking to do this.
Not a long term solution I did mine about 6 years ago & even with polyurethane doesn’t hold up to everyday wear & tear a kitchen is under
Thanks for the update! I always love to hear how projects hold up. It’s been more than three years since I did mine and they are holding up pretty well, but I definitely don’t expect them to last forever.
From Deb’s comment that the counter tops didn’t hold up after 6 yrs. is there something else we could do to strength the surfaces? I’m looking to use your instructions to do both my kitchen and my bathroom.
Well, my countertops are still going strong after four and a half years! From her comment, it sounds like Deb used a polyurethane to seal her countertops, while I used a much thicker resin coating to seal mine. Time will tell, but I believe the resin helps to protect the countertops much better. My other thought that painting anything isn’t going to be a permanent solution. Even walls needs to be touched up and repainted eventually. If my painted countertops are still looking good after six years, I think I will consider that a pretty good run!
Do you think having a toaster oven on the painted countertop would yellow the resin?
I don’t think so. The toaster is warm for such a short time, I don’t think it would yellow the resin. Our slow cooker did yellow the resin but I think it was because it was hot for many hours and also possibly because the resin was pretty new. We have since used our air fryer and toaster oven on our counter without a problem.
Carrie, you may have already answered this question, but I’m running for an appt. and hope you won’t mind me asking this question. I love what you did and I need to do something for my ugly laminate countertops. I really don’t want a marble look. What other choices could you suggest? I like the white so do you think just white would be okay?
Just white would look great – it would give the look of a great white quartz or solid surface countertop!
Hi
I love the look of your painted countertops. Do you think this method and materials would work on tile countertops too? What would you suggest?
Thank you.
Rasmey
I think it could work over tile with some modification. If you want a solid surface look, I think it would be best to fill in the grout lines first with a strong filler like Bondo or even a quick-mix cement. Once that was really smooth, you could paint and use the pour on sealer. Or alternatively, you could try not filling in the grout lines. The pour on sealer I used is self-leveling so it may still end up giving a fairly level surface. I think you would probably need to do at least two coats to get a smooth surface without any divots and it would probably be a good idea to do a test run first. Good luck!
Hi Carrie,
How do you avoid dust getting at it for 8 hours?
Thanks.
We just avoided going in the room for those hours and it worked fine. I don’t think our house is especially more or less dusty than anyone else’s. I would be sure to clean everything well before doing the counters and then avoid sweeping or doing anything else that would stir up dust in adjoining rooms. Otherwise, dust shouldn’t be a problem.
Hey there! Did you sand between your first and second coat of epoxy? I did the same thing you did and ran out and it looks rough in a few spots. I need to fix it but wanted to see if you sanded and then applied a second coat? Thanks!
I did not sand between the two coats of epoxy. When you add the second coat it should self-level and fill in any uneven areas from the first coat.
Hi! This is SO awesome!! I want to do this in my bathroom! I know for a fact that the counters aren’t level. Would u still be able to use the resin some how or would it be too difficult to try that? These counters are gorgeous & exactly what I would love to accomplish. I wish I could add a pic of my current countertops for laughs! Let’s just say That 70s Show
Love the description of your countertops as That 70s show! The resin is self-leveling so if the counters are very slightly off-level or maybe just have a few spots that are a bit lower, it could still work. But if there is a significant height difference from one side to the other, I don’t know if the resin would be the best choice. But you could build up and low spots on your countertop to be level with the rest of it and then paint and add resin. I haven’t researched this so I don’t know exactly what would be best to use but I’m sure there is some sort of leveler available.
Did you caulk around the back of your countertops (where back splash meets countertops) before or after the resin top coat?
Thanks!
I caulked before the resin. In my own kitchen I removed a thick laminate backsplash which left a gap between the back of the countertops and the wall. I wanted to fill the gap before pouring resin to prevent a huge mess behind the cabinets. In most cases, I think caulking before will probably work best.
These are beautiful and I would love to try it. My kitchen is desperate for a makeover. I wonder about the painted countertops being foodsafe though? Do you have to be careful about placing food directly on them?
Good question. What matters most is if the final surface is food safe – in this case, the paint is completely enclosed by the epoxy resin topcoat. So whether or not that topcoat is food safe is the big question. I found this article – https://resincraftsblog.com/is-epoxy-resin-food-safe/ which says it is safe to be used on surfaces like countertops and serving trays but not for objects food will be cooked in or poured in. Personally, I feel perfectly safe putting things like bread or cookies directly on my countertop, but everyone should do what they are comfortable with.
I wonder if you could give me your opinion on this. I want to try painting my countertops, but they were already painted when I bought the house. Do you think I need to remove the paint? Or just sand them, prime them, and then start with the new paint?
If it were me, I wouldn’t try to remove all the paint unless it was loose and peeling. If the paint isn’t loose, I would clean it well and sand it smooth with 220 grit sandpaper. Then I would use Zinnser oil-based primer – this primer will stick no matter what kind of paint was used before. And then paint and seal. Even though they’ve been painted before, it should still work well. Good luck!
Getting ready to try this… can’t wait. My only question is about blotting the medium gray with a Sponge. Did you only do that where you were drawing the marble lines. Or did you doing it all over the whole counter top ; then draw in the with the darker gray.
I sponged on the gray paint all over the countertop, not only where the darker gray lines are. But I did try to leave some areas darker than others to give some variation. I hope that helps!
Hi! These look fantastic. I wanted to do this to my counters, but I have a ledge of counter going up about 4 inches on the backsplash if that makes sense. Would the resin just drip down?
Thanks! The resin will probably still work on your ledge but I can’t say for sure because I haven’t tried it. Based on how the resin acted around the edges of my countertop, I think it will drip down some but I can’t say how much. I would expect enough to remain in place to give a similar finish to the rest of the countertop. Another option would be to use the resin on the horizontal surface of your countertops and use a different non-yellowing sealer like Minwax Polycrylic or General Finishes High Performance top coat on the vertical section. These sealers can be brushed on with a sponge brush or other smooth paintbrush. As long as you get a sealer in the same sheen as the resin (gloss or semigloss), it will still protect the small backsplash and you really shouldn’t be able to tell the difference.
Hi! We are looking in to painting our laminate countertops soon and my husband asked me about the edge. I’ve skimmed your instructions and comments, but I can’t seem to find anything about the edge of the counter (other than the drips). Do you seal the vertical edge of the counter, and if so how does that work?
If not, do you treat it the same as the 4” backsplash and paint on a different kind of sealer there as well (on the counter edge).
Thank you for any advice!
I sealed the edges of my counter with the same pour on sealer as the rest – when you pour it on to the horizontal surfaces, it pours over the edges a bit as it self-levels. You can also use a smooth paintbrush or plastic scraper to gently spread the sealer across the edges to get better coverage. That actually seals the edges pretty well – especially since they don’t get the same level of wear and tear as the main surfaces. Good luck!
I am going to start this project, but had a question you may not have an answer to. How would you do a backsplash if it is self-leveling? Any ideas? Maybe I should use something else? Thanks
For a backsplash, I would use a different product. You can use a non-yellowing clear sealer in the sheen of your choice – satin, semi-gloss, gloss, etc. If you are doing a countertop and a backsplash, I would use the pour on finish for the countertop and a finish you can apply with a brush or roller on the backsplash. As long as you match the sheen, it should look great.