Quick and Easy Bathroom Makeover Using Only Paint and Accessories
This budget bathroom makeover is a great example of how a few small updates like fresh paint and new art can change the whole look and feel of a room.
This bathroom makeover all started when we discovered there was water leaking under the tile floor. Not the most fun discovery, but thankfully my husband and I were able to fix the damage ourselves.
(Usually I’m the one who does all the fixing and DIYing in our house, but for this job, I knew I could use some help and he was an awesome assistant.)
Once we’d fixed up the floor and regrouted the tile, the bathroom looked pretty much exactly like it did before. It felt pretty anticlimactic after all that work, so I decided it was a good time for a quick bathroom update.
Budget Bathroom Makeover
This isn’t the first time I’ve given this bathroom a makeover.
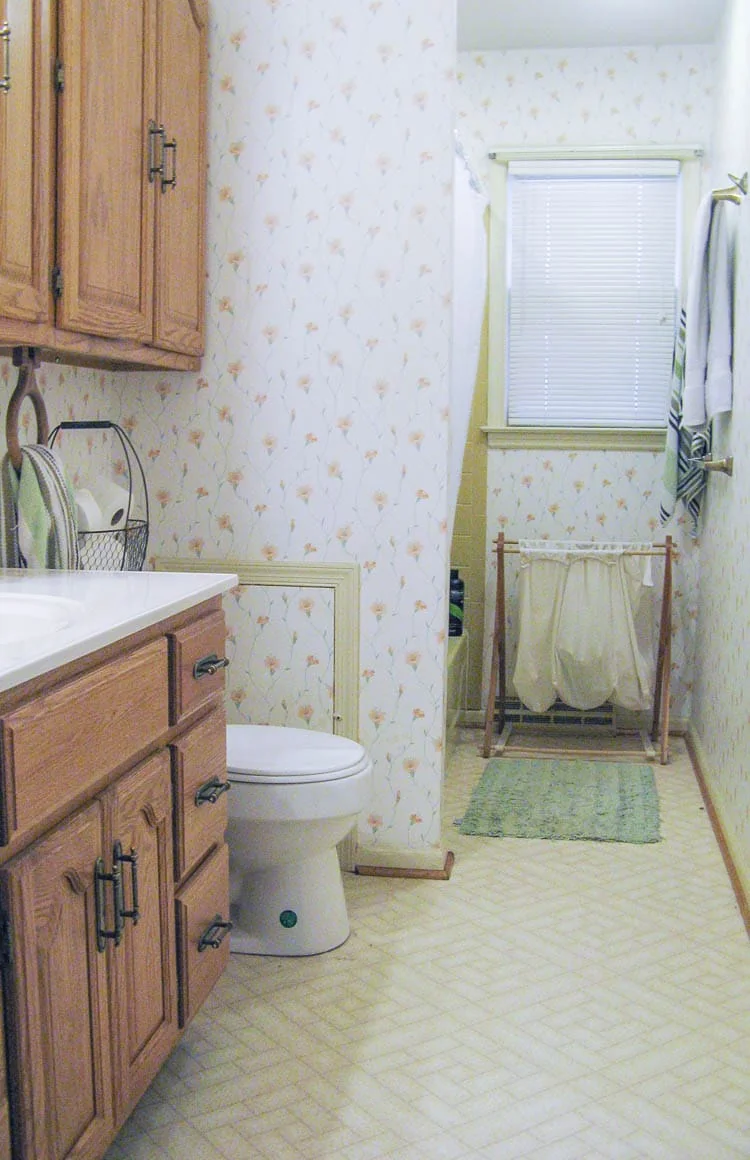
When we moved into our 1970s ranch years ago, the bathroom had been long neglected. This is how this room looked for the first few years we lived here:
In 2017, we completely renovated the bathroom and gave it a fresh new modern farmhouse look on a budget.
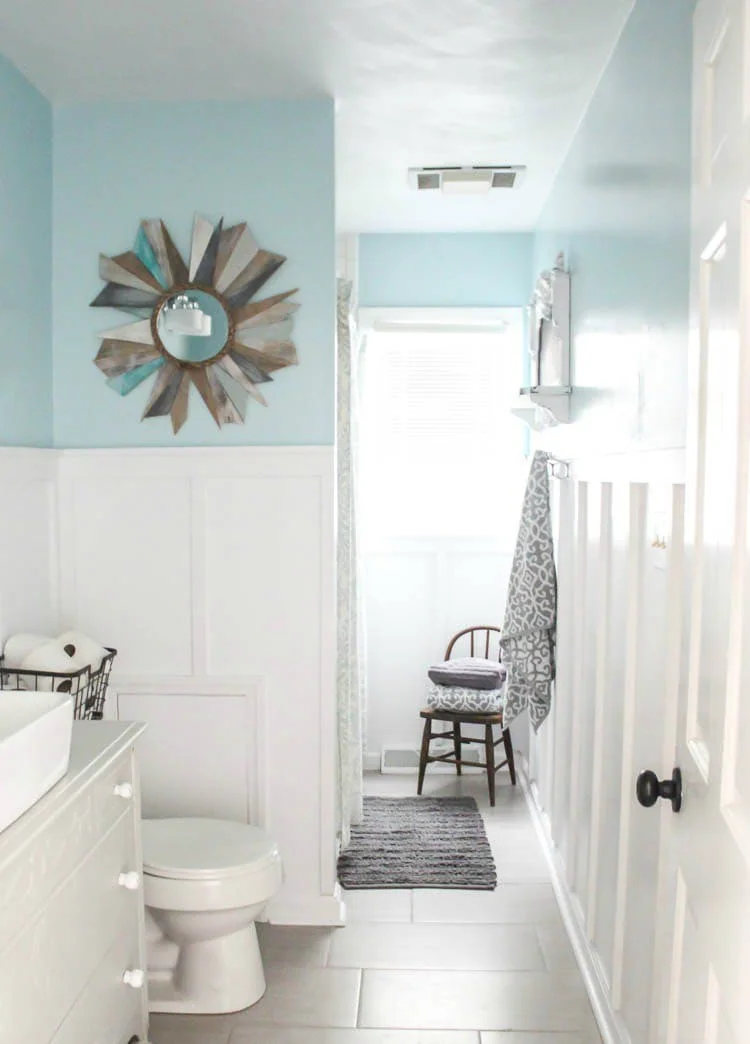
Five years later, I still think this bathroom looks pretty dang good, but I was also ready for a bit of a change.
There was absolutely no need for another total renovation, but my style has been slowly evolving and I wanted to give this room more of a classic feel.
Not to mention, after five years of heavy use and abuse by my three boys, a few things like the painted vanity were starting to look a bit worse for wear.
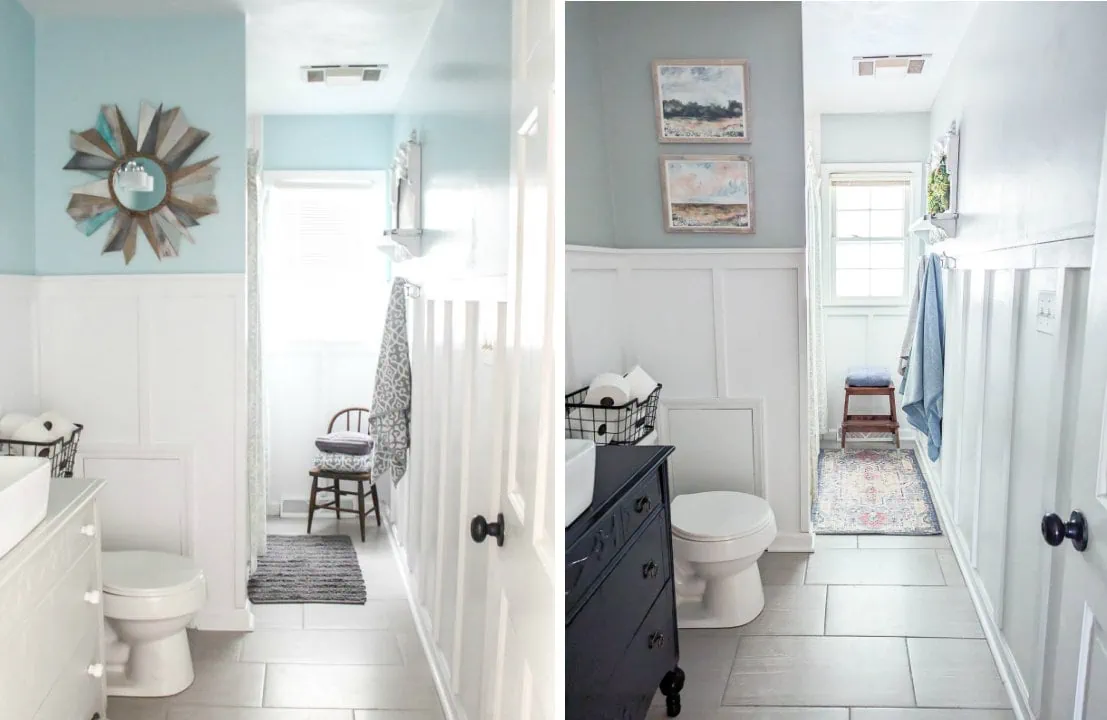
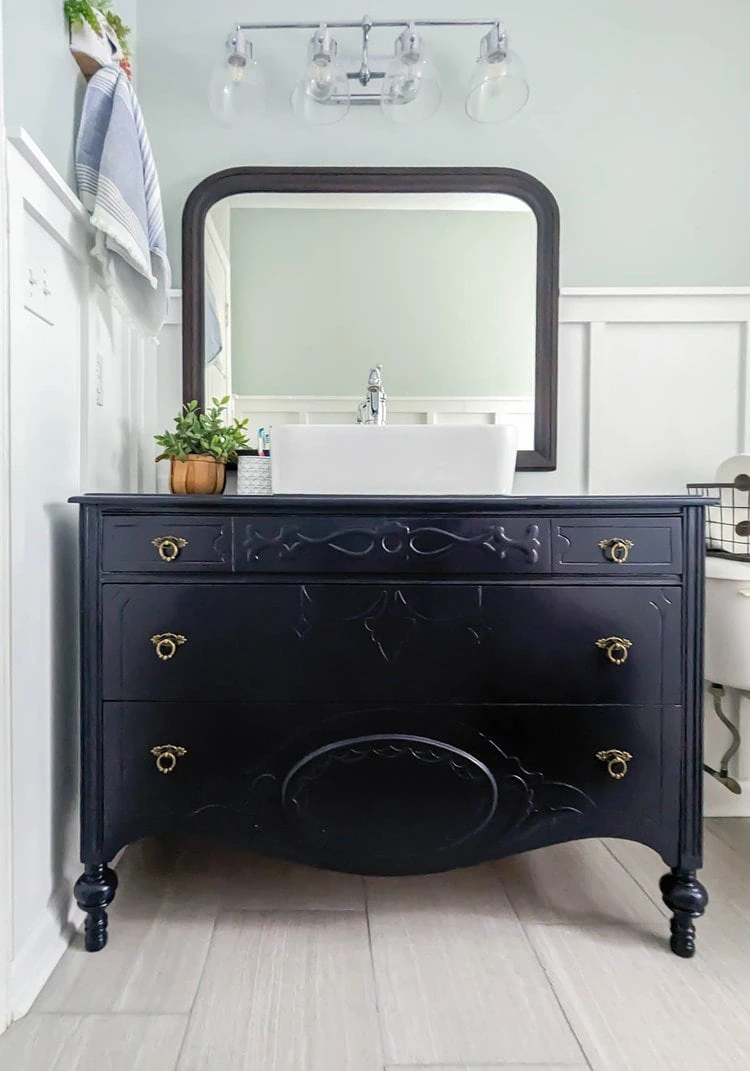
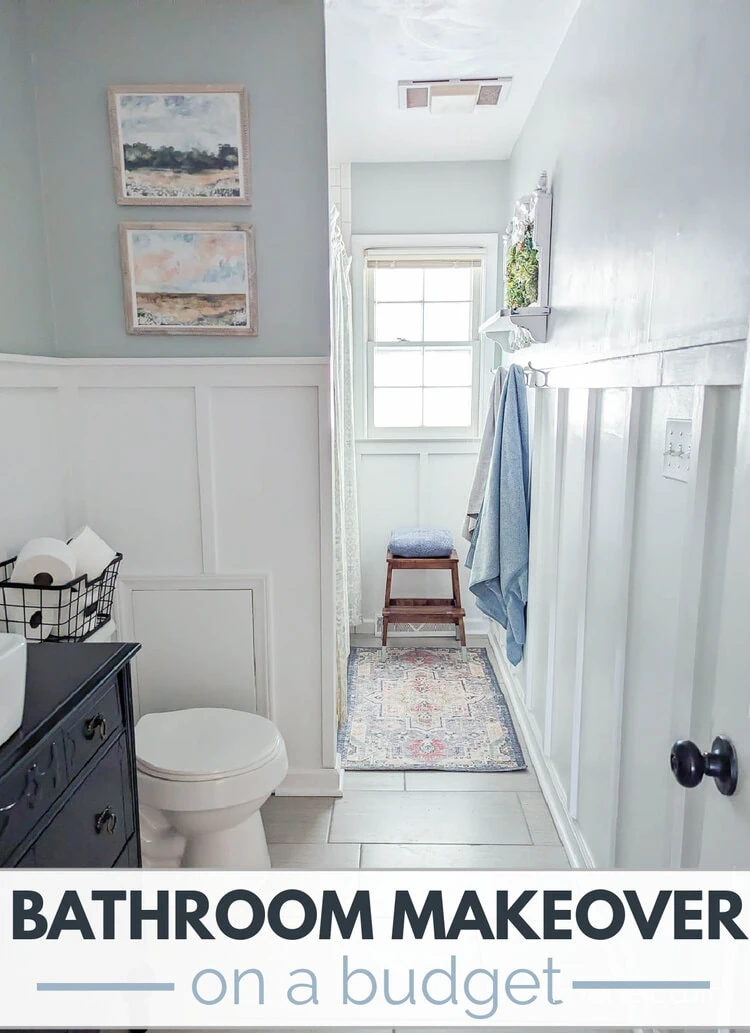
So I gave this room a quick budget makeover using just paint and some new accessories and here’s how it looks now:
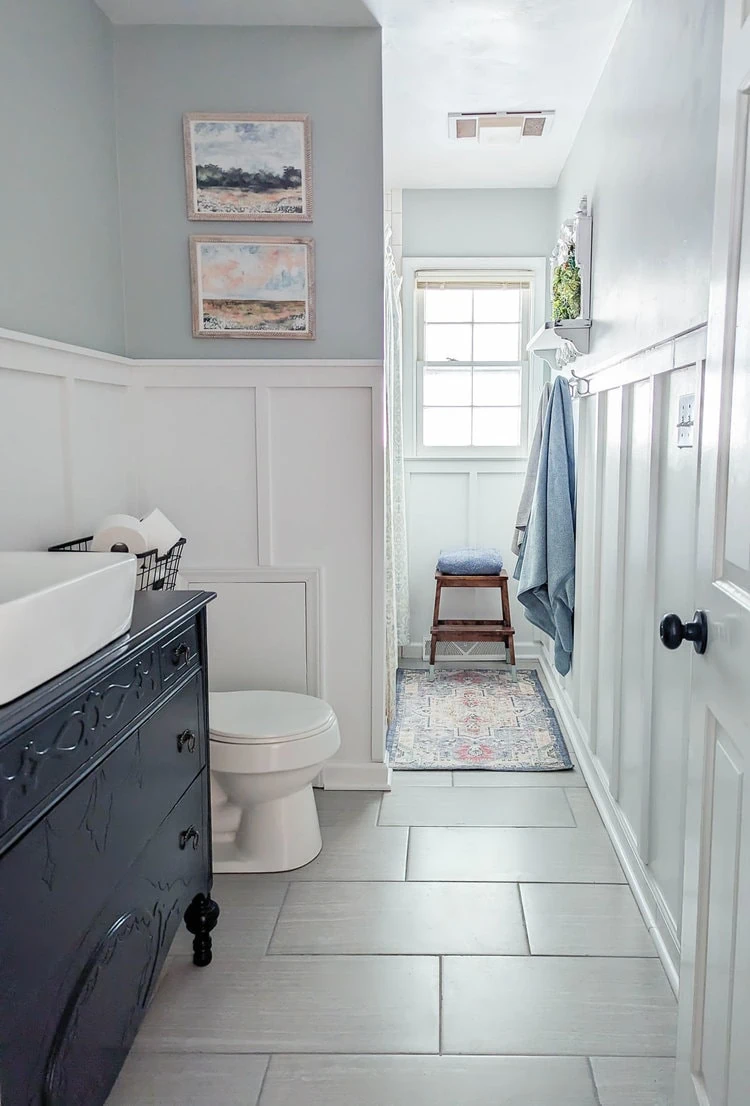
In the end I really only changed a few things. I repainted the vanity and the top half of the walls. I got a new rug, and I switched up some of the wall art.
Everything else including the layout is the exact same – the tile flooring, board and batten walls, the vintage mirror, even the shower curtain.
I love how making just a few small changes to the paint colors and accessories, gave the room a completely different feel. It’s a great reminder that you can make a big difference in a space without spending a lot of time or money.
This post contains affiliate links which means if you make a purchase after clicking a link I will earn a small commission but it won’t cost you a penny more. Click here to see my full disclosure policy.
New paint color on the walls
I briefly considered painting the board and batten a fun color, but ultimately decided to keep it white.
Painting it a color would have led to all kinds of complicated decisions about whether to also paint the window and door trim the same color and how to deal with the light switches in that portion of the wall. In the end, I stuck with white and I still love how light and bright it is.
But I did want to do something a bit different on the rest of the walls. I chose to use the color Lapland Ice from Sherwin Williams on the upper portion of the walls.
This is a light gray with a bit of a green undertone. It gives a nice contrast to the white trim without becoming the star of the room.
A new look for the vanity
The biggest change in this whole space has to be the bathroom vanity. A fresh coat of paint and some new hardware completely transformed this piece.
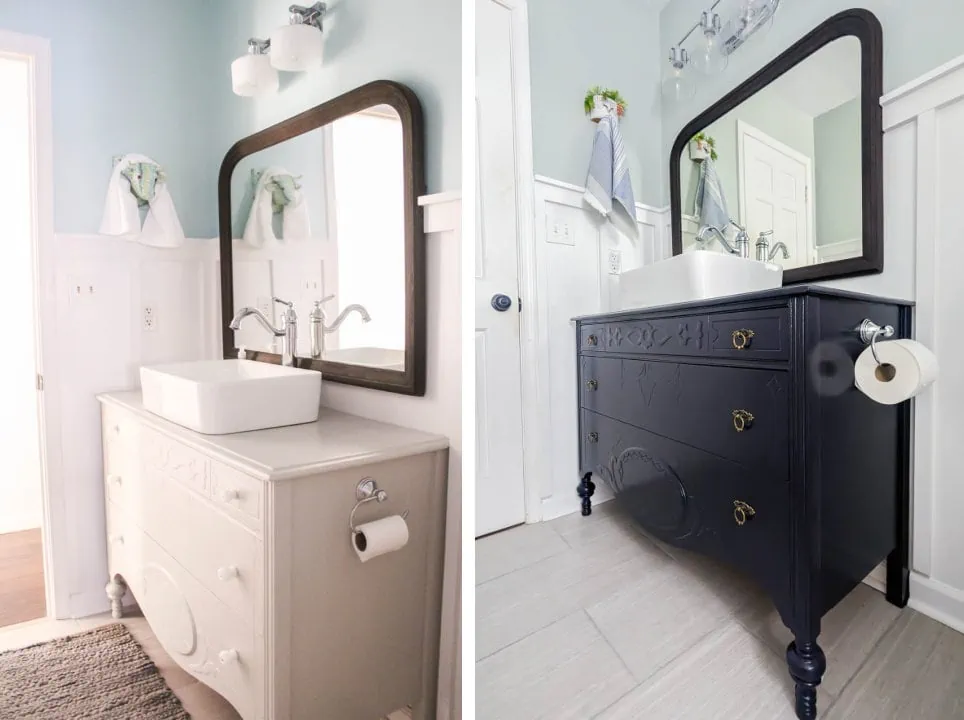
Even though the dresser, sink, and faucet are all the same as before, with the new paint and hardware, this vanity has a completely different look now.
Honestly, I still love both versions of this dresser. I think this is a great example of how there is more than one right way to finish any piece of furniture; usually there are many different style and color choices that can look beautiful.
You can get all the details on creating a bathroom vanity from an old dresser right here.
I painted the vanity using General Finishes Milk Paint in Twilight.
General Finishes milk paint is one of my favorite paints for painting cabinets and I love this super dark blue shade.
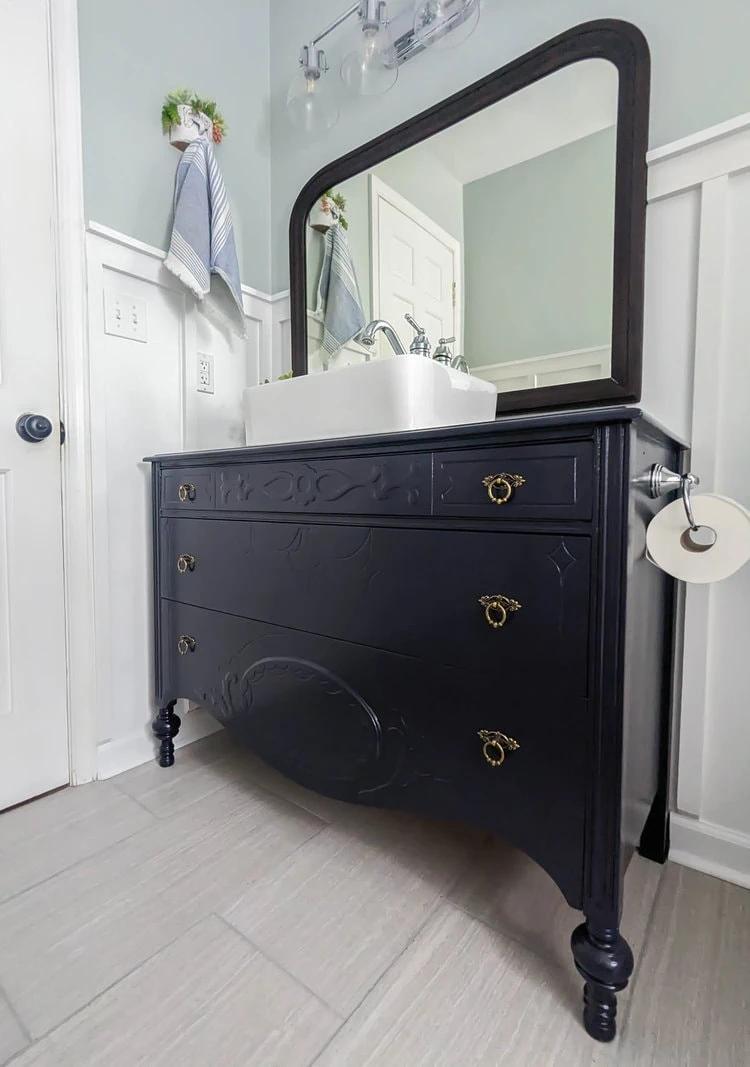
I chose to seal my dresser with General Finishes High Performance Topcoat in Satin.
I often prefer a more matte finish for painted furniture projects, but since this piece is in our main bathroom, I knew it would need to hold up to a lot of use and a lot of cleaning.
Shinier finishes tend to hold up to moisture and scrubbing better, so I went with the satin finish and I’m loving how the little bit of shine really accentuates the details of this dresser.
Once my dresser was painted it’s new deep blue color, I could tell the old milk glass knobs weren’t the right match anymore.
I found these inexpensive brass knobs on Amazon and I love how they look like they belong on this piece.
New Art and Accessories
The rest of the room updates really just came down to some new art and accessories.
I replaced the DIY sunburst mirror that was in here with two framed prints from Etsy. These are digital prints that you can download and print in any size you want. I love how they really tie the colors of the room together.
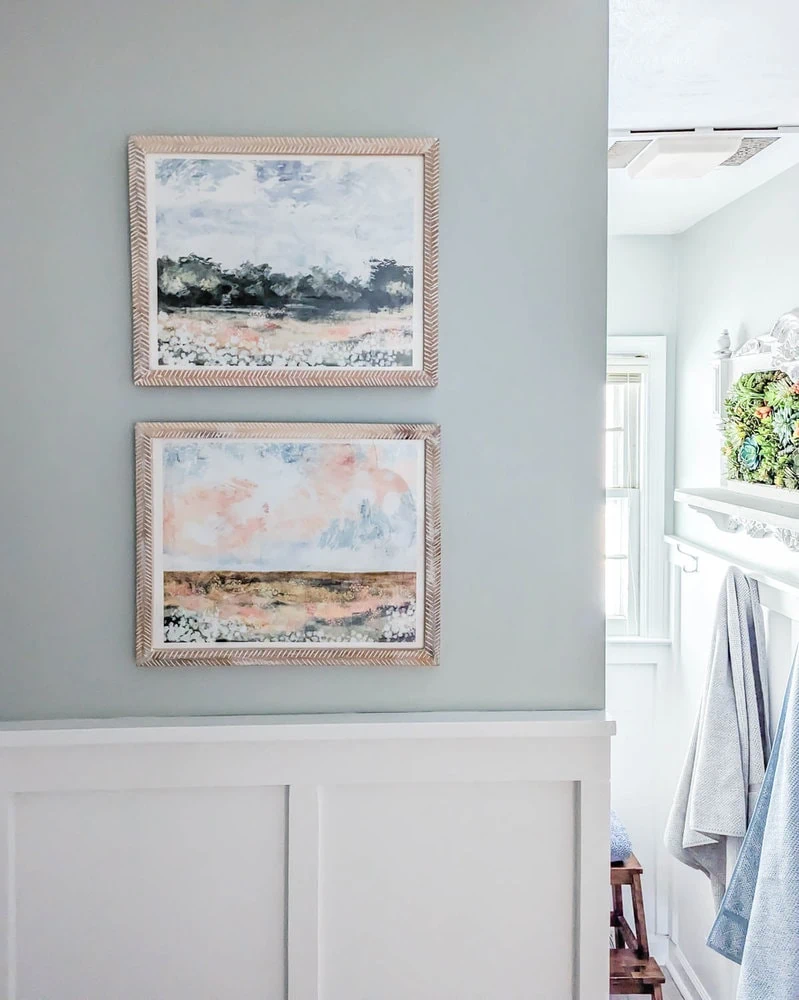
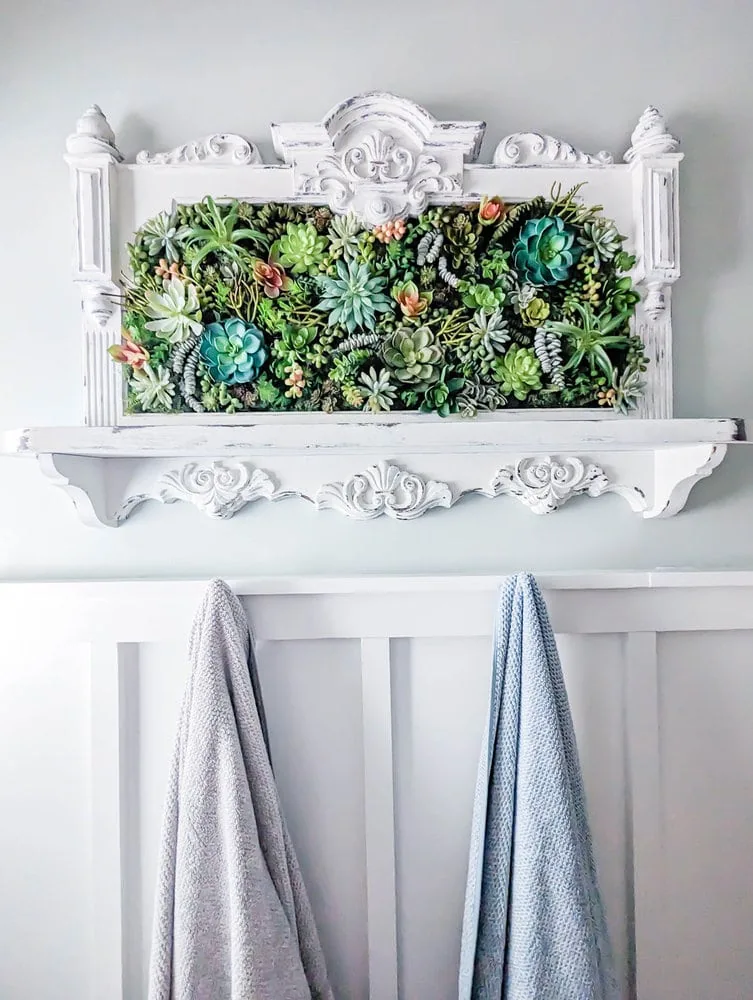
In the back half of the room, I reused the ornate frame that was already there in a new way. Instead of a chalkboard, it now holds a succulent display.
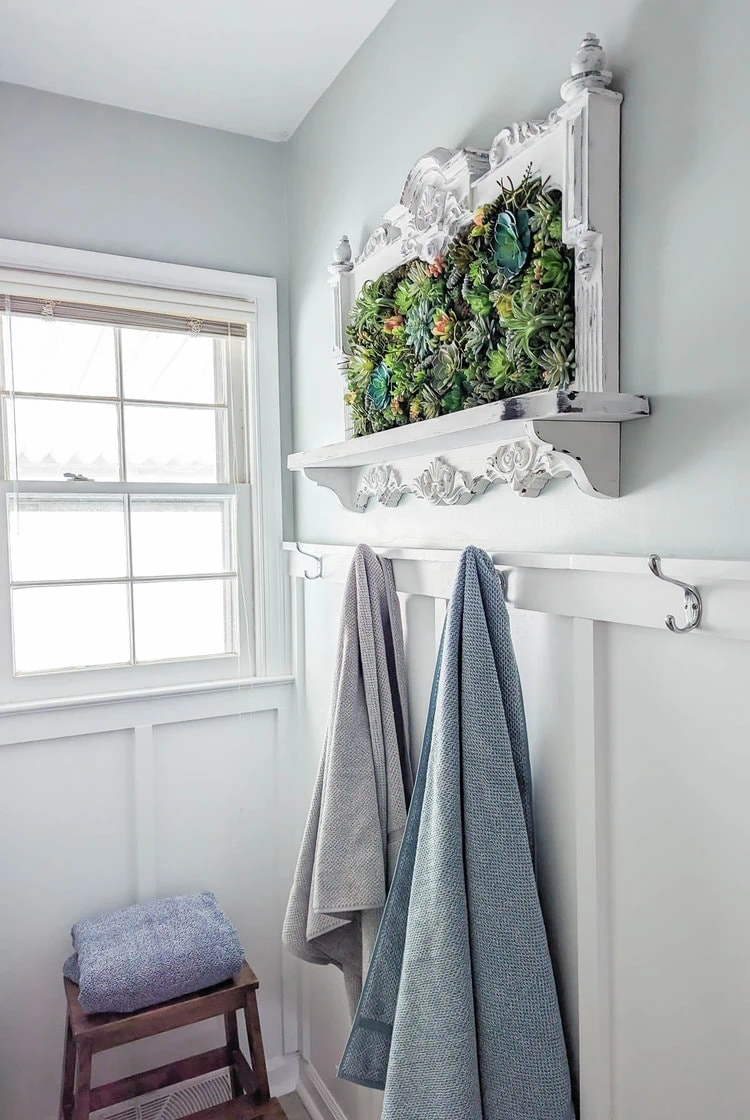
I love the cacophony of colors and textures. Even though these are faux succulents, it still feels like it brings a lot of life to this half of the room.
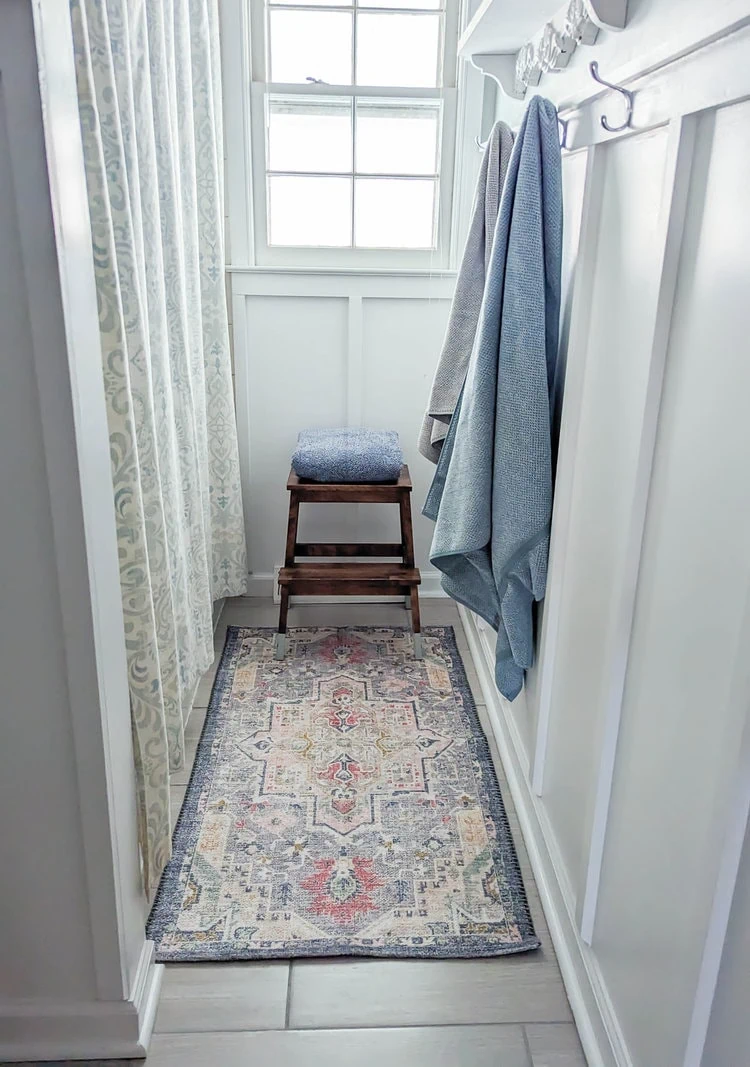
I also got a new rug for this space. When you’re working on a bathroom where most of the room is pretty utilitarian and there aren’t a lot of accessories, little details like the bath mat can make a huge difference.
I decided to use a small area rug rather than a traditional ‘bath mat’. I love the color and pattern in this rug from Target and it has non slip pads on the bottom so it really does everything a bathroom rug needs to do.
Finally, I made a new upcycled towel hook.
I used to have a cow head here where we hung our hand towels, but it felt a bit too country for the new space. I didn’t really want a boring regular towel hook though, so I created one using an old sewing machine drawer and a hook.
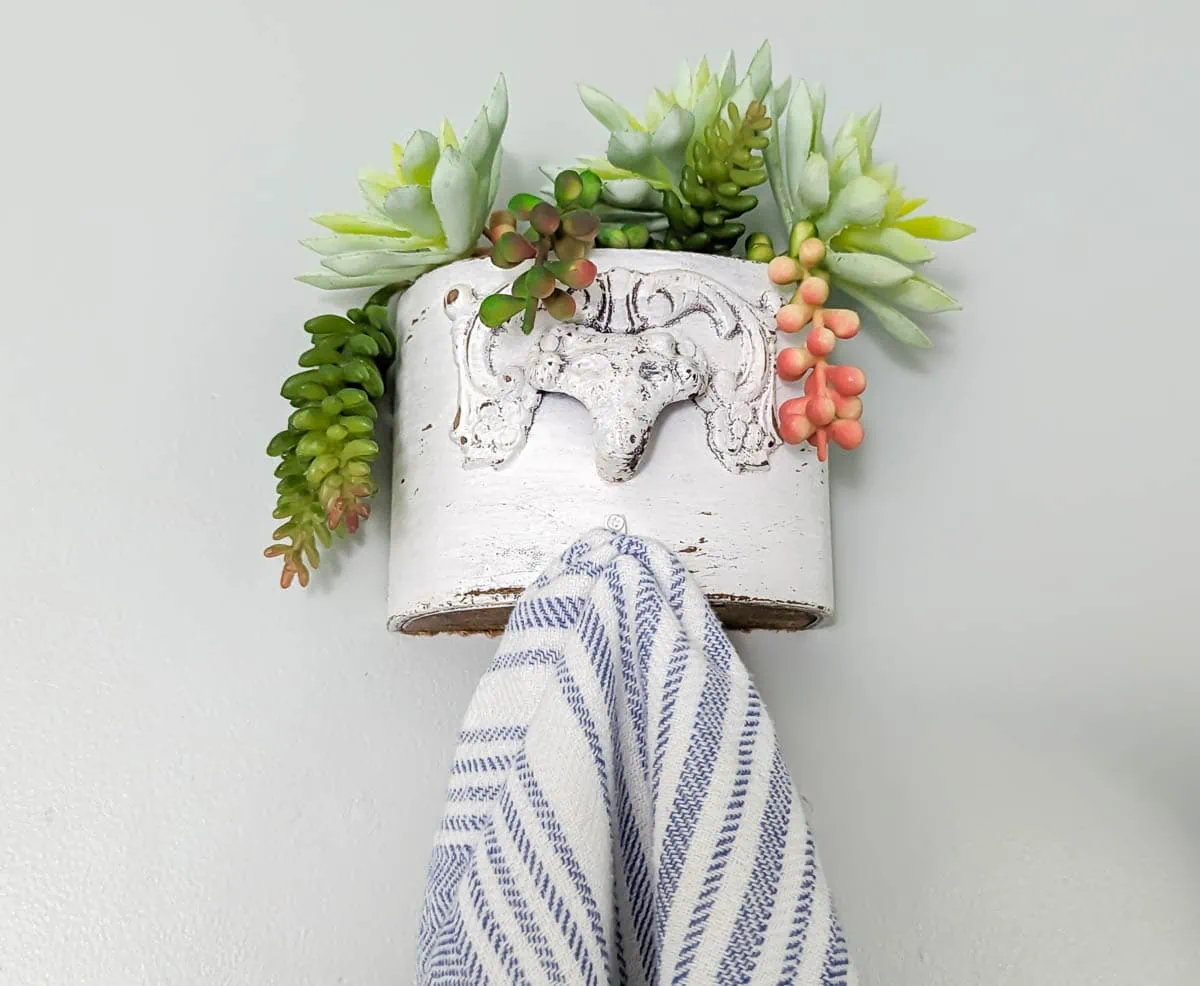
I’m pretty happy with how it came together and I’ll be sharing more details about this soon as well.
Bathroom Source List
Listed below are the names and sources for everything in this bathroom, including things that were already in the room before this makeover.
- Paint for walls – Lapland Ice by Sherwin Williams
- Floor tile – Leonia Silver Porcelain Floor Tile (This tile is beautiful and incredibly affordable at only $2 per square foot) with Keracolor Grout in the color Silver
- Paint for vanity – General Finishes Milk Paint in the color Twilight with General Finishes High Performance Topcoat in Satin
- Hardware for vanity – this is a great set of hardware for furniture redos and it is super affordable
- Rectangular Vessel sink
- Sink faucet
- Mirror – my mirror was a yard sale find, but this arched wood mirror from World Market and this mirror from Wayfair are similar
- Rug – This beautiful rug is from Target and comes in a small 2’x3’9″ size as well as a runner size.
- Stepstool – Bekvam stepstool from IKEA
- Towels from Target
- Art prints – Spring Landscape and Country Landscape, both are from the shop LittleLadyPrintShop on Etsy which has a huge selection of beautiful printable art
- Basket for toilet paper
DIY Projects in this Bathroom
- How to Turn a Vintage Dresser into a Bathroom Vanity
- Cheap and Easy Board and Batten Tutorial
- How to Regrout a Tile Floor: A simple Step-by-step Tutorial
- DIY Succulent Wall Art
- How to Refinish a wood mirror without sanding – tutorial coming soon
- Tips for repainting a bathroom vanity – tutorial coming soon
And now I’m gearing up to do a more major bathroom renovation in our master bathroom.
This room got a pretty sweet $100 makeover a few years ago, but it also has some water issues. (We have copper pipes and very hard water and the two don’t mix so we’re slowly replacing all the old pipes).
Here’s hoping that bathroom goes as smoothly as this one did!
More bathroom DIYs I think you’ll like:
I’d love for you to pin this post on Pinterest!

I love the vanity painted blue. It looks so chic. Love the power of paint.
Thank you!