Modern Farmhouse Bathroom: The True Final Budget and Source List
Ok, so last week I shared our newly completed bathroom makeover with you guys. I finished up this bathroom makeover as part of the $100 room challenge, knocking out the final projects and details on a tiny budget of less than $100.
But even though we did finish this bathroom on a tight budget, the whole bathroom start to finish sadly cost much more than $100 and took far longer than four weeks.
In fact it took pretty darn close to nine months to complete start to finish. Bathroom renovations are a lot of work and I definitely don’t want to give anybody the impression that it is fast or easy.
We were able to save a lot of money by doing most of the work ourselves, but that also meant we (um, make that I) put a lot of hours of work into this bathroom.
A lot.
And also, I want to give a realistic picture of the budget for a huge renovation like this. Like I said, I was able to save a ton of money by doing most of the work myself and saving money on materials wherever possible, but the budget was still significant.
So today I’m sharing the whole story of the bathroom start to finish, including the final budget.
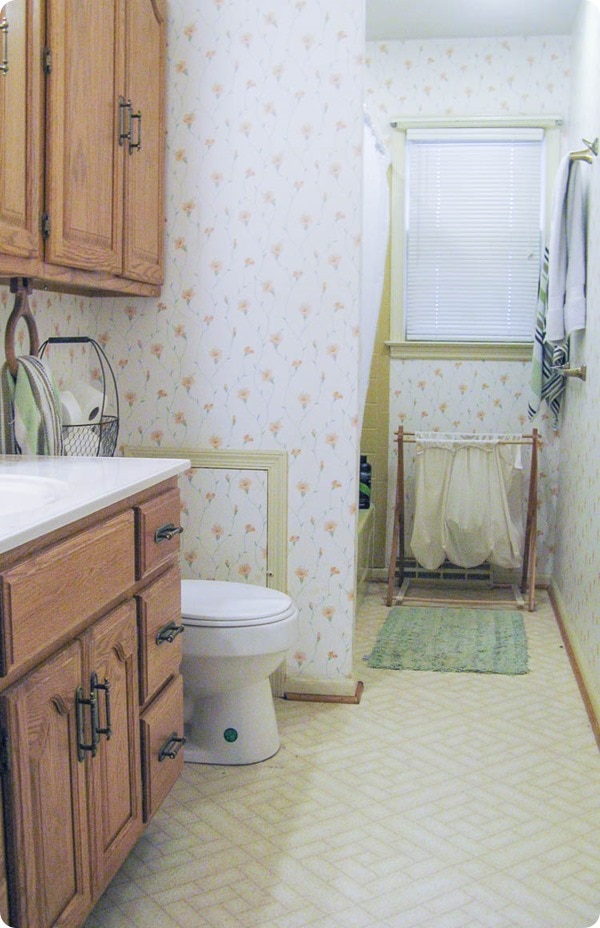
When this whole process started, the bathroom looked like this.
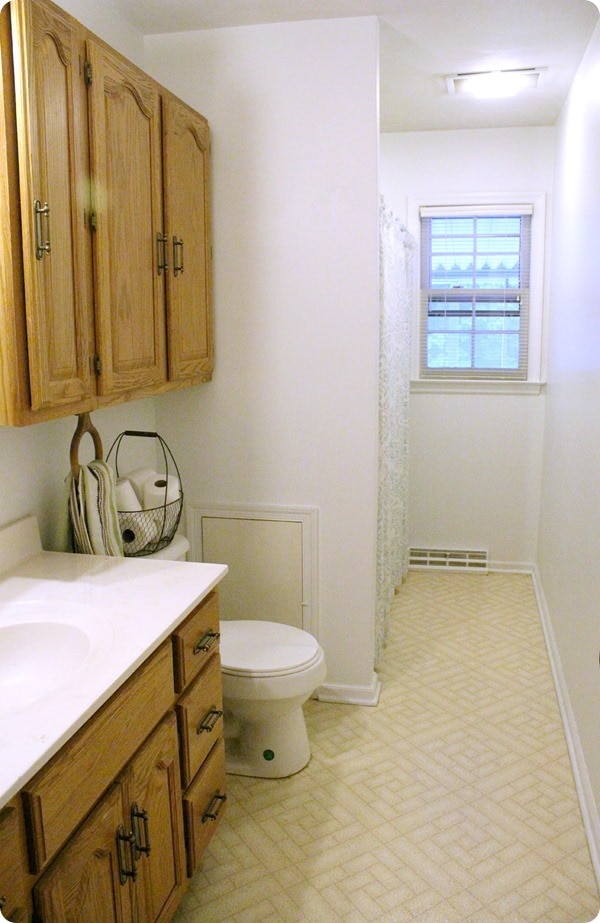
Not so pretty. A couple of years ago, I stripped the wallpaper and removed the excess of towel bars and robe hooks, so last spring the room looked more like this.
Better, but still not good. Especially when you look a little closer.
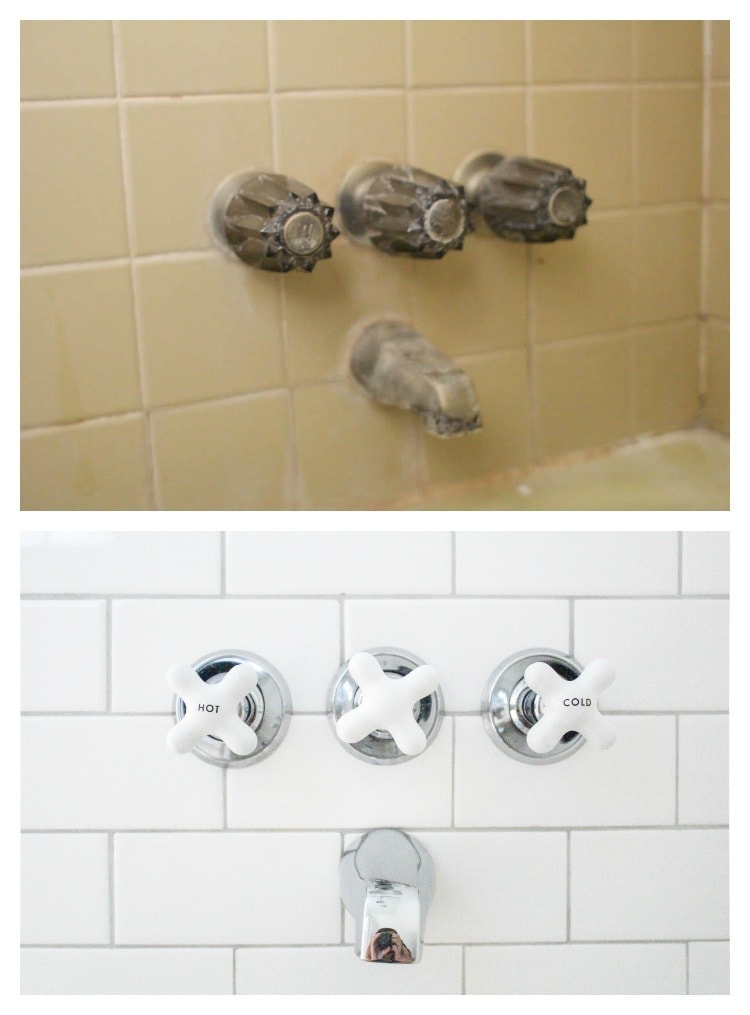
The smoky faucet handles, dated medicine cabinet, and yellow tile and tub were much much worse in person. But even that wasn’t what motivated us to overhaul the room.
The real problem was our plumbing. We had very nice copper pipes which were sadly being slowly eaten away by the minerals in our local water. So much so, that the floor was beginning to feel soft and squishy. Not good.
Once we realized we were going to have to replace the walls around the shower and the entire floor, it only made sense to go for a whole new bathroom.
New plumbing and dealing with water damage
We did hire professionals to deal with removing everything that was damaged, replacing the plumbing, putting new wall board around the shower, replacing the bathtub, and installing the new tile floor.
In retrospect, I wish I had just done the floor tile myself, but I am incredibly happy we had professionals do everything else. I love to DIY, but not when it comes to matters of safety and the structure of the house.
Of course the downside of having someone else do the work was the price. We paid $5000 to our contractors to complete all of the work. This also included the tub and all of the supplies they used other than grout and tile, which we provided.
This was of course, by far the most expensive part of the project. If we hadn’t been dealing with major water damage and replacing the plumbing, I think we probably could have handled the entire renovation ourselves and cut the total budget in half, but sadly that wasn’t the situation we were dealing with.
DIY Bathroom Makeover
When the contractors left, the room looked basically like this (minus the subway tile peeking out above the tub).
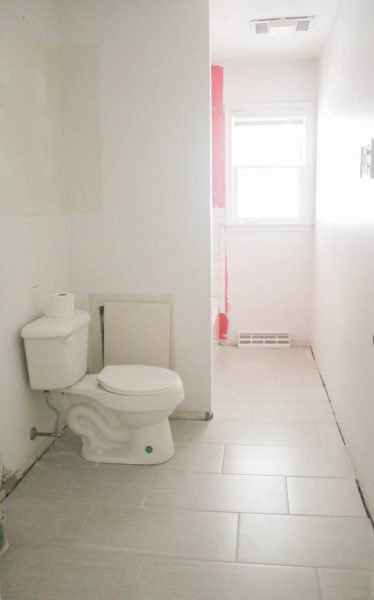
Then it was my turn to get to work. I tackled a lot of projects in this room including a lot of things I had never done before.
This was my first time tiling or doing any type of plumbing. (Even though the contractors took care of all of the plumbing in the walls, I installed the new vanity and sink myself.) This was also my first time doing anything like board and batten.
Let me tell you, there were moments I really regretted taking so much on, but in the end I was so happy I did.
Not only because it saved us thousands of dollars, but also because I learned how to do so many things I had never even considered doing before.
And I did them well! I’ve got to be honest – I may be feeling a bit invincible at this point.
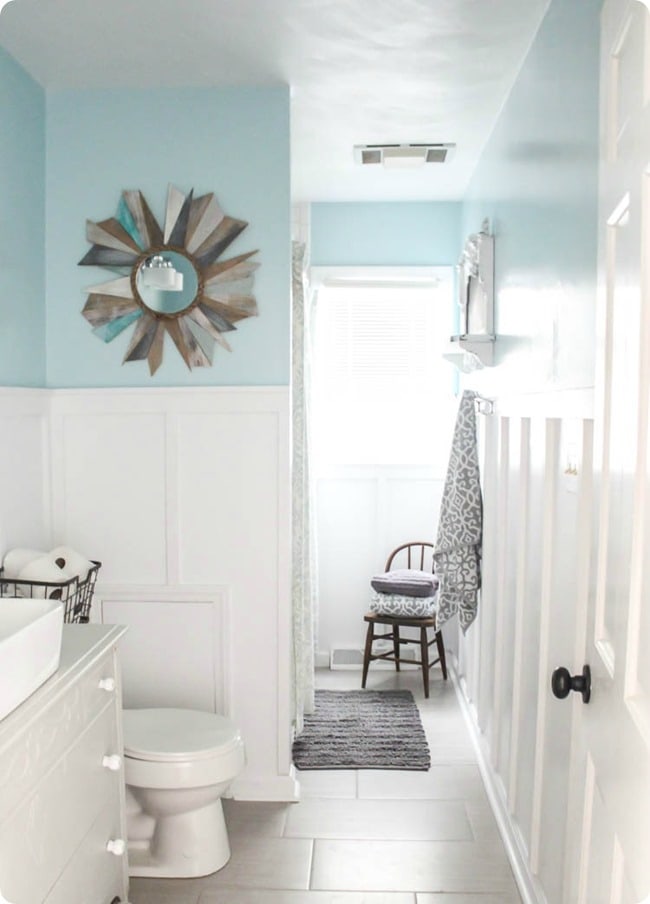
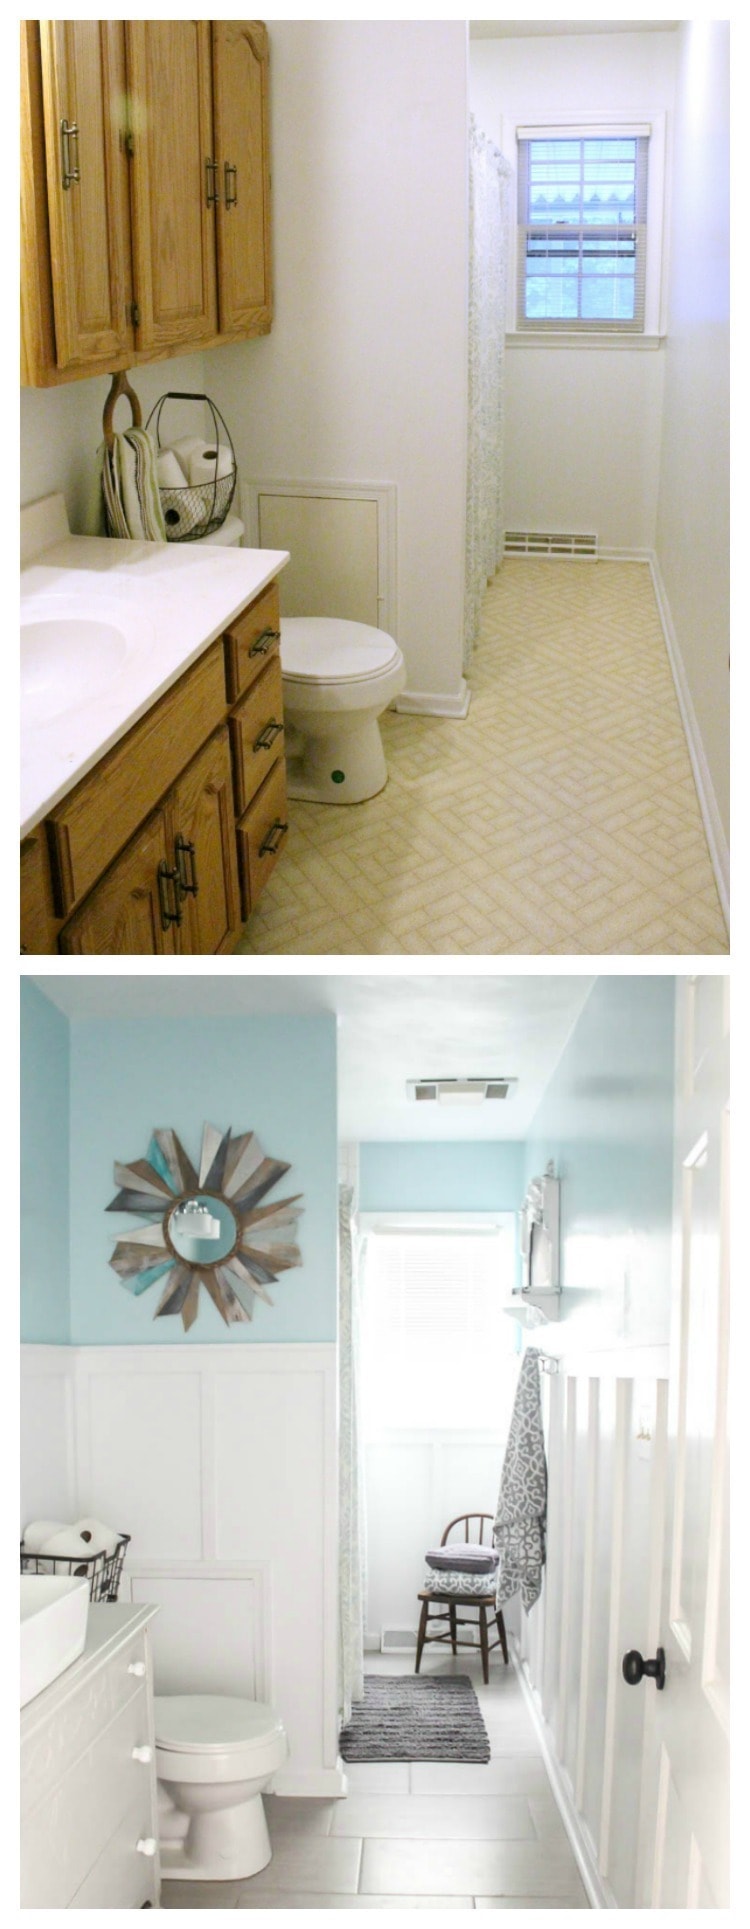
Here are a few more before and after pics to show just how much really changed!
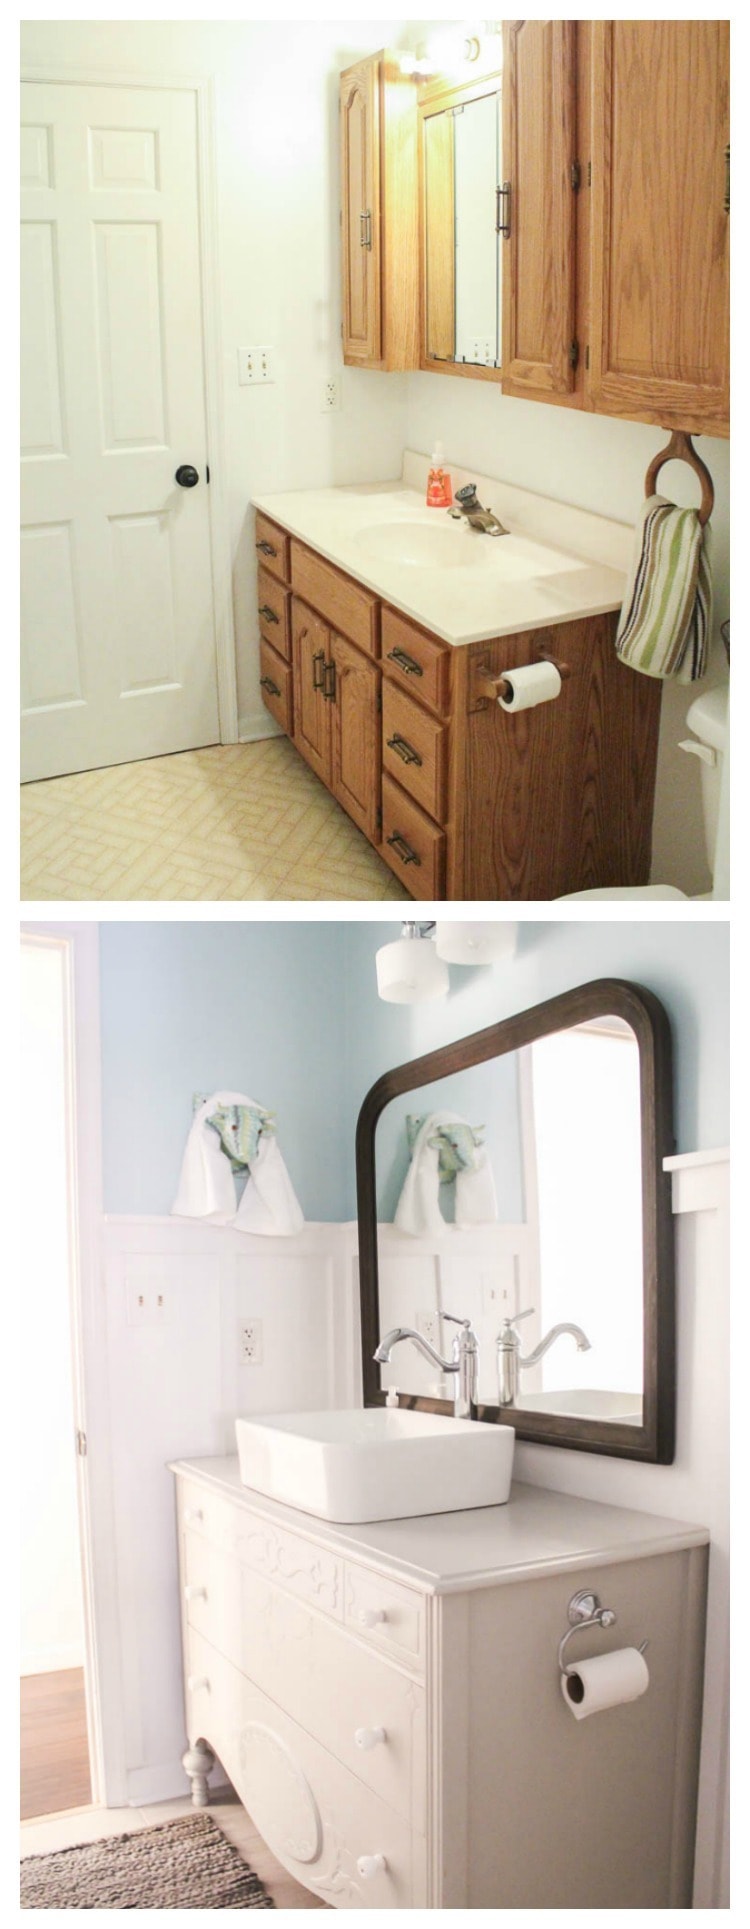
I love, love, love our upcycled vanity.
At first I wasn’t sure how I would feel about getting rid of the enormous amount of storage all of those upper cabinets gave us. But after living with the vanity for several months, I’ve found it has been more than enough storage.
In fact, it actually helped motivate me to clear out tons of stuff we really did not need but were hanging on to because we could.
I don’t have a full before picture of the shower, but this gross photo of the old brownish-yellow tile and huge handles gives an idea of how bad it was.
The fresh new subway tile and chrome fixtures is classic and looks so clean and fresh in comparison.
And whole room overall just makes me smile.
For me it is the perfect balance of modern and vintage, classic and whimsical. Exactly how I want my home to feel.
Bathroom DIY Projects
This is a list of everything I did in the room myself as well as links to all of the tutorials.
- Tiled the shower and installed the shower faucets and showerhead.
- Transformed an old dresser into a vanity with working drawers, a vessel sink, and a new faucet. (Plus paint and new hardware.)
- Painted the walls, ceiling, and trim and added inexpensive board and batten to the walls.
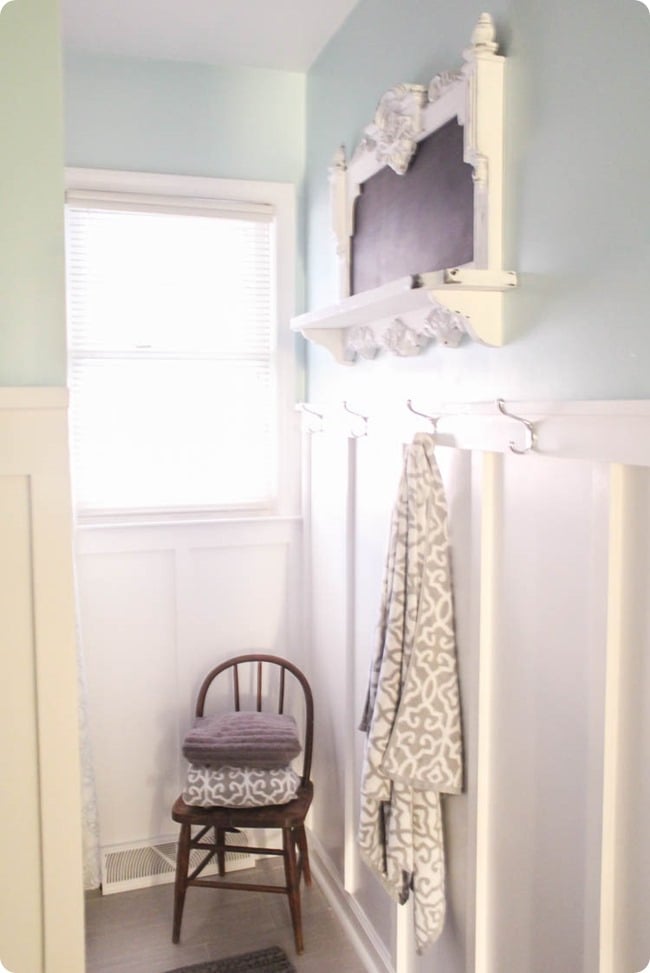
- Hung a $5 mirror I scored at a yard sale, new towel hooks, and a new toilet paper holder.
- Added a DIY sunburst mirror, a DIY chalkboard, and a unique cow head hand towel holder.
Full Source List and Final Budget
This post contains affiliate links which means if you make a purchase after clicking a link I will earn a small commission but it won’t cost you a penny more. Click here to see my full disclosure policy.
And now for the real deal budget. As I mentioned above, we paid $5000 for a contractor to fix some major plumbing issues and water damage which majorly impacted the budget. Everything else was done as inexpensively as possible.
- Floor tile (Leonia Silver Porcelain Floor Tile. This tile is beautiful and incredibly affordable at only $2 per square foot): $108
- Shower tile (Classic white subway tile) : $106
- Grout (Keracolor smoke grout), tile adhesive, tile cutter, etc.: $80
- Showerhead and shower fixtures: $79
- Dresser for vanity: $25
- Paint for vanity (Amy Howard One Step paint in Luxe Gray, polycrylic top coat): $40*
- New hardware for vanity (Milk White Glass Knobs from D. Lawless Hardware): $16*
- Vessel sink with pop up drain: $53
- Sink faucet: $45
- Paint for walls (Valspar mint to be and Valspar Perfect White in semigloss): $46
- Wood for board and batten: $74
- Towel hooks, tp holder: $27
- Mirror over sink (yard sale find): $5
- Misc. (caulk, wood filler, nails, pumbing for vanity, etc.): $55
- Bath mats (Threshold Chunky Bath Rugs from Target): $40 for 2
- Metal basket on toilet: $15
- White hand towels (from TJMaxx): $12
- Light over vanity (no longer available): $100*
Total not including contractors: $926
Total including contractors: $5926
Of course I much prefer the total without the contractors, but even when we add them in, I’d say a total bathroom redo from floor to ceiling for less than $6000 is pretty darn good.
If you have any questions about other things in the room, ask away! I kind of can’t wait to get started on our master bath (which sadly shares the same plumbing issue). But then again, a bit of a break might also be nice!

*I was provided the Amy Howard One Step paint by Ace Hardware, the vanity hardware from D. Lawless Hardware, and the vanity light from Wayfair for use in this project, but I have included their value in the final budget so you can see the true cost to recreate the look. Everything else, we purchased ourselves.

Great job, Carrie – congrats! :)
I’m not usually a fan of board and batten but in your bathroom it’s fantastic. And the cow is the perfect finishing touch. You have every right to feel invincible.
Sheila
Thank you Sheila! This was my first attempt at board and batten and I really like how it breaks up the room. And that cow really was the perfect finishing touch!
What a beautiful job you did! I have done reno in all of the 5 houses I have owned, so I can appreciate all your hard, and fashionable, work that you did.
Thanks Chris – it was definitely a lot of work, but well worth it! I can only imagine all the things you have seen and done in 5 homes!
Great that you were featured on Refabbed. This bathroom looks amazing. I’m so impressed that you were able to do all of that work. I love the color, the tile, the vanity. Oh, my.
All I want is a tall toilet and I’m afraid to tackle that!
Thank you! I am so happy with how it turned out – but it was a lot of work!
Wow!! This is absolutely incredible :) Our kids’ bathroom really needs a reno and I appreciate the “real” costs of it all — and we don’t have plumbing problems or water damage so it’s not so desperate. Thank you for the breakdown and inspiration.
Glad it could help! If you don’t have the water damage headaches we did, you could definitely redo your bathroom inexpensively with a bit of DIY. The high budgets on some home makeover shows truly blow my mind!
The transformation is incredible and the finished bathroom so beautiful. I love everything about it! Congratulations on learning all you did. I’m sure it was intimidating but you persevered and now you feel ready to tackle anything. I’m always a little scared to take on anything big or expensive because I sure don’t know if I could carry it off. I hope to learn but it might be a slow process.
Elisabeth, you are so right, it was scary at times! Especially when it was time to tackle the tiling and board and batten by myself. But now I do feel pretty invincible! Hopefully I can keep that feeling going until the next project! And slow progress is always ok – it is a million times better than no progress!
Hah! That bathroom with the wallpaper was pretty dismal but not as bad as our old bathroom. But then it’s hard to to top pink and blue floral wallpaper, baby blue shag carpeting and salmon pink bath fixtures. And you could see everything in sharp detail with the six giant globe lightbulbs over the mirror.
Oh my goodness, shag carpet in the bathroom! So bad! You definitely win.
WOW!! This is an amazing transformation! It is so much more inviting and very spa like! Great job!
Thank you so much Debbie!
Carrie this dresser turned vanity is everything! Thanks for sharing this gorgeous makeover.
Thanks so much Martina!
I know this is old but wanted to chime in and say beautiful bath! I’m getting ready to do board and batten in both of my bathrooms so that’s how I found your post. I can appreciate the work you put into it. My old house I redid the master bath tiling etc. I replaced the vanity with a table long before things like dressers were fashionable. It has drop down leads so I left the front one on for a kind of skier and used the back one as a sort of backsplash. Just curious-how do you like hanging towels on hooks rather than a towel holder? I live in NC and it’s very humid most of the year. Thanks!
Thank you so much! It sounds like your table vanity was beautiful! As far as hanging towels on hooks, I far prefer it to towel bars. Mostly because it is much quicker and easier to hang them on hooks and nobody in my family took the time to hang them straight on towel bars. Also, I feel like they dry faster on hooks. They aren’t folded up so air can get around them much better. I’m a die-hard towel hook fan now!