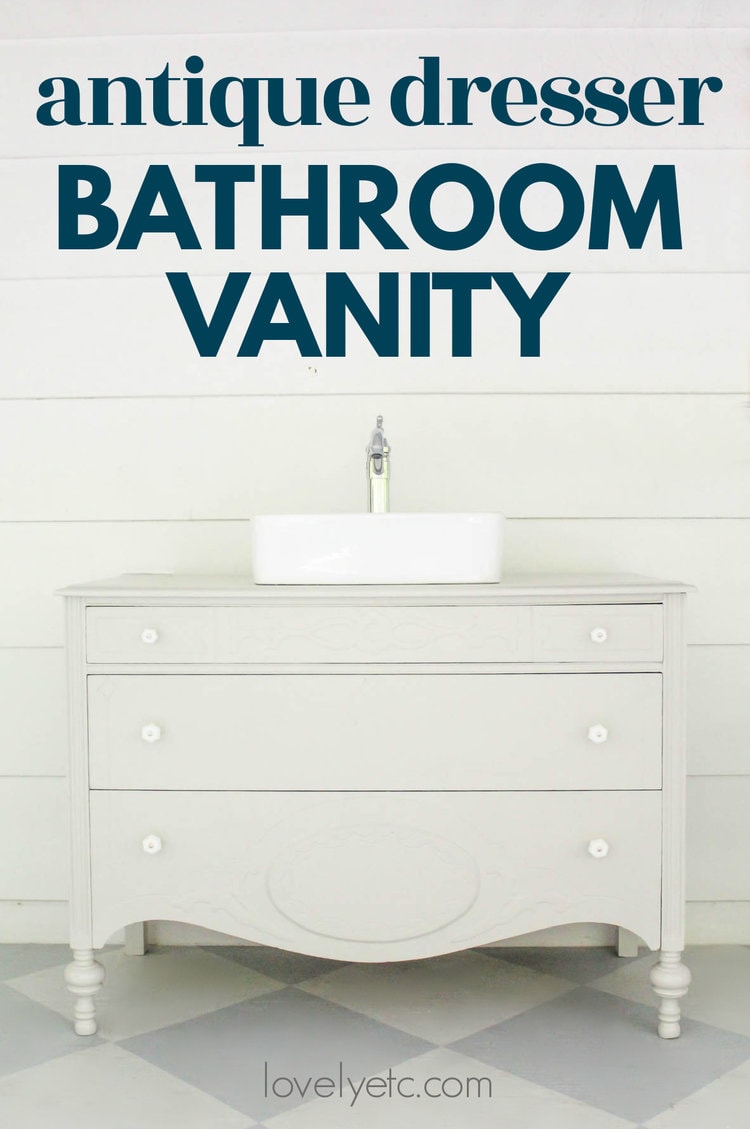
How to turn a dresser into a bathroom vanity: What you really need to know
I’m sharing everything you need to know to turn a dresser into a bathroom vanity including how to choose the perfect dresser, how to attach the sink, and how to deal with the plumbing.
I absolutely love home my antique dresser bathroom vanity turned out – it’s by far my favorite part of my entire bathroom renovation!
When I first decided I wanted to DIY this project on my own, I had no idea what I was in for. I imagined I would paint the dresser, add a sink and a faucet and that would be that.
In reality, there’s a bit more to it than that. There were all kinds of little details I didn’t really think through when I first dreamed up this project.
Of course in the end it turned out gorgeous, but if I’d had a better idea what to expect from the beginning, I could have saved myself a lot of trouble.
In this post I’m sharing everything you need to know to turn a dresser into a bathroom vanity. This includes all the things I wish I had known before I started including how to tweak your dresser so it fits perfectly, how to preserve as much drawer space as possible, and how to make sure the finish can withstand the moisture of your bathroom.
This post contains affiliate links which means if you make a purchase after clicking a link I will earn a small commission but it won’t cost you a penny more. Click here to see my full disclosure policy.
This is how our bathroom looked before the renovation.
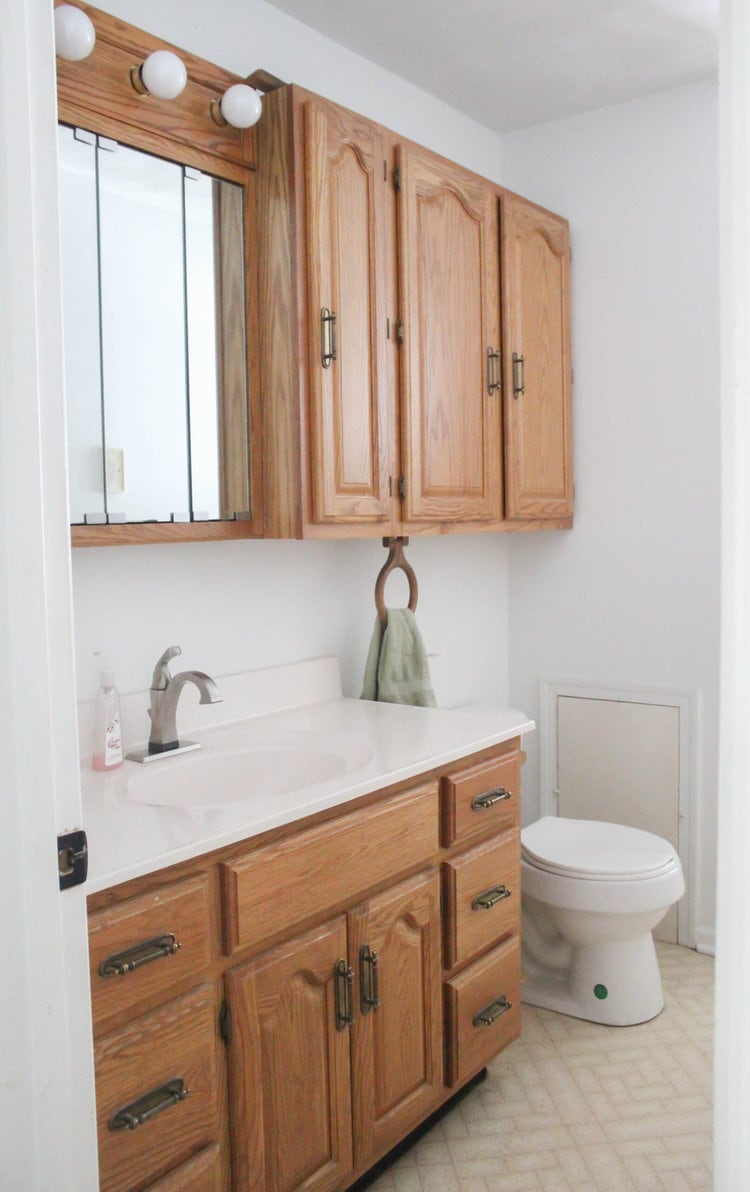
I knew I wanted to change pretty much everything in this room including the old vanity.
I’d seen several beautiful bathrooms with antique dressers turned into bathroom vanities and I absolutely loved how they had some much style and personality compared to builder basic vanities.
Plus, I have a bit of an obsession with repurposing old stuff into something useful and beautiful and this was the perfect opportunity.
The first step in creating my own awesome antique dresser vanity was finding the perfect dresser.
Choosing the right dresser
Finding a great dresser is one of the most important (and most fun) steps of this entire process.
You want to look for a dresser that is sturdy enough to last for years. Solid wood pieces with dove-tail drawers are best. Your dresser also needs to be the right style and even more importantly, the right size.
Be sure to measure your bathroom carefully so you’ll know what width and depth your dresser needs to be to fit the space well.
It will also need to be the right height – nobody wants a sink so low they have to bend over to wash their hands or so tall washing your hands is uncomfortable.
The current standard height for a bathroom sink is 34 inches from the floor. If you are using a standard drop-in sink, this means the counter also needs to be around 34″, but if you are using a vessel sink on top of your dresser like I am, your dresser should be a few inches shorter.
(If you find a gorgeous dresser that is just a few inches too tall, you may be able to trim a bit off the legs to reach the correct height depending on the style.)
Keep in mind that as long as your dresser is the right shape and has good bones, it doesn’t really matter if it isn’t the right color. Color is easy enough to change with paint.
There are lots of great places to search for the perfect dresser: Facebook Marketplace, estate sales, antique stores, Craigslist.
I searched for my own perfect dresser for a few weeks, but wasn’t having much luck. Everything I found was either the wrong size and shape, the wrong style, or way too expensive.
But as luck would have it, my grandmother’s best friend was cleaning out her house and she just happened to have a dresser that was the perfect size.
I was able to score this beautiful dresser from 1932 for only $25.
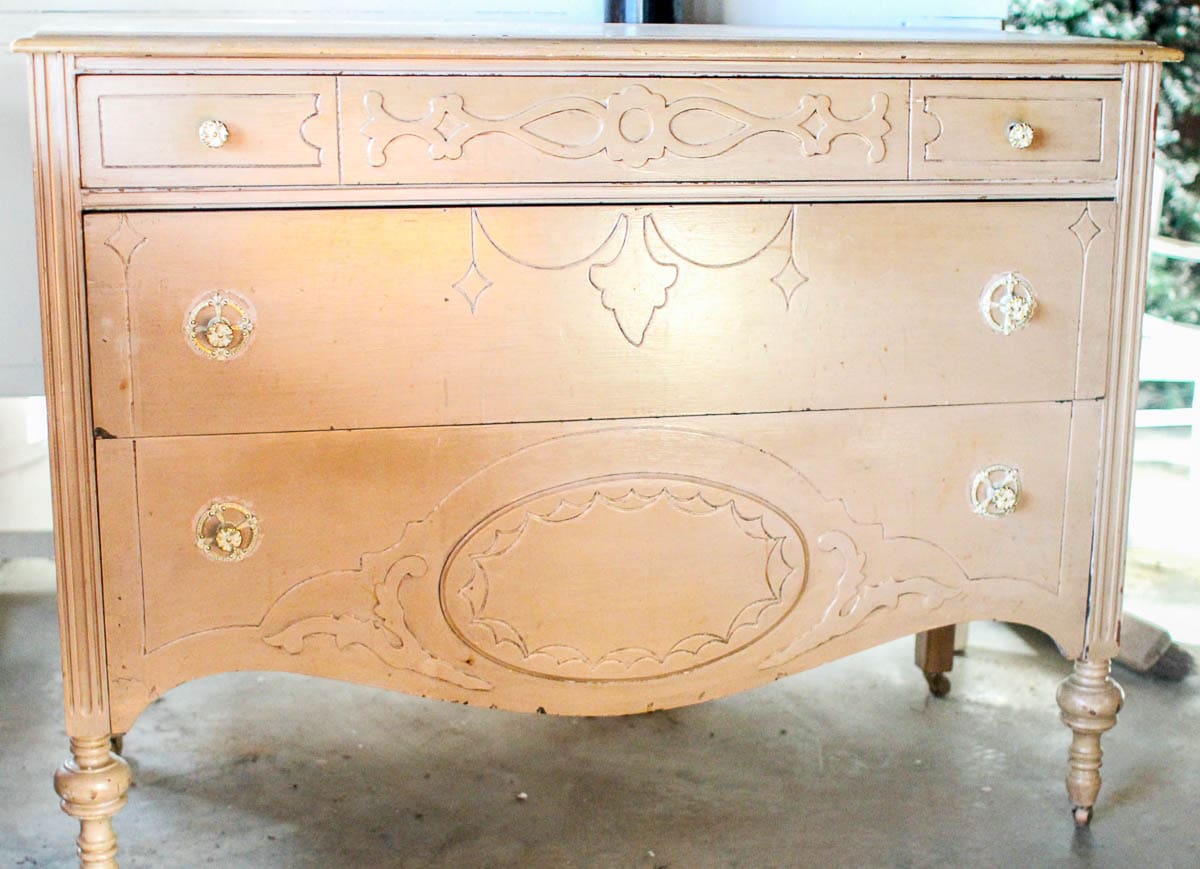
It doesn’t look so bad in photos, but it had been painted and glazed many times over the years and was in need of some TLC. Underneath the many layers of paint thought, it was a beautiful piece of furniture.
Choosing a sink and faucet
Once your dresser is chosen, it’s time to find a sink.
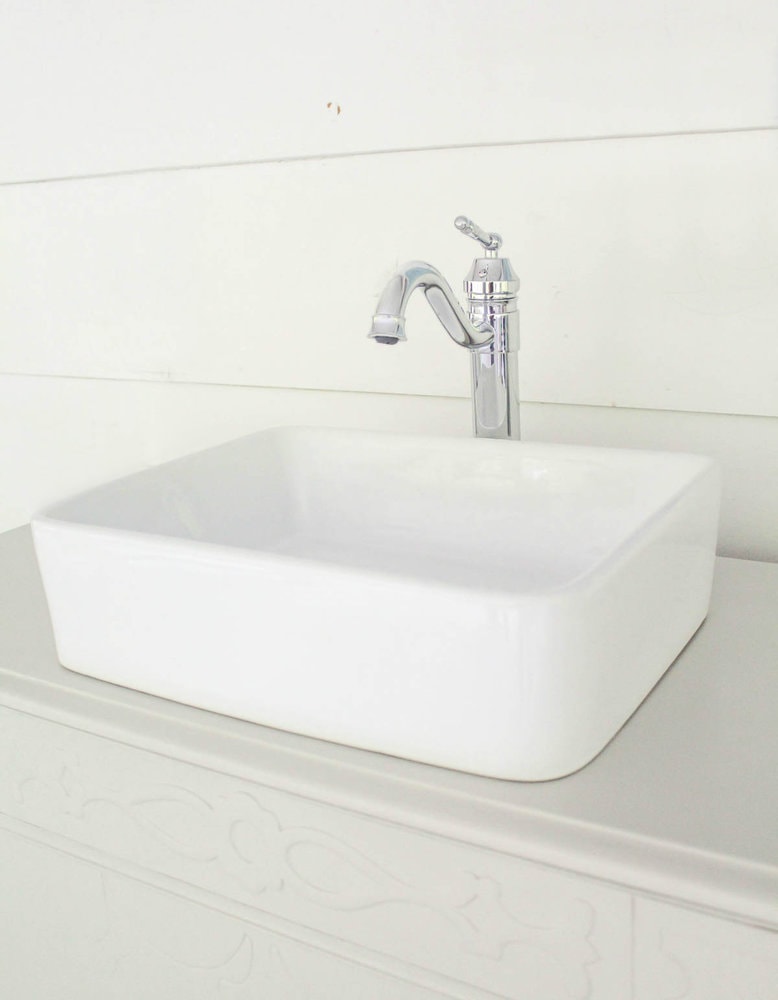
You can use a traditional drop-in sink, but I chose to use a vessel sink for my vanity.
When turning a dresser into a vanity, the biggest drawback is that the sink and plumbing can really eat up a lot of your usable drawer space.
A drop-in sink sits below the top of the dresser so the sink itself takes up a huge chunk of the top two drawers and the plumbing takes up even more after that.
A vessel sink sits on top of the dresser so only the drain pipes and water lines to the faucet take away from the drawer space.
When choosing a vessel sink, you want to look for one that is small enough to fit the top of your dresser with a few inches to spare at the front and enough room for your faucet at the back.
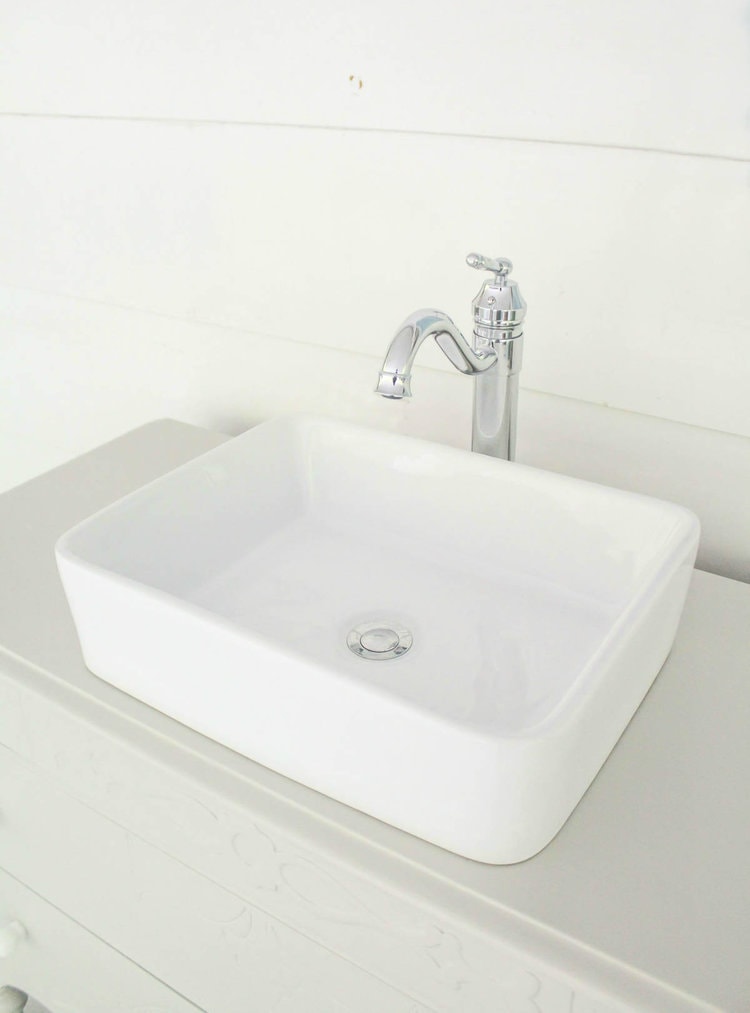
I was pleasantly surprised to find exactly the kind of rectangular porcelain vessel sink I was looking for on Amazon of all places at an really affordable price. This sink comes in a range of sizes so it is easy to find the perfect size for your sink.
I also found a great faucet on Amazon as well. (The one I purchased is no longer available, but this one looks very similar and has great reviews.)
In the end, the dresser, sink, and faucet all together cost less than $130 – a total steal for a custom vanity.
How to turn an antique dresser into a bathroom vanity
The first thing I did to my own dresser was paint it. In retrospect, this wasn’t a great plan. I ended up having to do tons of touch-ups to the paint later on. In the process of turning the dresser into a vanity, it got moved around, bumped, and scraped a lot which doesn’t mix well with fresh paint.
In this tutorial, I am going to share the steps in the order that makes the most sense, so while you may notice my dresser is painted sooner in photos, I don’t actually recommend painting or refinishing your dresser until right before attaching the sink.
Adjust the dresser height
As I mentioned earlier, a standard vanity is around 34 inches tall, but my dresser was closer to 37 inches high. Add the height of the vessel sink and it would have been way too tall to comfortably use.
If you need to shorten your dresser a bit to be the correct height, you can cut a few inches from the bottom of each leg. For my own dresser, I first removed the casters which dropped it several inches. It was still just a bit too high so I used our Dremel Multimax to cut another inch off of each leg.
Alternatively, if your dresser is a bit too low, you may be able to add casters to raise it up a bit, depending on the style of the legs.
Level the dresser
Before adding the sink, you need to make sure the top of the dresser is level.
Of course, this isn’t something you have to worry about if you are buying a vanity from a store, but most antique dressers aren’t even close to level. In fact, when I checked the top of my dresser to see how level it was, I got a different reading in every spot I placed the level.
Since the main reason it even need to be level is so that the sink will drain correctly, I placed the level right where the drain would be and based everything on that.
I checked how level things were from side to side and front to back and then cut a tiny bit more off two of the legs until things were just right.
Before checking if your dresser is level, be sure to move it into place where it will really be in the bathroom. If you are also replacing your bathroom flooring, you won’t be able to do this step until the new flooring is in place.
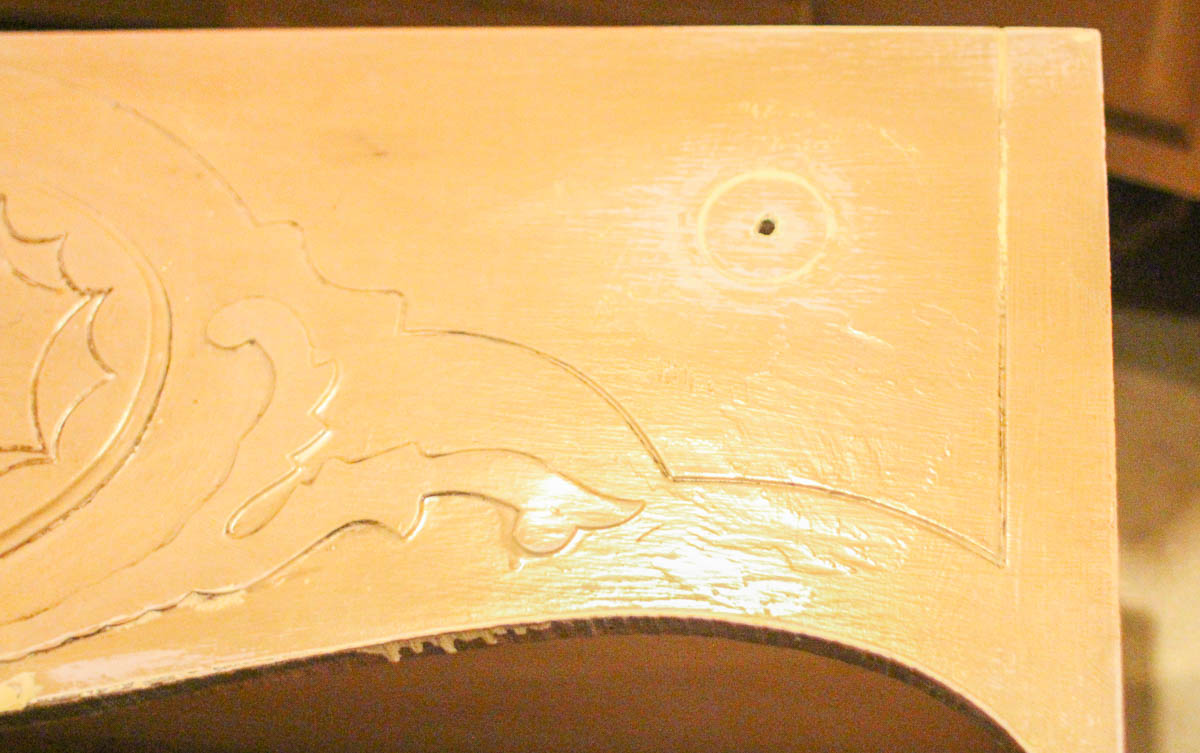
Cut holes for the faucet and drain
The next task: cut holes for the plumbing.
If you are using a vessel sink, you won’t need to cut a hole for the sink itself. The top of the dresser only needs a small hole for the sink drain and another small hole for the faucet.
Set your sink on the dresser top where you want it to go, making sure it is centered and trace the drain hole onto the dresser top using a pencil.
At the same time, you can place the faucet where it will go and trace it as well.
The easiest way to cut your holes is using a hole saw. You can get a set of hole saws in various sizes for as little as $20. These circular saw blades attach to any drill and cut perfectly round circles.
If you don’t have a hole saw, you can use a drill and a jigsaw instead. Use a drill with your largest drill bit to drill a pilot hole. Then insert the blade of your jigsaw into the pilot hole and cut around the circle you traced.
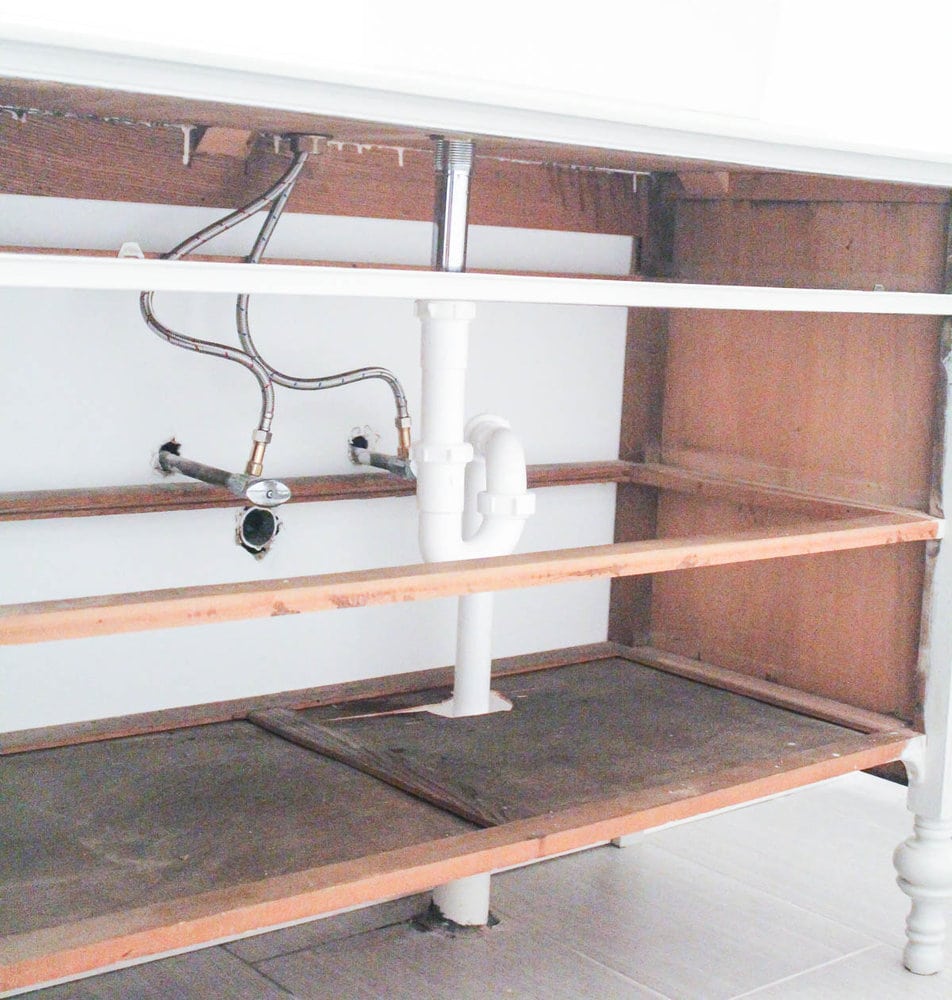
You will probably also need to cut some holes in the back of your dresser for the water lines and drain pipe to pass through. You can move your dresser into place and mark where these holes need to be and cut them the same way.
Or you may be able to simply remove the back panel from your dresser. My own dresser had a thin back panel that wasn’t needed for stability, so I simply pulled off the entire thing. With the vanity in place against the wall, it is impossible to see that the back has been removed.
My own sink has a bit of an unusual setup with the drain pipe leading into the floor rather than the wall. This is fairly uncommon, but if you have the same plumbing setup, you can simply cut a hole in the bottom of your dresser for the drain to pass through.
Make the back of the dresser flush
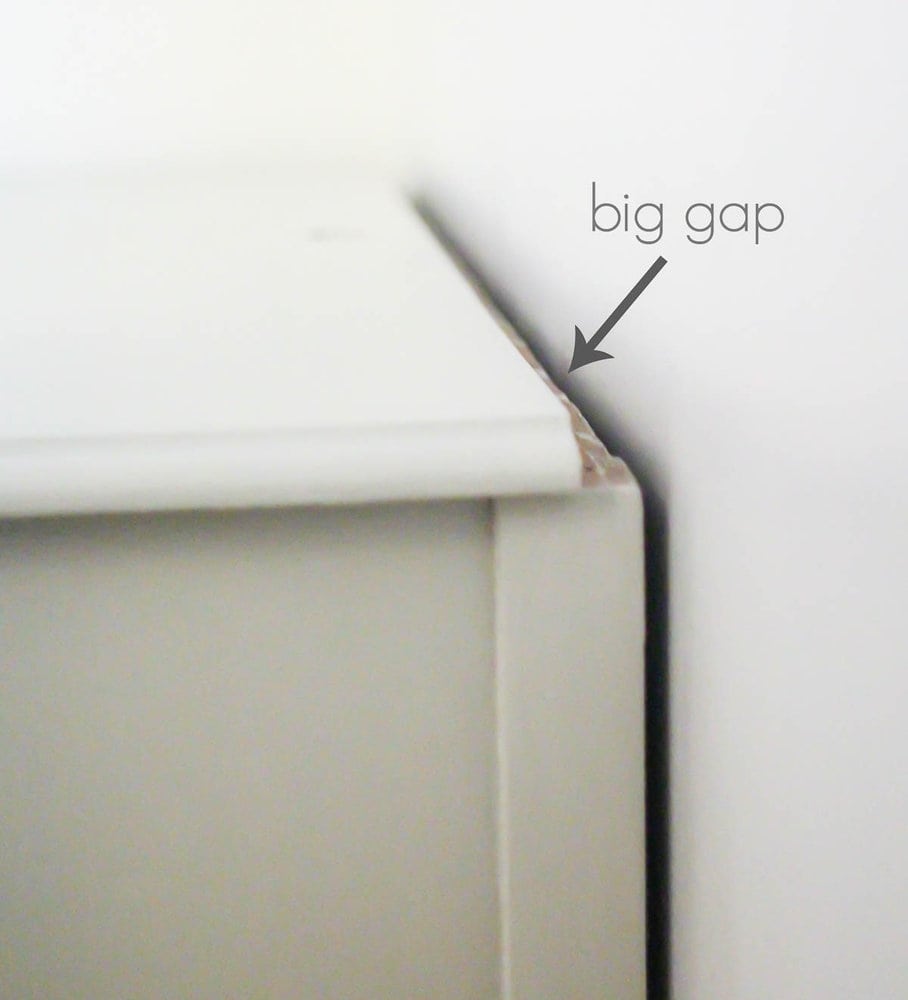
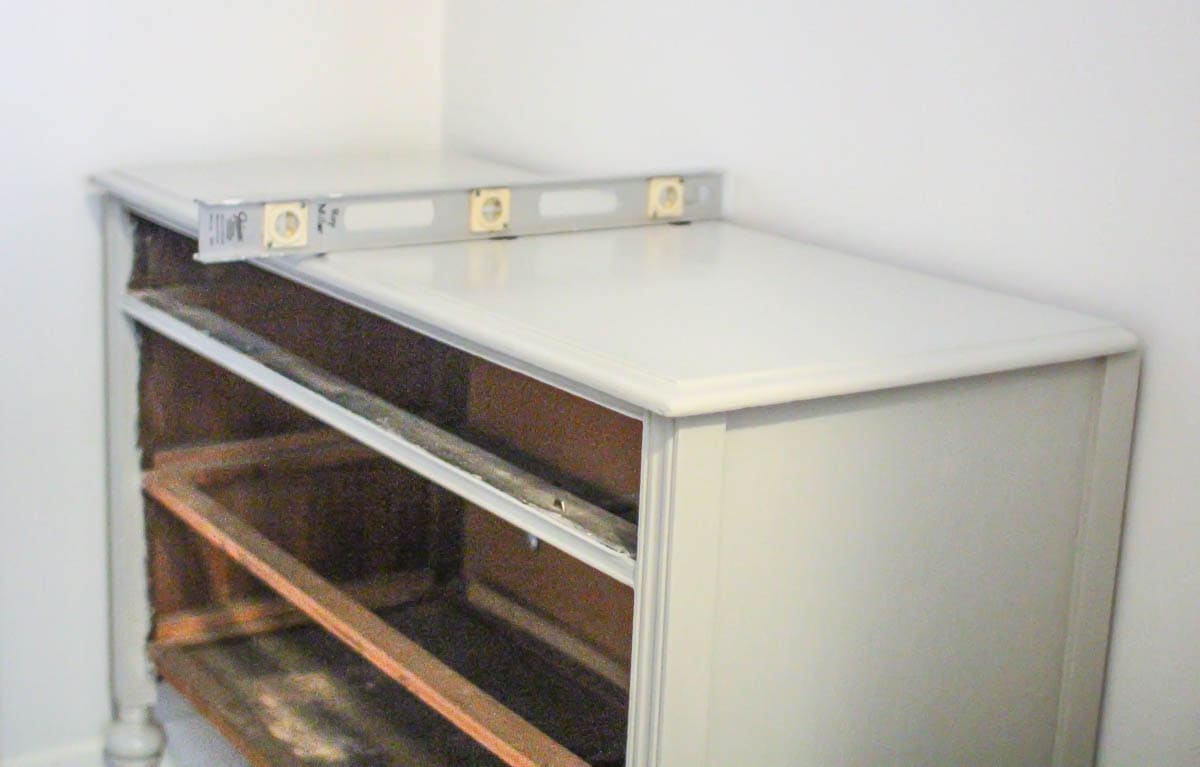
Many antique dressers originally had an attached mirror; this leaves a bit of a gap along the back of the dresser where the mirror would have sat.
This isn’t a big deal if you are just using the dresser in a bedroom, but if you are turning the dresser into a vanity, it becomes a bigger problem.
As you can see, I had quite the gap between my dresser top and the wall. I ended up getting a 1″x2″ board, placing it in the gap, and tracing the edge of the dresser onto it. Then I used my jigsaw to cut out the outline. I attached this to the dresser using wood glue and nails and then filled in the gap with some wood filler.
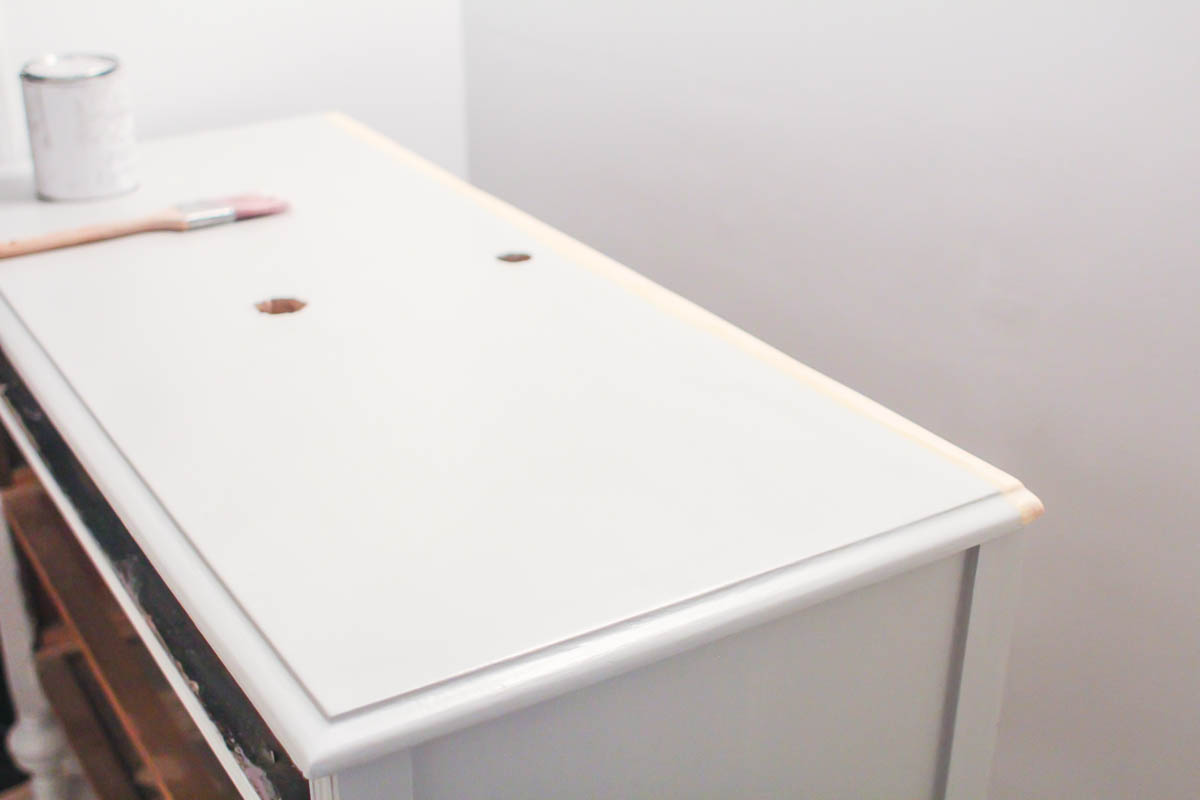
I sanded everything smooth using 220 grit sandpaper and then painted this new addition to blend with the rest of the dresser. (This was one of those points where I wished I hadn’t painted the dresser until later in the process!)
If you don’t want to deal with adding wood to the back of your dresser, another option would be to get a small scrap of marble or other countertop material and make a short backsplash to slide into this gap. Or a third option would be to replace the top of the dresser altogether.
Should you replace the dresser top?
I’ve gotten a few questions about whether it is better to replace the wooden dresser top with a stone countertop.
I’ve seen several other dresser bathroom vanities that have a marble or other stone countertop rather than using the original dresser top. I think this can be a beautiful look and if you want to add marble, you should go for it!
On the other hand, it is also perfectly fine to use the original dresser top. Adding stone obviously adds significantly to the cost and labor for a vanity like this.
I think most people want to add marble because they think it will hold up better to moisture, but a painted wood surface protected with a good topcoat should hold up quite well on its own.
Paint the dresser
Now it is finally time to paint your dresser.
If your lucky enough to have found a dresser that is already the perfect color, you can skip this step! But if your dresser needs a facelift, paint can easily fix that.
Alternatively, you could also keep your dresser the original wood or painted finish and simply seal it with a good waterproof top coat.
My dresser had been painted several times over the years with some pretty thick paint, leaving lots of brushstrokes and drips all over the place. The first thing I had to do was sand it down.
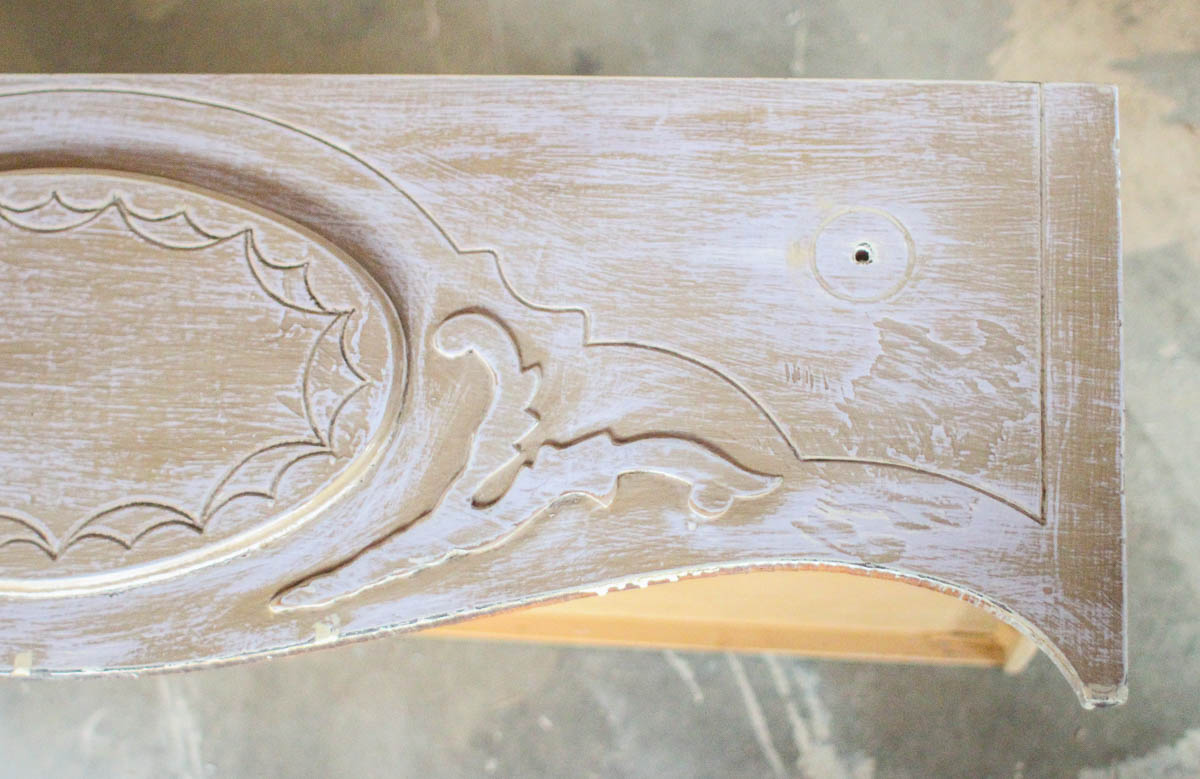
This picture was taken after sanding the paint smooth. All of those light areas are the next layer of lavender paint showing through.
If the paint finish hadn’t been so uneven, I probably would have skipped sanding altogether.
I used Amy Howard One Step Paint in the color Luxe Gray to paint my dresser. This is a chalk-style paint that can adhere to almost any surface without primer and dries to a fabulous matte finish.
I followed this with three coats of Minwax Satin Polycrylic to protect the paint finish.
I have a whole guide on how to paint a bathroom vanity so that the paint finish lasts if you want more details on the painting process.
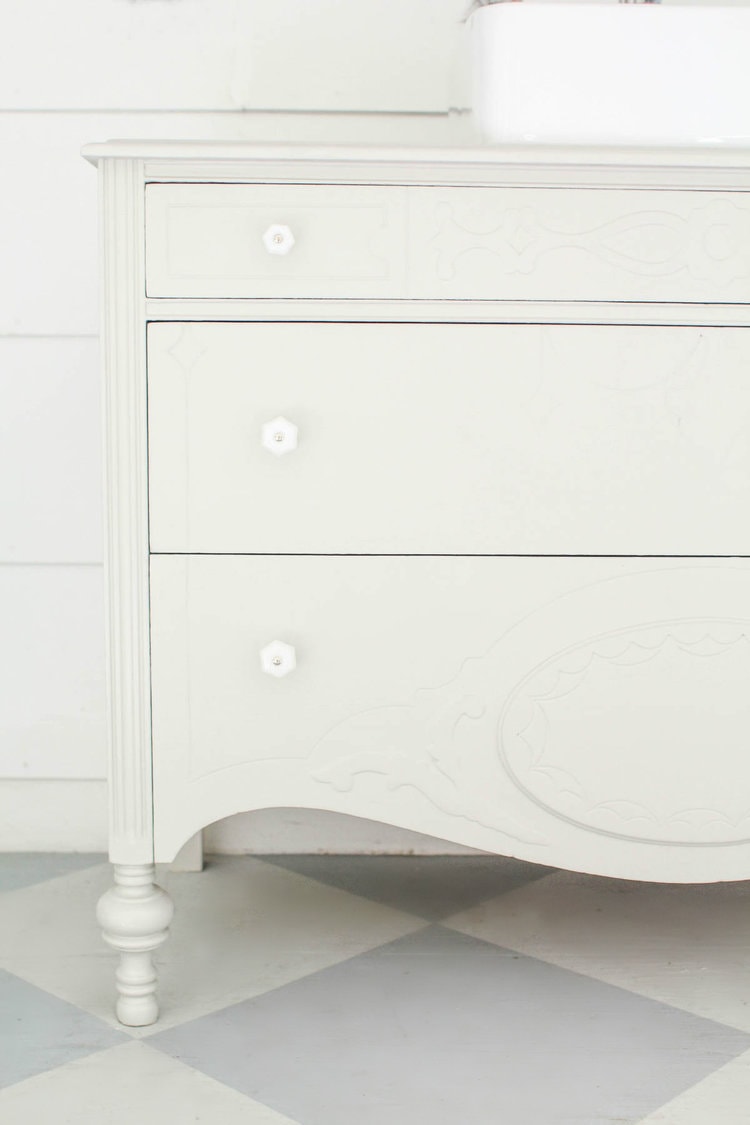
Along with painting my dresser, I also updated the hardware. I chose these white milk glass knobs from D. Lawless Hardware.
These beauties are the perfect modern/antique mix with a classic white glass knob and a shiny chrome center that ties in perfectly with the sink and faucet. (I used the larger 1 1/2 inch size on the larger drawers and the smaller 1 1/4 size on the small drawer.)
Attach the sink
Once the painting is done, you are ready to attach your sink and faucet.
I attached my sink using a waterproof adhesive making extra sure that everything was straight and lined up with the hole I had previously drilled.
At first I had some trouble with the drain leaking a bit which is a big problem anytime, but especially when you are using a wooden dresser below the sink. I was able to fix the leaking with some simple plumber’s putty underneath the drain.
After moving my dresser into place in my bathroom, I attached the faucet using the instructions that came with it and reattached all of the plumbing. (Yep, I did all the plumbing myself – it was definitely a proud moment.)
Adapt the drawers to fit around the plumbing
The final step is modifying the drawers to accommodate the new plumbing.
One of the best things about a dresser bathroom vanity (aside from the beautiful look) is all that drawer space. But you will need to modify your drawers a bit to work around the plumbing and in the process, you will lose a bit of drawer space.
I wanted to keep as much usable drawer space as possible in my vanity, so I carefully slid each drawer into place and marked where they would have to be cut to fit around the plumbing.
You will need to cut a section from the back of each drawer as well as a section from the bottom. I used my trusty jigsaw to cut the drawers.
I only had to lose a tiny sliver in the center of the top drawer.

After removing the needed section, I tested to make sure it would fit smoothly into the dresser around the pipes. Then I used some scrap 1″x2″ boards to close off the hole in the center so small items won’t roll down into it once the drawer is filled.
I cut about an 8 inch square from the middle drawer. Since this drawer is a bit deeper, I used 1″x4″ boards to enclose the cut section.

The bottom drawer only needed the tiniest piece taken off the back.
I didn’t bother closing this one off since this large drawer will probably hold towels and other large items that wouldn’t fit in that little hole. If our plumbing hadn’t been reconfigured to drain through the floor, I wouldn’t have had to modify this drawer at all.

The finished product
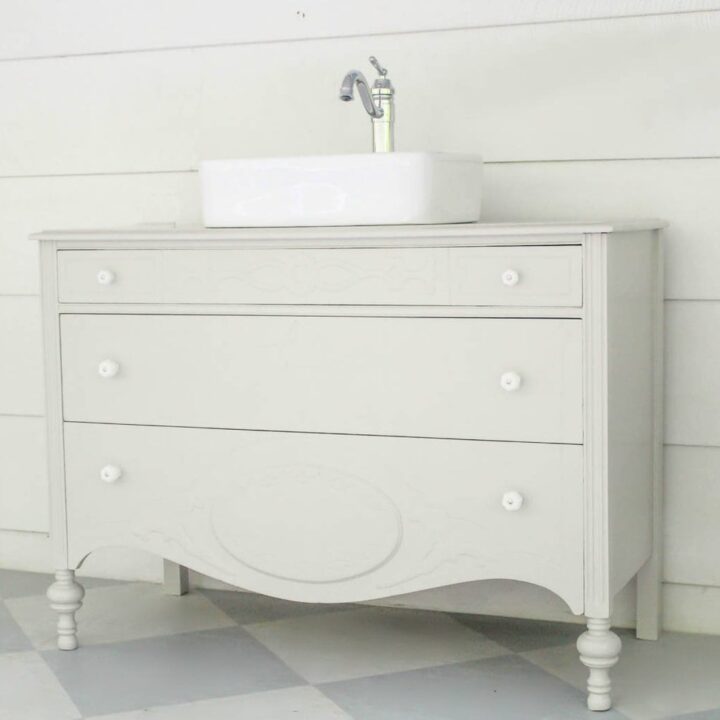
And finally, the fun part: putting it all together.

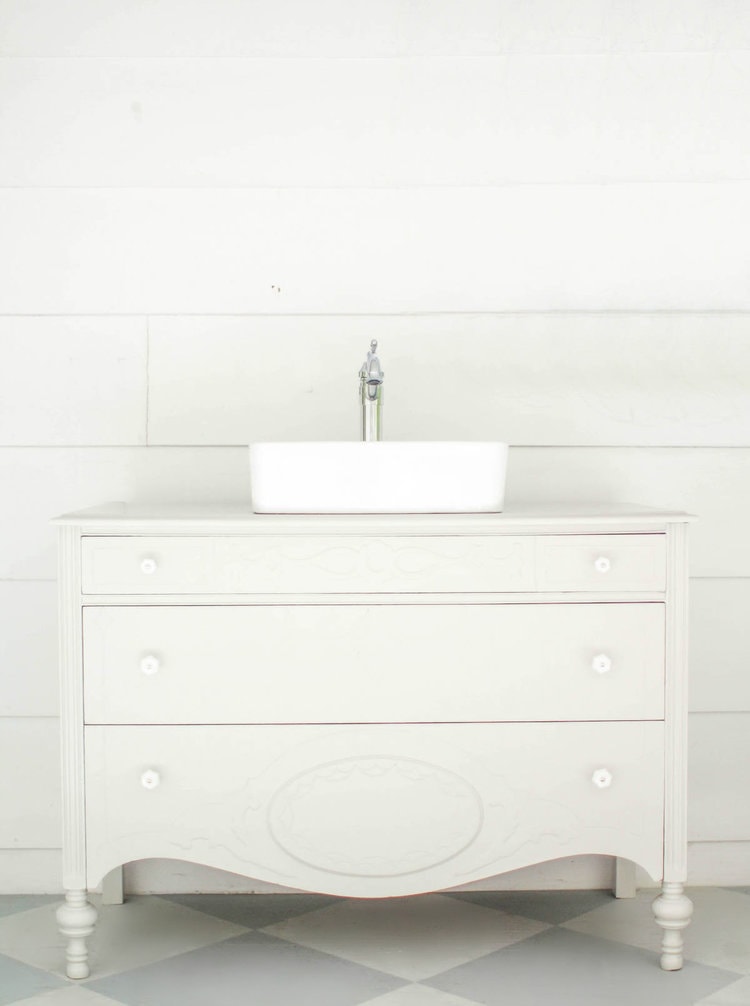
And here is my antique dresser vanity installed in our bathroom. I absolutely love how it came together.
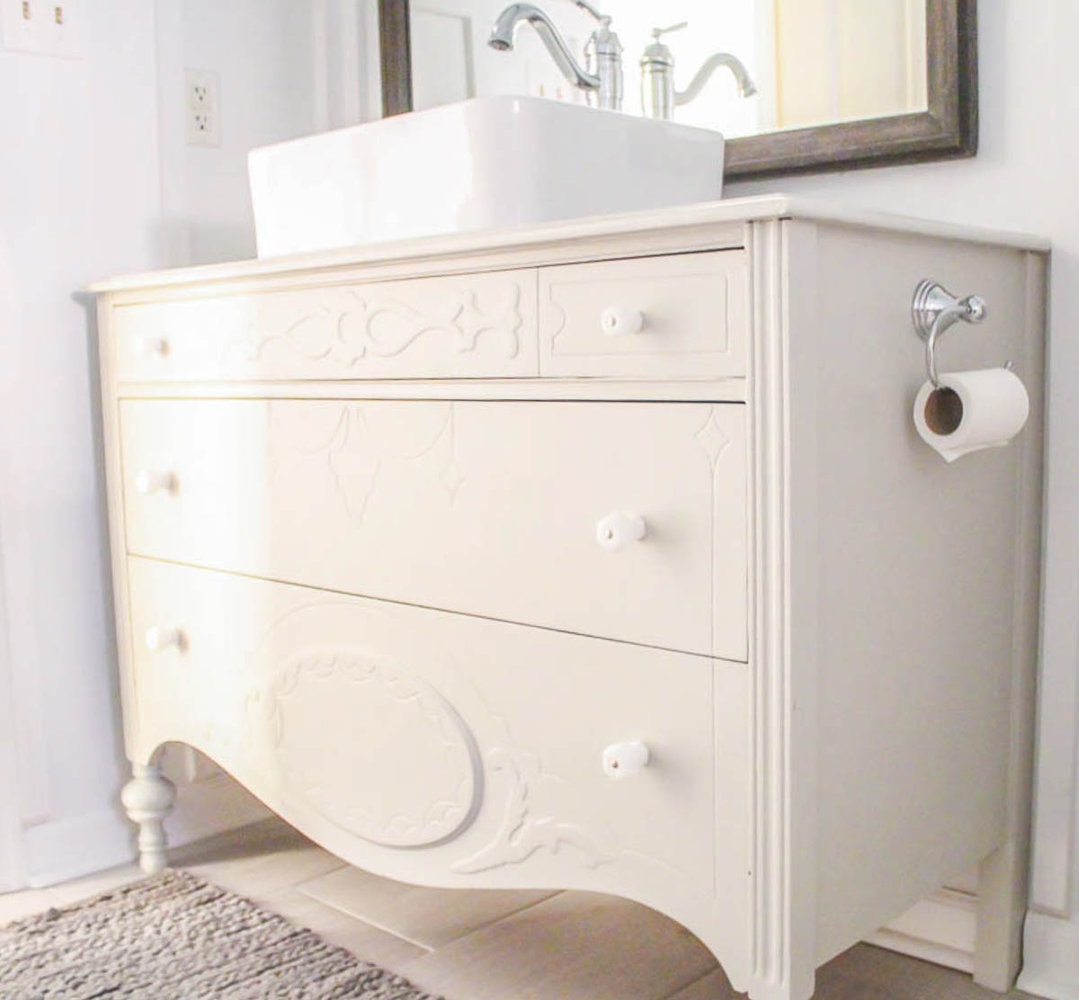
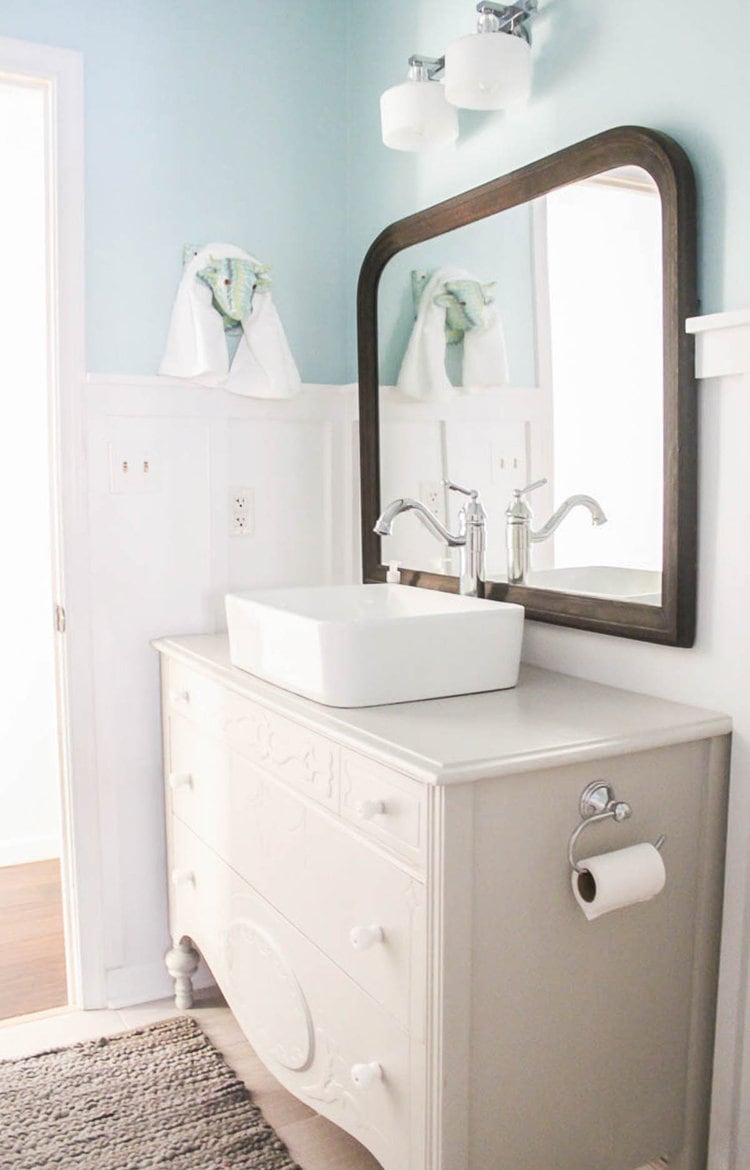
I am ridiculously excited about how this vanity turned out. And to be honest, I’m also pretty darn proud of myself for tackling this project on my own. If you’re thinking about making your own bathroom vanity, just know that while there are a lot of steps to the process, you can totally do it. And it is so worth it in the end.
I’d love for you to pin this post on Pinterest!


How To Turn A Dresser Into A Bathroom Vanity
Let me show you how to turn an old dresser into a gorgeous bathroom vanity, including attaching the sink and setting up the plumbing.
Materials
- Dresser
- Sink
- Faucet
- Paint
- Wood Filler
- 1x2 Board
- Wood Glue
- Nails
- 220 Grit Sandpaper
- Waterproof Top Coat
- Waterproof Adhesive
- Plumber's Putty
Tools
- Dremel Multimax
- Level
- Hole Saws
- Jigsaw
Instructions
- Choose the right dresser for your space.
- Pick out a sink and faucet for your dresser.
- Adjust the dresser height if necessary. I used a Dremel to cut the legs so it was 34" height.
- Level the dresser.
- Cut holes for the faucet and drain with a hole saw or drill and jigsaw.
- Cut some holes in the back of your dresser for the water lines and drain pipe to pass through.
- Make the back of the dresser flush. I used a 1″x2″ board cut to fit the gap with a jigsaw.
- Attach it to the dresser using wood glue and nails. Fill in the gap with some wood filler.
- Sand with 220 grit sandpaper.
- Paint the dresser.
- Seal with 3 coats of Minwax Satin Polycrylic.
- Attach the sink with waterproof adhesive.
- Attach the faucet using the instructions that come with it and reattach all of the plumbing.
- The final step is modifying the drawers to accommodate the new plumbing.
- Put everything back together.
Recommended Products
As an Amazon Associate and member of other affiliate programs, I earn from qualifying purchases.
-
 Dremel Multi-Max 3.5 Amp Oscillating Tool Kit with Tool-LESS Accessory Change- Multitool with 12 Accessories- Compact Head & Angled Body- Drywall, Nails, Remove Grout & Sanding- MM35-01
 -
 KATA Hole Saw Set 20PCS Hole Saw Kit with 3/4"-6"(19-152mm) 13PCS Saw Blades,2 Mandrels,3 Drill Bits,1 Installation Plate,1 Hex Key,Ideal for Soft Wood,Plywood,Drywall,PVC
 -
 1 qt Minwax 63333 Clear Polycrylic Water-Based Protective Finish Satin
 -
 Amy Howard Home - One-Step Paint - Chalk Paint for Furniture - Eco-Friendly - No Stripping, Sanding or Priming - Multi-Surface Furniture & Cabinet Paint - 32 OZ - Luxe Grey
Google Web Story: DIY Bathroom Vanity From a Dresser
hello. your designs are awesome. I really like the DIY painted plan wall you posted previously. I have been trying to track down the paint you used but it is not available anywhere near where I live. The companies around here are able to match the paint if I had the paint chips or product information. Is it possible you still have it and could possibly share with me?
keep up the good work!
Thanks! The paint I used is available online or you may be able to do color matching by going to the website. They have color cards and brochures there that can be printed or you may be able to request one be mailed. https://generalfinishes.com/retail-products/water-based-paints-pearl-effects-glazes
What did you use to seal/waterproof the top of the dresser? It looks great!!
Thank you Casey! I just used a brush on Polyacrylic. I chose polyacrylic because it is non-yellowing. Even though it is a water-based product, once it is fully dried, it works well at protecting against water damage. So far we haven’t had any problems at all with it!
Your work is so lovely! I have done lots of diy projects but no plumbing so please excuse my ignorance here. Here’s my dilemma. I want to remove a gross cultured marble countertop and replace with wood, then use sinks like you did. These appear to have a center drain where my current sinks sit to the back a bit. When I connect the drain, is the plumbing below adjustable to make the new drain connect? I’m not even sure if I’m explaining this correctly! Thanks for any wisdom:)
Elizabeth, Great question. Let me just be upfront and say before I did this vanity, I had no idea what I was doing with plumbing either. But based on what I know now, It shouldn’t be a problem to slightly change the placement of your sink drain. Most sinks have a drain leading down from the sink that leads to a P trap that leads to the wall, more or less. It shouldn’t be very difficult to change the distance from the wall by replacing a pipe.
I absolutely love this idea! My husband however is concerned with the top of the dresser becoming wet (we would be using this in our hall bath that the two children use), do you prep the top some how? Use a sealant?
Hi Sarah, I understand the concern because our kids use this bathroom too and sometimes they get a little overzealous washing their hands. I used several coats of polyacrylic sealer over the top of our vanity. We have been using it for about a year now with no problems. Sometimes water does get on the top and we just wipe it off with no problem.
It’s beautiful!
Do you remember the names of your faucet and vessel sink?
Thanks Cynthia! The sink is here: http://amzn.to/2xCJuwl. The faucet I used is unavailable but this one is very similar – http://amzn.to/2wWZ6xE.
Would you recommend sealing the inside? I’m using a beautiful mid century modern piece and I’m scared of it warping inside due to moisture.
Cece, I didn’t seal the inside of mine but that is a really good idea, especially for a special piece of furniture. Of course, no moisture should be getting to the drawers but we all know things go wrong!
The vanity is beautiful. I have been working on one for my bathroom for months. Part of the delay for me has been having the pipes in the floor and not wanting to cut three holes or a large section out of the dresser bottom for fear there will be issues later with it being able to hold the weight of the sink and water without starting to sag. Then I have had to figure out how to keep from creating an S trap due to the floor drain pipe. Have you had any problems with the plumbing the way you have it set up?
Plumbing can definitely be tricky – especially since every situation is different. We have been using our sink for over a year now with no problems. When I was figuring out the plumbing of the sink, I was trying to figure out the whole s trap question as well. One thing that helped for us was I was told since our main drain line is quite close to our sink plumbing we didn’t have to worry so much about the configuration. Of course I’m not a plumber so this isn’t professional advice! Good luck!
Looks great and thanks for all the tips. How did you measure where to cut the drain hole for the sink to be perfectly aligned to match the drain pipe underneath? I’m about to do this project, and cutting the hole slightly too far to the front or back is giving me stress!
Hi Sue! Good question. When you cut the drain hole, it needs to line up correctly for the sink as well as the plumbing. The sink is the more important part because pipes can be tightened or slightly loosened to help make the spacing work. Or you can add a small pipe to connect two parts that are bit too far apart. To find my drain placement, I laid my sink on my dresser top, making sure there was enough room behind it for the faucets and enough room in front to look balanced. Then once it was centered, I marked where the hole needed to be and cut it. Then I made adjustments to the plumbing as needed.
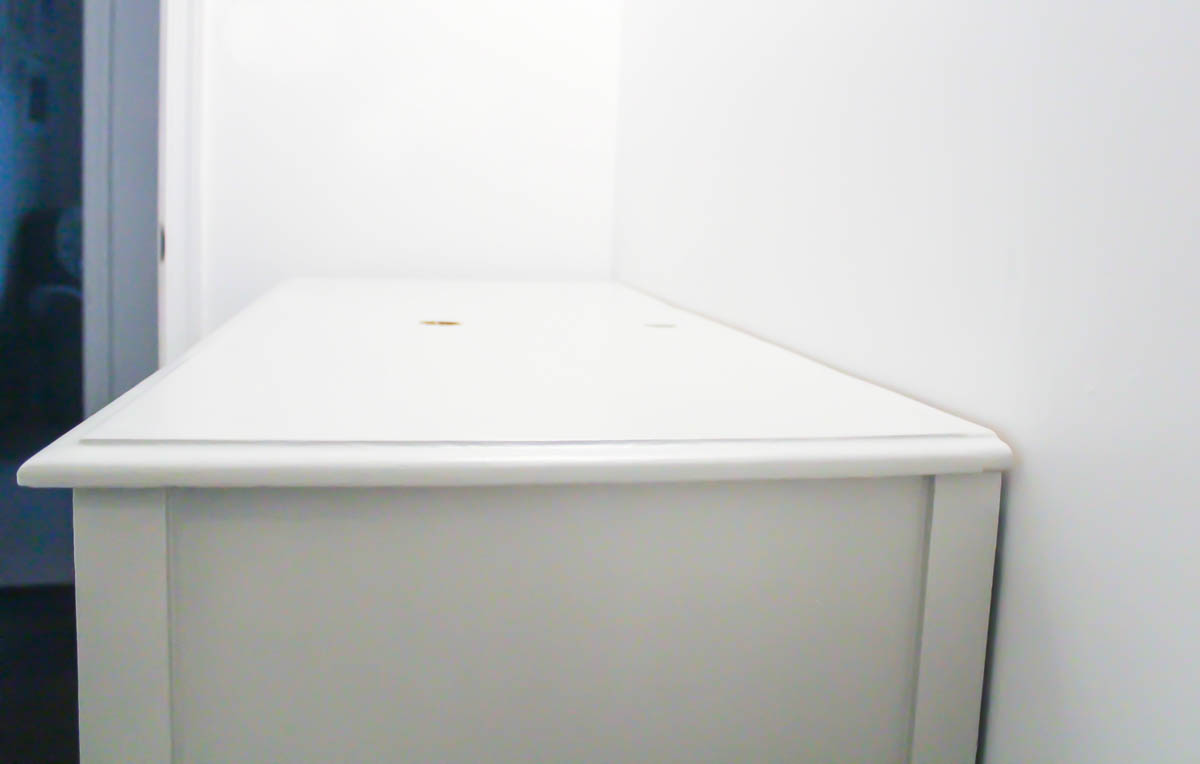
Is that final picture your sink in place? Trying to figure out where your pipe is coming up from the floor?
Hi Christine, great question. The final picture is actually before we installed the vanity in our bathroom. I took photos of it on our back porch because our bathroom is small and hard to photograph. But you can see final photos of it in place in this post: https://www.lovelyetc.com/modern-farmhouse-bathroom-the-true-final-budget-and-source-list/
Looks beautiful! Did you have to put in new drawer slides/tracks for your drawers? That’s the problem we are having with ours since ours had center drawer slides and had to be cut and removed due to the plumbing. We tried putting in metal slides and it’s not working well. I can’t figure out how to fix that part! Thanks!
Hmm, good question. I couldn’t remember since it has been a couple of years, but I just checked and our drawers don’t have drawer slides. My suggestion would be to try adding slides to the sides but it sounds like you already tried that. I’m sorry I can’t help more – good luck!
What kind of paint did you use?
I used Amy Howard one step paint (It’s a chalk paint) and sealed with Minwax polycrylic. Any paint will work as long as you use a good sealer. I have a step-by-step guide to painting furniture that may also help: https://www.lovelyetc.com/how-to-paint-furniture/
Beautiful
Yes! You have every right to be proud of yourself.
WOW! What an achievement.
Thank you so much!