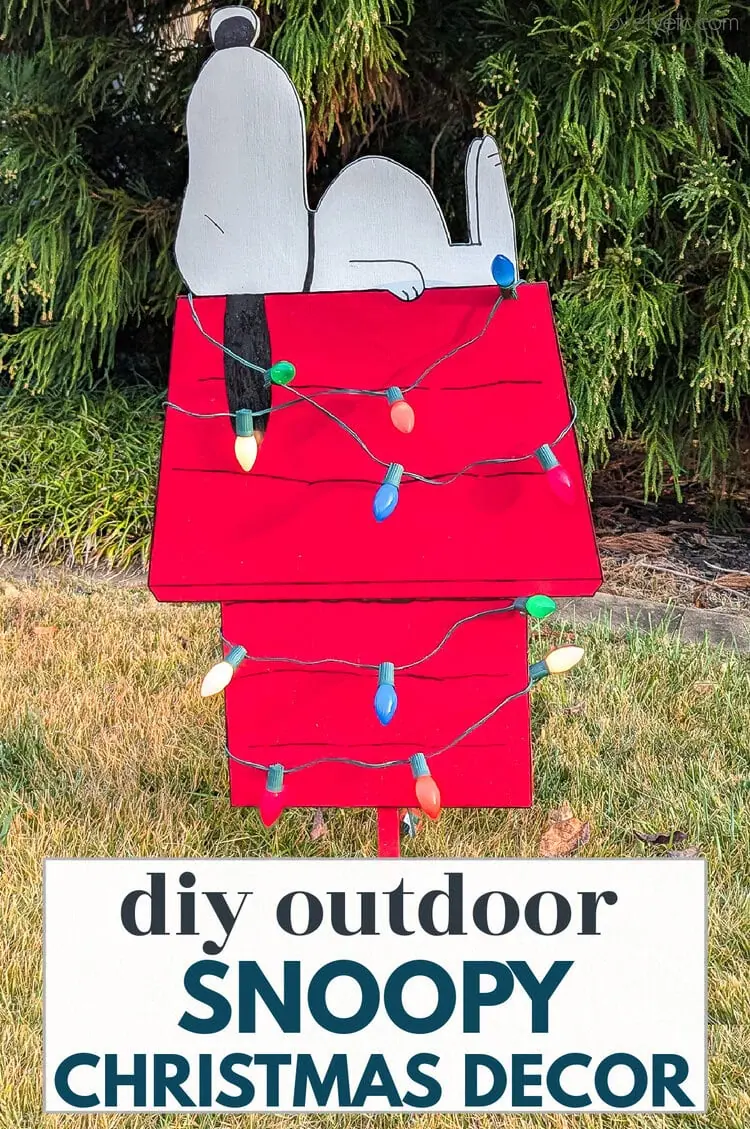
How to Make this fun DIY Snoopy Outdoor Christmas Decor
Everything you need to know to make an outdoor Snoopy and his doghouse Christmas cut out including the best materials to use, templates and measurements, and a full step-by-step tutorial.
As much as I love decorating our house for Christmas, I’ve always focused most of my efforts indoors. Which left the outside of our house decidedly unfestive. So for the last few years, I’ve been really working to bring some of the Christmas cheer outdoors so others can also enjoy it.
Last year, I made a set of outdoor wooden Christmas trees from scrap wood that turned out pretty darn amazing. And I decked out our front porch with a bit of Christmas.
And this year I decided to add a little fun to our outdoor decor with a big nod to one of my favorite Christmas movies: A Charlie Brown Christmas.
This big wooden cutout of Snoopy and his doghouse is pretty inexpensive to make, it only uses a few materials, and I love the extra touch the real Christmas lights add.
If Snoopy’s not your thing, you could easily use this same basic method to create a wooden cutout of the Grinch or Rudolph or any other Christmas character you love.
I’m sharing a full step-by-step tutorial along with the best materials to use and lots of tips to make the whole project go as smoothly as possible!
This post contains affiliate links which means if you make a purchase after clicking a link I will earn a small commission but it won’t cost you a penny more. Click here to see my full disclosure policy.
Do you need to use special wood?
One thing I’ve learned from building lots of outdoor furniture is that you really can use pretty much any type of wood. Yes, there are certain woods that naturally hold up better outdoors like cedar and redwood. But if you seal your wood properly, you can usually use any type of wood safely.
For my Snoopy Christmas decoration, I knew I would be fully painting the entire thing, so I chose to use regular plywood. Plywood is inexpensive and as long as it’s finished properly, it should hold up just fine. Especially since it’s only going to be outdoors for a month each year.
What’s the best way to finish your cutout so it stays protected?
Since this is an outdoor decoration, it needs to be able to withstand moisture, UV rays, and extreme temperatures. So what kind of finish can accomplish all that?
The easiest way to make sure your outdoor DIY projects will keep looking good year after year is to use outdoor paint. These paints are specially formulated to withstand moisture, prevent rot, and prevent fading from UV exposure. You can find inexpensive outdoor craft paints in most basic colors at any craft supply store.
But if you can’t find the colors you need or would rather use paint you already have on hand, it’s okay to use regular paints as long as you seal the whole thing with a non-yellowing clear coat afterwards.
Materials
- 2’x4′ plywood board – I used 1/2″ thick plywood, 3/4″ would also work well. I wouldn’t go thinner than 1/2″ though or it will be too flimsy and very likely to warp.
- Sharpie oil-based paint marker – these are my favorite paint markers. The oil-based version works so well for writing on bare or painted wood.
- Red outdoor paint – you can get this on Amazon if you need convenience, but you can usually find it much cheaper at Michaels and Walmart.
- White outdoor paint – here’s a link, but again you can find it much cheaper in stores.
- Primer
- 16′ strand of large colorful Christmas lights – you’ll want the old school multicolor lightbulb style to look like the ones in the movie. I used this set from Lowes.
- Wooden stake – you can find these with the yard signs or you can use a garden stake
- 3/4″ outdoor wood screws
Tools
- Jigsaw – to cut out the shape
- Drill – for attaching the wooden stake
- Staple gun – to hold the lights in place
- Pencil
- Straight edge
- Tape measure
- Sandpaper
- Foam roller or paint brush – I also used a small artist’s brush to paint a few of the finer details.
How to Make a DIY Outdoor Snoopy Christmas Decoration
Draw the outline.
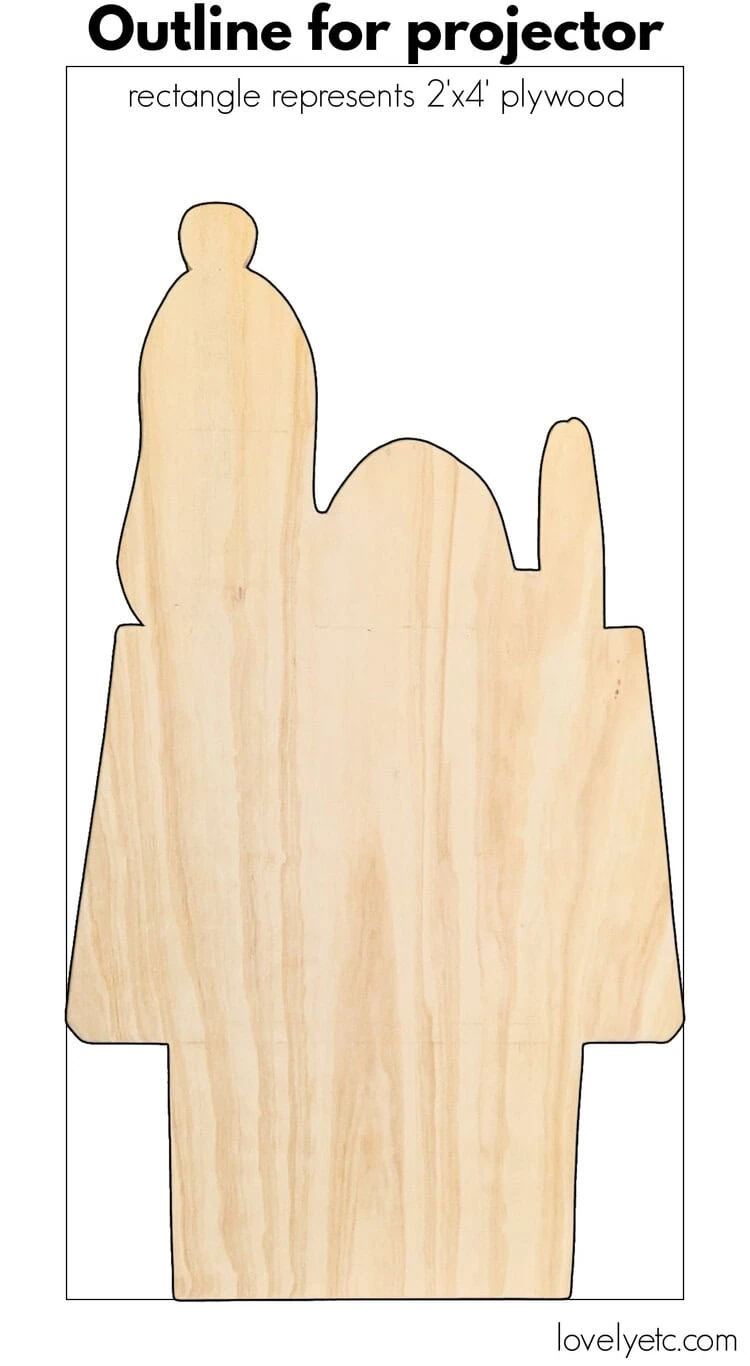
There are a few ways to do this. The easiest way is to use a projector to project the shape onto your wood and trace it with a pencil.
I did not have a projector so I drew mine freehand with a bit of help from a tape measure and a straight edge. Luckily, this is a pretty simple shape.
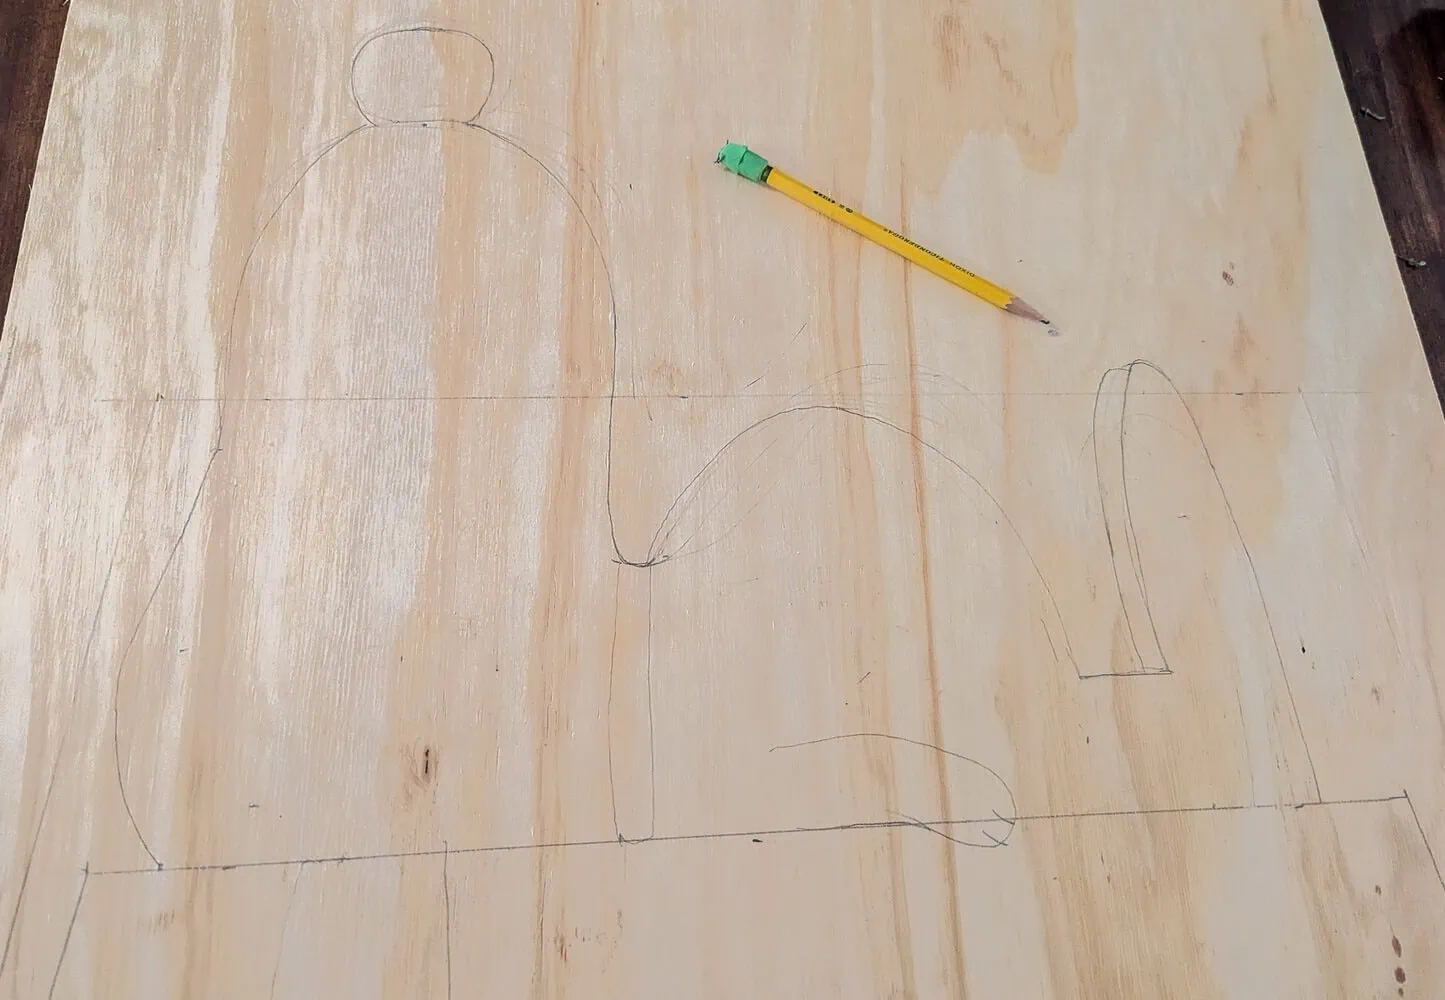
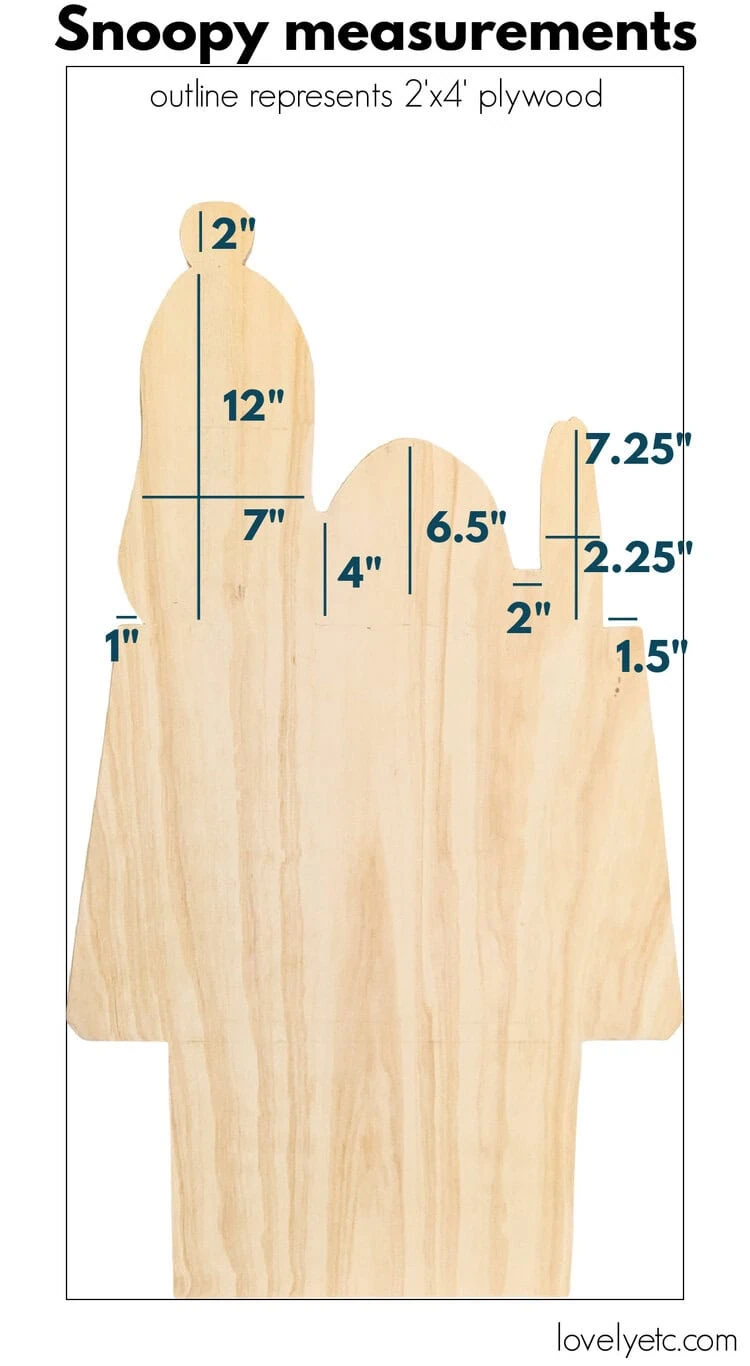
I measured the doghouse and a few key points on Snoopy to make sure the proportions were right. Then I used a straight edge to draw the outline of the doghouse and freehanded Snoopy. It took a few times drawing and erasing but in the end I think he looks pretty good.
I’m sharing the measurements I used for Snoopy and his doghouse below along with a clean outline for anyone who wants to use a projector.
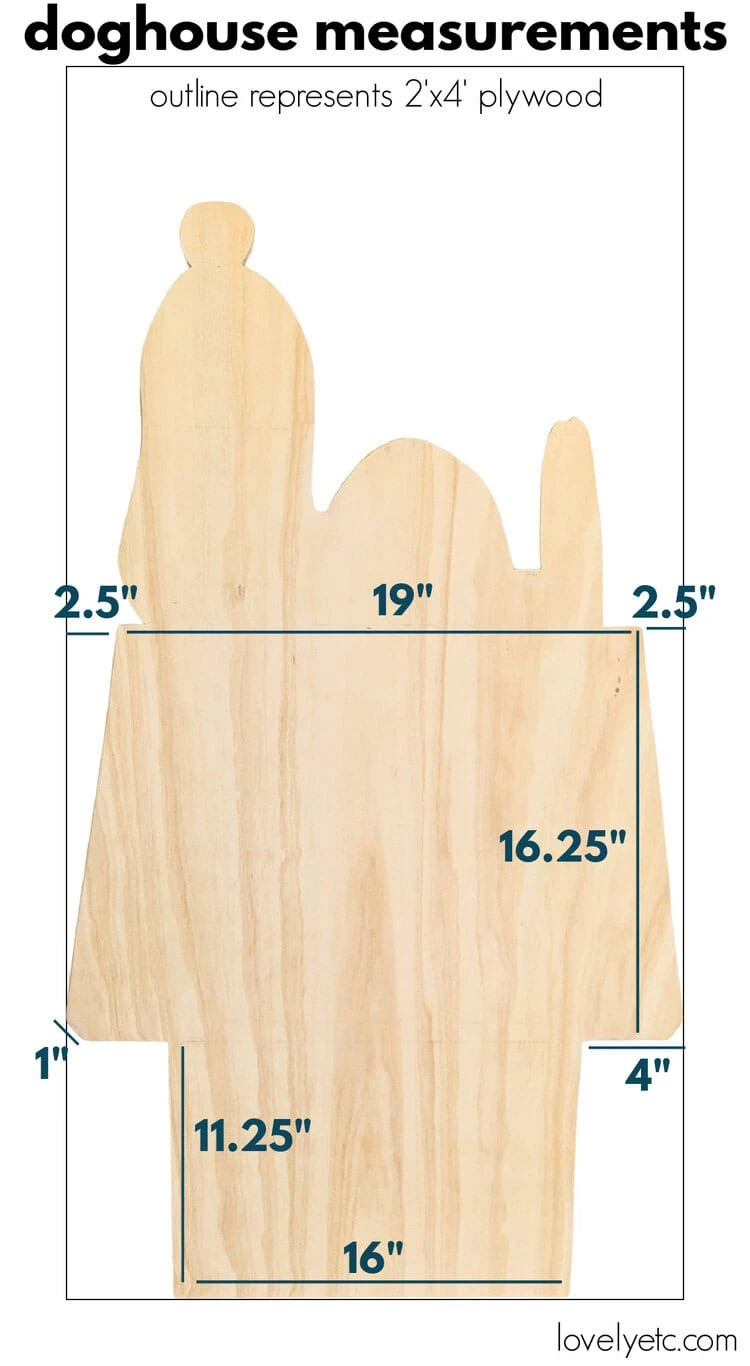
I’m also sharing the basic measurements for Snoopy’s outline. I used these measurements when drawing my Snoopy to keep things proportionate but if this is way too mathy for you, feel free to just draw your Snoopy freestyle.
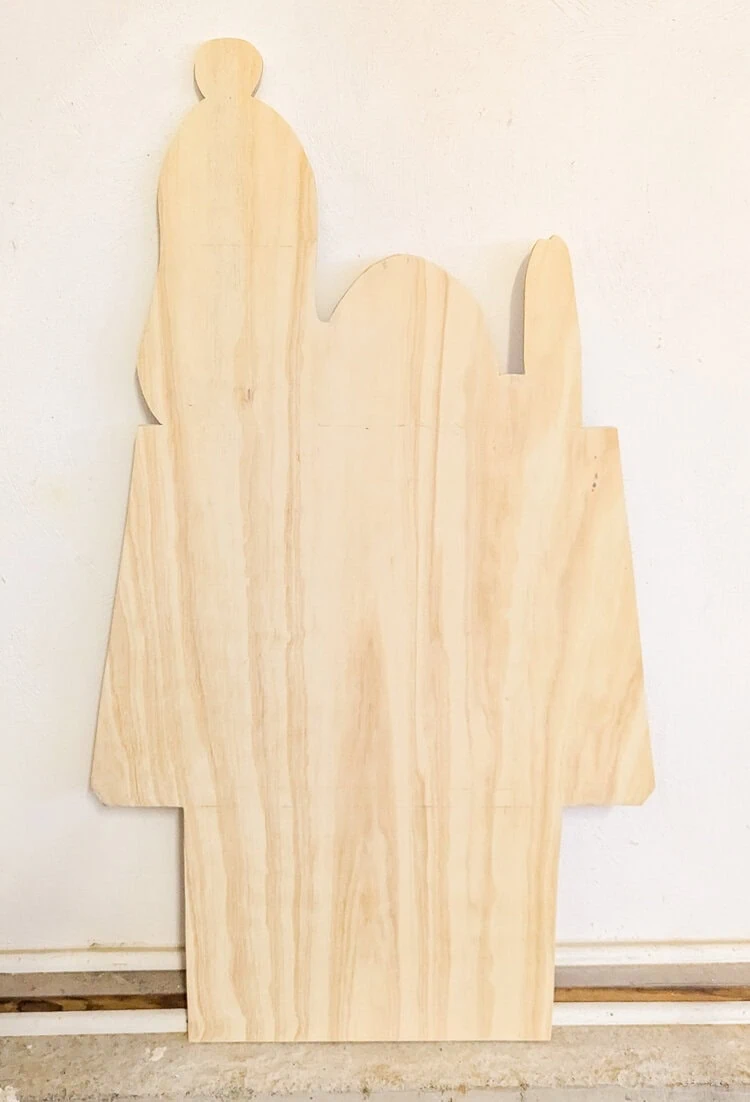
Cut out the outline.
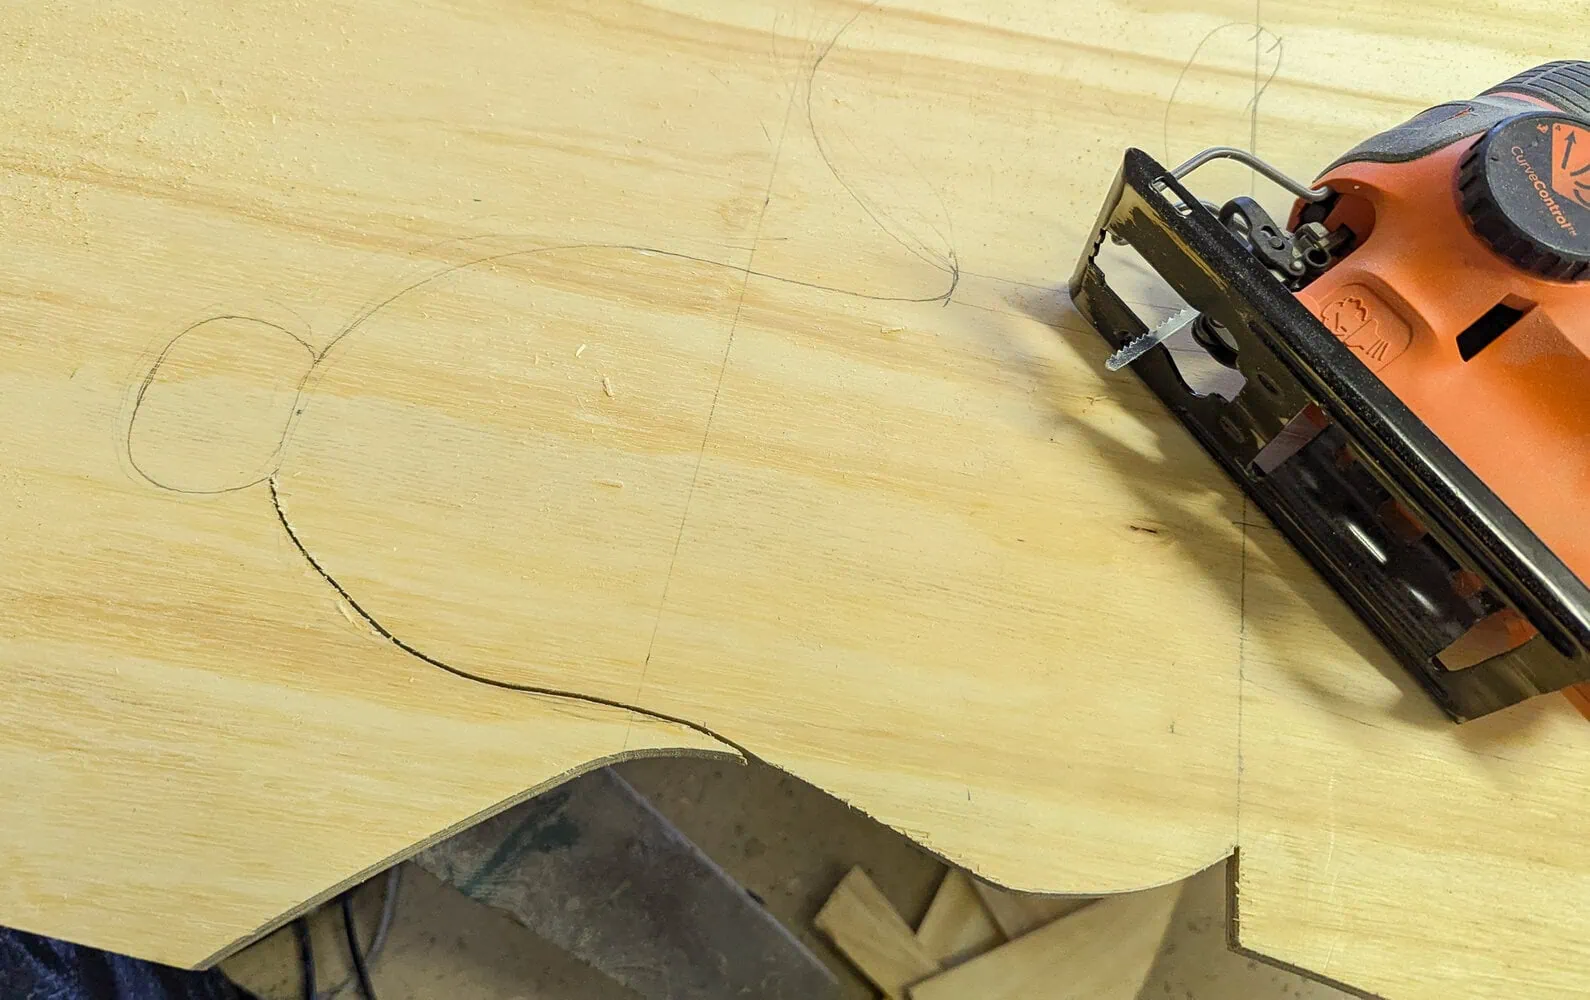
Once you have your shape, cut it out using a jigsaw. Sand any rough edges with 220 grit sandpaper.
Prep for paint.
Prime the entire thing including the edges. This will help the paint to adhere well, will cut down on the coats of paint needed, and will help prevent any knotholes in your wood from showing through.
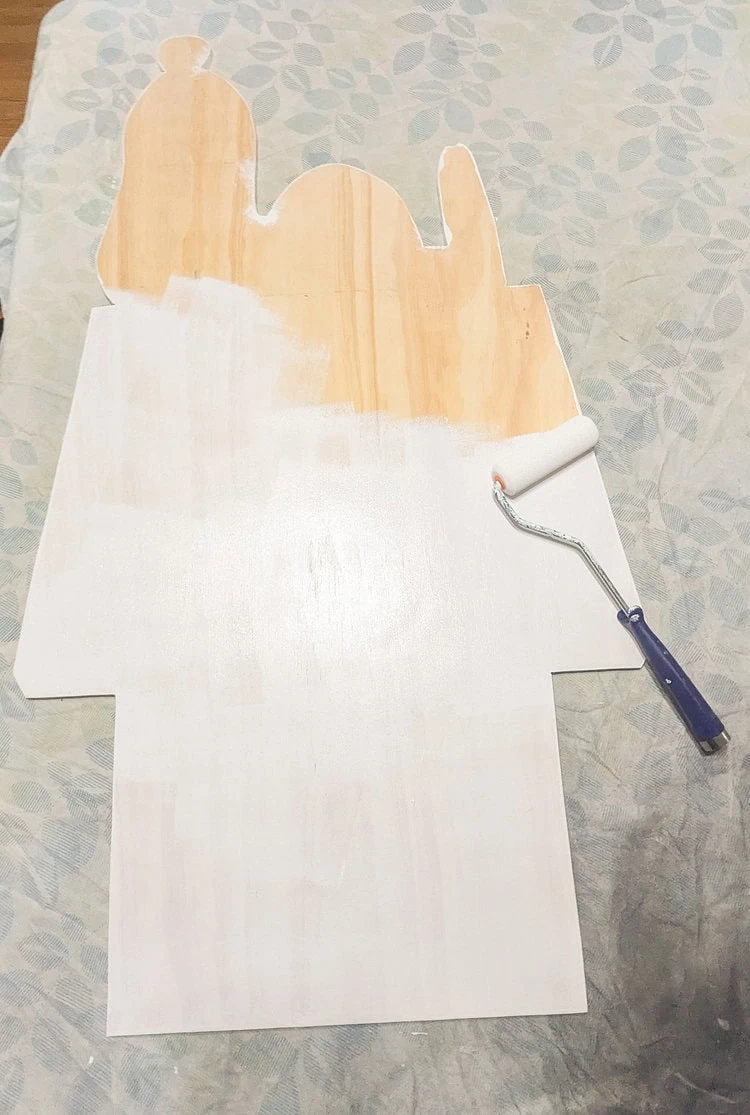
Note: It’s important to prime and paint all sides of your character, including the edges. This will seal your wood from moisture and make your character last much longer.
Paint Snoopy and his doghouse.
Now you are ready to paint!
A foam roller will get the paint on the fastest, but a good brush will also work. I used a small artist’s brush near the edges where the two colors meet – around Snoopys ear and body.
Unfortunately, red and white are both notoriously difficult paint colors for getting a nice, even finish so you will probably need 3 coats of each color to get good coverage.
It works best to paint one color and wait for it to fully dry before painting the other color so that you don’t accidentally mix the colors where they meet.

Once the red and white background is finished, you can add the black outline and details. This is what really brings the whole thing to life.
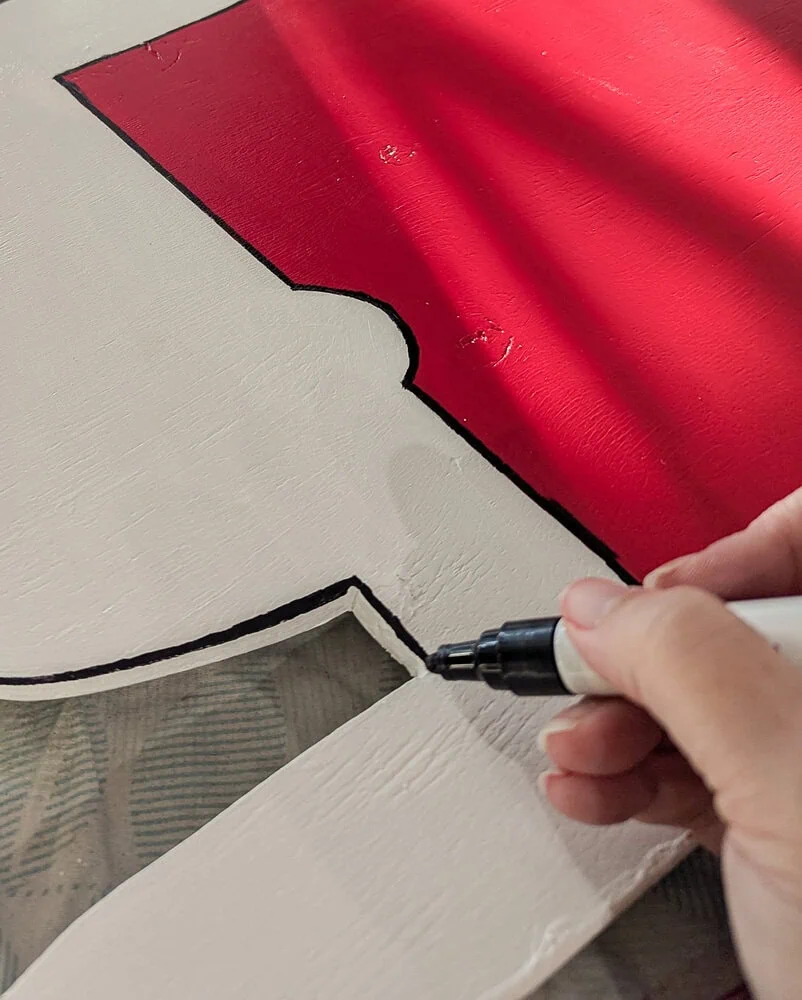
I used a fine tip black oil-based Sharpie paint pen and it was perfect for this. First I traced around the outline of the entire thing to give it that great cartoon look. For the doghouse outline, I used my straight edge to make it easy to get clean lines. Then I came back and drew the squiggly lines on the doghouse and added Snoopy’s eye, nose, collar, ear, and paw details.
The great thing is these lines are supposed to look hand drawn like a comic, so they really don’t have to be perfect.
I painted both sides of my cutout exactly the same so that it looks great from all directions. If your Snoopy will not be seen at all from the back you can paint the back a solid color, but remember to paint all the surfaces regardless to protect the wood.
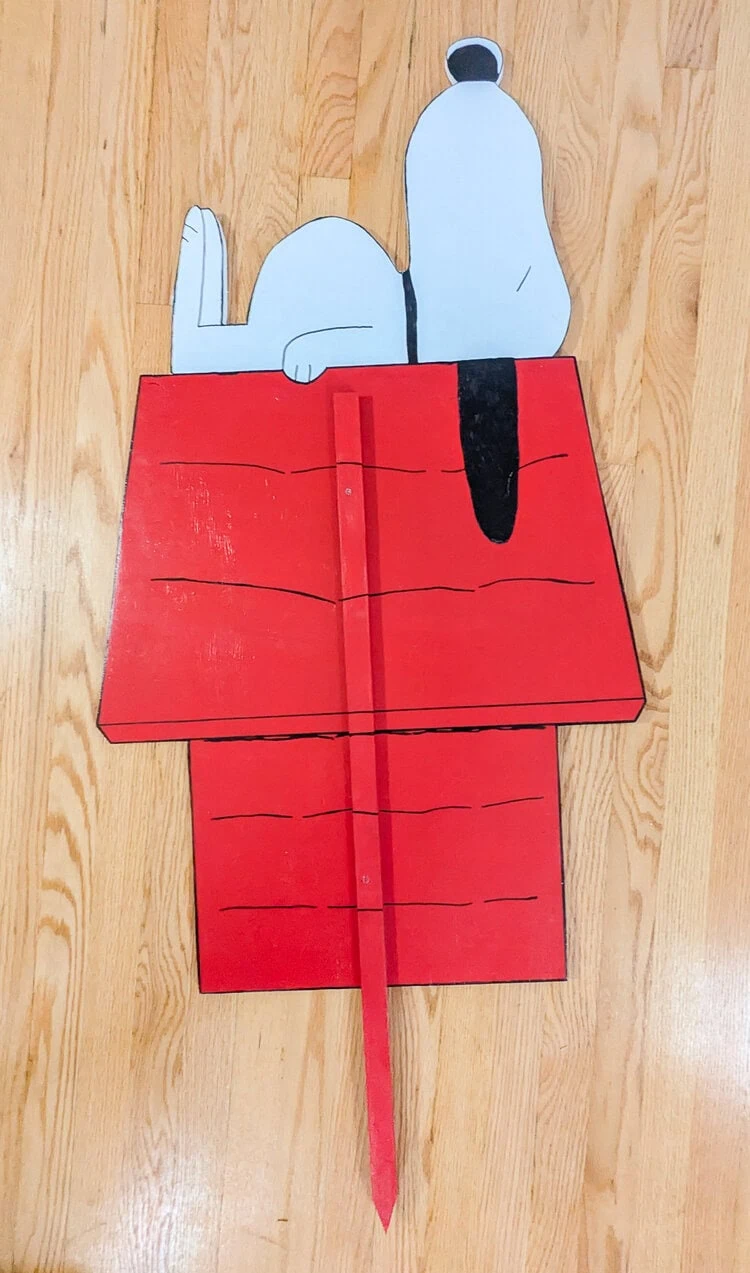
Attach the wooden stake.
To make your character cutout stand up, you can use a wooden stake or you can use rebar. I chose to use a basic wooden stake so that it would blend in and still look good from both sides.
You can find inexpensive wooden stakes at your local home improvement store in the garden section or with the yard signs.
Prime and paint your stake to blend in. Then you can attach it using 3/4″ screws. To finish it off, I painted over the screws with my red paint and used my paint pen to continue the black lines right over the stake.
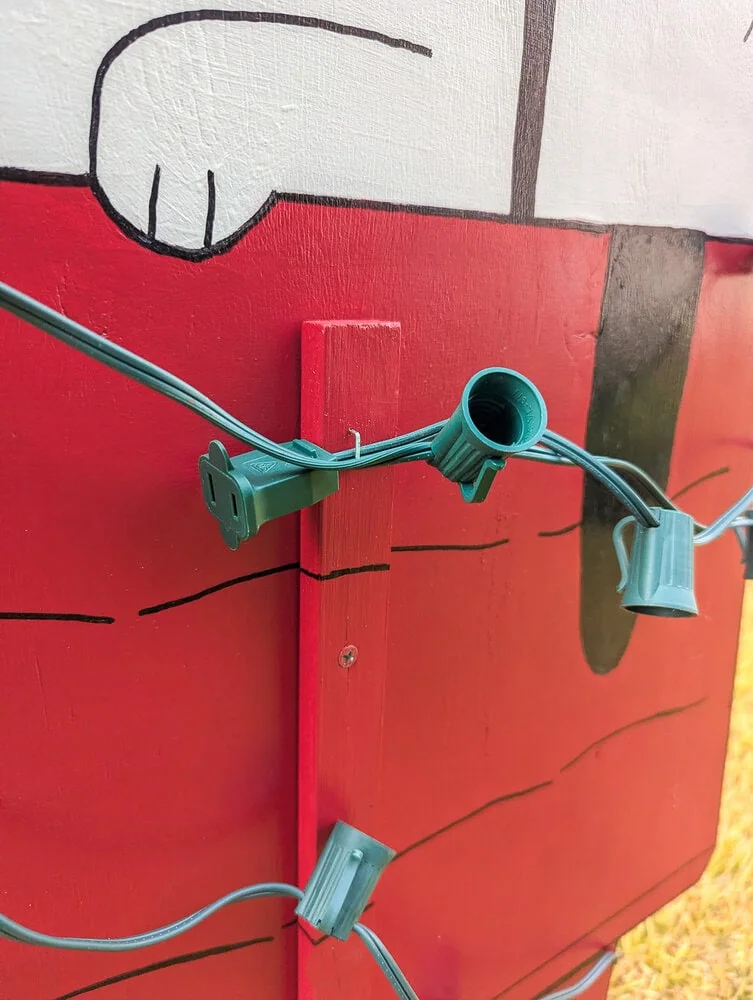
Add the lights.
The final step is to add the Christmas lights. I decided it would be easiest to stick my Snoopy in place in the front yard before adding the lights.
Then I started in the back and wrapped the lights around a few times. I did use a few staples in the back to hold the strings in place.
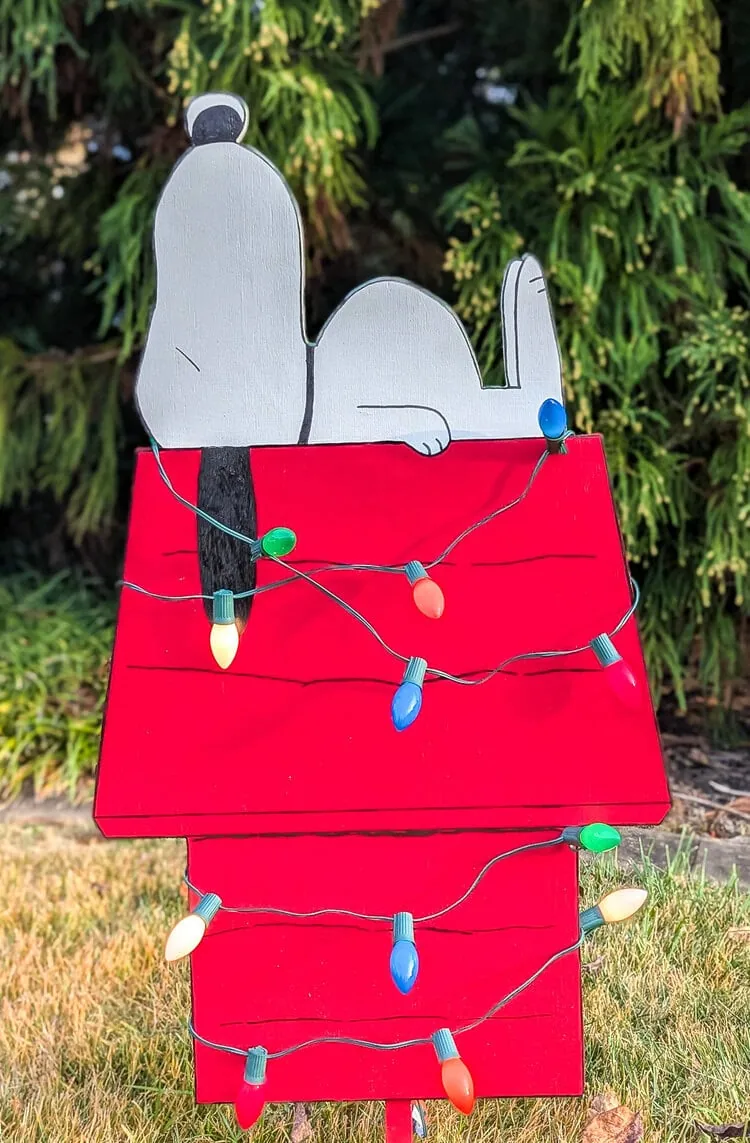
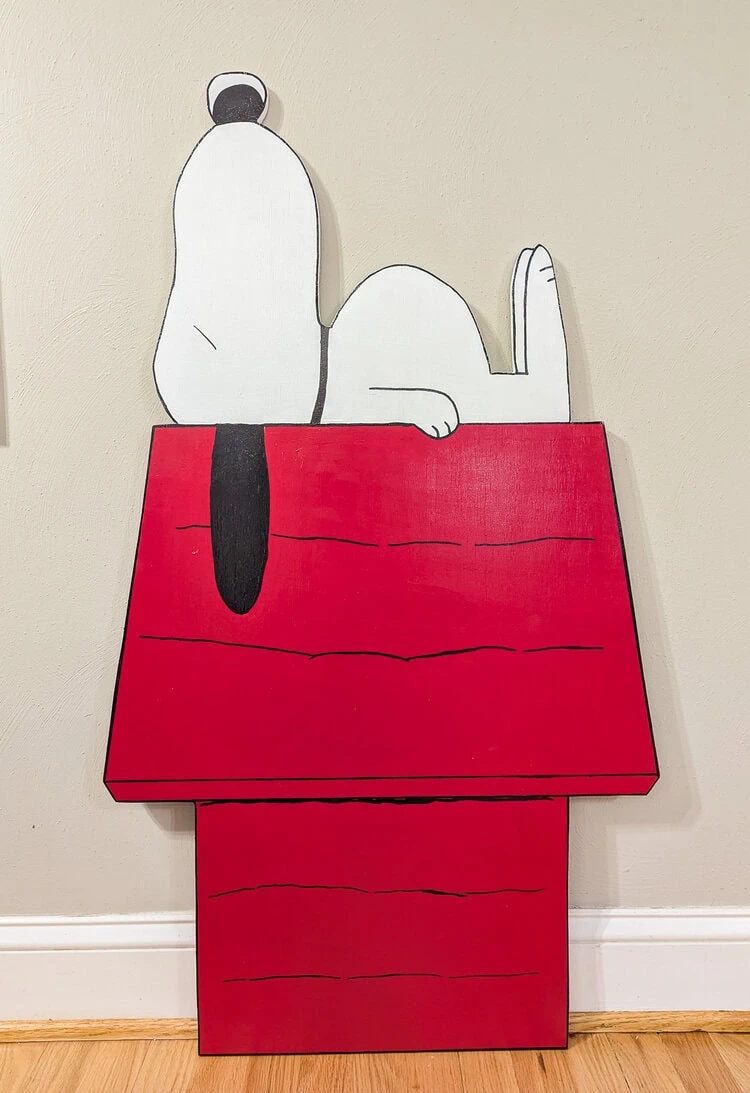
The finished Snoopy
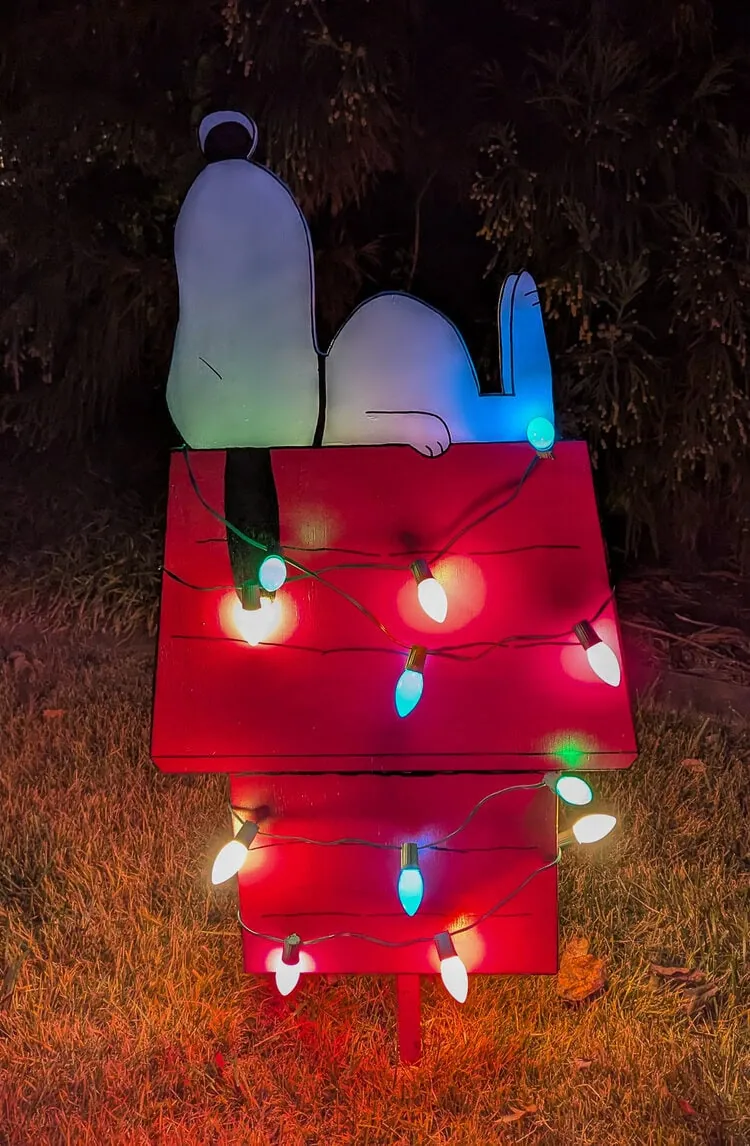
The last step is to turn on the lights and enjoy!
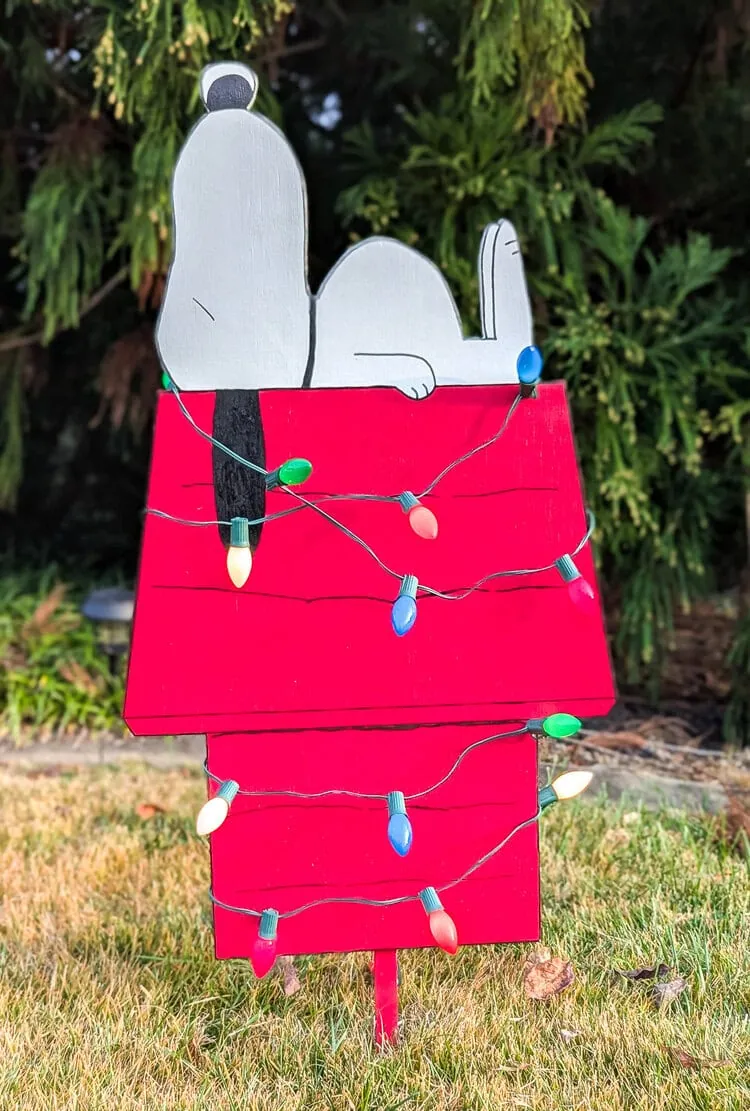
I love that this little Snoopy decoration looks equally festive in the daytime and at night with the lights on.
Want more outdoor Christmas ideas?
Last year I made this trio of outdoor wooden Christmas trees for my porch and I also put together a whole collection of 20 of DIY outdoor Christmas decoration ideas from some of my favorite creators.
I’d love for you to pin this post on Pinterest!