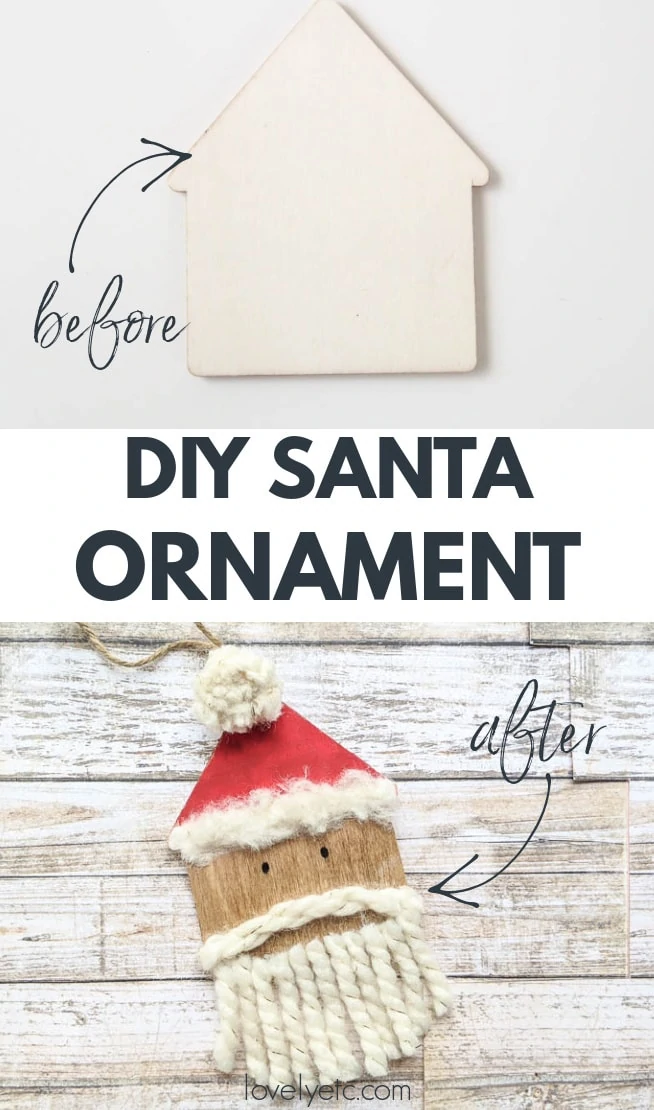
How to Make an Easy DIY Santa Ornament
This cute DIY Santa ornament is quick and easy to make and is a great Christmas craft that kids and adults alike will enjoy.
I love making new handmade ornaments every Christmas. I do lots and lots of big DIY projects every year, but I don’t seem to make enough time for crafting – except at Christmas time.
This year I decided I wanted to make a cute little rustic Santa ornament and after mulling over a few different ideas, I came up with the perfect way to make a super easy Santa ornament.
In fact, this ornament is easy enough, I think it would be a great little Christmas project to do with older kids or with a group of friends at a craft night.

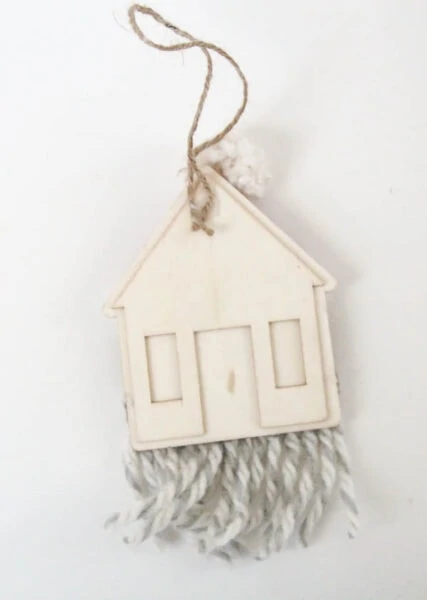
I bet you’d never guess this cute little ornament started as a simple wooden house shape! The little house made this Santa ornament so quick and easy.
This post contains affiliate links which means if you make a purchase after clicking a link I will earn a small commission but it won’t cost you a penny more. Click here to see my full disclosure policy.
Materials
- Small wooden house shape – These are pretty common in craft stores in the aisle with all the other little random wood things. This is the little house I used – I found it at Walmart with the craft supplies (and it’s super cheap).
- Red and white paint – Small craft paints are perfect for this, but any type of paint will work including chalk paint or latex paint samples.
- Wood stain – I used Minwax special walnut. You could use a darker or lighter stain color depending on what skin tone you want your Santa to have. If you don’t want to deal with stain, you could also use brown craft paint watered down a bit so the wood grain still shows through.
- Fluffy white yarn – The fluffier, the better. This is for the beard, the hat pom pom, and the hat trim. You could also buy a premade white pom pom for the hat if you prefer, but making your own is super easy.
- Paintbrush
- Clean rag for applying stain
- Hot glue gun
- Black Sharpie – for adding the eyes
- Scissors
- Twine or other string for hanger.
How to Make a Rustic Wooden Santa Ornament
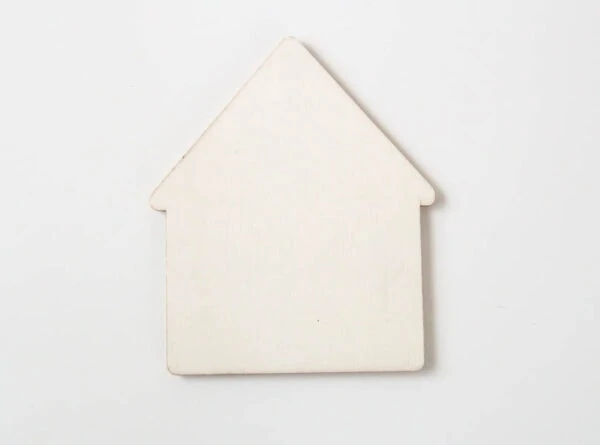
This cute little house shape is the perfect base for a Santa with a hat. My house came with raised doors and windows on one side so I just flipped it over to the plain back.

Start by painting your Santa hat (the roof) red with white trim along the bottom.
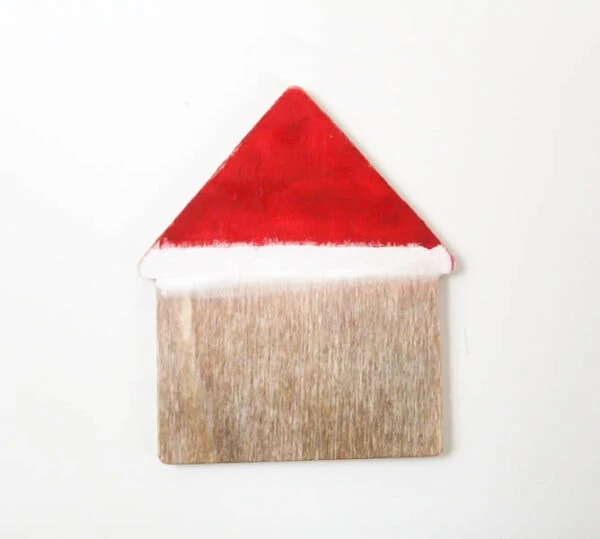
Let the paint dry completely and then use a clean rag to stain the rest of your house (Santa’s face).
If you’d prefer not to deal with stain, you can paint Santa’s face instead. I just like the rustic feel of the stained Santa face.
If you want a similar effect with paint, you can water your paint down and brush on a thin layer. The wood grain should still show through the thinned down paint.
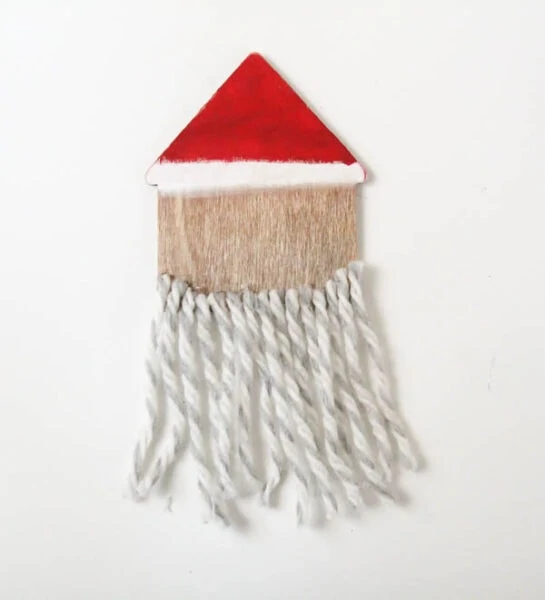
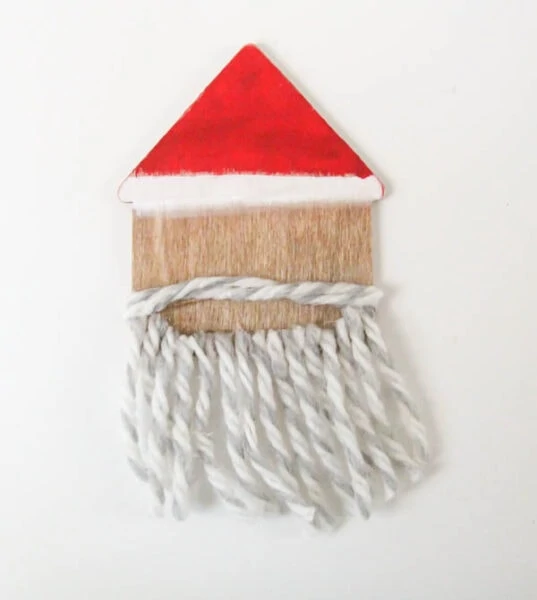
When all of the stain and paint are dry, it’s time to add Santa’s beard.
Cut a pile of yarn pieces 3-4 inches long. Then you can use a hot glue gun to attach the beard to Santa’s chin.
(If you are making this ornament with kids, you could use craft glue instead of hot glue; you will just need to allow more time for the glue to dry before moving to the next step.)
As you attach your beard, try to round the corners a bit so Santa’s face looks more round and less rectangular.
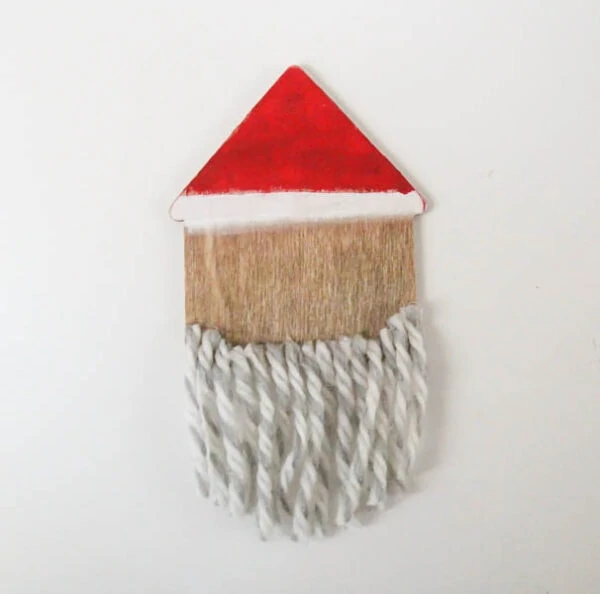
Then use scissors to trim the beard until it looks nice and tidy.
For Santa’s mustache, I folded a piece of yarn in half, twisted it, and glued it in place.
To finish off the Santa hat, I made a quick pom pom from my white yarn.
If you’ve never made yarn pom poms before, they are super easy and all you really need is some yarn. I have a quick DIY pom pom tutorial you can follow or you can always just use a premade pom pom or even a cotton ball if you prefer.
I also cut a bunch of little tiny scraps from my yarn and glued them along the bottom trim of Santa’s hat.
Finally I used a Sharpie to add eyes. I highly recommend penciling on your eyes first; if you put them in the wrong spot, your Santa could end up looking pretty crazy.
The last step is using your glue gun to glue a loop of twine to the back of your ornament for hanging.
(You may notice that Santa has a silvery-white beard in these photos but my final Santa has a more creamy white beard. After I finished Santa, I just couldn’t shake the idea that his beard wasn’t quite right. So I pulled it off, peeled off the old hot glue, and redid his beard with the same creamy yarn I used for the Santa hat.)
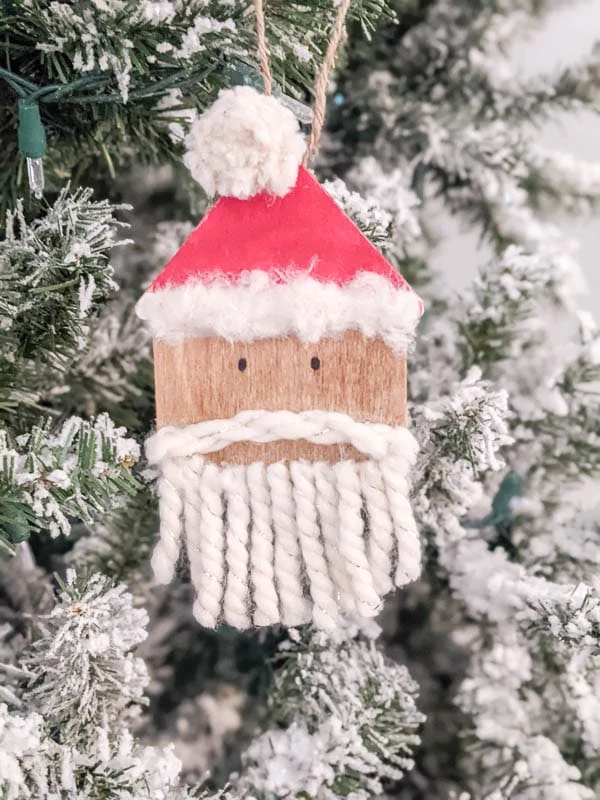
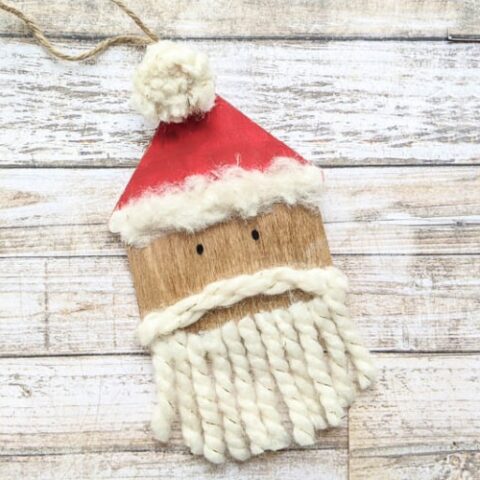
And here’s my finished Santa!
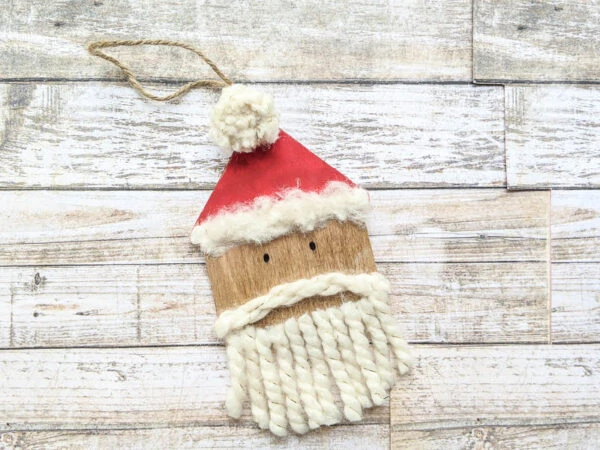
This was a seriously fun little craft and I love how adorable he turned out!
I’ve got tons more awesome handmade ornament tutorials as well including easy DIY photo ornaments and mini farmhouse sign ornaments. You can see the whole ornament collection right here.
I’d love for you to pin this post on Pinterest!
How to Make an Easy DIY Santa Ornament
Make an adorable DIY Santa Ornament that has a rustic vibe to it. This is easy enough to make with the kids too.
Materials
- Small wooden house shape
- Red and white paint
- Wood stain
- Fluffy white yarn
- Clean rag
- Twine
- Black Sharpie
- Paintbrush
Tools
- Hot Glue Gun
- Scissors
Instructions
- Start by painting the top of the house ornament red for Santa's hat.
- Paint white trim along the bottom of the hat.
- Let the paint dry.
- Use a clean rag to stain the rest of the house.
- Cut a pile of yarn pieces 3-4 inches long for the beard.
- Use a hot glue gun to attach the beard to Santa’s chin.
- Trim the beard with scissors so it's nice and tidy.
- Fold a piece of yarn in half, twist it, and glue it in place for the mustache.
- Make a quick pompom from white yarn and hot glue it to the top of the hat.
- Cut small bits of the yarn to make fluff and glue it to the bottom edge of Santa's hat.
- Use the Sharpie to draw two eyes.
- Attach a piece of twine to the back with hot glue for hanging.
Recommended Products
As an Amazon Associate and member of other affiliate programs, I earn from qualifying purchases.
-
 Lion Brand Yarn 792-437 Homespun Thick and Quick Yarn, Dove
 -
Apple Barrel PROMOABI Matte Finish Acrylic Craft Paint Set Designed for Beginners and Artists, Non-Toxic Formula that works on All Surfaces, Assorted Colors 1, 18 Count
-
Minwax 222404444 Wood Finish Penetrating Interior Wood Stain, 1/2 pint, Special Walnut
-
Hot Glue Gun, Surebonder Full Size 40W High Temperature Glue Gun Kit with 20 Glue Sticks


Oh you have to do Oscar the grouch and maybe try big bird somehow…..now sure how that one would work this is really cute and such a fun activity for a toddler to helping with I haven’t seen sesame street in so long I don’t know how else is in there but I am sure there are others you can do too I really want to do these with my granddaughter when she gets older she is only 5 months old so wouldn’t understand now but she will next year maybe thanks for the tutorial.
Great ideas!