How to turn a Basic Dresser into an Easy DIY Apothecary Cabinet
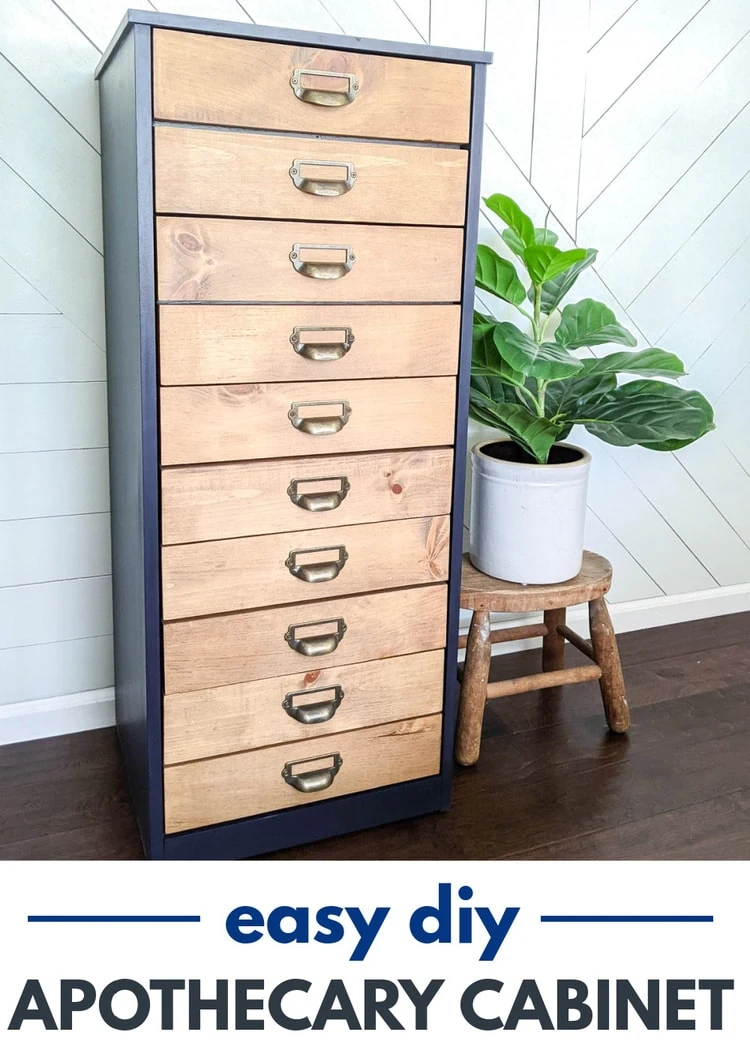
Learn how to turn any basic dresser or chest of drawers into a stylish vintage-inspired DIY apothecary cabinet.
This furniture makeover has all the things I love in a good DIY – it started out as a cheap and ordinary yard sale find, the actual work of the transformation was easy, and the ‘after’ blew me away!
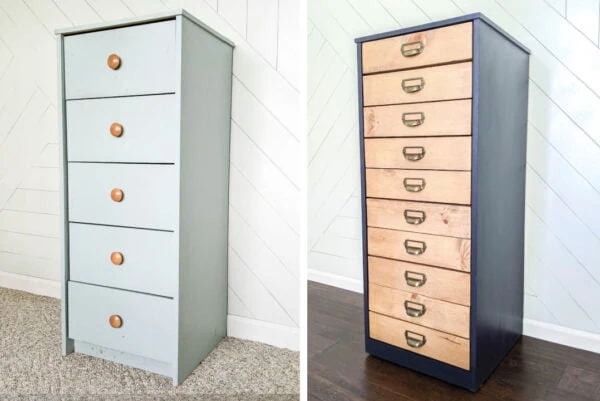
It all started with this plain little chest of drawers I found at a yard sale. There really was nothing special about this piece, but it had a lot of drawers which I love and it was only $15.
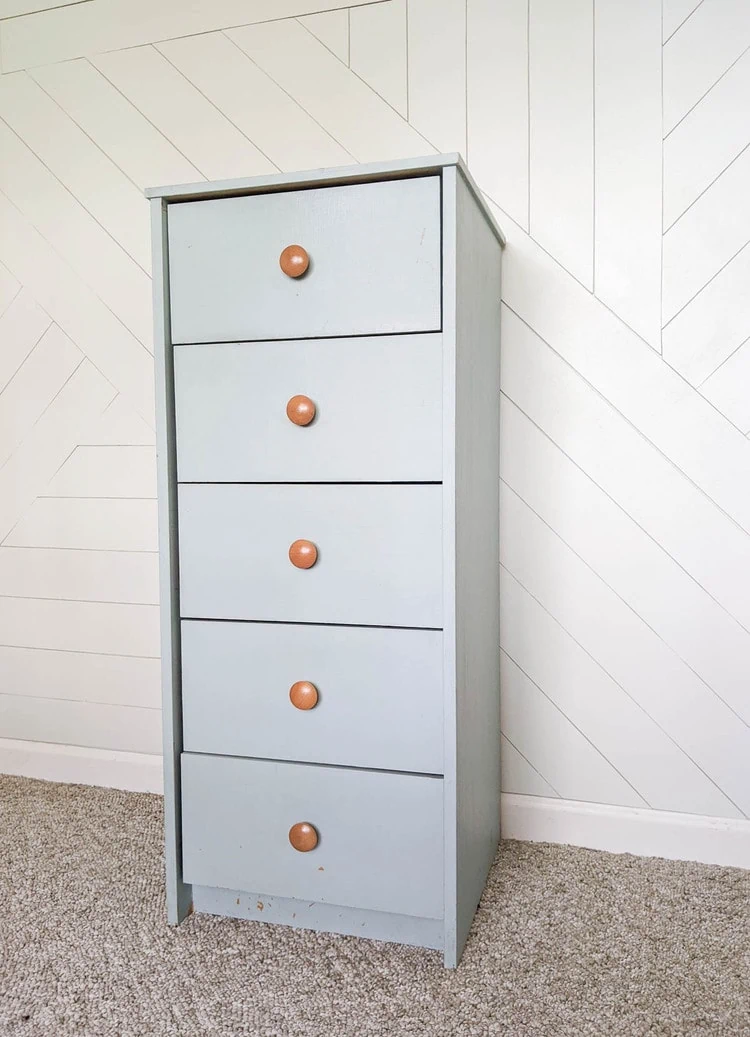
I knew immediately I wanted to give it a new look. I wasn’t a fan of the wooden pulls and while the paint color was fine, the paint had been slapped on super thick and there were deep brush marks all over it.
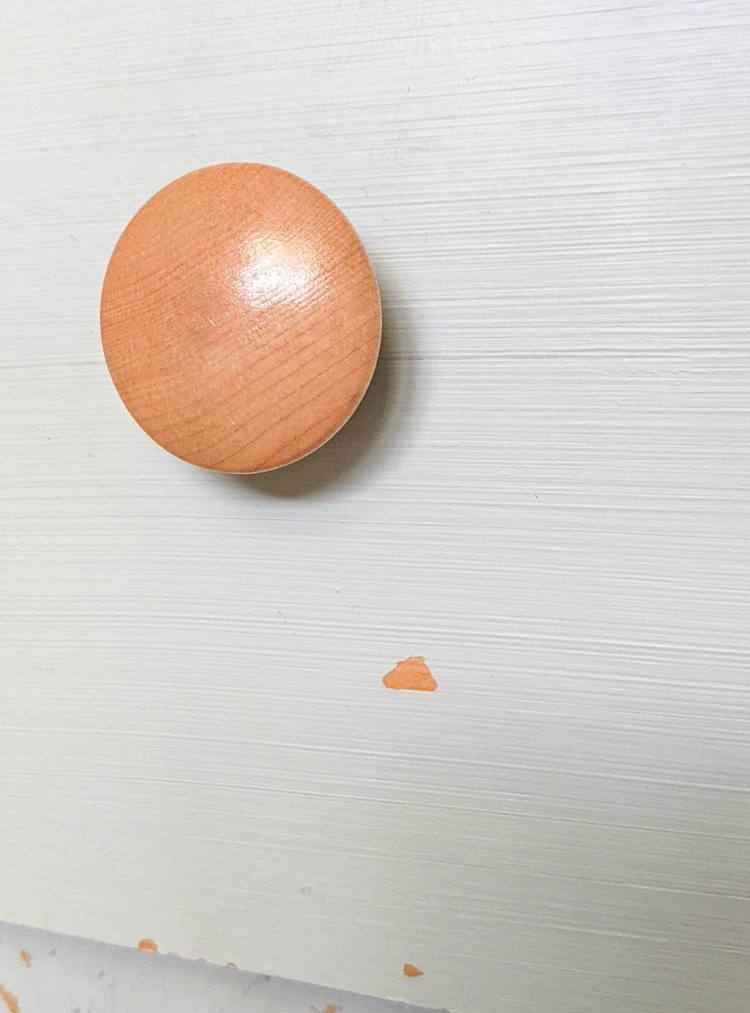
This was not a great piece of solid wood furniture just waiting to be saved. Underneath that thick paint was a super cheap piece of laminate furniture that definitely came out of a box originally.
But despite that, I knew it would make a great storage piece, so I started figuring out a plan to give it a whole new look.
I absolutely love vintage furniture pieces with tons of little drawers. Apothecary cabinets, map cabinets, tool cabinets, card catalogs – I love them all. But the real thing has gotten pretty hard to find at a decent price as they’ve become more popular.
I’ve been wanting to make my own DIY apothecary cabinet and the straight lines and flat drawer fronts of this little chest of drawers made it the perfect starting piece.
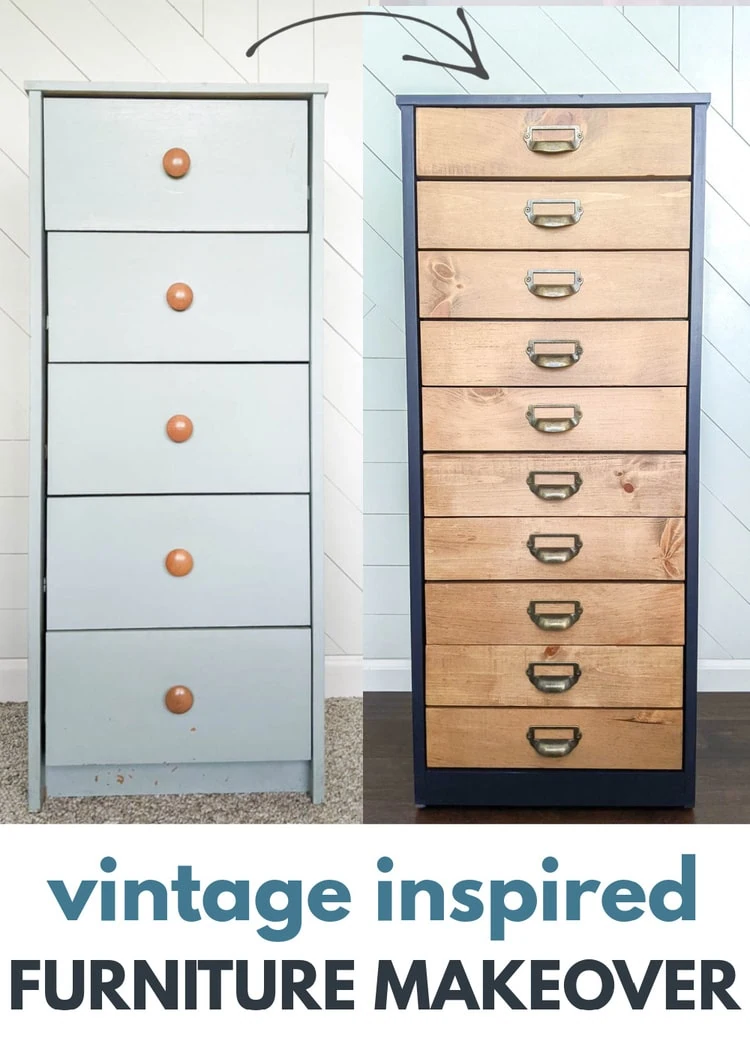
In this post I’m sharing everything you need to know to turn any basic chest of drawers into a vintage-style apothecary cabinet including an easy way to get the look of lots of little drawers.
This post contains affiliate links which means if you make a purchase after clicking a link I will earn a small commission but it won’t cost you a penny more. Click here to see my full disclosure policy.
Supplies
- Dresser or chest of drawers – this will work best on a dresser with plain flat drawer fronts
- Wood planks – you can buy precut wood planks at most home improvement stores in several widths or cut your own planks from thin plywood
- 220 grit sandpaper – for smoothing the wood planks and also sanding the dresser if needed
- Wood glue – for attaching the wood planks to the drawer fronts
- Wood screws – for attaching the wood to the drawers, the length you need will depend on the thickness of the wood planks you use
- Wood conditioner – this is totally optional but I like to use it whenever I am staining cheap pine
- Stain and a clean rag or paintbrush to apply it – I used Minwax Special Walnut, my favorite medium brown stain
- Paint for the exterior – I used General Finishes Milk Paint in Coastal Blue
- Small foam paint roller – for painting the furniture exterior, these small rollers are great for getting a nice smooth finish on large flat furniture surfaces
- Sealer – to seal the paint and stain, I used General Finishes Flat out Flat which gives a gorgeous matte finish
- Card catalog style drawer pulls – These are the ones I used, they are super cheap and look beautiful while also being sturdy enough to actually function as a drawer handle
Tools
- Drill – for attaching the hardware and faux drawer fronts
- Saw – for cutting your wood planks to the correct length, a miter saw works really well for this
How to turn a plain dresser into a DIY apothecary cabinet
Cutting the Wood for the Drawer Fronts
What really sets this furniture makeover apart is those beautiful wood plank drawer fronts.
To mimic the look of a vintage apothecary cabinet or map cabinet, I wanted to give my little cabinet the look of lots of drawers without the work of actually adding more drawers.
To do this, I attached two wood planks to the front of each drawer so that each drawer looks like it is actually two separate drawers.
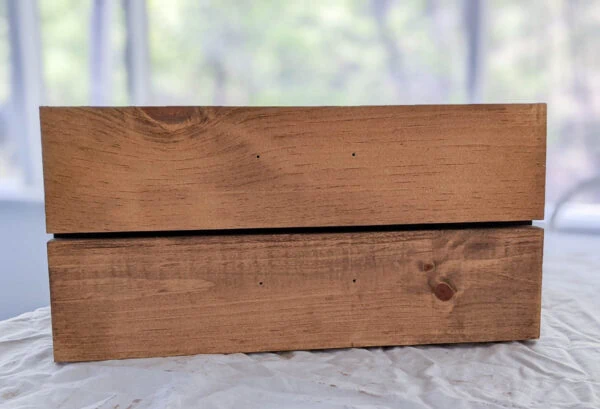
There are three measurements you need to figure out for your wooden drawer fronts before you can get started:
- the thickness of the wood you want to use
- the width of the wood planks you need to make the drawer fronts
- the length to cut the wood planks for the drawer fronts
These three measurements will be different for each furniture piece but are easy to figure out.
Choosing the thickness of the wood
This will depend on the style of your furniture piece. The drawers on my own little chest were inset from the sides, so I was able to use 1″ thick wood planks without a problem.
If the drawers on your own furniture are not inset like this, you will probably want to use thin 1/4″ wood so that the new drawer fronts don’t stick out too much.
You may be able to find 1/4″ wood planks in the sizes you need – these are often labeled as ‘project boards’ at home improvement stores. But if you can’t find wood planks, you can also cut a small sheet of 1/4″ plywood to size.
Finding the width of your wood planks
To figure out what size wood planks you need, start by measuring the height of your drawers. My own drawers were each 7 1/4″ high.
I wanted to leave 1/4″ margin between the two wood planks to mimic the space between two drawers, which left me with 7″ of space.
Then all I divided 7 by 2 to get the correct height for my faux drawer fronts. For my own chest, that worked out to be 3 1/2″ each.
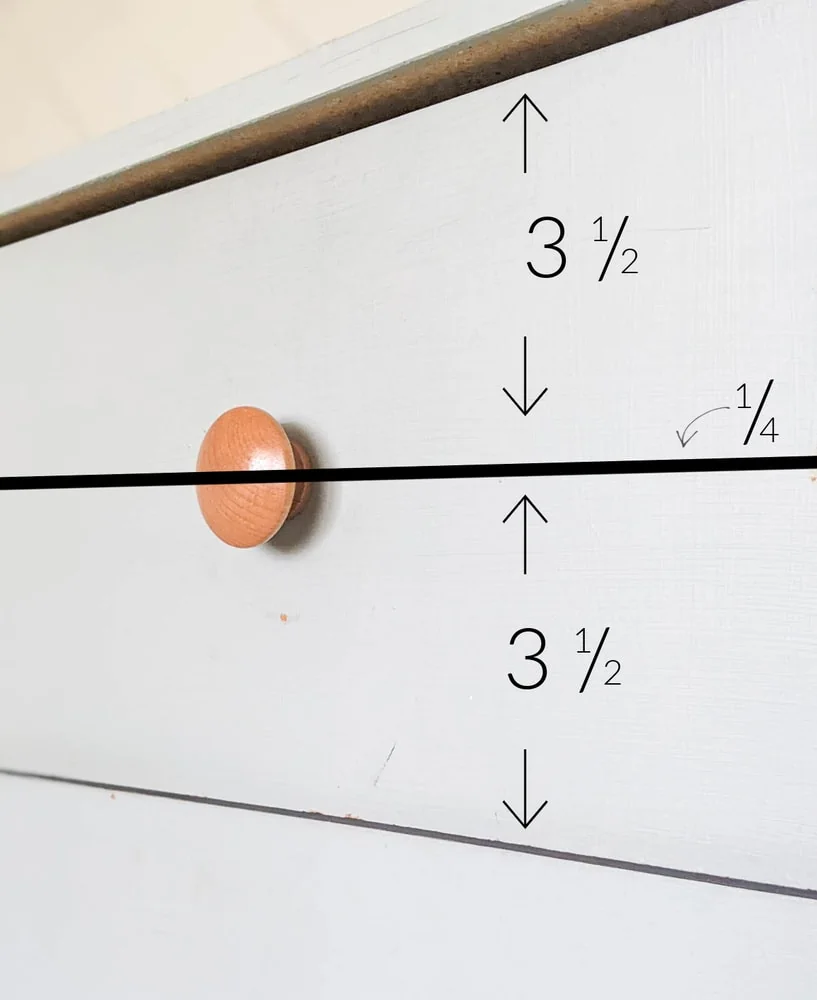
To figure out what size wood planks you will need for your own furniture, you can use this simple equation:
(Height of drawer – 1/4″) /2 = width of wood planks
My own 3 1/2″ drawer fronts are a standard wood plank size so I was able to easily find precut wood planks. (1x4s and 2x4s are actually 3 1/2″ wide – it’s a weird lumber measuring quirk.)
There are also a few other sizes that are pretty standard, but if you need a nonstandard size, you can use a table saw or circular saw to rip plywood or larger wood planks to the right size planks.
Measuring the length of your wood planks
And finally, you need to measure how long each wood plank needs to be.
This step is super simple. Simple measure the width of your drawers and use a miter saw to cut your planks to the correct length.
Staining your drawer fronts
Once your faux drawer fronts are all cut out, sand any rough edges smooth with 220 grit sandpaper.
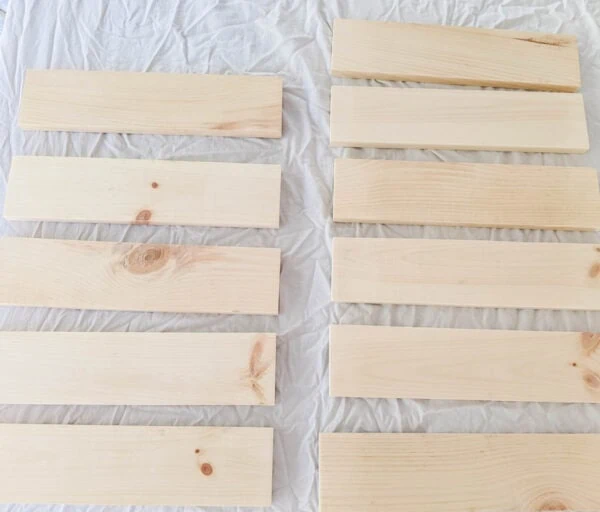
Then you’re ready to stain the wood.
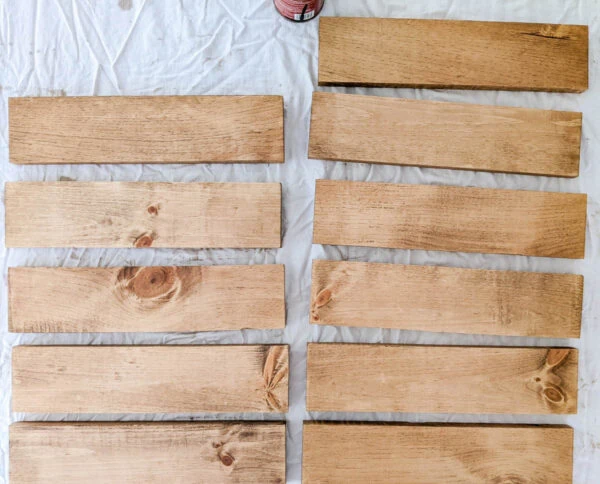
I used inexpensive pine wood for my drawer fronts which is notorious for taking stain unevenly, so I chose to use wood conditioner first to minimize any blotchiness. Just wipe on the wood conditioner with a clean rag and allow it to dry.
Then I applied the stain. I chose Minwax Special Walnut which is a nice medium brown shade. I applied it with a clean rag as well.
Painting the body of the cabinet
I chose to give my piece a two-toned look with a painted body and wooden drawer fronts.
My particular chest was not solid wood, so refinishing the wood wasn’t an option. If you are working on a solid wood piece, you could always choose to skip the paint and just refinish the wood to match your drawers instead.
I started by sanding down the previous paint. This isn’t always necessary when repainting a piece of furniture, but the old paint finish was very sloppy and was also chipping off in places. I sanded the overly thick paint smooth and then cleaned the entire piece well.
I chose to use General Finishes Milk Paint for this piece. It’s one of my favorite furniture paints because it doesn’t require primer and goes on really smoothly. I used the color Coastal Blue which is a nice rich navy.
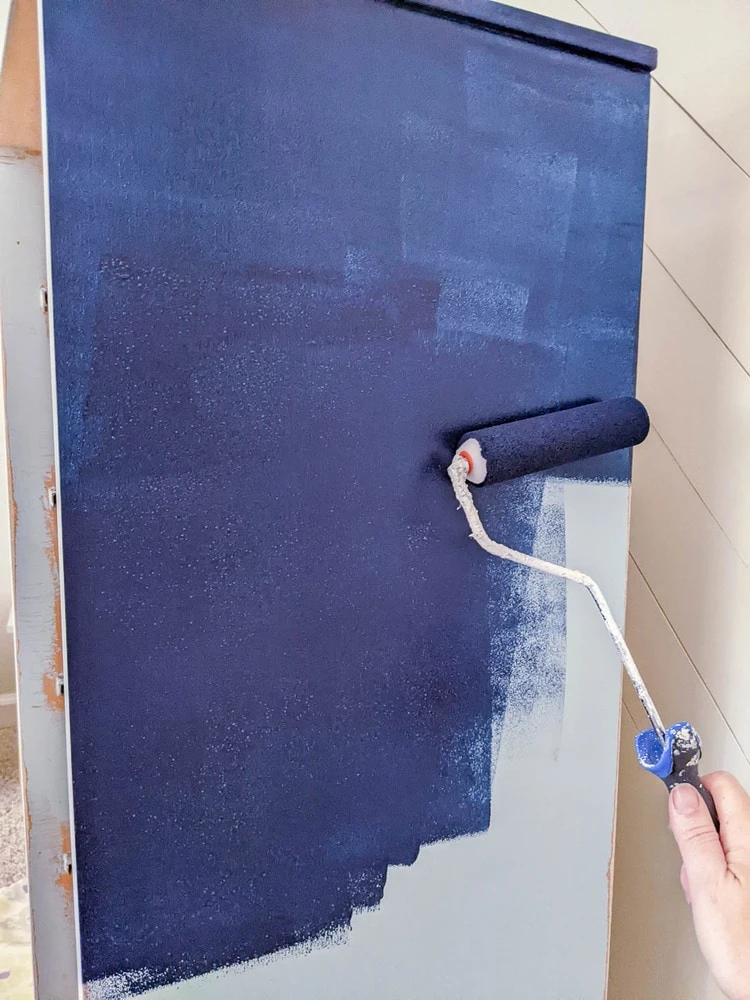
Once the paint had fully dried, I sealed it with a couple of coats of General Finishes Flat out Flat Topcoat. This topcoat has a completely matte finish that looks amazing on any type of vintage-inspired makeover.
I also used this same topcoat to seal the wooden planks I had previously stained. (Just be sure to wait at least twenty four hours between staining and sealing if you use this sealer over an oil-based stain like I did.)
Painting the drawers
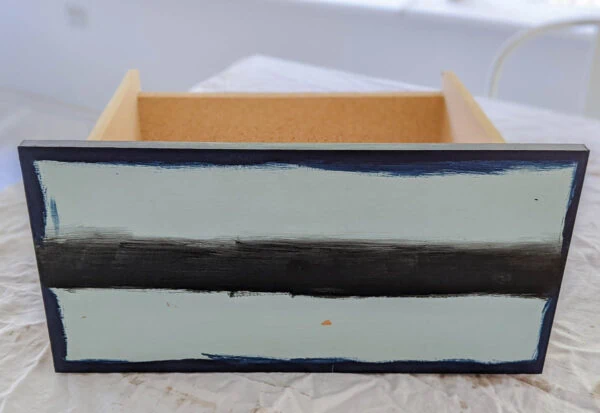
Before attaching the wood planks to my drawer fronts, I painted the edges of the drawers. I debated whether to paint these with the same navy as the rest of the piece or with a light brown that would be similar to the color of the wood planks.
I ended up painting them navy and I think it looks fine, but if I were doing this all over again, I would probably paint them brown to better blend with the new drawer fronts.
I also used black paint to paint a black stripe across the middle of each drawer. Once the two wooden planks are attached to each drawer front, the small strip of black that shows between them will just look like the shadow between two drawers.
Attaching the drawer fronts
Once the paint has dried, it’s time to attach the wood planks to the drawer fronts.
Lay two planks face down on your work surface and set the drawer facedown on top of them.
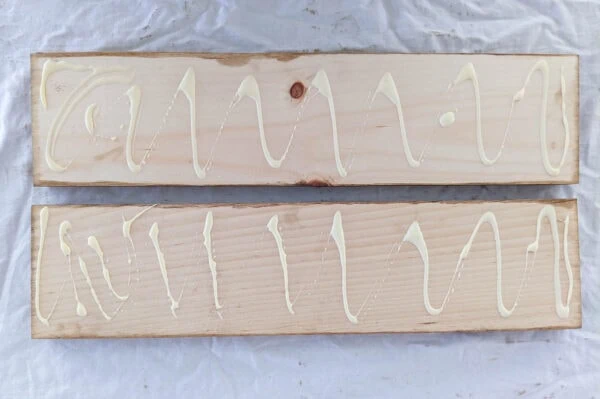
Once you’re sure everything is lining up correctly, you can lift the drawer off the planks and apply wood glue to them. Set the drawer back in place, making sure to line up the outer edges of the drawers with the outer edges of the wood planks.
Then you can use screws to further secure them in place. With the drawer still facedown on the work surface, predrill four holes in each drawer front – two per wood plank.
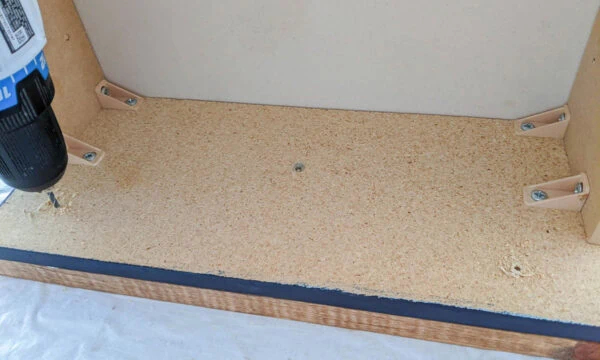
Then secure them in place with wood screws. Because we are screwing the wood in place from the inside of the drawer, these screws won’t be visible from the outside. (Just double check that your screws are the correct length to securely attach your wood without poking through the other side.)

Attaching the hardware
The final step is attaching the hardware. Because I had so many drawer pulls to attach to identical drawers, I decided to make a paper template.
I cut a piece of cardstock the same size as my faux drawer fronts and then measured exactly where I needed to drill holes so that my pulls would be centered.
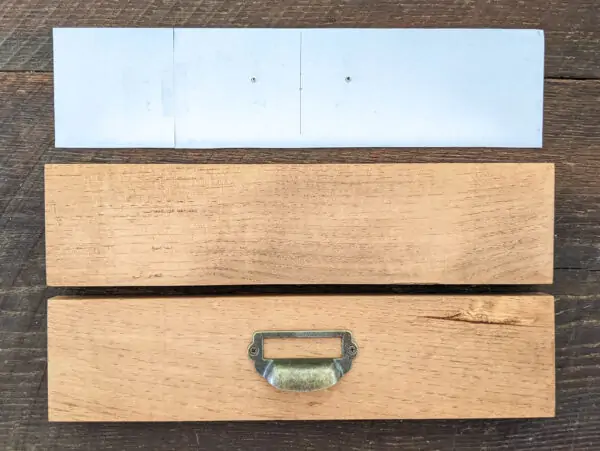
Using this template made drilling the holes for my hardware so quick and easy. I was able to line the template up with each wood plank and then drilled through the marked holes rather than having to remeasure each individual drawer front.
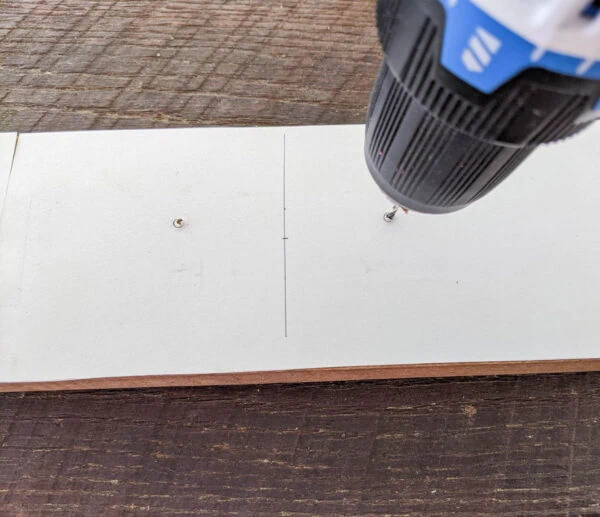
Tip: Bin pulls usually look best when they are placed slightly above the center of the drawer, rather than exactly in the middle.
Upgrading the cabinet base
One of the things that really made my own cabinet look like cheap flat-pack furniture was the kickplate at the base.
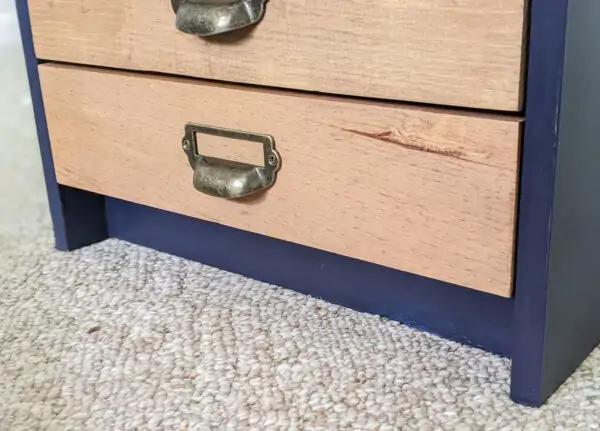
At first I considered just leaving it as is, but once I painted my cabinet, I realized that little detail was making the entire thing look cheaply made.
As you can see from the photos, I didn’t fix this issue until my entire cabinet was nearly done, but it would really be easiest to fix this before painting the rest of the piece.
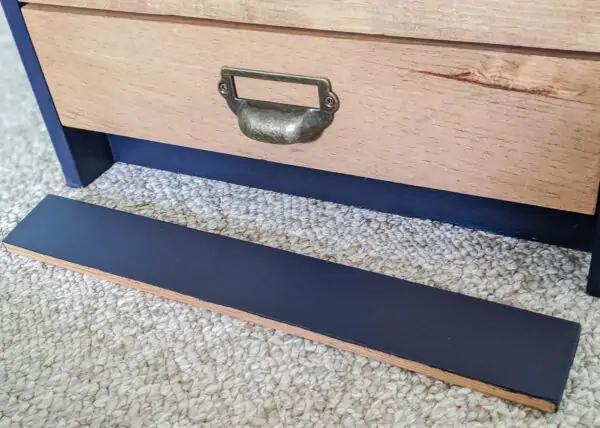
To fix it, I cut a piece of scrap wood to fit the recessed space at the bottom of my cabinet and then attached it using wood glue and a couple of nails through the sides of the cabinet. Then I filled in the nail holes and touched up the paint.
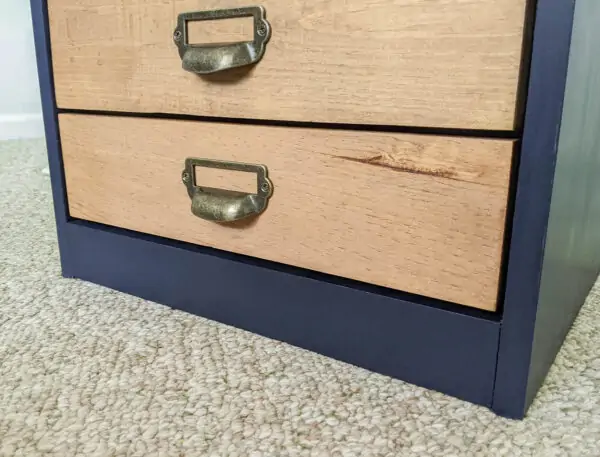
This was a really simple change, but changing that small detail really made a huge difference to the feel of the piece.
Finished Faux Apothecary Cabinet
I love how this little cabinet turned out! It’s got a great vintage, midcentury vibe that’s a far cry from it’s plain jane beginning!
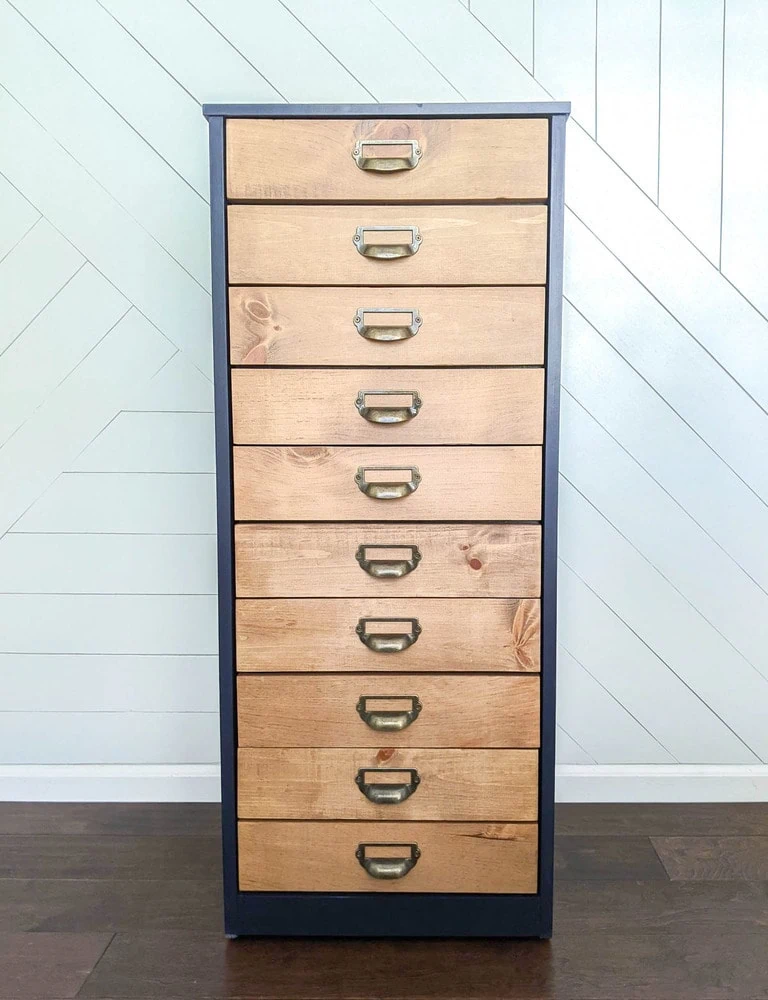
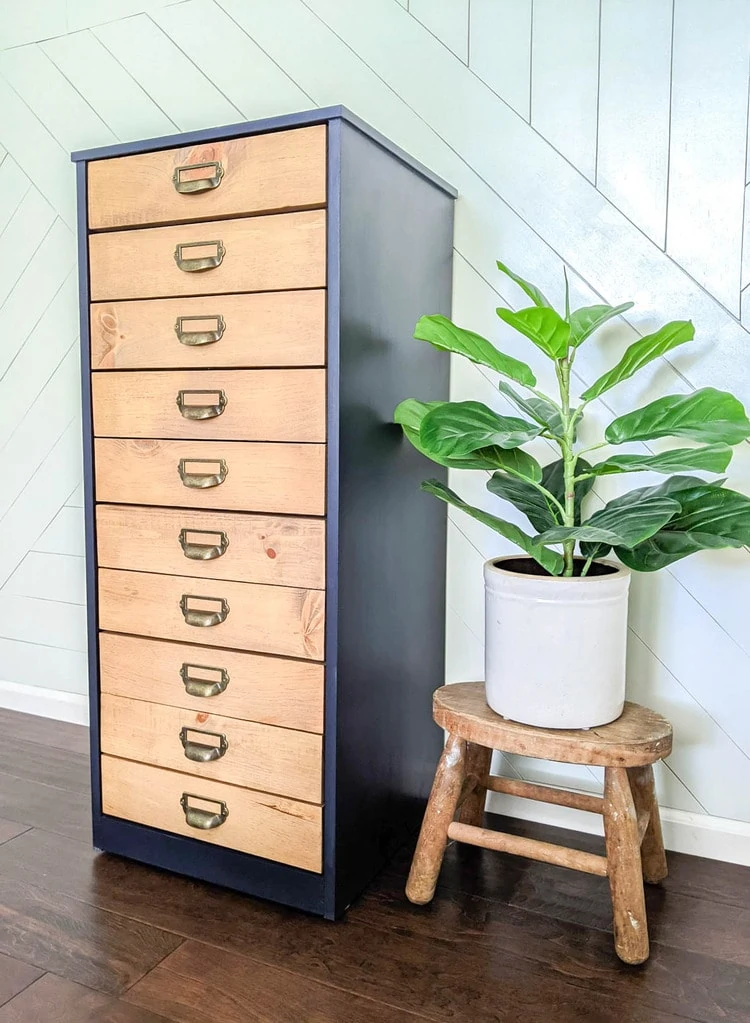
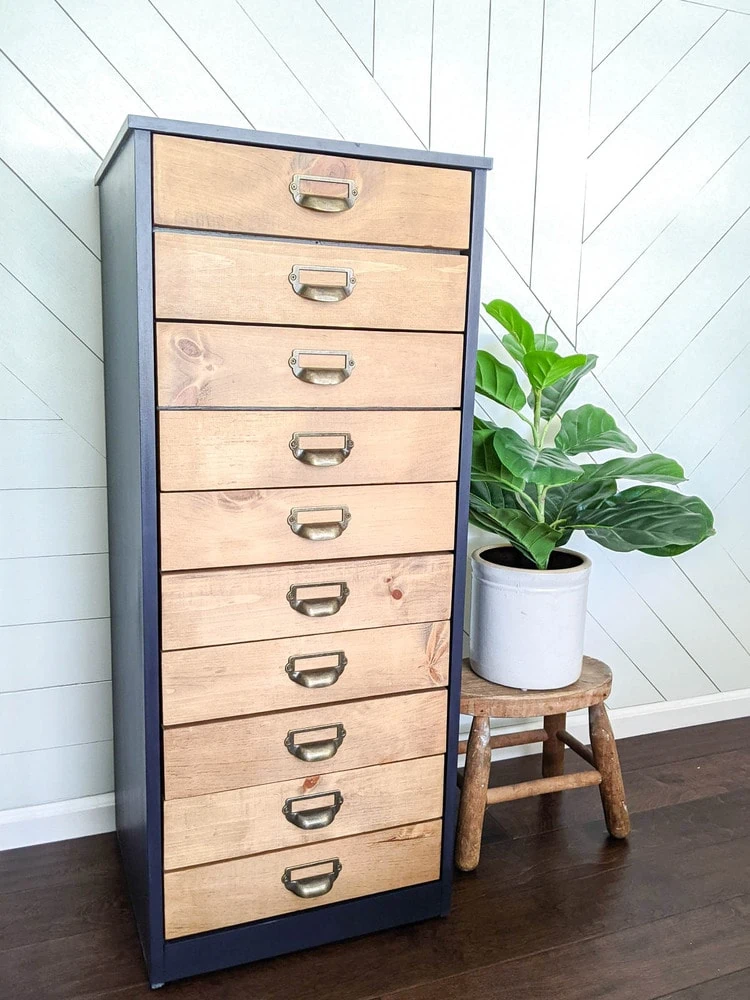
I’ve got about a million places I could use this little storage piece, but for now it has a new home in my office and I can’t wait to fill all those drawers up!
Google Web Story: Turn a Dresser into a DIY Apothecary Cabinet
Next, check out these other furniture makeovers I think you’ll love:
I’d love for you to pin this post on Pinterest!


Carrie, what a great job you did on this piece! Honestly, when I saw the initial photo (before & after), I thought the ‘after’ cabinet was your inspiration, not what you accomplished. So impressive! Just Wow! Good for you and thanks for sharing!
Thank you so much! I had a lot of fun with this one!
What a fabulous job! Love it!!!
Thank you!
Love this makeover!!
Thank you!
Hi Carrie! This was a great makeover. I definitely Pinned it. Hopefully someday I can try it.