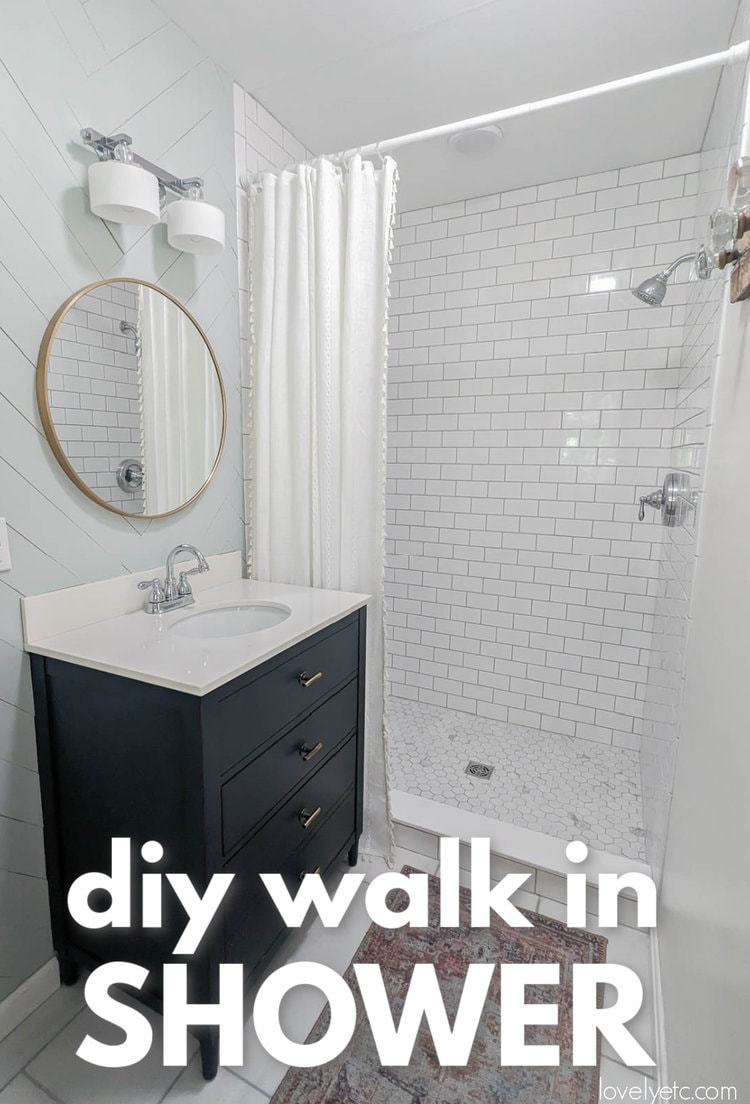
The Easier Way to Build a DIY Walk in Shower
Step by step tutorial for building a DIY walk in shower using the Schluter Shower System including how to install the shower pan and shower curb, how to waterproof the walls, and troubleshooting tips.
The DIY tile shower was by far the most important part of my small master bathroom renovation. Renovating that dark, cave-like shower completely transformed the entire room. It made a bigger difference than the new flooring, vanity, and everything else in the room combined.
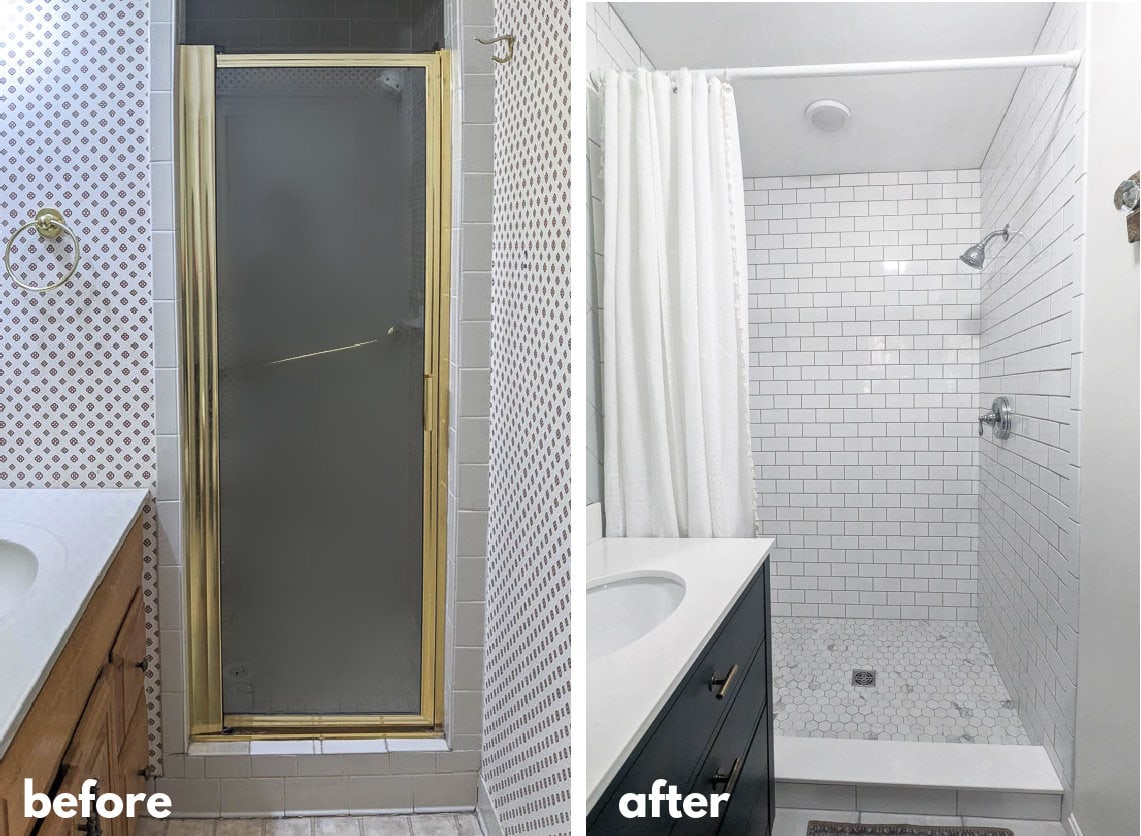
At the same time, it also took more time and effort than everything else in the room combined. Between putting up the new cement board, installing the shower pan, waterproofing, tiling and grouting, there were definitely plenty of moments where I felt like I would never finish working on that shower!
But thankfully, I did finish it and I can attest that it was more than worth all the work. The shower is now light, bright, and inviting. And by doing it myself, I saved a few thousand dollars which is pretty darn fantastic.
I am absolutely not a professional shower installer, but I wanted to share my experience with installing my own DIY shower because when I was planning my own shower renovation, I had a hard time finding great resources for DIYers.
I would have been over the moon to talk to another home DIYer who had just finished a shower install and could answer all my questions. Someone who had already found the best materials to use when you don’t already have a truck full of professional equipment and who had figured out what to do when things aren’t going quite as smoothly as the product instructions promised.
And while I’m not going to claim that this DIY shower was a quick or easy project, I do feel confident I found the easiest way to install your own custom shower.
In this post, I’m sharing:
- A brief overview of the different DIY walk in shower options
- A breakdown of the cost of my DIY shower
- A materials list
- A step by step tutorial for building a shower using the Schluter Kerdi shower system
This post contains affiliate links which means if you make a purchase after clicking a link I will earn a small commission but it won’t cost you a penny more. Click here to see my full disclosure policy.
DIY Walk in Shower options
As much as we all want a beautiful shower, I think we can agree that a shower’s main job is to serve it’s purpose well. It needs to be waterproof, it needs to drain well, and it needs to continue to do these things for many years to come.
When you think about the decisions involved in building a walk in shower, you probably start thinking about which beautiful tile you are going to choose. And while that is a big decision, the most important decisions have to do with the guts of the shower – the parts that will eventually be completely hidden from sight. This includes the shower pan, the shower curb, and the shower walls.
There is more than one way to build a good, watertight shower, so before you even begin, you have some choices to make. Which materials and methods you decide to use will significantly impact the time and cost of your project as well as the level of difficulty.
DIY Shower pan options
In my opinion, the shower pan is the most important decision in this whole process. There are several options for building your own shower pan and each has its own pros and cons.
Premade acrylic shower pan
Acrylic shower pans come in the most common shower sizes and can be installed right in your shower on top of the subfloor. These are by far the easiest to install, especially because you won’t even need to tile them. The downside is they can get expensive and they only come in a very limited range of shapes, sizes, and colors.
DIY concrete shower pan
This is the old school way of making a shower pan. It involves pouring concrete over a waterproof membrane to form a shower base that slopes appropriately down to the drain and can be tiled over. The materials for this method are very affordable, but it involves a lot of labor and can be quite challenging if you’ve never done it before.
Premade foam shower pan
The newer way to build your own tile shower pan is to use a premade foam shower pan. There are several companies making these foam shower pans including Schluter and Wedi. The shower pans come ready to install and tile over, with the correct slope and drain placement integrated into the foam. These shower pans can easily be trimmed with a utility knife to be the perfect size for your shower. They can be installed right over your subfloor and the installation is much easier than building your own cement pan, but they aren’t super cheap.
DIY shower wall options
Once you’ve figured out your shower pan, you also need to decide how you are going to waterproof the walls of your shower. There are several options here as well.
Cement board with liquid waterproofing
Cement backer board is the most common material used for tile shower walls. You can’t put tile directly onto cement board though; the board must be waterproofed first. There are a few different options for waterproofing. One option is applying a liquid waterproofing membrane like RedGard. You roll or brush the liquid onto the cement board before installing tile to create a waterproof seal.
Cement board with waterproof membrane
Another option is using a waterproof membrane like Schluter Kerdi. This is a sheet membrane that comes on a large roll. Picture applying wallpaper to a wall – this is sort of like that. You are sticking sheets of waterproofing material onto the walls with thinset. Once it dries, it forms a waterproof barrier and you can lay tile over it.
Kerdi-board
The third option is using Kerdi-board rather than regular cement board. Kerdi-board is similar to cement board with Kerdi membrane already applied. This can save you a few steps in the process, but it’s generally the most expensive option.
Schluter shower system
After looking at all of the options, I decided to build my walk in shower using the Schluter Kerdi shower system. Overall, using this system really seems like the easiest way for a DIYer to build a custom tile shower.
You can buy a Schluter shower kit that includes everything you need build a tile-ready shower including the foam shower pan, foam shower curb, a roll of Kerdi membrane, a Kerdi drain flange, Kerd-iband for sealing the seams, Kerdi corner pieces, and 2 valve gaskets. These kits are available on Amazon and come in a variety of sizes. The only things you will need to buy separately are thinset and a drain grate.
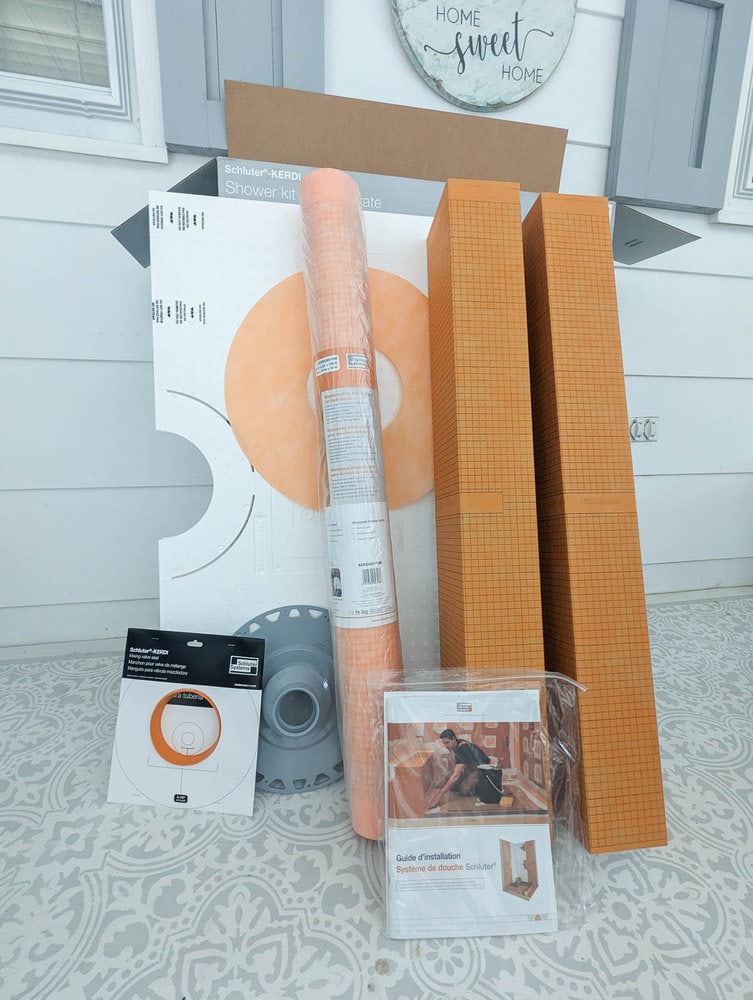
Our shower is 37″x52″, so I used this 38″x60″ kit and cut it down to the correct size.
I love that I was able to buy everything I needed all at once, but you can also buy the pieces separately if you don’t need everything that comes in the kit or want to do a bit of mix and matching.
Cost to Build a DIY Walk In Shower
Here is a price breakdown of all the materials I used:
- Schluter shower kit – $400
- Schluter All-Set thinset – $39 x 2 bags
- Drain grate – $43
- Cement board- $13 x 7 sheets
- Cement board screws – $12
- Mesh tape – $8
Total Cost: $632
According to Angi.com, the average walk-in shower costs $6700 to install. That total, of course, also counts the actual tile, tiling, and shower door in addition to the demo and waterproofing. But even accounting for those costs, doing this yourself will literally save you thousands of dollars.
How to Build a Walk in Shower
I’m going to walk you through the process of installing a custom tile-ready shower using the Schluter Shower System. Not only will this help if you decide to tackle this project on your own, but seeing everything involved can also help you decide if this is even something you feel ready to tackle as a DIY project.
Here’s a rough breakdown of the steps in order:
- Demo
- Cement board walls including shower niches
- Install Kerdi waterproofing membrane to walls
- Install foam shower pan
- Install foam shower curb
- Install Kerdi band and corners
- Do a water test
Once your shower passes the water test, you are ready for tile! I won’t be covering how to tile the shower in this post, but here are the basic steps:
- Tile the shower floor and install the drain grate
- Tile the walls and shower curb
- Install the shower trim (shower head and faucets)
I also recommend checking out the helpful installation videos at Schluter’s website.
Materials
- Schluter shower kit – each shower kit includes everything you need to waterproof your shower except the thinset and the drain grate. They include the shower pan, shower curb, a roll of Kerdi membrane, the Kerdi drain flange, Kerdi-band for sealing the seams, Kerdi corner pieces, and 2 valve gaskets. There are several different kits available – choose the one with the correct shower pan for your shower based on the size of your shower and the drain configuration.
- 1/2″ Cement backer board – the foundation of your shower walls
- Cement board screws – for attaching the cement board to the stud walls, 1 1/4″ – 1 5/8″ sizes work well
- Alkali resistant mesh tape – for sealing the seams between your cement board
- Schluter premade shower niche – if you want to include a shower niche in your shower, using one of these premade niches is by far the easiest way to do it. There are several different sizes and configurations available.
- Schluter All-Set thinset – for attaching the Kerdi membrane. shower pan, and shower curb. There are only a few specific thinsets that you can use with these products and this is the one I used. (Note: this sealer is available online at Amazon, but is much cheaper in stores)
Tools
- Utility knife – for cutting your cement board and trimming your shower pan and shower curb
- Drill – for attaching the cement board and mixing the thinset
- 5 gallon bucket – for mixing the thinset with water
- Paint mixer attachment for drill – for mixing the thinset thoroughly
- 1/4″ x 3/16″ V notch trowel – for installing the Kerdi membrane
- 1/4″x 3/8″ square notch trowel – for installing the shower pan
- Putty knife – to help smooth the Kerdi membrane into place
- Large sponge – to dampen the walls before installing the membrane, a grout sponge works great for this
- Cardboard knife – this is a handy little tool that works well for cutting the shower curb to size, especially if you are making it shorter
- Drain test plug – for plugging the drain to do a water test to make sure the shower is watertight before tiling
Demo your old shower
If you’re redoing an old shower, the first step is demo. I have an entire post about how to demo a bathroom if you want some tips.
Put up the cement board and any shower niches
Next comes the cement backer board. You’ll want to cover all your shower walls with 1/2″ cement board. Attach the cement board to the studs of your shower using cement board screws.
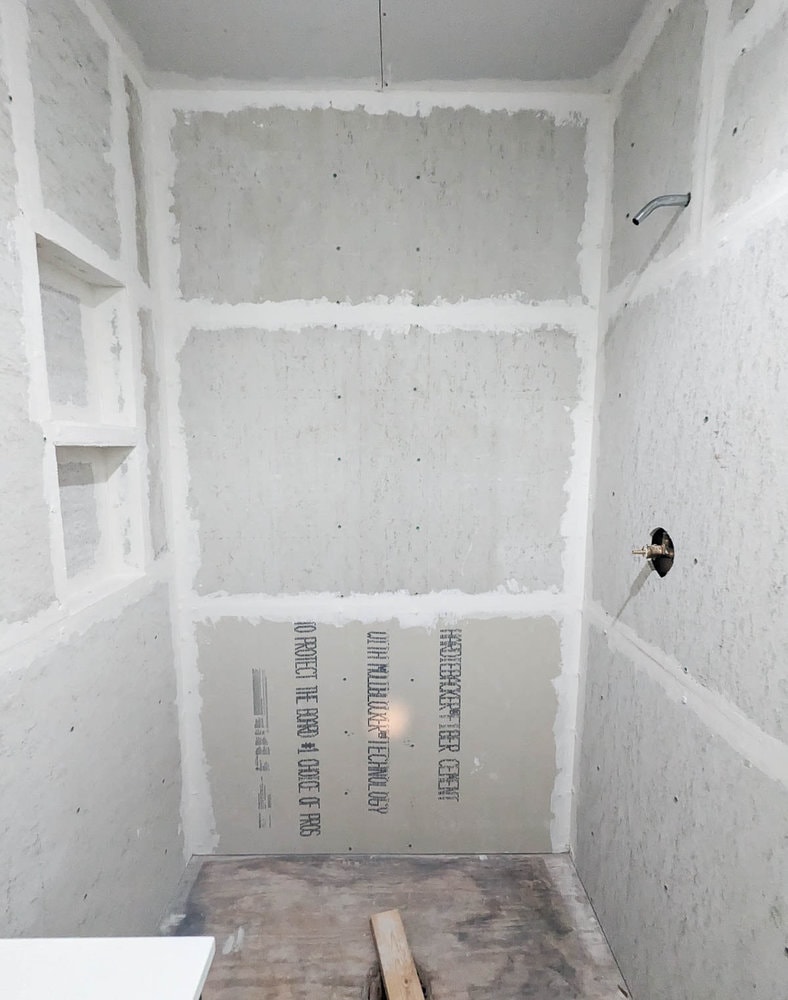
Before you start installing your cement board, it helps to plan out where each sheet will go so you can use as many whole sheets as possible. The simplest way to cut the cement board it to score the surface with a utility knife and then snap it.
Once the cement board is installed, seal the seams using alkali resistant mesh tape and thinset.
At this point you will also install any shower niches you are using. You can buy premade Schluter shower niches that come already covered in Kerdi membrane so you don’t have to worry about waterproofing all the nooks and crannies.
I did not do this. I wanted to save money so I built my own shower niches out of cement board which I really regret. The niches turned out great, but they took sooo muuuuch work. I severely underestimated how much time two simple shower niches would add on to this total project. Next time, I’m definitely spending the money for the readymade niches!
Waterproof the walls with Kerdi membrane
Once all the cement board is in place, it’s time to waterproof them with the Kerdi membrane. When installing Kerdi membrane, start by cutting your first piece to size.
Then wipe down the wall you’ll be working on with a damp sponge before spreading thinset onto the wall using a 1/4″ x 3/16″ V notch trowel. Notch the thinset in one direction and then smooth the Kerdi membrane into place, sort of like applying wallpaper.
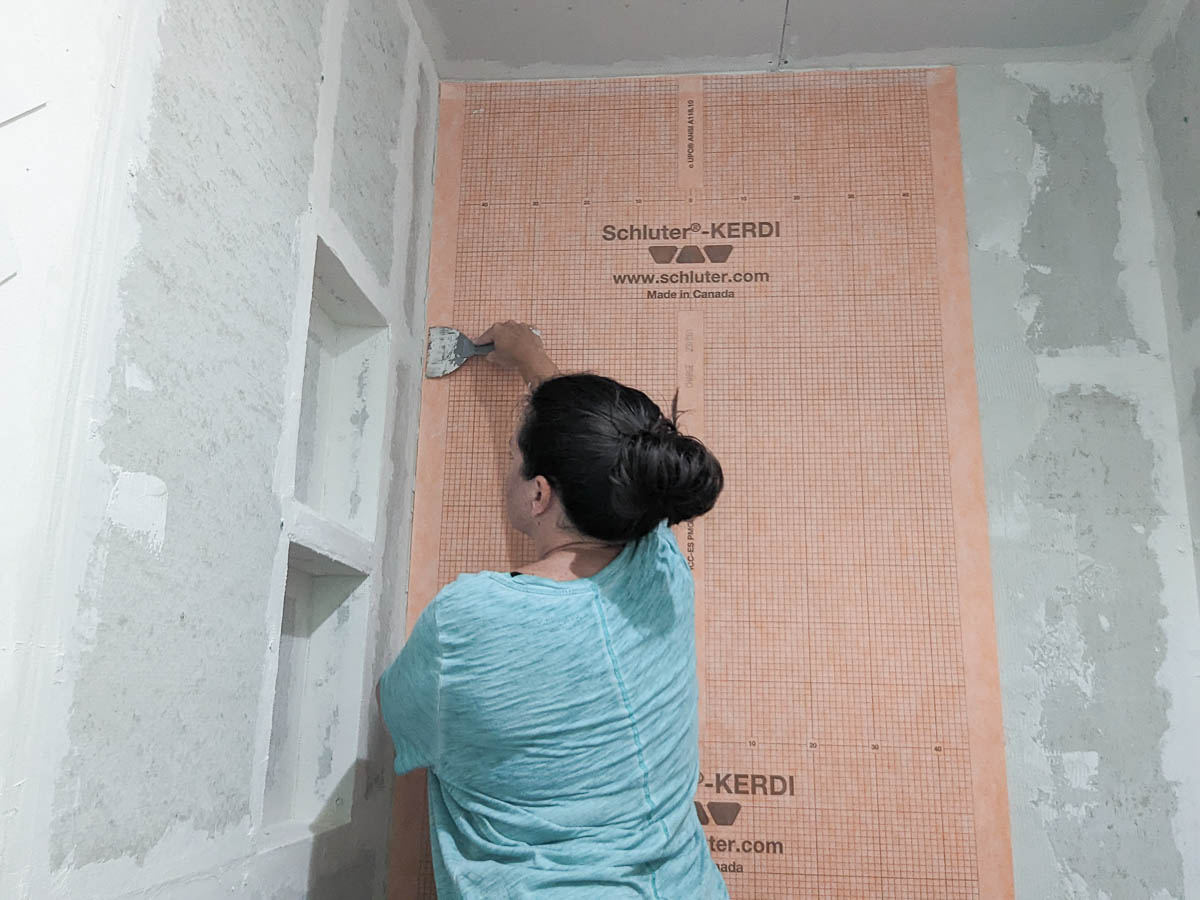
Once the membrane is applied, use a flat trowel or putty knife to smooth the membrane and squeeze any excess thinset to the edges. You can then trowel off the excess.
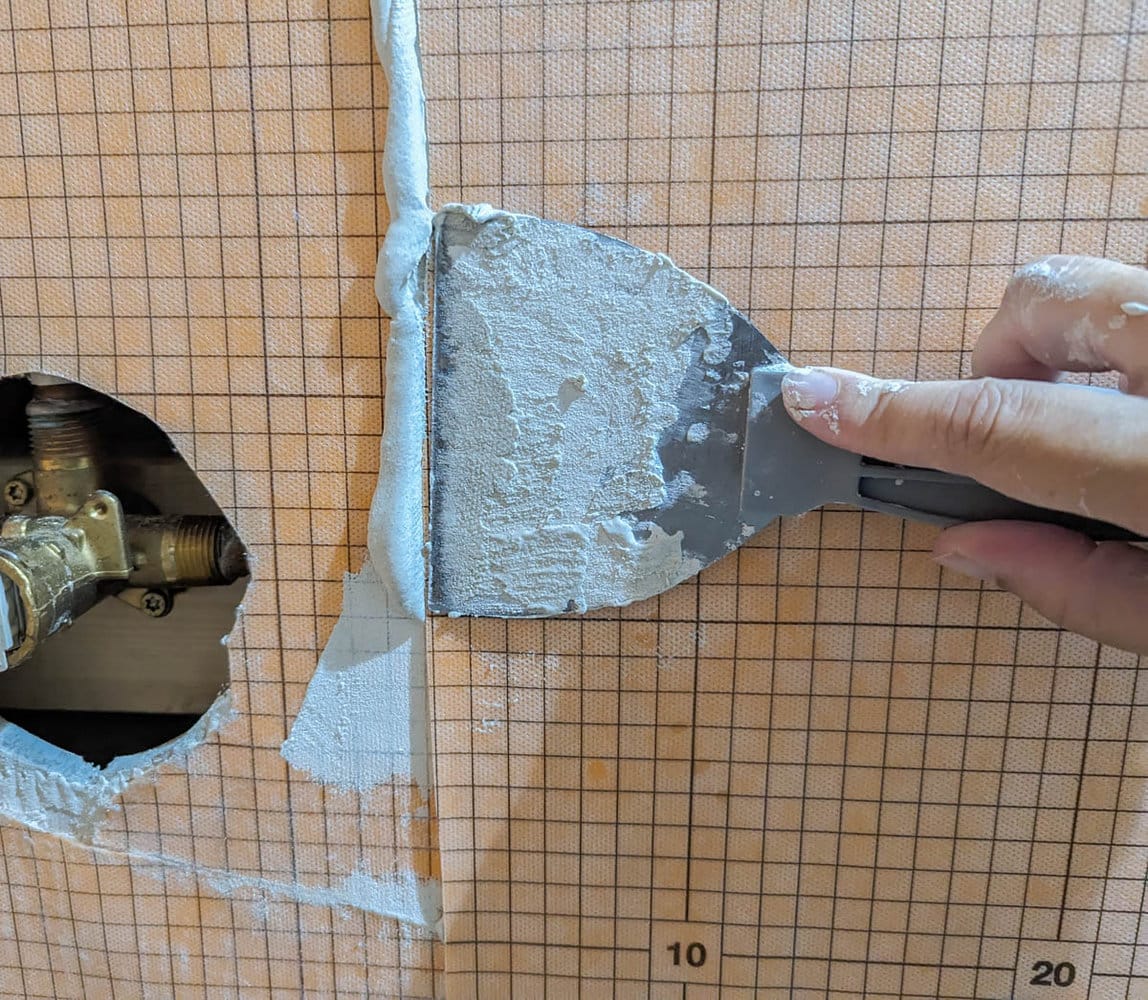
Wherever two sheets of Kerdi membrane meet, you want to overlap the two sheets by two inches and then cover the seam with thinset. (Another option is to have the sheets just touch, then apply a strip of Kerdi-band over the seam, and cover with thinset. I prefer to overlap because it saves time and materials.)
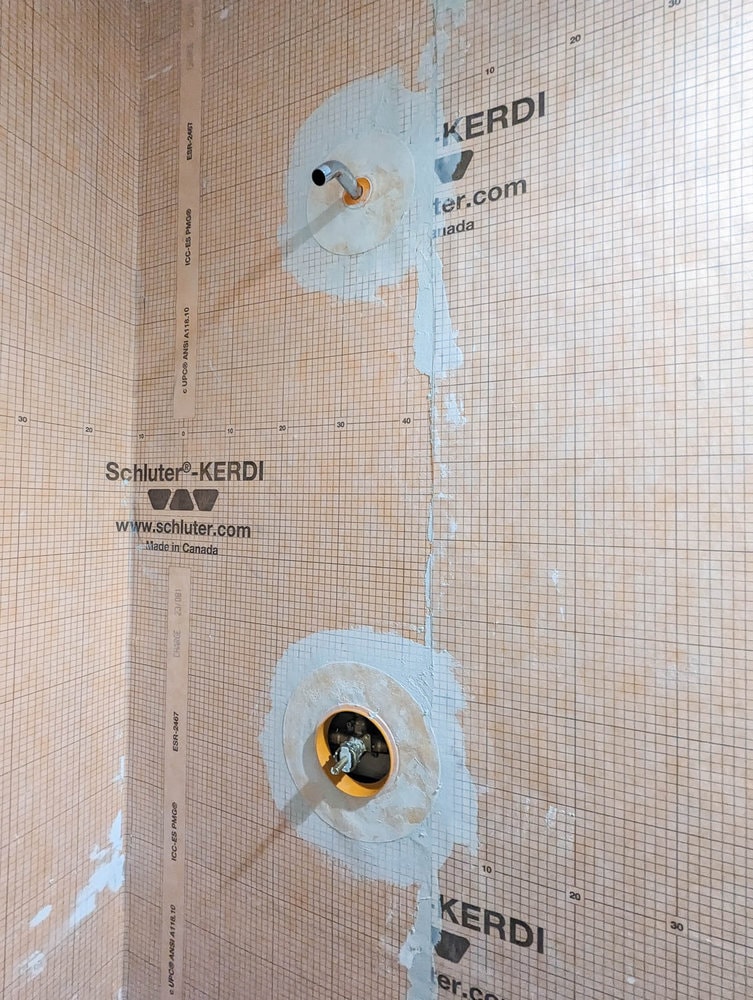
Your shower kit also includes two pipe valve gaskets to waterproof around the showerhead and the shower valve. You’ll install these over the Kerdi membrane on the wall.
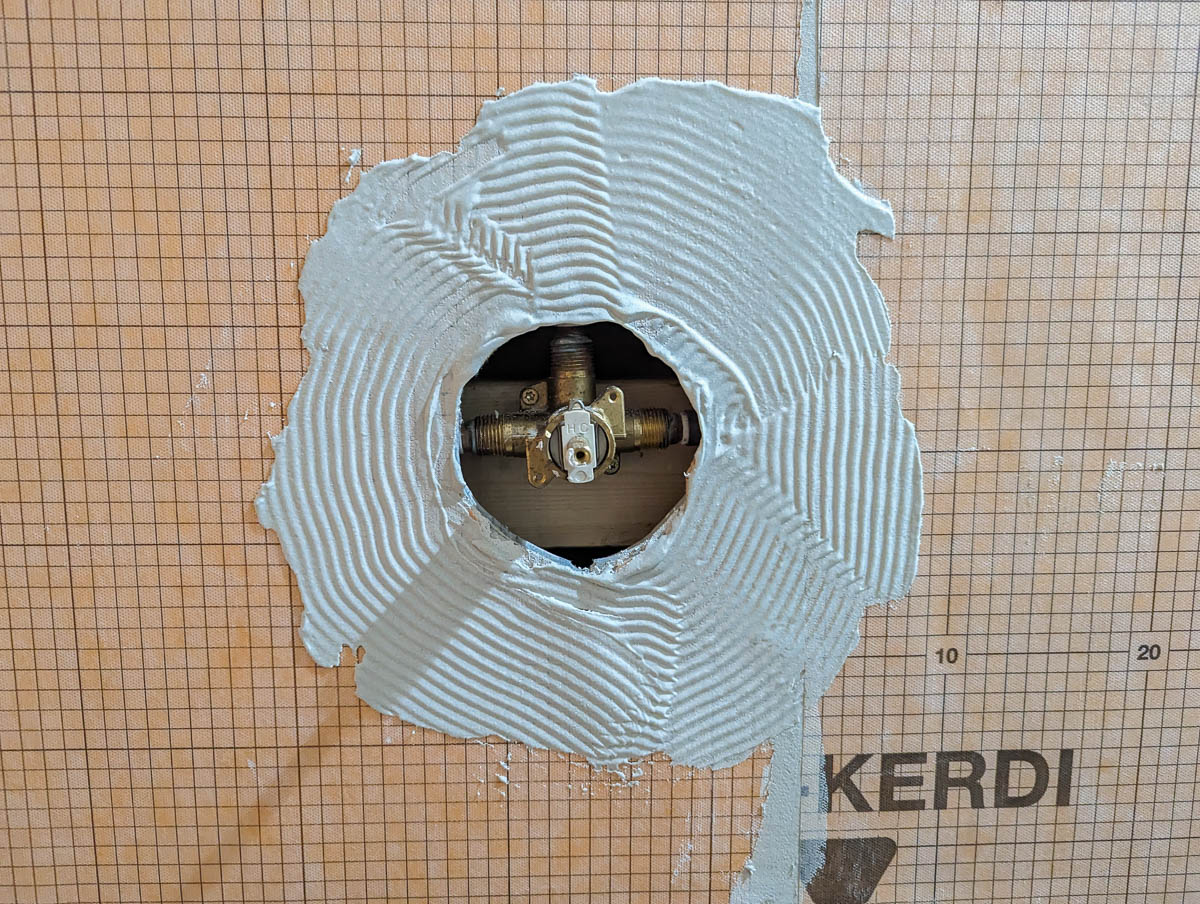
Trowel a layer of thinset around where the valve will be. Then smooth the gasket into place and seal the seam with more thinset.
How to apply Kerdi membrane without the thinset drying out
Installing the Kerdi membrane was actually more difficult than I imagined. In the demonstration videos, it all seems so straightforward and simple. But in reality, it was a struggle.
My thinset was starting to dry out before I got the entire wall section ready to apply the membrane. If you aren’t sure how to tell, you will know it is drying out too quickly if the thinset begins to develop a bit of a film and keeps it’s shape when touched.
This is a real problem because it will keep the thinset from bonding well to the actual membrane and this bond is what forms the waterproof seal.
It took a bit of trial and error, but I was able to figure out where I was going wrong and get the membrane properly applied. If you are also struggling to apply your Kerdi membrane quickly enough, here’s what I suggest:
- Make sure you’ve added enough water when mixing your thinset. Even if you followed the mixing instructions, if your thinset seems to be drying out very quickly, mix in a bit more water.
- Be sure to sponge down the cement board with water before you begin applying the thinset. This helps keep the cement board from sucking all the moisture out of the thinset so quickly.
- As the day goes on, the thinset in your bucket may begin to dry out. If it seems to be getting a bit thicker, mix in more water.
- If you are still having trouble with your thinset drying out, you can work in smaller sections. You can cut each long strip of Kerdi membrane in half and just apply one half at a time. Working in smaller sections means there is less thinset to apply at a time and less time for it to dry out.
Once I figured out how to keep my thinset from drying out, hanging the Kerdi membrane went very smoothly.
Apply Kerdi-band to the seams
The Kerdi membrane works well for waterproofing everywhere it covers, but the seams are still vulnerable to water getting through. Your shower kit will come with a roll of Kerdi-band to seal up these seams.
Kerdi-band is a five inch wide roll of Kerdi membrane. It is thinner than the regular Kerdi membrane so that you can apply it over the seams without adding too much thickness to the wall. You install Kerdi-band the same way as the membrane. Apply thinset, place the Kerdi-band, and smooth it into place.
You’ll want to apply this anywhere there is a seam – between sheets of Kerdi membrane (if you didn’t overlap them by 2″ earlier) and around shower niches for now. Once the shower pan and shower curb are installed, you will also use Kerdi band to seal all the pieces together.
Install the Schluter shower pan
The next step is the shower pan. There are a few tricks to getting your shower pan just right, but overall, it is a really easy process. (Especially compared to making a cement shower pan!)
Before you begin, be sure to measure your shower carefully. You may need to trim your shower pan a bit to fit properly.
This is definitely a measure twice, cut once type of situation. Since the location of the shower drain is already integrated into the shower pan, it’s important to make sure that it lines up correctly with your drain pipe. Instead of simply measuring the overall size of your shower, you need to measure how far each side should be from the center of your drain.
Mark this measurement carefully and then you can score the foam shower pan with a utility knife and carefully snap off the excess.
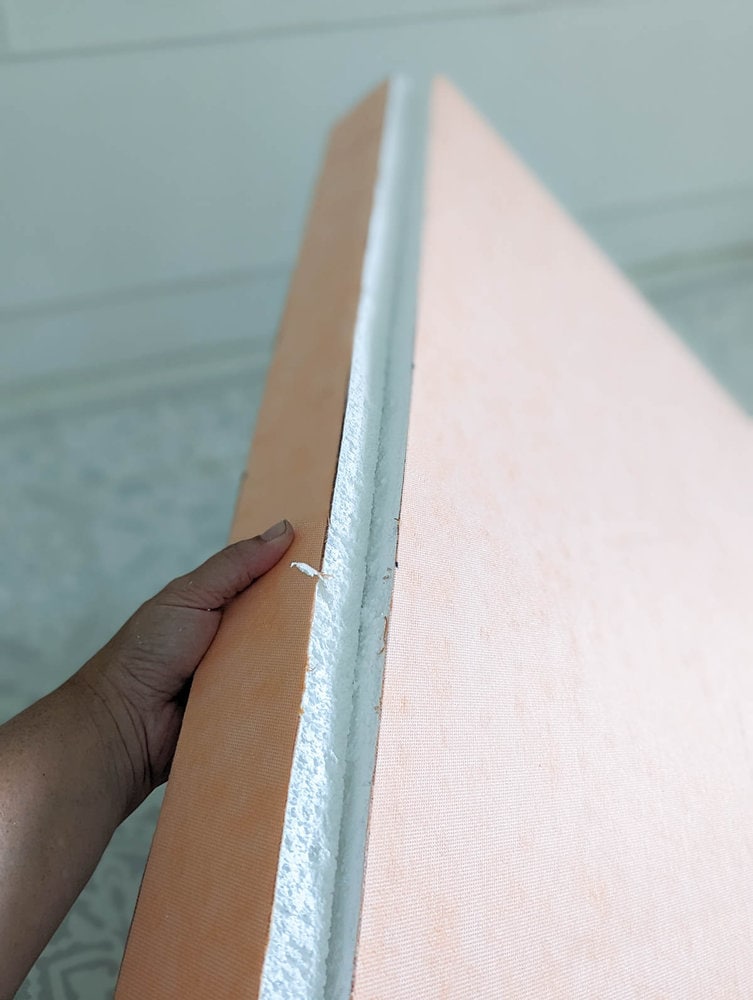
Once it is cut to size, you should dry fit your shower pan in your shower to make sure everything is perfect.
Then apply thinset to your shower subfloor using a 1/4″x 3/8″ square notch trowel. Notch the thinset towards the shower curb and set the pan into place. You can put a big piece of cardboard over your shower pan and then step all along it to press it firmly into place.
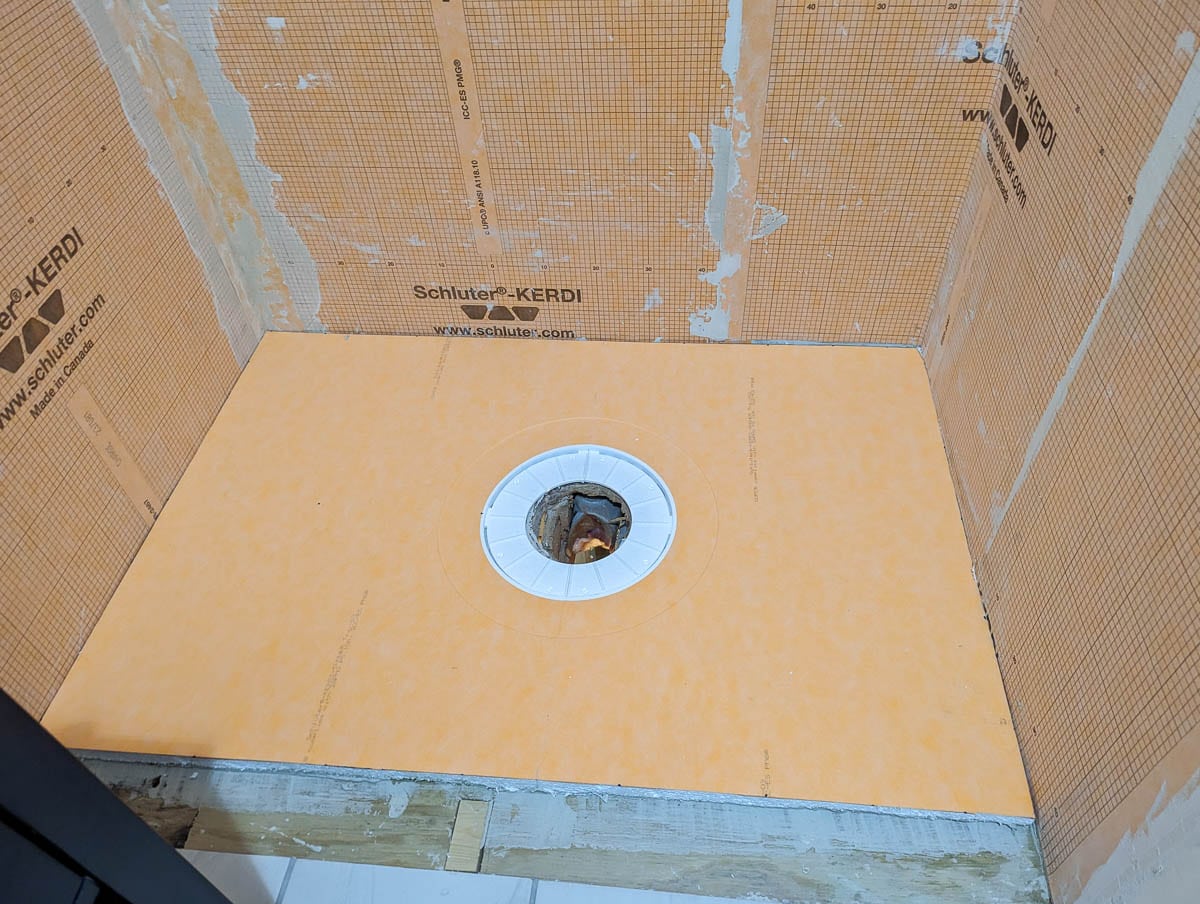
Once the shower pan is in place, you can install the Schluter shower drain flange. If you already have a shower flange in place that screws on, you’ll need to use the Kerdi drain adaptor kit.
If you are connecting into an open drain pipe, you can use the standard Schluter drain that comes with the shower kit. Use your V notch trowel to spread thinset in the inset area around the shower drain hole. Press the Kerdi-drain firmly in place and wipe away any excess thinset. Apply more thinset over the drain and place the Kerdi collar over the drain. (This is a precut round bit of Kerdi membrane that is included with the shower kit.) Press it firmly into place using a flat trowel or putty knife.
You’ll be adding the final drain grate during the tiling step.
Install the Schluter curb
I found installing the shower curb to be one of the easiest parts of this entire process. The shower curb is made from hollow, rigid foam and can be easily cut to the exact length you need. If you have a large shower or a shower that needs a curb along two sides, you can join two pieces of curb together.
The Schluter shower curb comes in a standard six inch height. You can definitely use it at this height, but I wanted my curb a bit lower, both for aesthetic reasons and to make it easier for people of all ages and abilities to step in and out of the shower. You’ll need to check local building codes, but in most places, the curb just needs to be two or more inches above the height of the shower pan. I cut my shower curb down to 4 inches high.
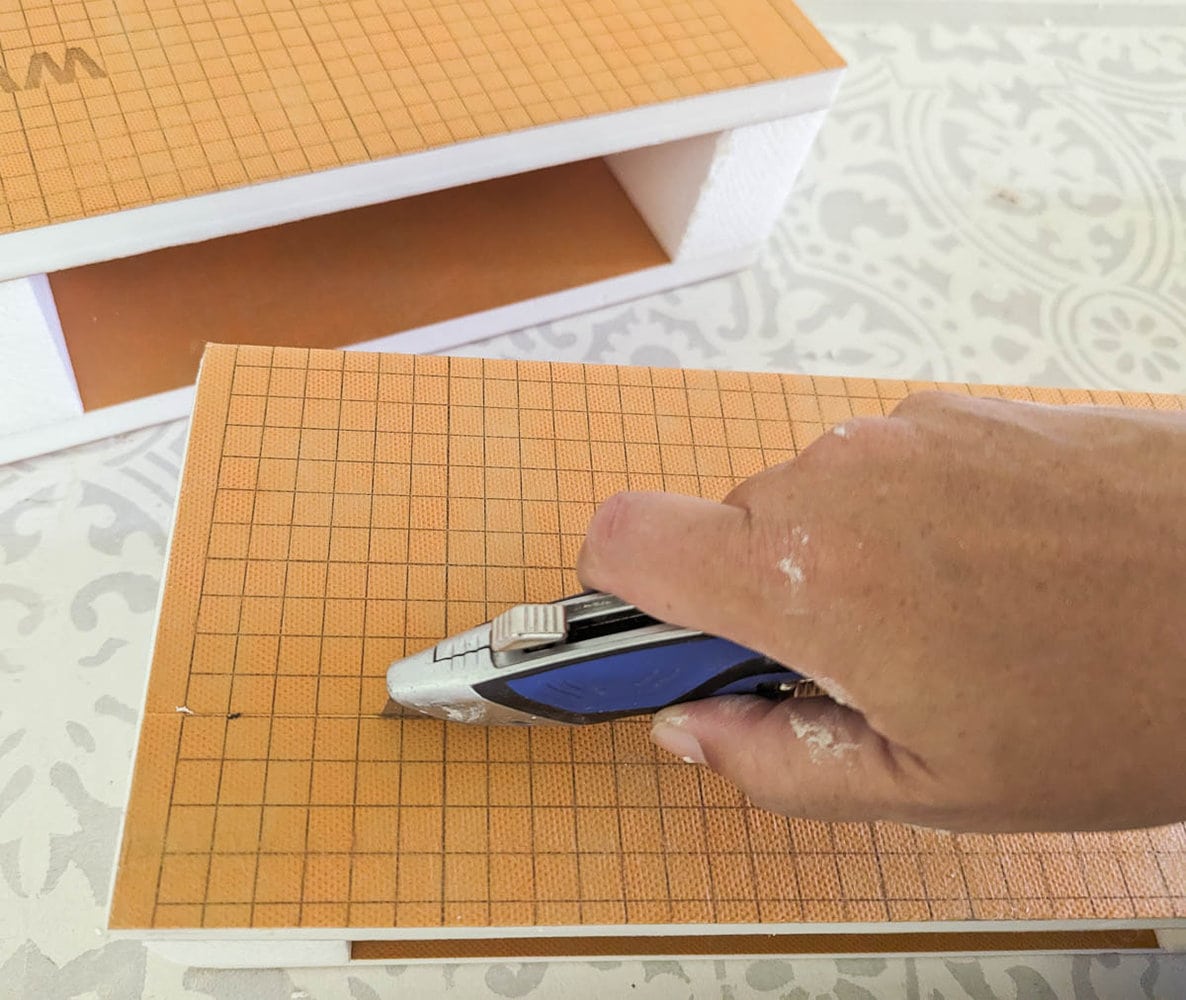
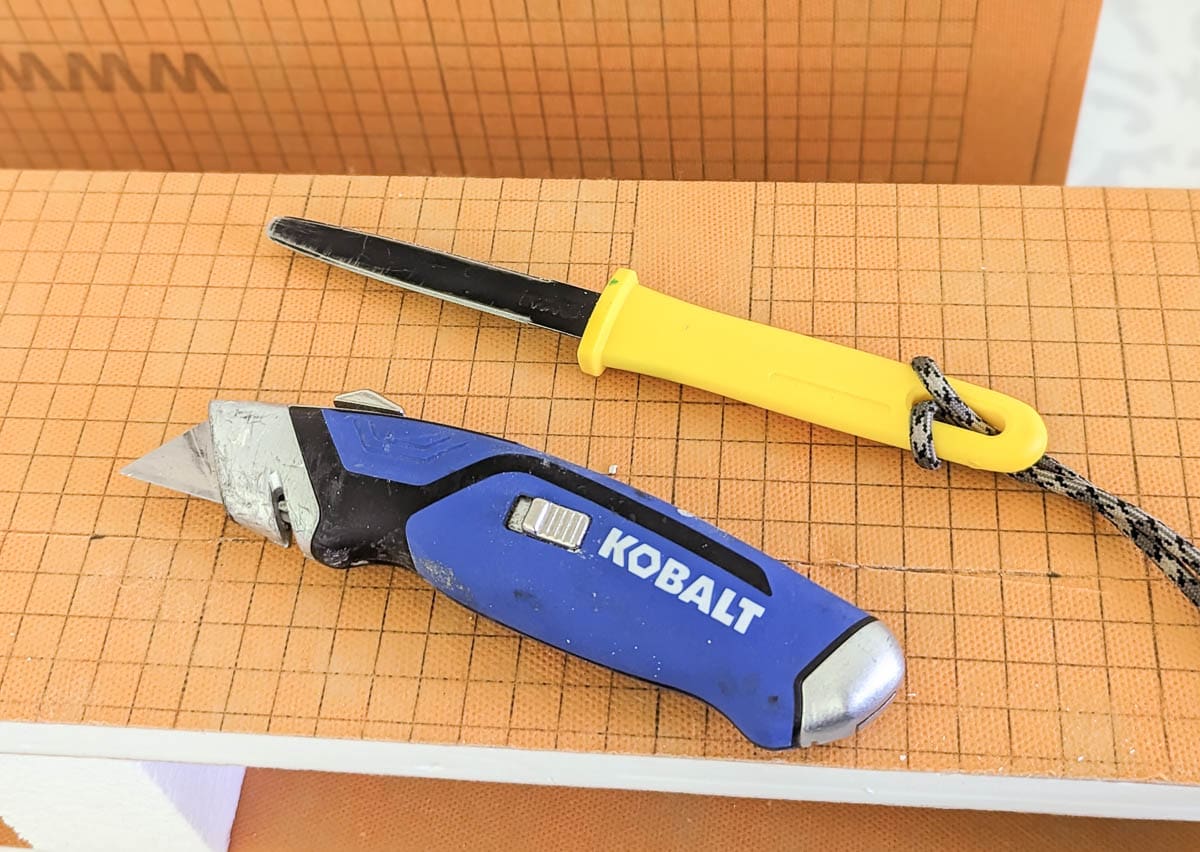
To cut your shower curb to the length and height you want, you can cut it pretty easily with a utility knife. There are some areas where a standard utility knife may not be quite long enough to cut all the way through. For those areas, I found that a simple cardboard knife worked great. (I love these little cardboard knives – they’re also great for opening boxes quickly.)
Once you have cut your curb to size, apply thinset to the all the surfaces that will be touching the floor or walls and set it into place. If you are butting two pieces of curb together, you can also apply thinset between the two.
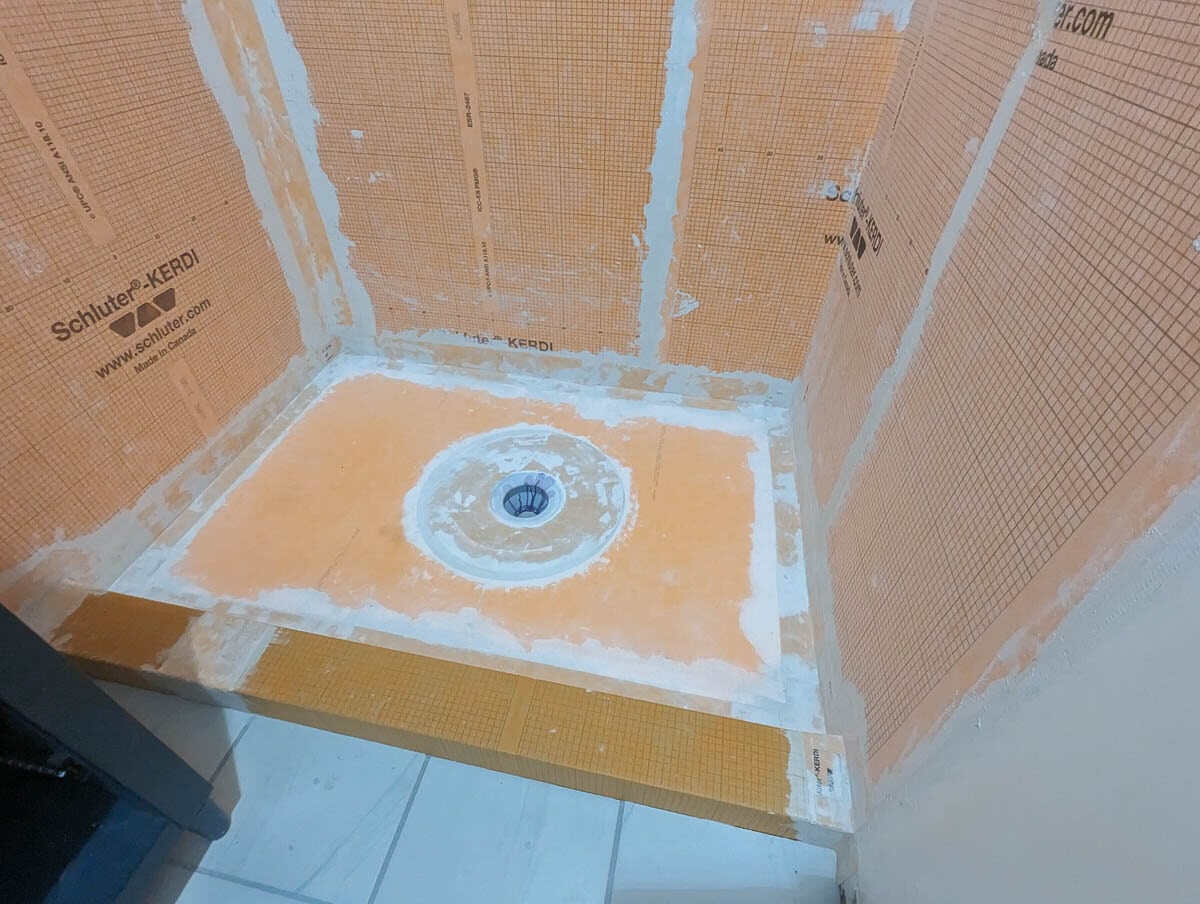
Install Kerdi-band and corners around bottom of shower
The final step is to waterproof all the seams around the shower pan and shower curb.
In addition to a roll of Kerdi-band, your Schluter shower kit should also include several pre-formed corner pieces. You can apply these to the corners where the shower pan meets the walls and the shower curb using thinset. Then finish the rest of the seams around the shower pan and shower curb using Kerdi-band.
If you used more than one piece of shower curb, be sure to use Kerdi-band on that seam as well.
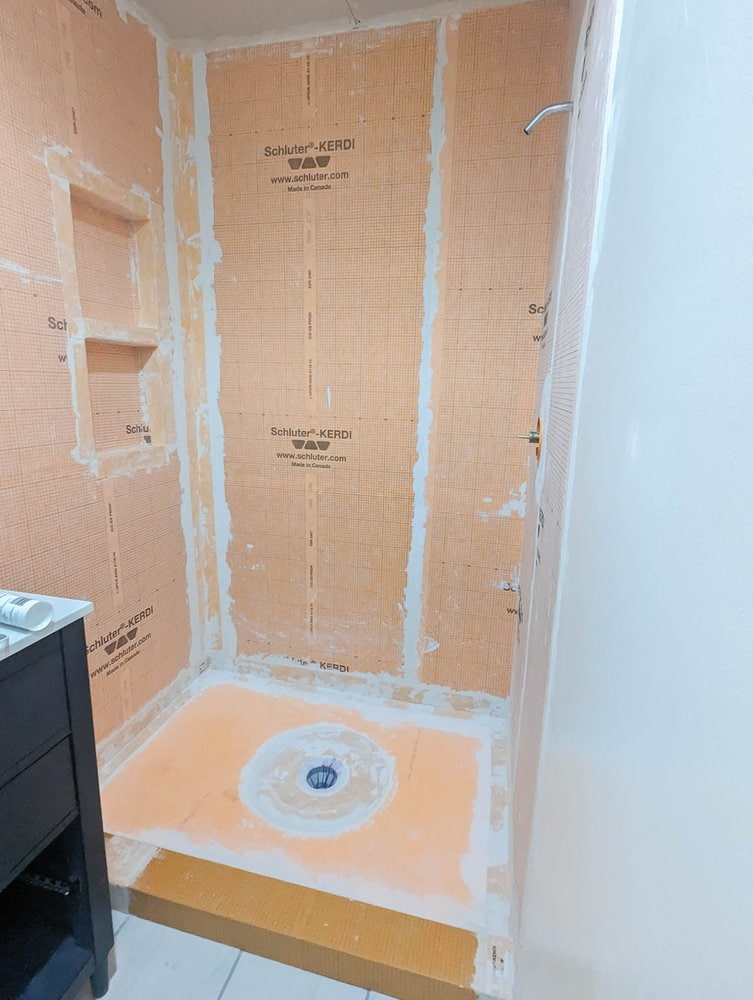
The twenty-four hour water test
Once all of your waterproofing is finished, let it dry for at least twenty-four hours and then it’s time to put it to the test.
It’s very important to test your shower before tiling to make sure it actually is waterproof. If there are any gaps or holes for water to seep out, that water will be seeping out into your walls and subfloors and it could be months or years before you ever realize there’s a problem.
Nobody wants to have to tear out their beautiful new shower after only a few months; it’s immensely better to make sure everything is as it should be now.
Doing a twenty-four hour water test is quite simple You’ll need to get a drain plug for your shower drain. Be sure it is in securely. Then run water into your shower nearly to the top of the curb. Mark the water level on the wall and then wait at least twenty-four hours. If the water is still at the same level, your shower is good to go. If it isn’t, there’s a problem.
Once you’ve passed your 24 hour water test, your shower is ready for tile!
I’ll leave you with a photo of my completed shower. If you’re in the middle of your own DIY shower project and feeling like it will N.E.V.E.R. end, here’s a little hope. In the end, it really is worth it.
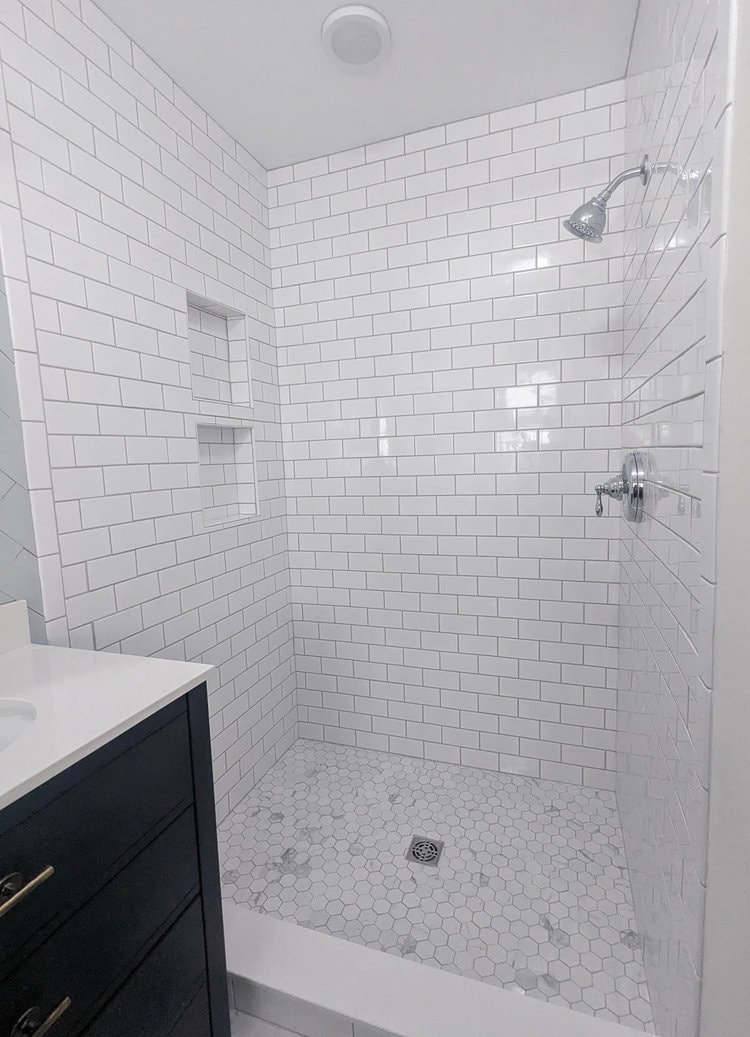
Want to see the rest of this bathroom renovation? Here are all the other DIY bathroom remodel posts published so far:
I’d love for you pin this post on Pinterest!
