How to Demo a Bathroom: A Step by Step Guide to Doing it Yourself
Learn how to demo a bathroom with this simple step-by-step guide including what tools to use and tips for removing tile, toilets, flooring, and more.
According to pretty much any home renovation show, demo day involves going all beast mode with a sledge hammer on anything and everything in the room. Once everything is thoroughly destroyed, you shove it in a dumpster and call it a day. Oh, and the whole process takes about an hour.
It makes for great TV montages, but in reality, demo is nothing like that.
In real life, you need to be careful not to damage anything that’s staying in the room – and that includes hidden things like pipes and wiring and subfloors. And unfortunately, in real life, it takes a lot longer than an hour.
Since I don’t recommend the crazy destruction you see on TV, I’m going to share how you can safely and efficiently demo your own bathroom for a DIY bathroom renovation.
This is the bathroom I’ll be demoing.
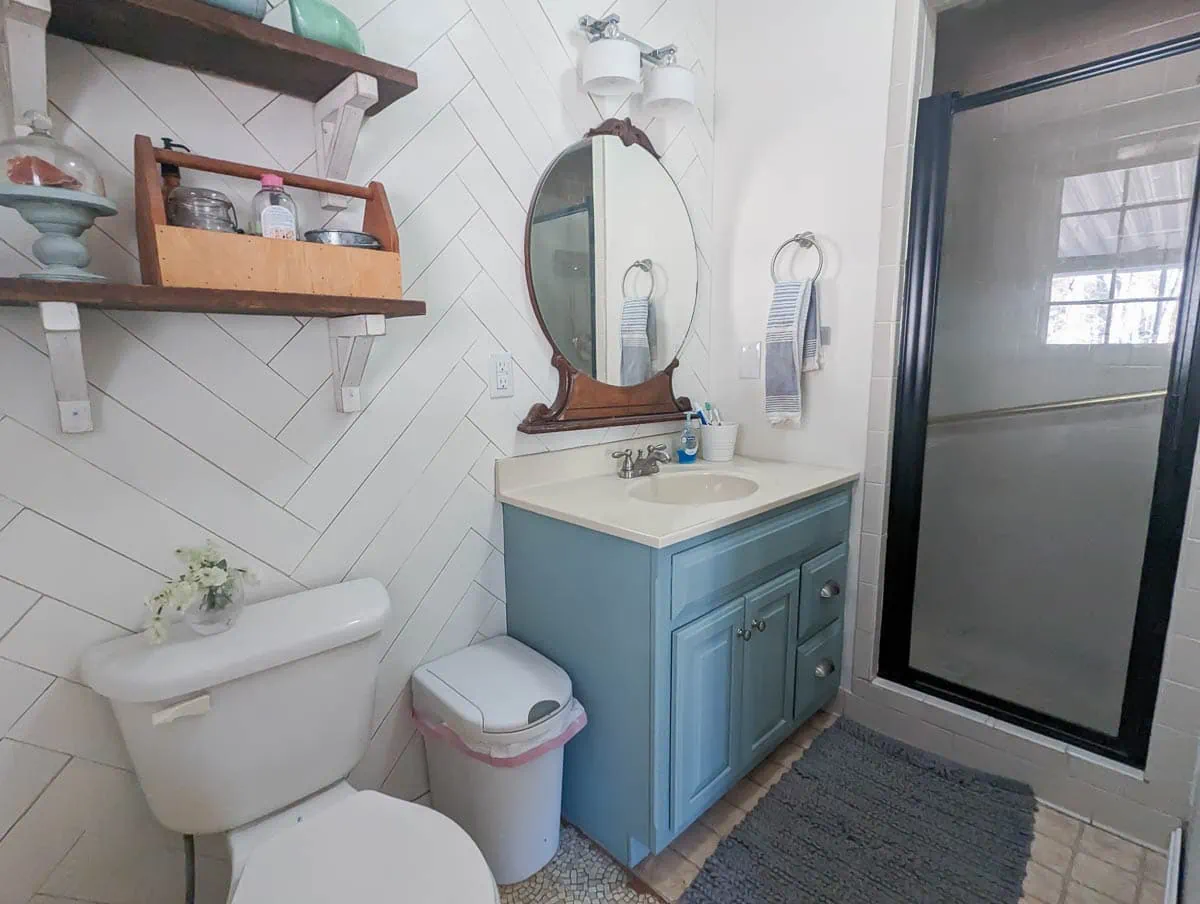
I’ve done a lot to make this dated bathroom look cuter, but hidden water damage meant everything had to go. Plus I was dying to open up that dark, closed-in shower.
This post contains affiliate links which means if you make a purchase after clicking a link I will earn a small commission but it won’t cost you a penny more. Click here to see my full disclosure policy.
Materials
The specific materials you’ll need for your bathroom depend on what types of materials you need to demo, but here’s a list to get you started.
- Utility knife
- Hammer
- Pry bar – for removing tiles and prying up floors and trim
- Oscillating tool – for removing stud walls. If you plan to do much DIY, I highly recommend adding an oscillating tool to your toolbox – they come in handy for so many projects. I currently have and love this Dewalt model but have also had great luck with the Dremel Multimax.
- Metal scraper
- Masons chisel – for removing old tile, you can use a simple handheld mason chisel or you can use a chisel that attaches to an impact driver
- Work gloves
- Mask – depending on what types of materials you are removing, a good N95 mask may be enough or you may need a full respirator
- Hearing protection – I love these protective, noise cancelling bluetooth headphones, but inexpensive ear plugs will also work.
- Cardboard, drop cloth, plastic sheeting – to protect parts of the bathroom that aren’t being demoed
- Contractor trash bags
How to Demo a Bathroom
Remove all loose items
Before you get started, you want to remove everything possible from the room – accessories, towels, art, mirrors, rugs, everything. Anything you don’t remove will get covered with dust and will likely be damaged during demo as well.
Protect any fixtures you are keeping
Before you can go any further, you need a solid plan of what is staying and what is going. Are you reusing the same bathtub or light fixtures or baseboards? If so, figure out how you are going to protect them from damage during demo. You can protect floors and other items you are keeping using cardboard, drop cloths, or plastic sheeting.
There will also be lots of dust escaping into adjoining rooms so you might want to consider covering doorways with plastic or closing doors during the worst of it.
Protect yourself
Even when you are being as careful as possible, demoing a room can be dangerous. There may be tile and other loose materials flying around the room and there is likely to be lots of nasty dust that you do not want to breathe in.
Be sure to open any windows in the room and turn on some fans to help with ventilation. It’s also important to protect yourself by wearing personal protective equipment – you should always wear eye protection, gloves, and a mask. And if you are using power tools, hearing protection is also important.
Make a plan for how you will dispose of everything.
It’s pretty amazing how much trash demoing even the smallest bathroom creates. Somehow a patch of tile that looks so small on the wall multiplies into bags upon bags of trash once removed.
You can rent a small dumpster if you are working on a very large bathroom or also have a lot of other stuff to dispose of. Or you may be able to put your trash out for bulk trash pickup, though many municipalities won’t collect construction debris.
We took several loads of trash to our local dump after demo to get rid of everything from our bathroom. There was a small charge for each load, but it was much cheaper than renting a dumpster.
Demoing a tile shower
The first thing we demoed was our shower. Since we were doing this entire bathroom reno ourselves, we knew it was going to take several weeks to complete. Luckily we do have another bathroom in our house, but only one, so we wanted to keep the toilet in usable condition as long as possible.
In a typical bathroom demo, the toilet would be removed pretty early in the process, but we left it to be the very last thing to demo. And honestly, if you are doing a slower reno like us, I highly recommend this method.
Plus, since the shower is often the biggest, most time consuming part of demoing a bathroom, it makes sense to start there.
Before you start, be sure to plug the drain of your tub/shower to keep debris out of your plumbing. And if you are not replacing your bathtub, protect it with cardboard or heavy blankets.
If you are able to cut off the water to just your shower/tub, you can go ahead and do that before you start. Our shower doesn’t have it’s own cut off, so we turned off our main water line on an as-needed basis.
Removing the wall tile
I started out trying to neatly pry tiles off the wall using a chisel and hammer.
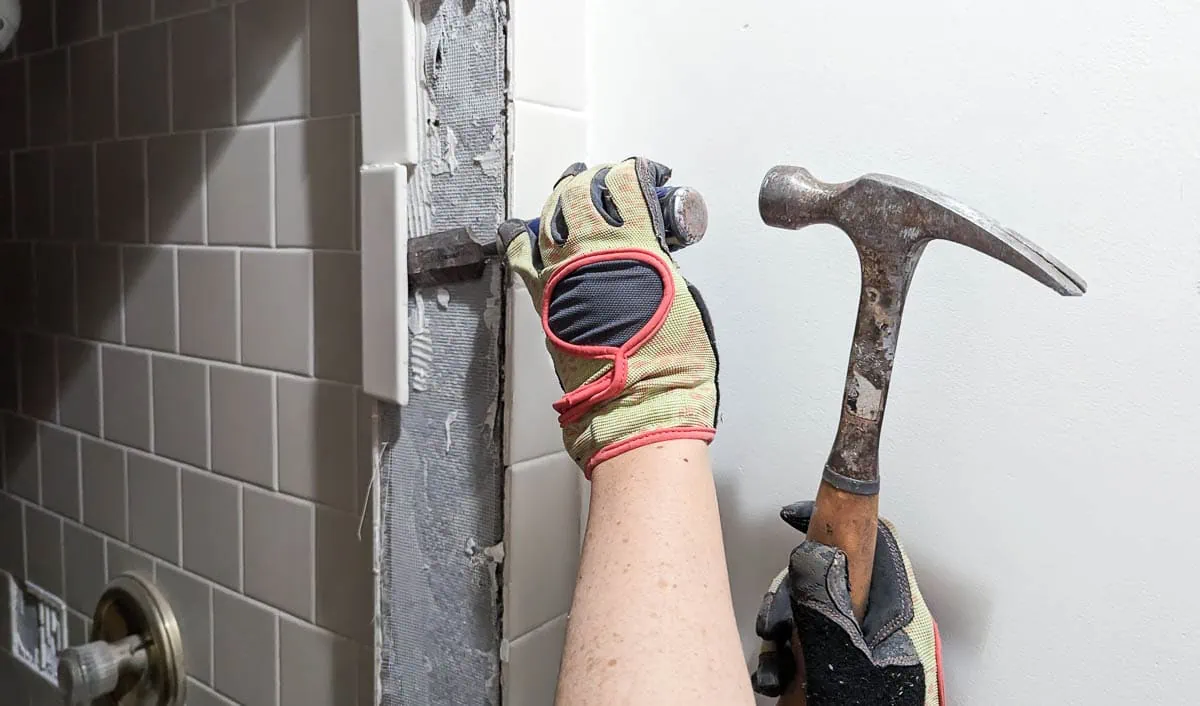
The first few tiles came off fine and this is a great method for small jobs. But I very quickly realized it was going to take weeks to remove all the tile that way.
So instead we went with the much faster and more fun method of smashing the tiles with a hammer. (Yes, this might be a good time to break out the sledge hammer, but a regular old hammer also works just fine.)
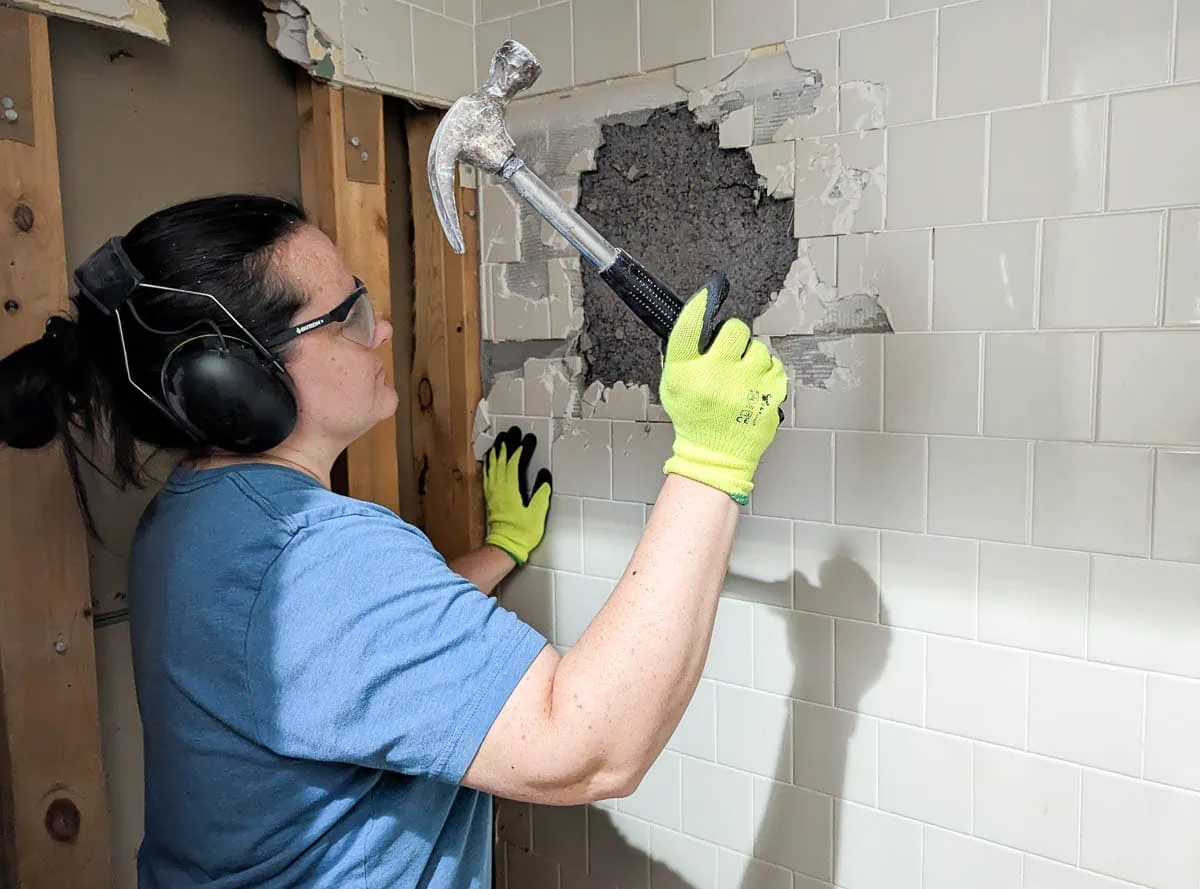
Pound the tiles with the hammer to break them up as much as possible. As they break, the cement board behind the tile will also start to break. (This is a good thing. You can’t reuse the same tile backer board so you need to remove it as well).
Then you can use your hammer claw or your gloved hands to pull the tile and backer board down in sheets.
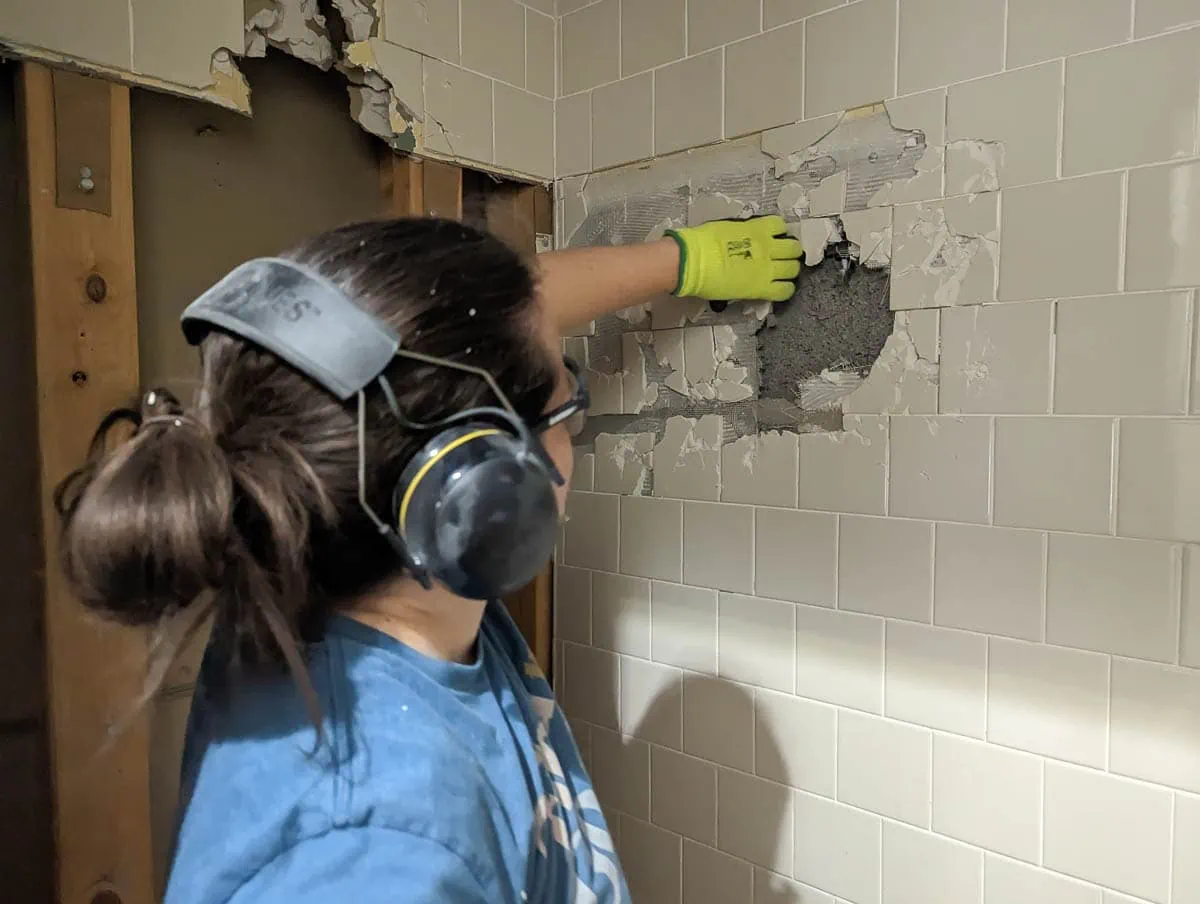
Use a utility knife to score where the tile meets the ceiling before removing the very top row of tiles. And if you are reusing your bathtub, do the same where the tiles meet the tub.
Removing the shower floor tile
I used the same basic method to remove the old tile on the shower floor. Hitting the tiles with the hammer loosened them so that I was able to pry them up in sheets. Then I busted up the concrete shower pan underneath with the hammer and tossed the pieces in the trash. The final step is removing the waterproof shower liner if there is one.
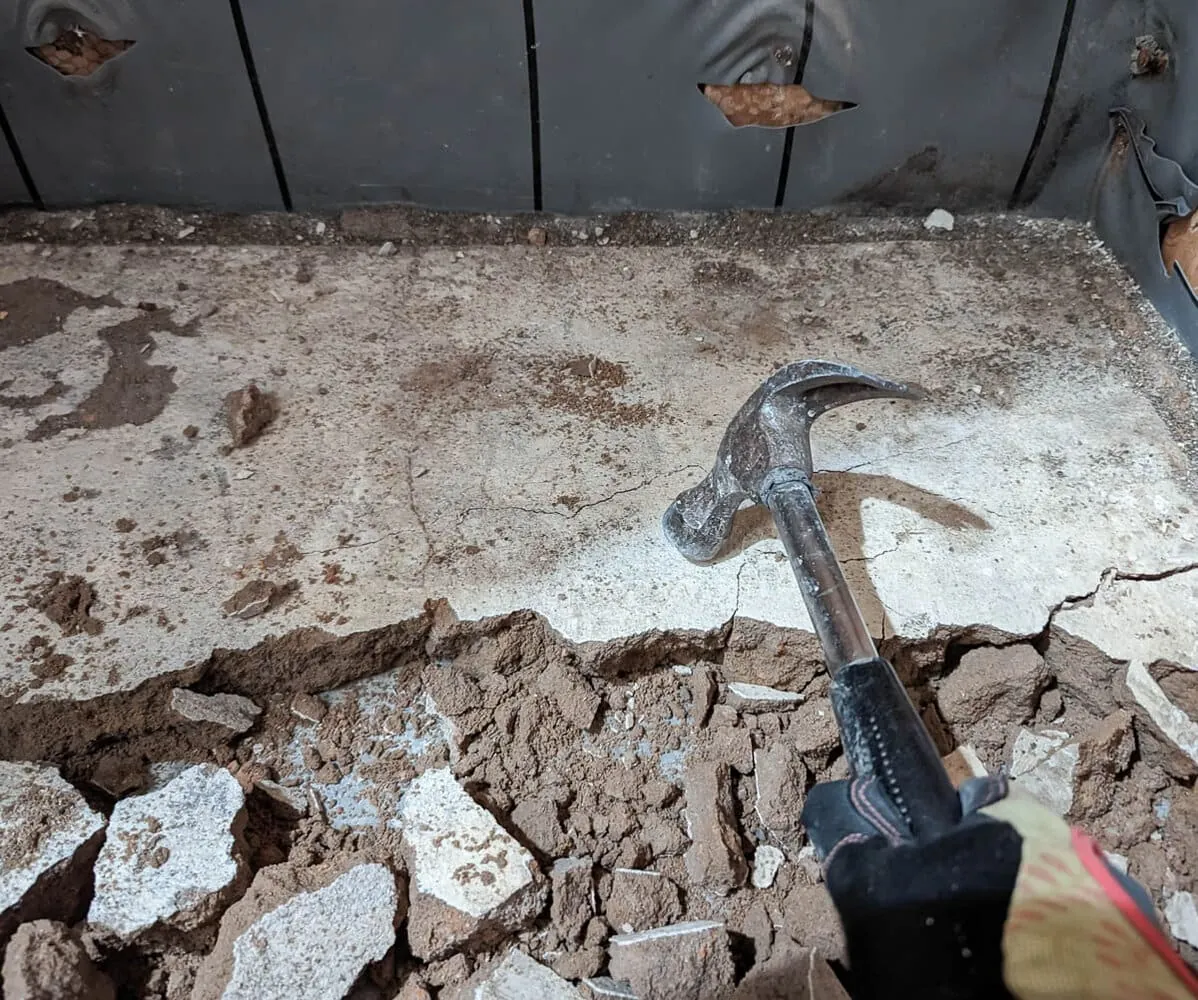
Another option is to use a tile removal chisel. This is an inexpensive tool that attaches to an impact driver to more quickly remove old tiles. It may be worth purchasing one if you have a lot of tile to remove.
Removing shower walls
This won’t apply to every bathroom, but we wanted to open up our old school closed-in shower. That meant taking down a small wall. Thankfully removing drywall walls is quite easy.
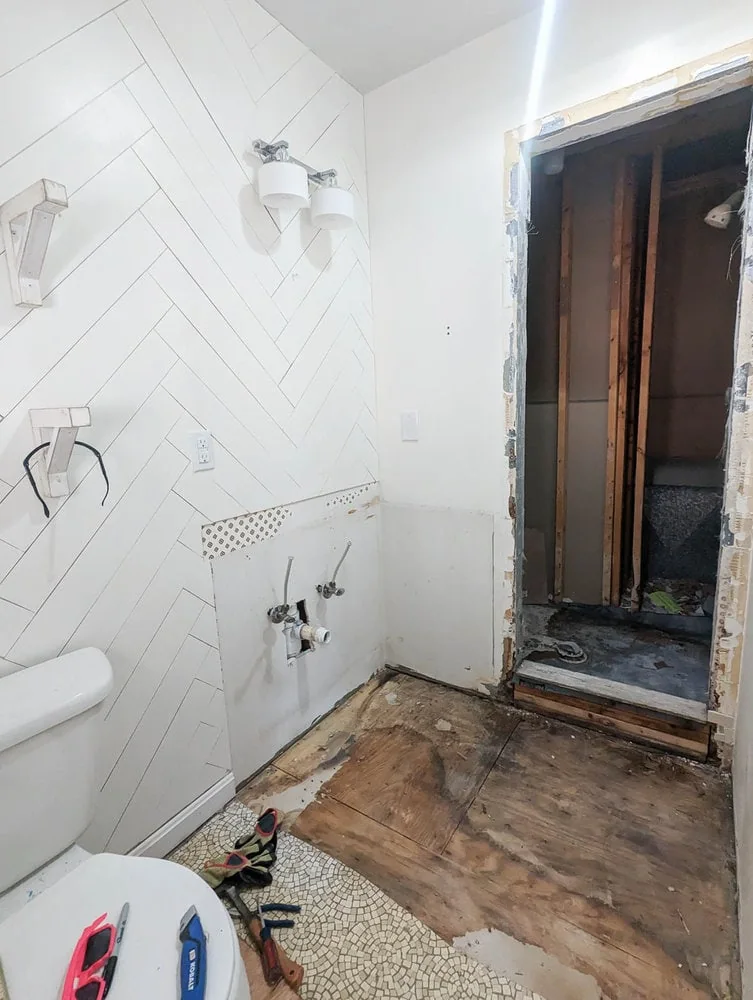
You can knock through the drywall with a hammer or sledge hammer (or kick through it if you’re feeling fiesty) and then just pull the pieces down. You may need to run a utility knife along the edges where the drywall meets the ceiling and adjoining walls to help it detach cleanly.
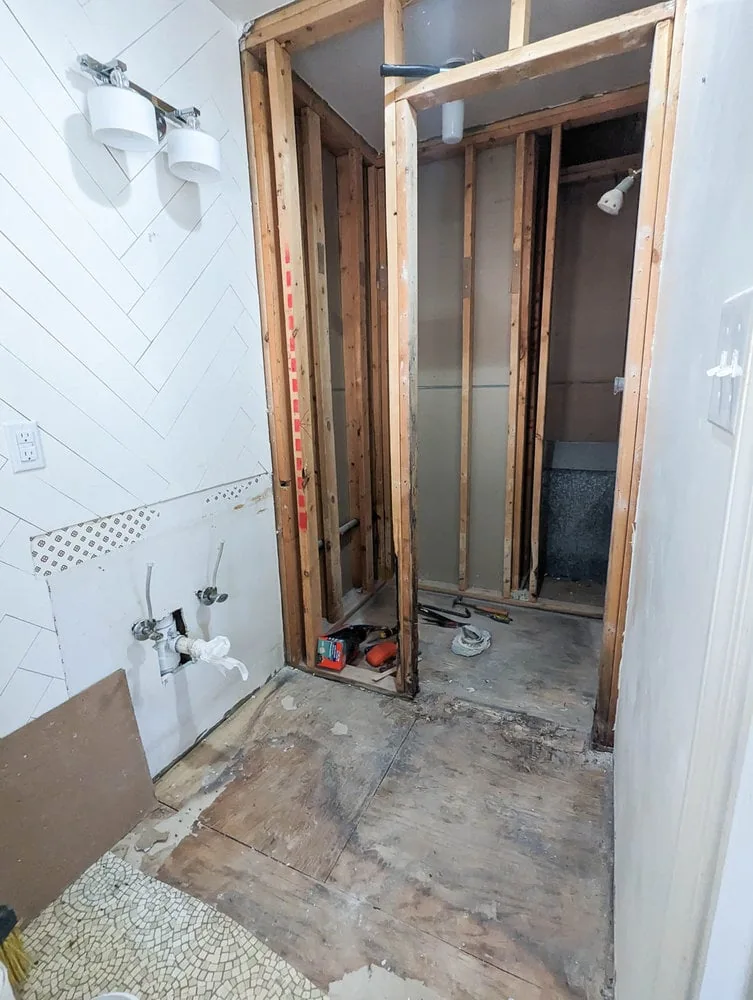
Then use an oscillating tool or reciprocating saw to cut through the stud walls and remove them.
Removing the vanity
While HGTV would lead you to believe that removing a bathroom vanity involves smashing it to bits with a sledge hammer, in reality it’s much easier (and less wasteful) than that.
Start by making sure the water is turned off and disconnecting the plumbing underneath.
If there is caulk sealing the vanity to the wall, run a utility knife along it to break the seal. Then you can pull on your vanity to see if it comes free.
If it is still stuck in place, look to see if there are any screws attaching it to the wall. If the back of your vanity is getting caught by the wall plumbing, you can use an oscillating tool to cut larger holes in the vanity so you can pull it free.
Removing the toilet
Once again, the first step is to turn off the water to the toilet. Once the water is off, flush the toilet a few times to drain as much water as possible. Then drain any water remaining in the bowl by hand, scooping as much as possible out with a cup and then using old towels to mop up the rest.
Once the water is gone, disconnect the water line and loosen and remove the nuts connecting either side of the toilet to the floor. Then you should be clear to lift your toilet and remove it from the room.
There will be probably be a bit of the old wax ring remaining on the floor. You can scrape this up with a metal scraper and throw it away. Then stuff an old rag into the drain hole to keep sewer gases from entering your home.
Demoing bathroom flooring
Now that the rest of the room is clear, the last step is demoing the flooring.
Be sure to remove the baseboards before attempting to remove the flooring. To do this, use a utility knife to score along the edge where the baseboards meet the walls to cut through any caulking. Then gently pry them from the wall using a pry bar and hammer.
If you are planning to reuse these baseboards, you can use a thin metal scraper blade to pry them away from the wall with less damage.
Removing Tile Floors
Removing tile flooring is very similar to removing shower tile.
You can use a simple handheld mason chisel and hammer or you can use a masonry chisel that attaches to an impact driver to help the job go faster. If you are just demoing a small area and don’t want to have to buy new tools, a hammer and pry bar can also get the job done.
Look for a weak spot like a broken tile or an area next to a doorway or vent to start breaking up the tiles. Try to maneuver your chisel beneath the tile so you can separate it from the adhesive. Then work your way around the room, breaking up and removing the tile.
Once the tile is all up, you may also need to chisel off any remaining mastic or mortar. The mason chisel can also help with this if it is stuck firmly or you can use a floor scraper to scrape it free.
Removing Vinyl Floors
If you have vinyl or linoleum flooring, you may want to do some research into whether you actually need to remove the old floors before laying new ones. Sometimes you can lay new flooring right over old vinyl. Just keep in mind that this might cause your bathroom floor to be higher than the flooring in adjoining rooms depending on what materials you use.
If you do need to remove your old sheet flooring, just know it might come up quite easily or it might be nearly impossible to separate it from the wood below depending on when and how it was attached.
Many times sheet flooring is laid over an extra layer of plywood so that it will be the same height as thicker flooring materials like wood flooring and carpet in adjoining rooms. If your flooring involves an extra layer of plywood, it might be easiest to just cut the plywood into smaller pieces and remove them.
The Demoed Bathroom
Once everything is removed and the room has been swept clean, demo is done!
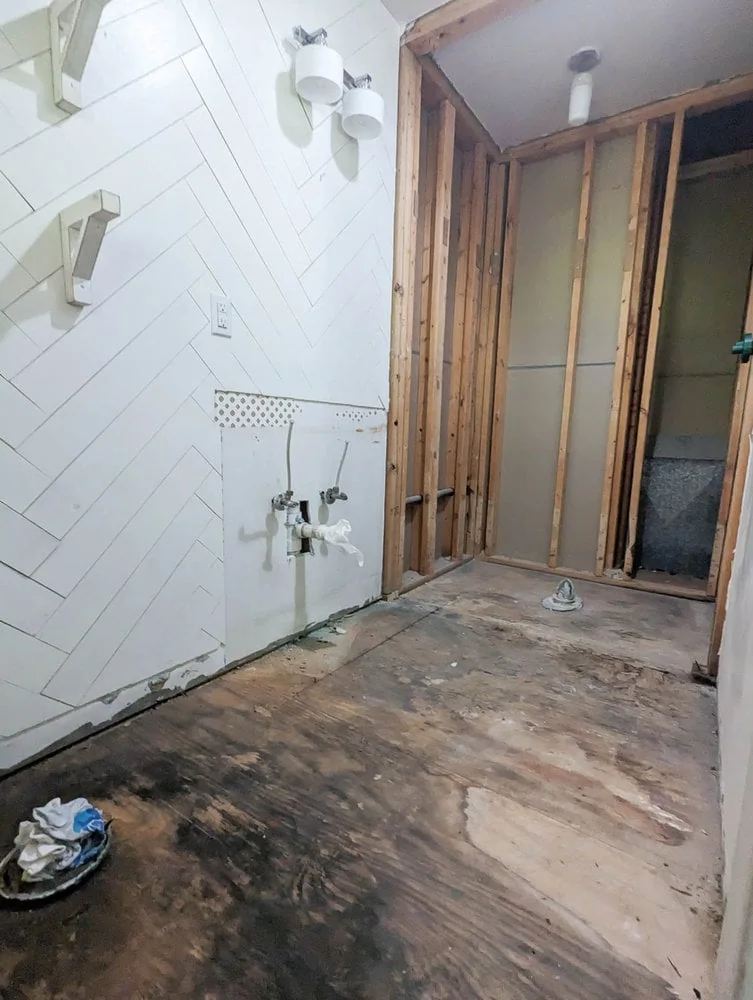
To tell you the truth, at this point our bathroom was looking pretty horrible. As you can see, there was quite a bit of water damage in here which was what started this whole bathroom redo in the first place.
This is the point in the bathroom renovation when I started to question what in the world I was thinking tackling this huge project.
But then we got to work and replaced all the damaged subfloor and started rebuilding the bathroom.
And I’m happy to report that it is now finished and it looks absolutely amazing. (Plus no more leaking!) I’ll be sharing the finished room along with lots more info on completely rebuilding a bathroom over the next few weeks.
In the meantime, you might want to check out these other bathroom renovation posts for tons of budget-friendly ideas:

