How to Make a Huge DIY Chalkboard for Cheap
This large framed DIY chalkboard is easy to make yourself even if you are a beginner DIYer. And even better, it’s crazy cheap.
One of my favorite parts of our $100 basement home gym is the giant chalkboard I made for the space.
It adds a ton of style and it has also been the perfect spot to keep track of workouts and fitness goals.
And even though our giant chalkboard lives in our gym, I think it would also look amazing in so many other types of spaces – a homeschool room, an office, a playroom, even a farmhouse-style family room or dining room.
Use it to display a giant menu plan or one of your favorite quotes or your plans for the week. Or just let your kids go to town adding their own sweet art.
I have been meaning to share this huge chalkboard tutorial for a while now and after a few readers recently asked about it, I’m finally getting it done.
I even got myself in gear and hauled it upstairs so I could get some decent non-basementy pictures.

There are two things that I think make this project extra special. (Besides how cute and vintagey it looks of course.)
1. It is seriously easy to make. You need to cut a couple of boards and drill some holes and that’s pretty much it.
This is a perfect DIY project for everyone including beginners.
2. It is seriously cheap. Like crazy cheap. I already had some chalkboard paint on hand from another project and the wood for this huge chalkboard cost less than $25.
For a chalkboard that is eight feet long! That is a killer deal.
(Also, I’ve got a tutorial for a DIY magnetic chalkboard in a more typical size right here if that’s more your speed.)
This post contains affiliate links which means if you make a purchase after clicking a link I will earn a small commission but it won’t cost you a penny more. Click here to see my full disclosure policy.
Materials
- four 1” x 4” x 8′ furring strips (these are inexpensive, rough-cut pieces of lumber you can get at your local home improvement store)
- Minwax dark walnut stain and a clean rag to apply it
- 4’ x 8’ sheet of 1/4” plywood – this is the plywood I used. You don’t need super high-quality plywood, just something that is smooth on one side.
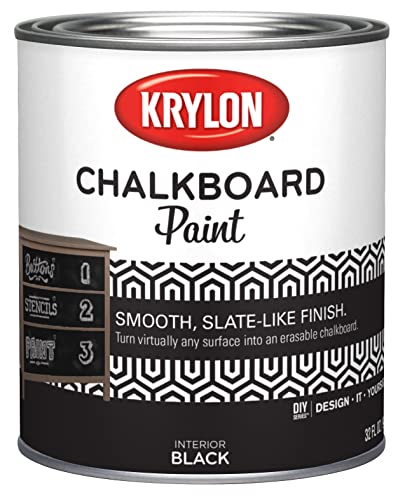
- chalkboard paint
- small foam paint roller
- wood glue
- painters tape
- drill
- 3/4” wood screws
- chalk
2 drawer pulls for chalk holders – the ones I used are no longer available, but these are very similar
How to Make a Large DIY Chalkboard
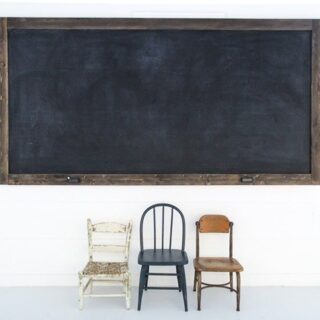
The final chalkboard is 51” high and 100” wide, or slightly bigger than 4’ x 8’.
If you would like to make a smaller chalkboard, you can easily adjust your woodcuts to whatever size you need.

The first step is to cut the wood strips for your chalkboard frame.
Furring strips are the perfect wood planks for this type of frame. They are very inexpensive and have a rough texture that gives a great rustic feel when stained.
Any big box store that carries lumber will have furring strips.
Cut two of the furring strips to 93” long and two of the furring strips to 51” long.
If you don’t have a power saw at home or want to save a little time, you can have these cut at the store when you buy them.
If your furring strips have any splintery areas, you may want to sand these off.
Otherwise, you can skip sanding altogether.
Use a clean rag to stain the frame pieces with Minwax Dark Walnut stain.
Simply wipe the stain on with a clean rag and then wipe off any excess after a few minutes.
Be sure to stain the sides of each board as well as the front.

While the stain is drying, you can your plywood into a chalkboard.
I used RevolutionPly from Lowes for this project and it came with one side already pre-primed.
If you are using plywood that isn’t already primed, it is a good idea to add a coat of latex primer before painting on your chalkboard paint.
Then simply use a foam roller to paint one side with chalkboard paint.
You will probably need a couple of coats of paint to get good coverage.

To build the frame, lay the boards that you previously cut and stained face-down on the floor.
Use wood glue to attach the pieces and then use painter’s tape to hold it in place while the glue dries.

Next lay the chalkboard face-down centered on the frame. The frame should extend slightly beyond the chalkboard on each side.

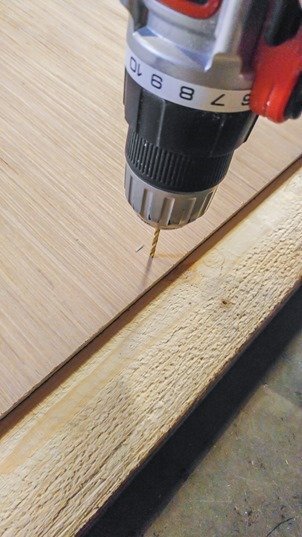
We are using wood screws to firmly attach the chalkboard to the frame.
Drill 4-5 pilot holes on each side of the chalkboard. These holes should be around an inch from the edge of the chalkboard; you want to make sure to drill through the chalkboard into the frame.
Then use a wood screw in each hole to secure the chalkboard to the frame.
Once the chalkboard is attached to the frame, you can flip the whole thing right side up.
My favorite detail of this huge chalkboard is the cute chalk holders along the bottom.
They just give it that extra something. These little chalk holders are actually just drawer pulls attached upside down.

These are really similar to the pulls I used, but any bin pulls will work. Simply use screws to attach them to the bottom of the chalkboard frame.
Before writing on your chalkboard, be sure to prime it with chalk.
Typically, you are supposed to allow the paint to dry for 24 hours and then rub a piece of chalk all over the chalkboard, but be sure to check the instructions on your specific brand of chalkboard paint.
Now your chalkboard is ready to hang!
Luckily, it isn’t very heavy considering how large it is. You can use a pair of picture hangers and sturdy picture hanging wire to hang it.
Or if you prefer, you can make it extra secure by using one of these heavy duty hanging cleats.


(you can find the growth chart tutorial here)
Isn’t it the perfect chalkboard for a big blank wall? I think it adds just the perfect amount of farmhouse/industrial style.
How to Make a Huge Chalkboard for Cheap
Make an extra-large framed DIY chalkboard that adds a ton of style to your space. It's so easy to make, even if you are a beginner DIYer. Plus, it's budget-friendly.
Materials
- Four 1” x 4” x 8′ furring strips
- Minwax dark walnut stain
- 4’ x 8’ sheet of 1/4” thick plywood
- Chalkboard paint
- Small foam paint roller
- Wood glue
- Painters tape
- 3/4” Wood screws
- Chalk
- 2 Drawer pulls for chalk holders
- Clean rag
Tools
- Drill
Instructions
- Cut two of the furring strips to 93” long, and two of the furring strips to 51” long. These will make the frame of the chalkboard.
- Use a clean rag to stain the frame pieces with Minwax Dark Walnut stain.
- Use a foam roller to paint one side of the plywood with chalkboard paint.
- Allow to dry, then paint another two coats.
- Lay the boards you cut and stained, face-down.
- Use wood glue to attach the sides to the top and bottom pieces.
- Use painters tape to hold it in place while the glue dries.
- Lay the chalkboard face-down centered on the frame.
- Use wood screws to firmly attach the chalkboard to the frame.
- Attach two drawer pulls upside down along the bottom side of the frame to serve as chalk holders.
Recommended Products
As an Amazon Associate and member of other affiliate programs, I earn from qualifying purchases.
-
 A29 Set of 10 Bin Pull, Vintage Hardware for Cabinets Drawer Bins Doors, Kitchen Cabinet and Cupboard Door Rectangular Pull (Iron, Black Coated Finish)
 -
Crayola (51-0320) White Chalk 12 each
-
100 Qty #6 x 3/4" Flat Head 304 Stainless Phillips Head Wood Screws (BCP18)
-
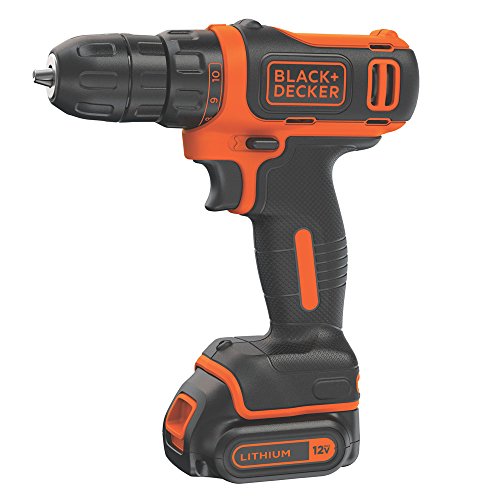
BLACK+DECKER 12V MAX Cordless Drill/Driver (BDCDD12C)
-
ScotchBlue Original Multi-Surface Painter’s Tape, 0.70 inch x 60 yard, 1 Roll
-
Titebond 5064 Original Wood Glue, 16-Ounces
-
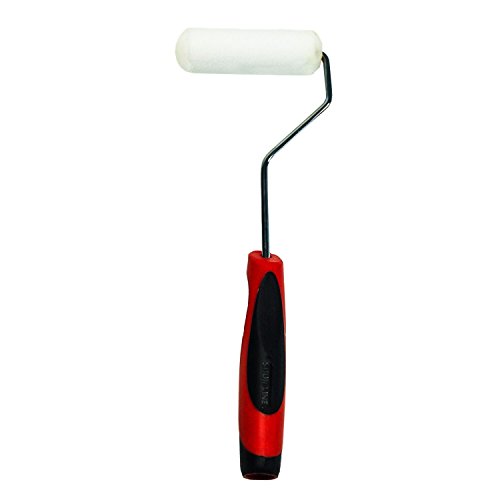
Shur-Line 2006689 4 Ergonomic Sure-Grip Foam Mini Roller with 12-Inch Handle
-
Krylon K05223000 Chalkboard Paint Special Purpose Brush-On, Black, Quart
-
Minwax 70012444 Wood Finish Penetrating Stain, quart, Dark Walnut


Cost is WELL over $25..!!
Sanded plywood alone is near $35… not to mention the stain..roller..primer..chalk board paint..1×4 lumber..and hardware
I am planning to do the project but realize the cost is MUCH more..!!
Prices may be different where you are. I used a very inexpensive type of plywood, RevolutionPly – it is a thin luan plywood similar to paneling. At my local Lowes it is $15 for a sheet. Here is a link: https://www.lowes.com/pd/RevolutionPly-5mm-Poplar-Plywood-Application-as-4-x-8/50121135. The 1″x4″ boards are furring strips which typically cost about $3 per 8″. I only included wood in the cost because the other materials (roller, stain, primer, chalkboard paint) are things many people already have on hand and only a small amount is needed for this specific project.
Which side gets painted ? Smooth or rough??
At what point I use the primer ??
Thank you in advance
Whichever side is smoothest is the best side to use for the actual chalkboard. My board said on the label that it was pre-primed so I didn’t use a separate primer. If yours doesn’t say it is pre-primed, roll on the primer with a foam paint roller onto the smooth side. Let it dry and then paint the chalkboard paint over it. I hope that helps!
Built it, looks great!
Awesome!